Last weekend I attended the first BattleTech event to be run at Cascade Clash, an event a little ways north of Seattle that primarily focuses on 40k and Kill Team. It was a duos event, so I partnered up with my friend Dustin, co-owner of
Waystone Wargaming Speakeasy (the best FLGS in Seattle and quite possibly the world). It was a nice easy 45 minute drive from home, though thanks to misreading the event schedule I showed up at 8 rather than 9, leaving me without time to stop for a fancy breakfast like our other intrepid tournament-goers.
The Missions
The three missions being used here were published in advance (amazing!), which let Dustin and I plan our forces around them and get a couple rounds of practice in, making sure that on tournament day our thoughts could concentrate on how we use our mechs and respond to the table rather than trying to figure out how the mission works as the clock ticks. All three missions were straightforward, rewarding a combination of fighting and holding objectives. There were no boxes of MREs to pick up and return or buildings to destroy or anything.
The first mission was the most straightforward – 5 objectives, placed roughly near each corner and one in the center, with the center scoring 2 VP and the corners scoring 1 VP each. Objectives were sticky, so we could take them and then move off, and destroyed or crippled mechs were worth VP at the end of the game.
The most complex mission was the second, with the defender placing an objective on 1511 or 1507, the attacker placing a second objective at least 8 hexes away between 7 and 10 hexes from the defender’s home edge, and the defender placing a third objective with the same restrictions. They all score every other turn, and then if someone controls two objectives at the end of the game they score 5 VP. I didn’t like this mission very much – the objectives are biased towards the defender’s board edge, with them having 2 objectives that are closer to them (most likely 7 hexes off their board edge) than the attacker can place (their one objective will be at best 8 hexes from the attacker’s board edge). The defender is thus able to set up much more defensively, giving them a big advantage through the whole game.
The third mission went back to being a straightforward fight – but after 6 turns you could move off your opponent’s board edge and score VP for yourself (as well as VP for kills and cripples).
One of the first things we realized looking at these is that some speed is helpful, but we don’t need a ton of it to win. Mission 1 needs us to control 2 objectives near our board edge and one in the center, and with a 2 hex control radius we should be able to do that starting turn 1 with an 8/12/8. The two corner objectives we just need to tap once. Mission 2 will need us to reach a little past the center if we lose the attacker/defender roll, but we’re not going to be bouncing all over the map – we expect most fighting to be for the center objective, with both teams holding a side objective mostly uncontested. On mission 3 we’ll need to cross the board, but not for six turns – that’s plenty of time for 4/6 mechs.
Our Forces
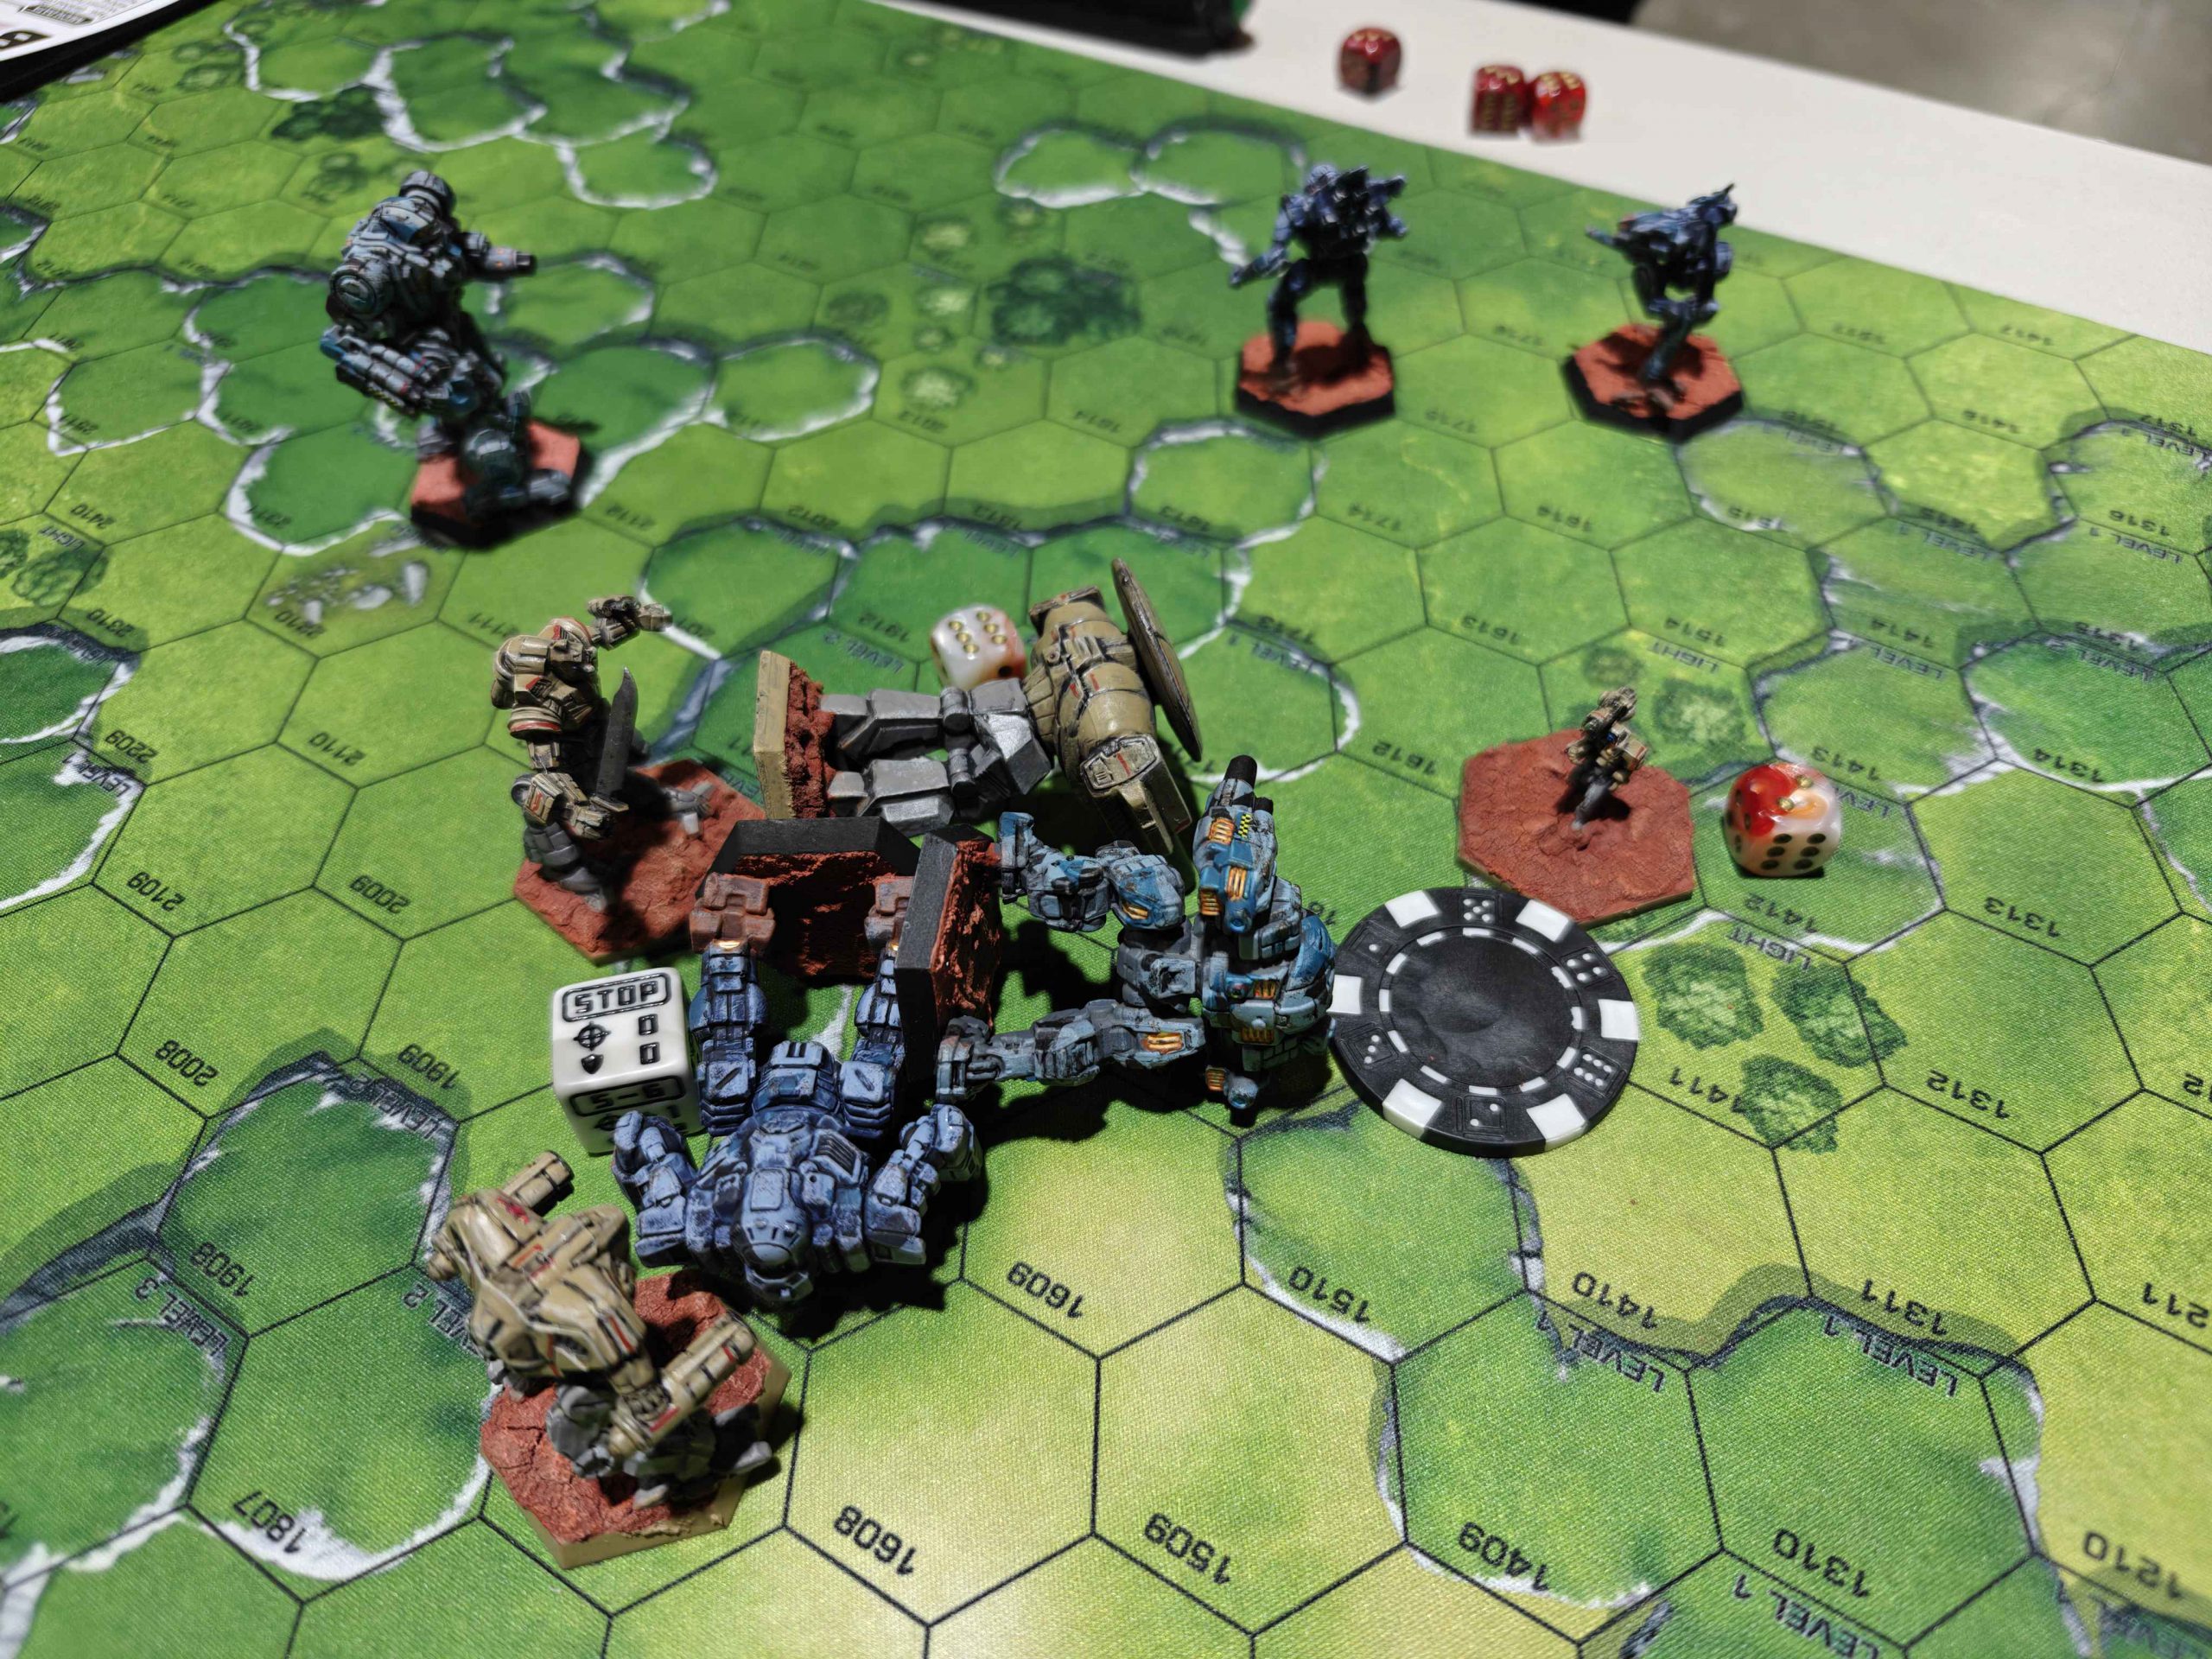
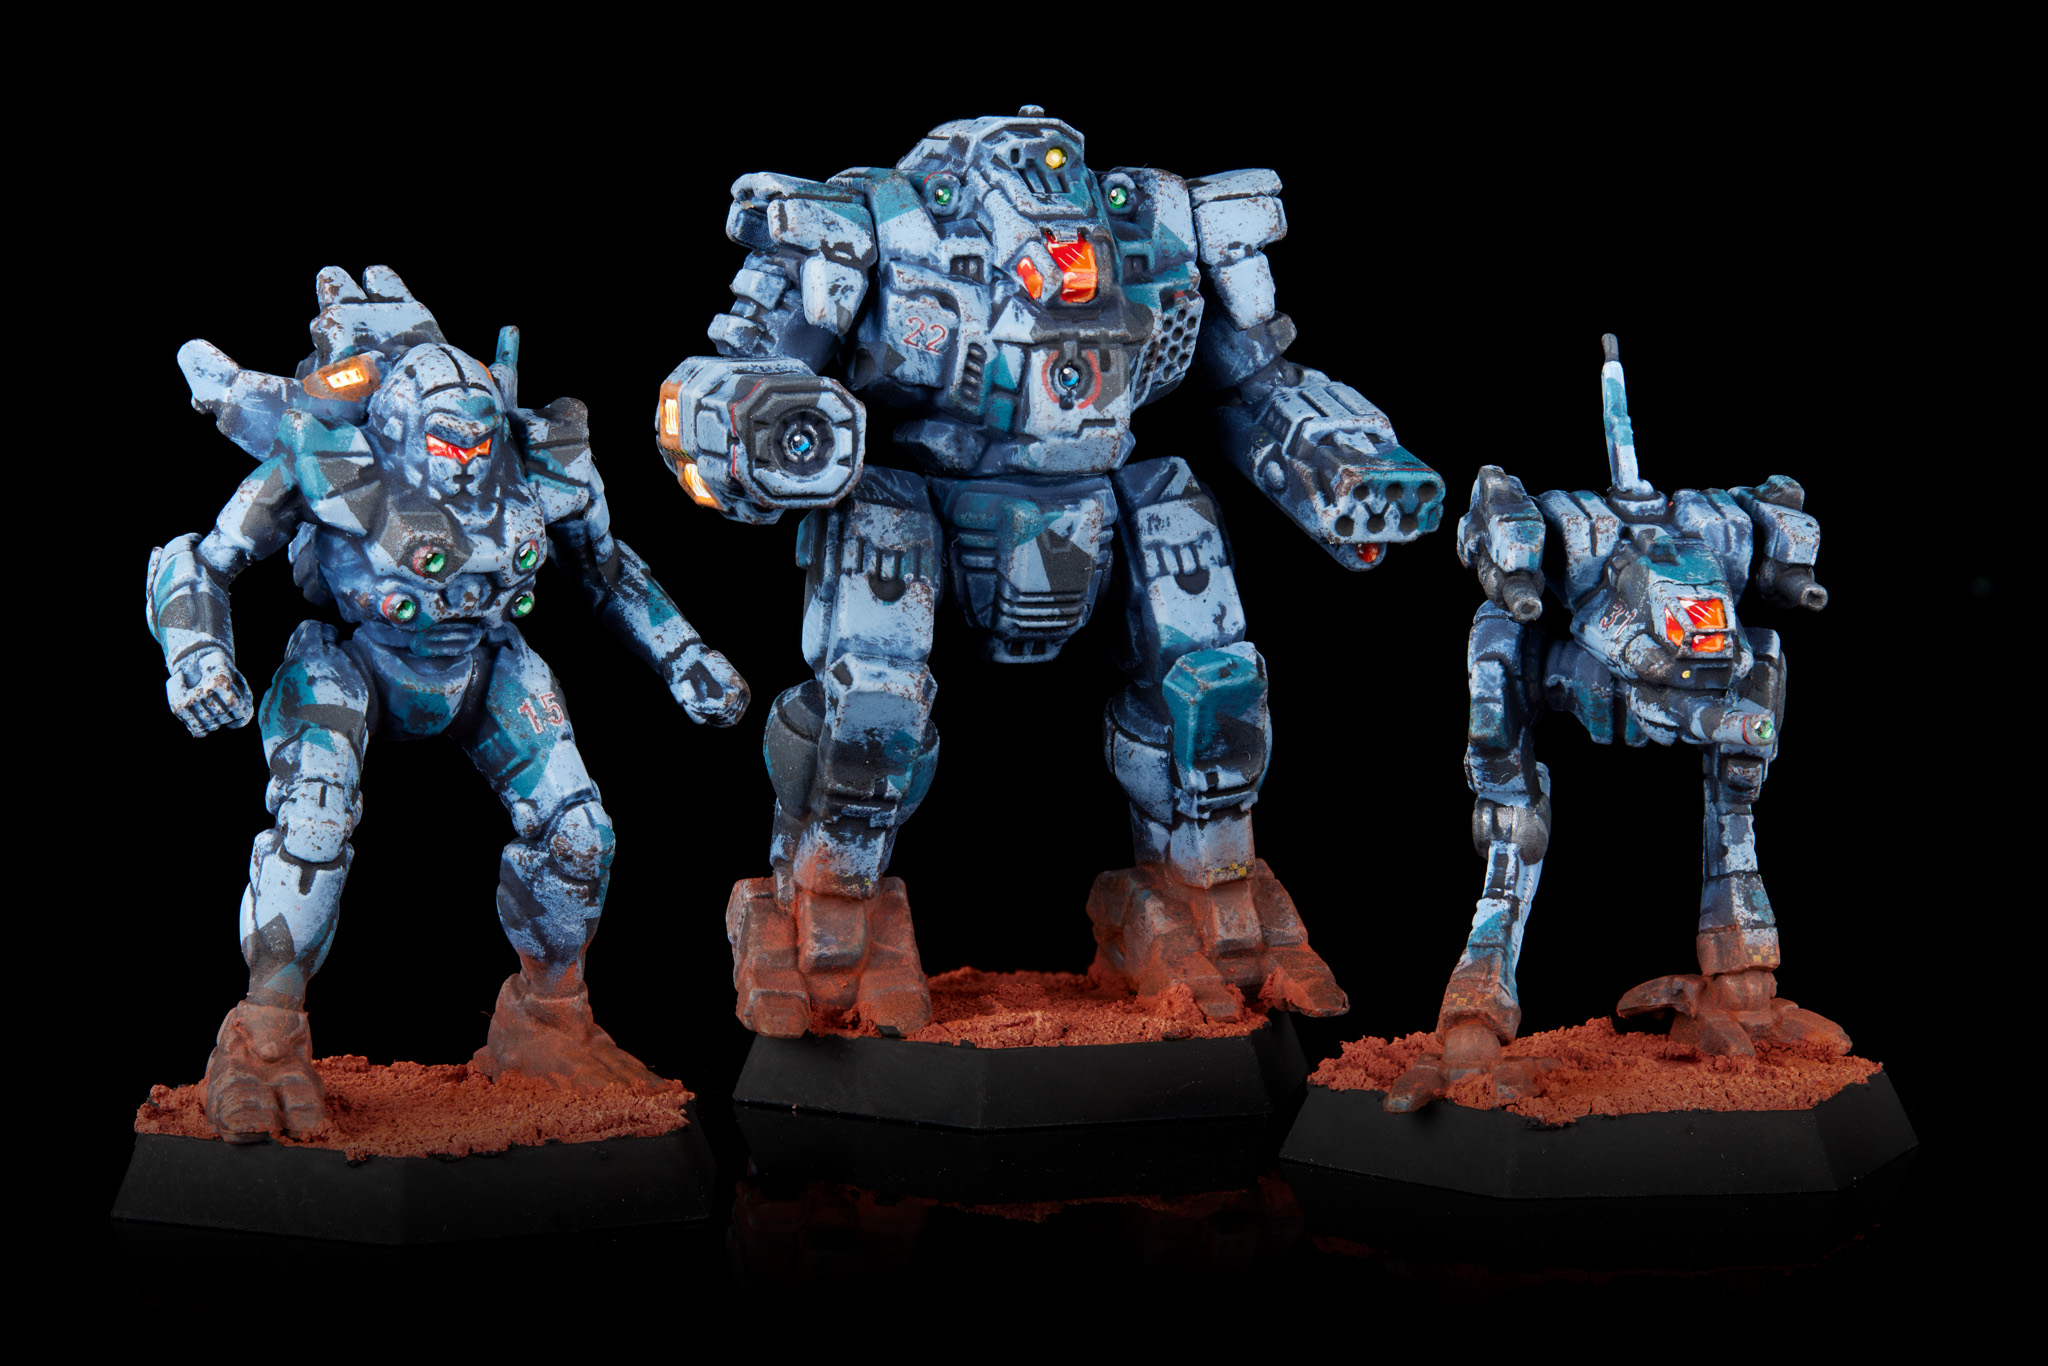 Simonson's Cutthroats for Cascade Clash 2026. Credit: Jack Hunter
As events go this had an incredibly light touch on unit restrictions compared to Brawl in the Bluegrass, Carolina Classic, or Southern Assault – we were fielding a Jihad era (availability from Clan Invasion, Civil War, and Jihad) force with no mechs walking 11+, jumping 10+, or having
all of pulse lasers, jump 7+, and a targeting computer. I’m told this was specifically to target the Septicemia B, though unfortunately it also hit the Conjurer 2, a mech that would’ve otherwise been in our force. Each player had 4,000 BV with 2-3 unit limit, and we were allowed mechs, battle armor, and vehicles. I didn’t see anyone there with a vehicle, but they were allowed.
Because this event was being run by Catalyst Demo Team with a painting competition, there were some pretty strict rules on minis and proxies – all minis had to be official CGL or IWM, and only one mini could be a proxy. The limit on proxies was to keep someone from picking all their best painted mechs and then using them as other units – in my mind that’s good both for integrity of the painting contest (it should be a competition around the force someone brought to the tournament) and for avoiding confusion during games. Nobody needed to worry about whether the atlas is really an atlas when they’re on their eighth hour of playing BattleTech.
Having our 8,000 total BV spread across two 4,000 BV forces was a surprising complication to list building, especially as we also wanted to include some battle armor. The packet ruled that battle armor was only allowed to start the game mounted on a mech picked by the same player, not by a teammate, so we were going to need to fit battle armor and effective transport into the same group.
Looking at the missions, and knowing that all three are long edge deployment, step one was to say that we wanted a couple durable high damage mechs moving 4/6. They’d be good at contesting the important center objectives, and in the third mission are fast enough to make it across the map (a 3/5 would’ve left me concerned) while not overspending on mobility. We’re in the jihad era, which makes the
Flashman 9M an easy pick. It checks every single one of our boxes, and at under 2k BV is going to leave enough room in its half of our force to fit a decent variety of other options. The second pick was a
Kingfisher E, which brings us solid damage and good accuracy to take out any light mechs. This one’s a bit over 2,400 BV, which was going to constrain picks in that force – especially if we want each force to hit 3 units, and the first mission was definitely going to reward having as many units as possible.
Next up we started looking at what battle armor to bring. From some early testing we thought that bringing at least one unit of it would be very important – they’re always a useful initiative sink, in the first mission they could stick on whichever of our home objectives felt more vulnerable and keep it from getting flipped, and in the second mission the objectives are spread far enough apart that they could hold one side while mechs focused on the center. We bounced back and forth between utility suits and combat suits – either something costs more but is a real high damage threat, or something cheap, not too hard to kill, but just enough to be annoying. Splitting our teams BV into entirely separate 4k lumps ended up driving this decision. A good squad of elementals or coronas was going to run 5-600 BV at minimum, which would leave us with just under 1,000 BV in with the Kingfisher, or 1,500ish with the Flashman. Strict unit counts would also not leave us with a ton of flexibility, as taking something a lot cheaper might leave BV on the table that we’re unable to fill. Specifically, that would do things like make the Fire Falcon E (1094 BV) a bad choice, as it, a squad of AP gauss elementals, and the Flashman 9M would leave 434 BV to fill with skill increases, and significant skill increases are not where we want to spend BV. Unfortunately, looking at those BV breakpoints we weren’t able to find anything that seemed likely to be effective in this gameplan.
Instead, we picked a squad of
Achileus Light Battle Armor. They were used by the Word of Blake, which meant that a 6-suit squad was a legal choice, and we could get them for all of 350 BV. Not as durable as elementals up close, the improved stealth armor did keep them from getting shot at range, and six small lasers is still enough to intimidate people into staying away. This left us with 1,750 BV if we used them with the Flashman, or 1,202 BV with the Kingfisher. After a bit of experimentation, we found that a
Gargoyle Prime would fit nicely along with a piloting skill increase on the Flashman. It gives us a third very durable mech, and 5/8 is a more than adequate move profile on these maps to drop battle armor off defensively.
We’ve now got 1,557 BV to fill up the rest of the Kingfisher side. From looking at the missions we know we want at least one 8/12/8 unit to help with quickly capturing objectives. The Kingfisher would cost 244 BV to bump up to 4/4, so that roughly the BV range of what I’m going to look for – 1,300 to 1,557 BV. The only options in this range are a couple marginal Dragonfly configs, an ER PPC Cicada, and a unique Hermes II that we can’t take. None of those seem like good options, so I’ve widened out the low end BV and plan to fill in with two mechs. I’m going to need to stay under 1,000 BV, probably by a fair bit, which leaves me looking at Ostscouts, Spiders, and Venoms. The Ostscout is cheap, but simply doesn’t contribute much. Of the Spiders, the only one I like is the 7K as it’s nearly fully armored, but there’s also a similar Venom option, the 9KA. The Spider has much better heat management as it can jump and still shoot, but I’m not going to want to do that much – once I start jumping, even with pulse lasers my accuracy is in the trash. Jumping is for defensive moves and claiming objectives, running is for shooting. With a third medium pulse, the
Venom 9KA is going to do a lot more damage than the Spider, so it’s my pick assuming I can find something good in the remaining 692 BV.
Looking at the Mekbay filters I could immediately tell that nothing was going to have much armor – 112 at the most, which means I’m still looking for an 8 MP walk to be able to build enough TMM. Two options pretty much immediately popped out at me – the
Locust 1Vb, and the Dasher II. Both are great mechs, even if one mostly exists to play a degenerate game of charging, but my decision was made by the IWM Dasher II model looking terrible and not having time to get it shipped anyways.
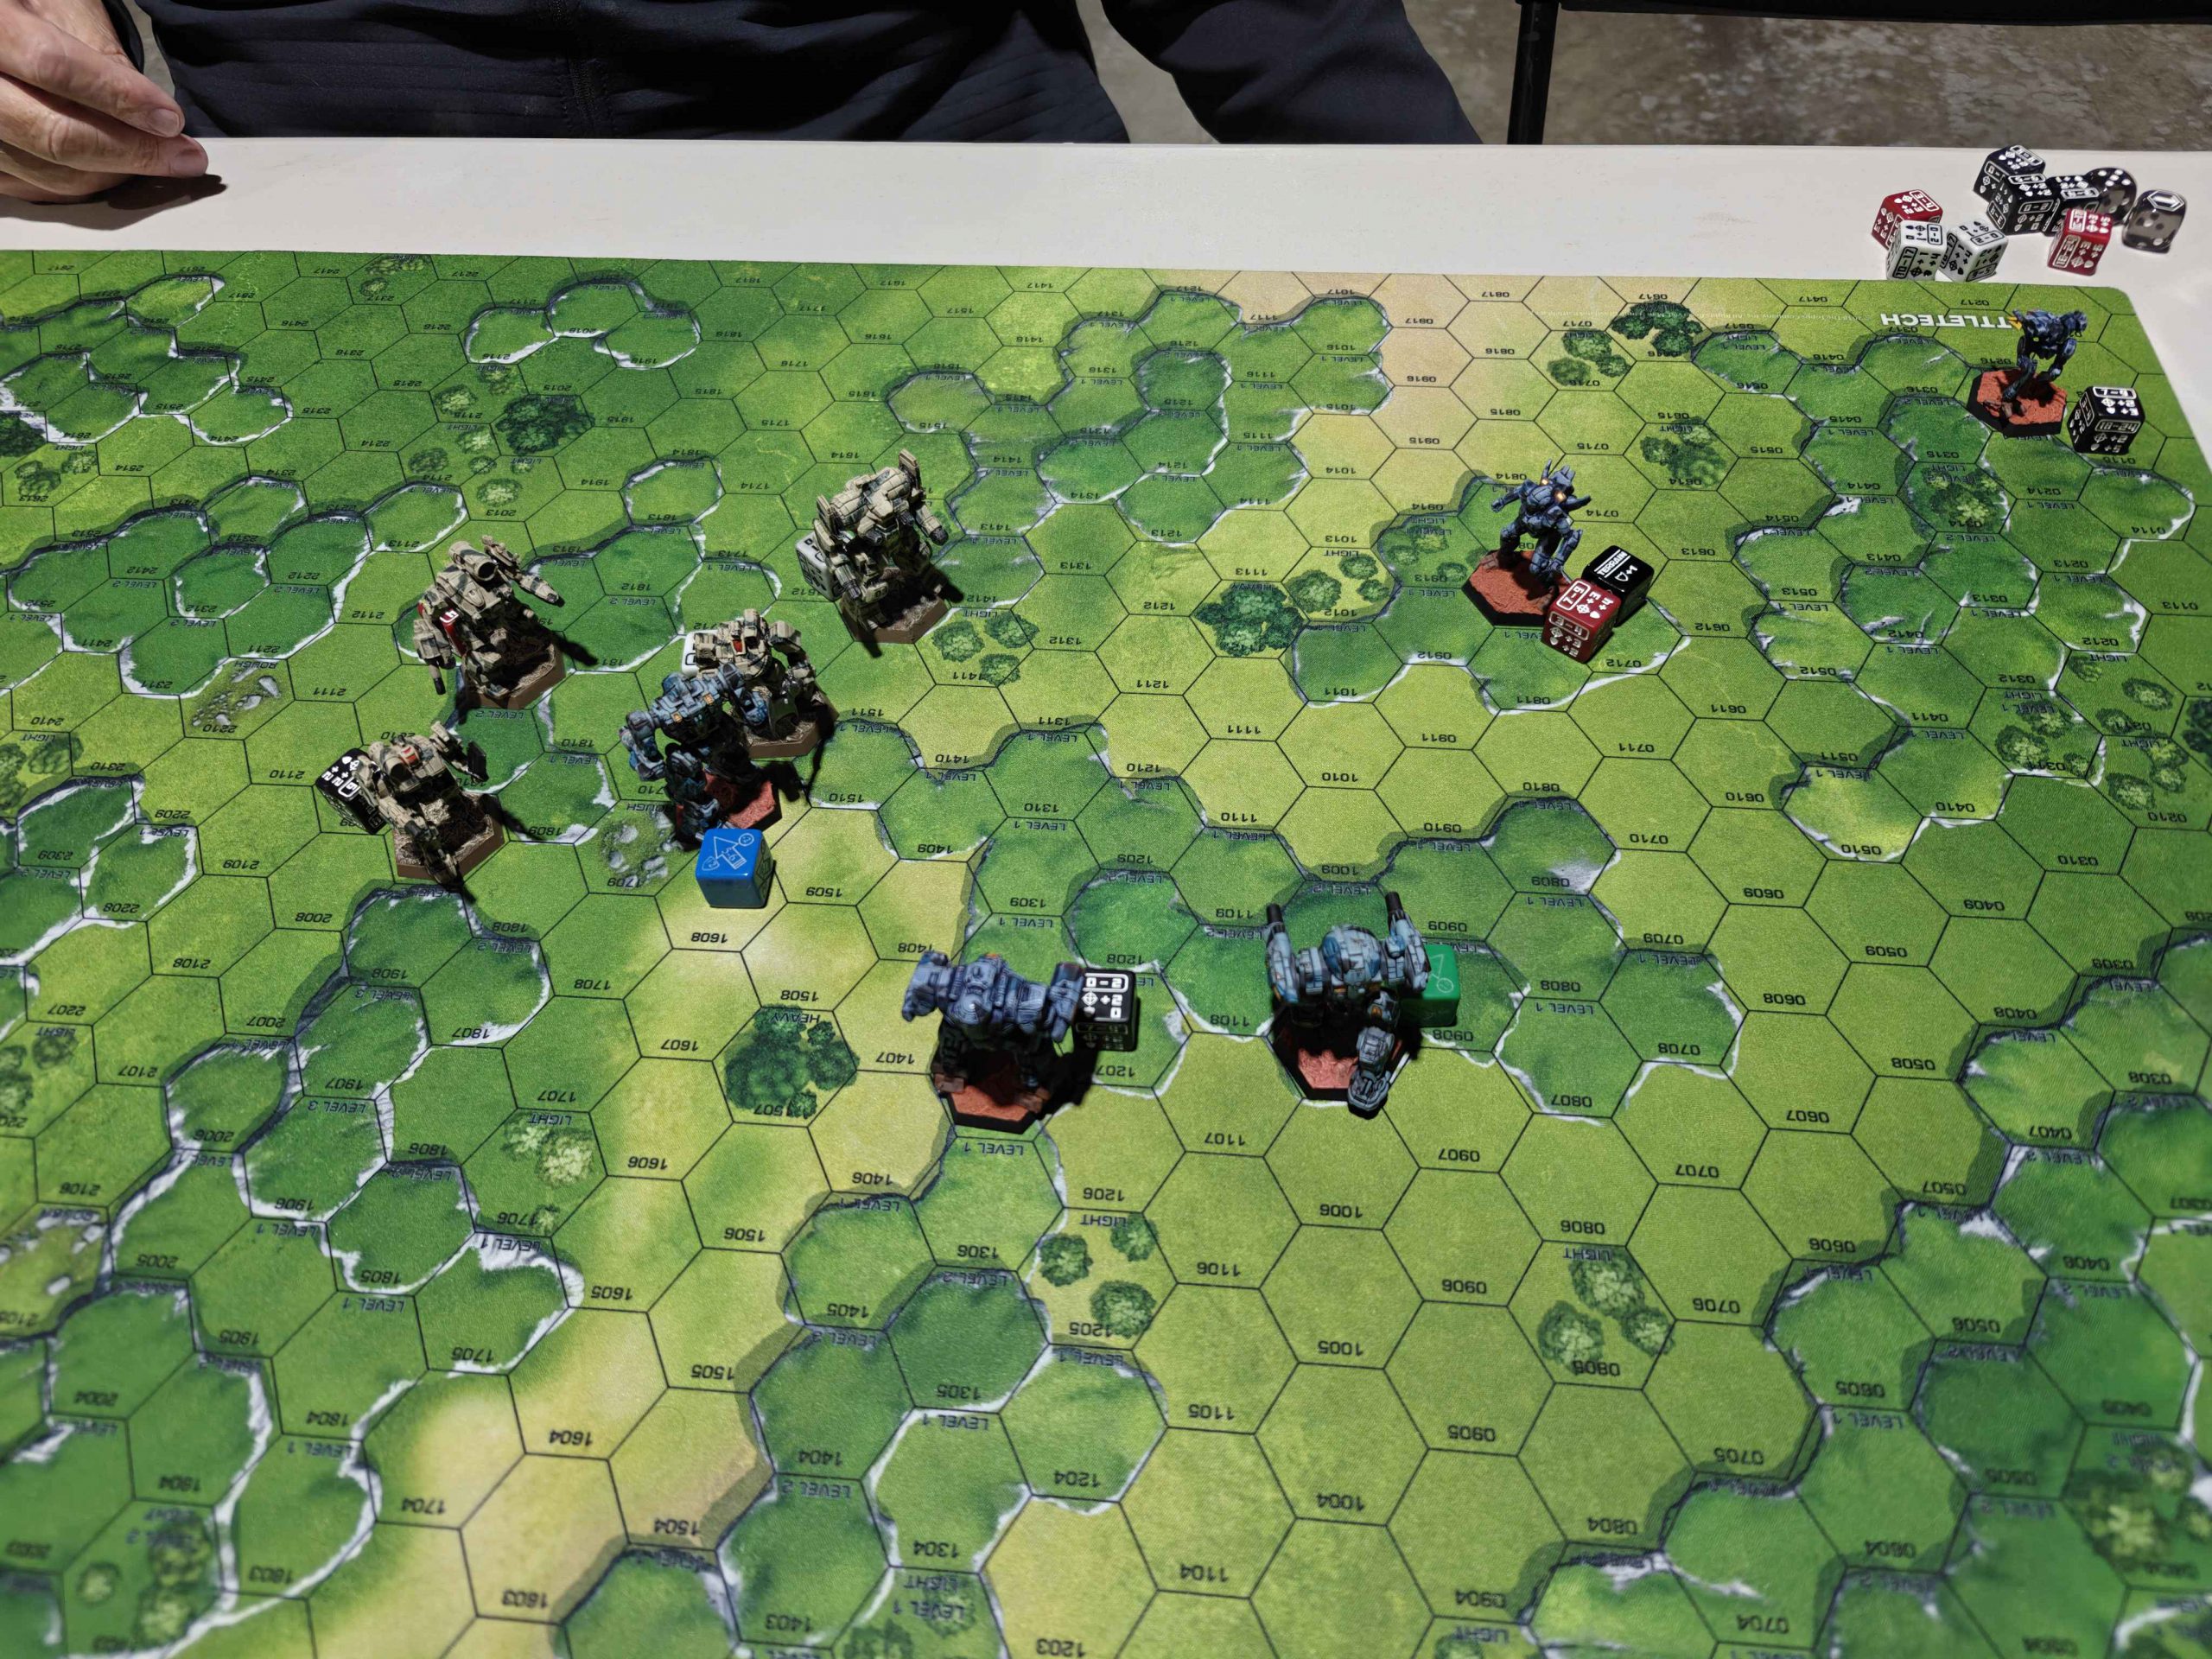
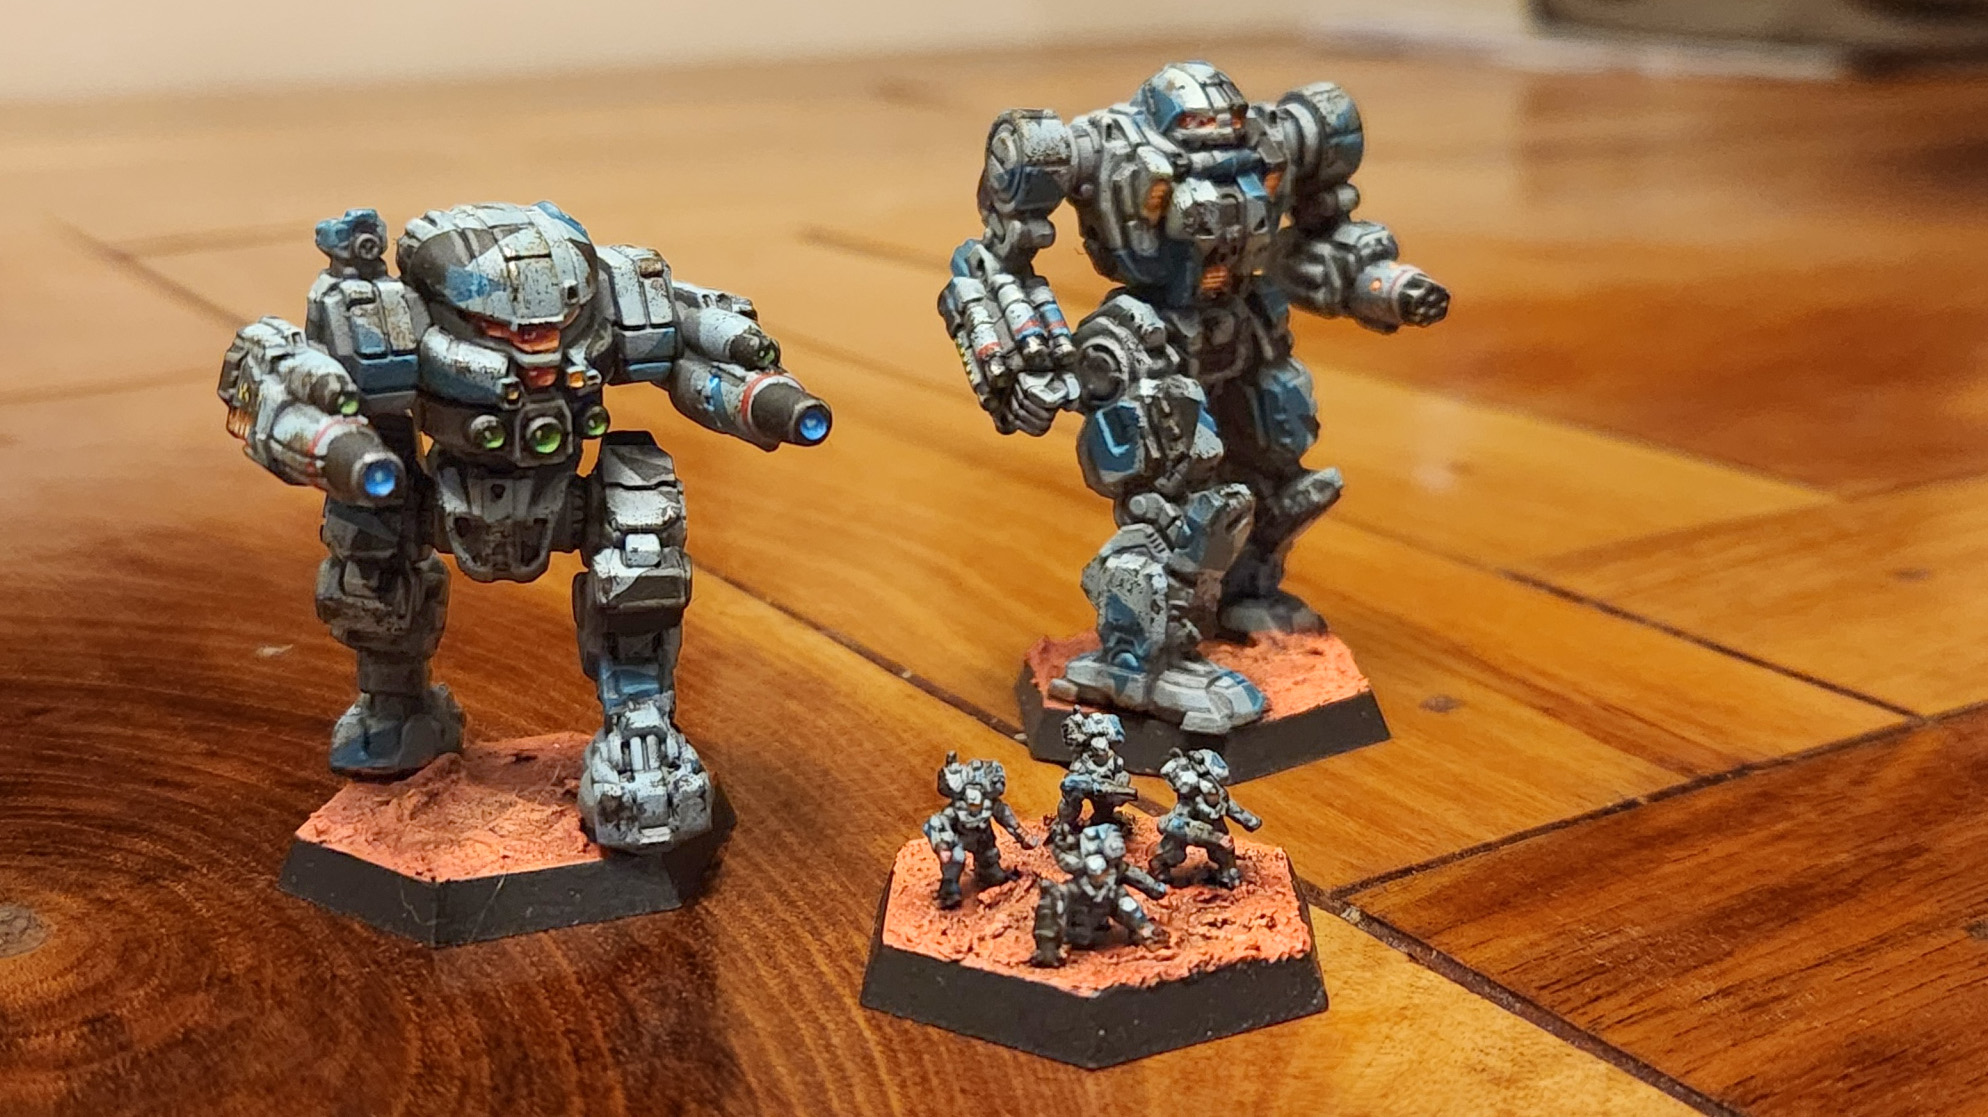 Simonson's Cutthroats for Cascade Clash. Credit: Dustin Stoddart
After some quick negotiation with Dustin deciding who would paint what, our forces end up looking like this:
Jack - 3950
Kingfisher E (4/5) 2443
Locust LCT-1Vb (4/5) 642
Venom SDR-9KA (4/5) 865
Dustin - 3977
Man O' War Prime (4/5) 1537
Flashman FLS-9M (4/4) 2085
Achileus Light Battle Armor [Laser](Sqd6) (4/5) 355
Mission 1
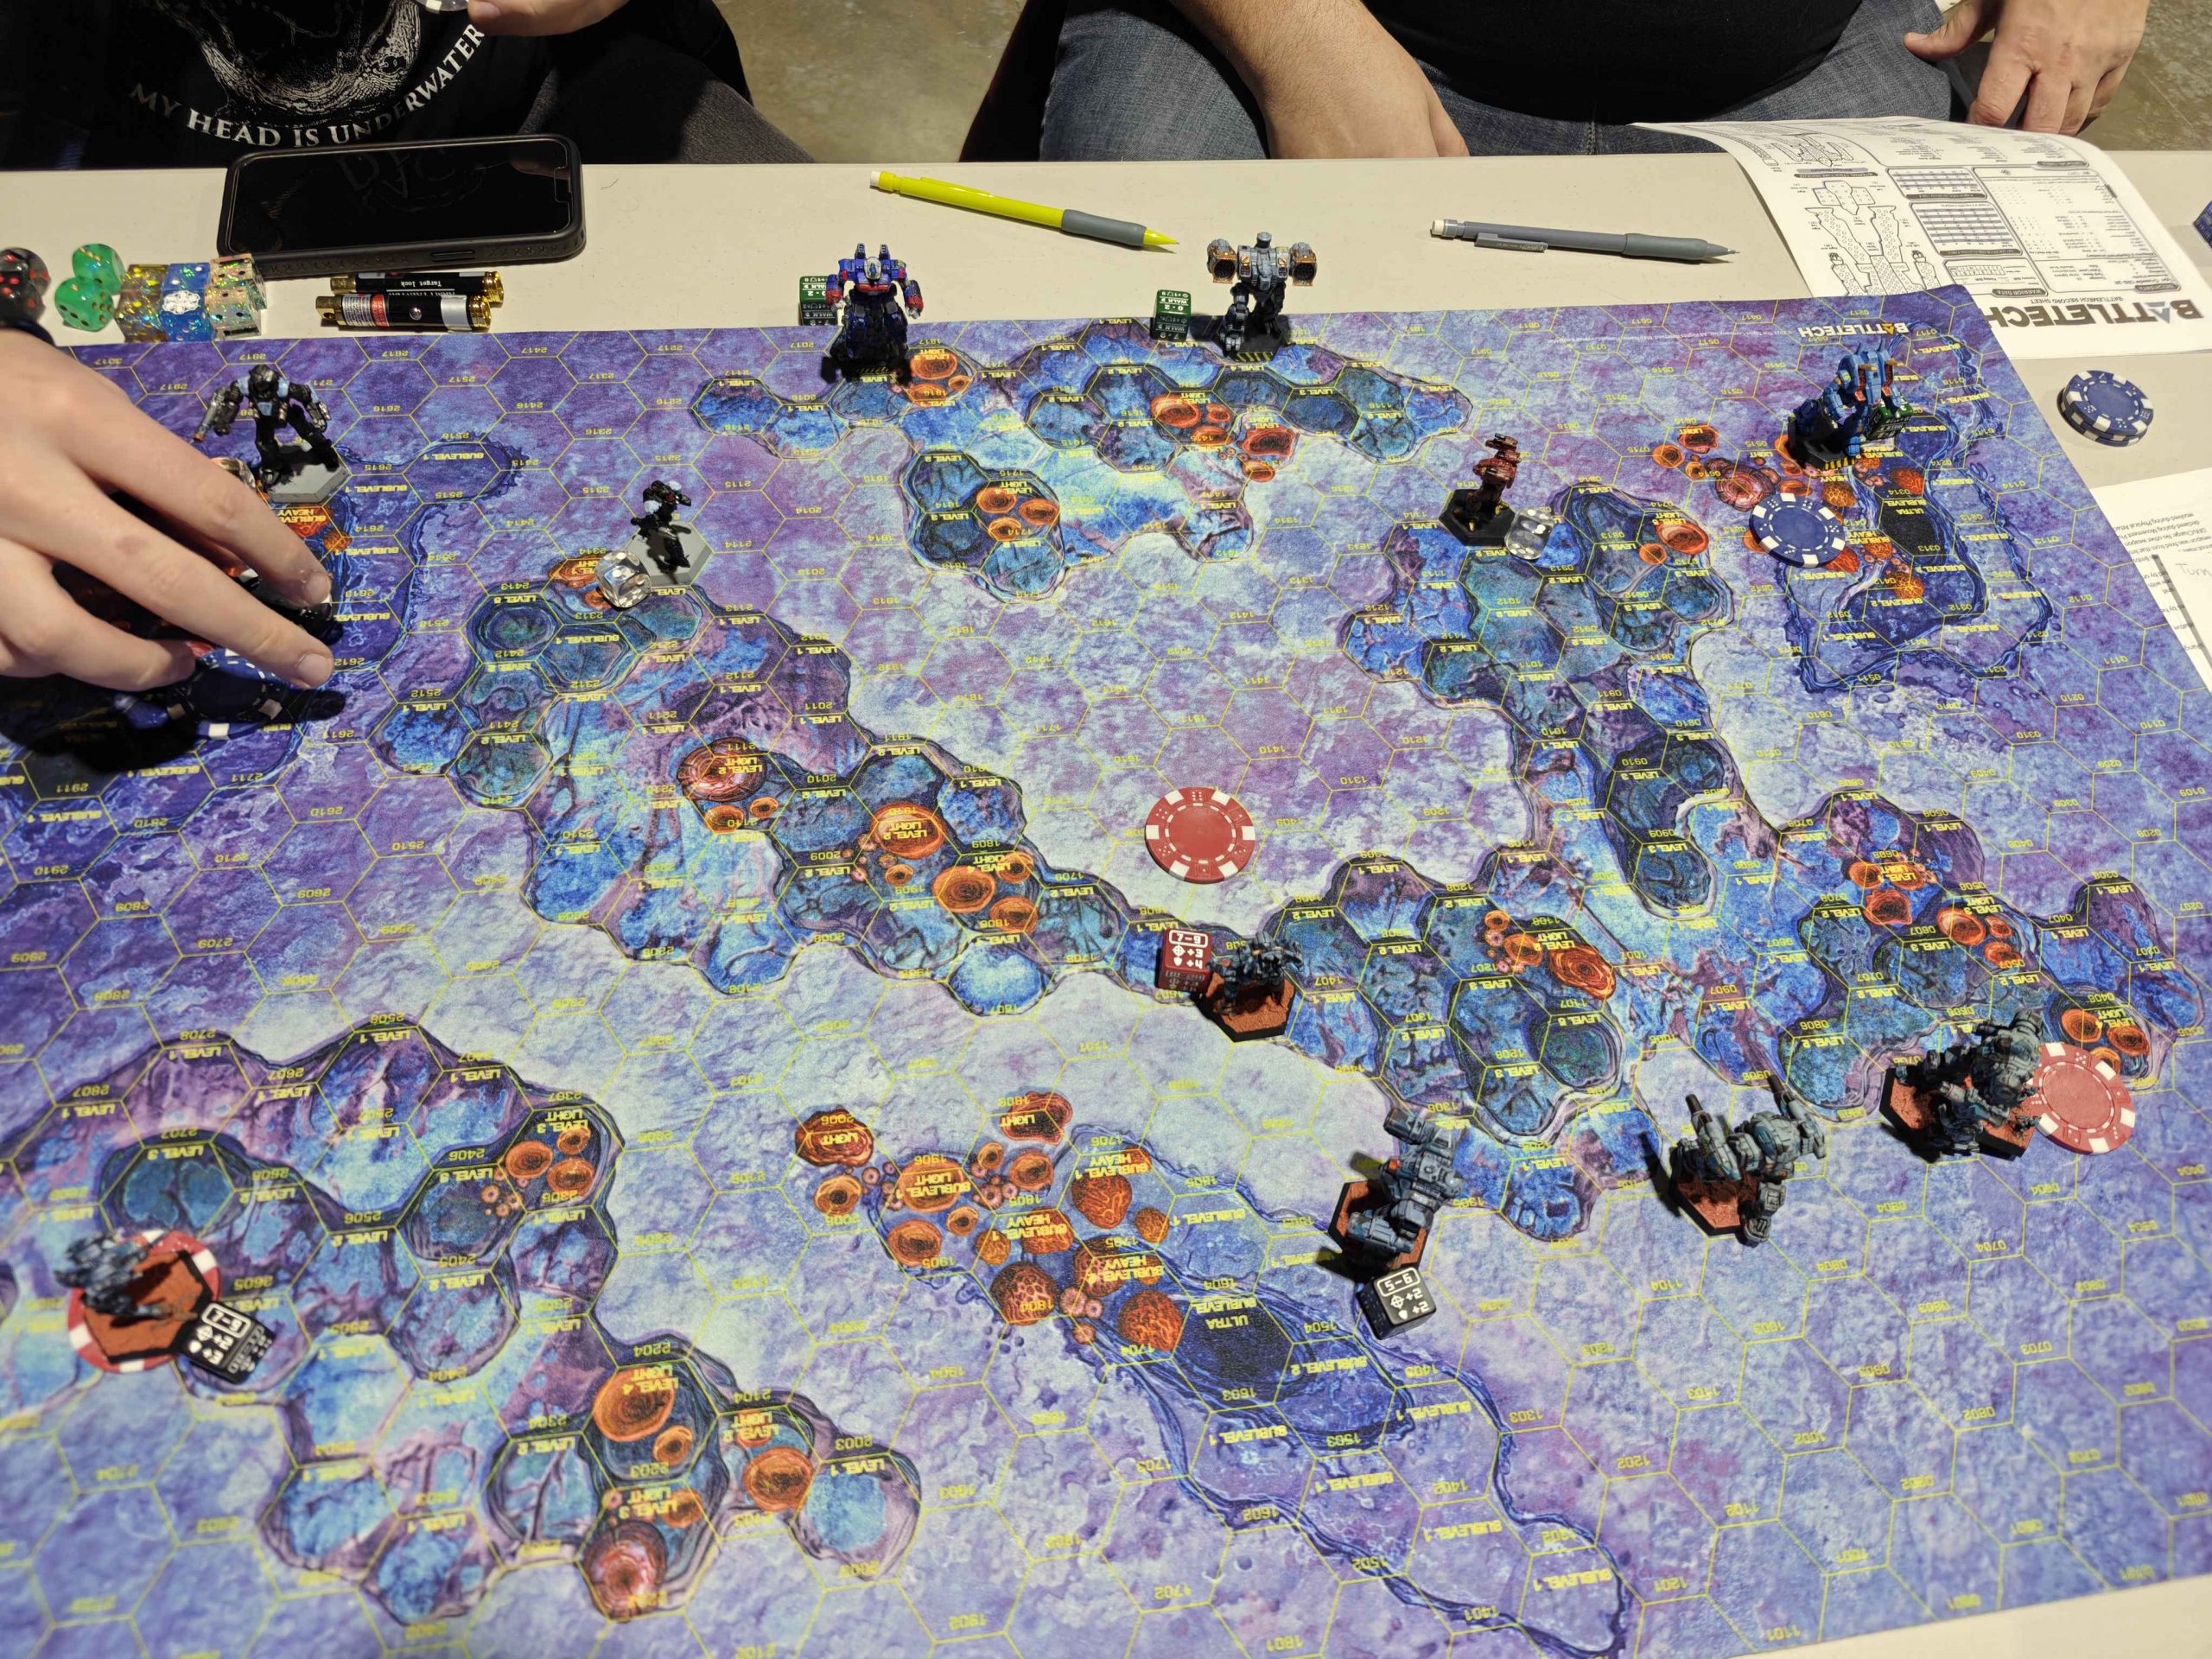
After getting to the venue (and slightly lost thanks to poor Google maps directions), our first game saw us matched up against something we hadn’t considered – an opponent oriented almost entirely towards semi-guided LRMs. One force was running the missile battery with an Archer ARC-5W, Crusader CRD-3R, and Longbow LGB-0W. The second force were their spotters and objective takers, with a Black Knight Bl-12-KNT, Wasp WSP-3S, and Fire Moth A, with a few skill increases. We were playing on Fungal Crevasse, which is OK but not my favorite map because of the slightly off-center hill that crosses the whole map. While it didn’t end up mattering, it did give an opportunity for someone starting on the south side to hold the center objective with decent partial cover. It’s not that big a deal, but what I hate about this map is that the yellow text on blue with neoprene printing is extremely hard to read – the text bleeds or something.
We won first turn initiative, which let us hold the venom back to move last. We could see that the Wasp and Fire Moth didn’t get too close to the center objective, and I was confident that the venom would be able to survive jumping in to cap that point straight off. The Black Knight and my Locust were lining up across from each other on the left side of the map, while all three of their LRM mechs were sitting on the very back of the map. I was hoping we’d be able to run across and push them off the map, but the way that map is set up they were well hidden behind level 2+ hills that would prevent us from pulling that off.
As actual fire started getting traded on turn 2, two LRM clusters promptly hit the Gargoyle in the head, leaving it unconscious on the ground. This was going to be a trend across the whole tournament. With the center objective now secured by the Kingfisher, both my lights could push up towards the objective the Black Knight was holding, which was in an area thoroughly covered in heavy woods so I was confident my lights would be able to survive even close.
Unfortunately, turn 3 saw my Locust getting tagged and then deleted. While it did some damage to the Wasp, it wasn’t quite enough – the locust can take some hits, but not that many. The Gargoyle continued to take a nap, but did absorb some of the firepower that wasn’t directed at the Locust. The Venom was able to jump onto the same objective the Black Knight was holding, flipping it back to neutral. It wouldn’t score for me, but it wouldn’t score for our opponents either.
Turn 4 was probably the critical misplay by our opponents, moving the Fire Moth to contest the center objective and parking it exactly 4 hexes from the Kingfisher, which had yet to move. I was confident it could survive LRMs, so I stood it still and hit the Fire Moth on 6s. It ceased to exist, putting the Wasp in a position where it could either try to contest objectives or tag things, but not both.
From that point on the game was in the bag. Our Flashman closed with the Longbow and killed it through ammo explosion, the Black Knight attempted to alpha strike the Kingfisher but wasn’t able to do enough damage, and though it didn’t shut down immediately it was ineffective the following turn with a second alpha strike, causing it to shut down and eventually die – though it did take very nearly every single pip of armor on the front before doing so. The Gargoyle finally woke up on turn 6, but the damage it had suffered left it minimally mobile. Still, the autocannons had enough range to help the Kingfisher take down the Black Knight.
Our opponents were great sports about the whole thing, with a final result of 33-13 victory for us.
Mission 2
Our second game was the most challenging, with opponents from one of my FLGSs that I know take the game seriously and have a mountain of experience (and pile of IWM metals for things like battle armor). As I called out earlier in the mission overview, this mission was strongly tilted towards the defender, and we lost the roll-off. Our opponents were running a much lighter list than us with more battle armor, with a Glass Spider 2, Battle Cobra C, and squad of Corona (SRM) heavy battle armor (set to 4/6 because they can’t swarm or make leg attacks anyways) in the first half of their list, and a 3/5 Griffin IIC 8, 4/3 Beowulf, and squad of Longinus (Magnetic).
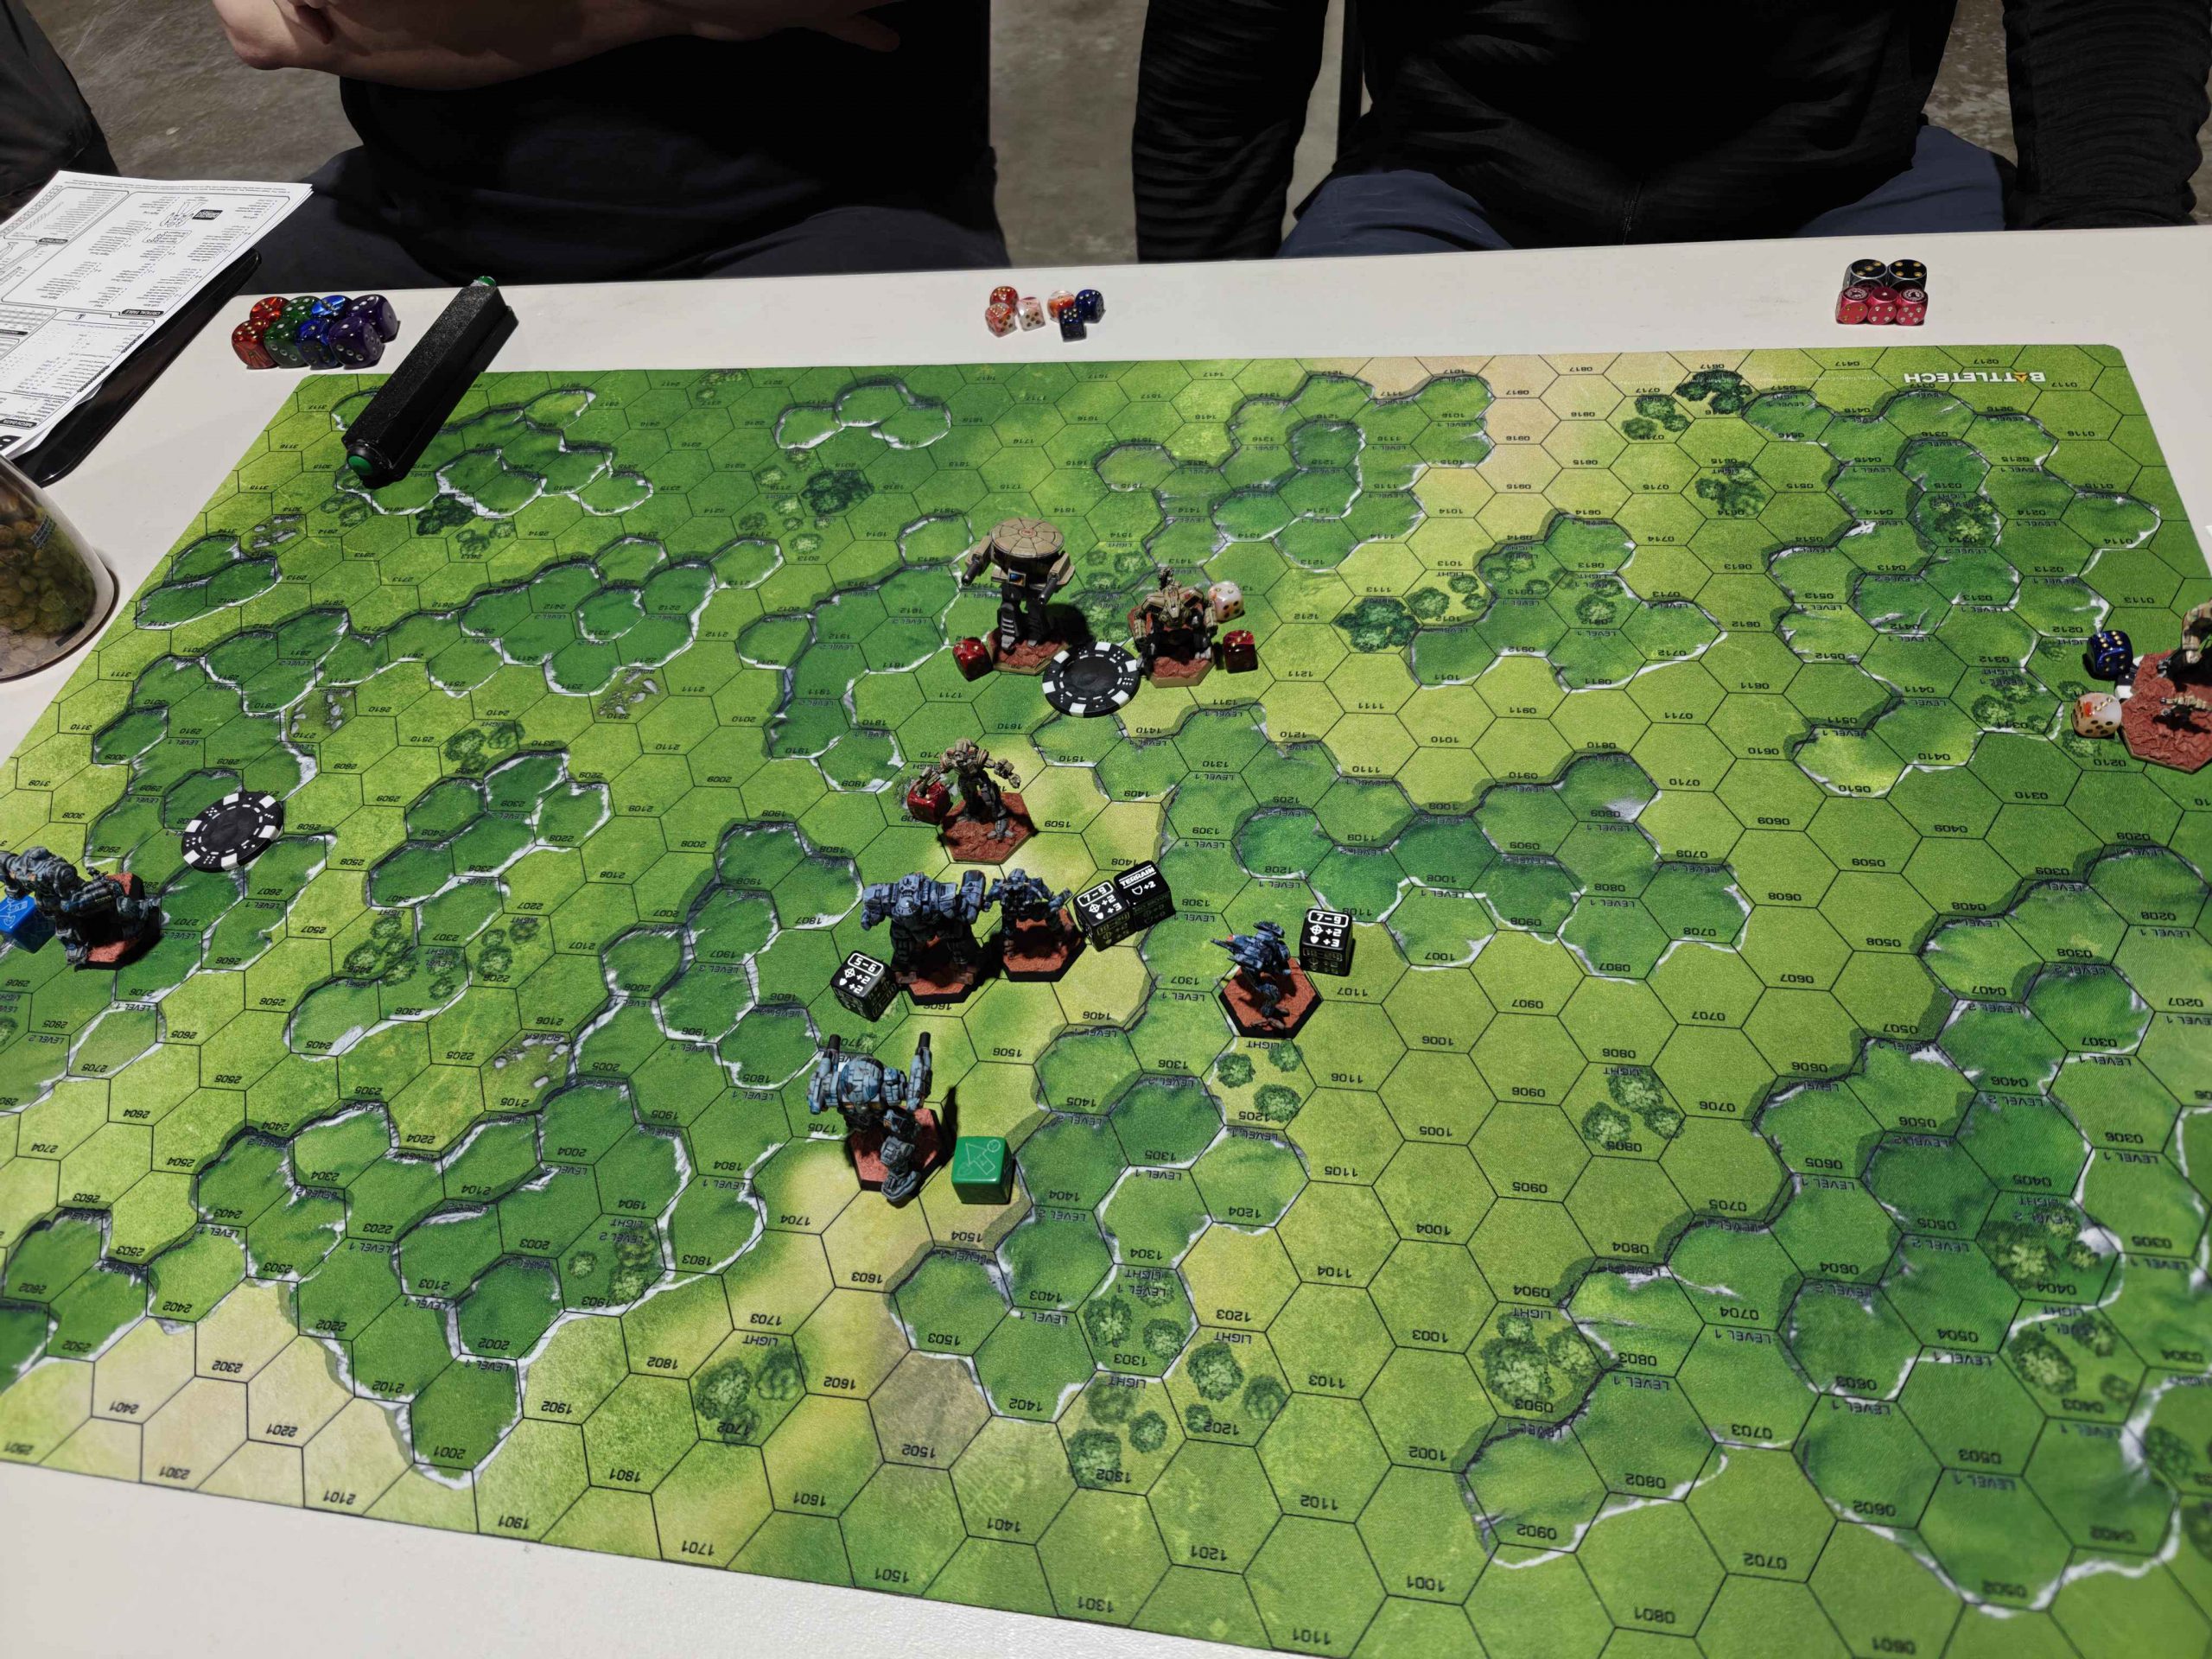
We played this game on Grasslands C, and after some back and forth placing our side objective in a defensible position that we could get to by turn 2 we set up most of our mechs to go pretty close to straight down the center. We had a numbers advantage in mechs, which we were hoping was going to get us an advantage holding that center objective while neither of us did much to contest the sides.
On turn 1 as we started pushing forward some decent hits on the Beowulf took its sword right off without us taking too much damage, but things went downhill quickly. On turn 3, the Kingfisher fell down and passed out on 2s. Losing a full turn of its high accurate damage was a turning point, and we shortly ended up with the Flashman also on the ground in exchange for having mostly (but not completely) killing the Glass Spider. At the same time, I put both light mechs into the squad of Coronas, with both mechs looking for sixes to hit with their pulses, and missing almost every shot. A turn later, the Venom pulled up behind a low TMM Battle Cobra and rolled to hit on sixes.
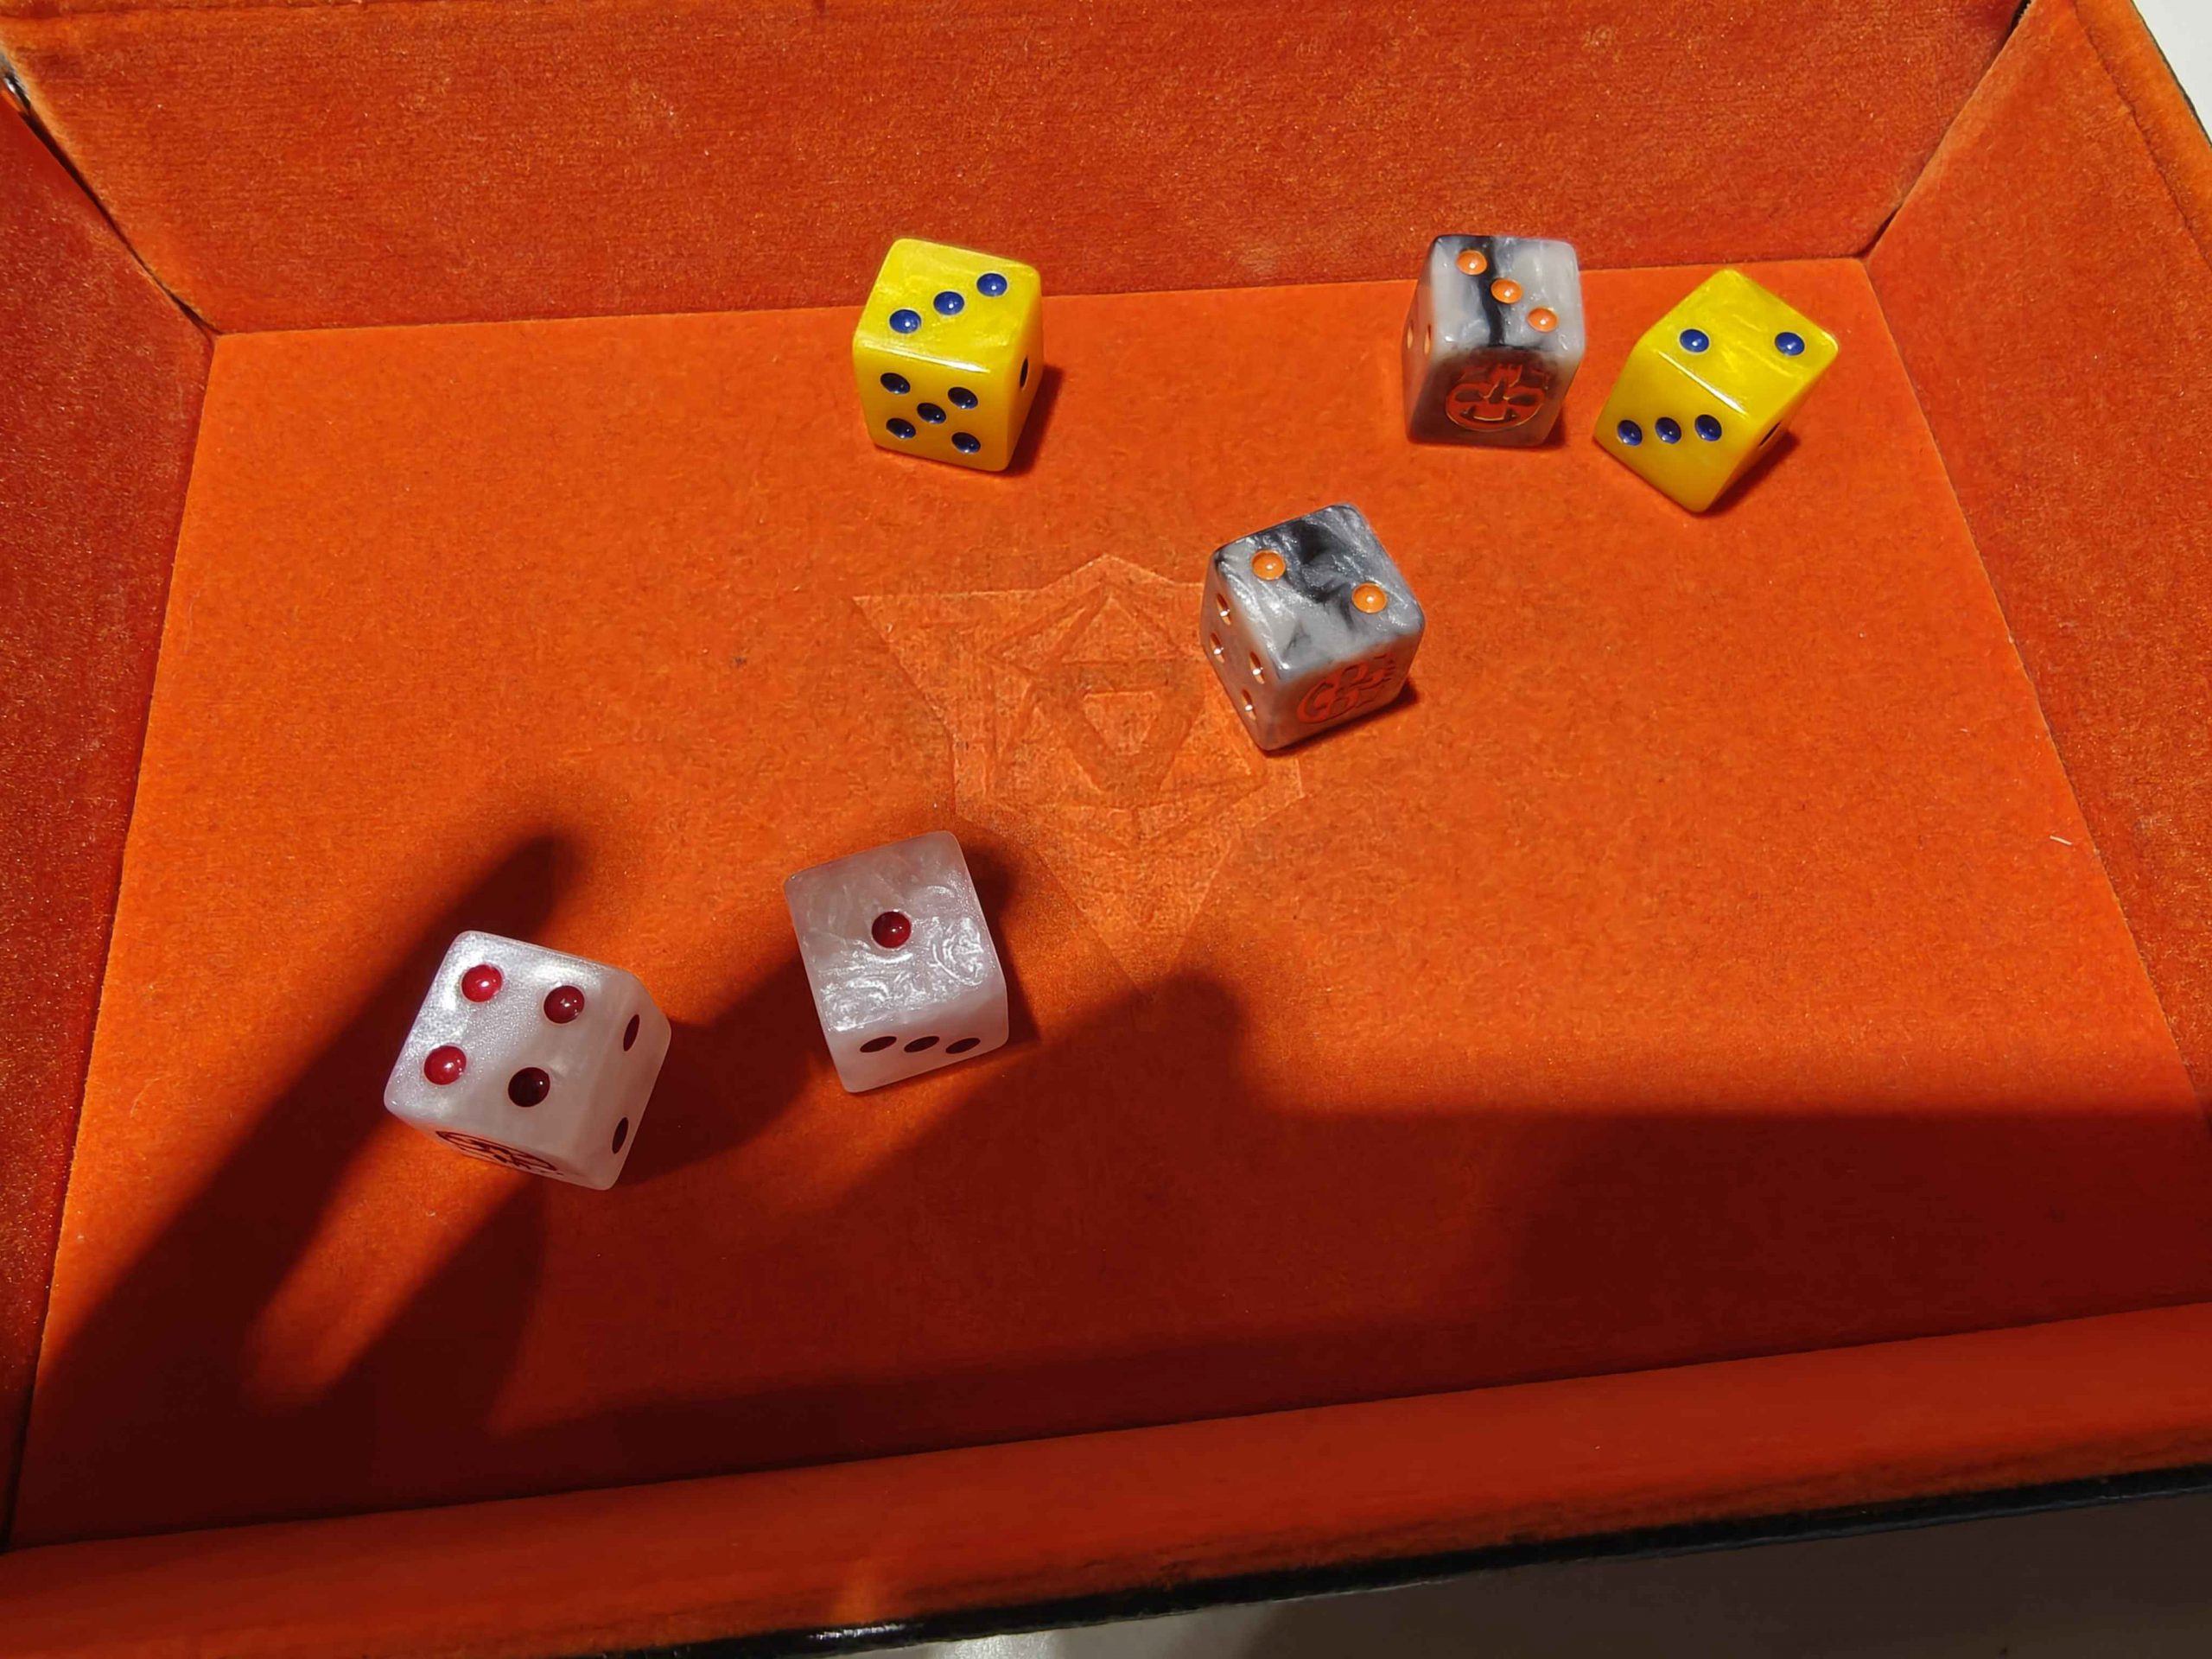 I only needed 6s
After having done nothing to the Battle Cobra, the Venom proceeded to get shot up and lose most of its mobility. As we approached the final turn the score sat at 3-5 – we’d each held our side objective fine, and we’d prevented one turn of scoring on the center, but everything would come down to who was holding 2 objectives on the final turn. We had three active units that could theoretically contribute, and our opponents had two. Unfortunately, the Venom was currently on the ground with a couple actuator crits. If it could stand up on the first attempt it could make it into scoring range. Instead, it fell over, put three crits into its own right torso, and spun to face away from the objective where it couldn’t even prop and fire. When both our big mechs on the objective also ended up on the ground, the game was over in a 10-4 loss (possibly 12-4, there were some quirks about scoring on the last turn that didn’t end up mattering). Unfortunately this game was close enough that I think our series of unfortunate events ended up a pretty strong determinant for who won – it could easily have ended up the same way if the kingfisher hadn’t decided to take an early nap, or the venom had decided to hit what it was shooting at, but would’ve been a lot closer.
Mission 3
Our third was against a guy whose partner was unable to make it at the last minute, so he was running all four mechs in his force alone. We were up against a simple lance of an 3/4 Awesome AWS-9M, 3/4 Thunderbolt TDR-9W, 3/4 Griffin GRF-3RG, and 4/5 Wolverine WVR-7K, back on the same Grasslands C map as our previous game. I would’ve loved to have bounced over to a different table for variety, but if I’m going to repeat a map Grasslands C is probably one of my preferences. This was going to be mostly a stand-up fight, with a bit of crossing the board and trying to get off the other side in the last few turns. With us holding an advantage in tonnage and mobility, we were confident in our gameplan to push straight forward and through.
We only traded a handful of shots on turn 1, with the Awesome and Kingfisher trading a few shots. Unfortunately, while the Awesome was perfectly happy to take those hits, the Kingfisher immediately fell down and hit its head. Off to an auspicious start. We had our light mechs flanking around the back, as we wanted to keep them alive as long as possible and potentially shoot the mediums in the back.
As we started turn 2, our Gargoyle pushed right into the middle, where it promptly took a gyro TAC and fell down, never to rise again. Things were going well. We were definitely getting good damage on the Awesome, but were getting some seriously unfortunate hits in return.
We kept pushing through, setting up on our opponents third of the board, a perfect space to prepare to move off the board as we get towards the late game, but the Kingfisher took another head hit on turn 4, putting it out of the game. At this point, with the Gargoyle on the ground and the Kingfisher dead we’d lost a ton of our damage, and while we’d taken the Awesome out weren’t going to make much progress with the Thunderbolt. My Venom got hit for a pair of engine crits, which while not quite enough to kill it did push it up to 12 heat with no way to dissipate a meaningful amount – it sinks 12 and now generates 12 on a run.
We do manage to put two crits into the Wolverine’s gyro, which leaves it permanently on the ground in roughly the middle of the map. This was going to cause some confusion as we went to score at the end of the game. We got both the Flashman and Locust off the field, and our opponent got their Griffin and Thunderbolt off. Unfortunately, because the Wolverine retained both its arms and could prop and shoot, it didn’t score points for either side.
At the end of the day, we ended up just having taken too much damage early, and lost 94-52.
The Outcomes
At the end of the day, we ended up solidly in the middle of the pack. I thought our execution and planning went well, but our Kingfisher and Gargoyle had some of the worst dice luck I’ve ever seen. The second mission was not a particular surprise, as soon as we lost the attacker/defender roll I was expecting a loss – our opponents were just too good for us to fight up from the position we got put in by the mission.
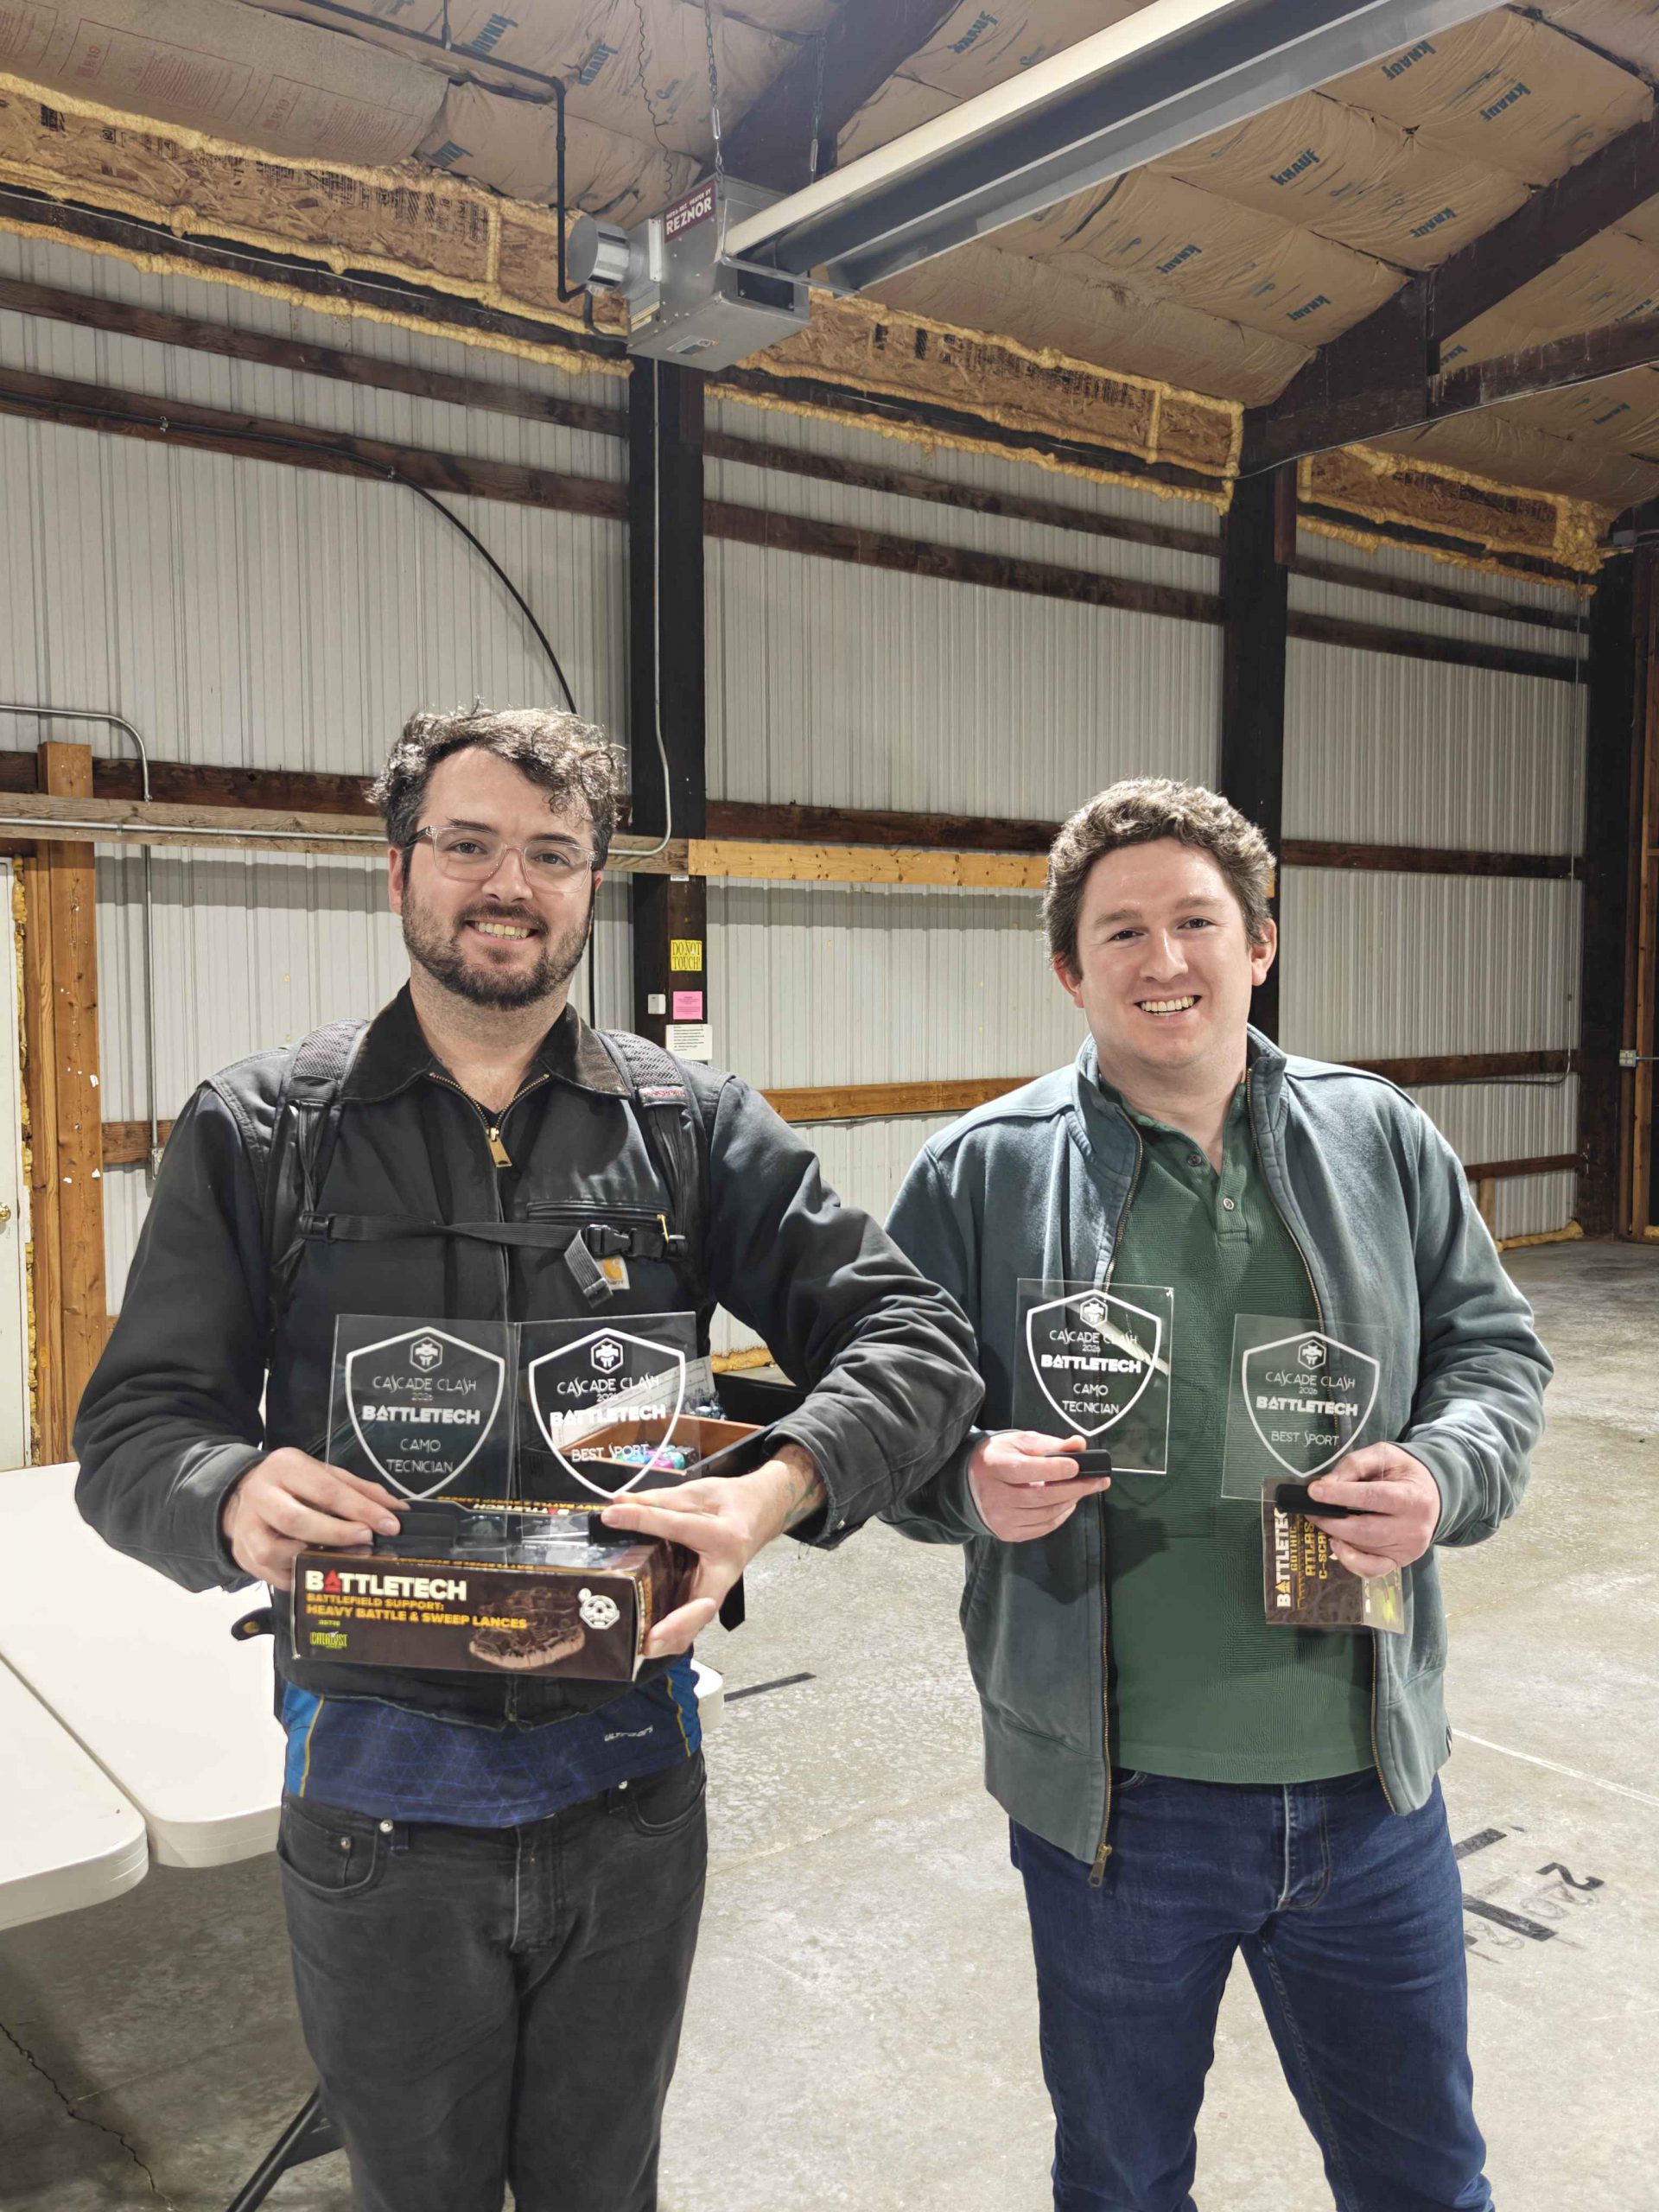
We did not, however, go home unrewarded. We took home the best sport trophy, which is always fun, and more importantly we got best painted. Judged by a Camospecs painter on a particularly strict scale, we topped the pack with 17/30 points. We lost some points from missing the endless mold lines but did score a couple bonus points in both the canonicity and “jazz” sections. I’m a little confused on the canonicity scoring - our paint jobs closely match an image of Simonson’s Cutthroats on page 129 of the new Force Manual Mercenaries book, and it’s noted that we used the correct colors. We only scored 2/5 points there, so I’m not sure how we could’ve scored more points. My other comment here is that with 10 points available for canonicity and “jazz” I think the scoring rubric should’ve been included in the player packet – without anything to suggest that using canon paint schemes would score you points, I can see people choosing to run their own schemes, and it would be disappointing to have the best painted models but lose because you painted them the “wrong” colors. Click the banner below for a How to Paint Everything article on how I painted my Cutthroats.

I know that planning has already started for Cascade Clash 2027, and we’re both excited to return (and hopefully win).
Have any questions or feedback? Drop us a note in the comments below or email us at contact@goonhammer.com. Want articles like this linked in your inbox every Monday morning? Sign up for our newsletter. And don’t forget that you can support us on Patreon for backer rewards like early video content, Administratum access, an ad-free experience on our website, and subscriber-only content covering competitive Warhammer 40K!Thank you for being a friend.


 Goonhammer App and Patron Updates: April, 2026
 Kill Team Tournament Report: Engage, Party, Repeat's March Madness 2026
 Goonhammer Reviews: Tribal Conquest