Welcome to another installment of Starting Hex, a series about Warhammer Underworlds. This is a fun one for me in particular because I am recapping my first time attending Adepticon! I did a lot more than play Underworlds on this trip, but for now I'm going to focus primarily on the warband and deck that I took to the event and how it performed for me. I'm fortunate enough to have met some wonderful people through Underworlds, so I was able to hang out with them for a huge portion of the event. I know it's cheesy and I know it gets said in almost any write-up from an event, but the community is truly what makes these games so great.
I've attended NOVA a few times in the past, but this was my first time venturing out to Wisconsin to partake in one of the other "big three" tabletop gaming conventions (with the third being the Las Vegas Open). Honestly, I just assumed it was going to be NOVA but colder and with more cheese and beer. Boy, was I mistaken. About the size, at least – there was plenty of beer and cheese. Adepticon is huge. If you haven't been, it's probably bigger than you are thinking. The Baird convention center spans roughly two blocks and three stories with a sky bridge connecting the north and south portions.
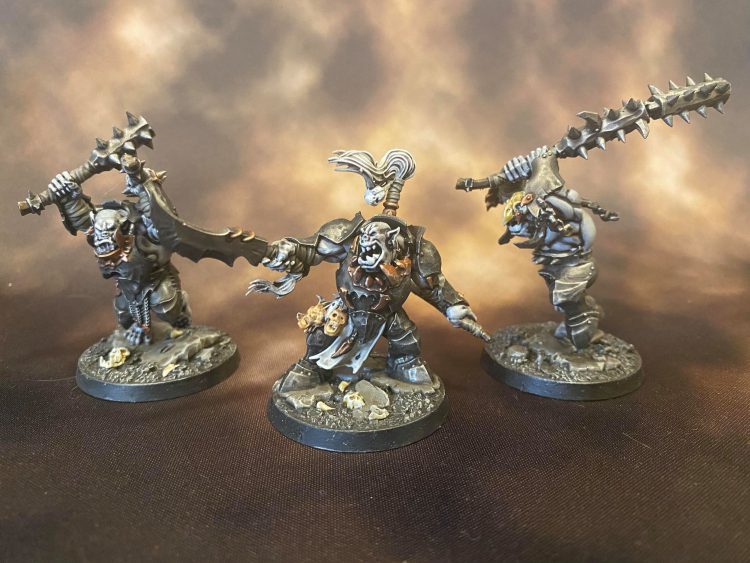
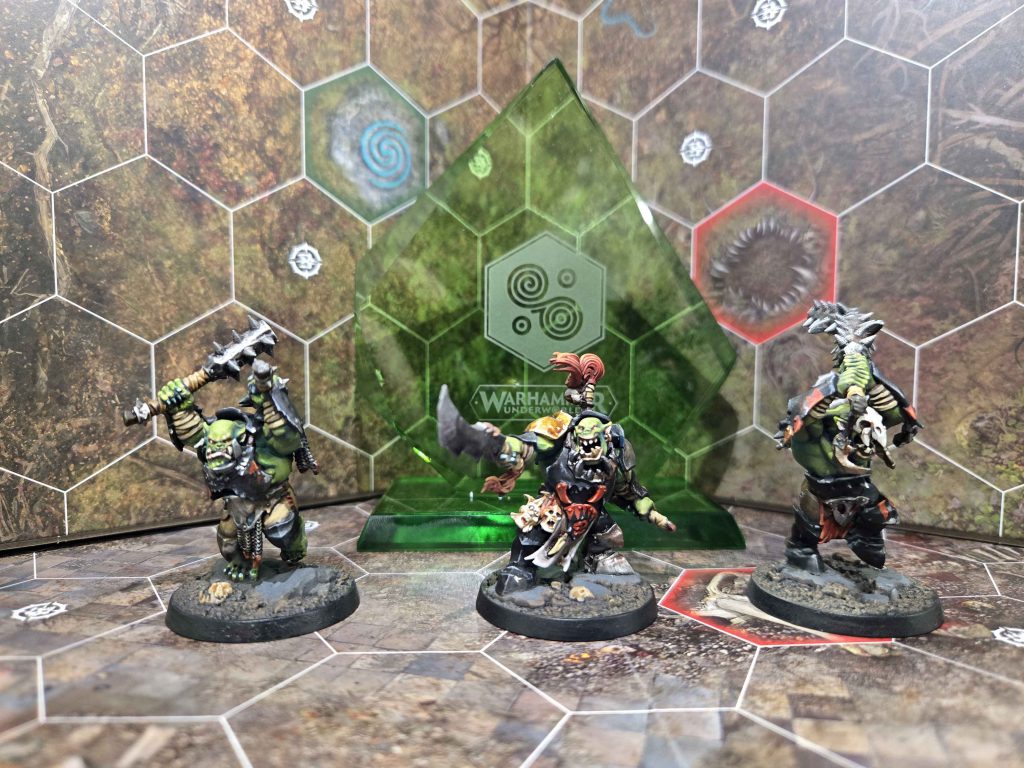
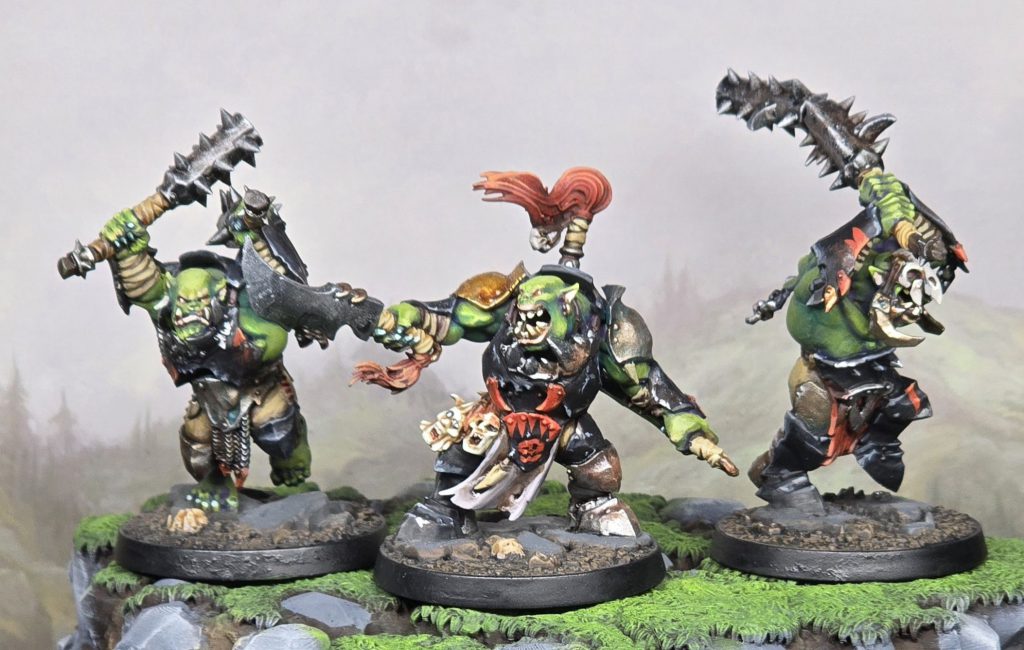 Morgok's Krushas. Credit: keewa
I'll get straight into the deck I brought before I turn this into a full blown travel blog. I took Morgok's Krushas, the trio of hard hitting and fairly durable greenskins who are almost exclusively seen in pure aggro approaches like Blazing Assault / Reckless Fury (aka BARF). For the first time, I did some real brewing on my own and cooked up what I thought was a pretty weird combo with Emberstone Sentinels and the new Nexus of Power. Both of these decks are highly focused on treasure tokens and either holding them or being near them. That's a pretty far cry from the "go hit them, then hit them again" approach that I used when I took them to NOVA last year. So why the change?
I've mentioned here and there that my default approach in this game has been of the ABC (Always Be Charging) variety and I have taken it upon myself to use 2026 to break out of that habit. I've had mixed success using warbands like
Cyreni's Razors,
Elathain's Soulraid, Ephilim's Pandaemonium, Zondara's Greavebreakers, and Khagra's Ravagers but nothing has really felt like it has clicked with me. I'm constantly battling my own impulses to charge and getting tired of being beaten up by the enemy while I try to control my little cardboard hexes. Instead of playing a fully hold focused approach, I've been branching out into more midrange styles.
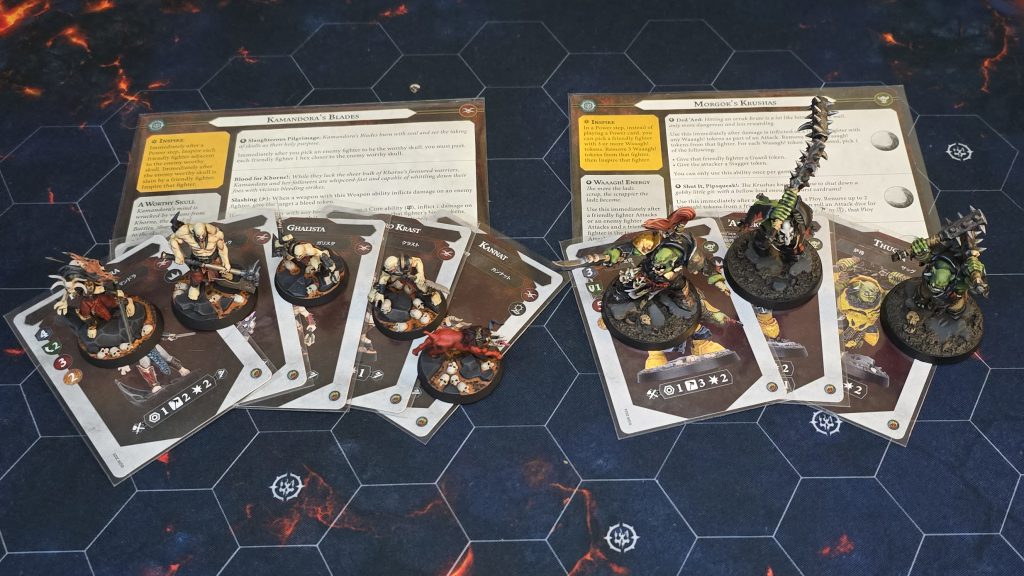
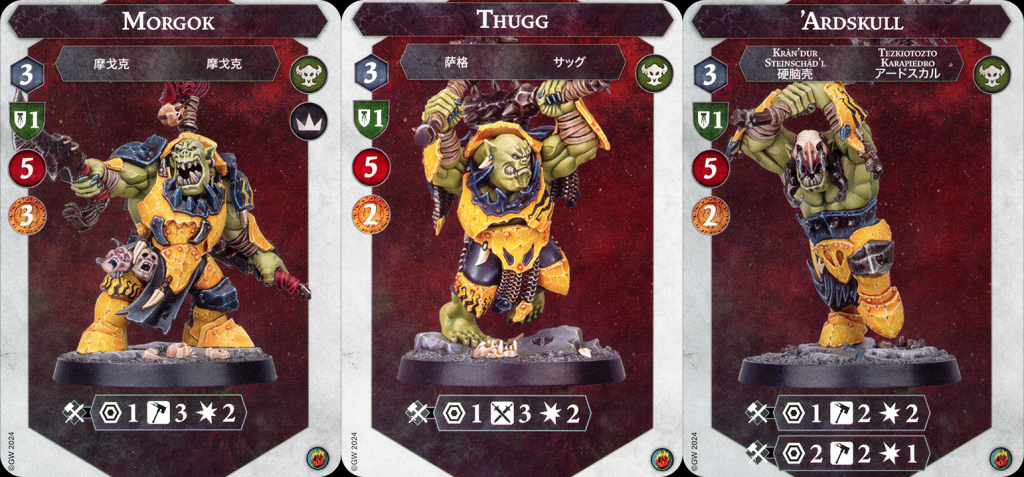 Fighter cards for Morgok's Krushas. credit: UnderworldsDB
I know "midrange" is a pretty vague term, but I'm taking it from my experience in Magic: the Gathering where it's referring to a deck that's not quite aggro and not quite control. Instead, it takes into consideration what its opponent is doing and tries to lean into whatever weakness they have. Basically, you want to attack your opponent wherever they are the weakest. Real big brain Sun Tzu stuff, right? For instance, against an all out aggressive opponent, you can choose to lean into the more control-y element and force them to come to you and disrupt your fairly guaranteed scoring. Against a more hold focused enemy, you can rush forward and place fighters onto the tokens the opponent wanted to control which not only disrupts their scoring but enables your own.
A lot of this comes down to being able to recognize whether you are filling the attacker role or the defender role in your match-ups as well as whatever the current game state is. This goes back to an ancient article written for Magic called
Who's The Beatdown? This came out in the late 90's which makes it older than some of the people reading these words right now, but it's still worth reading even if you don't know anything about Magic. Go read it, but the short version is that you need to know when you are comfortable with the current state of the game and when you need to do your best to change the state of the game.
 Fighter cards for Morgok's Krushas. credit: UnderworldsDB
When
Nexus of Power came out, the plot card's ability to increase the reach of your range one fighters felt like it'd be a powerful tool to leverage and really enable this midrange strategy. However, you needed to be able to park a body onto a treasure and not get knocked off of it. I started looking at the various warbands that could go for a treasure focused ES/NP pairing while still offering some offensive output. There are plenty of options where giving fighters extra range would be beneficial but I wanted to focus on ones that also had tech to be able to hold. Gnarlspirit Pack were one of my first considerations because they have both a guard ability and a multi-fighter push ability on their warscroll, but I was still trying to make a decision only a week or so out from the event and I had zero practice with GSP. I was flipping through my warscrolls when I got to Morgok's Krushas and took a good look at what they had to offer.
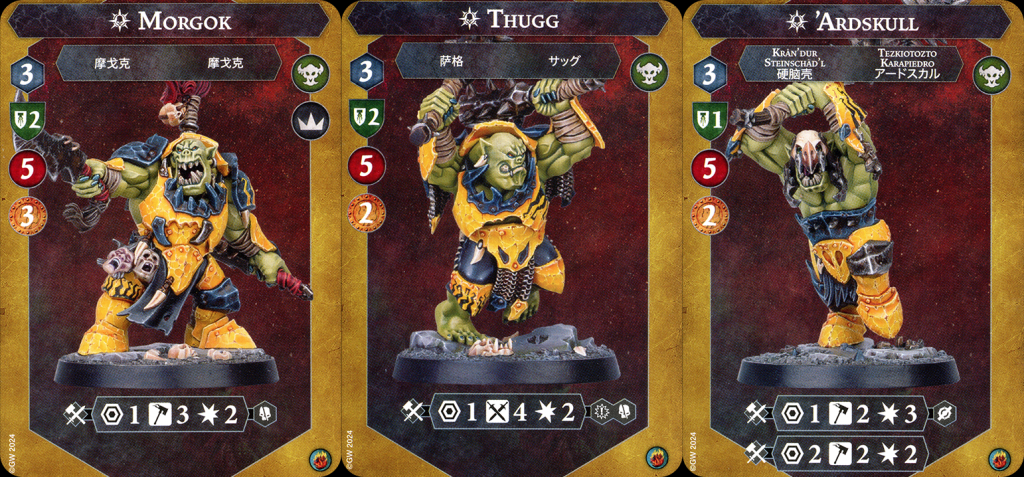
Morgok's Krushas
 Warscroll for Morgok's Krushas. credit: UnderworldsDB
Consider this warscroll from the point of view of a hold treasure warband. It basically has everything you could ever want if your goal was to pick a token or two and control it for the rest of the game.
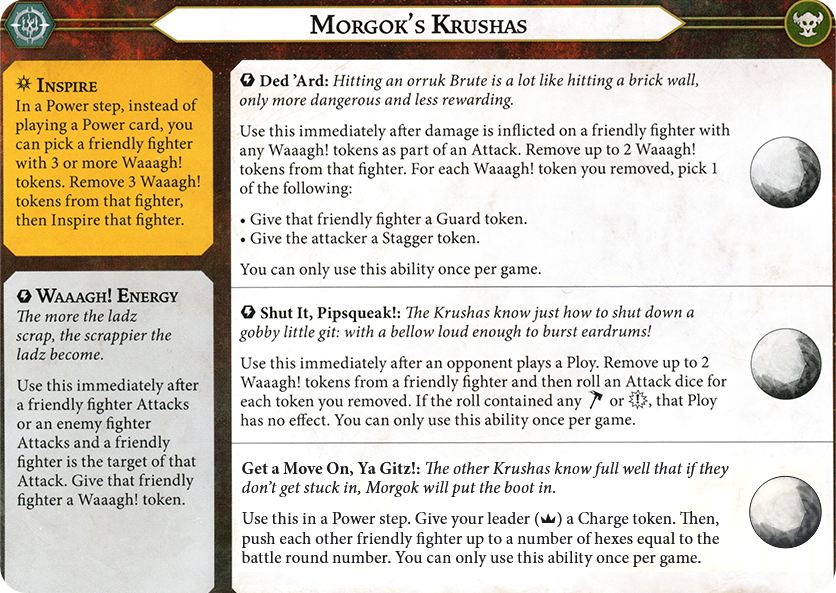
They have
Dead 'Ard to start with, which is frankly bonkers. There are two timing windows here that make it arguably the best way to secure a token in the game. First up, check out when you gain a Waaagh! token (henceforth referred to simply as a waaagh token because I hate having to stop my text editor from automatically capitalizing the following word). It's after a fighter attacks, so as soon as the attack action is underway. The timing for Dead 'Ard is immediately after damage is inflicted – meaning that by then, the target fighter would have a waaagh token and can choose to use this ability. The key here is that the window to use the ability is "immediately after damage is inflicted" on your fighter. If you check the Combat Sequence diagram in the rulebook, you can see that damage is inflicted as the first part of the "attack successful" step (see below).
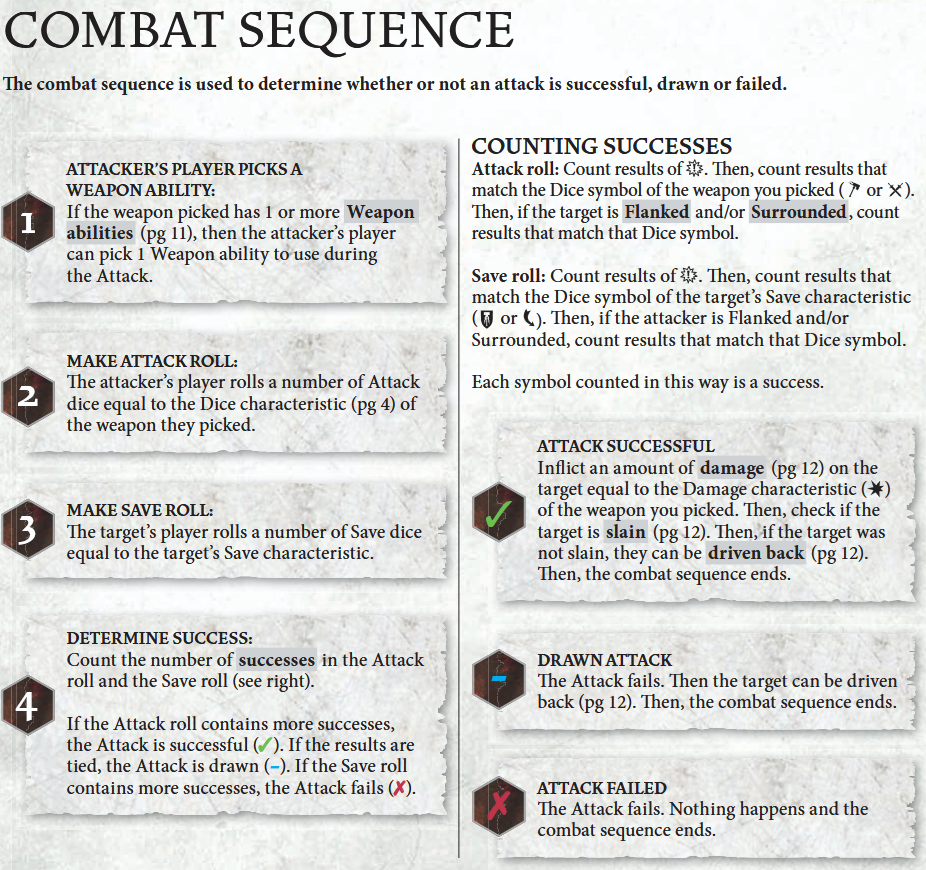 Section of the Warhammer Underworlds rules covering the combat sequence. credit: Games Workshop
Notably, this means your fighter will take damage and then have the opportunity to go on guard
before the opponent can choose to use drive back to push your Orruk off the token. You won't benefit from the extra save properties of guard because the attack will have already gone through, but on the whole that's not so bad. For a shield fighter like these dudes it is just an extra 16.6% success rate per dice. That's not nothing but it's also not huge. All three of your fighters also have a beefy five health, so they can take a hit and reliably still be feeling just fine. In practice, this means you can move or charge a fighter up to a treasure token without any anti-drive back support in your hand and still feel confident that they're
probably going to be on that token after your opponent acts – either because the opponent didn't bother in which case you still have Dead 'Ard loaded and ready to use later, or because they ran up to your fighter and made you use it. There
is the edge case where they attack and neither of you roll any successes; this is a drawn attack that won't inflict any damage, but the attacker can still use drive back. Alas, no ability is completely perfect.
I'm going to skip down to
Get a Move On, Ya Gitz! next. Any warband that wants to hold treasures (or really any warband in general) loves having access to a push. It's a way to extend your reach just far enough to grab a treasure or hop right back onto a treasure if you get driven back or pulled off with something like Lure of Battle. The "typical" way of using this is to extend your charge range, position one or two fighters into range to wallop the enemy without having to charge, or to escape danger and those are still all entirely relevant here. Just because we're holding tokens doesn't mean you don't have access to your daunting melee profiles!
 Morgok's Krusha's from Warhammer Underworlds. Credit: Magos Sockbert
Something that came up in my test games before Adepticon and at the event itself was that I was able to hold Get a Move On for longer than I did when playing something like BARF. In the all-out aggro style, I'd often want to blow it in the first round to ensure I got any use. Morgok was often up in the front lines, and if he dies then the ability can't be activated. Being able to save it for the second (or rarely, the third) rounds allows it to really power up and be able to shove your other fighters two or three hexes. That's massive considering how important board position is for the ES/NP pairing. I had one game where in round three, I had Morgok and Thugg alive. I was able to use Get a Move On to push Thugg three hexes away from danger, then move another three hexes in my activation and end with The Extra Mile to safely deposit him on a treasure token seven hexes from where he started! With some careful positioning, you can even use it to have 'Ardskull and Thugg do a tag-team swap on a single token in case one of them needed a breather.
The third ability here is
Shut It, Pipsqueak! This is functionally a counterspell. Why do orruks get it? I have no idea, but in all my time playing them as aggro it has
never felt as good as it does when using them to hold tokens. I've managed to shut down the opponent's attempted use of Illusory Fighter, Lure of Battle, Confusion, Sidestep, and potentially fatal Twist the Knife. I always spend two tokens when I can, because that brings the success chance up to 75% from 50%. Has it failed me? Absolutely, but it's also succeeded enough times that I've really warmed up on how important this ability is. One thing I did this time around was to make a mental note of which ploy in each deck I was most concerned with and tried to save Shut It, Pipsqueak for that ability. Most of the time it was when the enemy was trying to move me such as Lure of Battle or Confusion.
After checking out the warscroll, I realized there might be something here. I went into the deck building with the plan to hold two objectives and threaten to score a bunch of semi-passive glory. If the opponent wanted to stop me, they had to come and face off against three fairly intimidating fighter bodies that were more than happy to trade blows with the opponent. Having the Nexus of Power plot card also meant standing on a token increased their offensive power by letting these fighters reach out and wallop their enemies, and as I mentioned before these fighters are no slouches. Morgok starts (and stays) on an impressive three hammers, 'Ardskull is a little less accurate but has the option to natively reach out and bonk someone at two range (and when standing on a treasure, he can use his even more damaging range one ability from two hexes away instead), leaving Thugg as the "worst" fighter but he's still throwing three or four dice looking for swords making him an ideal candidate for flanked attacks which themselves are easier to set up when attacking with two range. Another huge benefit is that each fighter is either natively hitting for three or threatening to hit for three once inspired. This puts them in the top tier of threats, in my opinion.
Deck Tech
 My Adepticon list. credit: UnderworldsDB
The cards in the deck are listed above, but
you can also check it out on UnderworldsDB.
There are 16 glory worth of objectives and it was pretty common for me to blow through my entire objective deck by the end of the game. I often entered round three by drawing the remaining one or two cards in my objective deck which is a pretty great feeling. While 16 glory is not as high as some other decks can threaten (especially Pillage/Emberstone decks where they're taking two of the big three glory end phases), it's fairly respectable. I might be able to sneak another end phase in there, but honestly I'm quite pleased with the times when I can chain score surges early on and I don't want to dilute the deck any more than I have to.
Speaking of objectives, the package I went for is fairly straightforward so you shouldn't be too surprised to see anything here. I'm going to dive deeper into the card choices just to
hear myself talk review my reasoning, though.
Aggressive Defender is a no-brainer and even easier to score than usual with the Nexus of Power boost to your range.
Calculated Strike will just happen at some point during the game; if it's in your hand, prioritize attacking with Morgok or inspired Thugg just to roll more dice.
Unassailable is a card that's usually up to the whims of fate, but between Dead 'Ard, two guard ploys, and two of your fighters rocking two shields for defense I've never had an easier time scoring it than here.
Sally Forth and
Stand Firm require you to be mindful during token placement at the start of the game, but much like Unassailable, you're sporting so many ways to ensure your fighter will stay rooted on their token to let you score these after your opponent takes a turn. Stand Firm even has some cute synergy with the downside of Nexus of Power. At the start of the game, I noticed my opponents often want to flip down the treasures that are obvious landing points for my fighters. If they do this, I can simply move onto the cover token, delve it back into treasure, and then that fighter is all set to score Stand Firm in the following turn. Of all my surges,
Seized was probably the most difficult to score simply because my opponents would (wisely) delve the treasures down and then be standing on cover, which means I can't score this by going after them. Most of the time, I was scoring this from forcing my opponents to come to
me while already holding a token.
Supremacy is the big end phase and one I would love to see in my opening hand. The bounty split in this warband means I can use any two fighters to score this for a big fat three glory.
Skin of their Teeth was often Supremacy-lite – I never had any issues with having injured fighters, but I could see that coming up against some enemy pairings on occasion. The fact that Morgok's Krushas all have five health and respectable defense means they can take a hit (or two or three) and still comfortably claim a token.
Hold Treasure 1/2 and
3/4 were my filler objectives but they're perfectly serviceable.
Audacity, like Sally Forth and Stand Firm above, is another reason to be mindful during token placement.
Iron Grasp was particularly fun because I could adapt to how the tokens were being deployed. In fact, let's briefly talk about token placement.
During the board setup, I would try to have one or two treasures in enemy territory that I can safely reach from my own starting hexes. If you can space them out so they're two hexes away from the opponent's starting hexes, that's even more appealing because it means you can charge onto one, use the bonus range granted by the Nexus of Power plot card, and whack an enemy in their starting hex while (probably) staying out of range of retaliation. This helps score some of your objectives while also giving you Waaagh tokens to fuel your abilities and get closer to inspiring. If my opponent was being cagey and loading their back line with tokens in an attempt to deny me access, I was fine with that. Just place one or two close to neutral on their side and that's all I needed most of the time. A nice bonus is that means there were often only one or two in my own territory, making scoring Iron Grasp even easier. If the opponent decides to push all the tokens into my back field, I can simply deploy my fighters further back and make the opponent come to me. Against most aggro approaches, this is going to work fairly well but I'd worry against something like Gardeners ES/PP being able to outscore me if we both sat back and stared at each other. Luckily, since I am playing midrange, I can go forth and bonk when that situation arises.
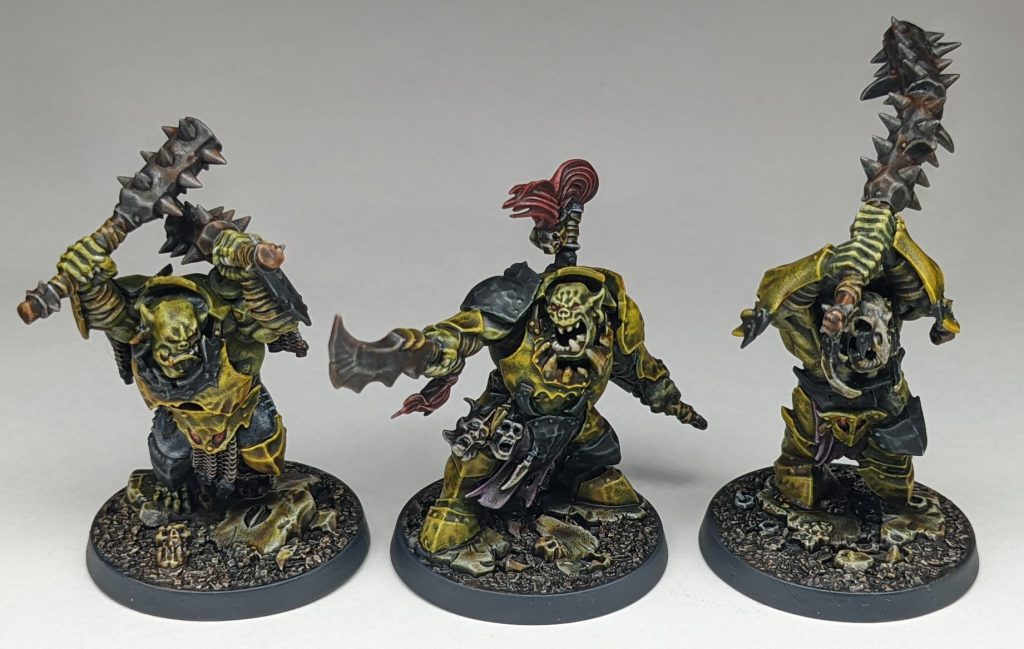 Morgok's Krushas. Credit: Rich "Cronch" Nutter
The power cards are where it feels particularly good when playing this deck, particularly with the ploys.
There are so many duplicates of staple cards (or at least as close as you can get in a singleton game) that I felt comfortable using them on the first opportunity that arose without needing to sit and wait. I have
Settle In along with
Into the Deepwoods for easy access to guard tokens, as well as the Dead 'Ard warscroll ability. Noted all-star
Sidestep makes an appearance alongside Sidestep-but-a-little-worse
Pilfer. Those worked great with Get a Move On from the warscroll and
The Extra Mile to let me shift whenever I needed or reach a token that was just barely too far away.
Confusion is a no-brainer when you need to hold tokens. Nothing feels better than responding to an opponent's Confusion with one of your own, too.
Healing Potion was just there to give a little defensive edge and keep a fighter from dying, but make sure you don't brick scoring Skin of Their Teeth by using it too early. I almost did that once, but fortunately my opponent gave me a hand by punching one of my orruks.
By the Numbers is never going to be truly busted in a three fighter warband, but being able to draw two cards with it is still a great deal. There were times when I was simply using it to draw a single card and it honestly didn't feel bad because the rest of the deck is just so good.
Defiance is a pretty poor version of the attack dice boost card, but it's the best this deck has – use it to fish for Calculated Strike, overrun opportunities, or when you
really need an enemy fighter to die. Probably my least favorite card in here was
Hold the Line! which is weird to say, but all the guard effects made it pretty redundant. I'd swap it for
Move at the Opening or
Unearthed Treasure if I were going to update this deck.
For upgrades,
Great Speed helps speed up your otherwise not-very-speedy fighters.
Brute Momentum is yet another drive back prevention card, and one you can cheekily trigger on Morgok by using Get a Move On since that gives him a charge token.
Great Fortitude,
Inviolate,
Agile, and
I Like Those Odds are all defensive tools to keep my fighters alive and hold those tokens even more reliably. The latter is in here not only for 'Ardskull to get to two block, but I'll even fire it off on Morgok or Thugg before they inspire if they're in position to take advantage of it.
Duellist is always a fantastic card when you have a ranged fighter to let them skate around the battlefield but it's also great for (you guessed it) reaching just a bit further to grab a treasure or doing a poor man's overrun impression to knock an enemy off of a token and then Duellist onto it yourself. I expected
Starmaw and
Cautious Attitude to be useful, but they far exceeded my expectations. Being able to slap stuff around from four hexes away is insane reach and allows you to safely stand on a token and still influence the battle, finish off stragglers, or knock enemies off of their own tokens.
Keen Eye obviously helps the hard hitting fighters to land attacks, but also makes Thugg's critical grievous more likely to trigger and helps score some of your objectives (Audacity, Seized, Calculated Strike). Of these, I think Agile was probably my least useful upgrade. Among all the attacks I received in the last 15 games, I think it was useful one time. Even so, there aren't really a ton of other options.
Great Strength feels redundant when Morgok inspires to native grievous and Thugg can somewhat reliably trigger his critical grievous. Perhaps
Sharp Reflexes to go onto 'Ardskull or the uninspired other guys, which after typing it out sounds kind of nice.
Games Played
 Morgok's Krushas managed to come out on top and win Shadeglass at my local store. It was a nearly perfect showing of the trial for this new and somewhat oddball deck. Photo credit: RJ
As I mentioned, I have played fifteen total games with this deck so far and gone 10-5 with it (not matches; that'd be 5-2-1). The first game was an impromptu practice match where I was trying it out and it immediately felt like it had juice, so I took it to a clash at my local gaming store where I won my first Shadeglass and also the fancy Spitewood alternate art board. I felt confident after that so I locked it in for Adepticon where I proceeded to go 2-2 and learn some very valuable lessons while playing against some of the most pleasant opponents I've ever had the fortunate of being paired into.
First lesson: Stand Firm is fairly reliable to score and
normally the incidental staggers from having to flip cover tokens back up to treasures from the NoP plot card aren't a huge deal, but it sure does matter when playing into Kamandora's Blades or the Exiled Dead. Those are also both warbands that are well suited to focus firing down token holders between the stacking damage from Kamandora's bleed or the enhanced accuracy and damage from conductive zombies surrounding the orruks. These were also games where I overestimated my offensive output and misdiagnosed who the beatdown was. Instead of charging forth into their territory and brawling, I should have sat further back in my own zone and forced the enemy to come to me. Being a slow learner, it wasn't until my second game with each of these opponents that I realized it and tried to adapt, but by then it was too late.
Second lesson: Despite trying to reduce randomness by leaning into safe scoring, dice and card draw order are still very much a part of the game. To win any event, you not only have to be good but also a little bit lucky over the course of a full day or two. I'm definitely
not blaming any of my losses on pure luck because my opponents were all skilled players who did a great job controlling the game, but it does hurt to mulligan aggressively for Supremacy only to see it as your final objective in the deck in round three when you're down to a single fighter. Oh well!
Third lesson: Identifying who is the beatdown is important. Make your decision and then
commit to it. There were a few times where I made a half-assed call and decided I needed to play defensively, only to needlessly leave myself open to charges or risk an injured fighter. Conversely, if I know I need to Go Forth and Punch, then I need to do that. At the same time, it's also important to be able to adapt to the changing game state which can be hard in an alternating activation game like this. The best example I have is after realizing I was
definitely not the beatdown, I was able to deploy my fighters so far back and in the opposite corner of my opponent that it messed up their ability to charge out in the first round. It felt kind of dirty, but even Morgok and the lads know to be afraid of Mollog.
 Credit: Jake Bennington
Fourth lesson
Credit: Jake Bennington
Fourth lesson: Never underestimate Kannat. Sure, he's a crappy little dog with the defense of wet toilet paper and one of the most inaccurate attacks in the game, but he has big dreams and can still kill an inspired Morgok equipped with Agile* for a six or seven point glory swing in the last turn of a game.
*Sure, Kannat had Keen Eye, used Brother-in-Arms to borrow an inspired Throkk's weapon, used Twist the Knife, and might have had some extra dice or a re-roll – I can't quite recall. But it doesn't matter, he also has a big heart.
I want to thank all of my opponents that I've played throughout the last few weeks as I was testing this out and taking it to events. You're all gems and I didn't have a single negative experience at any point. The lovely people in this community are genuinely my favorite aspect of the game. There might not be as many of us in the US as we'd like, but at least the ratio of good to bad eggs is astronomically high!
Have any questions or feedback? Drop us a note in the comments below or email us at contact@goonhammer.com. Want articles like this linked in your inbox every Monday morning? Sign up for our newsletter. And don’t forget that you can support us on Patreon for backer rewards like early video content, Administratum access, an ad-free experience on our website, and subscriber-only content covering competitive Warhammer 40K!Thank you for being a friend.


 Goonhammer App and Patron Updates: April, 2026
 Kill Team Tournament Report: Engage, Party, Repeat's March Madness 2026
 Goonhammer Reviews: Tribal Conquest