Welcome back, Dear Reader, to my ongoing blog of hobby and competitive progress through 2026.
Last time around I wrote about my trip to Palm Springs for the GW Open event there - I ended up placing fourth with my Death Guard, which was a hell of a finish and my best yet at a major.
As much as I'd have liked to keep up that momentum for another week, I needed a break. I've got a ton of hobby work to do and I needed a weekend not spent standing and bent over a table filled with toy soldiers. That said, I also had a lot of great conversations over the past two weeks that have fundamentally changed my plans for events this year and so it's time to revisit those and firm up my calendar.
So let's start with that calendar. Back in
Part 1 of my 2026 series, I listed attending ten events this year as a goal. So far I've already attended two - LVO TT and Palm Springs GW Open - but I didn't really plan the rest. After having a number of conversations at both events, I added a few events to my schedule, and now it's shaping up into something proper, which looks like this:
- Clutch City GT (Houston, Feb)
- GW US Open Dallas (May?)
- Ottawa Teams Tournament (June?)
- GW US Open Tacoma (July?)
- Lone Star Open (August, Dallas)
- Challengers Cup (September, Utah)
- 2026 Grand Narrative
Note: GW Events in Dallas and Tacoma haven't been announced, but given the vibe around those and how much GW likes those venues I've got a strong suspicion they'll be back again at both this year, so I'm factoring those in to my travel plans.
That would put me at nine events for the year and not even cover smaller events like RTTs, plus I may want to attend the 2026 Las Vegas Open. There may also be room to do an event in April there and I'm also planning to attend Adepticon and the Goonhammer Open this year, though I won't likely be playing much 40k at either - those are more like business trips than opportunities for game time.
Either way that's a pretty full schedule and I'm likely to supplement it with another few RTTs or small local GTs in the mix. As I write this I'm already hoping to try and hit up an RTT at a local game shop in early February as practice for Clutch later in the month. I'm hopeful Goatboy will be out to join me for that one, but that's currently up in the air for a few reasons. I'm also semi excited to be going back to Dallas later this year for the Lone Star Open - that's an event I've been to a couple of times but haven't returned to since 2023, and I'm interested in going back again this year.
Hobby Progress
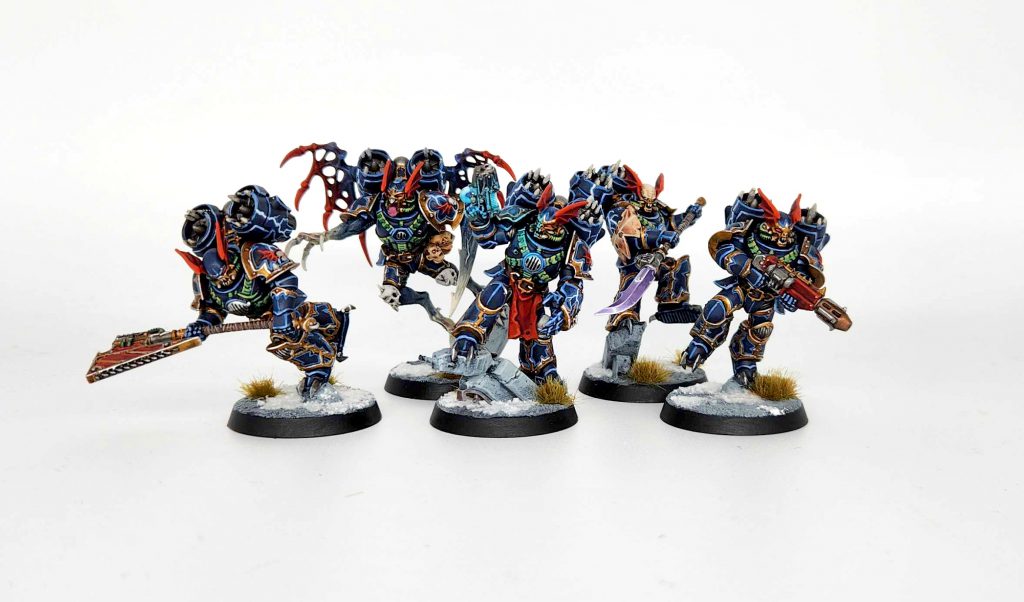
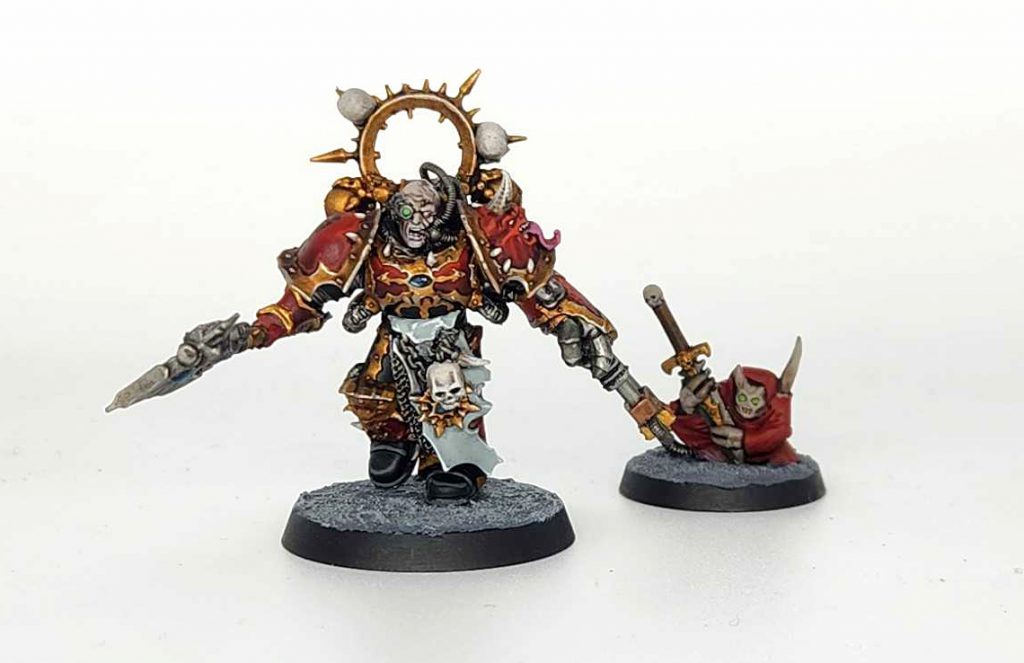
Taking a break from games this week left me more time to work on my hobby progress. Unfortunately, a lot of that hobby progress was stuff I just can't talk about yet. But I can talk about my work on my Night Lords. Yeah, I was supposed to be done with that army but they keep dragging me back - with new Detachments and new model releases. Specifically, the new Raptors kit, which gives the unit a huge face lift and makes them much more playable.
 Credit: Robert "TheChirurgeon" Jones
I decided to kitbash the preview kit Games Workshop sent with Raptor heads and shoulder pads, so they'd better fit my existing army. We didn't have the datasheet for these models yet when I was building them, so I had to more or less guess how I'd want the loadout to go. In that sense, the only uncertain part was the heavy melee weapons - that axe is meant to go on the champion model, and any time you have something like that it there's a good chance they limit the loadout to "champion + one in five" instead of what we got, which is champion + two in five. That said, I was more than capable of just swapping this new axe raptor into a squad of older models as needed, so I put as many heavy melee weapons on the unit as I could.
Loading...
I'm really happy with the final models and it's always cool seeing models show up on WarCom, even if it usually means painting them way faster to make a tighter deadline (usually a week or two before the normal embargo date). The new models are really cool and while they're around the same height as the older Raptors, they're definitely bulkier, and I'm going to want to mostly use these moving forward.
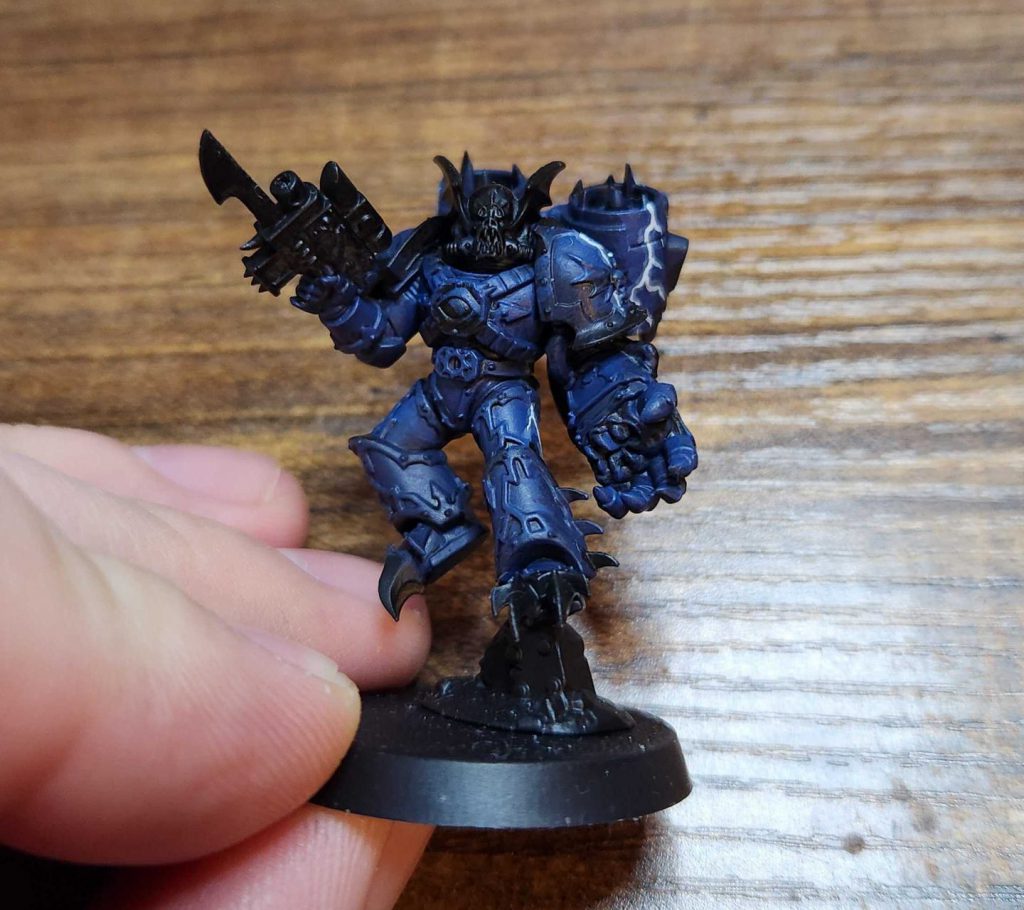
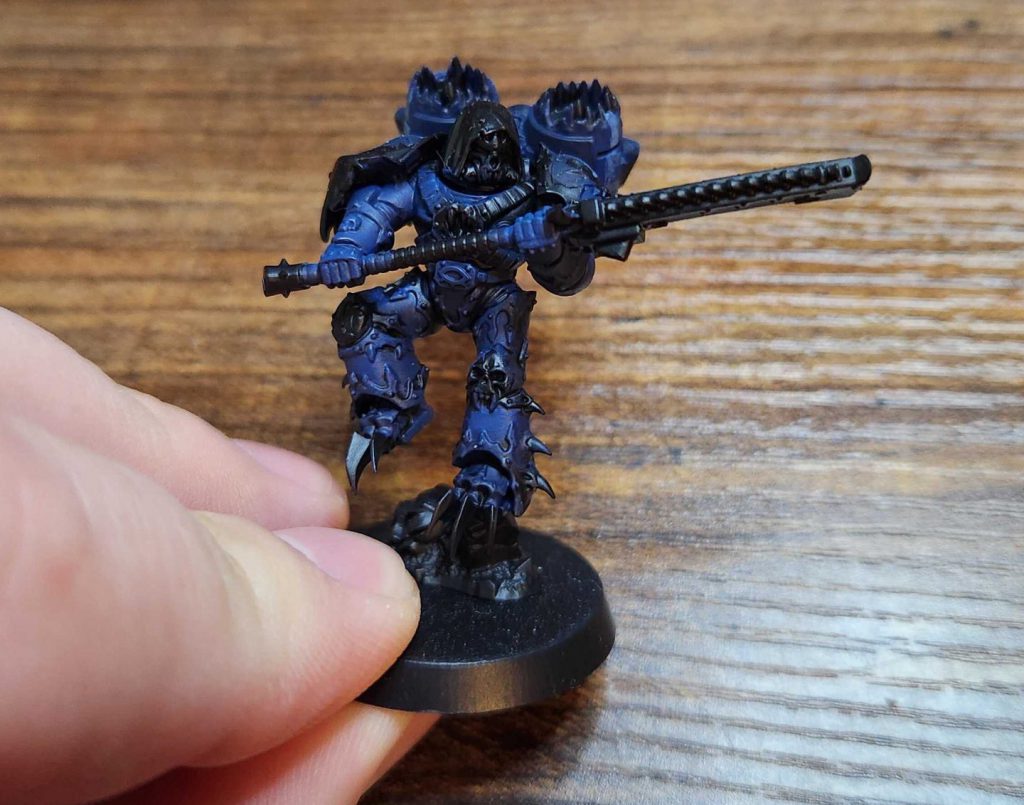
That said, I have a ton of older Raptors and I'm not about to throw those away, especially given I've already painted a unit. I suspect I'll need three units of five Raptors for a proper Nightmare Hunt Detachment, so I've been working on those, and doing conversions with the models to make them work. For the guy up top I used a Chosen Power Fist I had sitting around, while I used the Nemesis Claw glaive to make a second heavy melee weapon option.
This is an area where I can use some of the Nemesis Claw bits I haven't yet on my Raptors, throwing the hooded helmet on the model to give him more of an "executioner" look similar to my Master of Executions.

The mutations guy is a bit tougher; for him I happened to have a lot of bits from older Possessed models. Those models are pretty bad on the whole but they have some solid bits in the kit which make for obvious conversions on the model. These make for an easy Possessed marine in the set and I'm happy with how this looks. He, like the other two guys, is still a work in progress and I'm going to need to finish a third squad of Raptors when these three guys are done but so far we're in a good place with how these are going. I also need to paint two meltaguns as they're often going to be a better choice than the fifth guy being a bolt pistol and chainsword.
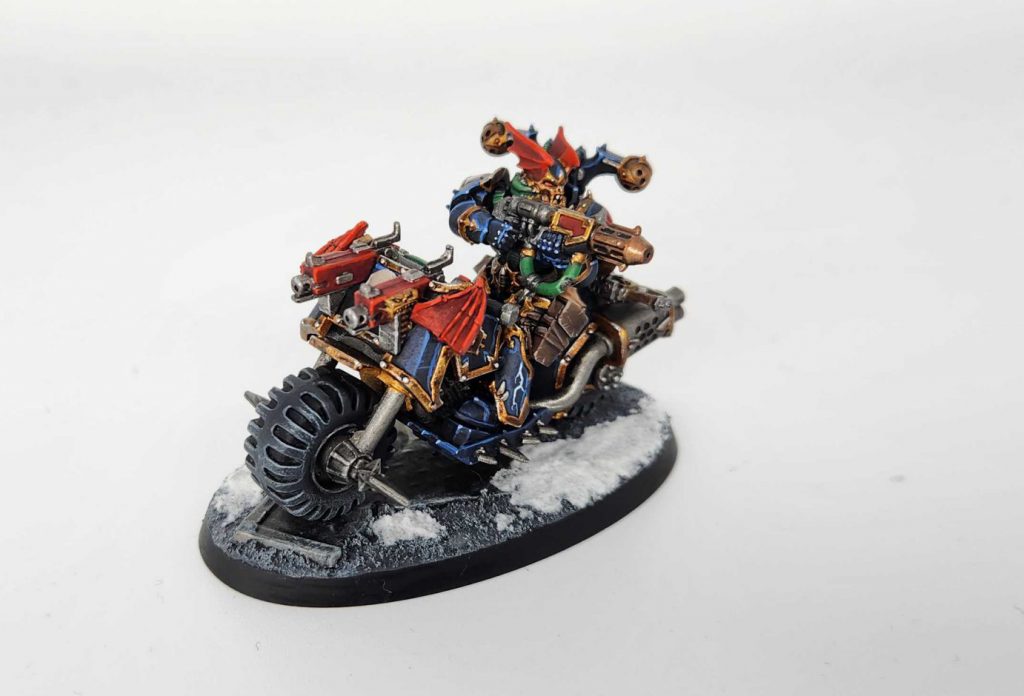
Of course, as bad as GW's attempts to derail my Emperor's Children with Night Lords have been, things got a whole lot worse during Palm Springs, when Games Workshop announced that they'd be releasing a ton of new Red Corsairs models and Iron Warriors kits, plus upgrade kits for both. This is insanely rough for me, as I'm absolutely going to run Red Corsairs at some point - in fact, I already have a few units of Red Corsairs and a converted Huron Blackheart from back in the day when you needed this guy in eighth edition:
 Photo & Models: TheChirurgeon
Now those guys all have bolters and I'm 100% sure that I will
not want bolters on any future Red Corsairs units I paint and add to my army, but they're a good start. My Huron was a conversion I'd done a long time ago using some Chosen models from the Dark Vengeance kit, and while I liked him, I always disliked that I had to reverse his fist and axe arms to work with the bits I had.
 The completed Huron Conversion
That said, I was really happy with how he painted up and while I initially wanted to steal a Hamadrya from a resin Huron end the end I decided to just use the goober from the Terminator Sorcerer model.
 Credit: Robert "TheChirurgeon" Jones
That Huron wasn't bad at all but I'm extremely glad that I'll be able to replace him with a new, official model soon - I've always liked the Red Corsairs conceptually and I like what they're doing with the new kits, which look a lot like pre-Primaris Marines turned to chaos, using less trim and mutated armor and more Mk. 6 and Mk. 7 bits. The problem with the new kits as I see it is that while they've got lots of great bits and a cool upgrade sprue, they do not come with bikes. And that's a shame, because the Hounds of Huron are a known biker unit and one that I'd want to include in my army.
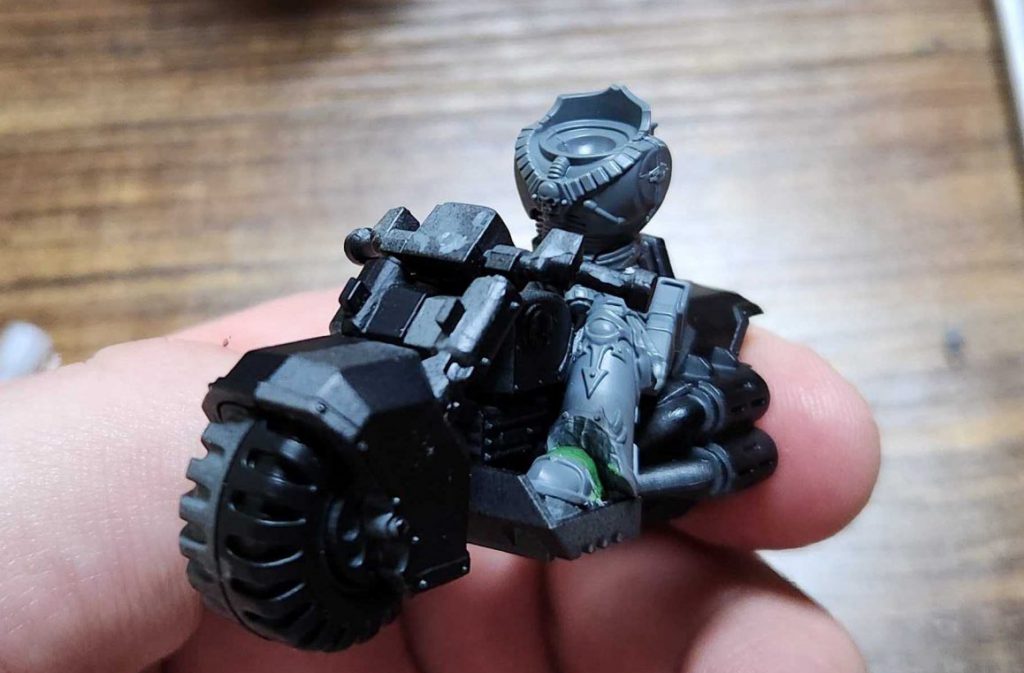
As I was working on some models I stumbled across three old Space Marine bikes in my bitz box that were still unassembled. This was a huge problem, because I immediately knew what I had to do - the loyalist aesthetic with thick trim is
perfect for these modern Corsairs, and doing up Chaos Bikers using loyalist bikes would be a great way to make bikes which look distinct and can be prettied up later with conversion bits and shoulder pads from the upcoming kits.
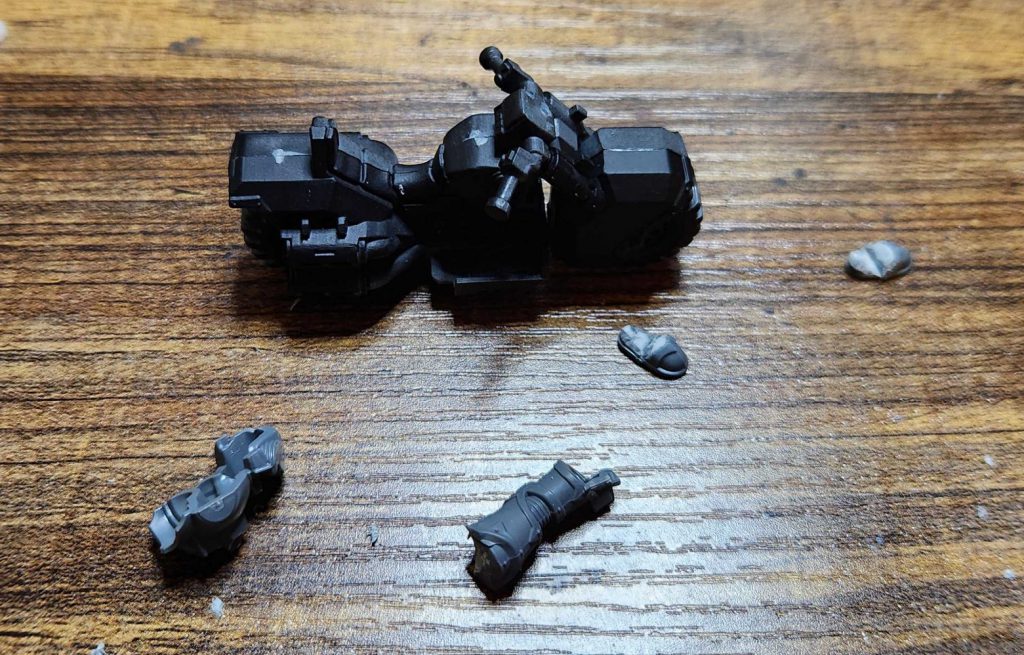
I say "a huge problem" however because well, I swore I'd never do another set of converted bikes after the last one. It's not a fun conversion process. But here we go again anyways. I may as well show off the process so you can try and do it at home, or at least appreciate how much work goes into this.
Rob's Guide to Converting Chaos Space Marine Bikes
 Credit: Robert "TheChirurgeon" Jones
The big problem you have with bikes is the legs - Biker units have to have legs positioned to straddle the saddle and press their feet against the footplates on either side of the bike. That's very specific, and the legs that come in these boxes are tiny and thin, designed back in 2000 for a range of marines that comfortably fit on 25mm bases. Even if you drop a new torso on top of them, they'll look severely mismatched, like your guy perpetually skipped leg day.
The answer here is that if you want great looking bikes, you have to cut the legs to fit. The best way to do this is to identify a set of legs from the Legionaries kit that are already outstretched - you want one of the pairs of legs that aren't running - and with less of a tabard between them, or one that's easy to cut away without taking too much detail off the leg.
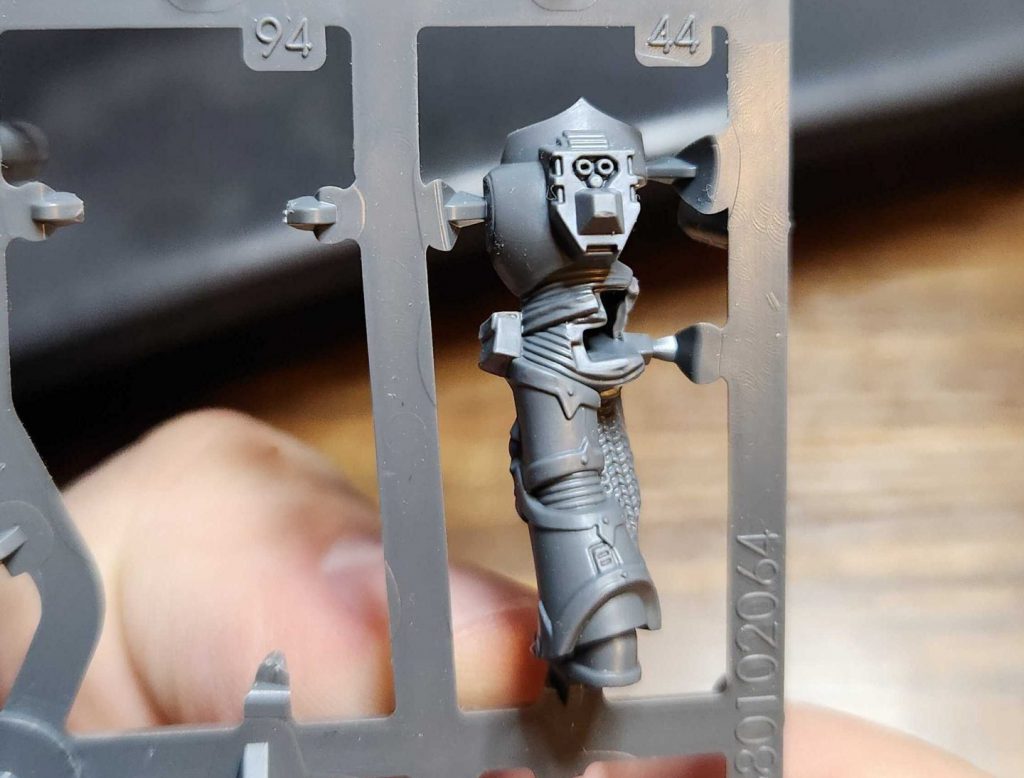
Using outstretched or slightly bent legs is ideal because it means you'll have to do less work repositioning the legs - I've done this before and it sucks. Rather than mess around with cutting legs at the knee, save yourself the time.
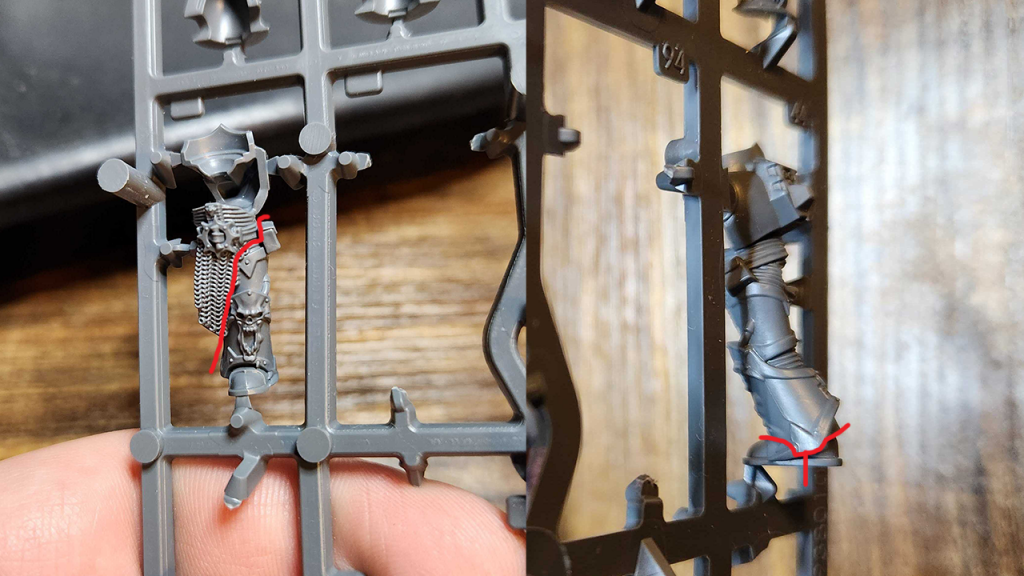
Once you've done that, there are three cuts you need to make on each leg. First, you need to cut the leg off the body. You want as clean a cut between the leg and crotch as you can get. In the photo above I've shown where I'd do that, but I'd use other legs before this one as you have some better options that have both more of a bent knee and also will take less detail off the leg. When you do this, the crotch of the model is going to end up mangled; do not worry about that - no one will ever see that bit.
The second cuts are to the foot. You need to cut off the foot and reposition it. I start by cutting the foot in half, right beneath the greave. This makes it much easier to cut off the foot, because I can cut the front and back half off separately, and that makes the angular cuts in the front and back much easier.
Once that's done you can glue the feet back together and then carve out the area under the greaves. I use green stuff to fill the gap between the foot and the greave again. This starts by gluing the foot to the bike, then putting green stuff on the foot after the glue dries and pressing the legs down on top of that.
You want to position the legs as best you can and dry fit them with the torso. This is also a good time to shave down the interior of the leg to help it fit a little closer - the bikes are not designed for interior details on the legs, these can bump into parts of the bike and push your legs out too wide.
From there you smooth out the green stuff on the foot to make it look more like a model and set your torso in between the legs. I put gobs of green stuff around the crotch when I do this and just push it into place with the legs until I get everything into the right spot. Then I'll come back and do some sculpting/smoothing and let it set.
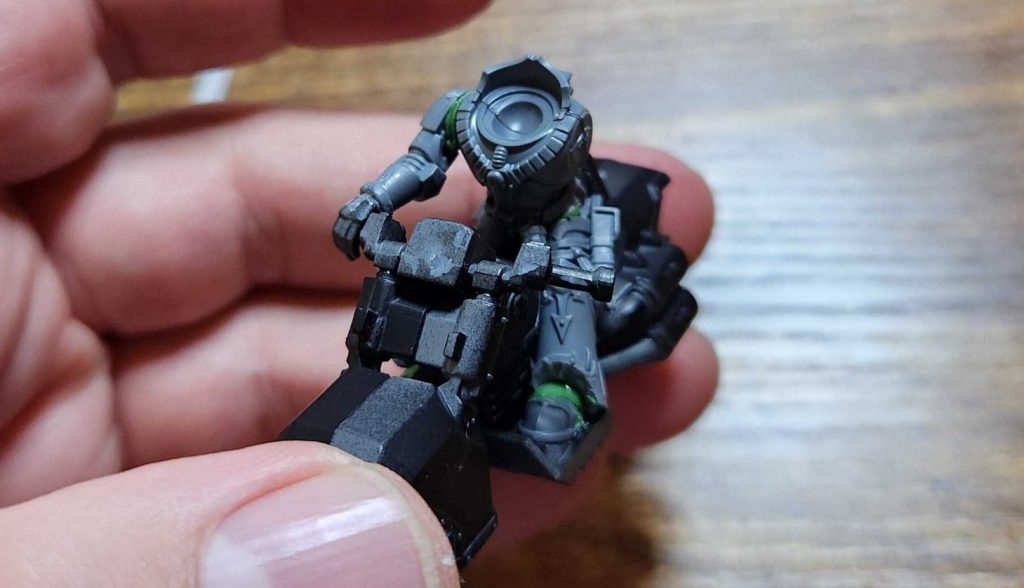
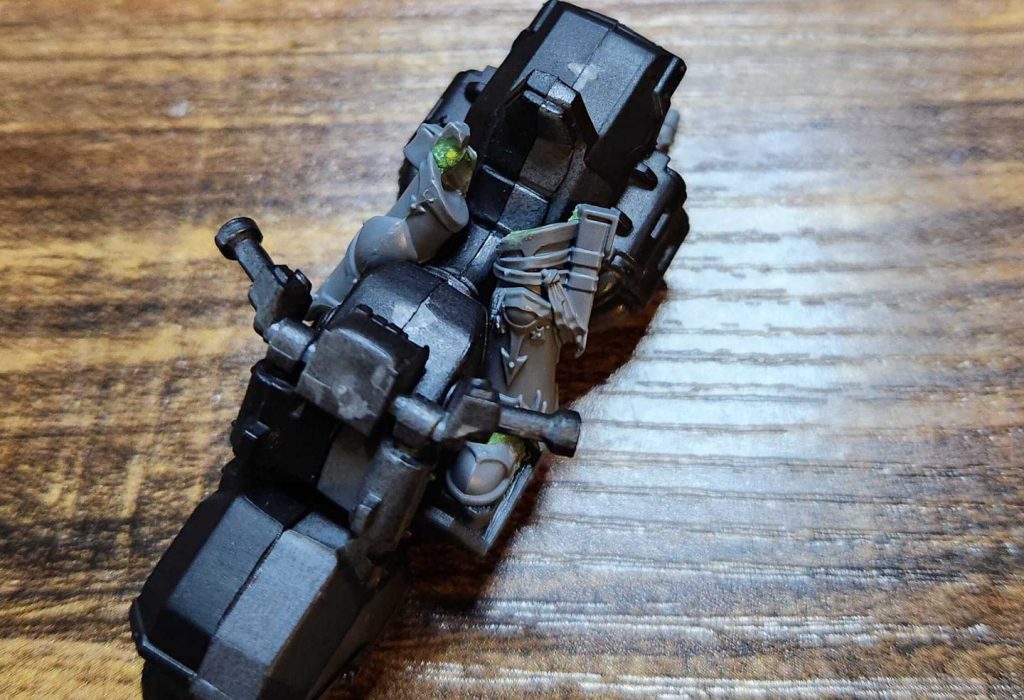
The other problem is the arms and there's no getting around it: You need the hands from the bikers kit. The good news is they're sized fine. The bad news is the arms they are attached to are not. So you can either use the arm and pad out the shoulder to actually fit a shoulder pad on top of them or you can take another regularly sized outstretched arm like the one above and put one of the hands on it. Either works, and I've done both. I try to only use one of these arms per bike at most, as it both frees up the other arm to use cooler bits and also means I can do less conversion work.
Once that's done I finish assembling the guy, prime him, then break him back off the model to paint everything - I'll come back and glue it together later but it's just way easier to paint if there isn't a guy on there.
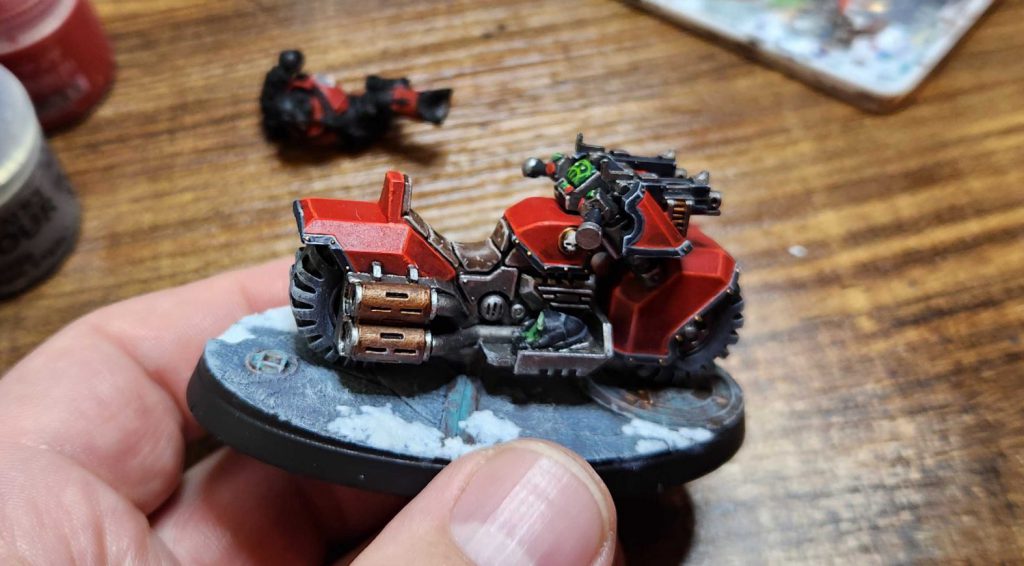
The bike itself is a great test bed for my Red Corsairs scheme - Mephiston Red shaded with Carroburg Crimson, then highlighted up to Evil Sunz Scarlet and edge highlighted with Wild Rider Red. I'm mostly doing black trim (Corvus Black, edge highlighted with Mechanicus Standard Grey), though I'll do some gold trim here and there, and any sections of black armor will most likely get gold trim.
It was cool to be doing another set of Bikers after the Night Lords set and I'm working on cutting up and assembling the other two as I write this. Doing this set wasn't as bad as the first set, and I think I'm getting the hang of doing these cuts.
 Credit: Robert "TheChirurgeon" Jones
That said, I'm glad these guys only come in squads of three models now because I'm not really into the idea of doing more than one unit of them.
Next Time: Testing Nightmare Hunt
That's it for this week but I'll be back next Thursday with at least one game of Nightmare Hunt Chaos Space Marines under my belt. It seems like such a cool way to play the army and I'm eager to try it out with the new Raptors datasheets.
See you next week.
Have any questions or feedback? Drop us a note in the comments below or email us at contact@goonhammer.com. Want articles like this linked in your inbox every Monday morning? Sign up for our newsletter. And don’t forget that you can support us on Patreon for backer rewards like early video content, Administratum access, an ad-free experience on our website and more.Thank you for being a friend.


 Goonhammer App and Patron Updates: April, 2026
 Kill Team Tournament Report: Engage, Party, Repeat's March Madness 2026
 Goonhammer Reviews: Tribal Conquest