Welcome to another installment of Starting Hex, a series about Warhammer Underworlds. I'll be continuing revisiting the Rivals decks that have been released since second edition of Warhammer Underworlds has come out. Consider these entries to be companion pieces to the initial preview reviews that I wrote when the decks were brand new, but now with more hands-on experience behind the thoughts. It's intended to be a resource for players to familiarize themselves with the decks and assist in picking some out to play with as well as just learning what options are out there. I'll hit on the rough game plan of each deck, key cards that are worth focusing on, potential trap cards that could be pitfalls to take, and various sample Nemesis pairings that have seen success.
The
first entry of this series covered the Blazing Assault and Emberstone Sentinels decks. This time, we'll pick up with the remaining two decks that were in the Embergard box and go over both Pillage & Plunder and Countdown to Cataclysm. If you want to travel back in time to get my initial take on these decks, you can do so in
the original preview article.
Embergard Decks
As mentioned in the last installment, the decks in Embergard have served as the foundation for this edition. They were the first decks that we got to play with, but they're also designed to be fairly flexible and nearly every warband that has been released since then can make use of one (or more) of these decks very effectively. This is great news for anyone getting into the game because they can pick up the Embergard box which they'd probably want anyway given that it has all the tokens/boards/dice but also walk away with four potent and flexible decks that they can use with any warbands that catch their eye.
Gameplan
This is the OG Flex deck and does a great job of upholding that gameplay style in action. There's a mixture of objectives that care about positioning in various territories, fighters being on feature tokens, and delving those feature tokens. Among the decks that care about feature tokens, Pillage & Plunder is unique in that it cares about delving them, not holding them through to the end phase. This makes scoring these end phase objectives much easier because you only have to meet their condition at some point during the round, unlike similar objectives such as Supremacy or Iron Grasp from Emberstone Sentinels that require you to stage your fighters and then successfully remain on those tokens when scoring comes up.
Along with the baked in flexibility of the end phases, Pillage & Plunder boasts surge objectives that can feel almost free or effortless to score. In fact, the objective suite in general is an incredible draw to this deck. It isn't uncommon for a Nemesis pairing to lean heavily on Pillage & Plunder objectives which can be of great assistance when pairing it up with other decks sporting weaker options in their objective offerings.
The power cards are generally less impressive, but there are enough solid options to augment whatever other deck you're taking in Nemesis. If you're playing Rivals, it's probably one of the smoothest and most reliable decks out there for many warbands.
Key Cards
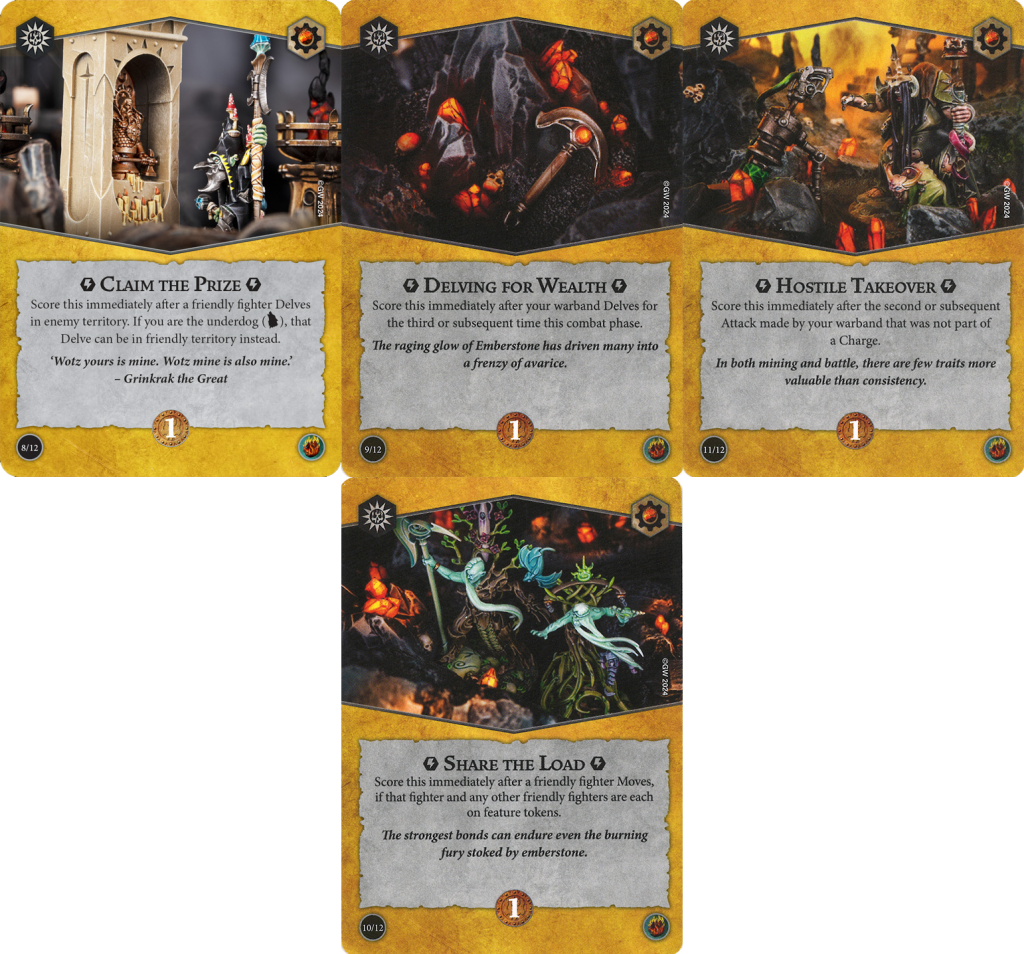
For key surge objectives, this deck is packed with solid options. They're so good, in fact, that two of them are Restricted in Nemesis which gives this deck the dubious honor of being the only deck with multiple Restricted cards in it. When playing Nemesis, you can only have a single Restricted card in your deck, so if you're pairing Pillage & Plunder with any other deck with a Restricted card, you're going to have to make some tough choices. Claim the Prize and Delving for Wealth are the two cards, and while Delving for Wealth is the one I tend to go for first, it doesn't mean Claim the Prize is effectively banned. Hostile Takeover is incredibly easy to score, especially once you realize you don't have to make the non-charge attacks in the same round. You can make a single standing attack in round 1, draw this card later in round 2 or 3, and then score it on your next non-charge attack. Share the Load is also fantastic, because you're probably going to be standing on feature tokens anyway – whether delved treasures or Aqua Ghyranis tokens – so you might as well get even more glory out of it.
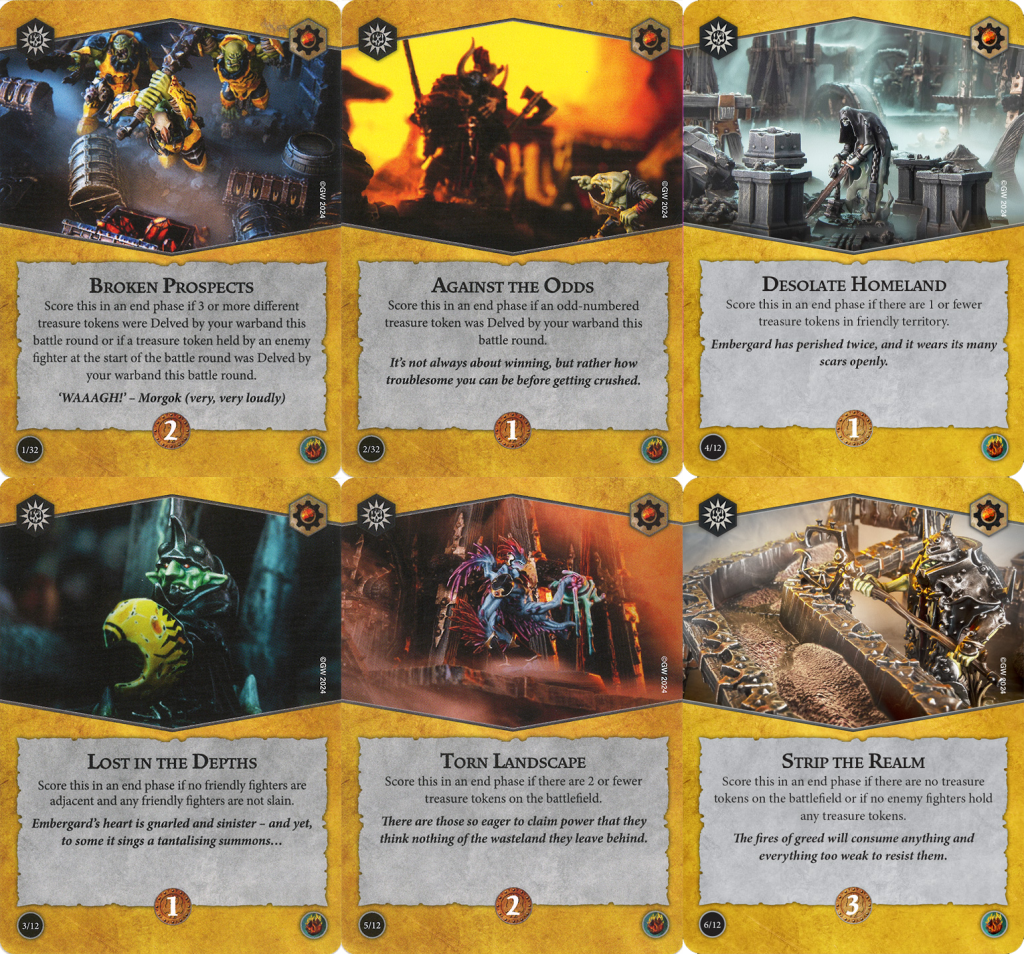
End phases are also powerful here for a variety of reasons. Broken Prospects is a nice chunk of glory with two ways to score it, so you can always pick the easier route. Against the Odds, Desolate Homeland, and Lost in the Depths are incredibly reliable single glory objectives that you can cherry pick from to fill your 11th or 12th objective card. Torn Landscape and Strip the Realm are game defining objectives that
force your opponent to play around them or else just hand you a whopping five glory on a platter. They might be difficult to score when your opponent is denying them, but keep in mind that's also forcing your opponent into plays they wouldn't necessarily want to make which is a win for you as well.
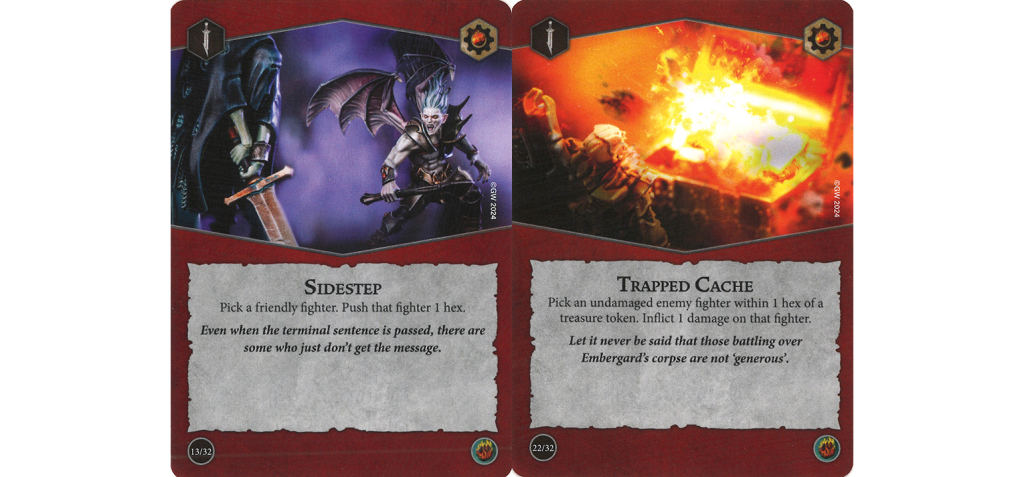
There aren't too many universally solid ploys on offer that make it into every deck. Sidestep, of course, is one. Trapped Cache is a card that can really feel dead in some match ups or game states, but if you've ever sniped (or had sniped) a Spinefin or Sotek's Venomites, you know how much it can swing a game. I tend to include it in most of my decks even if I make a face at it when I draw it sometimes.
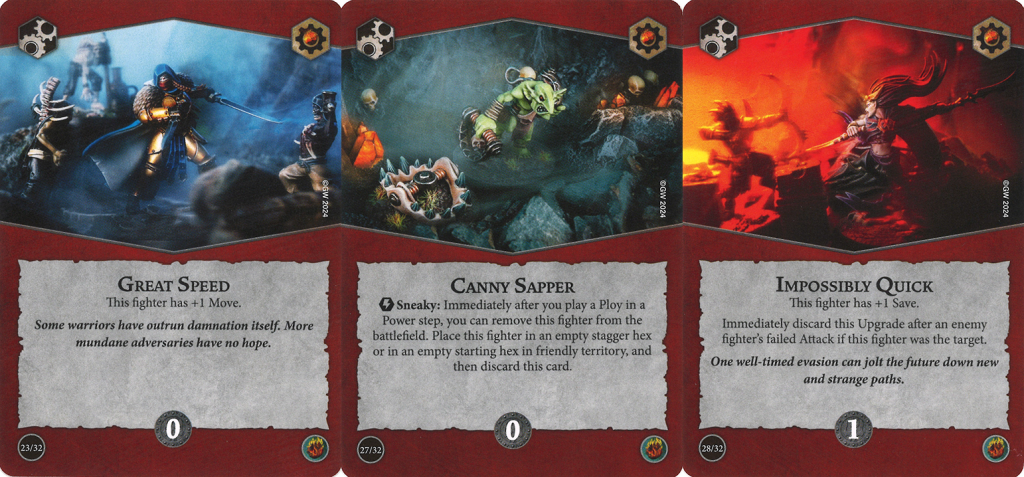
There are likewise only a handful of upgrades that I'd say are key. Great Speed is one of those handy 0-cost upgrades that functions more like a ploy, and unless your warband is already at the ludicrous speed level you can generally appreciate the boost in movement. Canny Sapper is another 0-cost upgrade. It's a strong teleport effect that not only can land in a friendly starting hex or any stagger hex, but importantly it doesn't apply a move or charge token to your fighter so you can immediately follow it up with an activation on your turn. Impossibly Quick is a cheap way to temporarily boost the save of a fighter which is almost always worthwhile.
Trap Cards
There honestly aren't any trap objectives in this deck. They're all quite playable.
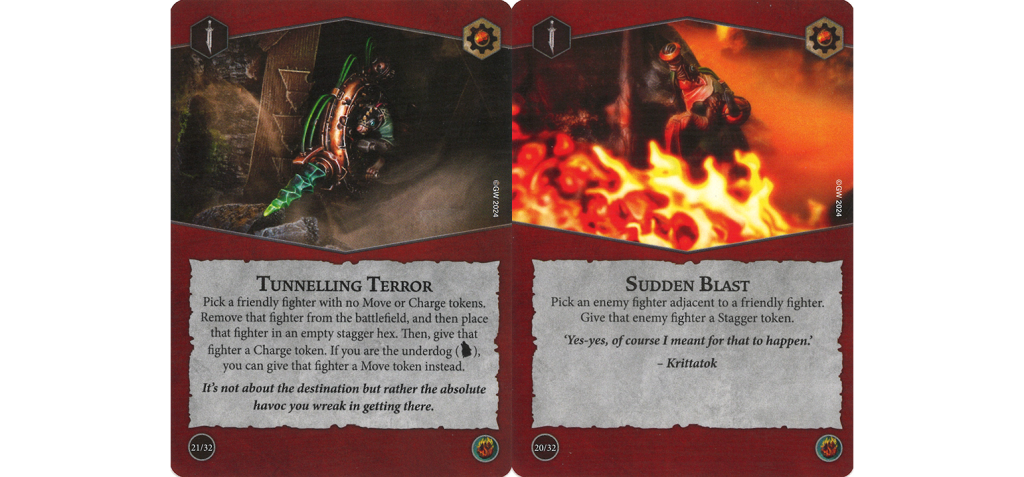
Tunnelling Terror is a teleport, but it's one with just a few too many restrictions tied to it for me to ever have success with it. Between the target needing to not have a move/charge token, applying either a charge or move token afterwards, and only being able to pop them into a stagger hex, I've never had any luck with it. Sudden Blast also just doesn't do much. Sure, a stagger token is nice, but needing to be adjacent to the enemy
and this taking up one of your precious ploy slots means it's not competing usually.
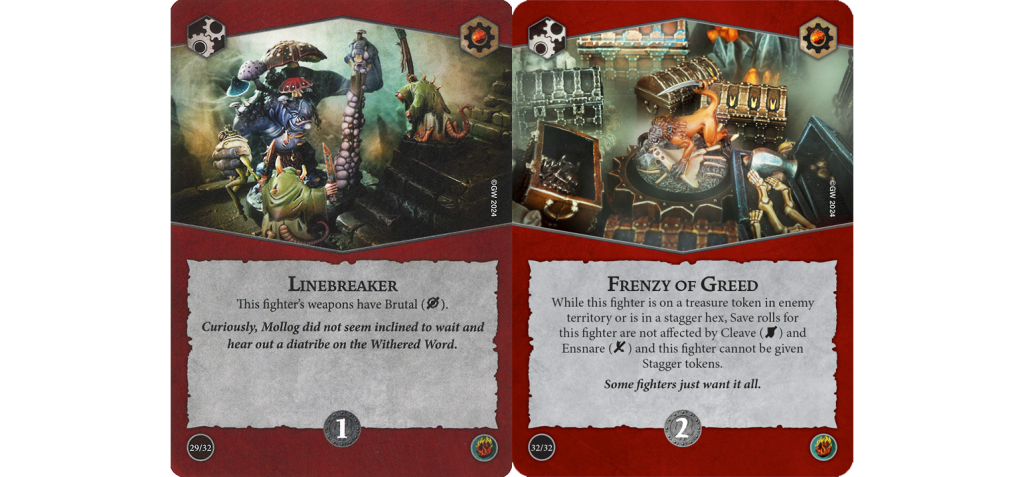
Linebreaker theoretically could be good if you're highly aggressive with solid hitters and expect to go into a lot of Deadly Synergy, but it's still just worse than Cleave or Ensnare and thus feels like a wasted card. Frenzy of Greed, on the other hand, is just bad. On the surface it seems like a nice defensive card, but since your fighter can't be given stagger tokens, that means they also cannot delve which goes against the entire game plan of this deck. Skip it.
Nemesis Pairings
Like Blazing Assault, Pillage & Plunder can pair well with so many of the decks out there.
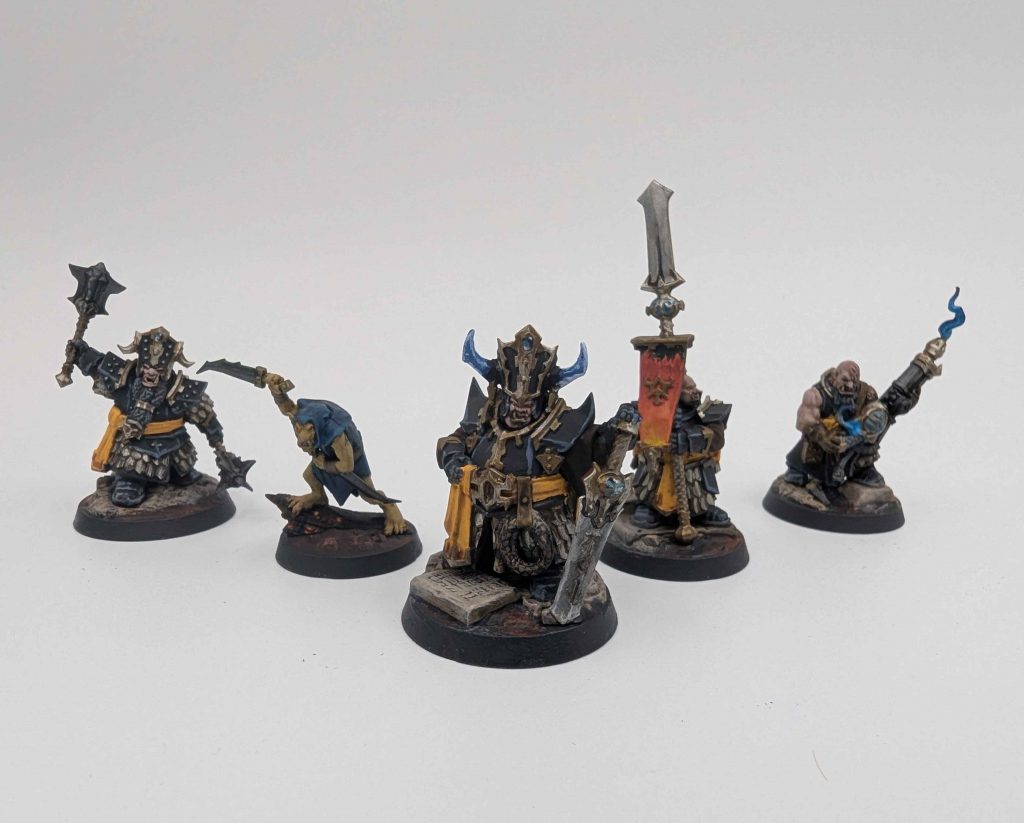
 Jaws of Itzl warband. Credit: keewa
Blazing Assault itself is a perfect match given its weak objectives but strong power deck. This allows both of these decks to cover the weakness of the other. Raging Slayers is another deck with bad objectives, but this time it offers a wildly strong plot card. The power deck does feel a little lacking when using P&P and RS, however. Reckless Fury isn't a common pairing that I've seen, but now that I think about it I want to give it a shot. You can wind up with a pretty high glory ceiling and some fun charge tech this way.
 The Blood of the Bull. Credit: MildNorman.
The Emberstone Sentinels pairing is on the other end of the aggro spectrum. Combining these two decks might feel like they're at odds with each other, but you're able to cherry pick the high scoring objectives and end up with a substantial glory ceiling through fairly passive play which some other decks struggle to keep up with.
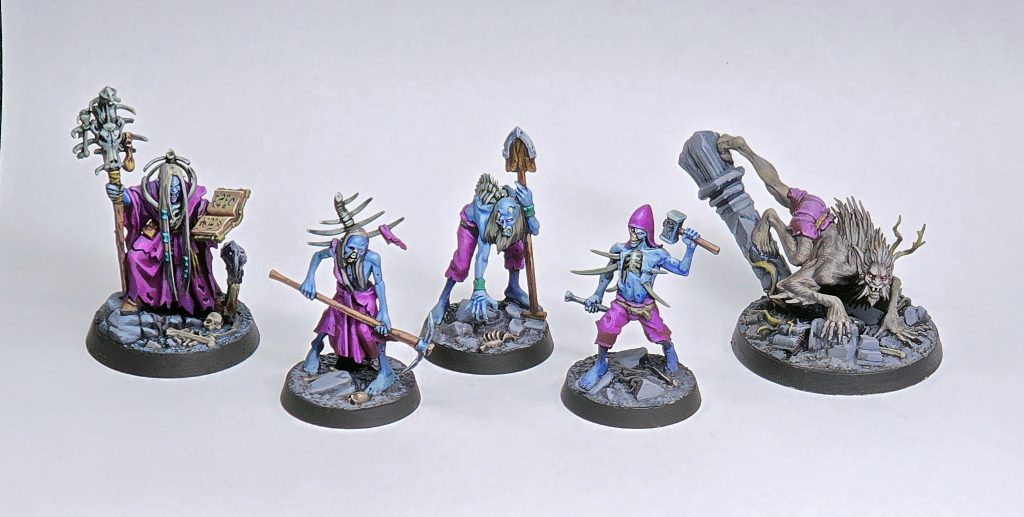 Zondara's Gravebreakers. Credit: Dave Szymanik (@bourbonbrush)
Countdown to Cataclysm was a solid partner for Pillage & Plunder early in the edition, but it's fallen off in popularity a bit once the Forsaken and Restricted update came through. It still has legs, though. Perhaps that's why it's referred to as CataPilla. 🐛
Honestly, Pillage & Plunder is such a solid base that you can pair almost anything with it. The ideal is finding another deck that can offer enough ploys and upgrades to fill out the power deck.

Gameplan
The game's first Mastery deck really shows how that's not really a gameplay archetype. If anything, this is just a Flex deck with some extra weirdness going on. It also makes it a particularly useful second deck in Nemesis, allowing you to pick the elements that most line up with what your plan is. Whether you want to hold treasure tokens, slay enemy fighters, or just score glory because you have a pulse and sat down to the table, Countdown to Cataclysm can do it.
It's worth pointing out that the addition of Aqua Ghyranis tokens in the Spitewood release has changed how this deck plays out. The plot card is the cataclysm tracker, and it will increase much faster now given that there are two additional feature tokens on the board. It used to be fairly rare to reach the end of the tracker, but now I routinely see it happening before the third round.
Key Cards
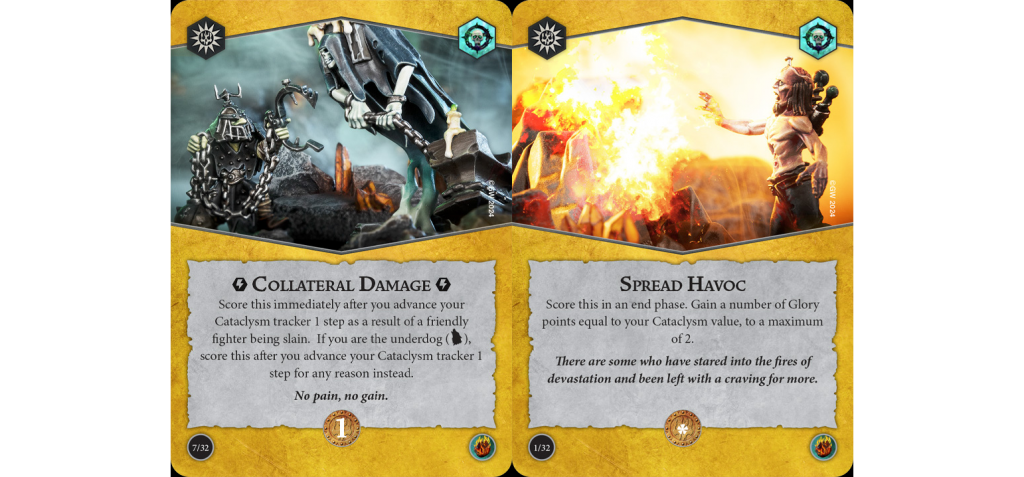
Collateral Damage is, ironically, a good example of collateral damage from the Aqua Ghyranis change mentioned above. This was a perfect card to take if you thought your fighters would die, particularly if you had a spread of weak ones that are likely to do so early on, but it's a little riskier now. Once you reach the end of the cataclysm tracker, you are no longer able to advance it when your fighters die so this becomes a dead card. It's still something I tend to include though, because early on it's a nice bit of scoring to get the glory train rolling.
For end phase objectives, Spread Havoc is the Platonic ideal of free glory. If you draw this card, you score this card. The vast majority of the time it's worth 2 glory, but even if it's only scoring you a single point it's so good.
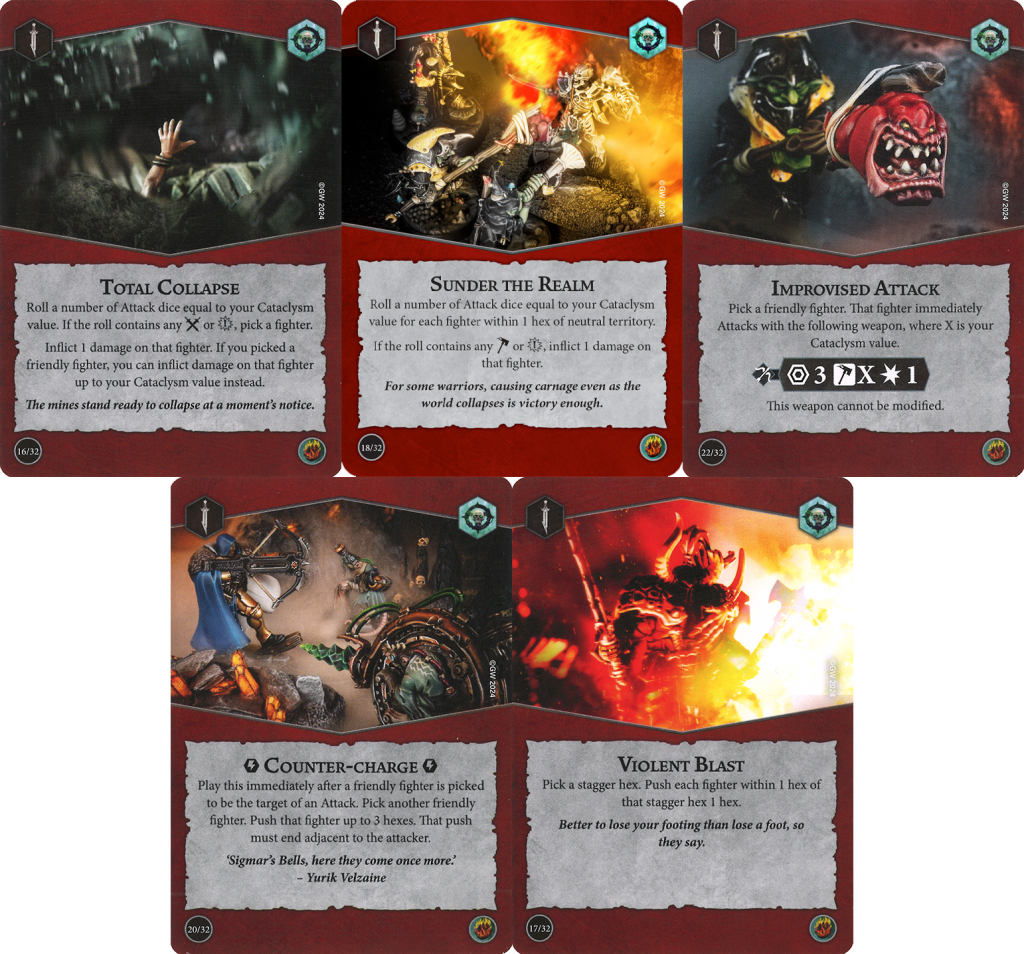
Countdown to Cataclysm offers a few ploys that can damage fighters based on dice rolls. Normally I shy away from effects that aren't reliably triggered, but between the raw power of direct damage and being able to stack the odds in your favor by powering up the cataclysm tracker, Sunder the Realm, Total Collapse, and Improvised Attack are great additions to your power deck. Counter-charge is a 3 hex push which is great for extra positioning options. Speaking of pushes, Violent Blast has the potential to shove many models around – whether friendly or enemy – and can severely screw with your opponent's plans.
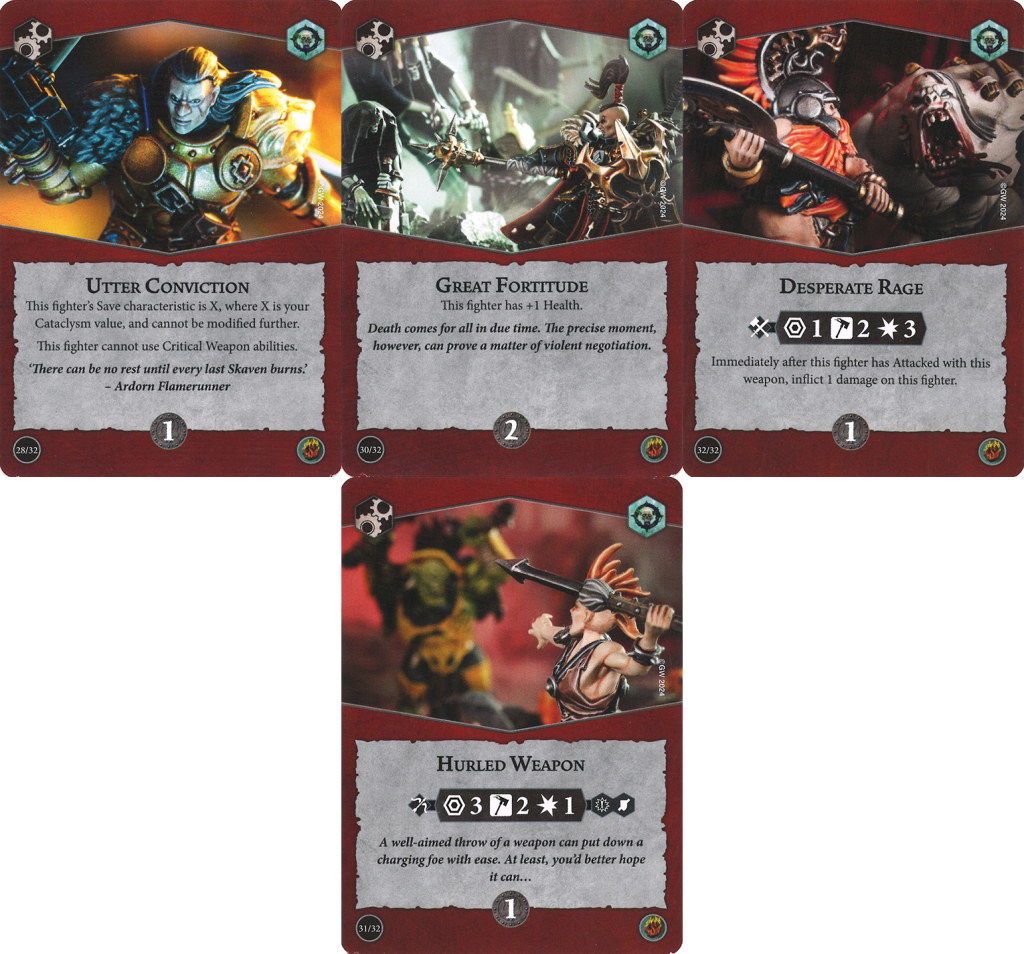
Cards that boost save values are always in high demand, and Utter Conviction does that quite nicely. There are times where you can run around with a fighter with four dice and feel like an unkillable god using this card. Great Fortitude is a generic classic that also helps keep fighters around for longer. Offensively, the deck also has two solid weapon upgrades to either give your fighters more range (Hurled Weapon) or more damage (Desperate Rage) so filling in whatever weakness you have with the appropriate tool is a solid plan.
Trap Cards
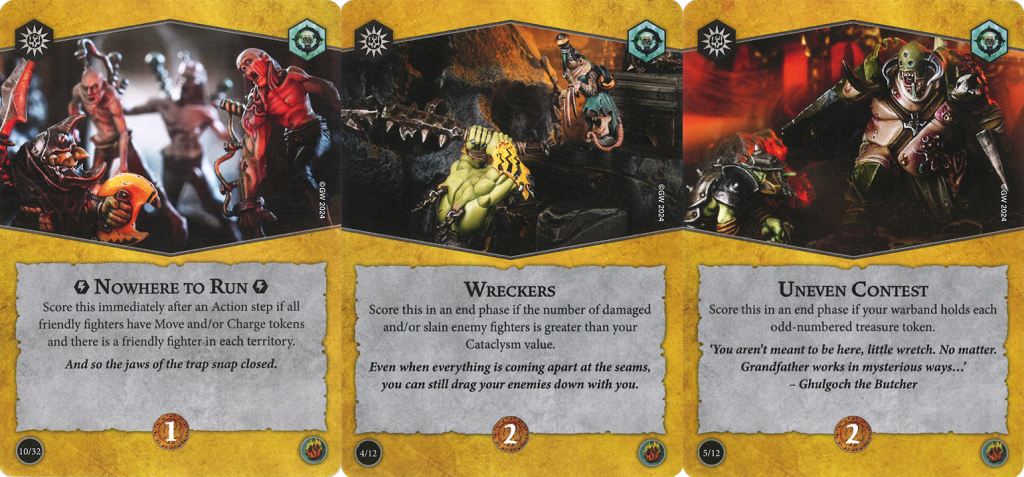
Nowhere to Run is a pretty demanding card. You need to have a fighter in each territory
and have all your fighters sporting Move and/or Charge tokens. This requires both enough bodies to pull it off and enough action economy to get those tokens spread out. There are usually 6 better surges in a Nemesis pairing so this doesn't get taken.
Wreckers isn't a trap card, but it's quite hard to score against elite warbands and only became harder to score with the introduction of Aqua Ghyranis tokens. Be extra wary of this one and only take it if you're confident you can splash out plenty of damage. Uneven Contest is just not something I've ever seen. There are three odd-numbered treasures, so you either need to be able to hold all three of them or find a way to delve one or two of them down and hold whatever is left. The uncertainty of where the treasure values will be placed means this is going to fluctuate wildly in difficulty with no way to influence that.
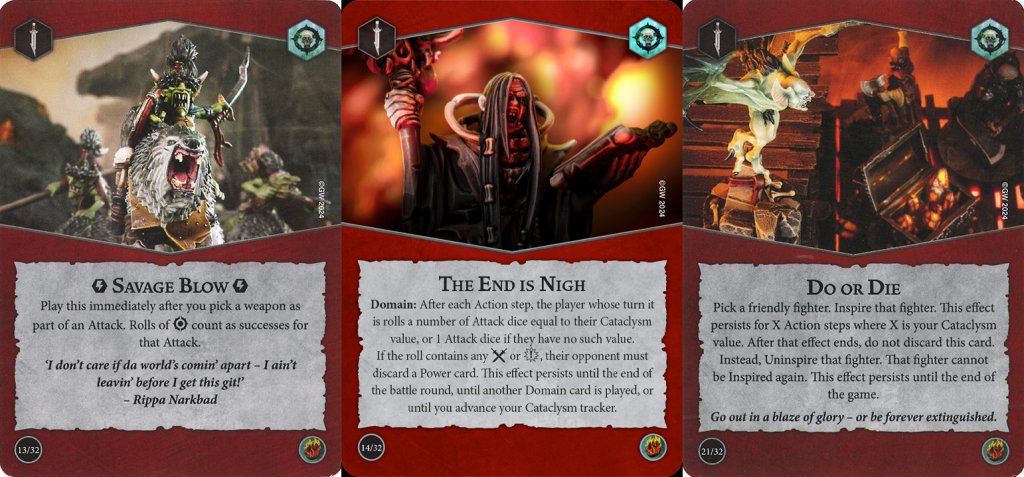
Savage Blow probably doesn't help your attacks as much as you might think. You can see for yourself by heading over to a dice calculator like
whudice.com and throwing in some examples. The End is Nigh is a weird card that I still maintain could see play, but it just hasn't found a niche yet. Finally, unless you have some very specific use case in mind, Do or Die is more of a Don't or Die. The temporary boost from inspiring a fighter is usually offset by never being able to inspire them again. In your average deck with an average warband, it's not going to make the cut.
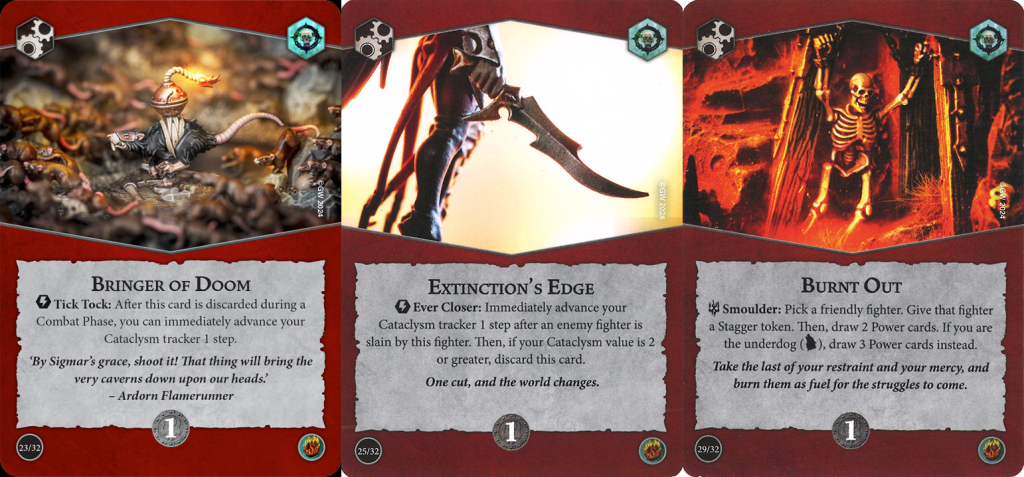
For upgrades, Bringer of Doom and Extinction's Edge have felt redundant for a while and only got moreso when Spitewood came out. Your tracker is going to go up plenty by itself. Burnt Out is the only other upgrade that falls to the wayside in this deck. It's not
bad necessarily, but the fact that you could just instead use the Focus action to do a similar effect without needing to stagger one of your fighters or draw this card to begin with makes it feel kind of pointless.
Nemesis Pairings
 Ephilim's Pandaemonium. Credit: Keewa
A common pairing here is with Wrack and Ruin, allowing you to double up on the pings that both decks offer to really augment the offensive power of your warband. This pairing is pretty fun to play because it's not straight up aggro, nor does it
super care about feature tokens. It has unique tools and a lot of positional care. If you haven't tried it yet, I suggest giving it a spin.
If you want to lean more towards an aggressive approach, Blazing Assault can get you there. You can take Wreckers and Spread Havoc to augment the low glory of Blazing Assault while packing in some pings and other choice power cards.
Flipping to the other main playstyle, you could pair Countdown to Cataclysm up with Emberstone Sentinels and lean into really holding those treasure tokens with all your heart. Set Explosives and Shocking Assault pair nicely with Emberstone's suite, and once again the pings can add some extra reach to your warband.
Wrap Up
And with that, the Embergard decks have been re-covered. Next up, I'll re-review the decks that came out shortly after Embergard's release by highlighting the useful cards and pitfalls found within Reckless Fury and Wrack & Ruin.
Have any questions or feedback? Drop us a note in the comments below or email us at contact@goonhammer.com. Want articles like this linked in your inbox every Monday morning? Sign up for our newsletter. And don’t forget that you can support us on Patreon for backer rewards like early video content, Administratum access, an ad-free experience on our website, and more.Thank you for being a friend.


 Goonhammer App and Patron Updates: April, 2026
 Kill Team Tournament Report: Engage, Party, Repeat's March Madness 2026
 Goonhammer Reviews: Tribal Conquest