Shatterpoint is a game about controlling objective points. It’s one of the things that makes the game interesting and sets it apart from a lot of other skirmish games. Changing up the way those objective points are positioned, and how they behave, is something that will help keep the game from getting stale, so it’s gratifying to see that the game’s designers appear committed to releasing new Mission Packs on a regular basis.
Never Tell Me the Odds is the third such Mission Pack, after
Shifting Priorities in the core set and
Sabotage Showdown. Like the other two mission sets,
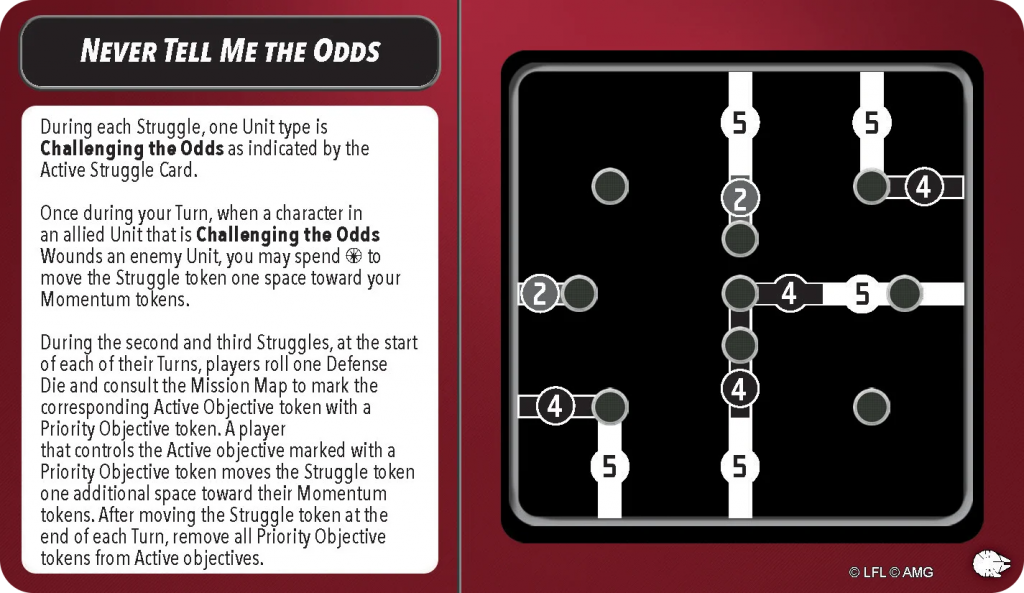
Never Tell Me the Odds features a new objective point layout, three cards for each struggle that randomize which objectives are active and worth extra momentum, and a special rule that changes slightly for each struggle.
Here’s Where the Fun Begins
 Card image © Lucasfilm © Atomic Mass Games
The layout of objective points in
Never Tell Me the Odds changes things up quite a bit from the previous two mission sets. Rather than the straightforward grid from
Shifting Priorities or the circular shape of
Sabotage Showdown, we have a layout that is a bit of both. The objective points are split into three loose columns, with the points on the sides forming a curved shape, and the ones in the middle a straight line, but very close together.
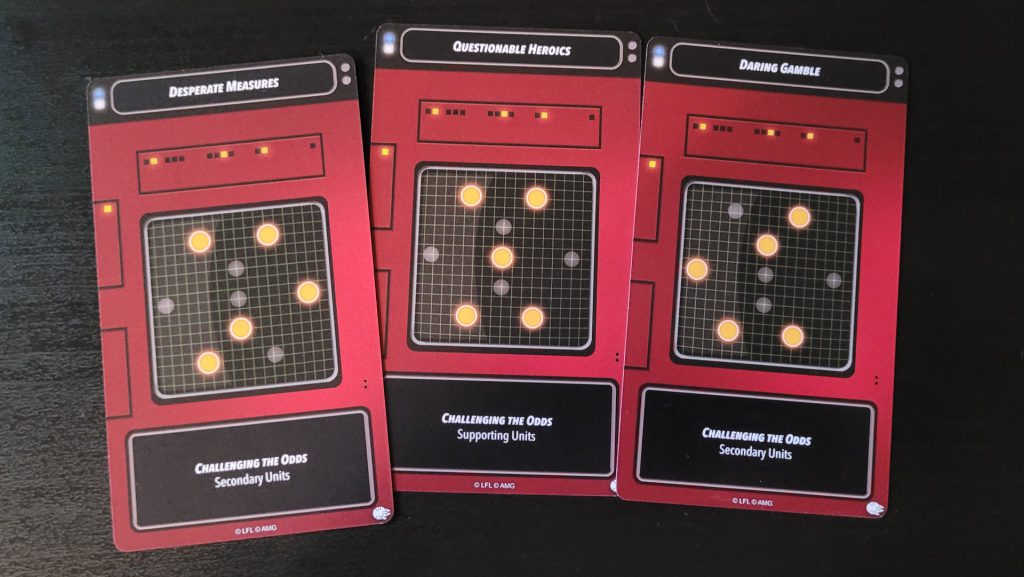 Three possible starting objective positions. Card images © Lucasfilm © Atomic Mass Games
Looking at the three potential first struggle cards, each player has a 2 in 3 chance of having two active objectives close enough to deploy at least one unit within control distance of, and a 1 in 3 chance of their opponent only having one – in those cases, the opponent has a second active objective in reasonably easy reach, so even the worst case doesn’t favor one player over the other as long as some thought is put into starting deployment.
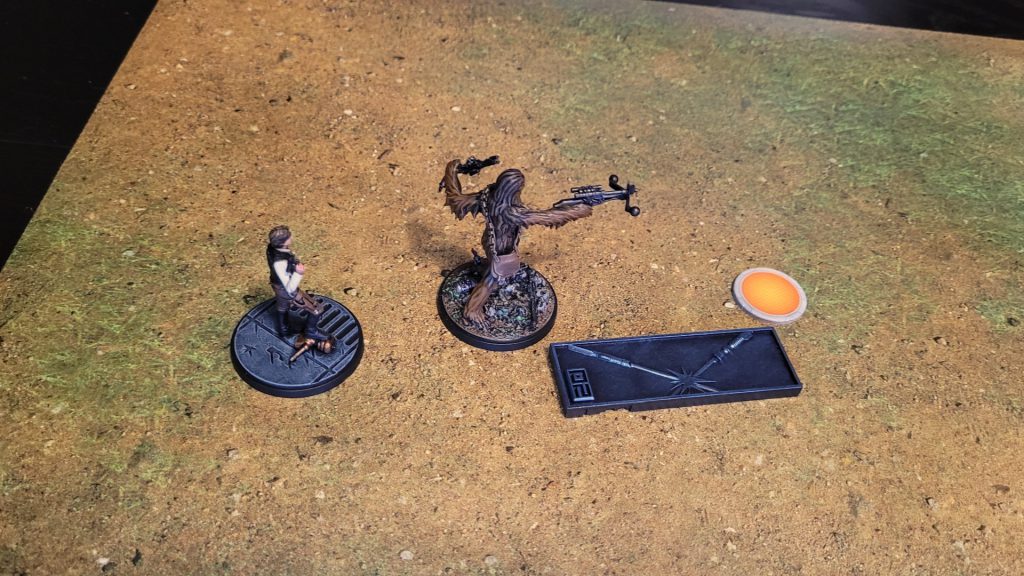 Han and Chewie helpfully demonstrate control of an objective from their starting deployment position. Photo by Jefferson Powers.
One of the three firsts struggle cards gives both players two objectives to control right away, and places the fifth dead center, which could force a “rush to the center” but may also encourage some more strategic thinking as players think about trying to snatch away one of their opponent’s home field objectives, and also about where they want to have their models positioned when the second struggle starts.
Everything’s Under Control, Situation Normal
 Card image © Lucasfilm © Atomic Mass Games
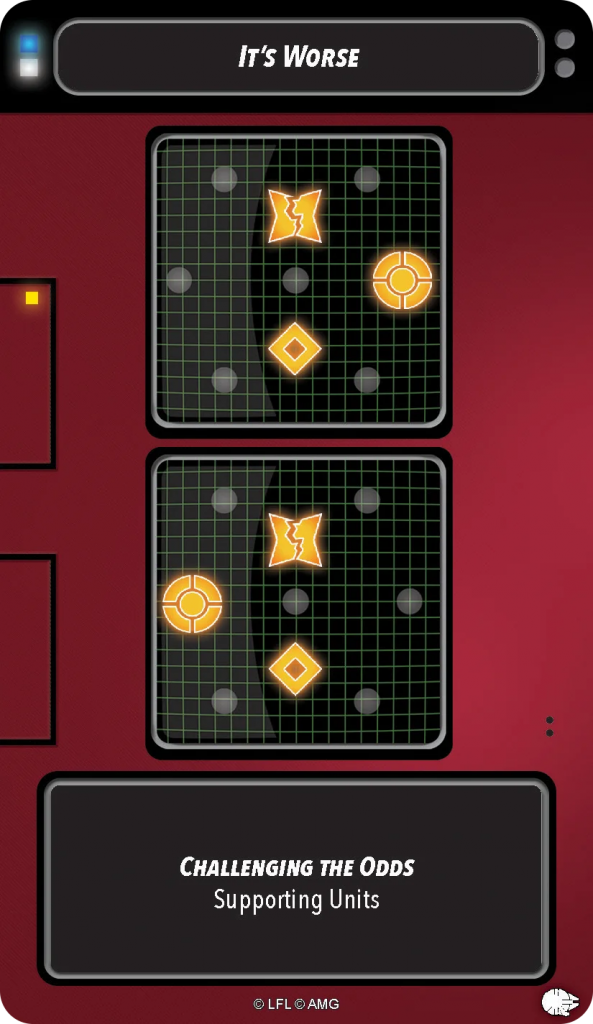
The second and third struggle cards use the same set-up established in the other two mission sets – three active objectives with a randomly chosen priority objective that changes each round. The pattern of active objectives on all three second struggle cards forms a triangle shape, with “I Have a Bad Feeling About This” and “It Could Be Worse” putting the three points about as far apart as they could possibly be, forcing players to divide their forces and rewarding units with high mobility and/or long range.
“It’s Worse” places the active objectives closer together, with two of them in the central column. There isn’t a position that allows control of both central objectives so there will still be a lot of moving around during this struggle, but the closer proximity will likely lead to a larger melee battle in the center of the table.
The third struggle cards offer some unusual choices for the player who lost the previous struggle. Most of the second and third struggle cards (in this as well as the other two mission sets) offer a choice of two objective layouts that are mirror images of each other, but two of these have asymmetric options instead. “One in a Million” lets the player choose either a diagonal pattern that crosses the board, or a more irregular one with one objective in a nearby corner, one on the opposite side in the center horizontal row, and one in the center vertical column closer to the opponent’s side of the board. “Noble Sacrifice” gives the same choice but mirrored.
These two cards are interesting due to the wide leeway they offer the player who is choosing which layout to use. Unless things are going very badly, they should be able to pick one that works with the current position of their units, and hopefully forces their opponent to scramble to get back into control range.
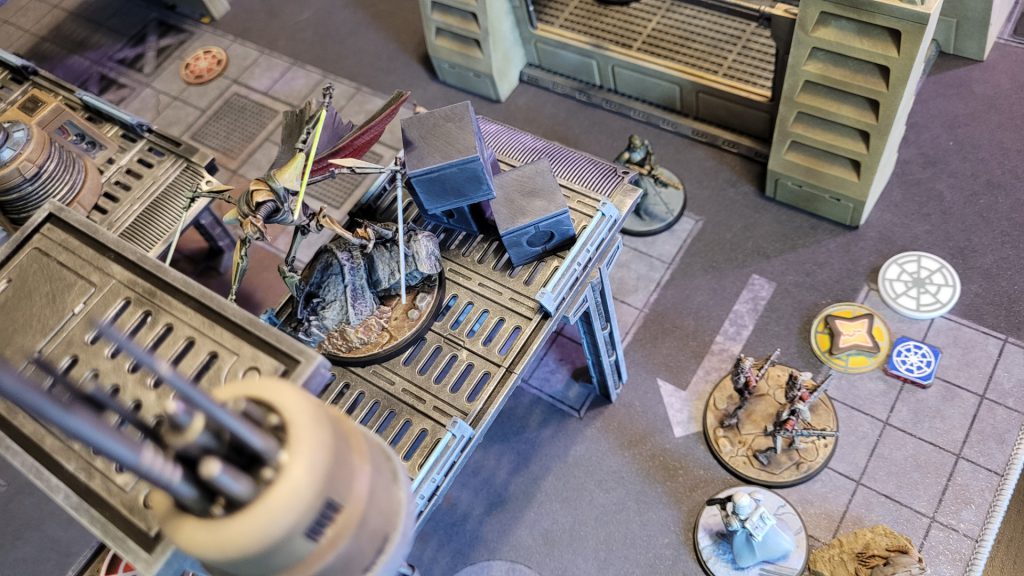 General Grievous shifts his attention as the active objectives change. Photo by Jefferson Powers.
I Prefer a Straight Fight to All This Sneaking Around
This mission set’s special rule will reward players that like to play aggressively, but it will make them work for it a little. Each struggle card singles out a particular unit type (Primary, Secondary, or Support) that is
Challenging the Odds. When a unit of that type inflicts a wound on an enemy unit, their player can pay 1 force to move the Momentum tracker one space in their direction.
For the first struggle, two out of the three cards have Secondary units as the odds challengers, and the other one has Supporting units. The second struggle is 2 out of 3 Supporting and 1 out of 3 Secondary, and the third has 2 out of 3 Primary and 1 out of three Secondary. Those odds should make players think about how to set up their shots so that the right unit can deal out the wound-causing damage.
Depending on what’s happening in the game, paying one Force for the struggle move may end up being too costly, especially when you’re already getting a Momentum for inflicting the wound. And it might be a mistake to focus too much attention on setting up the shot, at the expense of other things that might be going on in the game. It’s not a special rule players are likely to build a whole strategy around, but it could definitely be something to take advantage of if the right situation presents itself.
We’re All Fine Here Now
This mission set is a bit of a mixed bag. The positioning of the active objectives asks players to think on their feet and keep their units moving – it’s a little unpredictable and seems to offer some opportunities for losing players to catch up, which might explain why
Never Tell Me the Odds isn’t as popular with tournament players (at least according to the statistics on
Longshanks). Additionally, the special rule takes some setup that could prove distracting and overly costly for the reward it offers.
If you’re looking to add variety to your Shatterpoint game, the
Never Tell Me the Odds Mission Pack might be worth picking up just for the oddball objective layout, but I wouldn’t call it an essential purchase otherwise.
If you’re interested in reading a play-by-play of a game using this mission set, check out this battle report right here on Goonhammer.Thank you for being a friend.


 Goonhammer App and Patron Updates: April, 2026
 Kill Team Tournament Report: Engage, Party, Repeat's March Madness 2026
 Goonhammer Reviews: Tribal Conquest