Until now, the mission packs released for Shatterpoint have stuck to the same basic theme: between 7 and 9 possible objective locations, with 5 or 6 starting objectives for the first struggle and 3 for the second and third, with one of them being a randomly chosen Priority Objective that changes each round. For the most part it’s enough to keep the middle and late game fairly dynamic as units chase the Priority objective between three possible locations, but it can also make it tempting to just dig in at an objective or two that you know won’t be moving soon, which is safer but less tactically interesting.
So what if the active objectives moved around more, with more possible locations to keep track of?
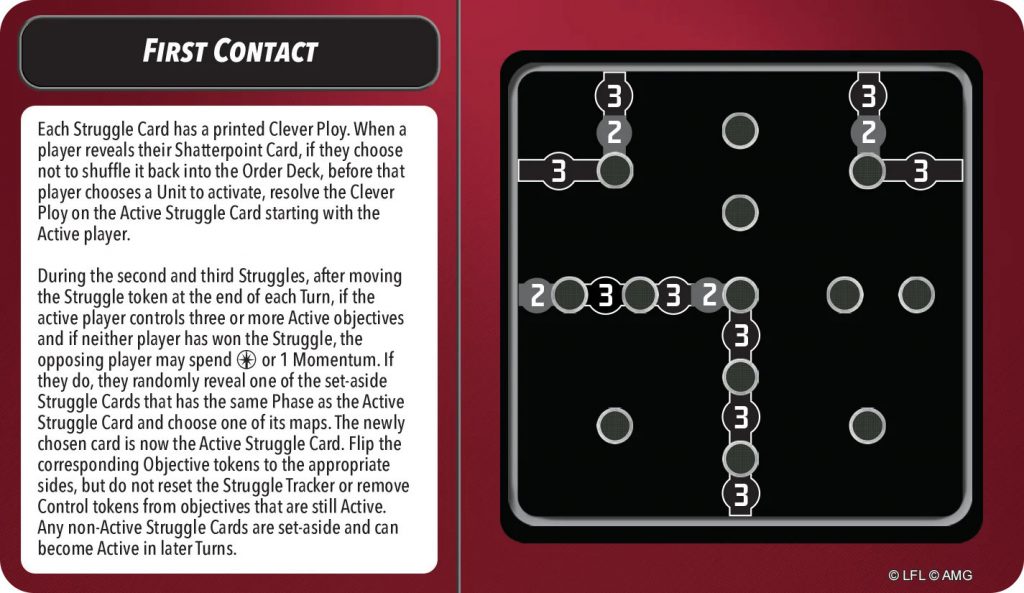
First Contact introduces a staggering 13 possible objective points, with 8 in a circle around the perimeter and the remaining 5 forming a cross pattern that cuts across the X and Y axis of the board. It’s a dizzying array of ground to cover, but also allows for a wide range of interesting patterns for the active objectives.
 Card image © Lucasfilm © Atomic Mass Games.
First Struggle
“
I like firsts. Good or bad, they’re always memorable...” – Ahsoka Tano
Depending on the luck of the draw, each player will start with one or two active objectives within range of their initial deployment, as long as they position each of their squads to cover the right and left corners of the board. The three possible first struggle objective layouts have 5 active objectives and are all symmetrical, so no matter which one comes up neither player will have a particular advantage. “We Get One Chance” and “Surprise Assault” are mirrors of each other, giving each player one active objective they could control right away, and a second within fairly easy reach. The fifth and final objective will be along the center of the board, either at the far left or right, and that’s the one players will have to work for.
“What Could Go Wrong?” gives each player two active objectives that they could control without moving any units, and a final objective at dead center. It might be tempting to assert control over the corner objectives and then send everything you’ve got to the center, but it seems likely that the winner of this struggle is going to be the one who manages to get some units over to the opponent’s side of the board as quickly as possible.
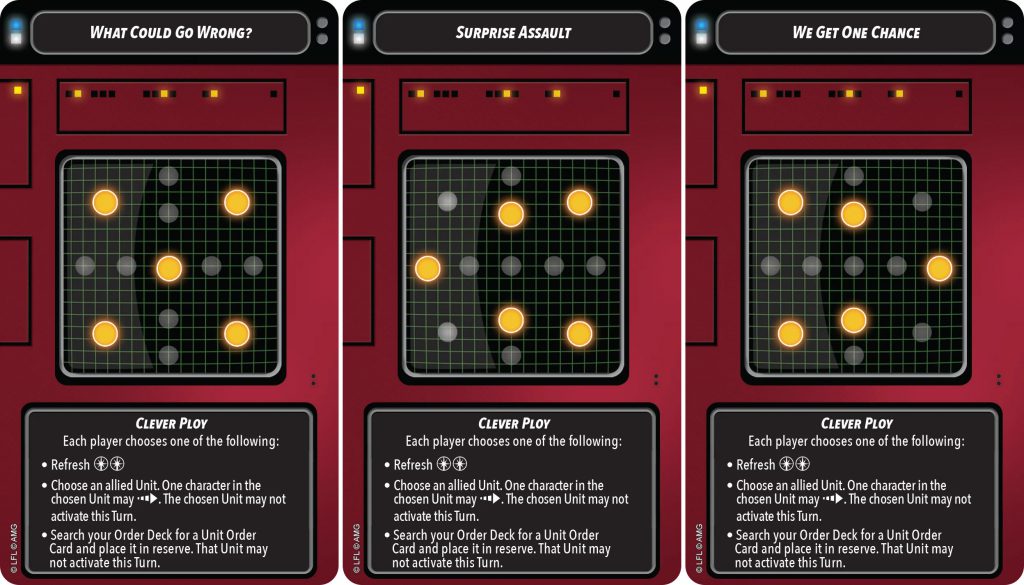 First Contact's first struggle cards. Card images © Lucasfilm © Atomic Mass Games.
Clever Ploys
In addition to a new pattern of objective points,
First Contact introduces a new special rule: Clever Ploys, which resolve when a Shatterpoint card is used. But unlike the previous mission card sets, this special rule allows both players to choose an ability to resolve. For the first struggle, it’s the same on all three cards: each player can choose to either refresh two force, give a dash to an allied unit (who may not be activated on the same turn), or search the Order Deck for a Unit Order Card and place it in reserve (that unit may not be activated on the same turn). The second and third options will be especially useful in the early turns of the game.
There is more variety in the second and third struggles, where each card has its own Clever Ploy text. Abilities range from healing and removing wounded or injured tokens, to reposition moves, to clearing control tokens from objectives.
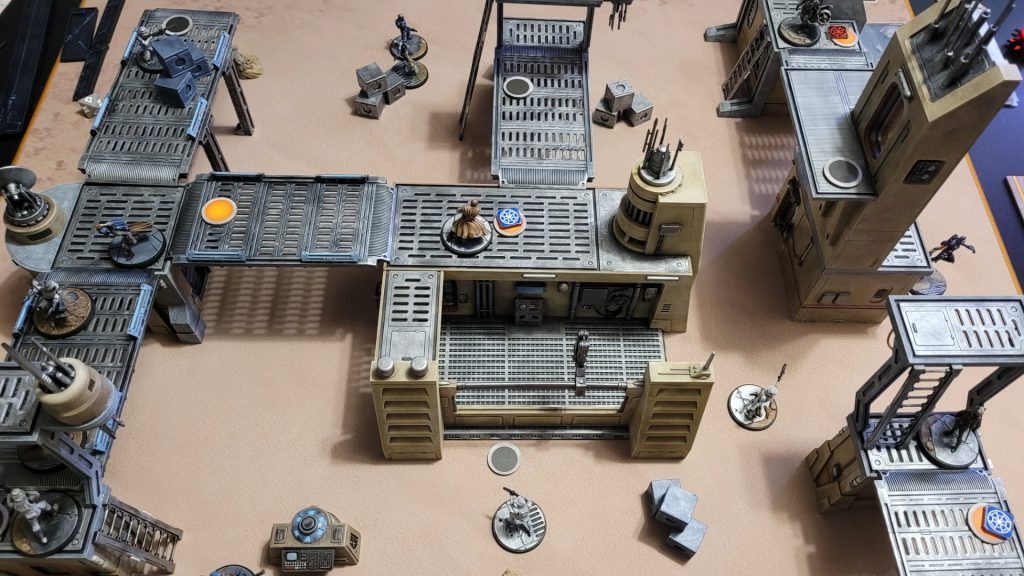 Mace Windu thinks he's got the center of the board under control. However, he may have miscalculated... Photo credit: Jefferson Powers.
Second and Third Struggles
“
Always in motion is the future...” – Yoda
First Contact’s first struggle doesn’t play all that differently from any of the other mission sets – it’s in the second and third that things get...interesting.
Similar to what we’ve seen in the other mission sets, the second and third struggle cards all give the player who lost the previous struggle two options for objective placement. On most of the cards the two options are mirror images, but there is one that turns the objective pattern 90 degrees, and one intriguing card in the third struggle that gives a choice of the four innermost or outermost objective points.
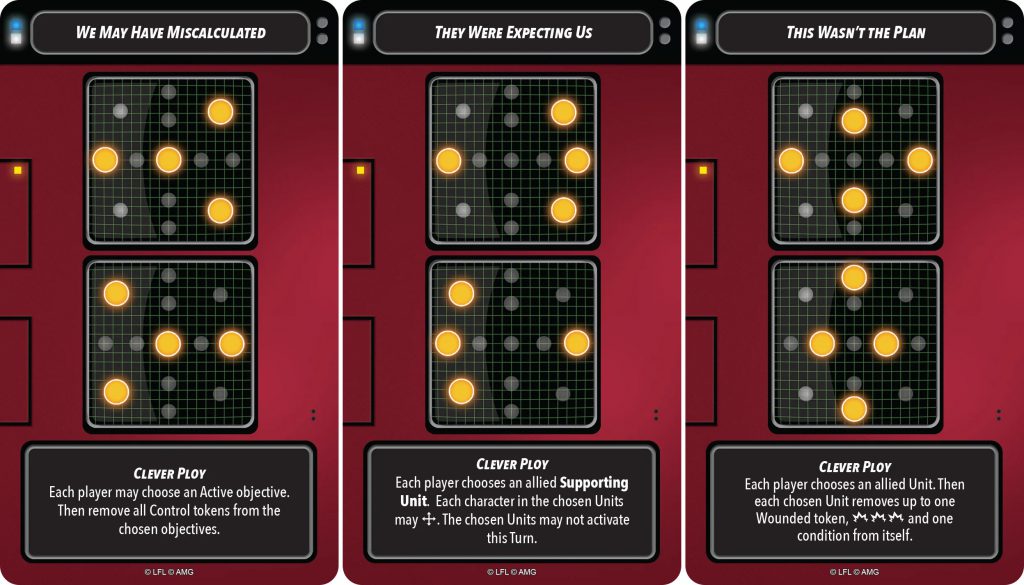 First Contact's second struggle cards. Card images © Lucasfilm © Atomic Mass Games.
Instead of the familiar three active objectives, with one Priority Objective worth double points,
First Contact gives us four objectives with no priority. The catch is that on any turn that a player controls three objectives at the end of their turn, their opponent may spend one force or one momentum to replace the struggle card with one of the other two (randomly selected), choosing one of the two maps and changing the active objectives as indicated.
In every instance of switching from one card to another, this will move at least two of the active objectives to new locations; in many cases, three or even all four. This means that players will want to try to position their units to be within range of as many objective points (active or not) as possible, and/or be ready to move to a new active objective at a moment’s notice. With this need to be more nimble and cover more bases, it’s more likely that players might not want to leave units “on guard” contesting objectives, especially ones that are more remote and outside their opponent’s easy reach – instead they’ll want to establish control and then move on.
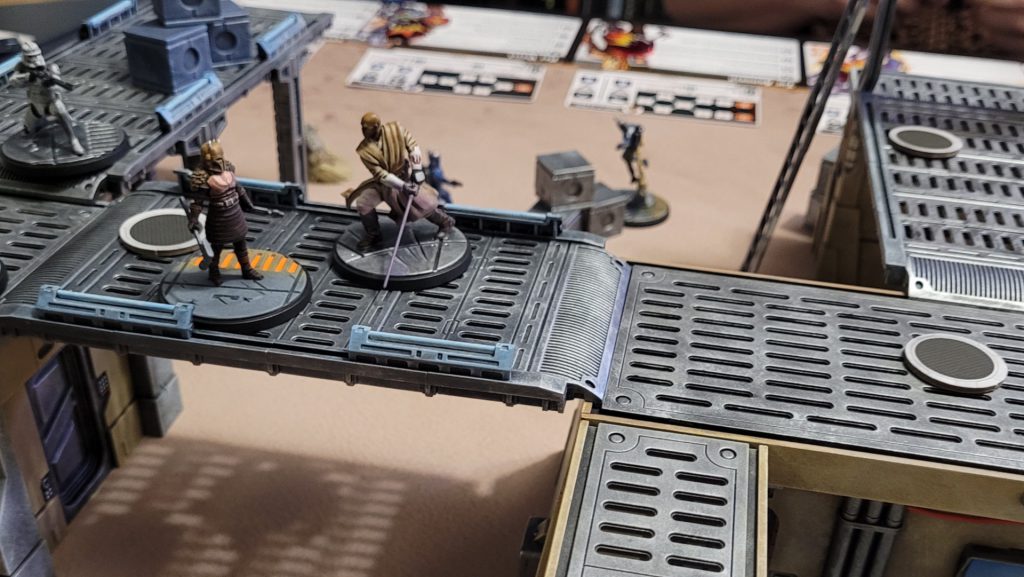 A change in objective locations leaves Mace and the Armorer fighting over nothing. Photo credit: Jefferson Powers
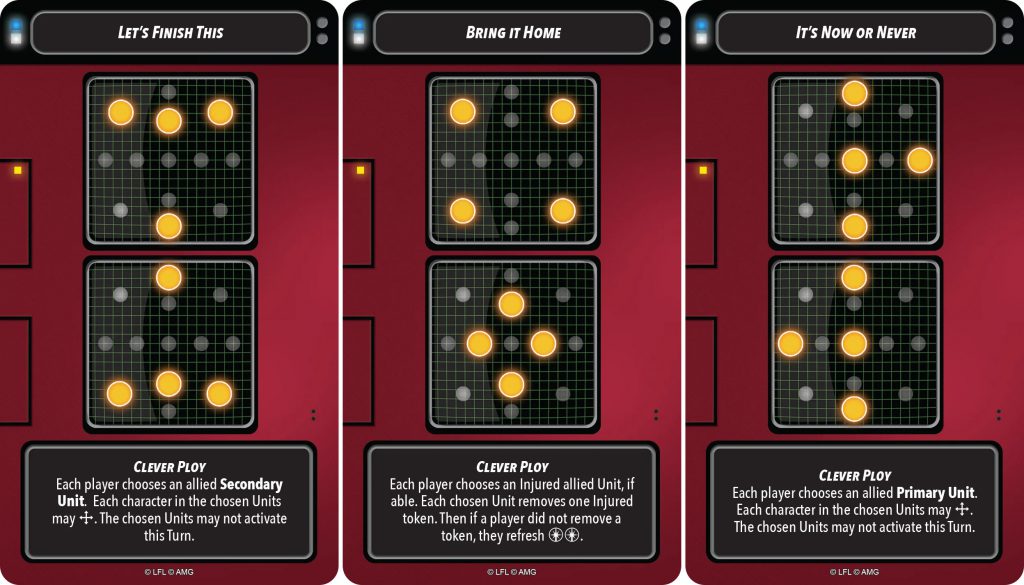
The Clever Ploys in the second and third struggles support this style of play fairly well. In the second struggle, “We May Have Miscalculated” clears the control tokens from two active objectives (one chosen by each player), while “They Were Expecting Us” allows each player to reposition a supporting unit. “Let’s Finish This” in the third struggle gives that reposition to a secondary unit, and “It’s Now or Never” does the same for a primary from each player. And with the struggle cards potentially changing several times over the course of each struggle, players will be crossing their fingers that their Shatterpoint card comes up at the right time...
 First Contact's third struggle cards. Card images © Lucasfilm © Atomic Mass Games.
Conclusions
“
If we can make it to the ground, we’ll take the next chance. And the next. On and on until we win … or the chances are spent.” – Jyn Erso
The potential for active objectives to move mid-struggle creates a very interesting catch-up mechanism, no doubt designed to prevent one player from keeping a stranglehold on the active objectives – if the losing player can’t dislodge the contesting units, they can try to move at least some of the active objectives to what will hopefully be better positions.
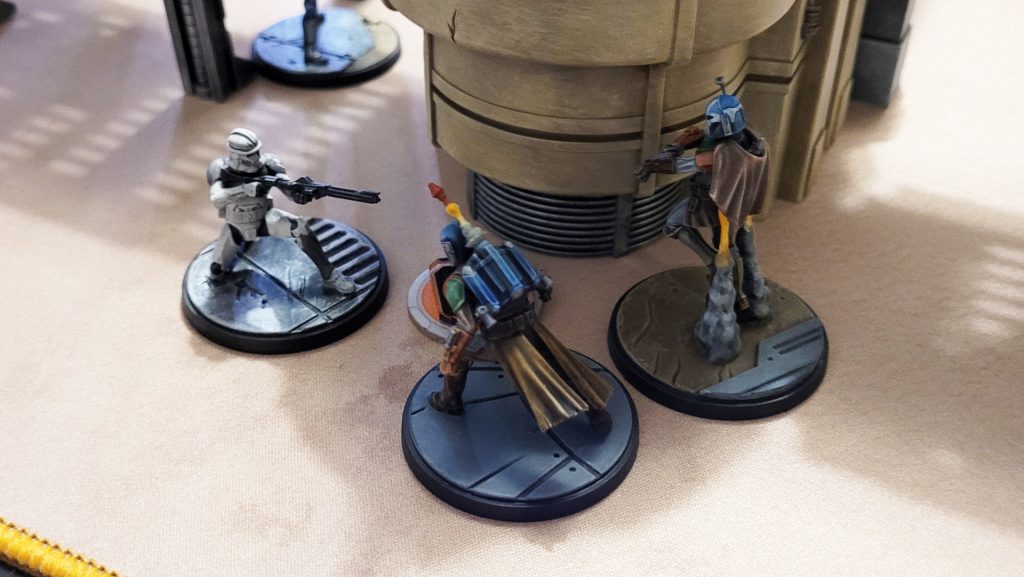 The Clever Ploy on "They Were Expecting Us" gets these supporting units over to an objective that just became active. Photo credit: Jefferson Powers.
It might seem like giving the losing player a catch-up option could serve to drag the game out, but so far my experience has been the opposite, with games using this mission set feeling more fast paced and breezy. The more fluid (some might even say chaotic) battlefield is great for strike teams with a lot of mobility, and dynamic movement is one of the things that sets
Shatterpoint apart from a lot of other skirmish games.
Have any questions or feedback? Drop us a note in the comments below or email us at contact@goonhammer.com. Want articles like this linked in your inbox every Monday morning? Sign up for our newsletter. And don't forget that you can support us on Patreon for backer rewards like early video content, Administratum access, an ad-free experience on our website, and subscriber-only content covering competitive Warhammer 40K!Thank you for being a friend.


 Goonhammer App and Patron Updates: April, 2026
 Kill Team Tournament Report: Engage, Party, Repeat's March Madness 2026
 Goonhammer Reviews: Tribal Conquest