We’ve written a ton about competitive terrain layouts but in this short series we’re looking at how to make good layouts for narrative play – layouts which go above and beyond the paintball arenas and bare MDF often presented in competitive formats. Last time around, I looked at building more vertical layouts and using raised platforms in your games. If you’ve missed our previous articles in this series, you can find them here:
In this seventh entry, I'm going to be looking at building for asymmetric layouts, and how we can apply the lessons we've learned toward building better layouts for Asymmetric missions with a clear attacker and defender. Lots of narrative missions have deployment maps that are different for the attacker and defender, changing play patterns and forcing players to adopt different strategies.
Before we dive in, let's revisit some of our guiding principles for terrain layouts:
- Places to Hide in Deployment. Your terrain layout needs to give players the ability to hide units during deployment, so that they won't necessarily lose the game if they're going second and their opponent has a ton of strong ranged weapons.
- Force Interaction. Your objective markers need to have some protected or relatively safe areas around them - at least from shooting attacks. The idea is to force both players to move to the objectives and interact on them rather than just being able to shoot the other player off repeatedly, making going second too powerful.
- Force Players to Make Choices. As you do your layouts, you want players to have to make interesting choices - how to split their forces, where to commit, and how to weigh safety vs. reward - going back to places to hide, we want places where a player can hide in deployment, but taking these should also not always be the optimal starting position - you have to give up a little turn 1 movement in order to be protected and safe.
- Create Staging Areas. We want to create staging areas where units can sit for a turn and prepare for a big charge or "Go" turn.
- Vehicle Movement Lanes. We want something dense enough to block long lines of sight, but also with 5" movement lanes for vehicles. Infantry should have protected movement paths while vehicles can get up the table as they need.
With those in mind, let's look at a few examples from the Nachmund Gauntlet Crusade book and design layouts around them.
Example 1: Saboteurs
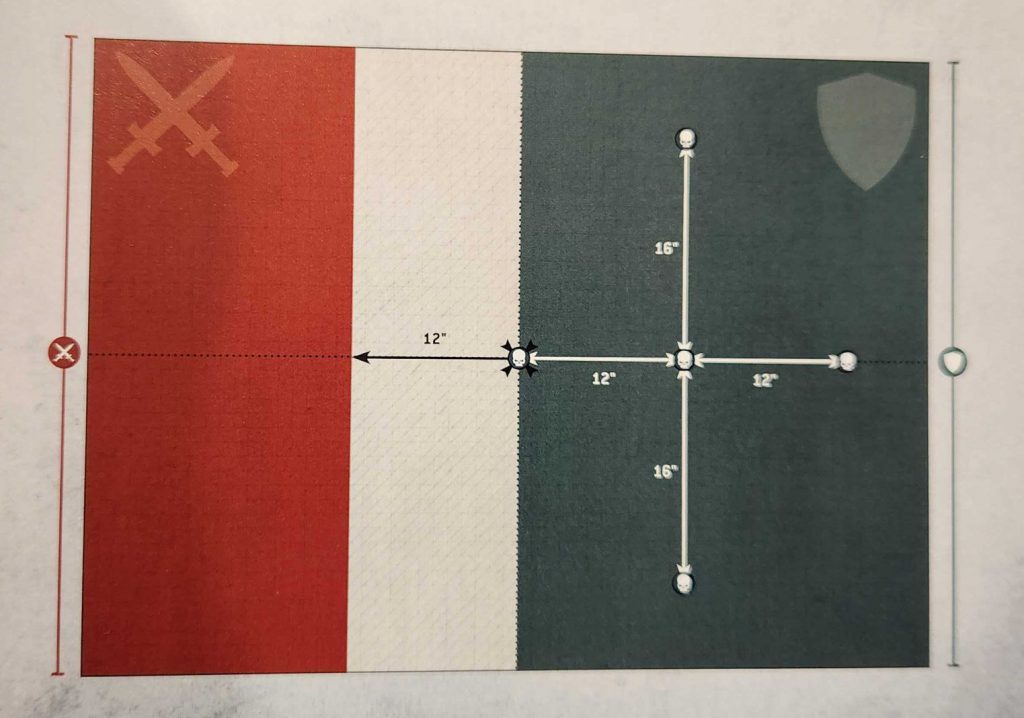
In this mission the Attacker is trying to push deep into enemy territory and destroy the objective markers, and scores points for doing so. In order to do this the Attacker has to perform the Sabotage action, which takes a full round to complete, making it very dangerous and difficult to perform, especially with weaker units.

As I think about this layout, it needs to be almost guaranteed that the attacker will get the first Sabotage, and more difficult to get the others. A game where the defender pitches a full shut-out is likely to feel pretty boring and pointless, so I want to make sure that first objective has a clear wall in front of it to hide behind with a tough unit.
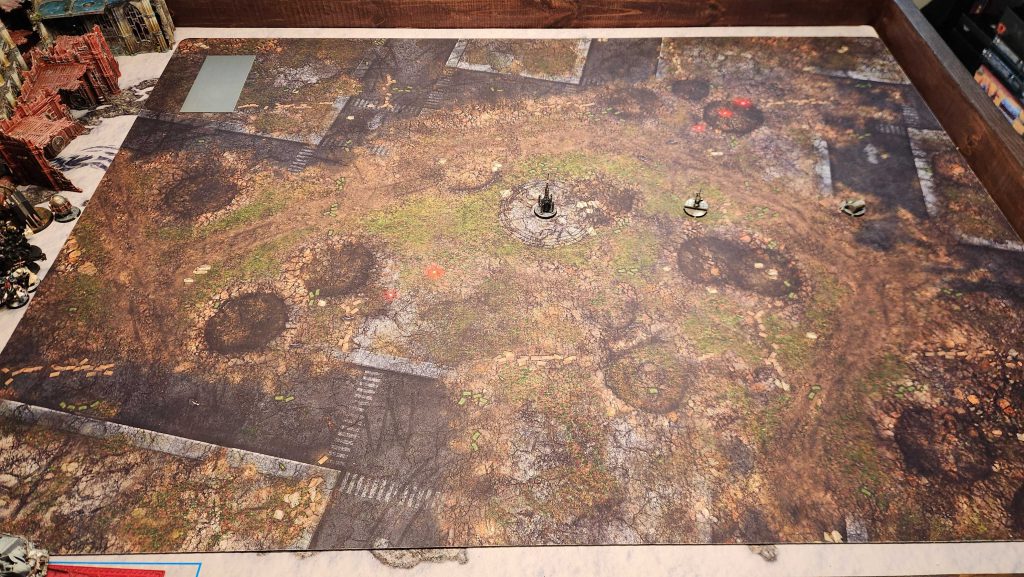
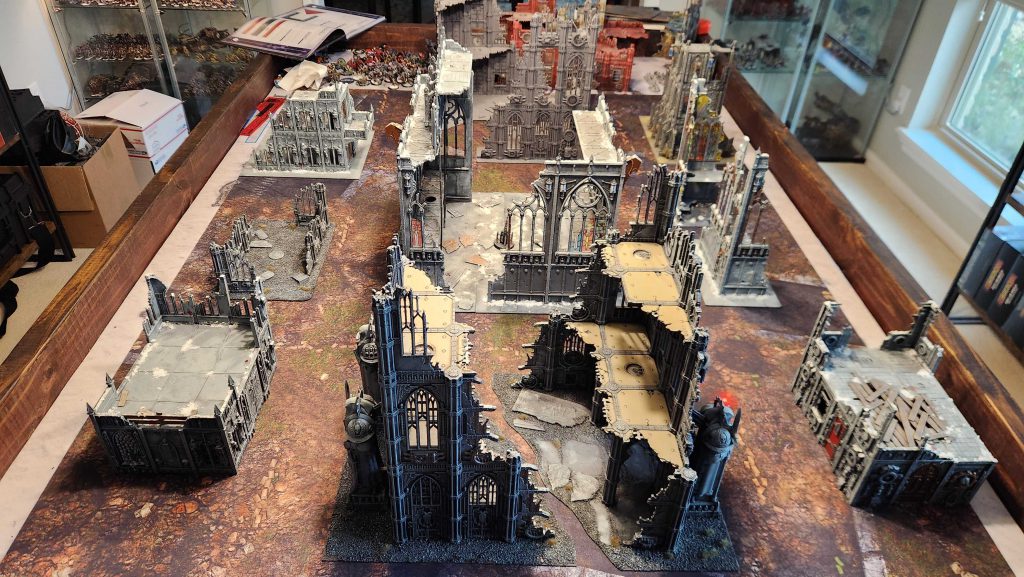
Here's our initial layout:

I want to put walls between each objective, making it difficult to sit on one and see the others. The Defender should have to move up and take a risk and engage with the Attacker in order to prevent this action. I want spots for the Attacker to hide early, but note that on this mission the Attacker can choose to go first, so it's not
that big a deal if they have lots of hiding places; one or two for slower units is fine.
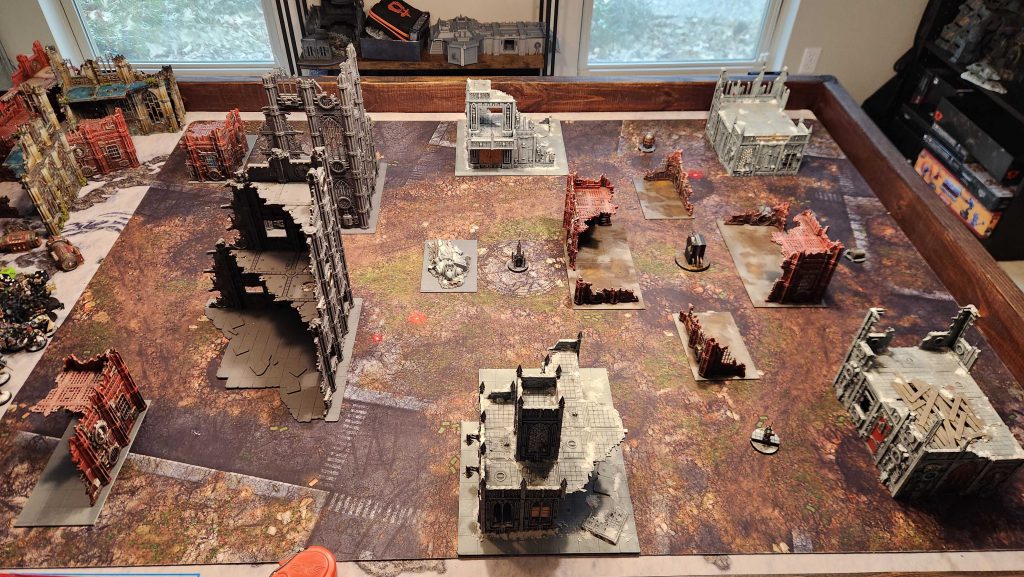
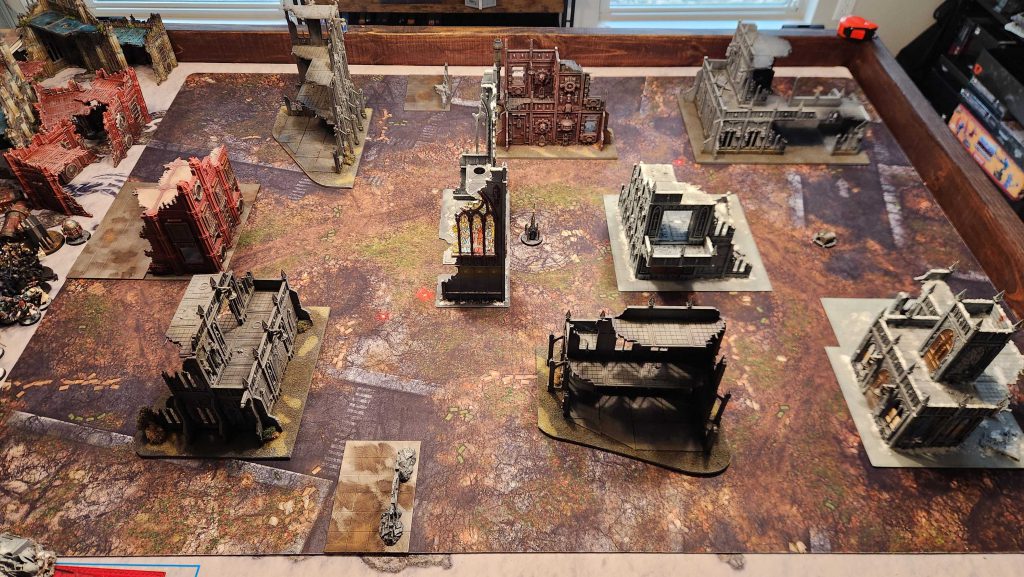
The big buildings give the Attacker the ability to hide in deployment/early turns while that first objective is hidden on the other side of a ruin. There are still longer lines of sight than I'd like between some of the objectives but there's enough breakup here that you can force an opponent to move to catch you on an objective if they want to shoot you. The buildings against the long table edges block those sight lines and create staging areas, and the ruins in the defender's backfield can be moved over but block line of sight.
I may consider rotating those small footprints 90 degrees or swapping the 10x5" ruins for 12x6" footprints, but overall I think this works. The big question mark is those those two side objectives - it's harder to hide on those and I may rethink this placement after a game or two but I don't want to overprotect them, either - the attacker should have to commit to destroying an opponent or preventing them from stopping the action.
Mission 2: The Gauntlet
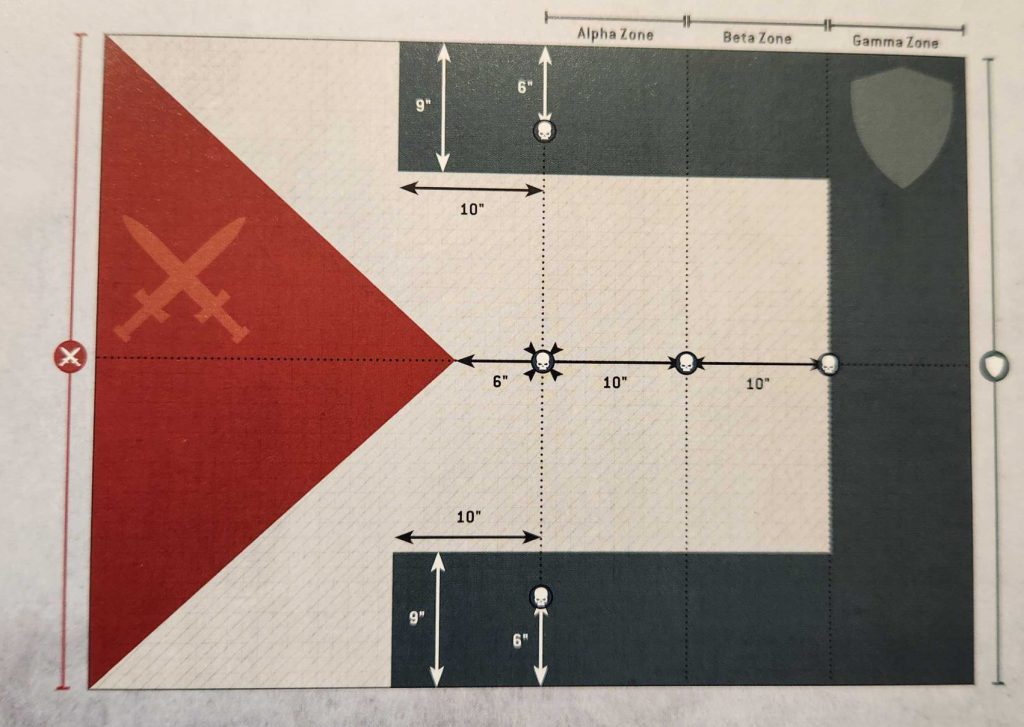
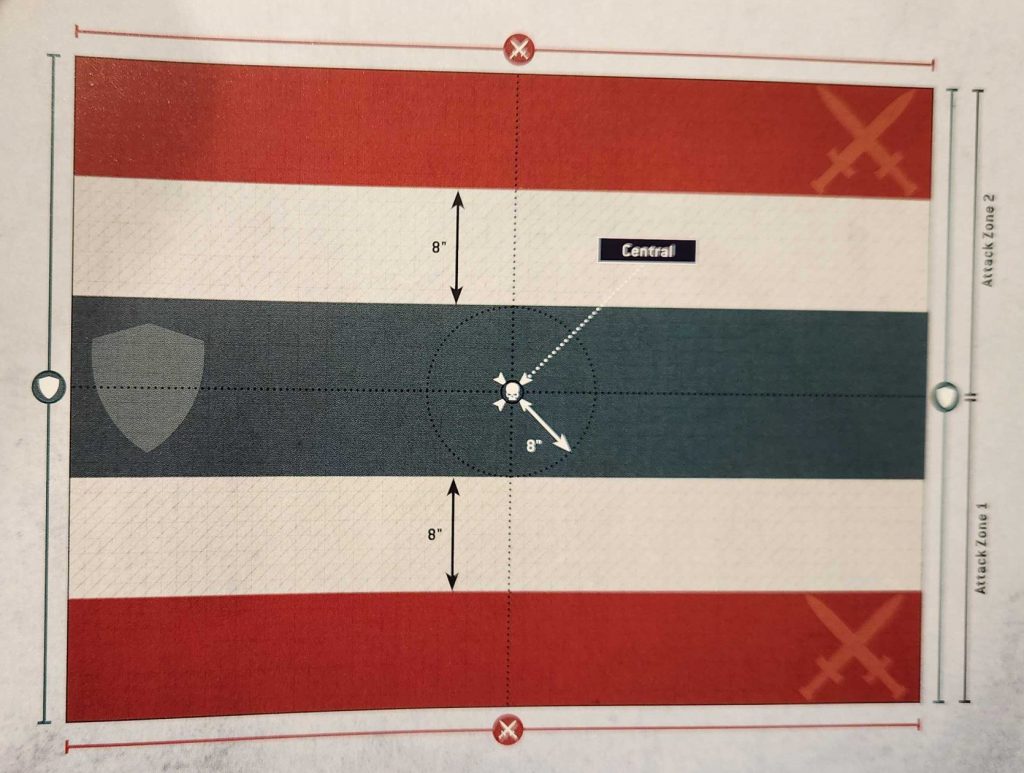
This is another "Attacker can go first" mission, where the Attacker is trying to hold objective markers as they press forward and objective markers are removed as they're controlled. The Attacker scores VP for being in progressively deeper zones, i.e. the Alpha/Beta/Gamma zones denoted on the deployment map above.
This one feels lopsided in favor of the Attacker for me, but I still want to be mindful that the Attacker is forced to move up the middle of the table and will be vulnerable and I want more fighting mid-table over objectives. The Defender needs to hold those and doesn't have any ability to retake them. That said, they also score for keeping Attackers out of the Gamma Zone and killing enemy units.
Here the triangular deployment makes it easy to create OK hiding spots and I can play it loose with the amount because the Attacker can just go first. The sides of the table give the Defender ample hiding/staging points, and that first objective is pretty protected - it can be captured from the other side of the ruin walls in the middle of the table, so it's an easy get. But the second and third markers are not so easy - one is in that large square ruin footprint, and the last is relatively open. Taking that one is going to be an uphill battle, but since the Attacker scores at the end of their turn, just touching it and capturing it is enough to destroy it and score; they don't need to sit on it a round, and that changes some of the math here.
This is one I might need to play again to fine tune but I think this layout does the job fairly well.
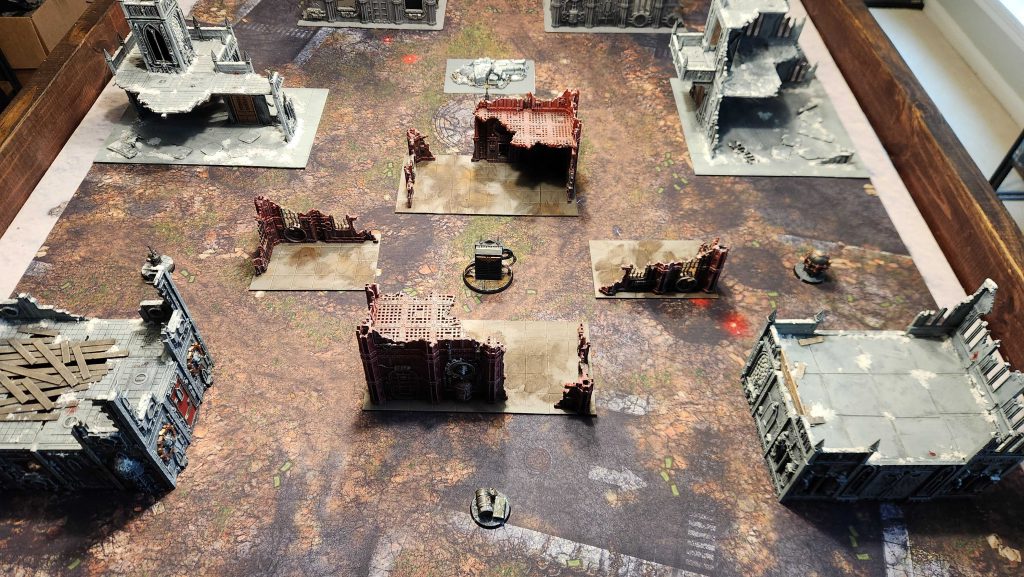
Example 3: Vital Stronghold
In this mission the Defender deploys along a narrow band in the middle of the table and is beset on all sides by the Attacker. This was the hardest mission to design for because making protected locations in the middle of the table is hard. I contemplated fortifications, but they're a mixed bag - one I'll touch on in the future - and decided instead to go for some large buildings with high walls.
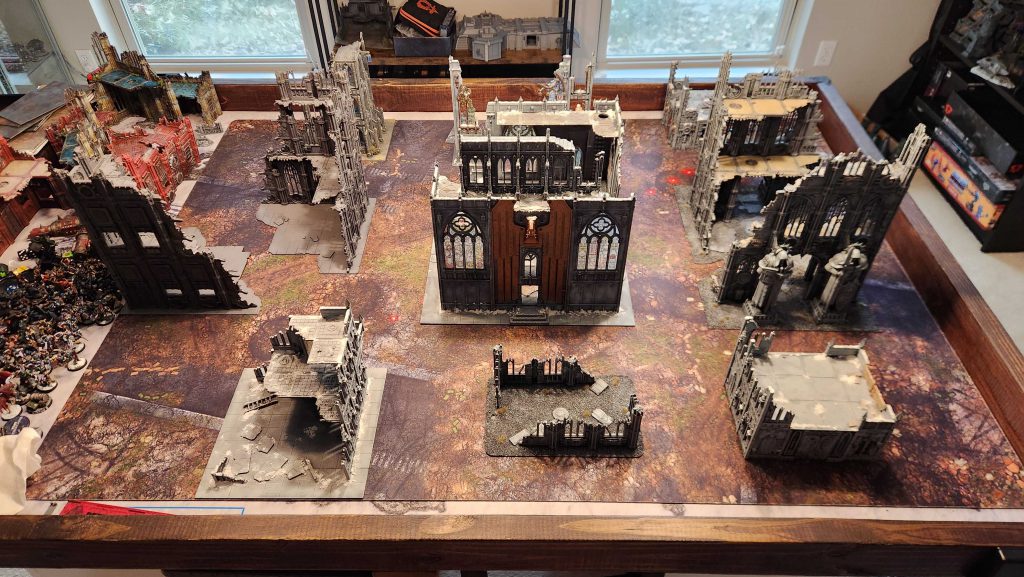
I've got three fairly large buildings I can use for this, and they're all designed to fit together in one way or another to create structures that provide good hiding spots for the Defender while also making them huddle up. The middle ruin is key to this - it has large walls on either side that can protect even larger units, while I've split the other two ruins to make it a bit harder to hide as the Defender. The Attacker gets
some cover, but largely has to be aggressive early and take advantage of the short distance between deployment zones. The Defender also has to put more objective markers on the table, so I've added some spots where those might make sense.
Splitting the two large side ruins means you can't see through one to the other, and that helps them not just be big open middle ruins. It makes hiding easier, though the attacker can still see around pieces of them into the opposing ruin with the right angle, so the defender can't full hide in this pincer situation, which feels like the point - they'll have to figure out what they want to start hidden. Meanwhile this is mitigated by the Attacker having to put some units in reserves. It's hard to imagine a fun mission like this for both players without some large walls like this to protect the middle and force players to move in and interact.
Next Time: Mailbag
That does it for this week's article but I'll be back next week to address some specific questions from your comments and on Discord. If you have anything specific you'd like to see covered, drop me a note in the comments below or ping me on Discord - I'm happy to tackle as many of these questions/requests as make sense for an article.
See you next week.
Have any questions or feedback? Drop us a note in the comments below or email us at contact@goonhammer.com. Want articles like this linked in your inbox every Monday morning? Sign up for our newsletter. And don’t forget that you can support us on Patreon for backer rewards like early video content, Administratum access, an ad-free experience on our website and more.Thank you for being a friend.


 Goonhammer App and Patron Updates: April, 2026
 Kill Team Tournament Report: Engage, Party, Repeat's March Madness 2026
 Goonhammer Reviews: Tribal Conquest