In Marvel Crisis Protocol and increasingly in other miniatures games many of the miniatures are monopose. That is to say that outside of some alternative head sculpts they look how they are intended to look.
This can be both a good and bad thing. Generally Atomic Mass Games do a great job with the poses that they give the miniatures making them dynamic and showcasing the character in their element. Sometimes though, for whatever reason you might not like the pose that the character was given. Maybe it isn't expressive enough, maybe you want to recreate a panel from one of your favorite films or comics.
Even if you do like the pose you might not like the fact that if there are two of the same character on the table outside of paint job you may not be able to identify your model vs your opponent's.
In these cases you might want to make your model individual to you. This guide will go through a few options from simple to more complicated to how you can or may want to individualize your models.
Orientation
The simplest conversion is just to take the model as it is and orient it in a different way without adding or changing anything else on the model itself.
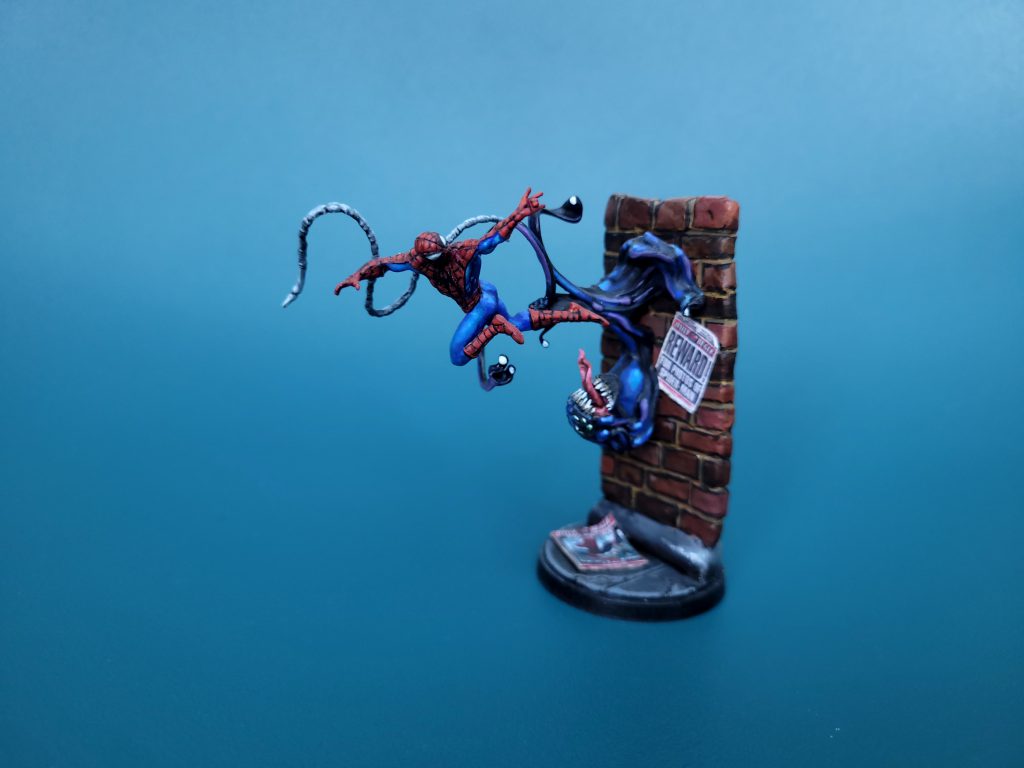 The Spectacular Spider-Man. Credit - Alfred_Pharius
Shown here is my version of
Spectacular Spider-Man. I used miliput to create a basic brick wall but you don't necessarily need to sculpt this. Anything could be a wall if you paint it right. Being Spider-Man means that his feet aren't always on the floor and moving things vertically means that his web slinging feel much more animated to me. It also gave me an opportunity to paint some fun grafitti on the other side of the wall which is the symbol that Miles paints in the Spider-Verse films.
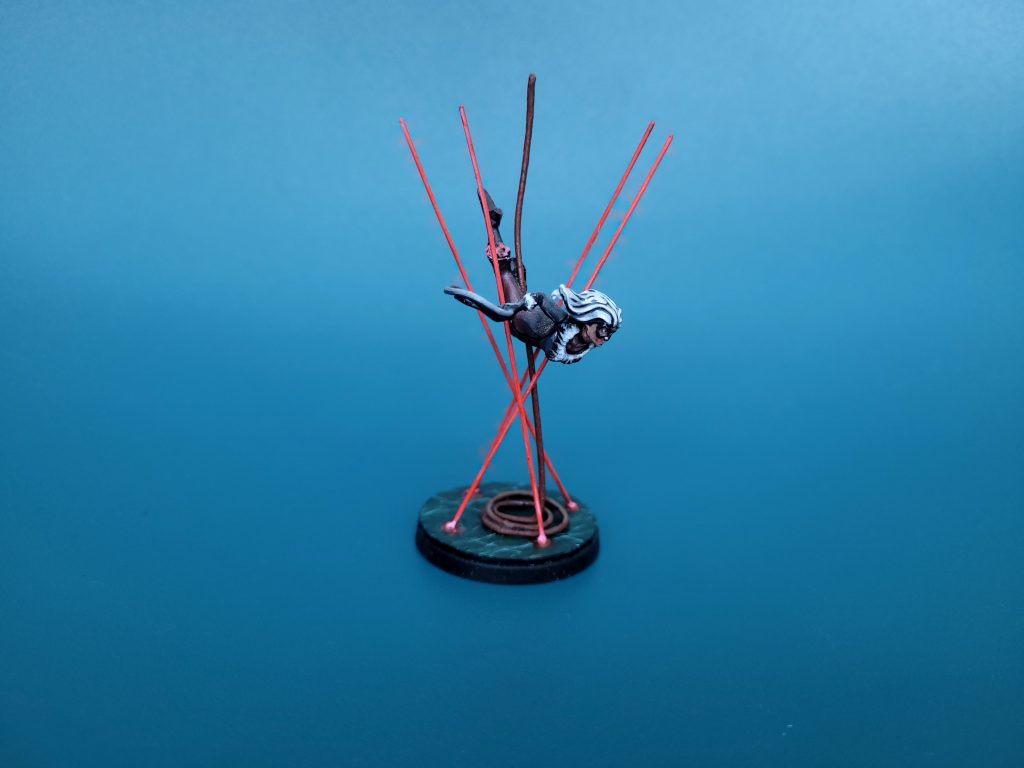 Black Cat mid heist. Credit - Alfred_Pharius
This
Black Cat may look like a complicated conversion but it's actually quite simple. I wanted her to resemble the stereotypical cat burglar, rappelling down to steal something in a high security area. The rope is some gardening wire which I use for a lot of my conversions as it is so versatile. Then for the lasers themselves they are also wire of a slightly thinner gauge straightened out and drilled into the base to give some stability. Black Cat herself has just been turned upside down from the original pose. This model is a popular one to repose as many people, myself included, aren't a fan of the back flip that she is doing originally.
The only thing to be careful of when using metal wire like this is that paint doesn't want to stick to it very easily. Make sure you use a good primer before painting or you may have issues with your paint flaking off the metal.
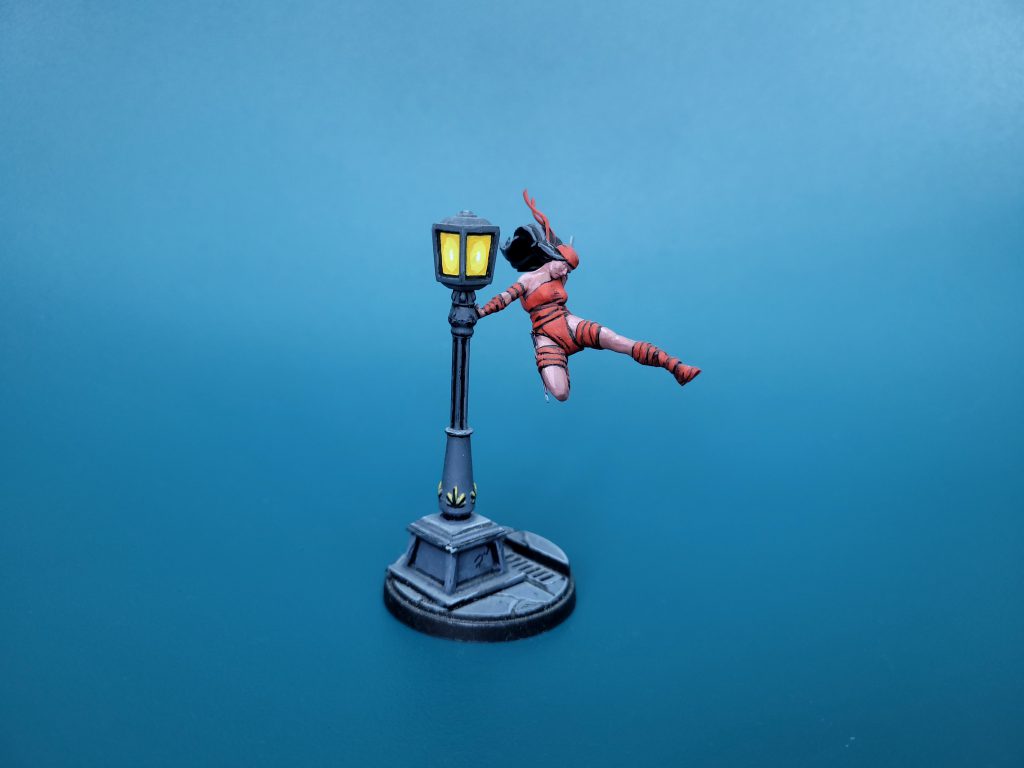 Elektra from Marvel Crisis Protocol. Credit Alfred_Pharius
For
Elektra I wasn't a fan of her vaulting over some debris. I used a lamp post from the core set and cut the base so that it would all fit on a small base. Then it was just a case of orienting her so that she was using the lamp post for leverage as she kicks down.
Simple Green Stuff
Sometimes its just something small such as hair that you want to change. A small amount of green stuff can go a long way to changing the overall look of a model.
When working with green stuff my number one tip is to use simple sculpting tools where possible. Using your fingers can be fine initially to get a rough shape but pure green stuff can hold your fingerprints which you probably don't want in the final sculpt. The other thing to bear in mind is not to work with it immediately after mixing. I find it much easier to work with after 15-20 minutes of combining the two parts. It can initially be far too sticky and difficult to hold a shape so mixing the amount you need and then working on something else for a little while as it starts to cure can be very helpful.
Finally always keep your tools that you are working with wet either with water or Vaseline. There is nothing more annoying than thinking you've sculpted the perfect shape only for the green stuff to unnecessarily stick to the tool and move out of position.
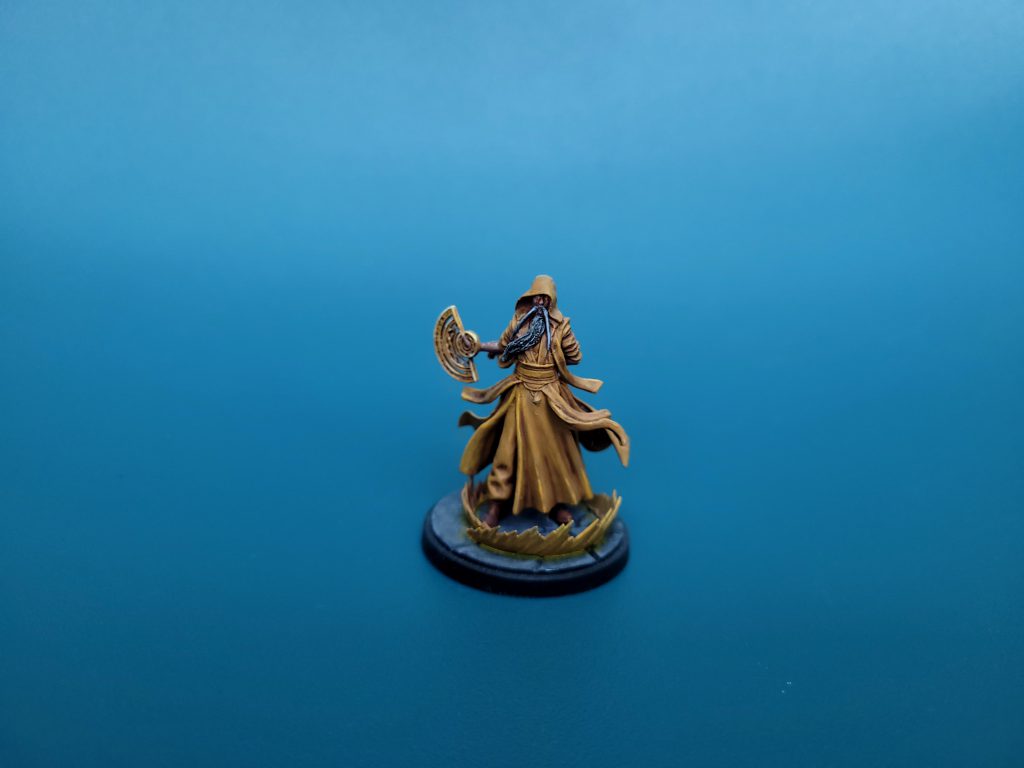 The Ancient One From Marvel Crisis Protocol. Credit - Alfred_Pharius
For the
Ancient One I wasn't a fan of the Tilda Swinton version of the character that was initially sculpted. I think she did a great job in the film but personally I want a character called 'the Ancient one' to look a little more Ancient. It was a little fiddly sculpting such a small beard but this small amount of green stuff managed to alter the appearance of the entire model. For such a small amount of green stuff the feel of the whole model can change.
Adding Effects
The model itself can be fine but you might want to add something to add more dynamism. After all these superheroes aren't stood there shouting at each other (well maybe Deadpool is) they're firing lasers or throwing buildings at one another.
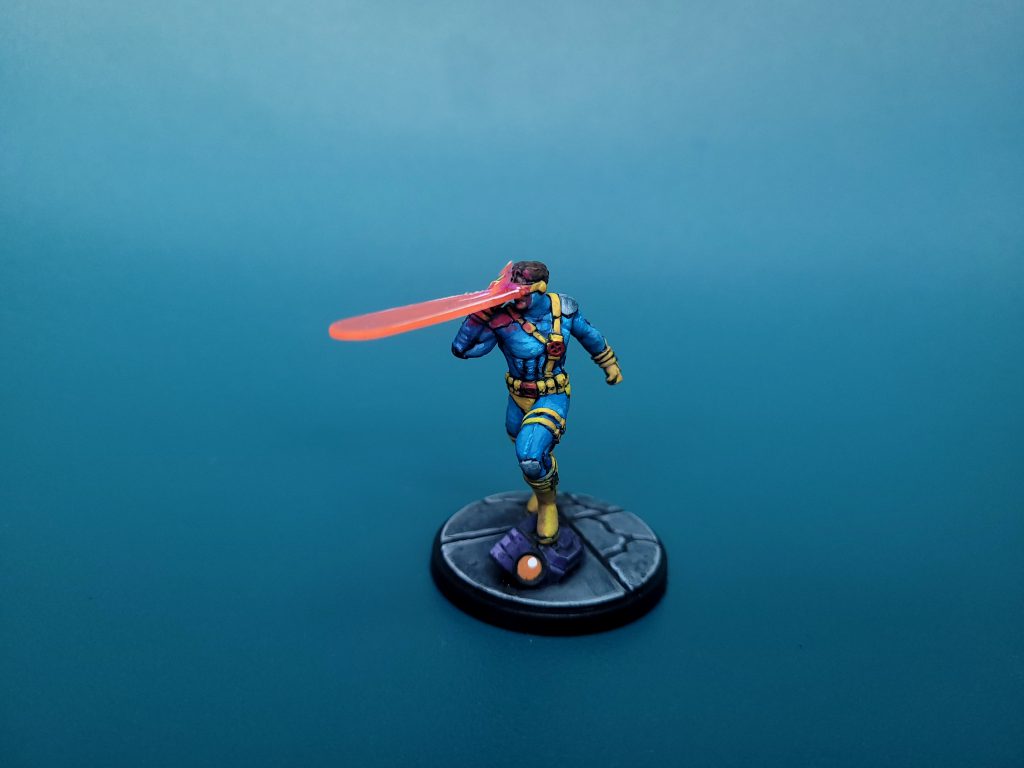 Cyclops leader of the X-Men (Sometimes). Credit Alfred_Pharius
For
Cyclops I didn't like how the original model just looked like he was trying very hard to win a staring competition. He needed something more to show off his concussive eye beams. To achieve this I took some clear pink sprue from a Gundam model. I first used some paper to create a template so that I knew what the final size should be and then I cut and filed the pink sprue to shape. Rather than using superglue to stick to the model I used a small amount of UV resin. Sometimes the fumes from superglue can make clear plastic like this appear cloudy and that was something that would have ruined the effect. As a bonus I mixed some fluorescent dye to the UV resin and broke off a small dried section for some additional laser flare arcing off the main beam.
I wanted
Thor to really bring the thunder to the table (big image at the top). To do this I used two different thicknesses of wire, the thicker one for the main bolt and the smaller gauge for the extra lightning arcing off. The process was similar to Black Cat above but rather than keeping the wire straight it was important to add bends to give the illusion of arcing. For the larger wire I was able to drill into the hammer slightly to give more surface for the glue to grip onto. The smaller wire was too small to do this so I had to carefully use superglue to attach it. Being very light is a double edged sword, on the one hand the smaller wire doesn't need much to stick but on the other hand it is potentially more fragile than I would like for a playable miniature.
Making the Base More Exciting
Changing the base can sometimes enhance the look and feel of the miniature more than any changes to the model would. We've also had the same city bases to choose from since the game's inception and as someone who now owns hundreds of MCP models some of them need a change. It would make a lot of sense for Atomic Mass Games to produce their own base packs with for example Wakanda bases or Asgard bases but until they make something official we can make our own.
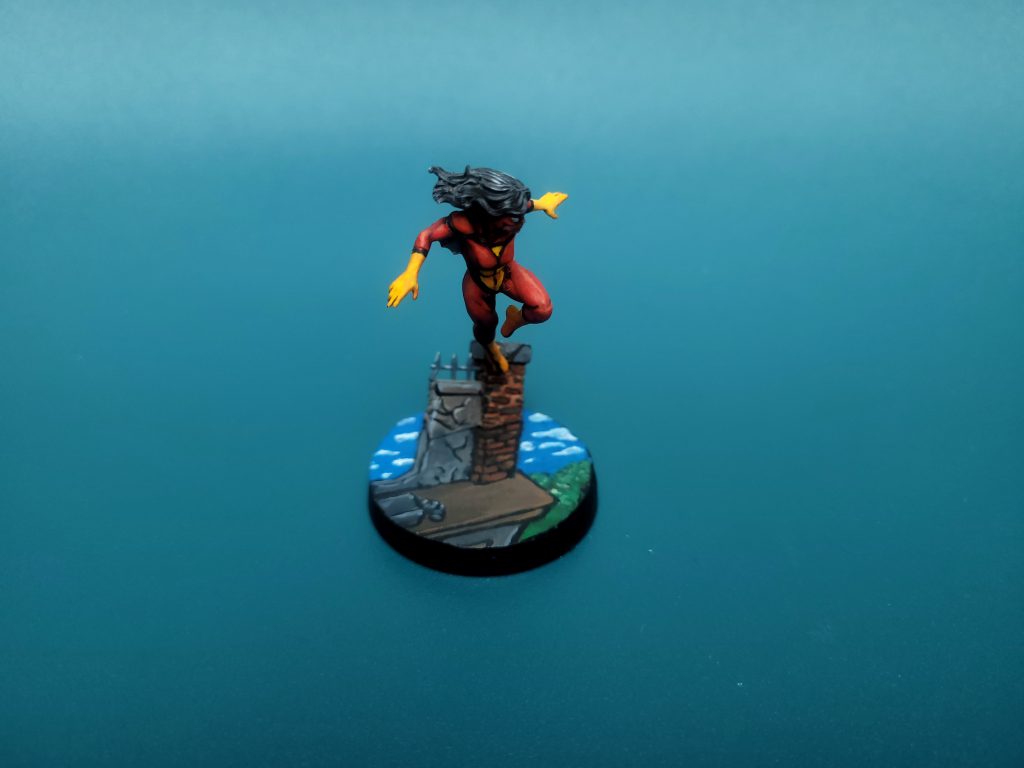 Spider-Woman for Marvel Crisis Protocol. Credit - Alfred_Pharius
Some models are sculpted in such a way that just having them on a city street makes no sense so for me I had to make some changes.
Spider-Woman's model is clearly supposed to be leaping on a rooftop and I wanted to make this the case. To do this I first had to make a blank slate base to work from. I took one of the city bases that was flat (some of them have curbs which would get in the way) and cut out a small circle of card to glue on top. I then took a small sliver of green stuff so that there was no gap between the flat card and the sides of the base. Once the model was glued to this and primed I painted a forced perspective to make it look like she is high in the air. Unfortunately with forced perspective it only really works from one angle but that's fine for my purposes.
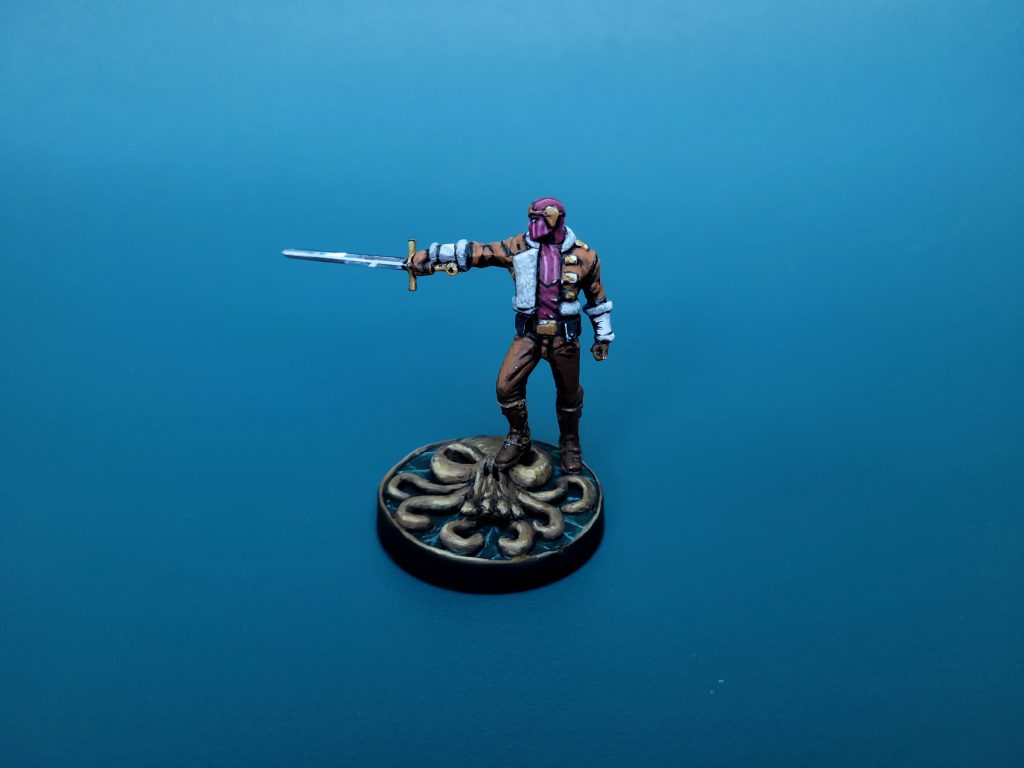
As I add
Baron Zemo to so many of my lists I wanted to make him a more exciting miniature on the table. For this one I started by making a blank slate base just like Spider-Woman but sculpted on top of it with green stuff. For this sculpt I started by outlining in pencil what it would look like in two dimensions. I then used sculpting tools to push the green stuff into place so that it sat properly on the outline. This gave me a much easier starting point than If i had done it entirely from scratch. When sculpting (or painting) it is also very helpful to have a reference image in front of you. This way you can keep referring back to it to make sure the final product is headed in the right direction. The Hydra symbol seems a little complicated but once you break it down into 2D and then build it up in sections it isn't too bad. Another tip when sculpting or freehanding is to add a grid to the original image and where you are working. You can then use the grid to make sure everything is aligned properly. It is much easier to work in small sections than all at once.
Reposing
Sometimes you want the entire model to change poses. This can be a little more involved as you need to chop and change entire limbs. Once limbs are chopped off they may also need pinning into place as green stuff alone won't be enough to hold things back in place in some cases.
For anyone who hasn't pinned a model before this technique refers to using a small drill to drill a hole into both pieces. Then you use a piece of paperclip or similar short piece of metal to strengthen the joint and give more surface for any superglue to stick onto.
For
Iron Man I wanted him to be flying rather than just on the ground shooting (See image at the top). To do this I had to reposition his legs as his original pose has quite a wide stance. I used a hobby saw to cut the legs off and drilled holes in the stump and leg so that I could pin them back in place. I then filled the gaps carefully using green stuff. To keep everything smooth (and to avoid fingerprint marks) I used sculpting tools throughout. I used a similar process to create the flames from his repulsor jets. The center of each foot was drilled and a small piece of wire added. I then put green stuff around the wires in a twirling pattern to simulate the movement of fire. I left the very bottom of the flames as bare wire as I knew I needed them to be drilled into the base for stability.
Speaking of the base for this one I once again had to create a blank slate of a base in the same way as Spider-Woman above. One this was primed I drilled holes in and added glued in the flames from his feet. Finally I painted a dark blue onto the flat surfaces and used UV resin to create a water effect. I used some heavy white acrylic paint to simulate the crests of the waves created from the force of him flying.
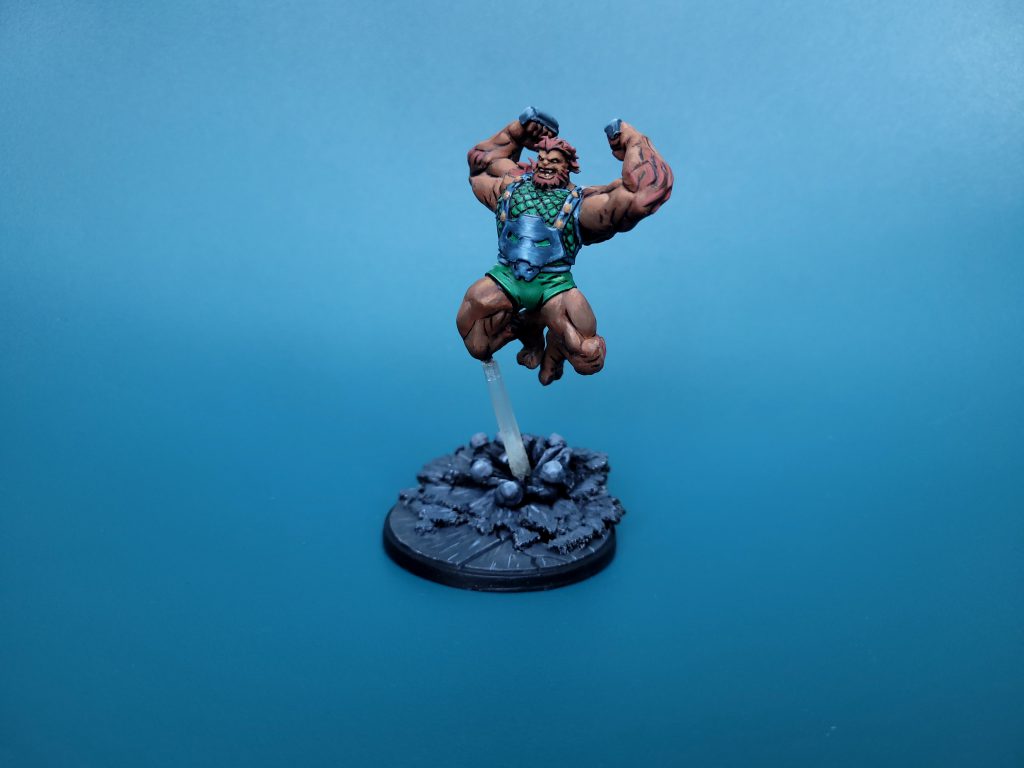 Ulik is ready to Rock and Troll. Credit - Alfred_Pharius
A more complicated repose was done with
Ulik. Once again this model is just stood on the ground when in my mind he should be using his crushing leap to get him around. The legs and arms both needed to be reposed in the same way as Iron Man's legs were above. As his legs are relatively thick this was in some ways easier as there was more room to drill. However this also meant that there was a larger area that needed greenstuff to fill in the gaps and on reflection I didn't do the best job here as his legs look a little off when you look too closely. They can't all be winners I suppose.
Finally I used a spare flying base for him to be in mid air from and once again pinned this both to the base of his knee and to the base of the miniature. I knew that this was a potential point of failure so made sure to reinforce it as much as possible. I added some off cuts of cork to the base to stimulate the ground bursting from the force of his leap. As an extra touch green stuff was used to simulate dust though once again I'm not particularly happy with this effect and might need to revisit this particular conversion one day.
Additional Elements
Certain elements might not be worth sculpting by hand. In these cases you can either look in your bits box to find a part that will fit or sometimes a trip to the dollar store or can bring some great additions to a miniature. For
Captain America I decided the base model wasn't "America" enough for me. I sculpted a flag out or a mix of green stuff and miliput and used a small Eagle toy on top to make it extra patriotic. The scale is probably a little off but maybe this is a gamma mutated eagle, there are far weirder creatures in the comics to be worried about scale after all.
I don't have the sculpting chops to sculpt an Eagle from scratch so using an existing toy made my life easier and looks better than what I could do anyway.
Changing to a Different Character
When you really aren't happy with the original model one of the most extreme conversions you can do is to try and turn it into another model completely.
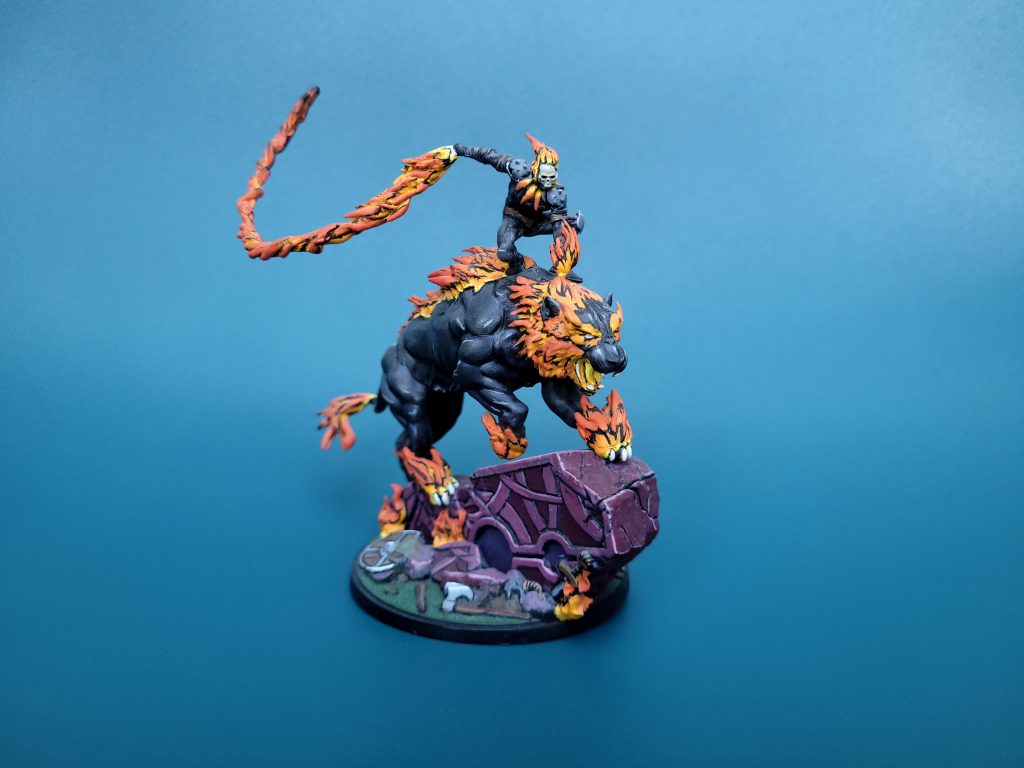 Ghost Panther a Malekith Conversion Credit - Alfred_Pharius
The
Malekith storyline was past my time as a comic reader and I was never a huge fan of the Asgard stories in Marvel. When they announced Malekith as a giant 7 threat I wasn't sure how I felt about a flying bat tiger so decided to go a different route.
There is an alternate version of
Black Panther where he becomes the Ghost rider. When I saw the image of what this Ghost Panther looked like I knew that I wanted him to be my Malekith.
To make this conversion used up a lot of green stuff and some wire. I replaced his head with a skull from a GW skulls box. All of the flames on the model were sculpted with green stuff. A tip for sculpting flames is to start with a teardrop shape and twist and pull it out. Once you have multiple of these shapes you can combine them to give a respectable approximation of fire. I used this method for the majority of the model.
For his flame whip I kept the sword in his hand and used it as a base. I glued some wire to the sword and then worked green stuff flames around it. Finally where the wings were I filled the gaps with green stuff and smoothed it back to hide where the wings would have been.
A Little Something Extra
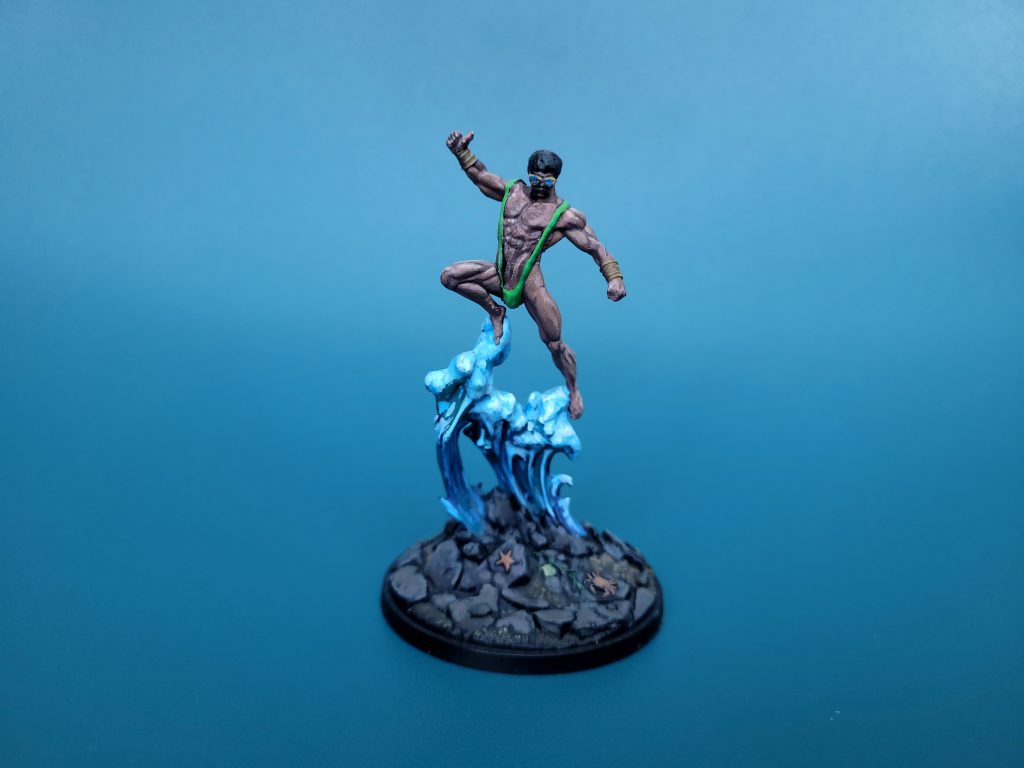 Borat joins the table. Very Niiiice. Credit Alfred_Pharius
It's a-me Namorat...
As soon as I saw the
Namor sculpt I decided he needed to be Borat in a mankini. The difficulty with this conversion was that there was a texture to the underpants he wears so I had to file all of that back to get a smooth bum. I sculpted the mankini from greenstuff and gave him an afro, moustache and sunglasses. finally I cut off his trident and gave him a classic Borat thumbs up. Sculpting the thumb was particularly fiddly and took multiple attempts to look right.
And there we have it several options to make your monopose miniatures more interesting. Hopefully anyone who has read this far has picked up on some tips and tricks on sculpting and converting. If you have any questions I'd love to hear from you on Discord or instagram @alfred_pharius.
Have any questions or feedback? Drop us a note in the comments below or email us at contact@goonhammer.com. Want articles like this linked in your inbox every Monday morning? Sign up for our newsletter. And don't forget that you can support us on Patreon for backer rewards like early video content, Administratum access, an ad-free experience on our website, and subscriber-only content covering competitive Warhammer 40K!Thank you for being a friend.


 Goonhammer App and Patron Updates: April, 2026
 Kill Team Tournament Report: Engage, Party, Repeat's March Madness 2026
 Goonhammer Reviews: Tribal Conquest