I had the chance to attend another Infinity tournament, my first in-person games since the recent slew of Mission, core rules and army updates (I had played quite a lot on Tabletop Simulator). So naturally I thought it would be a good time to roll out the revitalised Military Orders Sectorial, and expected to see some other new armies there. The event was the St Albans Smackdown, a long-running, very well organised tournament which was once my local and therefore sort of my home ground. This time ended up smaller than most due to an unusual number of last-minute drop-outs, from 22 down to 14 players. But there were guaranteed to be a good handful of experienced competitive types there. You can see the event on the new Corvusphere site/app here - warning, spoilers for how I did.
My Lists
New stuff is always alluring, and I had just finished painting a few models in the days leading up to the event. So I had a couple of priorities outside of actual mission analysis: to use some of the cool new profiles, and to use some selection of Dart, the dismounted Montesa, and some variety of Crux Knight or Knights of Justice. So a lot of fortunate overlap there.
Looking at the missions, B-Pong is a fairly standard second-turn-favoured scoring mission where you need specialists to go into the midfield, and potentially defend themselves. It has 16” deployment zones and a 4” exclusion zone, so there’s not much benefit for Forward Deployment or Infiltration. Crossing Lines doesn’t give any benefit for those deployment rules at all, and is also second-turn-favoured on scoring, but the special rule that allows forward-deployment of up to 75pts of any models makes it a potentially very aggressive mission, where you should plan potential alpha strikes, and be prepared for your opponent to do the same. I saw these missions as a natural pairing. Provisioning, by contrast, has very strong scope for Infiltrating/Forward Deploying specialists, and there is more of a call for mobility. So I determined to write the second list with that in mind, and differentiate the lists to allow some choice for worrying match-ups.
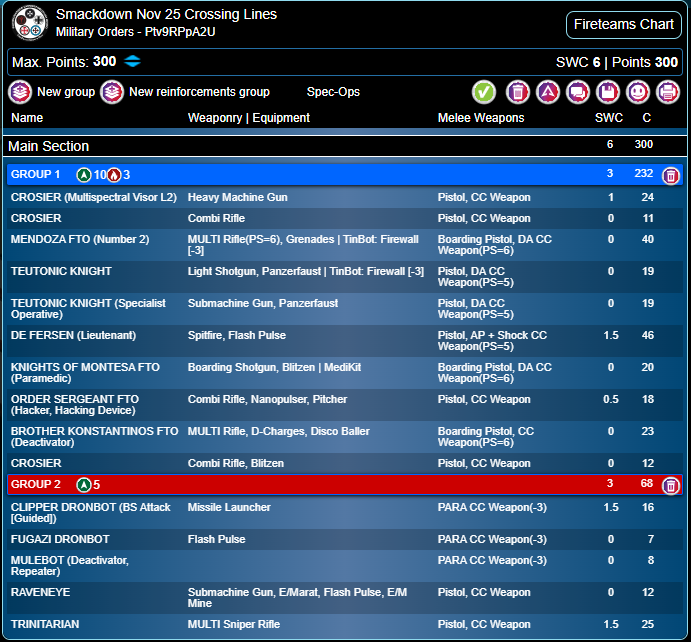
List 1: Crossing Lines & B-Pong
Looking at new rules and synergies, I definitely wanted to try De Fersen since he’s now such an all-round excellent hacker, and I have a strong belief that if playing him, you need at least one pitcher elsewhere in the list to bring his skills to bear, and in that case, you might as well play a missile bot. Not very knightly, but I thought that pitcher and missile play might be very useful in providing the capability to strike deep into the enemy deployment zone - something I don’t think MO is too efficient at normally. I also considered an Order Sergeant pitcher, made reliable by teaming with a Crosier, a good option for first turn attacks in Crossing Lines. My other, more direct idea for that mission was to use Mendoza (as his new FTO profile) to simply smash into the enemy, and I made sure to have options to team him with cheap LI to gain +1SD, while staying under the 75pt budget. Those two expensive characters, and wanting the flexibility of several potential team configurations, led me to fill my main group entirely with units that could build the central MO Fireteam - Teutons (the specialist profile seemed ideal as a button-pusher in both Missions), Crosiers, including the new MSV2 HMG, which I am a huge fan of, and Konstantinos, because Sensor and Discoballer are two capabilities I really want to have and to learn to make better use of. The dismounted Montesa doesn’t contribute to Fireteam bonuses but he can Wildcard in anywhere, and besides being freshly painted, it is simply a beastly efficient profile. At one point the list had 3 Teutons before I realised a tiny points tweak could upgrade one of them into that Montesa, and why wouldn’t I?
Due to points constraints, this meant my second Combat Group was cheap bots, which I wanted for Orders and Baggage, the missile bot, so I could fire missiles after potentially exhausting my main group pitching and hacking, and a Raveneye so I could run and claim a console without impinging on my main pool, which would be running offense. Finally I threw in a Trinitarian sniper, figuring it might be a useful way to ambush console or beacon claimers in B-Pong, or hold back an opening rush in Crossing Lines. If possible I would also like to reveal it when an opponent provoked the Montesa’s ARO, for a sort of Reactive fork.
The models used for my first list.
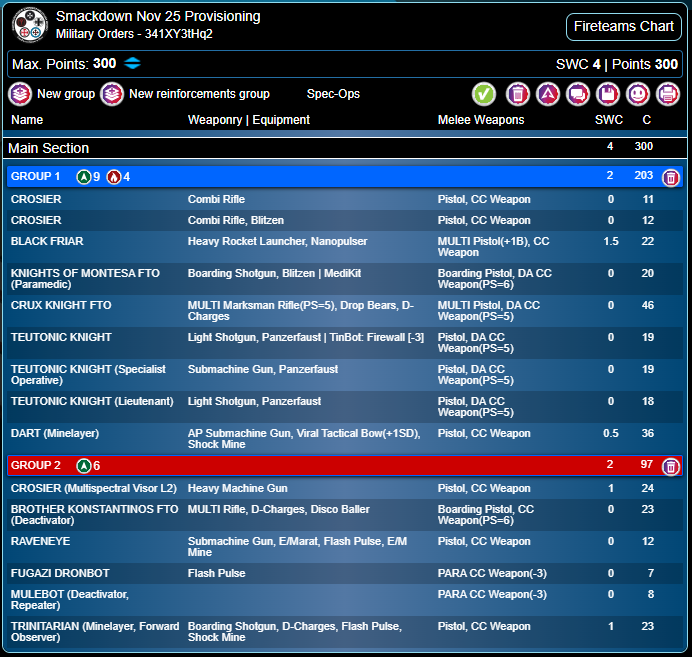
List 2: Provisioning
Since this was my alternative list, and considering the need to access widely separated objectives efficiently, I was resolved to take my new Dart, and I wanted at least one Trinitarian specialist as well. Specialists and minelayers for the objectives, neatly packaged! Although I heavily considered De Fersen again - the chance of getting bullied by strong hacking is an issue with MO - I wanted to use the Crux Knight instead. The bulk of the models - cheap Orders and utility pieces that could join MO Fireteams - were the same as the other list, but arranged a bit differently. I went with a 9/6 split, and put a dedicated Duo of the Crosier HMG and Konstantinos in the smaller group, to remind myself to use Discoballers! I also added a Black Friar, to have some firepower over 32” in my main group. Overall I felt this list had a strong game-plan for Provisioning, where I feel the optimum strategy is to get the boxes from their starting places into your Safe Zone as efficiently as possible, and defend them there. But I also thought it was very different from the first list, so I could choose it in match-ups where Albedo looked potentially useful, and shelve it if I thought hacking would be a critical factor.
Round 1: B-Pong
Pre-Game and Deployment
For the first game I would face the White Banner Army, played by a chap I didn't know. I won the Lt roll and chose deployment, so my opponent decided to go first, despite being fully aware of the risks in this mission. A lucky outcome for me, it is far more comfortable playing second in B-Pong.
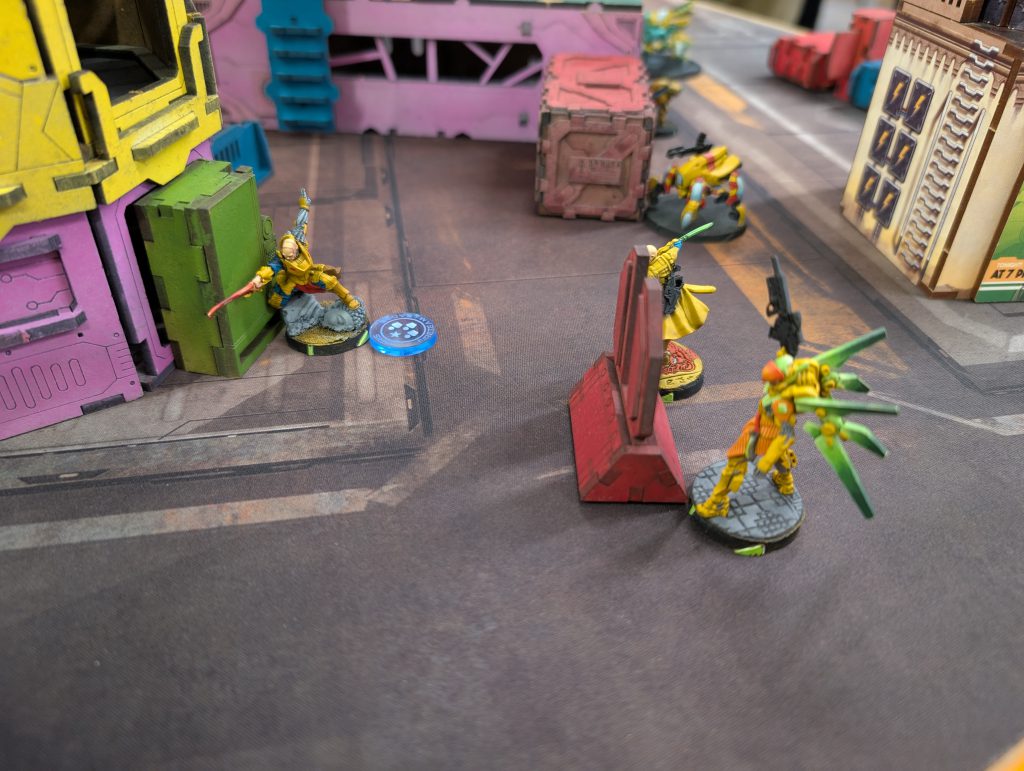
An unusual White Banner list, with no Long Ya remotes or Dokkaebi hackers - indeed no hacking at all. He had an aggressive 3-model team of Liang Kai, a Shaolin monk and Lei Gong, on his far left flank. Deployed his Gudans quite aggressively, out of cover in front of his force, along with a couple of Mimetism-3 camouflage tokens, which would turn out to be a Daofei spitfire and a Beasthunter. A Total Reaction remote, an EVO remote, a flash pulse, and a doctor were tucked away in supporting roles, and he had an MSV2 Rui Shi ready on his right - something I had to be careful of for Mendoza and my Trinitarian, and I regretted the lack of Albedo in this list.
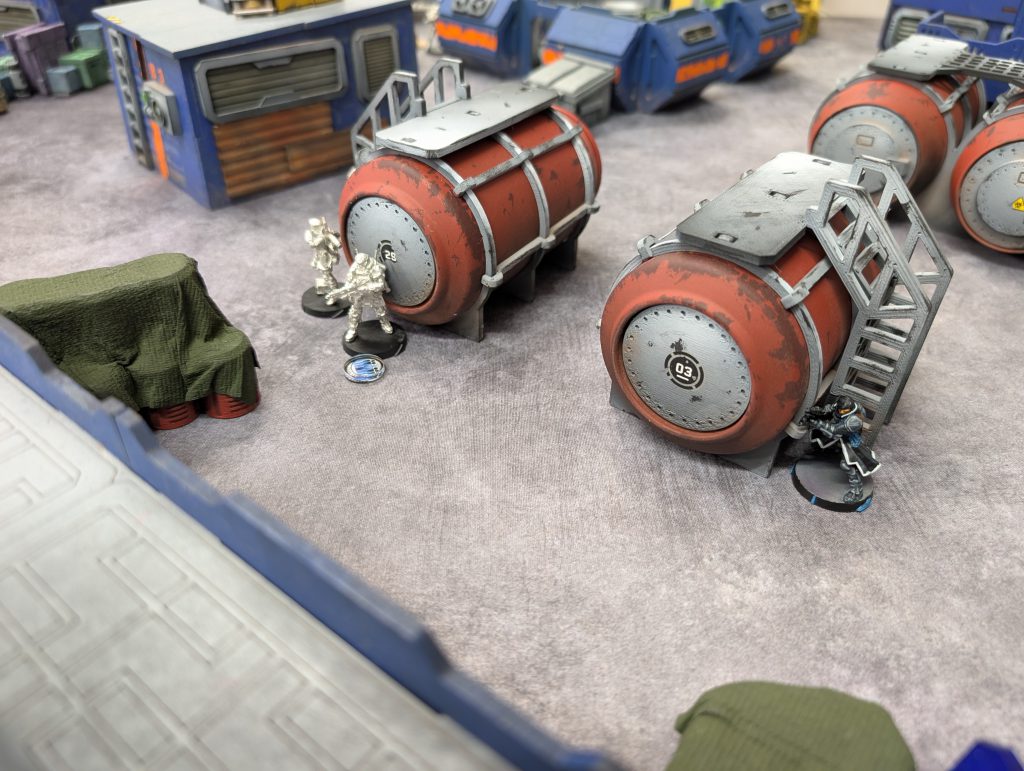
Lei Gong & Liang Kai waiting on their starting line - total reaction and EVO remotes are visible behind them.
I deployed my mass of Fireteam-able main combat group a little differently than planned, with Mendoza and both Teutons on my left, a Duo of Konstantinos and a Crosier HMG in the centre (the HMG’s position, safely elevated on a roof, would be very useful) and a Haris of the Montesa paramedic, Order Sergeant hacker and one Crosier on my right. This left one unattached Crosier hanging out in the middle, next to my Mulebot, but that wouldn't be a big problem. I tucked my flash pulse bot away on my right, my missile bot on my left, and the Raveneye quite far forward in the centre right - everything else was sitting further back in my DZ to weather the first turn, but he was using the 16” depth, as was his EM mine! The Trinitarian sniper I Hidden-Deployed quite centrally and nearly on my board edge, atop a building.
My opponent deployed a Haetae with AP HMG centrally, ready to blast down my AROs, and I deployed De Fersen on my far left, joining him up with Mendoza and the Teutons into an expensive, meaty Heavy Infantry (HI) Core. I'd held him back in anticipation of a potential Dokkaebi, but that fear didn't materialise.
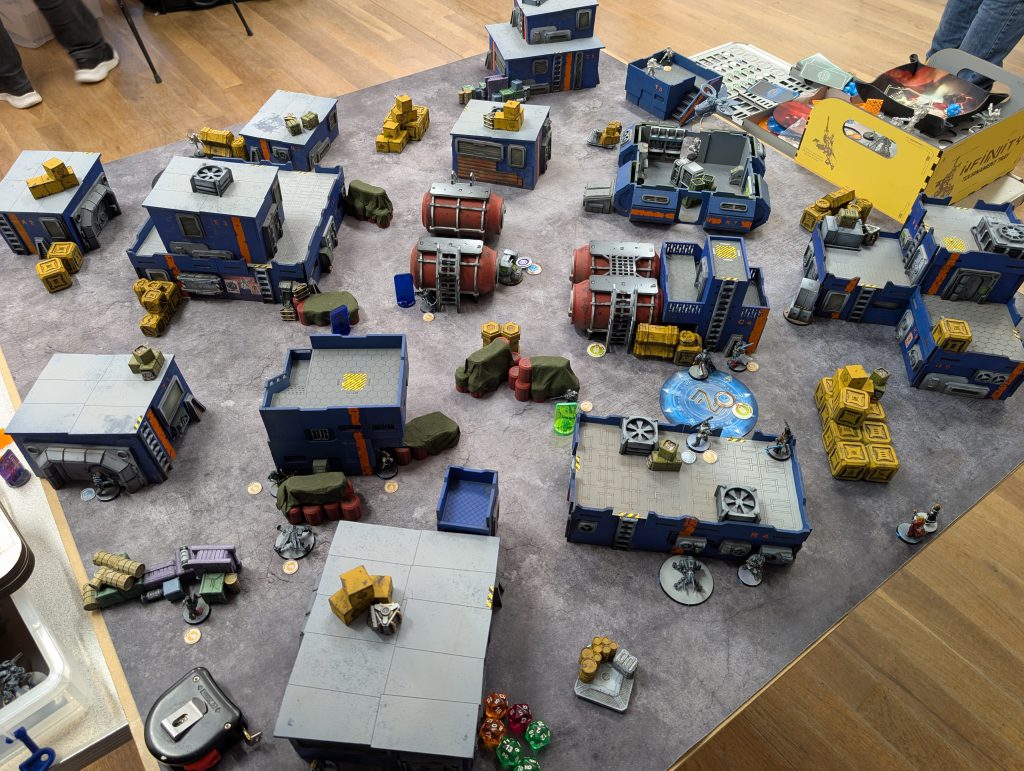
Deployment, seen from my table side.
Round 1
After Impetuous-moving a monk on his right (I had no AROs up there) my opponent tried to crack the Montesa paramedic ARO on my right, to free his Lei Gong/Liang Kai Haris team for an assault. The method was direct, brute force by the Haetae firing down the centre. Honestly this was a big risk for him, because the Face to Face (FtF) roll is dangerously close (4x 14s for him and 3x 13s for me) and the Montesa’s Blitzen is a more decisive hit than an APHMG round. In fact I did win two initial FtF rolls, only for the Haetae to tank 4 survival rolls! This meant the Montesa was down to blasting his shotgun. Fortunately the engagement was just within 24”, and my opponent, perhaps overconfidently, left cover to maneuver where he wanted to end up, so the Montesa successfully wounded the Haetae. Eventually the Montesa was knocked out on the 4th FtF roll. Not a bad effort from this terrific new profile. My opponent moved a Rui Shi up on his left flank, but seeing no way to engage Mendoza without coming into template range, hacking area, and indeed fighting a Teuton shotgun within 8” first, left it in Suppression Fire near the objectives. He then went back to his Haris and pushed them into my table half. I thought carefully but decided to reveal my Trinitarian, because he luckily saw the second part of a Move-Move order and could fire uncontested. I was willing to take this risk despite the Rui Shi being easily able to target the Trinitarian, reasoning that it would waste the Order my opponent spent on putting it on Suppression and cost another Order at least that wasn't going into assaulting my main group. Unfortunately, the Trinitarian connected and Lei Gong tanked his ARM roll - I had not realised he was Immunity (ARM)! The Rui Shi promptly gunned down my Trinitarian on the first attempt. This did exhaust his Order pool; the Rui Shi returned to Suppression Fire and his Haris was left rather swinging in the wind. But on the balance I think I made a mistake, I could have revealed the Trinitarian later just as well. Another lesson in the patience required for Hidden AROs, something I have frequently learned and then forgotten before.
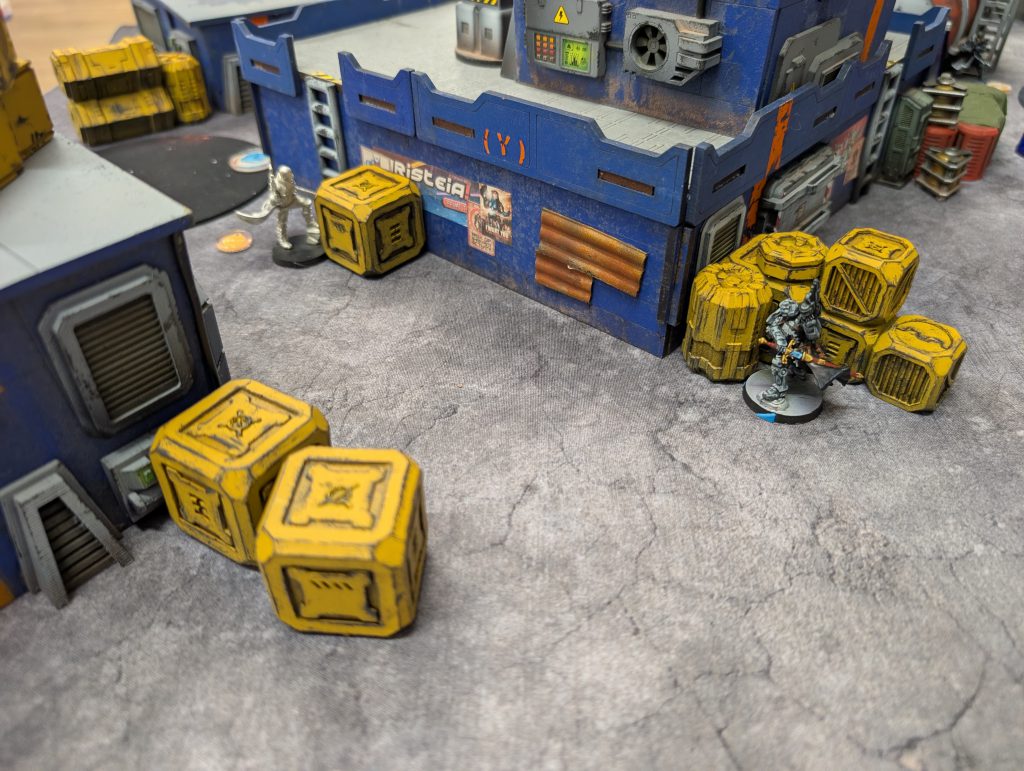
The Montesa paramedic enjoys a well earned nap.
This still left me in a decent position given the strong second turn advantage of the scenario - I had lost 2 models which were largely intended for ARO and saw some strong chances to hit back. My Crosier HMG was in an ideal position, prone on a central roof, but I needed to clear the Rui Shi and Monk from my centre left. I decided to push my main Teutons and characters Fireteam up through the large building on the left, to outflank them and force the Rui Shi out of Suppression with De Fersen’s hacking, while simultaneously clearing the camo marker in that building and securing the left hand console. This immediately ran into an issue as my opponent revealed a Hundun HRL and blasted the Firewall Teuton leading the advance. Now that ARO was both deadlier and luckier than my Trinitarian’s, burning the Teuton to ash on the spot, and breaking my Fireteam. That was another technical mistake as I forgot Mendoza FTO has the Number 2 skill, and should have taken over. While a bit of a setback, this was sort of the mirror of my mistake - the Hundun could have been revealed later, potentially covering multiple knights with the blast template and leaving me fewer Orders to deal with it. Now it was easily swept up by the Crosier HMG thanks to MSV2 and Burst 4+1 Special Dice (B4+1).
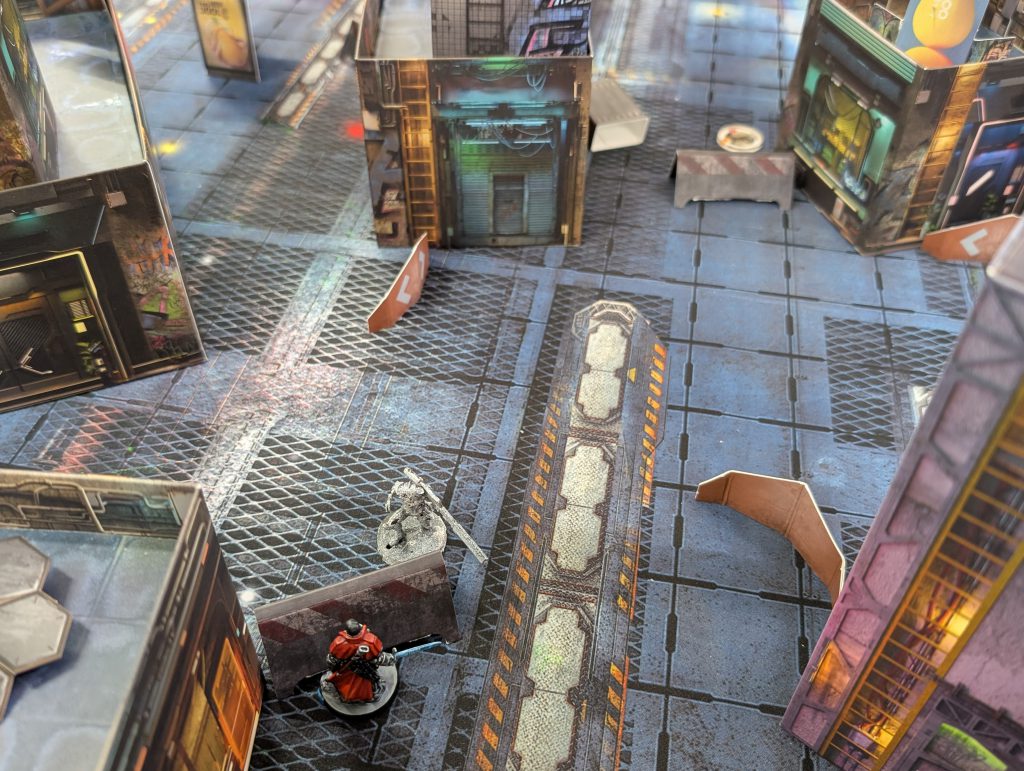
With the team broken up, I took a couple of moves to secure my left flank. I pushed Mendoza up to attack both the Shaolin and Rui Shi with his boarding pistol, counting on armour to weather any return fire. Mendoza was unarmed and burned the Remote to death, but the monk passed his Dodge roll and went into melee. Fine, that was a problem for another turn! The Crosier HMG picked up a flash pulse bot on the left, and then my Raveneye was free to use the second combat group's Orders to go grab the beacon. It was watched by the Haetae, but close enough that the HI was forced to Dodge away by the EMarat template. My opponent revealed both Gudans in succession to try and keep the Raveneye off the beacon, but since they weren't even in partial cover, it was a vain effort. The Raveneye fended off the AROs with its own SMG shots, the Crosier HMG picked up one Gudan and a cheeky long range angle from my Clipper missile bot exploded the other.
The Raveneye secures the beacon for the first round.
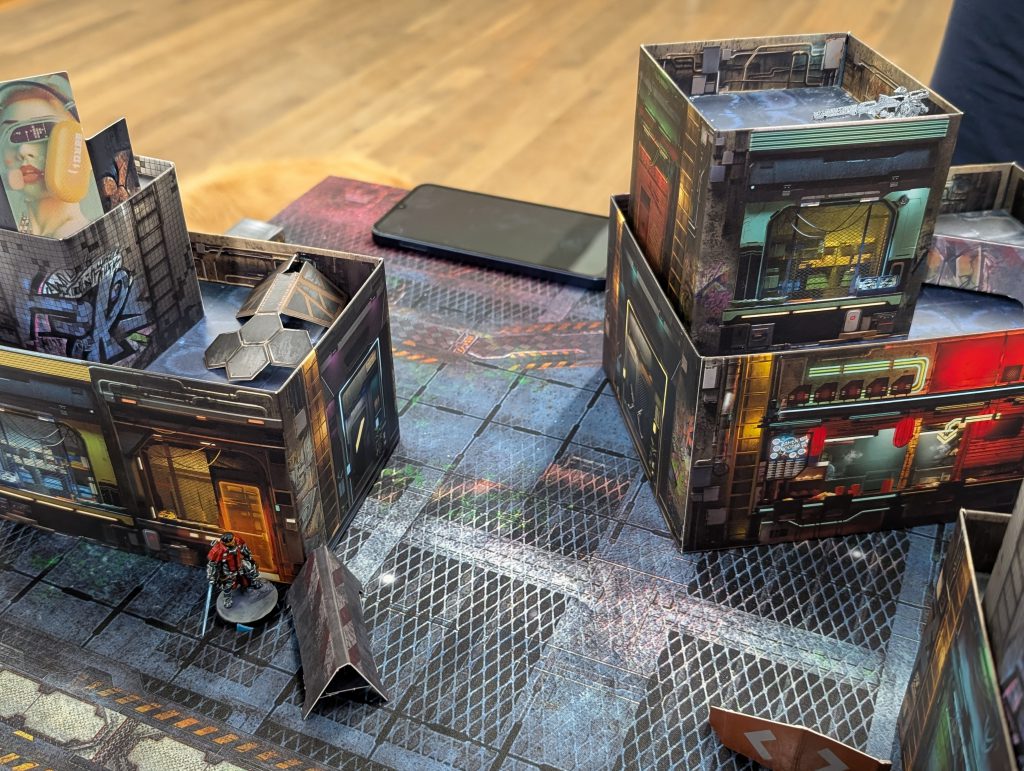
I pushed my surviving Teuton towards the left console. A Beasthunter revealed to try and Dodge into melee to lock it down, but the Teuton won the FtF with its shotgun, knocked the Beasthunter out, and ended on the console. This left me in the best possible scoring position. To cap off the turn, I used my Speedball to revive the Montesa paramedic on my right, and fired off a pitcher to cover Lei Gong & Liang Kai. I didn't see any big assassination threats, so used De Fersen’s Lt Order and managed to Isolate Liang Kai right at the end, so I was relatively confident in my right flank as well.
He's back! The Montesa stands ready to frustrate my opponent further.
Round 2
With my score starting to run up (2-0), my opponent was under pressure, and had taken quite a few casualties as well. He had to make some sort of play for a console and the beacon, and if possible dislodge me from my beacon, if he was to stay in the game. He was able to consolidate into one large combat group and had options. With his Haris broken by Lei Gong’s Isolation, he tried to Impetuous the now-Irregular Shaolin Monk to cover the more important models with smoke, but died to an ARO crit from the Montesa. Liang Kai had to activate to destroy the Repeater, getting Targeted by De Fersen and Isolated by an EM mine in the process. With no more hacking area to worry about, he activated his TR bot (given Marksmanship by the EVO), knocked out my Raveneye on the beacon, and moved across to Speedball Switch On Lei Gong. This seemed a bit of a desperate move at the time - he tried to attack the Montesa, but although wounded, it's a Mimetism-3 model so the TR bot still struggled to put damage through. Prioritising Lei Gong, my opponent moved out of cover and delivered the Speedball, accepting an ARO from the Montesa, but tanking the armour roll. This was a bold decision that really paid off. Lei Gong was able to brick my Montesa with his EMitter, jump to the console and successfully nudge the beacon away from the Raveneye and into my table half - a very nice, efficient play. Finally he brought his Daofei spitfire from the centre over to my left flank, attacking the Teuton holding the console, but only managing to wound it.
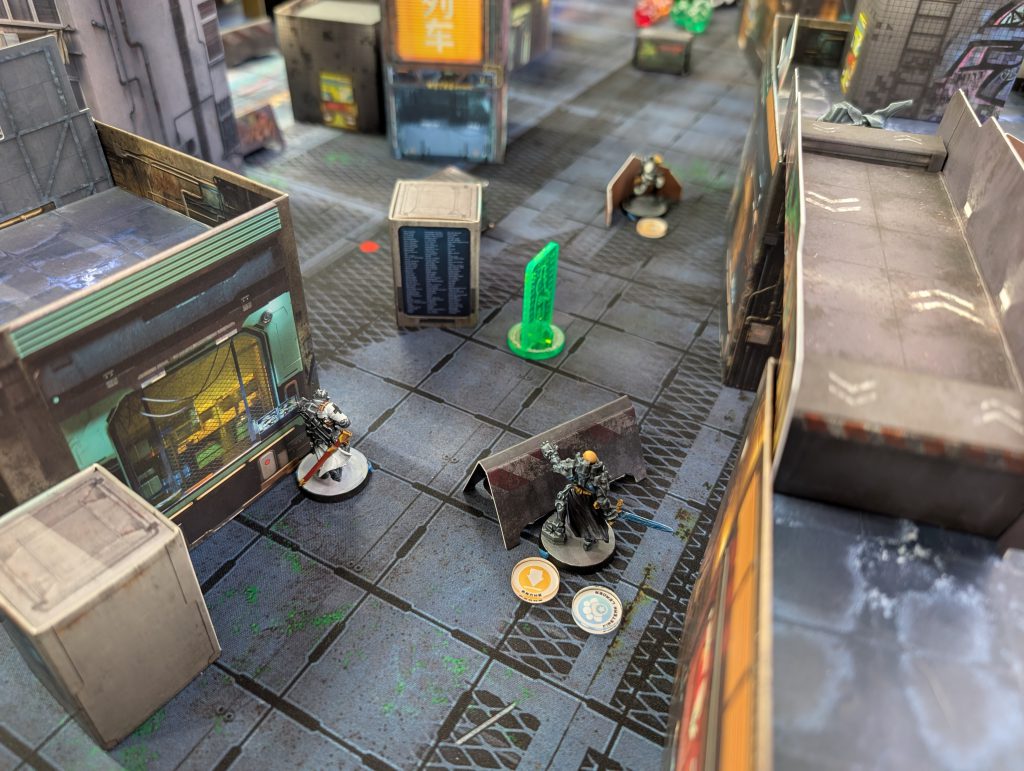
Lei Gong secures a console for my opponent. As an Immunity (ARM) model, he is very inefficient to missile, and I didn't have any other suitable tools in position to take him out thanks to his Albedo.
In my second turn, I started still holding one console on my left, and thought I had some options to control the beacon, so I expected to further my lead in Objective Points (OP). But more broadly, I needed to try and clear some enemies to ensure Round 3 would go equally well. Here I think I made some silly decisions. First, I used the now-frenzied Mendoza’s Impetuous Order to fight the Shaolin Monk. It was the cheap, Shock CCW variant, so I reasoned that I wasn't too likely to die outright, and a lucky success (Mendoza has Martial Arts Level 2 to the Monk's MA3) would really free me up. I took a wound on him for my hubris, and in retrospect, this really closed off the other option I saw to free Mendoza up, which was shooting into combat with Konstantinos, and relying on the advantage in ARM and VITA so that the Monk would probably be the one to go down. Second, I spent perhaps 3 Orders trying to finish Liang Kai with the Crosier HMG, then with an Order Sergeant/Crosier two-model team. My general principle is that Liang Kai is a priority target, a piece you kill when it's exposed, lest it run through your whole force. But I was making a double blunder: I'd forgotten he was Targeted (I remembered after those wasted Orders, and promptly blew him up with a missile) and that he was Isolated. So really I didn't need to attack him at all, he couldn't have had too much impact in the one turn left to my opponent.
This was one of the more foolish plays I can remember making in competitive play.
Aside from those significant mistakes, my objective plays were to achieve a Classified Objective, scanning the HVT, with De Fersen, and to send my team-less basic Crosier to hold the beacon. She did so - the route happened to be uncontested by any AROs - and went into suppression. My only other aggressive moves were to try and finish off the Haetae with my Crosier HMG, but its armour was too strong and it successfully passed its religious troop roll to Guts prone. I don't think my overall line of play was too bad here, I did rack up a score, but with hindsight I don't think I really gripped the game during this turn. If I'd not wasted several Orders on Liang Kai, I think I could have used De Fersen far more aggressively, to assault the Daofei on the left, taking it out with some combination of hacking and Burst firepower, and maybe neutralising or locking down the Haetae as well.
Round 2 ended with both of us controlling one console, and my humble Crosier controlling the beacon, but in my table half. I also had one Classified already achieved and was in position to Secure the HVT. So officially the score stood at 5-1 in my favour, but we both had points up for grabs in the final round.
A Teutonic Knight holds the other console, all too aware that the Daofei (visible behind the Unconscious remote) is ready to come and finish him off...
Round 3
Firstly, the Shaolin Monk did use his Impetuous Order to fight Mendoza, but no damage resulted. He didn't try again, preferring to convert his Irregular Order for more important things. My opponent played his Daofei nicely, moving out on allmy far left flank and finishing off the Teuton holding my left console, before picking the Crosier off the beacon. Without too many Order left, he had a choice of whether to attack De Fersen, or move to the beacon himself. He sensibly decided on the latter - not only was it a matter of directly scoring OP, but he couldn't have engaged De Fersen outside of 8”, so would have been inside his spitfire’s ideal range, and facing a dangerous hacking ARO. My opponent secured the beacon, but did end up giving Mendoza a dodge which allowed him to finally break contact with the Shaolin Monk. Finally, the Haetae stood up to offer another ARO against my best assets to push towards the beacon.
I rather felt, starting my Turn 3, that it was my game and I could win big. Spoiler, I then came very close to throwing it all away. To recap, the score was 5-1 at the start of the Round, and if I hadn't moved a muscle in this turn, it would have been a 6-5 win (I would add 1 for Securing the HVT, my opponent would add 4 for controlling the beacon and a console, and having the beacon in my table half). I felt I had a decent line of play to neutralise the Daofei with hacking, kill it, claim the beacon myslef, and have De Fersen simultaneously control the left console and the enemy HVT. The opening moves were fine. I used Mendoza’s Impetuous Order to contact the Monk, and simply let him fight me, burning him to death with the boarding pistol template. A bit humiliating for the church militant, but I needed to clear the way to the beacon, even at a cost. Mendoza did go down in this exchange. Then I jumped my Mulebot, landing out of sight, but in Zone of Control (ZoC) of the Daofei, so he was in De Fersen’s hacking area. All set.
This is when I mucked it up. I thought the quickest, and certainly simplest, way to remove the Haetae’s ARO was to burst it with my Crosier HMG (remember it was wounded already), but it crit its ARO and the Crosier died. Ok. I had to spend another Order without forward movement, but Konstantinos managed to Discoballer and block the Haetae out - I really should have seen that and done it first. I moved De Fersen towards his goal, and successfully Carbonated the Daofei. But then I had to Move-Move Konstantinos towards the beacon, before getting him into a firing position. He doesn't have Stealth and this was in the Daofei’s ZoC - it successfully Reset. This was a stupid, avoidable error in the order of operations. I could easily have moved into position first and used De Fersen after - the Daofei couldn't Dodge out of his hacking area without abandoning the beacon.
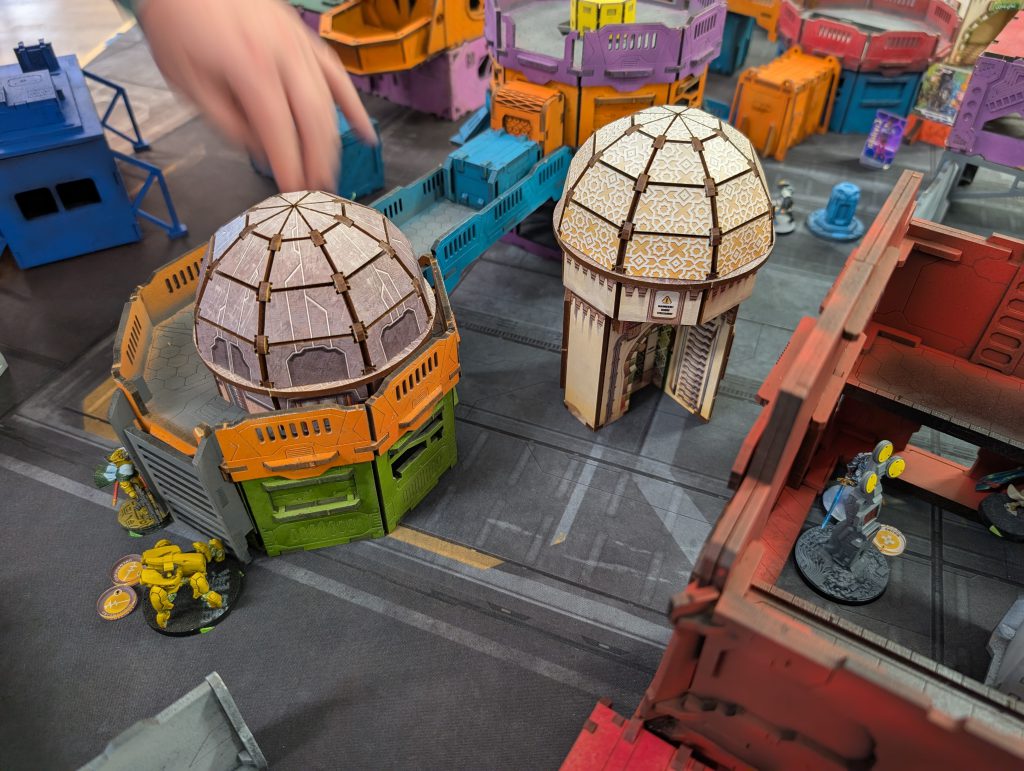
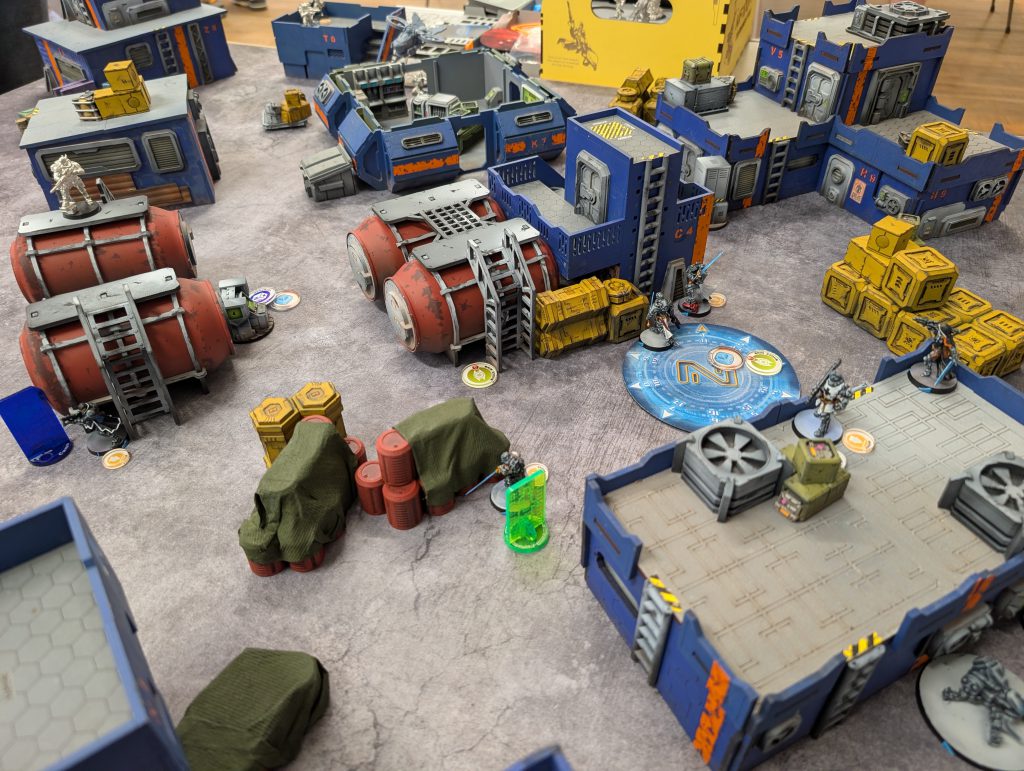
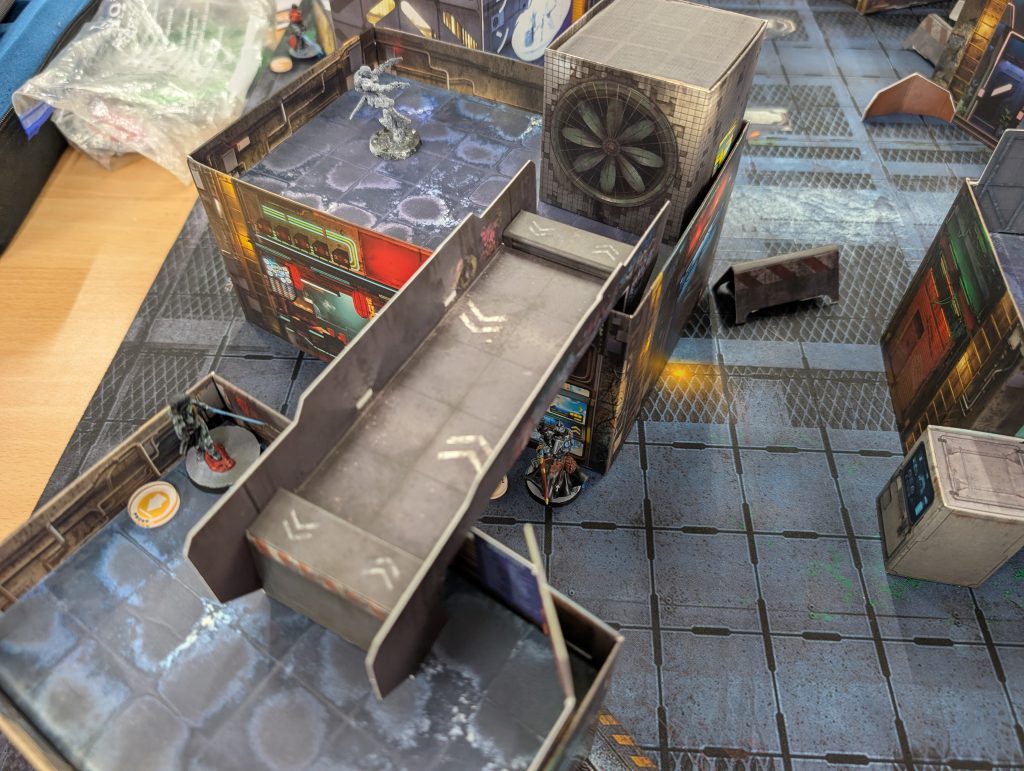
The position of AROs around the objectives. The Haetae (bottom centre) is blocked by a discoballer directly ahead (you can just see the purple token behind the central domed building) but can see into the large red hangar building, where De Fersen and the console were.
Rapidly running out of Orders, I decided to move De Fersen into his final position, and have a blast at the Daofei while doing so. I reasoned that he was barely on worse numbers than Konstantinos, with more Burst and less chance of dying to an unlucky ARO. But now my opponent informed me the Haetae could also see De Fersen. I was too hurried or careless to consider asking to roll back and see if I could move more carefully to avoid one of the AROs. I simply split my burst. The Haetae crit again and dropped De Fersen on the spot. Adding pointless insult to a very real injury, the Daofei also straight won its FtF roll and De Fersen died. I was very much rattled, and starting to calculate if I’d suddenly lost the game. I hadn't necessarily needed to win the FtF rolls, but if De Fersen had just survived I'd have scored 2OP more. Reading the mission sheet again, I realised that we would draw 5-5 if I didn't contest the beacon. Konstantinos went in blasting, wounded the Daofei and advanced so both were on the beacon. I had one Order left and experienced a small crisis of conscience. I could skip spending the Order and win 5-4. If I activated Konstantinos and killed the Daofei it would be 6-4. But if I was crit in ARO again, I could be looking at that 5-5 draw. The technically correct competitive play was probably to leave it, but in my mind, you can't bring Military Orders onto the table and decline an honourable challenge. I (well, Konstantinos) blazed away madly, but the Daofei passed its survival rolls.
Konstantinos attempts to secure the beacon, but the Daofei refuses to go down.
Summary
So it was a 5-4 victory in the end - as close as it gets! My overwhelming feeling at the end of this round was relief that I’d managed to cling on in the face of what I initially saw as bad luck in the last turn. But writing this recap, I can see where I made mistakes that squandered a lot of the second-turn advantage inherent to the mission - which, again, I was lucky to have in the first place. I revealed my Hidden Deployment too early, I wasted Orders on Liang Kai, I didn't extricate Mendoza from close combat the right way, my second turn was overall a bit weak, and I messed up sequencing and risk management in my third turn. Overall, I should be grateful to have come out with a win at all!
Round 2: Provisioning
Pre-Game and Deployment
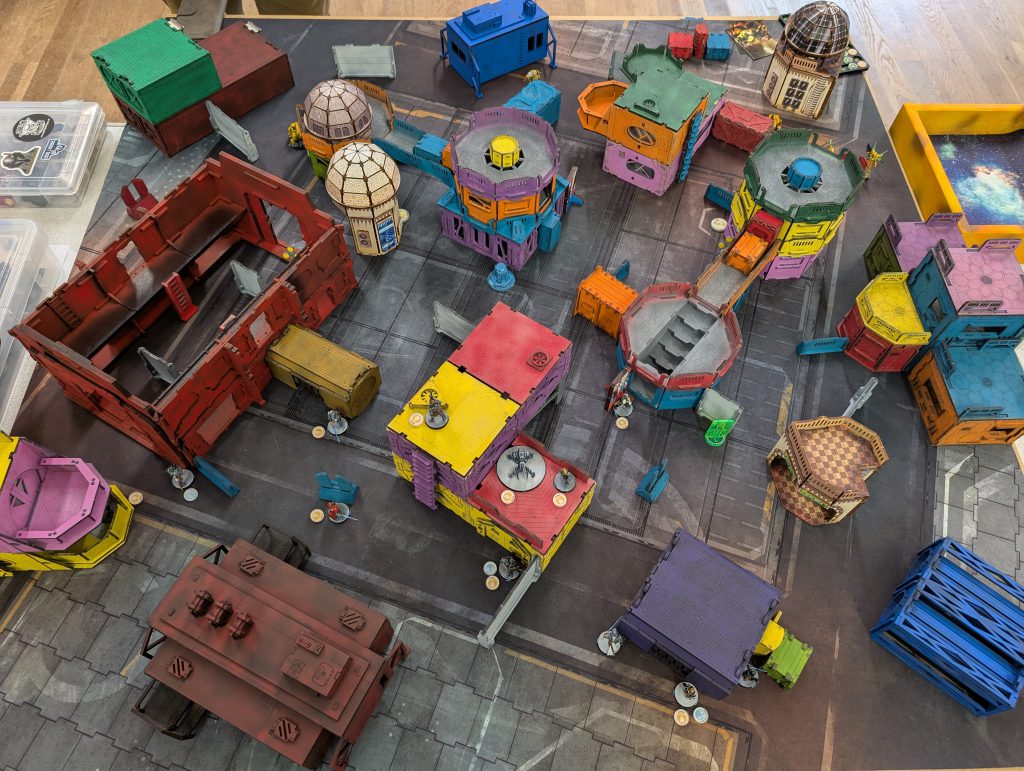
This was against Kestrel, played by a guy I have faced before. He has some experience but is returning to the game after a long time away, so can be rusty on some of the finer points of the rules. I was honestly quite happy with the faction match-up, because the list I intended for Provisioning has some Albedo, while its lack of hacking might not be as big a weakness against a faction whose plan A is famously ‘shoot everything'. Additionally, I was lucky enough to win the roll and choose deployment again. That may seem counterintuitive, I think the first turn is strongly favoured in Provisioning, and Kestrel have strong potential for alpha strikes. But I much preferred the defensive positions available in one corner to the opposite, and I thought that my Fireteams could actually be quite formidable in holding back an opening push. I can't fully justify my choice, there was just something about the terrain layout that made me want to have the advantage of deploying second, over that of playing first.
My opponent chose to put down his Safe Area quite far on his right, behind a building which accessed the objective on that side (which he had protected access to and I couldn’t cover from my DZ). I placed mine just outside my DZ on my centre-right, quite near the objective on my right, and again behind a nice solid building so it couldn’t be controlled with long range fire. The Safe Zones were therefore quite distant from each other, so I thought it might be very challenging to ‘flip’ any supply boxes from one into the other.
My opponent laid down a big Core team including a Griffin with feuerbach, dominating a very long lane over the central objective, and further forward in the centre an elite Haris of a Hetkari with multi red fury, Bipandra and a Firefly hacker. That latter team was a slightly unusual choice, but it would have TacAware and NCO Orders to spend. He had a Duo with Richard Quinn on his right, a Duo of a Magistrate Chain of Command with a Jackal holding his left, and a Yamabushi slightly forward of his centre. His Lt was pretty clearly a Fennec hanging out right in the back, but it was safe from any direct attack and with CoC anyway it didn't look vulnerable.
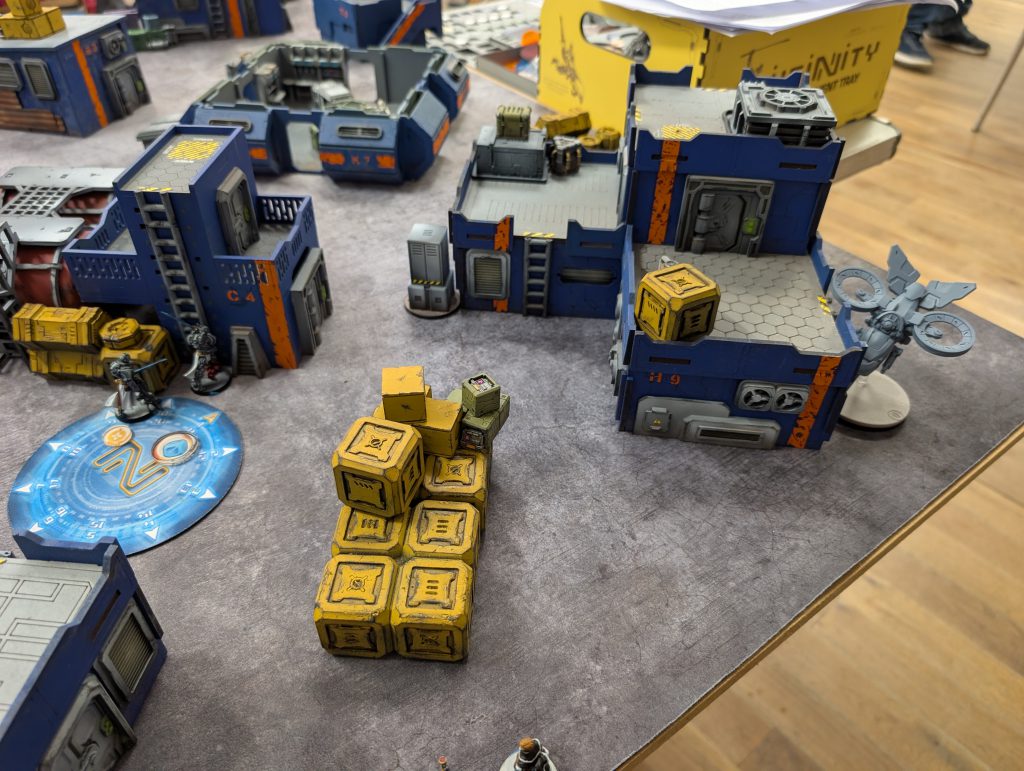
My opponent's deployment. The open-roofed room was played as blocking LoF to infinite height, which would be a huge factor. Note the Griffin feuerbach in the foreground, which was in a Level 5(!) Fireteam and would have been dominant otherwise.
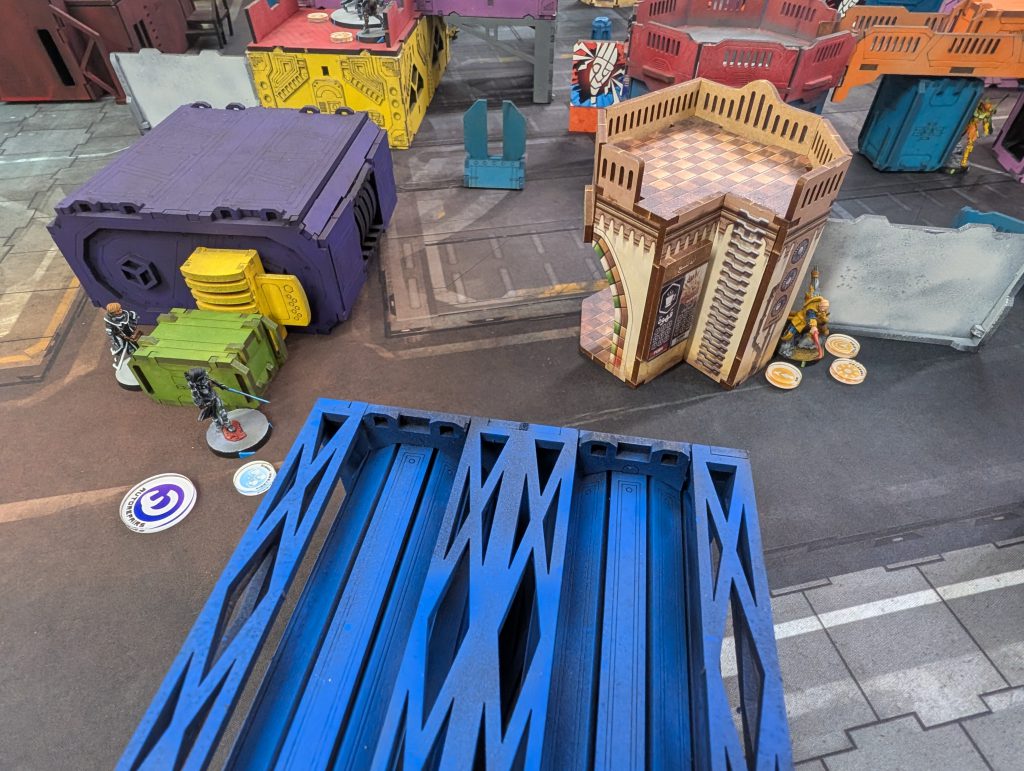
I deployed my large knight team quite aggressively on my right flank, taking advantage of a square objective room building on my opponent’s left that we were playing as infinite height. That meant they couldn’t be engaged from extreme range by the feuerbach Griffin, so I carefully angled panzerfausts and a blitzen to the sides, to oppose any pushes forward, watch the central objective and the one on my right, and trap his Hetkari at its starting position, so it would essentially have to engage outside of 24”. I had my baggage bot ready to reload them, with my Teuton Lt and a plain/decoy Crosier watching the rear table edges, since my opponent could have a Black AIR with Parachutist (Deployment Zone). Konstantinos and the Crosier HMG were well hidden on my left, ready to either fire across the board, or Discoball the centre objective. The Raveneye protected my centre with his mine, and most importantly, I had the Trinitarian minelayer covering the central objective, ready to sneak in, and Dart as my only real option for the far left objective, with her mine covering a lane into the centre.
I suspected a Redeye or Tikbalang as his Reserve, so held my Black Friar back. It did turn out to be a Redeye which deployed ready to push my right flank - frankly a relief as it can’t brute force my ARO pieces quite as well - and I accordingly dropped the Black Friar where it could oppose any movement around my right flank or into the middle of the table, well layered with panzerfausts and the Montesa’s blitzen. This did mean I messed up my intended Fireteams a little, and had one big Core (3 Teutons, the Crux and the Friar) with the Montesa paramedic hanging out alone, relying on his native +1SD.
My deployment. A Teuton, the Black Friar and the Crux Knight are all standing atop the building on the right, with the Montesa looking around the corner. These AROs would have to be fought for my opponent to access the centre and right-hand objectives.
Round 1
I did strip 1 order from his main group, deciding that even with Counterintelligence it was best to mitigate my opponent’s reach, since I was most worried about him stealing the boxes to his distant Safe Area. His first recourse was to test my Teuton’s panzerfaust with his Hetkari, and Montesa’s blitzen with his Redeye, but a few Orders led to no damage on either side. This led my opponent to concentrate on grabbing the uncontested objective on his right/my left. A few Orders saw Quinn leave his Duo partner (who would have had to get past a long diagonal ARO from the Black Friar), get to the Objective, back to his Safe Area, and drop the box. Potentially a problem, but I thought Dart could go after it there, it wasn’t well covered by other models.
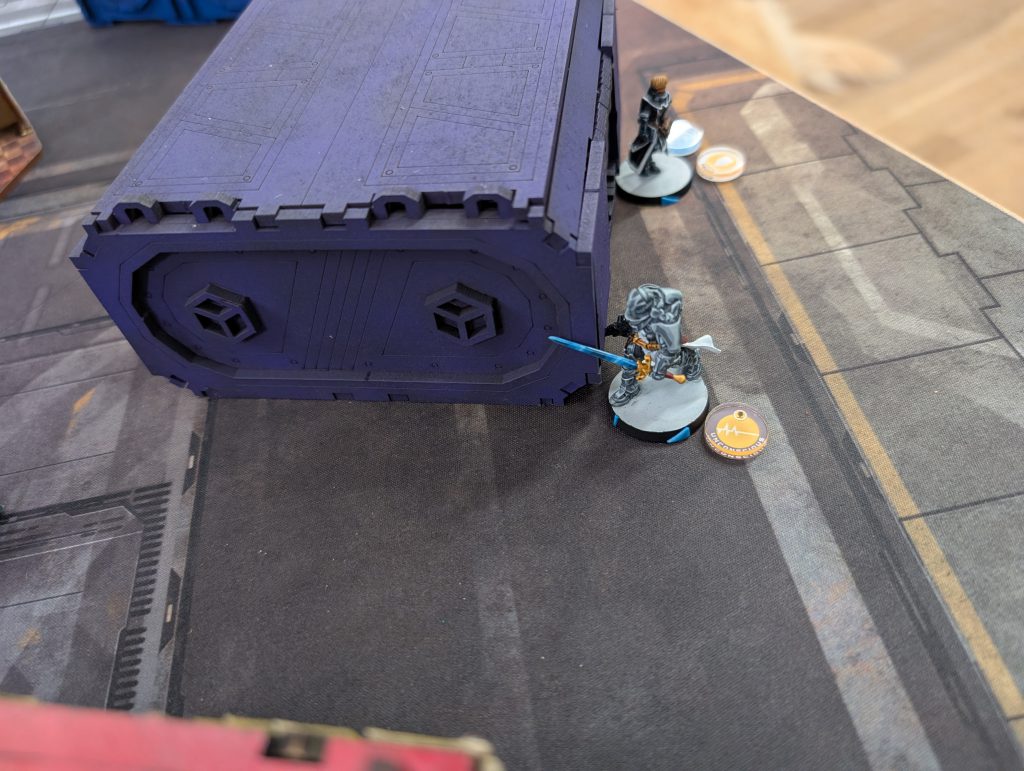
Quinn (proxied by a Sforza model) leaves the box in my opponent's safe area. The other nearby model is his HVT.
The final Orders were spent developing his Hetkari’s Haris forward, which I think was a mistake - possibly my opponent was misled by the urge to use his NCO and TacAware Orders. But it left the Haris well within my reach in the middle of the board, open to attack without fighting the feuerbach ARO. He moved his Yamabushi forward, but stopped short of the centre objective on realising that my camouflage marker next to it could only be a mine.
I felt very relieved to have got through the first turn without any casualties! My first target was definitely that Haris team, and I saw a golden opportunity, revealing my Trinitarian, shifting slightly around terrain, and surprise shotgunning the Firefly hacker. I rolled hilariously poorly, missing with both dice (on 18s!), and the Firefly also tanked a second Order. Frustrating, but in Dodging or Guts Rolling back to partial cover, it had exposed Bipandra, and I shifted my Crosier HMG (which I had not wanted to use against the Albedo(-6) Firefly) further back and deleted her easily. The Trinitarian put one more Order into the Firefly and this time knocked it out.
Trin-time baby! Despite a perfect opportunity, the Trinitarian takes a few attempts to down the Firefly.
So far so good; I now went to my larger Group. I had used the Montesa’s Impetuous Order to move forward unopposed, so I was very simply able to get him to the undefended objective on my right, grab the box, and deposit it back in my Safe Area. I then decided that the central objective was still too strongly held, and pushing it with my heavy Fireteam would potentially leave them over-exposed. So I went for the left hand objective and the enemy Safe Area with Dart - I thought she could easily gank Quinn one-on-one, and possibly grab the Supply Box from his Safe Area, or certainly stage to do so in the endgame. Well, she got crit and died outright. Oh well.
Dart (my proxy is an old converted Acmon model) suffers an embarrassing defeat. The curse of the newly-painted.
Left with a few unused Orders, I managed to avoid the temptation to tilt and charge forward into overexposure. I shifted my big Fireteam slightly forward into and around my Safe Area, throwing down a couple of drop bears with the Crux Knight and re-positioning my AROs. My final Order was for the Trinitarian to deploy a mine to deter the Hetkari from coming after him.
The position at the end of Round 1. Note the concentration of Heavy Infantry around my safe area.
Round 2
My opponent made further attempts to break my back with the Hetkari and Redeye. I’d probably been too bold with my Black Friar; it was the first target the Hetkari could attack, and it was just within 24”, so the Hetkari was firing on 4x 11s against 1+1SD back on 13s. A very risky FtF roll, but the Black Friar is only 1VITA and got dropped on the first Order.
The Hetkari takes out the Black Friar. It was actually firing from the ladder, beneath its physical location here, to avoid other AROs.
However the Redeye was less successful in pushing my right flank. It snuck around to my far right, avoiding fighting the Montesa or Crux Knight directly, which my opponent had learned was too unlikely to get damage through their ARM and VITA. It had one shot at the Crux from behind his Line of Fire (another mistake by me, I should have remembered I had a hyper-mobile threat and been more careful of his facing) but I was very fortunate and the Crux tanked 3 ARM rolls and passed its religious check to Guts Roll into Partial Cover, and that allowed the Teutons and Montesa to declare Alert and swivel their facing as well. The Redeye was now pinned down, but this led to a very dangerous situation for me. With no more aggressive options, my opponent fell back on its new grenade launcher with Continuous Damage, and spent 4 Orders shelling my Crux Knight and Montesa, on 8s. This was a nerve-wracking experience, especially since he hit 3 of 4 times. Somehow, I either made even better Dodges, or tanked the saves, taking just 1 wound on the Montesa. My opponent’s only use for Orders in his other group was to develop his Magistrate and Jackal forward into a building, hoping to dash for the central Objective in Turn 3.
The Redeye hammers indirect fire into my knights, narrowly missing out on inflicting critical damage.
I once again felt very lucky to have come through without major casualties, but I knew that even more than the Objectives, I wanted to deal with that Redeye, or it might sweep down my back line, killing multiple support models and/or my Teuton Lt (I had not advanced him with the rest of the Fireteam) and depriving me of my Turn 3. I tried to use my smaller combat group to do this, Discoballing to block the Griffin & Hetkari so my Crosier HMG could climb atop a building and rain fire down at the Redeye. Unfortunately it dodged away unscathed. But this did allow me to split Konstantinos off to go and kill Quinn, who was still badly exposed, and stage to grab the box from the enemy Safe Area.
Konstantinos takes up the gauntlet and succeeds where Dart failed, killing Quinn.
My main group charged forward, hoping to kill the Redeye, do some other damage, and be in place to secure the centre objective in the endgame. The Crux wounded the Hetkari, but it Guts Rolled out of sight, fortunately to where it was threatened by the Trinitarian’s mine. One Teutonic Knight chased the Redeye around a building with its shotgun, bouncing rounds off it to no effect, but finally the Cruz Knight got a bead on it around the other side of the building and knocked it out with his multi pistol. Finally, my Montesa paramedic killed the Magistrate and I reformed the team to include the Montesa. I was very happy with their position at this point, I felt close enough to directly engage the remaining Kestrel forces and still blast through to the centre Objective in Turn 3.
The Crux knight finally manages to take the Redeye out.
Round 3
My opponent was quite on the back foot; he had only lost about 5 models, but they represented a lot of his mobility and the remaining troops were very much pinned back in his DZ. He didn’t have any vision control left (Quinn was his Discoballer) and would have to fight the Crux and Montesa, and possibly a Teuton or two, to reach the centre Objective or anywhere near my Safe Area. His Jackal tried to trade up, but was cleanly killed by the Montesa in ARO. He aimed to use the Hetkari to clear those AROs, but first had to Dodge and clear a mine; most unfortunately he failed both the Dodge and the ARM roll, and went down. Next he spent several Orders trying to Gizmokit his Redeye with a Tech-bee, but he couldn’t quite get within 16” due to the Crux Knight’s ARO. With the negative range penalty, he missed two or three attempts. Running too short of Orders, he just had to stand up as many models as possible to watch the board and hinder my scoring.
The Hetkari attempts to dodge the Trinitarian's mine and most unfortunately goes down.
In my last turn, I pushed the Crux Knight again, engaging my opponent’s Core Fireteam from the far right flank and taking out a Fennec and then the Griffin. He was a real hero during this game. I was able to get great value out of Konstantinos, who ran round the left flank, picked up the Supply Box from the enemy Safe Area (succeeding on the first attempt) and then fired his last Discoballer into the centre, blocking a few Fennec Fusiliers from seeing the central Objective.
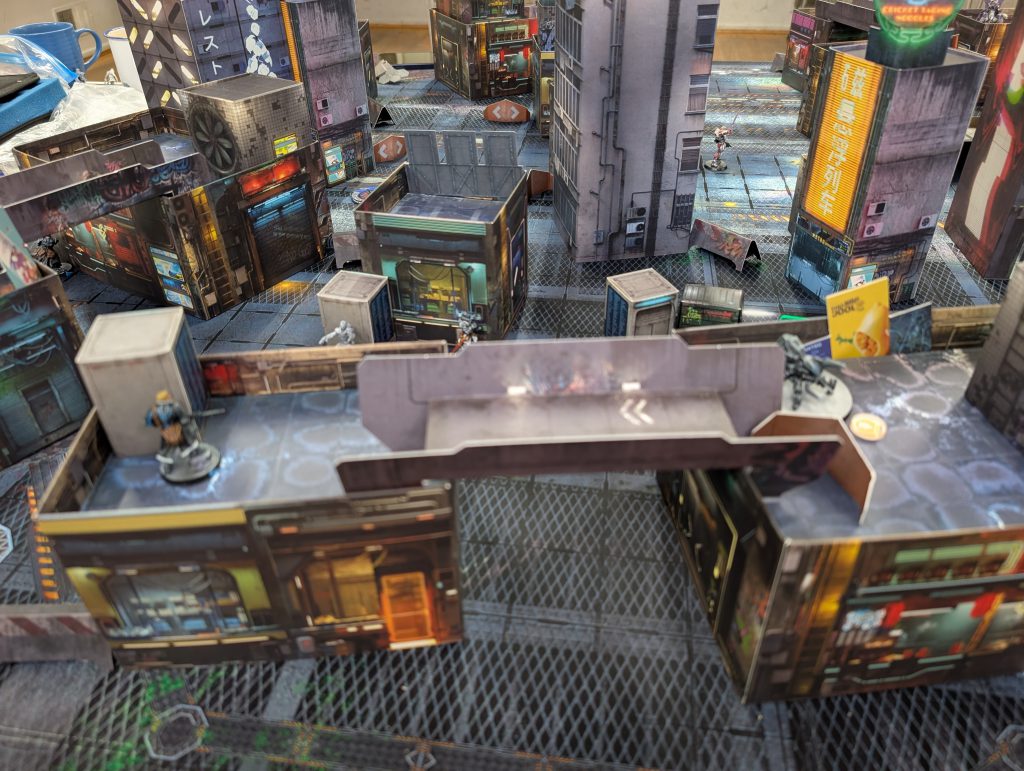
The discoballer token (pictured in the centre here) was crucial, saving me from having to fight through the remaining Kestrel AROs before reaching the central objective.
This let my Core Fireteam run back towards the centre to try and pick up the boxes. My opponent revealed his Yamabushi, but its chain rifle was ineffective against my HI (the Montesa was the only wounded model, and tanked the save) and he then made a mistake by Dodging into combat with the Montesa, who had just pulled a supply box out. This meant I could use my last Order on the Teuton specialist to extract the last supply box, and all the Yamabushi could do was dodge again.
The endstate - my knights cluster on the central objective, while the Yamabushi gives one of them a congratulatory hug.
Summary
That made it a 10-0 win for me, since I held all the boxes, including one in my Safe Area, and Konstantinos Secured the HVT. That score doesn’t completely reflect a game which did have to be thrashed out right to the finish. I scored my last OP with my last Order, and I have to note I took 4 Scenario rolls, one of them at -3, and made all of them on the first attempt. There were also moments where I felt luck could have hurt me but didn’t - none of my AROs went down in Turn 1, my knights didn’t die to speculative grenade fire, and I won my fights in Turn 3 (which admittedly were heavily weighted) without wasting Orders. I did lose Dart to an ARO crit, but Konstantinos happily shouldered her job and made it look easy. I really need to play some more lists with the Crux Knight.
The models for my second list. I need to use that Crux knight (front centre) more often.
Two wins did mean that I was second in the rankings and would have to scrap it out for a chance at winning the day…
Round 3: Crossing Lines
Pre-Game and Deployment
What did I say in the review article for the last rules update? That I had to play Crossing Lines, and I just knew I’d have to play against Achilles. Well, my opponent - a very experienced competitive player whom I have won and lost against before - was playing Next Wave, and coolly announced his Lt’s WIP to be 15. He then won the initiative roll. I was already preparing to receive Achilles in a sensitive part of my anatomy when he announced he would keep deployment. This surprised me, but it let him choose a side of the board that had higher buildings and better sight of both the Objectives. I obviously chose the first turn as a result, and resolved to keep my pitcher Order Sergeant as one of my reserve drops.
I put my Crosier HMG with Konstantinos and a supporting Crosier as a Haris team on my far left, De Fersen with the Teutons and Montesa Knight on my centre left, the Raveneye and his mine protecting their right flank, and Remotes tucked away in safety. I placed my Trinitarian (hidden) on a roof where he could see at an angle into the approaches into my DZ on the right. Finally, I put a plain, basic Crosier prone on a central rooftop in the forward deployment area. This probably tipped my hand, but there were covered positions either side of that building, so I could place my Order Sergeant with pitcher access to most of the likely enemy positions and still gain the +1SD from teaming her with the Crosier. I could also put Mendoza, my second hold-back, with them if needed.
My opponent placed what was clearly a Limited Insertion list down, and his reason for choosing deployment became apparent - he had Neurocinetics Teucer, and placed him atop a two-storey building where he completely dominated both objectives, and all the routes for my main Fireteam to move up. This would be a huge factor in the game. Elsewhere he put Achilles in the very back corner on my right, Patroclus on my far left, and a thunderbolt Q-Drone (a Mimetism-3 Total Reaction bot) and a Glyph Warcor looking out aggressively. He had an EVO bot on the left, and a Raindancer shotgun, and Ko-Dali FTO, tucked away prone in the forward deployment zone, more toward my right flank.
I was very tempted to go after Achilles with my Pitcher. But I thought that Patroclus was probably Chain of Command, and Achilles would at least have to move to start killing me; Teucer had the table on lockdown and needed to go. So I placed the Order Sergeant prone in the centre forward zone, where it could potentially cover him with a pitcher. Mendoza I placed separately on my far left forward zone, where he could potentially sneak past and get into Patroclus and the EVO bot, which I saw as more vulnerable targets. My opponent placed Pandora as his reserve, but actually put her quite aggressively, watching the Order Sergeant, presumably to restrict my pitching options.
Deployment, as seen from my table side.
Round 1
My opponent sensibly docked me 2 Orders in my main group, leaving me on a tight budget. To stretch it, I decided to use my Trinitarian sniper aggressively - by sheer chance, it could easily see the Q-Drone from its starting position, without provoking Teucer. It took several Orders, but I dropped the bot and the Glyph Warcor. With my main combat group, I resolved to take out Pandora first, and try for Teucer afterwards. The method I chose was to spend one Order crawling my Crosier HMG past Teucer’s sightline, and then blast away at Pandora. She has the superlatively annoying skill Dodge(-6), but it was risk free, and I just needed to crit, or for her to fail a single time, to have a decent chance at killing her. This maneuver took 4 Orders in total and left my Crosier HMG peeking out. I’m not sure in retrospect that this was the right play. I could have used my Order Sergeant directly; Pandora would have to flash pulse and accept a similarly dangerous FtF roll, or Dodge to impose the penalty, in which case I would have just fired my pitcher towards Teucer. I just didn’t have the brainpower left at the end of a long day to run through all my options.
My Trinitarian sniper plugs away at the Q-Drone and Glyph Warcor.
This left me with 4 Orders left, and although I had done some damage, Teucer was still oppressing me and I couldn’t expect my pitcher hacker to live until the next turn. I crawled into position, landed the pitcher, and would only get one shot at the Spotlight and one shot at the missile. I activated my Fireteam and actually stood up the Montesa knight in Teucer’s LoF, daring him to take the shot and not Reset against my Spotlight. My opponent accepted the challenge, and splattered the Montesa over the landscape, but Teucer was Targeted. I fired the missile and missed. Womp womp. While it’s tempting to bemoan my luck, I think I was just that bit too inefficient in how I set things up in deployment and opening moves. I could have simply sacrificed my pitcher hacker to get the repeater down over Teucer, and had more leeway for actually executing him. This was a costly failure, because despite some other twists and turns elsewhere, he would be the ultimate thorn in my side all game.
My forces await the Next Wave's Turn 1 counter-attack.
My opponent went on the offensive with Achilles, moving efficiently to shoot away my repeater and then move-Resetting Teucer successfully. Achilles went to gun down my Order Sergeant, and I normal-rolled to drop a pitcher covering him. I knew there were options to get out of the trap though. My opponent then brought on a Cliff-Jumper on my left flank. This was a very good position and I should have deployed my flash pulse bot watching the board edge rather than into the centre. I don’t have any shaped expectations yet of what Next Wave could bring against me, and I didn’t see this coming. Crucially, Mendoza failed his ZoC Dodge (aiming for a 13) which would have at least forced the Cliff Jumper to engage him. Instead, the drop trooper jumped onto a building and assassinated my Crosier HMG, before jumping aggressively toward De Fersen and firing into his back.
The enemy Cliff Jumper prepares to dive at De Fersen. Not pictured: my Crosier HMG (RIP).
De Fersen was wounded, and in the next Order the Cliff Jumper was diving at him inside template range. This model has a B4 SMG and a B2 zapper; as my Lt, De Fersen clearly couldn’t risk the 4 saves against EM, so had to Dodge. I failed the Dodge outright, my opponent rolled well on his hits, and De Fersen went down. The game was getting tricky. This was a belatedly suicidal move - Konstantinos failed his easy multi rifle shot at the Jumper, but a Teuton engaged it in melee, so it was stuck.
"You shot my Lt! You grey heathen bastard!"
My opponent had one other model to bring to bear, activating Patroclus against Mendoza on my left. Unfortunately, Patroclus is not that great a gunfighter and the range was just within 16” - bad for his HRL and good for Mendoza’s multi rifle. I was lucky and the DA/Continuous ammunition burnt Patroclus to death. A nice stroke of luck for me! That left my opponent’s remaining few Orders for use on Achilles, who took the time to destroy the repeater (he knew I would Speedball De Fersen) and easily disposed of my cheap Crosier in the forward DZ. It was clear I was in Loss of Lieutenant, but there was no scope yet to flip the scoring zone in my table half; we each secured our own zone at the end of the Round, sending the score to 1-1.
Round 2
Clearly I wasn’t going to accomplish much in Loss of Lieutenant. I killed the Cliff Jumper in melee with an Impetuous Order, Speedballed De Fersen, reformed that Fireteam, laid another EM mine with my Raveneye, that sort of thing. I should perhaps have moved my Remotes and surviving Crosier with an eye to getting more points in the scoring zone, but they didn’t have great options and I knew Achilles would be coming in hard. I used my last command token to move and then discoball with Konstantinos, so that Mendoza could work in closer to Teucer on the far left flank, but he didn't have the Orders to attack the EVO bot. I secretly chose Mendoza as my new Lt.
My opponent sent Achilles in to break my core team. First he shot up De Fersen, but the revived hacker managed to pass a survival roll and the subsequent religious roll to drop prone. He then engaged a Teuton, but couldn't split it out from the Trinitarian which was on a rooftop directly above. Achilles ignored the sniper to maximise his odds of avoiding a panzerfaust hit and killing the Teuton. He dropped the Teuton cleanly, but the uncontested sniper shot connected, and Achilles failed both his armour rolls. Now badly wounded, Achilles moved away, firing again at the Trinitarian - but lost the FtF roll again and died! This was an absolutely wild and game changing stroke of luck. Quite apart from being well positioned to kill a lot of my army, Achilles was his prime piece to dominate my scoring zone, and could almost certainly have won the game. Losing him really flung my opponent onto the back foot, and the earlier situation was reversed - with both his potential Chain of Command models already dead, I knew the Next Wave would be in Loss of Lieutenant in their final turn. My opponent moved Ko Dali forward, out of cover and into my scoring zone, but this was a vain effort. She was not worth as much as Konstantinos and my surviving Teuton, so I held the zone, and the score went to 2-2.
Achilles (visible between two tall buildings on the right) meets his doom at the hands of my Trinitarian sniper (apparently Paris in disguise).
Round 3
The opposing forces were all but spent, I had a little bit of wind back in my sails (at least I wasn't in Loss again) and I felt a bit hopeful. However, Teucer was still completely locking down my movement. I gunned down Ko Dali with my Trinitarian sniper - he was earning his pay in this game - and De Fersen spotlit the Rain dancer, setting it up to be killed by a guided missile.
Ko Dali is shot down in the open - trying to score the zone at the end of the previous Round was a bridge too far.
Mendoza took down the EVO bot, and tried to get Teucer to no result (that was a dangerous FtF roll). My opponent literally only had Teucer and one camo marker left. But here my inexperience with Crossing Lines showed itself. I fundamentally didn't understand the assignment. While I was all over my scoring zone, I only had Mendoza in the far one, so it could still potentially be secured by my opponent. I did realise this at the last moment and tried my Trinitarian on a slightly disadvantaged FtF roll against Teucer (2x 9s vs his 2x 11s), because unlike Teucer, the Trin wasn’t going to have any further effects on scoring. It didn’t work and the Trinitarian went down in a blaze of plasma. This was not a bad idea per se, but it might have been slightly better to simply move the Trinitarian into LoF in camouflage and leave him to ARO, since Teucer was going to have to move to score the zone.
Mendoza pressures Teucer. I really ought to have pressed this FtF repeatedly.
That's exactly what happened. He moved Teucer down his ladder, and I made another mistake by declaring Dodge with Mendoza. I wasn’t quite close enough to lock him in combat, I should have shot. My opponent converted his Contrabandelero’s Order, moved Teucer once more, I did shoot with Mendoza this time, beating Teucer’s B1 pistol shot, but Teucer passed just enough survival rolls to remain in NWI. He was in the zone, and with the Contrabandelero outweighed Mendoza - we held one zone each and the game ended on a 3-3 draw.
The endstate. Teucer is in NWI but had joined Mendoza in the scoring zone; the camouflaged Contrabandolero is visible in the background.
Summary
Well that was a bloodbath and in many ways a very exciting game, but draws are always frustrating when an overall tournament win is in sight. I can chide myself for several errors. I didn’t think properly about the mission, I didn’t execute my first turn that well, I didn’t protect De Fersen well enough in my deployment, and finally I should have taken some different moves to kill or lock down Teucer - beyond setting a better trap for him to leave his DZ, I should have just risked Mendoza against him repeatedly. However, my opponent was probably chiding himself at least as much for not simply taking the first turn. I can see why he wanted deployment and DZ choice advantage for Teucer, but equally, I’m not sure I could have stopped Achilles in a first-turn rampage. I do think my opponent played better than me - certainly he understood the mission better - and if Achilles had not been so unlucky in ARO, he probably would have won convincingly. So I had better not complain.
Tournament Results & Military Orders Thoughts
Despite having two good wins and a draw in a small event, I only came 4th (my last round opponent was 2nd) as the other pair of players on two wins and a draw were edging us both out on VP for 1st and 3rd place! Not a particularly great result, but not bad either. This was my second N5 tournament with MO, and I can really see the difference since their rules update. The faction has the same constraints on its low end models, but there are much better ways to use their basic Crosiers in teams thanks to the new MSV2 HMG, the Order Sergeant hacker, and Konstantinos. On the top end, De Fersen is a real force and competes with the other prestige HI models. I need to experiment more with using hacking as a first option in MO, as I’m not used to making it a key part of my offensive plan. There are some other models with updated profiles (notably the Knights of Justice) that I didn’t get to play with in this event, so I certainly have room to take MO to some other tournaments in the near future, without re-treading old ground.
Currently, Infinity N5 is in a very interesting place. There is a lot of new stuff alongside dramatically different missions, and it seems like that has generated a lot of interest. Quite a few of the strongest players in the UK are experimenting with Next Wave, or with newly-revived factions. We will look forward to bringing you some more general articles on tactics and list-building, as well as Faction Focus pieces.
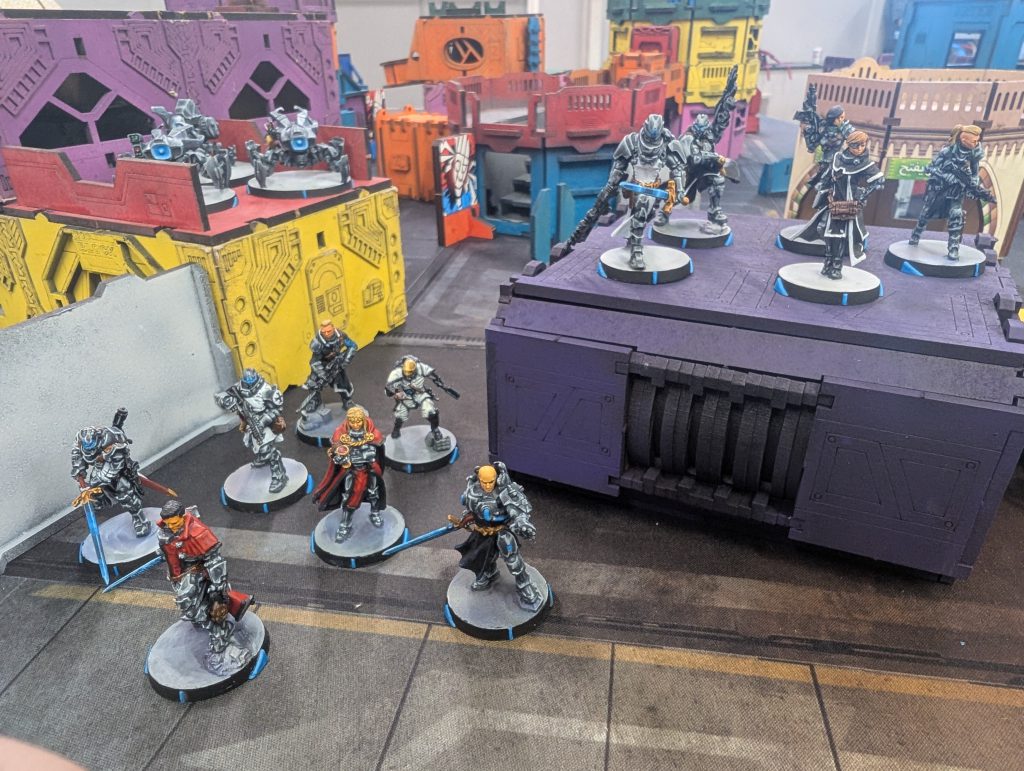 The models used for my first list.
 Lei Gong & Liang Kai waiting on their starting line - total reaction and EVO remotes are visible behind them.
 Deployment, seen from my table side.
 The Montesa paramedic enjoys a well earned nap.
 This was one of the more foolish plays I can remember making in competitive play.
 A Teutonic Knight holds the other console, all too aware that the Daofei (visible behind the Unconscious remote) is ready to come and finish him off...
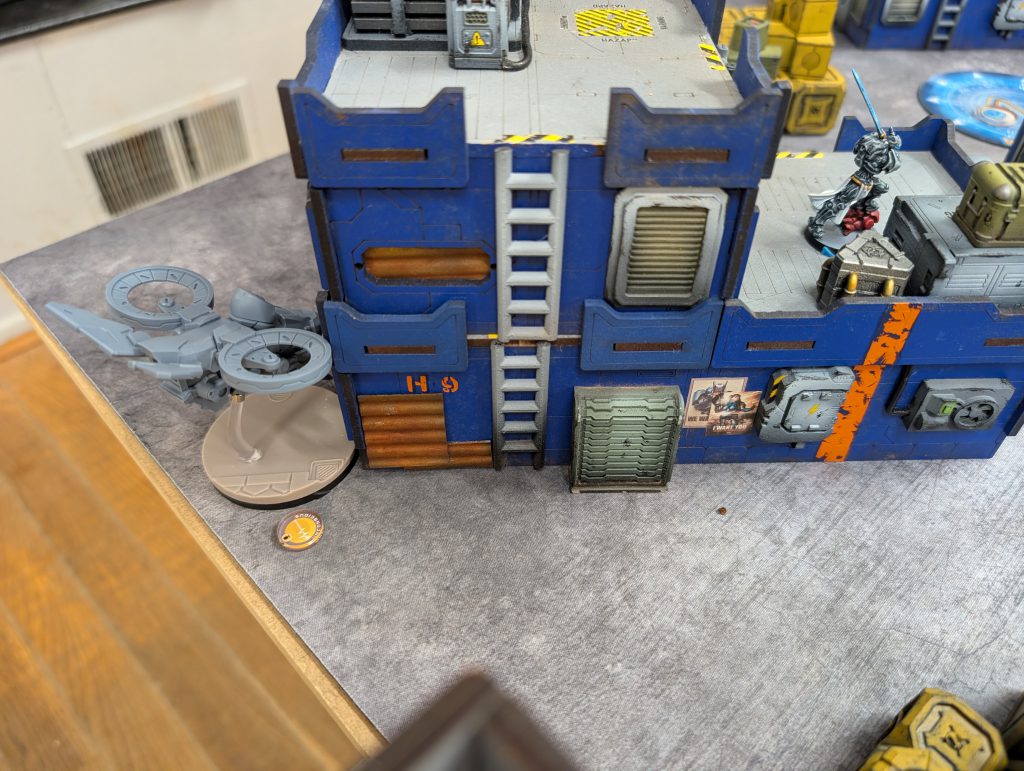
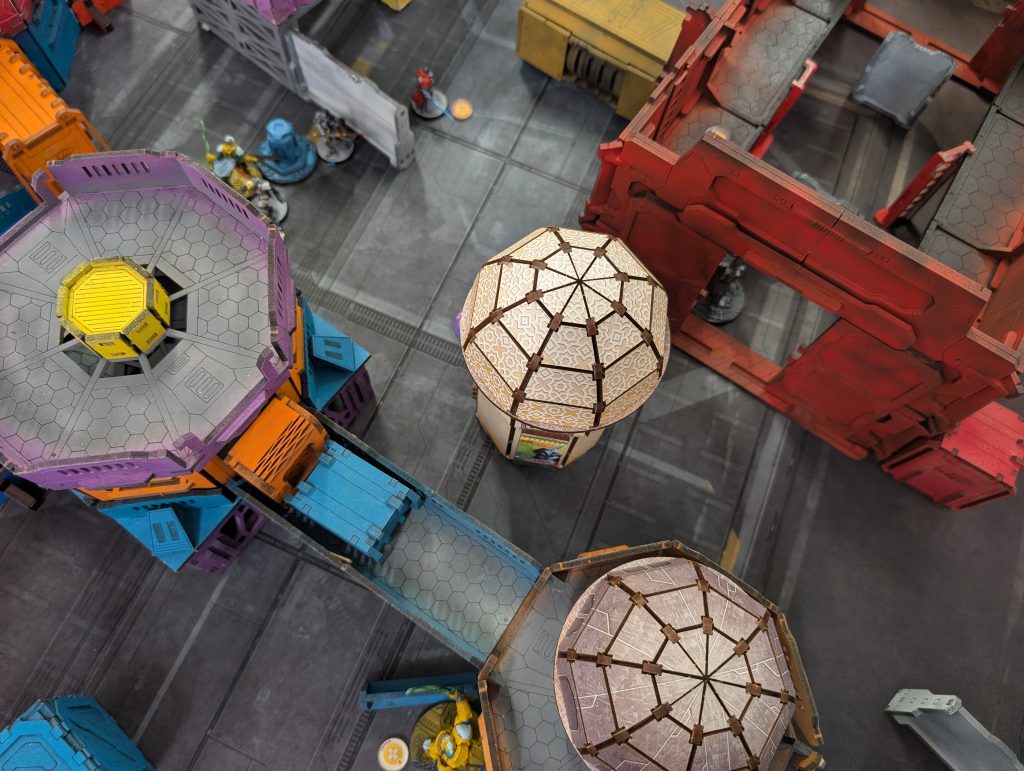 The position of AROs around the objectives. The Haetae (bottom centre) is blocked by a discoballer directly ahead (you can just see the purple token behind the central domed building) but can see into the large red hangar building, where De Fersen and the console were.
 My opponent's deployment. The open-roofed room was played as blocking LoF to infinite height, which would be a huge factor. Note the Griffin feuerbach in the foreground, which was in a Level 5(!) Fireteam and would have been dominant otherwise.
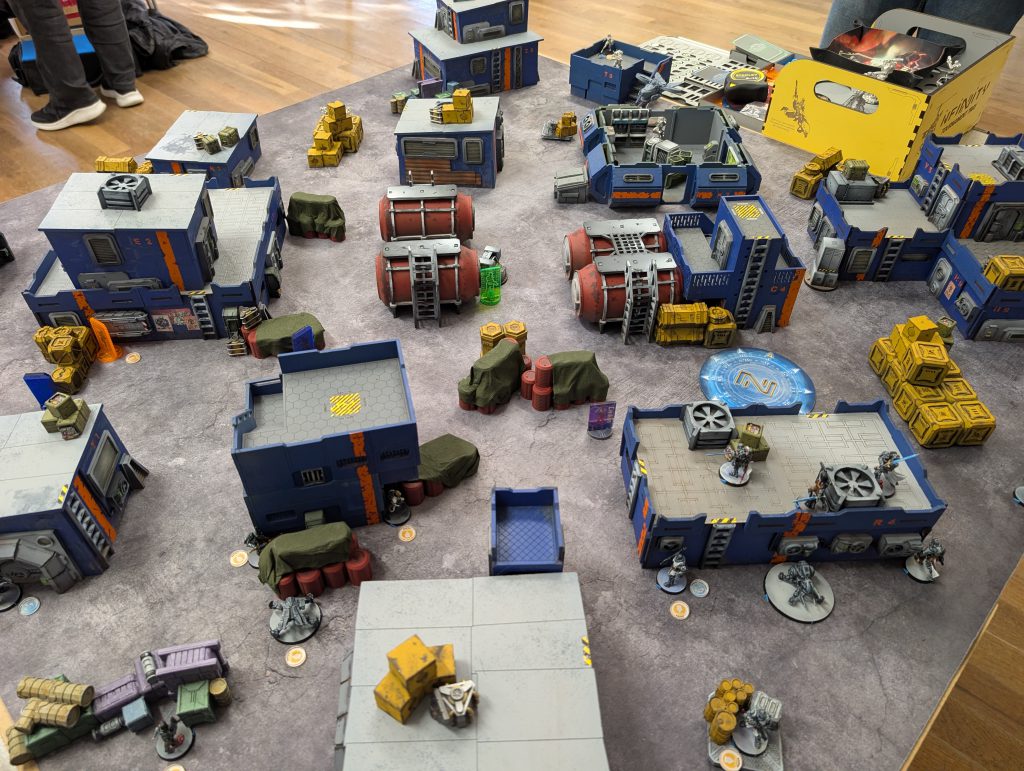 My deployment. A Teuton, the Black Friar and the Crux Knight are all standing atop the building on the right, with the Montesa looking around the corner. These AROs would have to be fought for my opponent to access the centre and right-hand objectives.
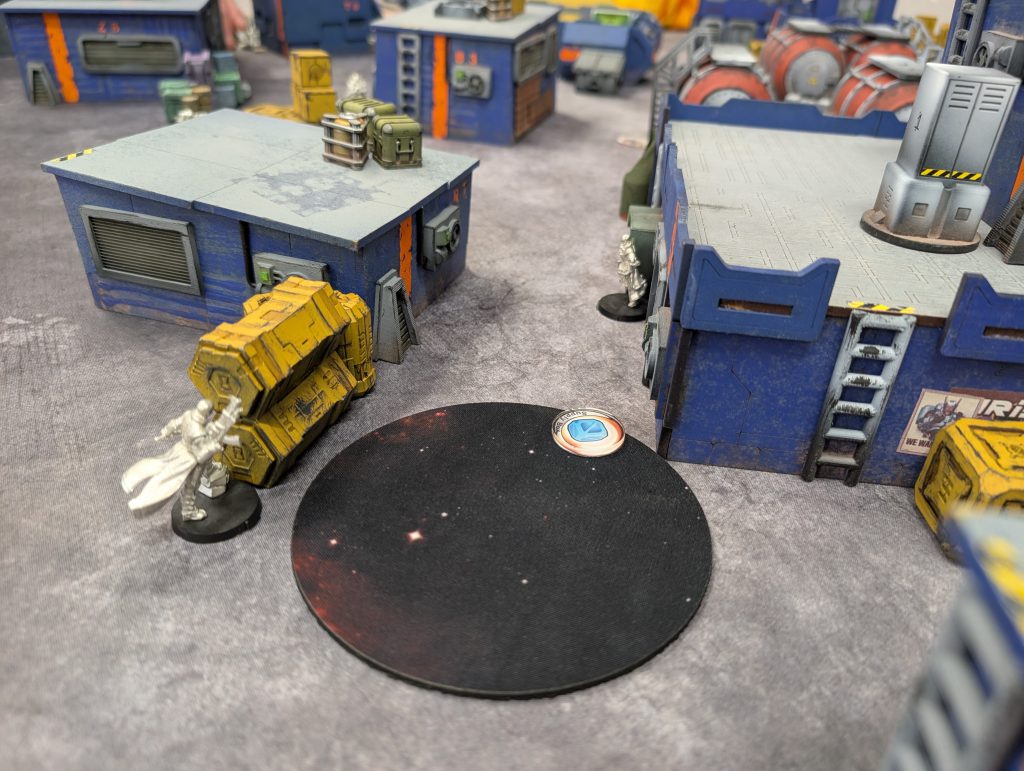 Quinn (proxied by a Sforza model) leaves the box in my opponent's safe area. The other nearby model is his HVT.
 Trin-time baby! Despite a perfect opportunity, the Trinitarian takes a few attempts to down the Firefly.
 Dart (my proxy is an old converted Acmon model) suffers an embarrassing defeat. The curse of the newly-painted.
 The position at the end of Round 1. Note the concentration of Heavy Infantry around my safe area.
 The Hetkari takes out the Black Friar. It was actually firing from the ladder, beneath its physical location here, to avoid other AROs.
 The Redeye hammers indirect fire into my knights, narrowly missing out on inflicting critical damage.
 Konstantinos takes up the gauntlet and succeeds where Dart failed, killing Quinn.
 The Crux knight finally manages to take the Redeye out.
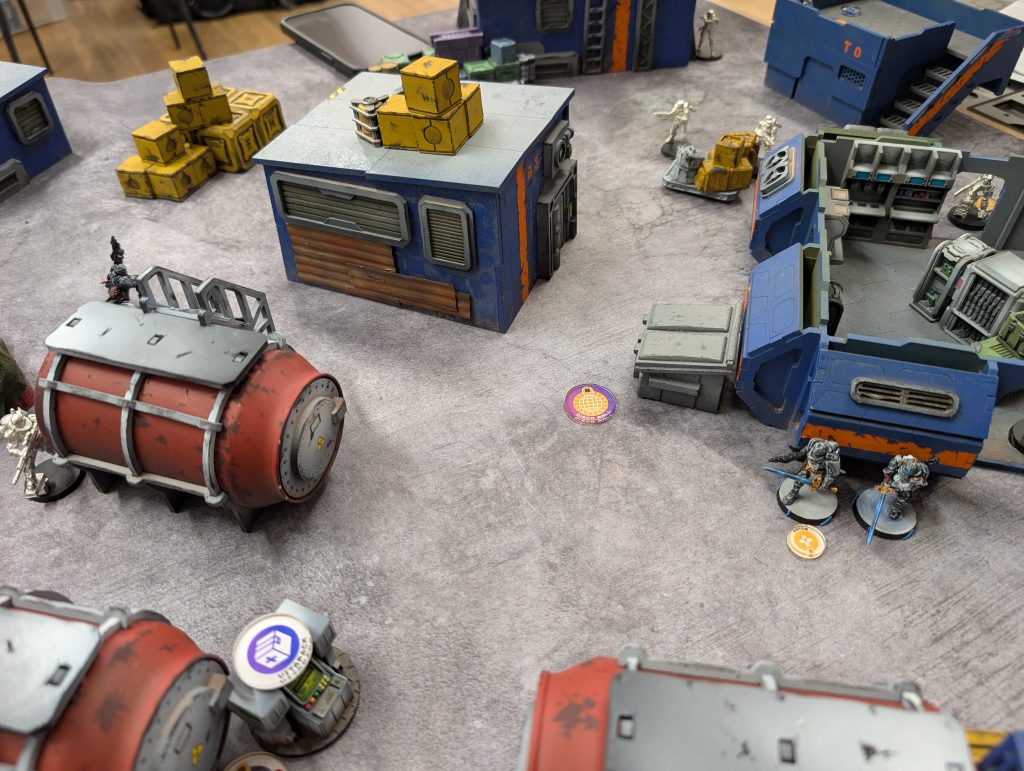 The discoballer token (pictured in the centre here) was crucial, saving me from having to fight through the remaining Kestrel AROs before reaching the central objective.
 The endstate - my knights cluster on the central objective, while the Yamabushi gives one of them a congratulatory hug.
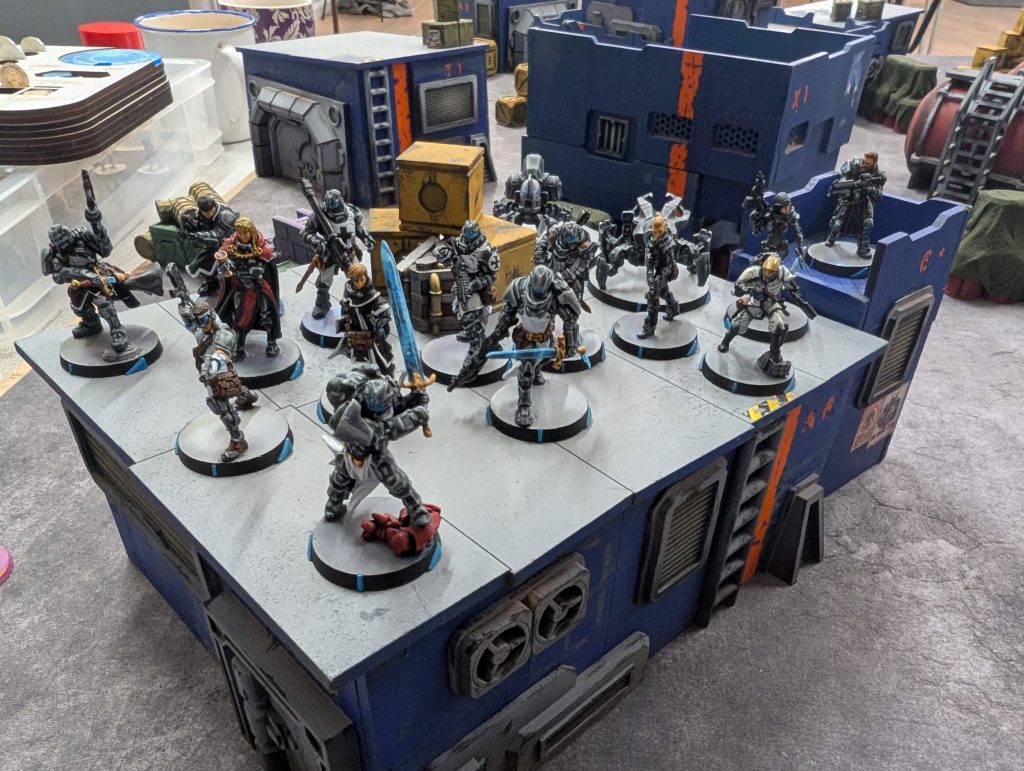 The models for my second list. I need to use that Crux knight (front centre) more often.
 Deployment, as seen from my table side.
 My forces await the Next Wave's Turn 1 counter-attack.
 The enemy Cliff Jumper prepares to dive at De Fersen. Not pictured: my Crosier HMG (RIP).
 "You shot my Lt! You grey heathen bastard!"
 Achilles (visible between two tall buildings on the right) meets his doom at the hands of my Trinitarian sniper (apparently Paris in disguise).
 Mendoza pressures Teucer. I really ought to have pressed this FtF repeatedly.
 The endstate. Teucer is in NWI but had joined Mendoza in the scoring zone; the camouflaged Contrabandolero is visible in the background.

 Goonhammer App and Patron Updates: April, 2026
 Kill Team Tournament Report: Engage, Party, Repeat's March Madness 2026
 Goonhammer Reviews: Tribal Conquest