So. The Yncarne eh. A while back I bought the Triumverate because I wanted Yvraine for quite a few of my 8th Edition lists, but I never quite got around to doing the Yncarne. They didn't really fit into my normal style of list, and there always seemed to be something else nearer the front of the queue.
Part of that was definitely how intimidating the model looked to paint. I am not a fantastic painter - I have a resting hand tremor which makes precise work quite challenging, and while a
lot of practice and learning techniques has got me up to a level I'm happy with, part of that is choosing my battles in which projects I go after. Large, smooth panels and face concealing helmets are very much my jam, and the Yncarne is uh, not that.
However, the time for hobby cowardice is over, for two key reasons. First up, Contrast is a thing now, and the Yncarne is, in theory, the perfect model to use it on. Certainly it made the idea of trying to paint the big energy swirls and the hair seem more approachable. Second, and if we're honest the main reason, is that the Yncarne seems real good in 9th Edition, and the lists I'm happiest with of the ones I've written thus far use them.
All in all, that meant it was finally time, and you all get to join me on this journey.
Planning
First up, with something this complicated I felt like I needed a clear plan before I started. the main thing I was sure I didn't want to do was the "official" scheme. It looks good, but I felt pulling off the very pale shades of blue and pink it uses effectively with Contrast was going to be hard to get looking great, and that something a bit deeper and more vibrant would work better. It would also fit more closely with the wider aesthetic of my army - bright, full colours (green on tanks and characters, the appropriate primary colours for the various aspects), whereas the pallid, sinister default would be a bit out of place.
My initial plan was to do something along the lines of:
-
-
- Talassar Blue on the hair.
- Akhelian Green on the body.
- Ork Flesh/Tesseract Glow on the energy swirl.
Green fits my existing forces, while the teal of the
Akhelian would fit with how I'm planning to differentiate the other Ynnari units I'm painting. However, on playing this through in my head, it didn't quite feel right. Mostly, without some sort of purple (as Liam has used) or red I was concerned, ironically, that there wouldn't be enough contrast on the model. I also tested out some
Akhelian Green and found it coming out a bit darker than I wanted as the colour for what should be one of the key bits of the model.
I did like the idea of the blue-green transition though and wanted to keep some of that, and had a think about what I could do to keep it while fixing the issues.
In the end what I landed on was something a bit more ambitious. Blues and greens felt like they would work well on the flowing hair, and I liked the idea of using some sort of dark red on the body to sharply contrast with it. However, I didn't want the energy swirl all in red, so would want to transition it to other colours along its length. Between that and wanting to transition the blue/green on the hair, I decided it was time to try one of those fancy new tricks I've been hearing about, which is Contrast blends.
The overall plan I ended up on was as follows:
-
-
- Bright blue transitioning through to bright green on the hair swirl.
- Pallid pink for the face (a small nod to the official scheme).
- Dark red on the body.
- A rainbow transition from red through to bright green-blue on the energy swirl.
- Beige for the chunks of Aeldari temple.
- Grey for the rubble/dirt.
- Metal detailing.
Ambitious - let's see how it went.
Preparation
I've been trying to paint my models in larger parts recently as it makes a number of things a
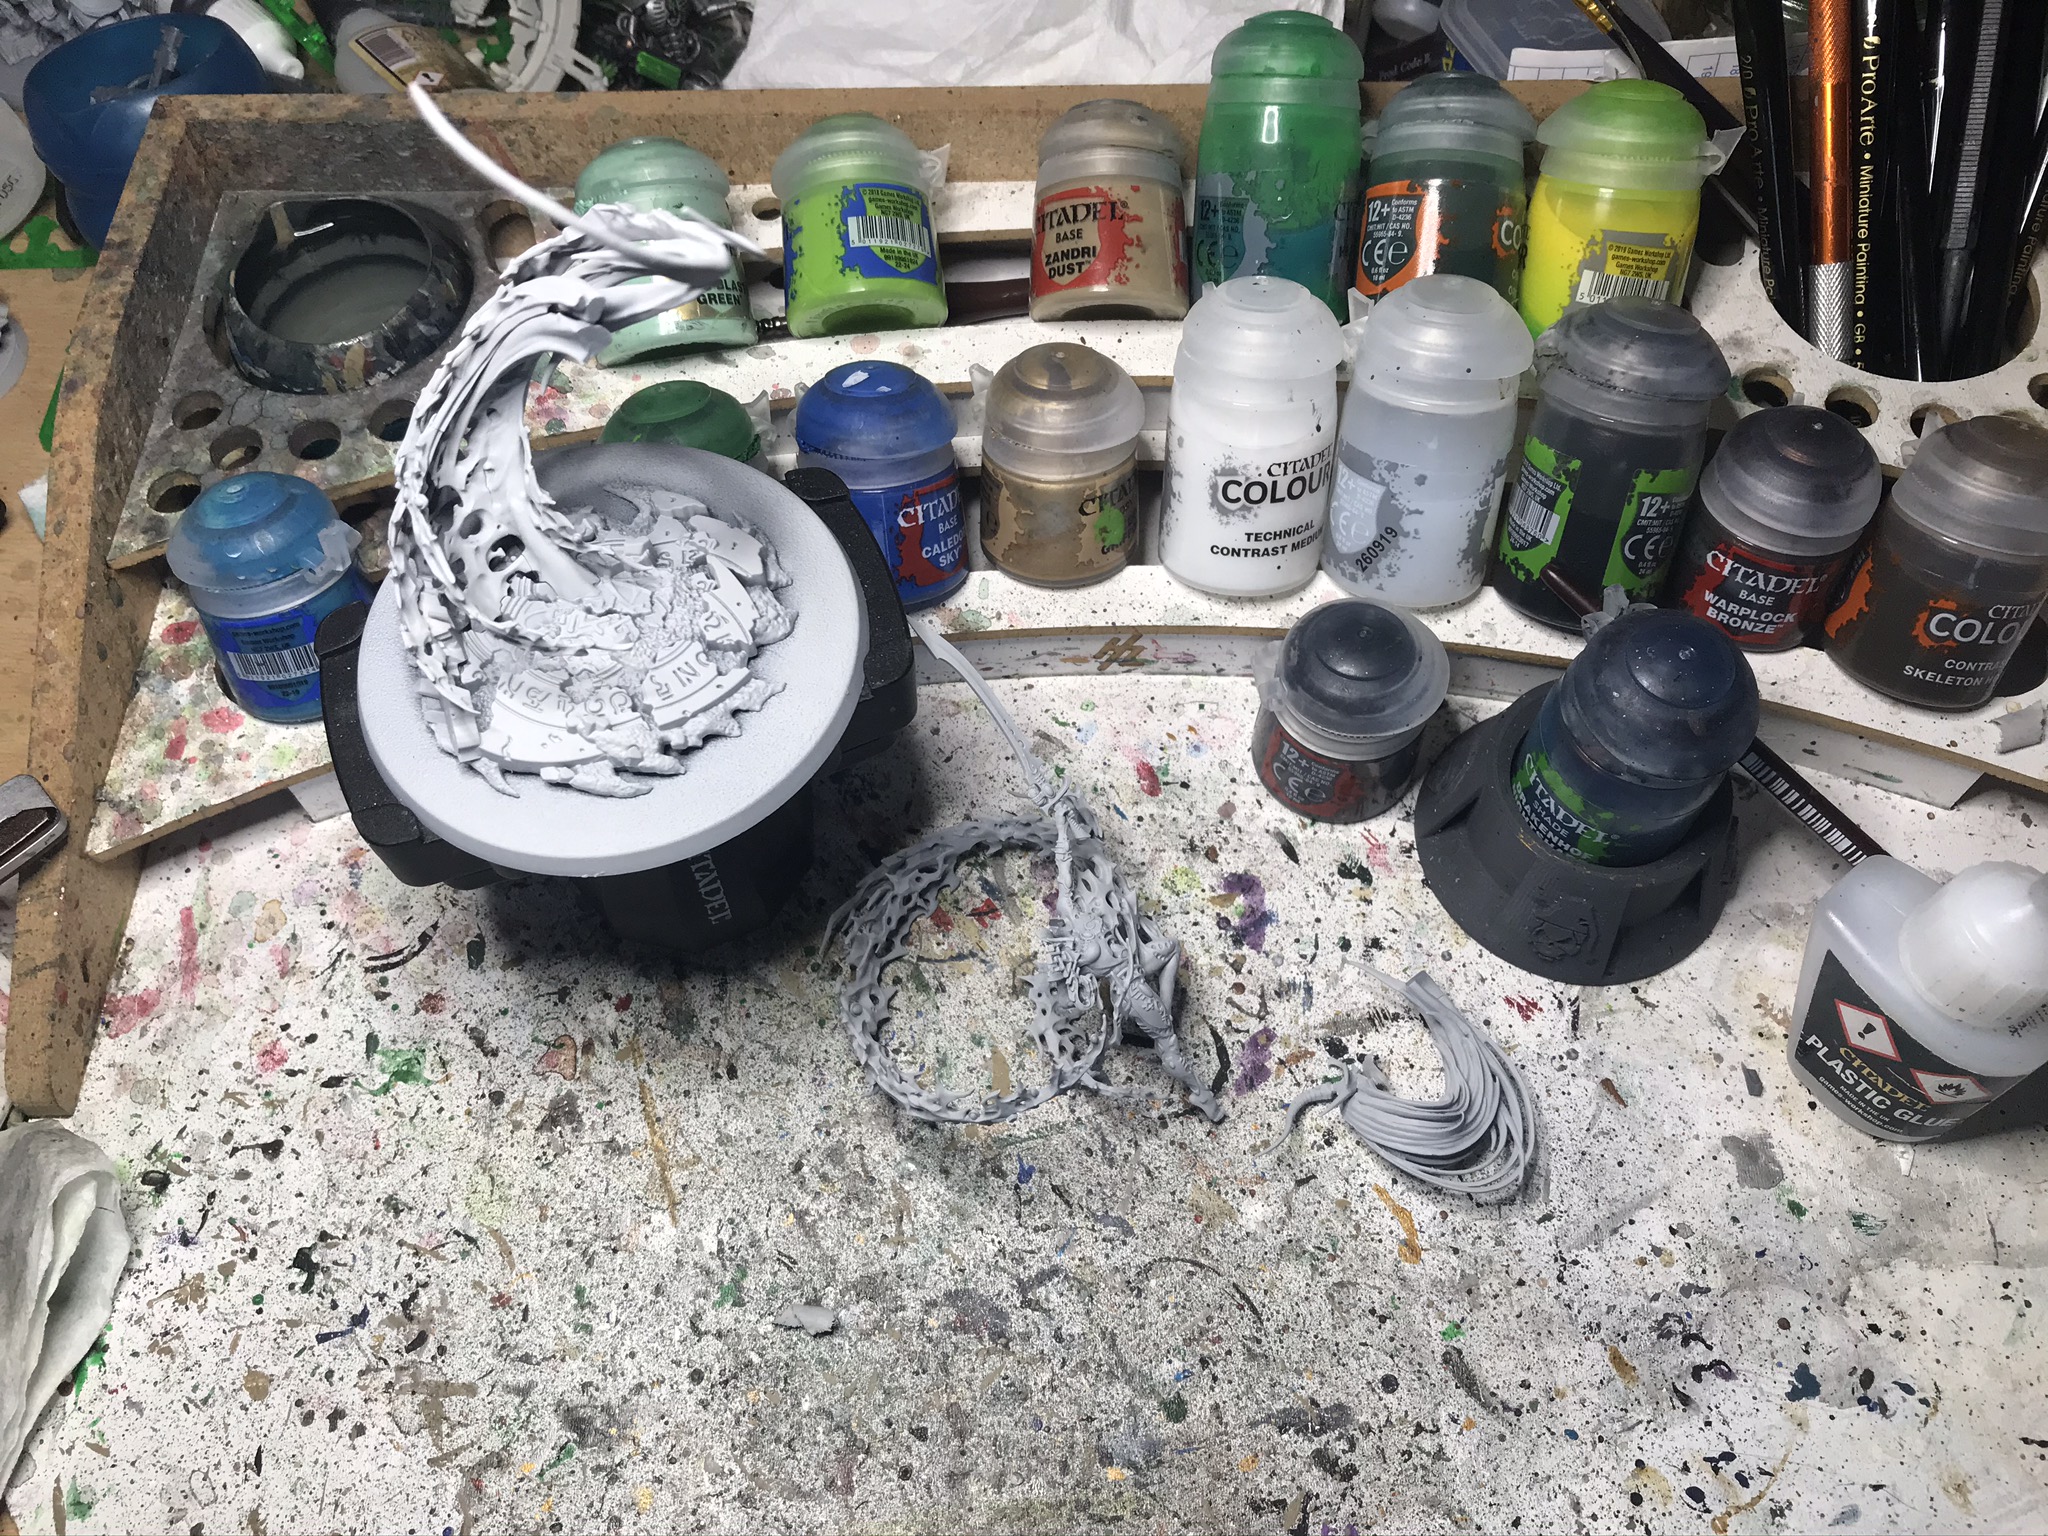
lot easier, but here it was clear that I'd need to keep some parts separate. Since I was going to use quite a different set of colours on the "supporting" swirl coming out of the ground and the one spiraling out from the body, and the head was the split point (and also load bearing), I went with three subassemblies:
-
-
- The base and supporting swirl.
- The head and the first chunk of hair.
- The body and the energy swirl.

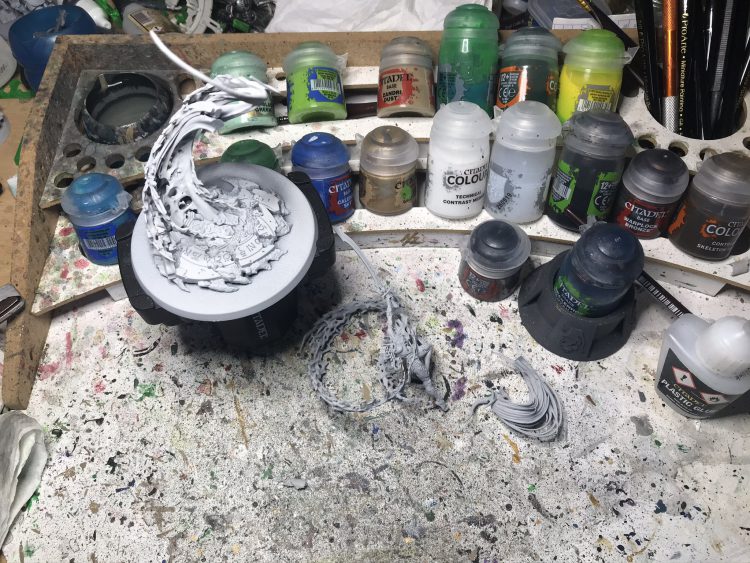
I put all this together and used some masking tape to cover off the places they would later join together. I don't always bother with this, and try to awkwardly get plastic glue to work even after painting, but here I thought the joins were likely going to be finicky enough that I'd want the glue to work easily. I should note that this turned out to be
extremely true - the final assembly of this model is a total pain - so definitely make sure you keep the joins clean if you're sub assembling. Once the tape was on, I primed with
Grey Seer, and was ready to go.
Painting
First up, I had to be disciplined and do the really boring bit. This comprised:
-
-
- Blocking in Black Templar on anything that was going to end up metallic, something I always do when working on top of one of the contrast primers.
- Painting the rubble and ruins on the base. For this I used a few coats of thinned Skeleton Horde on the ruin bits, and Basilicanum Grey followed by thinned Black Templar on the rubble.

With that out the way, I could go on to doing the first of the two exciting bits, and decided to do the swirly coming up from the base first (along with the hair on the separate head piece). The plan, as covered above, was to do a gradual contrast transition, and the mechanism for doing this was basically:
-
-
- Paint a section in one Contrast colour.
- While still wet, paint about the first centimeter of the next colour in, starting right up against where the first colour was.
- Charge my brush with Contrast medium and work it around the point where the colours overlap, blending them together and giving a nice transition.
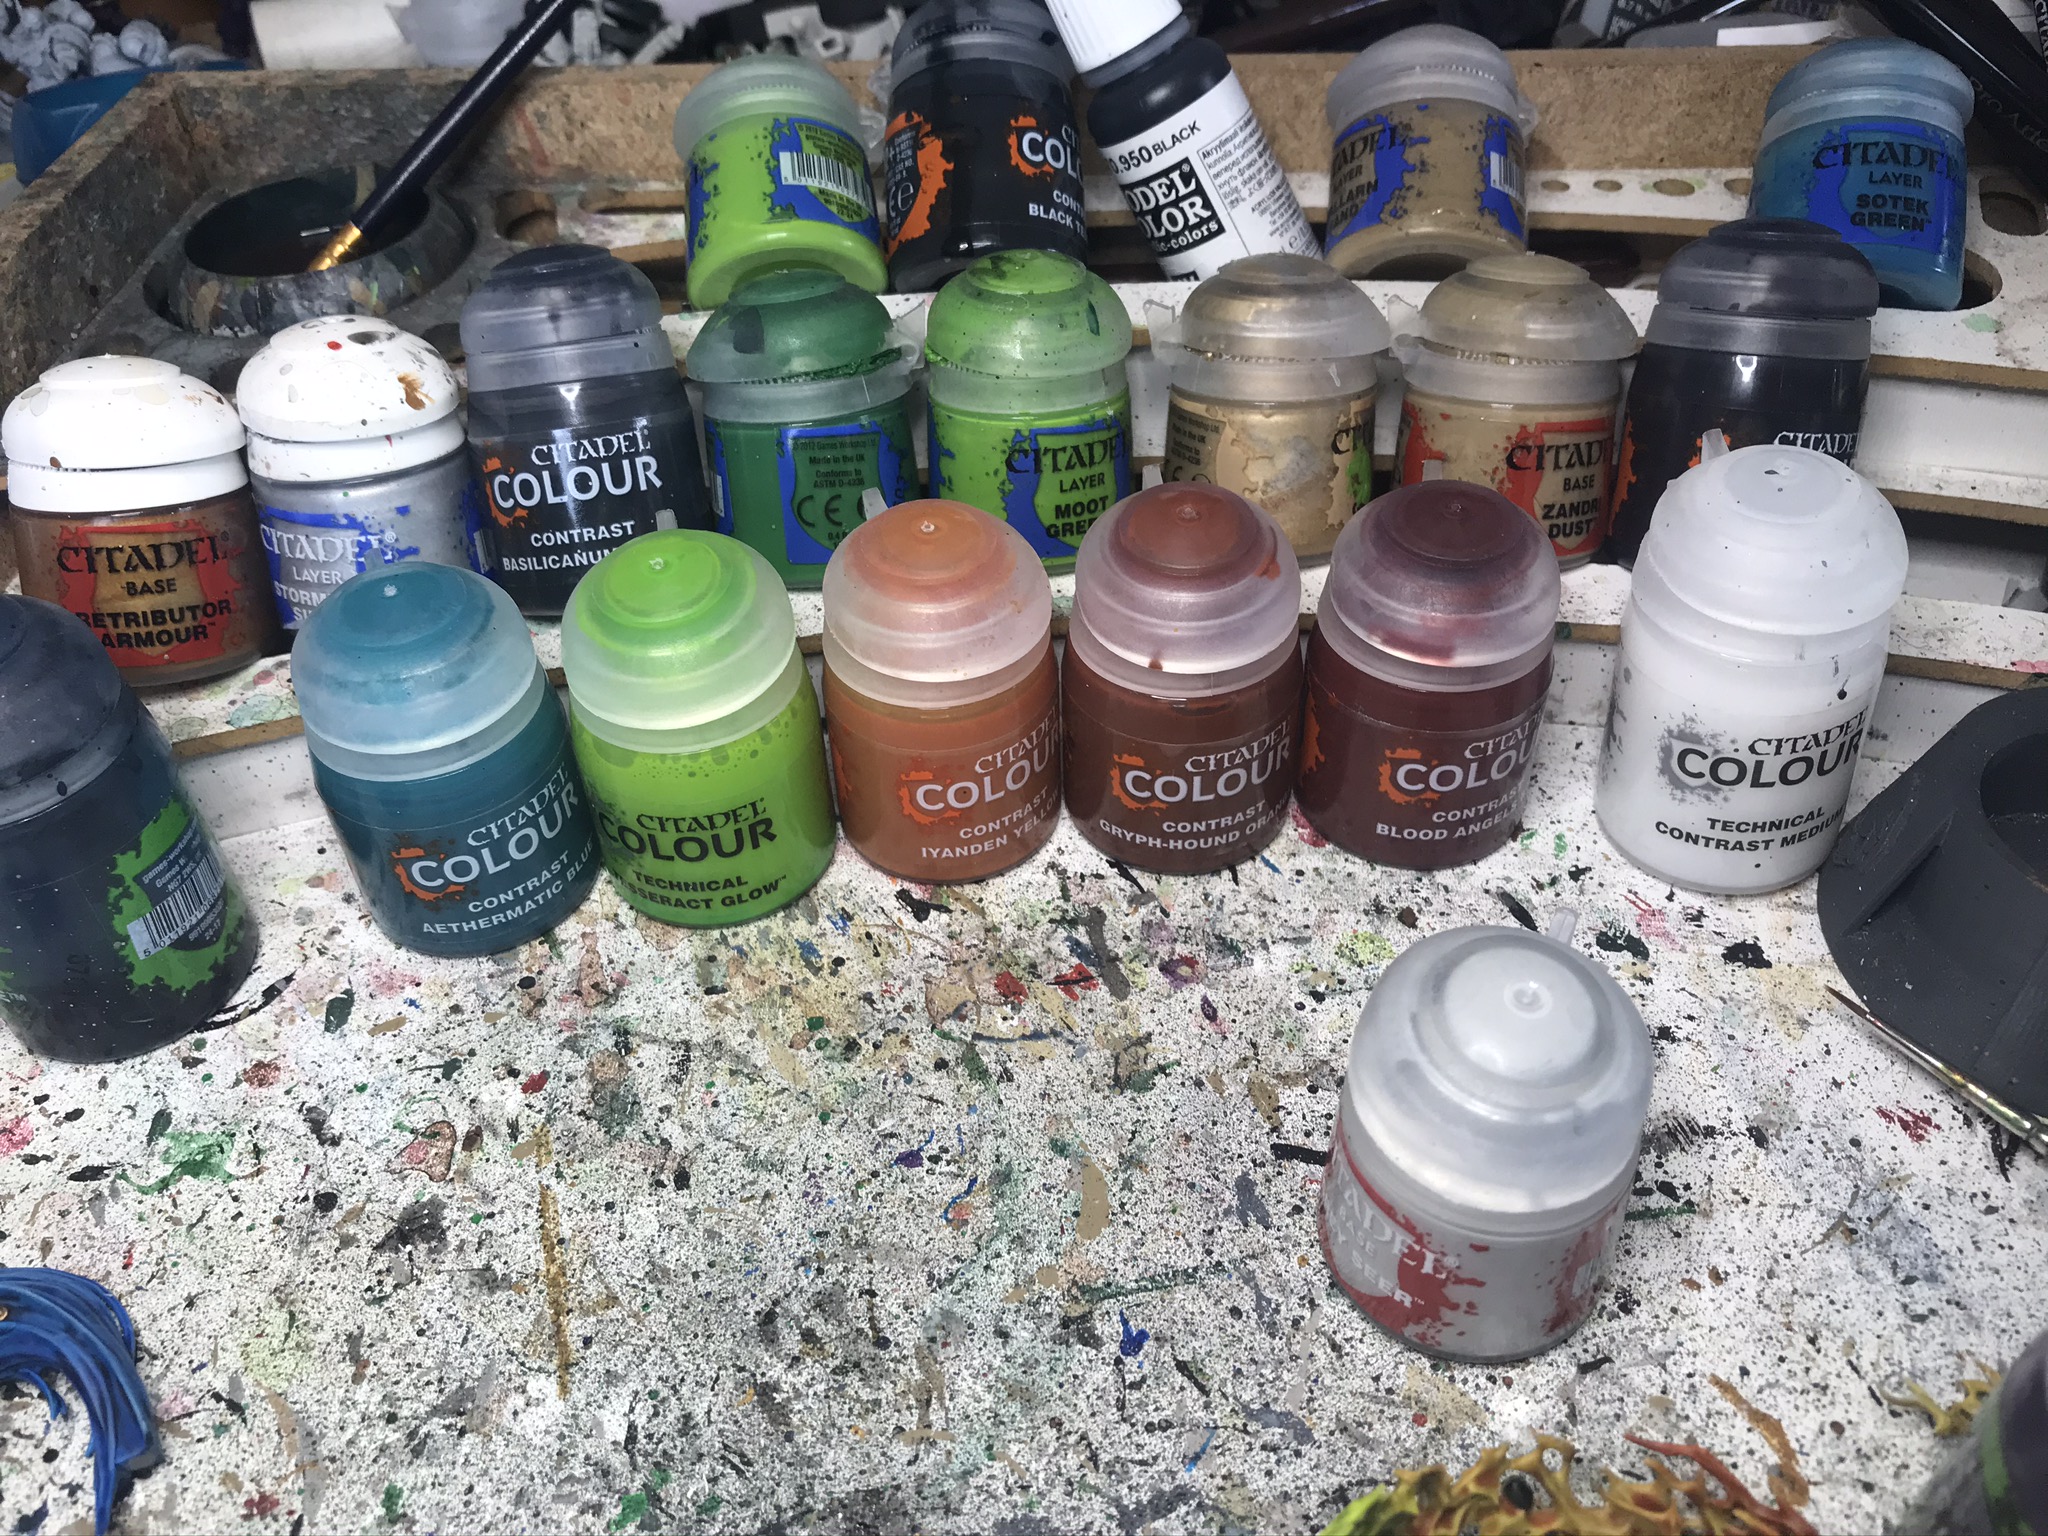
For this first section, I used the following series of colours (in order):
-
-
- Aethermatic Blue at the very tip.
- Talassar Blue
- Akhelian Green
- 50:50 Akhelian Green/Ork Flesh
- Ork Flesh
- Tesseract Glow (which I am designating an honorary Contrast paint for these purposes).
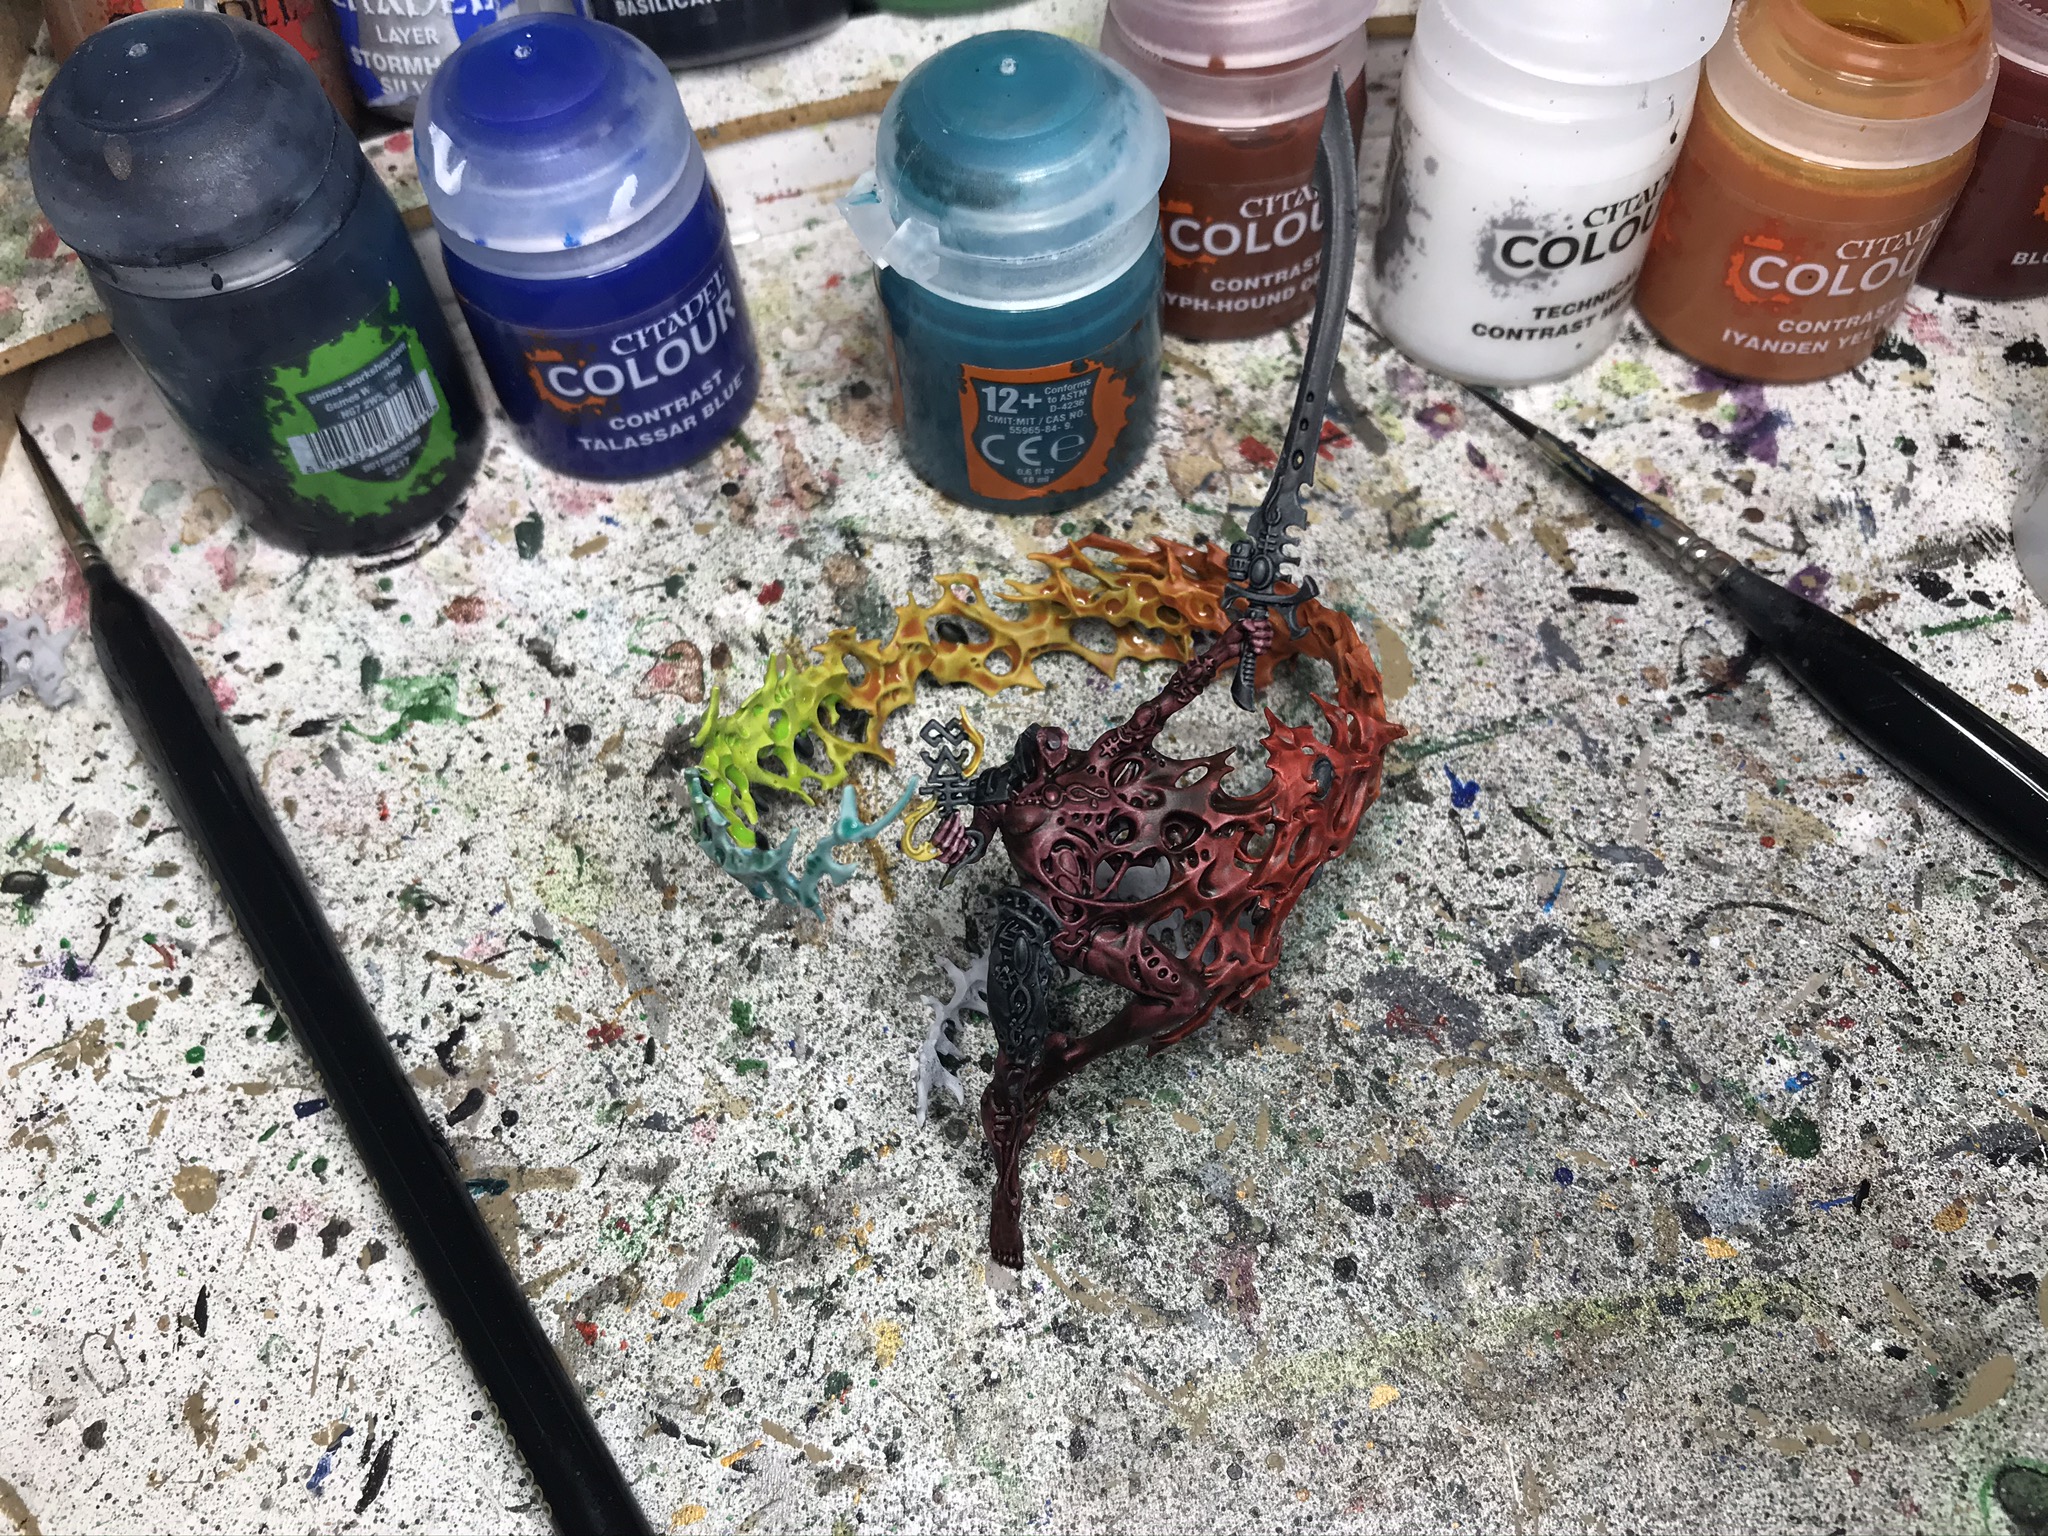
The terrifying part about this, obviously, is that once you start you ideally need to keep going, and a frenzied half-an-hour later and I had this:
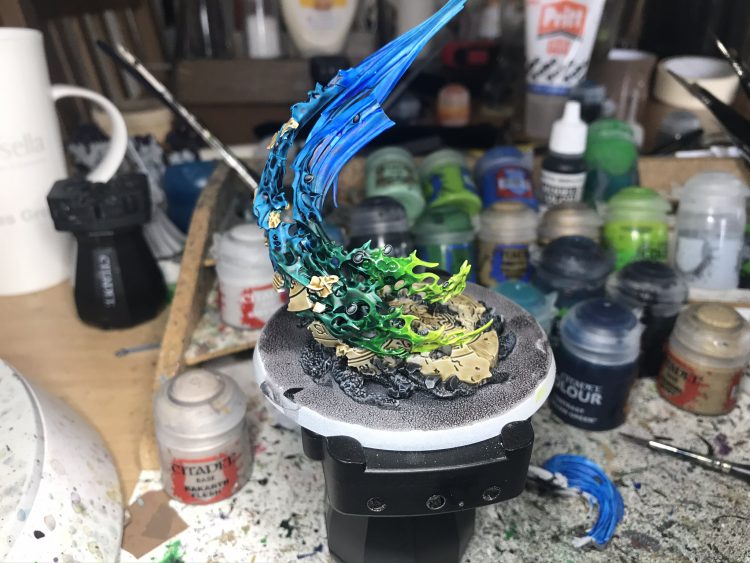
That, honestly had worked
shockingly well. I had to do a bit of tidying, and then used drybrushing to finish off the colour at various points. I can't recall if the above picture was pre- or post-drybrush, but basically all I did on top of the contrast was light brushes of:
-
-
- Imrik Blue and Gauss Blaster Green for the Talassar
- Sotek Green and Gauss Blaster Green for the Akhelian/Akhelian mix
- Moot Green for the Ork Flesh
- Flash Gitz Yellow for the Tesseract.
Once that was gone, I finished off the spiritstones for this section. I painted the whole of all of them with
Retributor Armour, nuln oiled them, applied
Stormhost Silver to them gems themselves then completed with thinned
Blood Angels Red or
Gryph Hound Orange.
OK, so far so good. Now for the body and swirl. For the body itself I used a thinned mix of 50:50
Blood Angels Red and
Shyish Purple. I am
extremely wary of
Shyish - it gets good coverage, but I've found it one of the worst Contrasts for pooling and ending up blotchy, hence the mix. I also lined up my armaments so I was ready to go straight into the swirl transition.
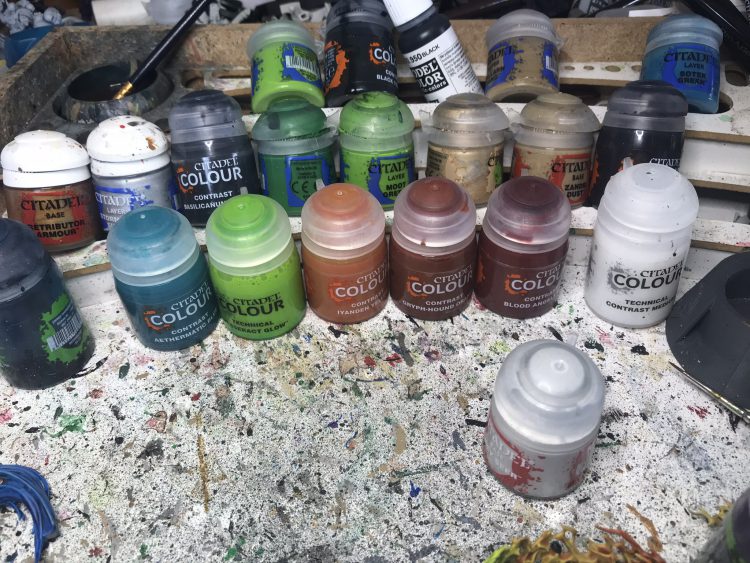
From the Blood Angels/Shyish mix, the plan was:
-
-
- Blood Angels Red
- Gryph Hound Orange
- Iyanden Yellow
- Tesseract Glow
- Aethermatic Blue
Once more I went for it in a flurry of activity, and once more the outcome was pretty good.
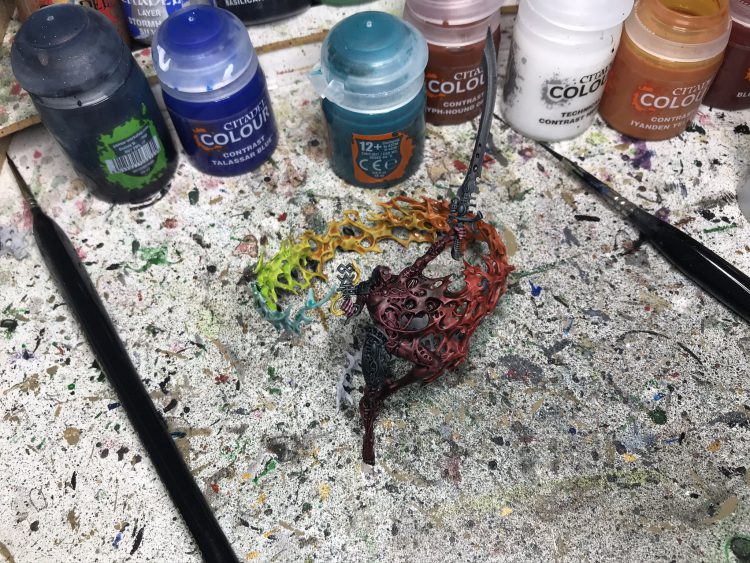
I again followed up with some drybrushing, paying particular attention to the body, which had come out a bit drab. Some
Evil Sunz Scarlet and
Fire Dragon Bright brought that up nicely. I used
Fire Dragon Bright and
Flash Gitz Yellow on the rest, and then did the gems as before, except using blues and greens rather than red and orange where that was needed to contrast with the swirl.
Finally on this section, I needed to do all the metals on the body. For this I used:
-
-
- Grey Knights Steel washed with Drakenhof for the large plates on the thigh and shoulder.
- Retributor Armour washed with Druchii Violet for the filigree and raised sections of the plates.
- Runelord Brass washed with Agrax on the sword handle (plus some Basilicanum Grey on the grooved bit to darken it).
- Leadbelcher highlighted with Stormhost, washed with thinned Basilicanum on the sword.
I also added colour to the gems as usual.
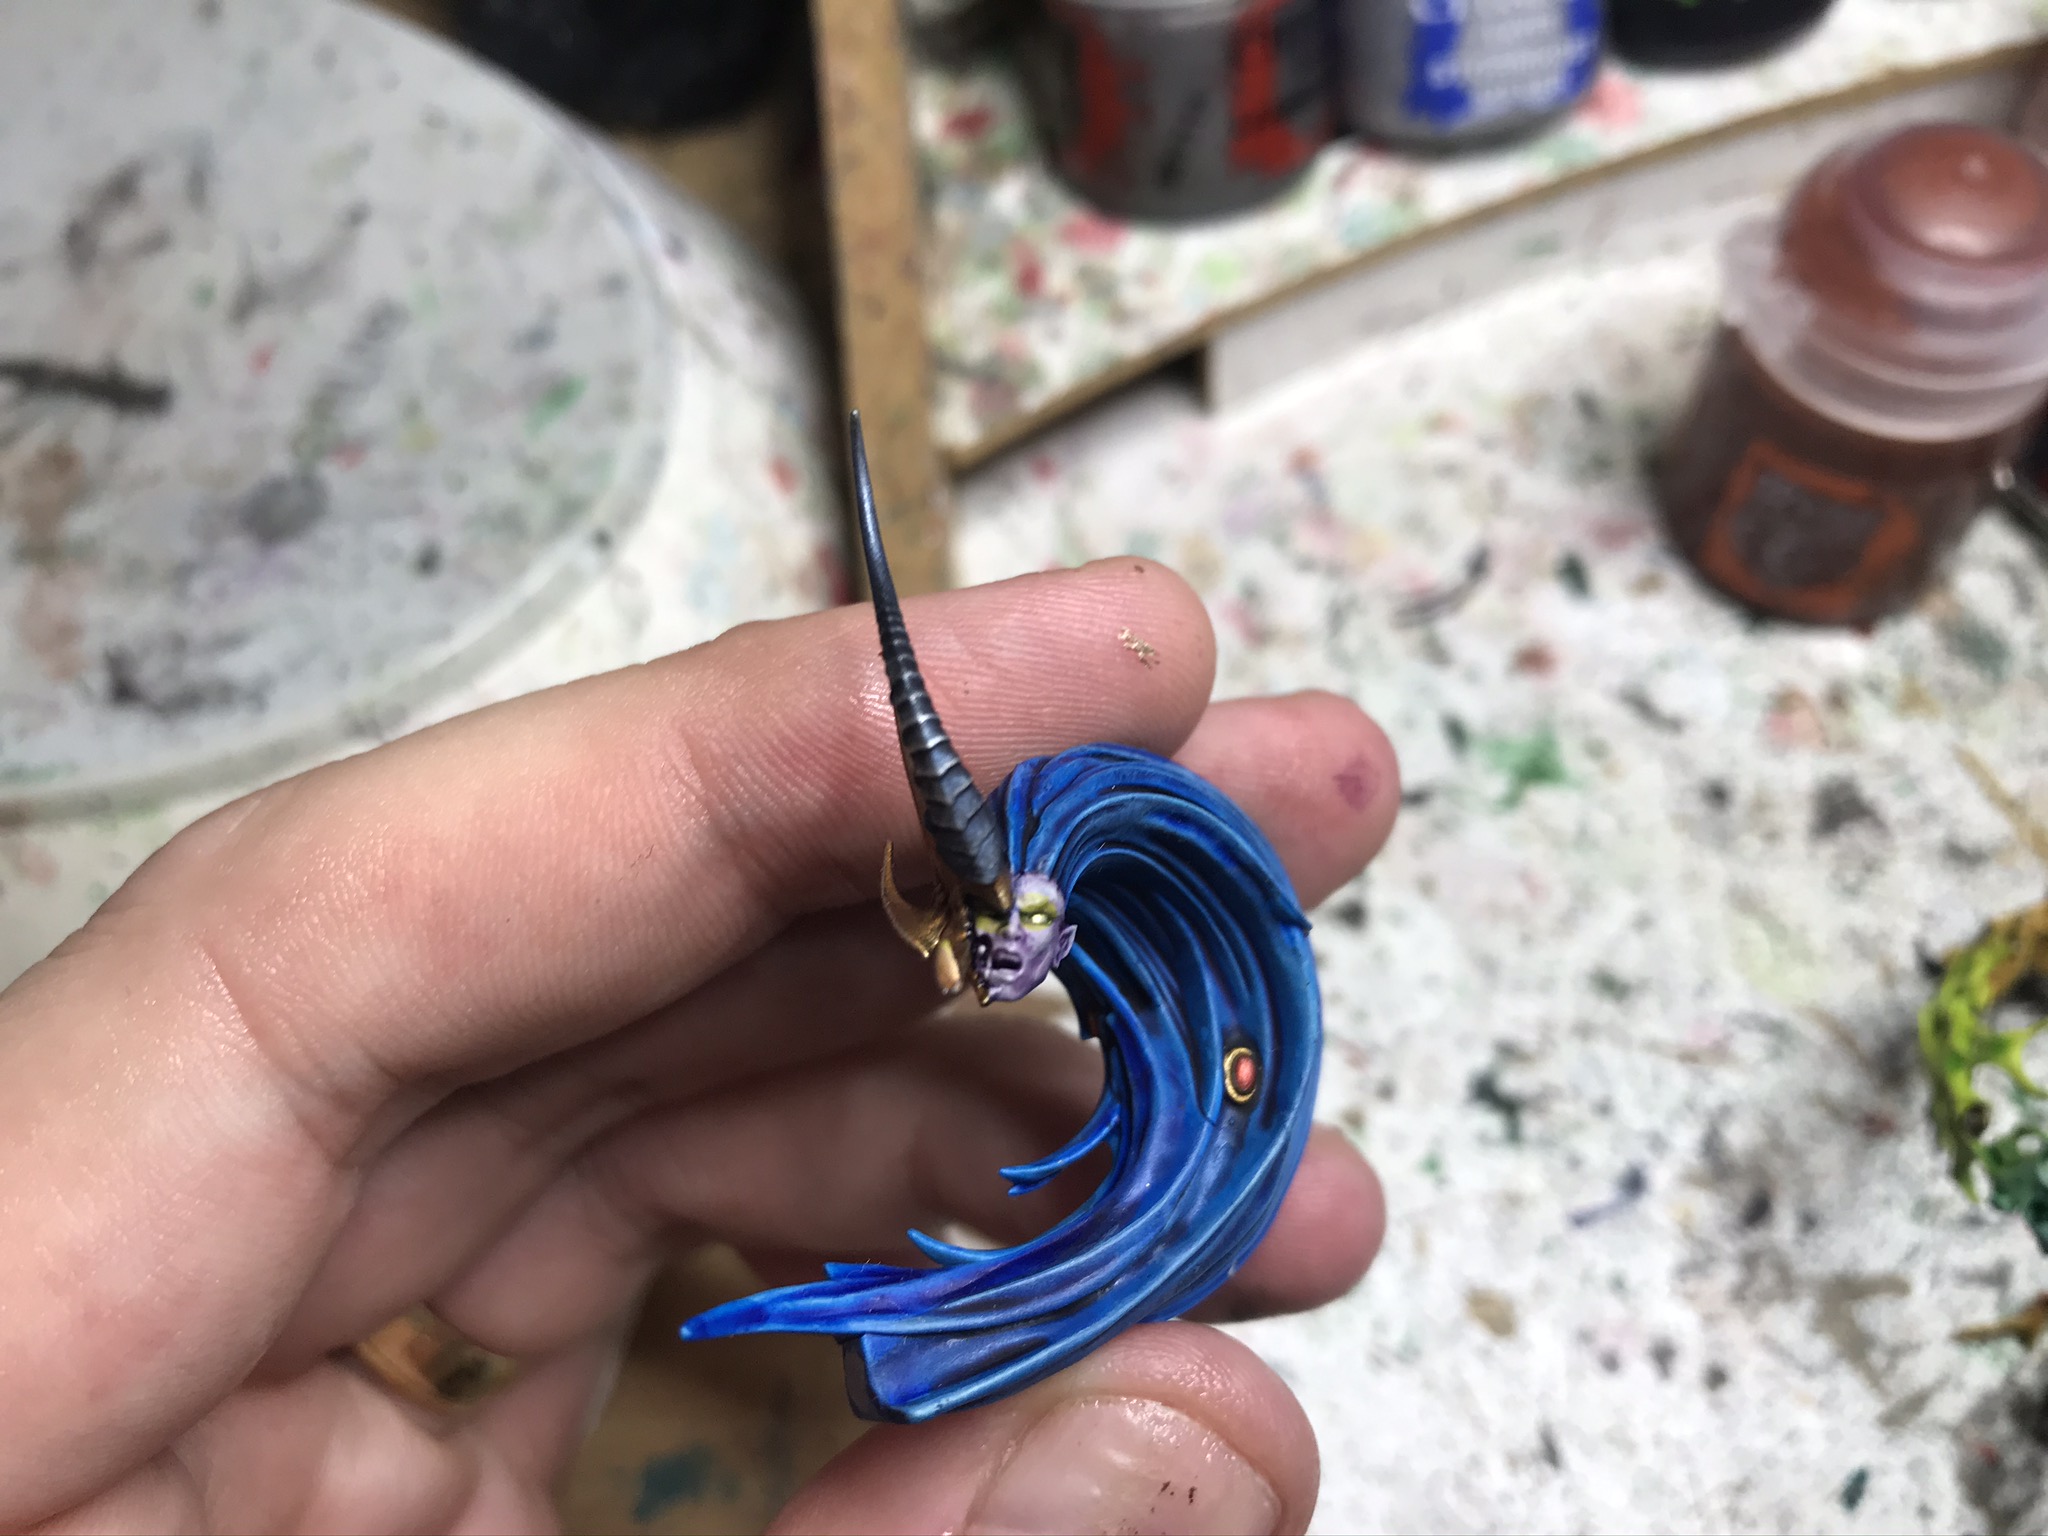
Finally, the head. The hair was
Talassar, continued from the base mount, and for the face itself I washed the
Grey Seer very gently with
Druchii Violet for a pallid effect, then highlighted with
Grey Seer to which I'd added a tiny amount of the violet. I dotted the eyes with Stormhost then added
Tesseract Glow, and for the horn I painted it in
Grey Knight Steel, washed with
Drakenhof and drybrushed
Stormhost. The face armour is just
Retributor >
Druchii > drybrush
Gehenna Gold.

Nearly there now - at this point I assembled the model and then added Astrogranite Debris to the non-scenic bits of the base.

Getting this together was a complete pain and I abraded the paints off the tips of some bits of the swirl, but luckily this was very easy to tidy up with thinned contrast of the appropriate colour. Once the
Astrogranite had dried, I washed it with
Basilicanum Grey and drybrushed with
Dawnstone. Finally, I painted the base rim black and we were done!
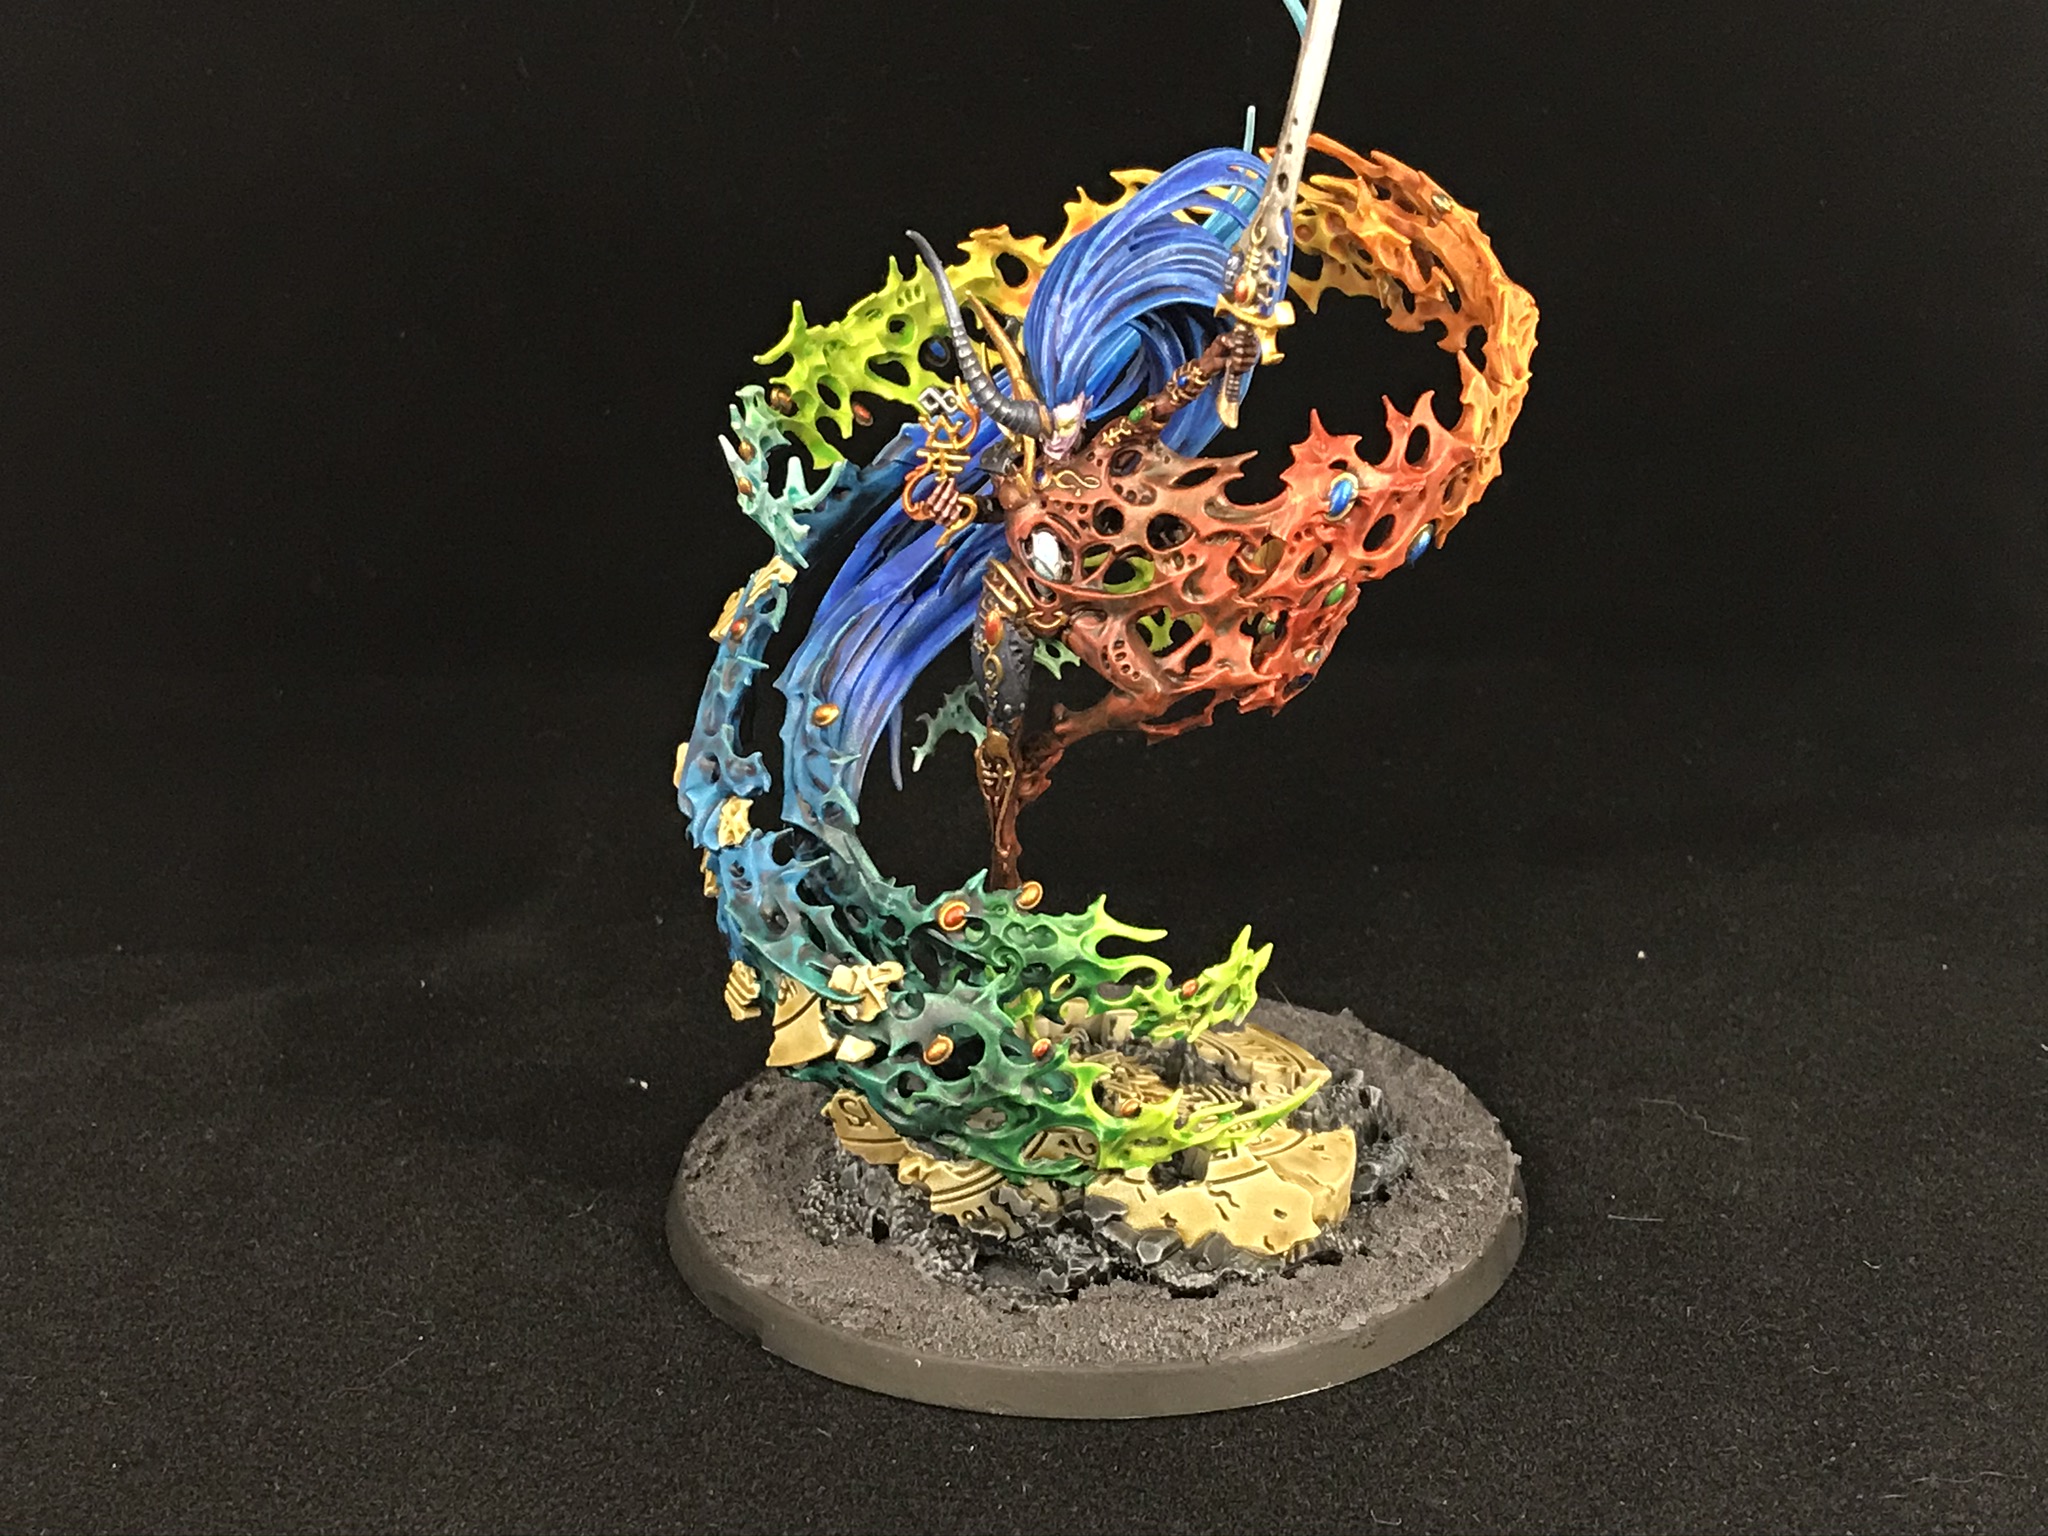
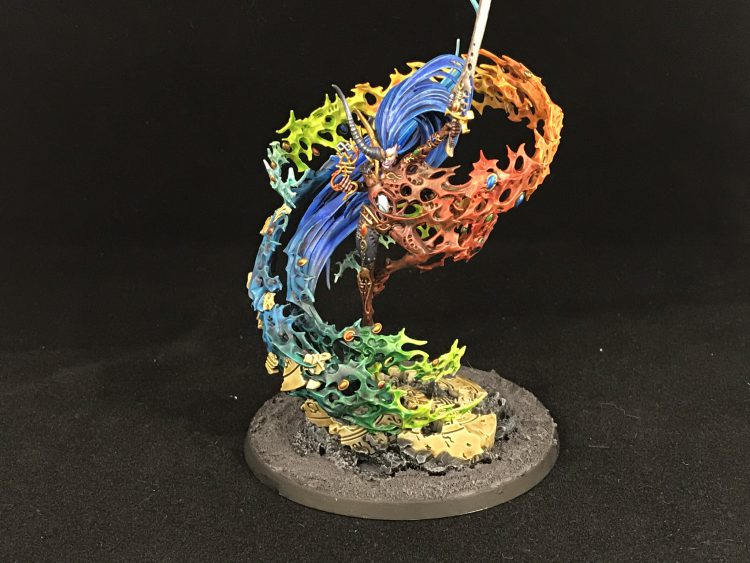 Credit: James "One_Wing" Grover
I'm thrilled by how this came out and surprised by how easy it was - I'll definitely be looking for opportunities to use Contrast blends in the future, as the results with minimal practice or skill were much, much better than I expected. I'd also strongly recommend the Contrast option for anyone else intimidated by this model, and I now look forward to actually getting it out on the table!


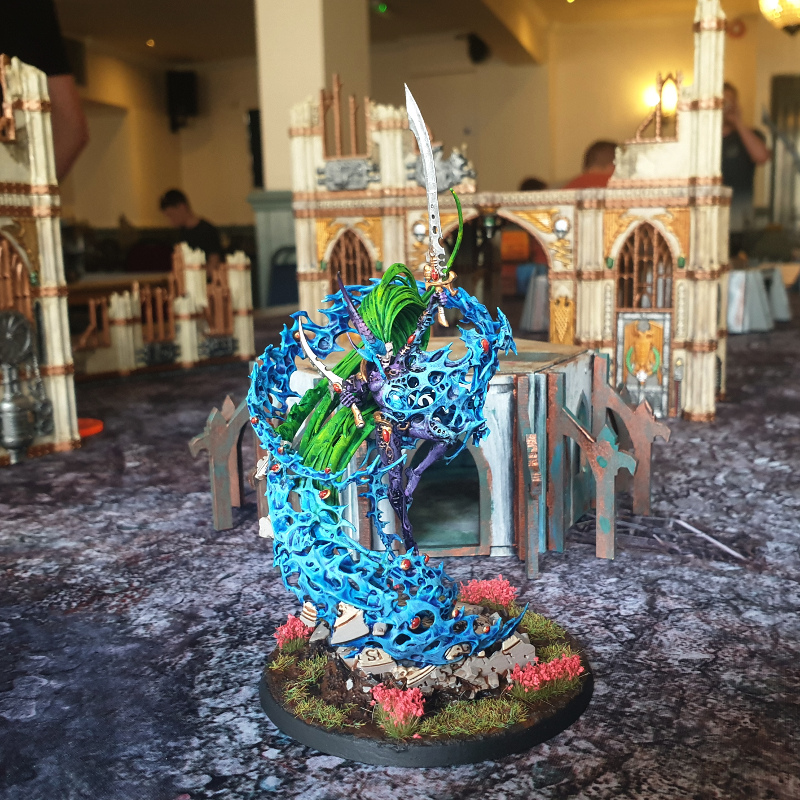 The Yncarne by Corrode


 I again followed up with some drybrushing, paying particular attention to the body, which had come out a bit drab. Some Evil Sunz Scarlet and Fire Dragon Bright brought that up nicely. I used Fire Dragon Bright and Flash Gitz Yellow on the rest, and then did the gems as before, except using blues and greens rather than red and orange where that was needed to contrast with the swirl.
 Nearly there now - at this point I assembled the model and then added Astrogranite Debris to the non-scenic bits of the base.

 Credit: James "One_Wing" Grover

 Goonhammer App and Patron Updates: April, 2026
 Kill Team Tournament Report: Engage, Party, Repeat's March Madness 2026
 Goonhammer Reviews: Tribal Conquest