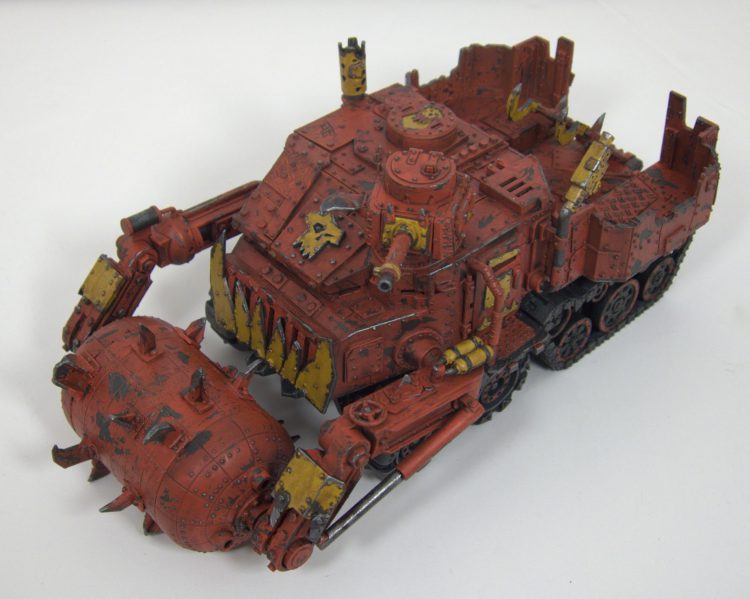
 Ork Battlewagon. Credit: Kevin Genson
Weathering with hair spray (and salt, which produces a similar effect) is about layers.
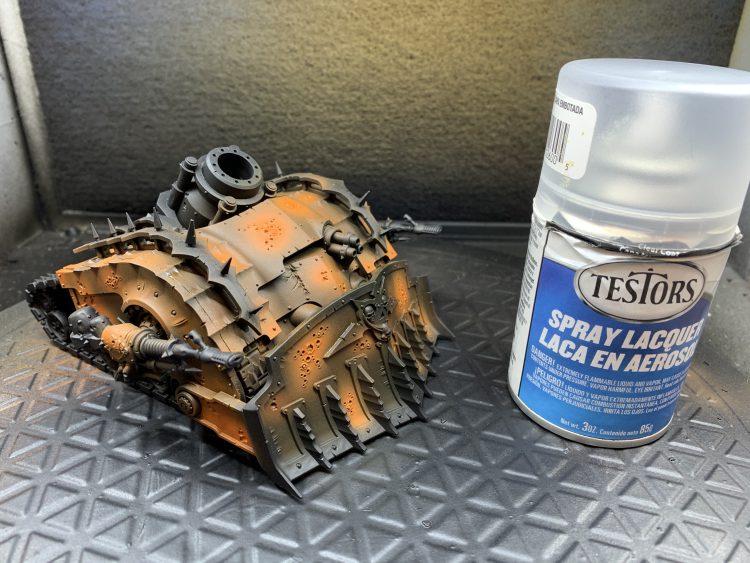
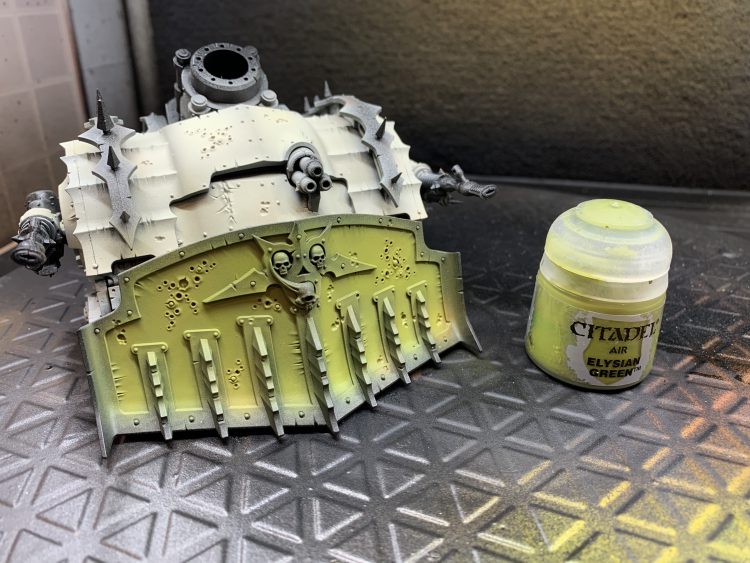
- Prime the model and paint the bare metal layer. The Battlewagon above was done with a simple metallic spray, brighter metallic drybrush, and dark black wash. If you also intend to add rust, this is when you would do so. This forms your foundation that will be revealed in the end.
- Apply a layer of varnish to seal in the base layer.
- Spray the entire model with a few thin layers of hair spray. Get the cheapest stuff you can find from a can. Theoretically, you could airbrush liquid hair spray (out of the pump style plastic container), but I haven’t tried it.
- Apply a base layer of paint, highlighting and shading as appropriate.
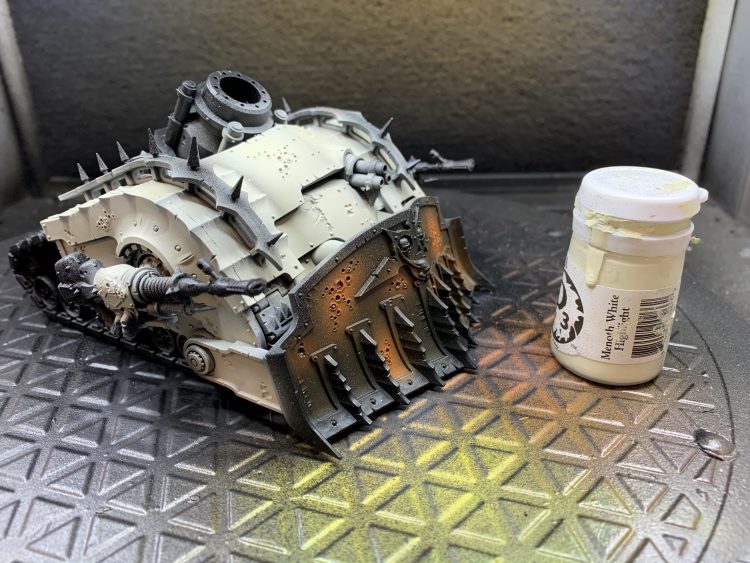
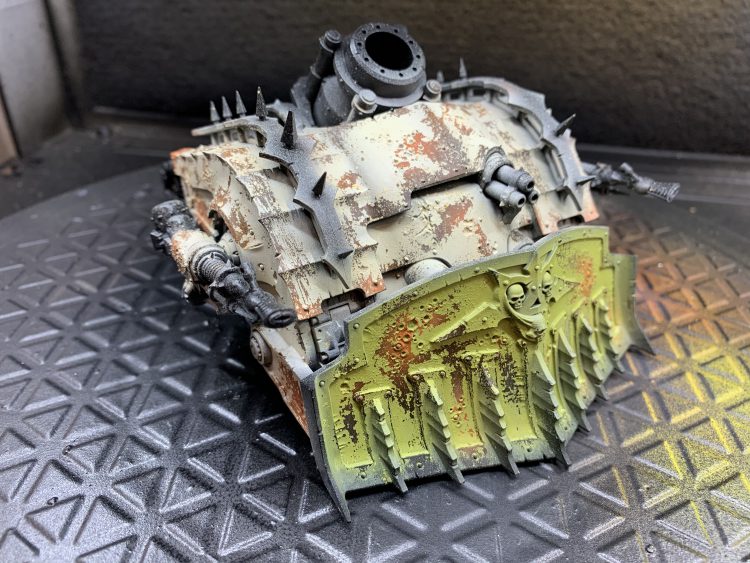
- Wet the surface with water and use an old toothbrush, toothpick or some other hard item to scrape away the top layer to reveal the bare metal underneath. Go slow, using a paper towel to clean up the excess water. Hair spray can cause large chunks of paint flake off, and once it’s gone it’s not likely to come back.
- Varnish the entire model to seal everything in.
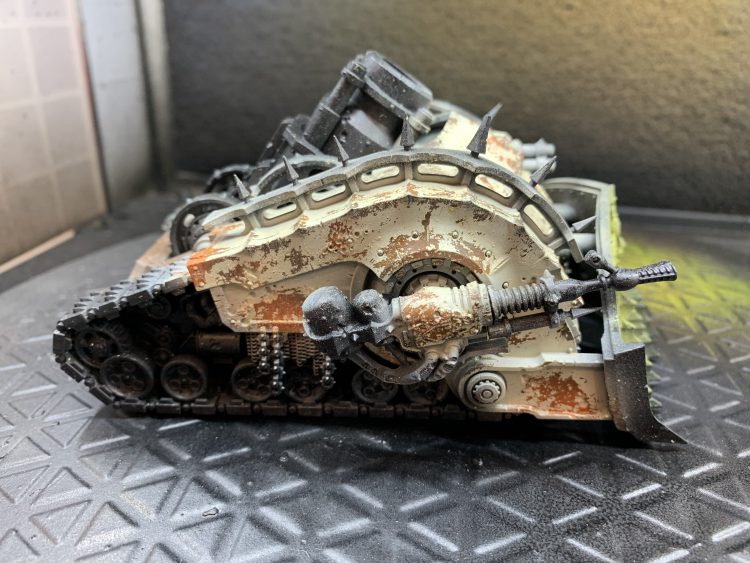
- If needed apply additional weathering steps. Perhaps an oil wash, highlight raised areas with silver to reveal recently damaged metal, apply pigment for dust or concentrated rust effects, etc.
The same technique can also work with a coarse salt like kosher salt. Instead of applying the hair spray, use water to deposit clumps of salt on areas that you want to see weathered. After painting, you can then remove the salt to reveal fine details bits of corrosion. Once you get used to the technique you can get a sense of what does and doesn’t work for your particular style, and combine effects as needed.

[expand title="Felime's Method - click to expand"]
I did a fairly detailed tutorial on the specific method discussed here, so I wanted to go a bit more in-depth into what makes weathering look good. Pretty much every effective weathering involves layering different textures on top of each other in ways that add to the techniques underneath, as well as covering up mistakes, assuming that you, like me, want to do things with as little effort and precision as humanly possible.
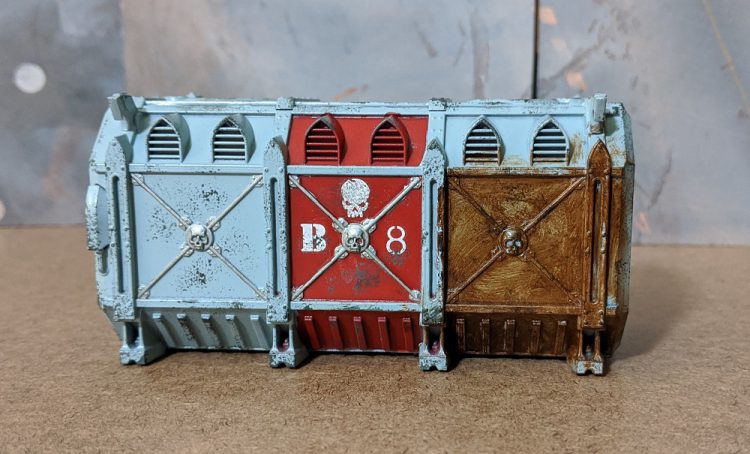
Textures can be anything that adds differentiation and visual interest to the model. When weathering, typically I try to have at least three layers of visual interest that compliment each other. Four is better, but after a certain point, you’ve devolved into historical diorama levels of effort and madness. In the case of my shipping containers, the layers of detail are the transfers, the sponge chipping, and the gradient produced by the oil paints. Each of these three steps is super simple and easy on their own and doesn’t really stand on its own, but together they make things really pop.

The transfers make the container look a little better, but at this point, it’s a container with stickers on it.
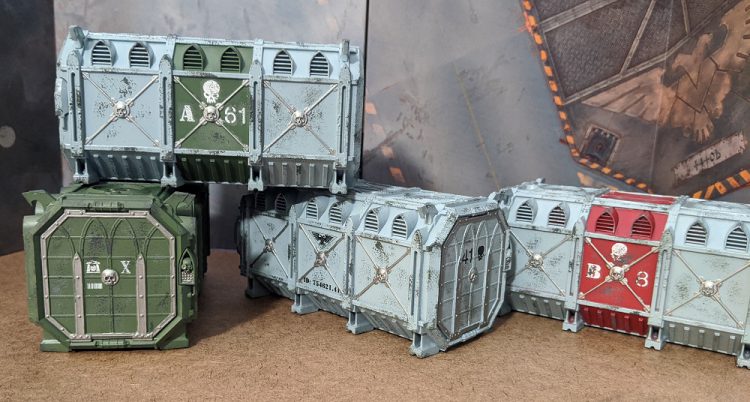
Now we’re starting to get somewhere. The key thing to notice here is that the chipping is interacting with the layer of detail with it, creating chips in the transfers (and covering up spots where I screwed up. Messed up the entire bottom of a skull transfer on one crate? Chipping takes care of that. Layered weathering helps hide your mistakes).
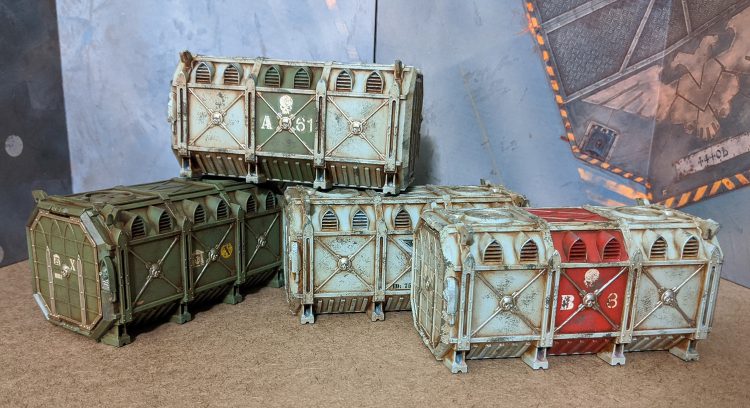
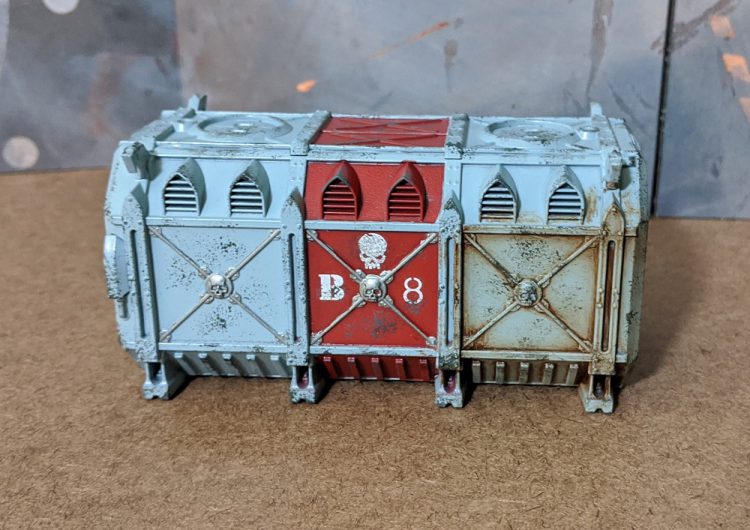
Oh, look, now we have a gradient on the models. This could be airbrush shading, recess shading. You could add mud splatters to the bottom, or slap some weathering powders there. The key is that each layer enhances the layers below it. In this case, the fade gives depth and variation to the chips, and dirties up the transfers, making them more interesting.
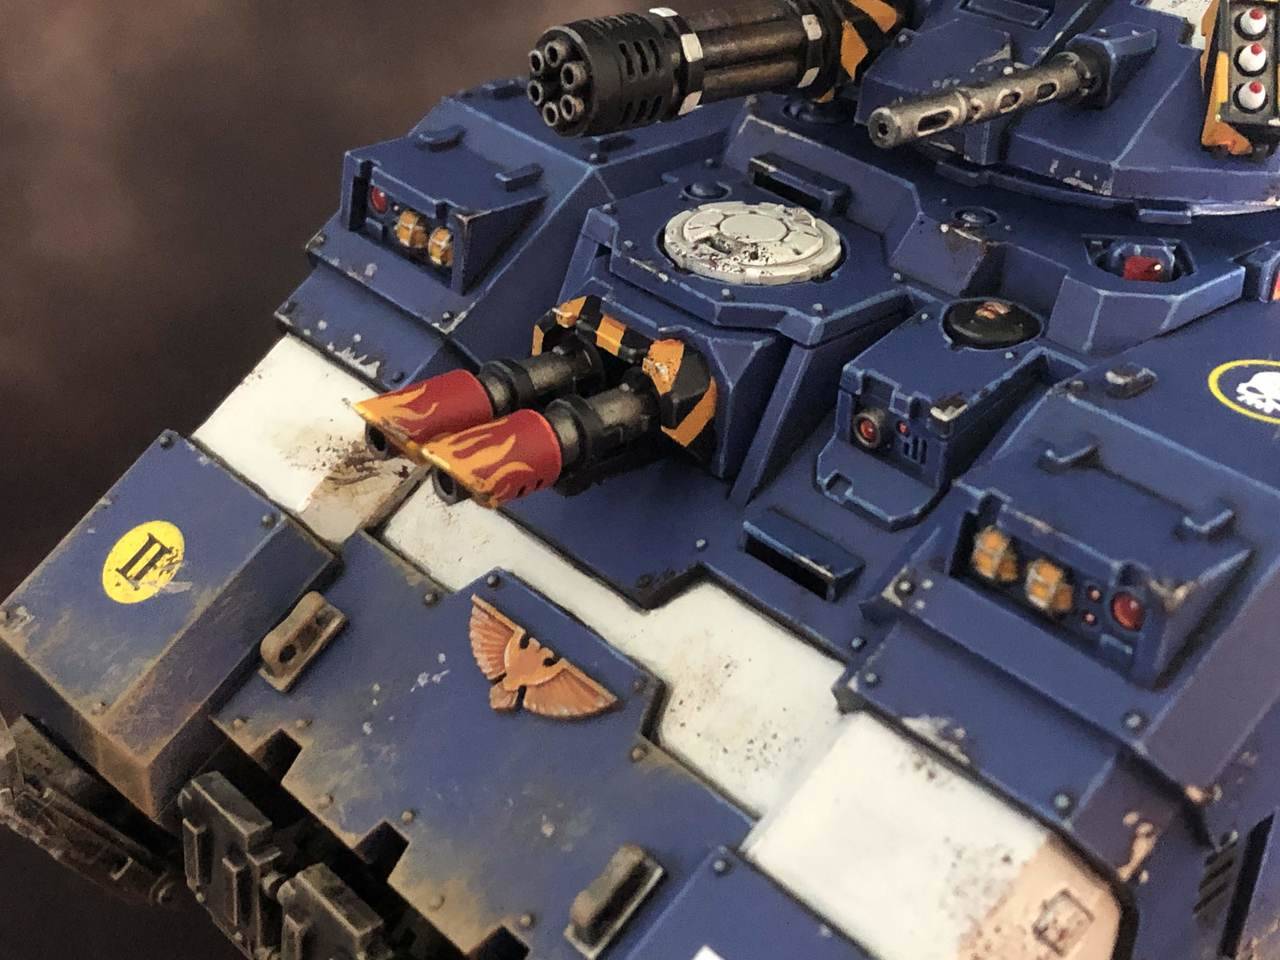
Now, I’m going to explain two techniques, so don’t get mad at me. The first is Sponge Chipping. Sponge Chipping is the simplest, easiest, least effort intensive method of chipping. It’s great for adding a spot of texture and edge damage to a model, but it doesn’t really produce an effect that’s amazing looking on it’s own. It’s best used in conjunction with other techniques, or possibly jazzed up by adding highlights to the lower edges of the chips with a brush, little specks of bare metal in the middle of large chips, or streaks of Agrax Earthshade weeping out of your rusty chips.
Take a sponge. The foam out of old blister packs is excellent. If you’re too tidy or young to have any of that, some pluck foam scraps from a model case works as well. Ball it up so you have a little round puff. Then jab that in some paint, gingerly. Then blot that off onto your palette or a paper towel, until you’re leaving a pattern you’re happy with when you press down. Then just jab it onto the bits you want weathered. Instant chips.
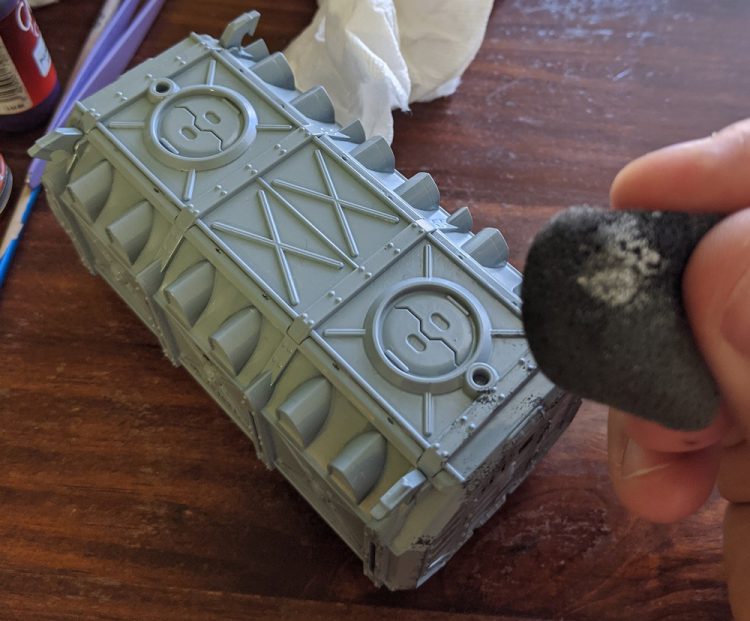
Concentrate along the edges and jab it repeatedly to form larger chips on corners that would see a lot of abuse and wear. The little poof of foam produces a pretty fine chip pattern. If you want bigger chips, you can tear the foam and use an edge to blot on the paint.
The second technique is borrowed from the prop and cosplay world. To put it simply, you take some paint, smear it all over your model, then wipe as much of it off as possible. This has some very significant limitations and caveats. This is most useful for large surfaces, such as vehicles, terrain, etc. It’s very hard to get into the recesses of an infantry size model to clean it out the way you’d want to. It will also tint the color beneath a great deal, so if you want your vehicles to match your Marines' armor, this is not the technique you want. What it is good at is being dead easy, amazingly forgiving, and quite quick in comparison to carefully shading all your recesses.
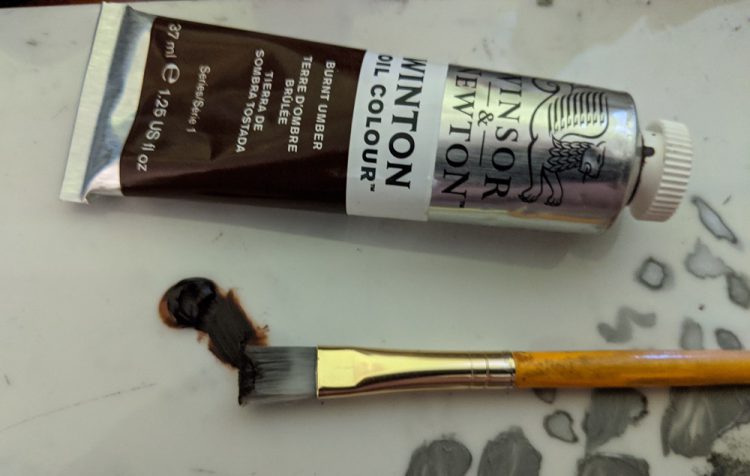
Take some oil paint. Burnt umber is a great color. Not so strong it overpowers things completely like black oil paint, but a nice strong grime color.
Smear that shit everywhere with a brush you don’t care much about. It is good to work in sections so you don’t get paint all over your hands as much.
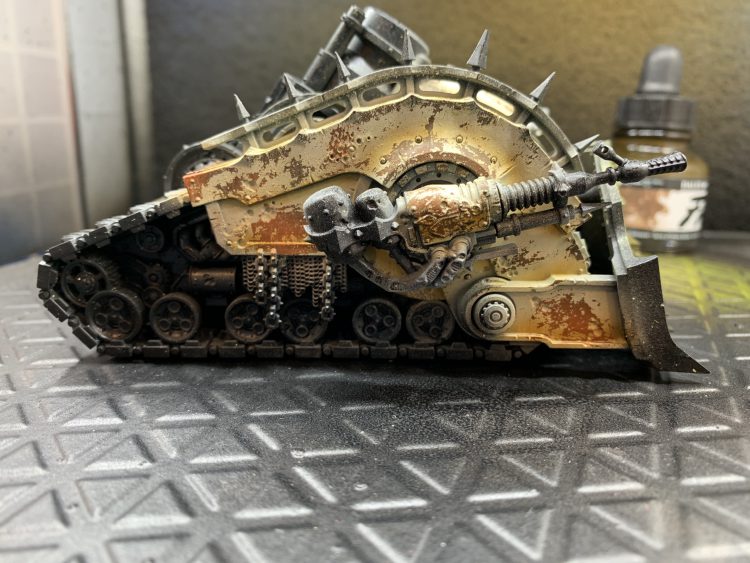
Then wipe it off. A paper towel works for most areas, and a q-tip will get into deeper recesses if you need. You have plenty of time to play with the effect to get it where you want it. Once you’re happy with it, put it inside a cardboard box somewhere to dry for a week or so without getting dust or hairs in the oil paint, and wash your hands. The oil paint will get on your fingers, and it will stay wet and get on things if you don’t wash well with soap and water. Soap and water will also mostly clean your brush, though you’ll never get all of the oil paint out of it.

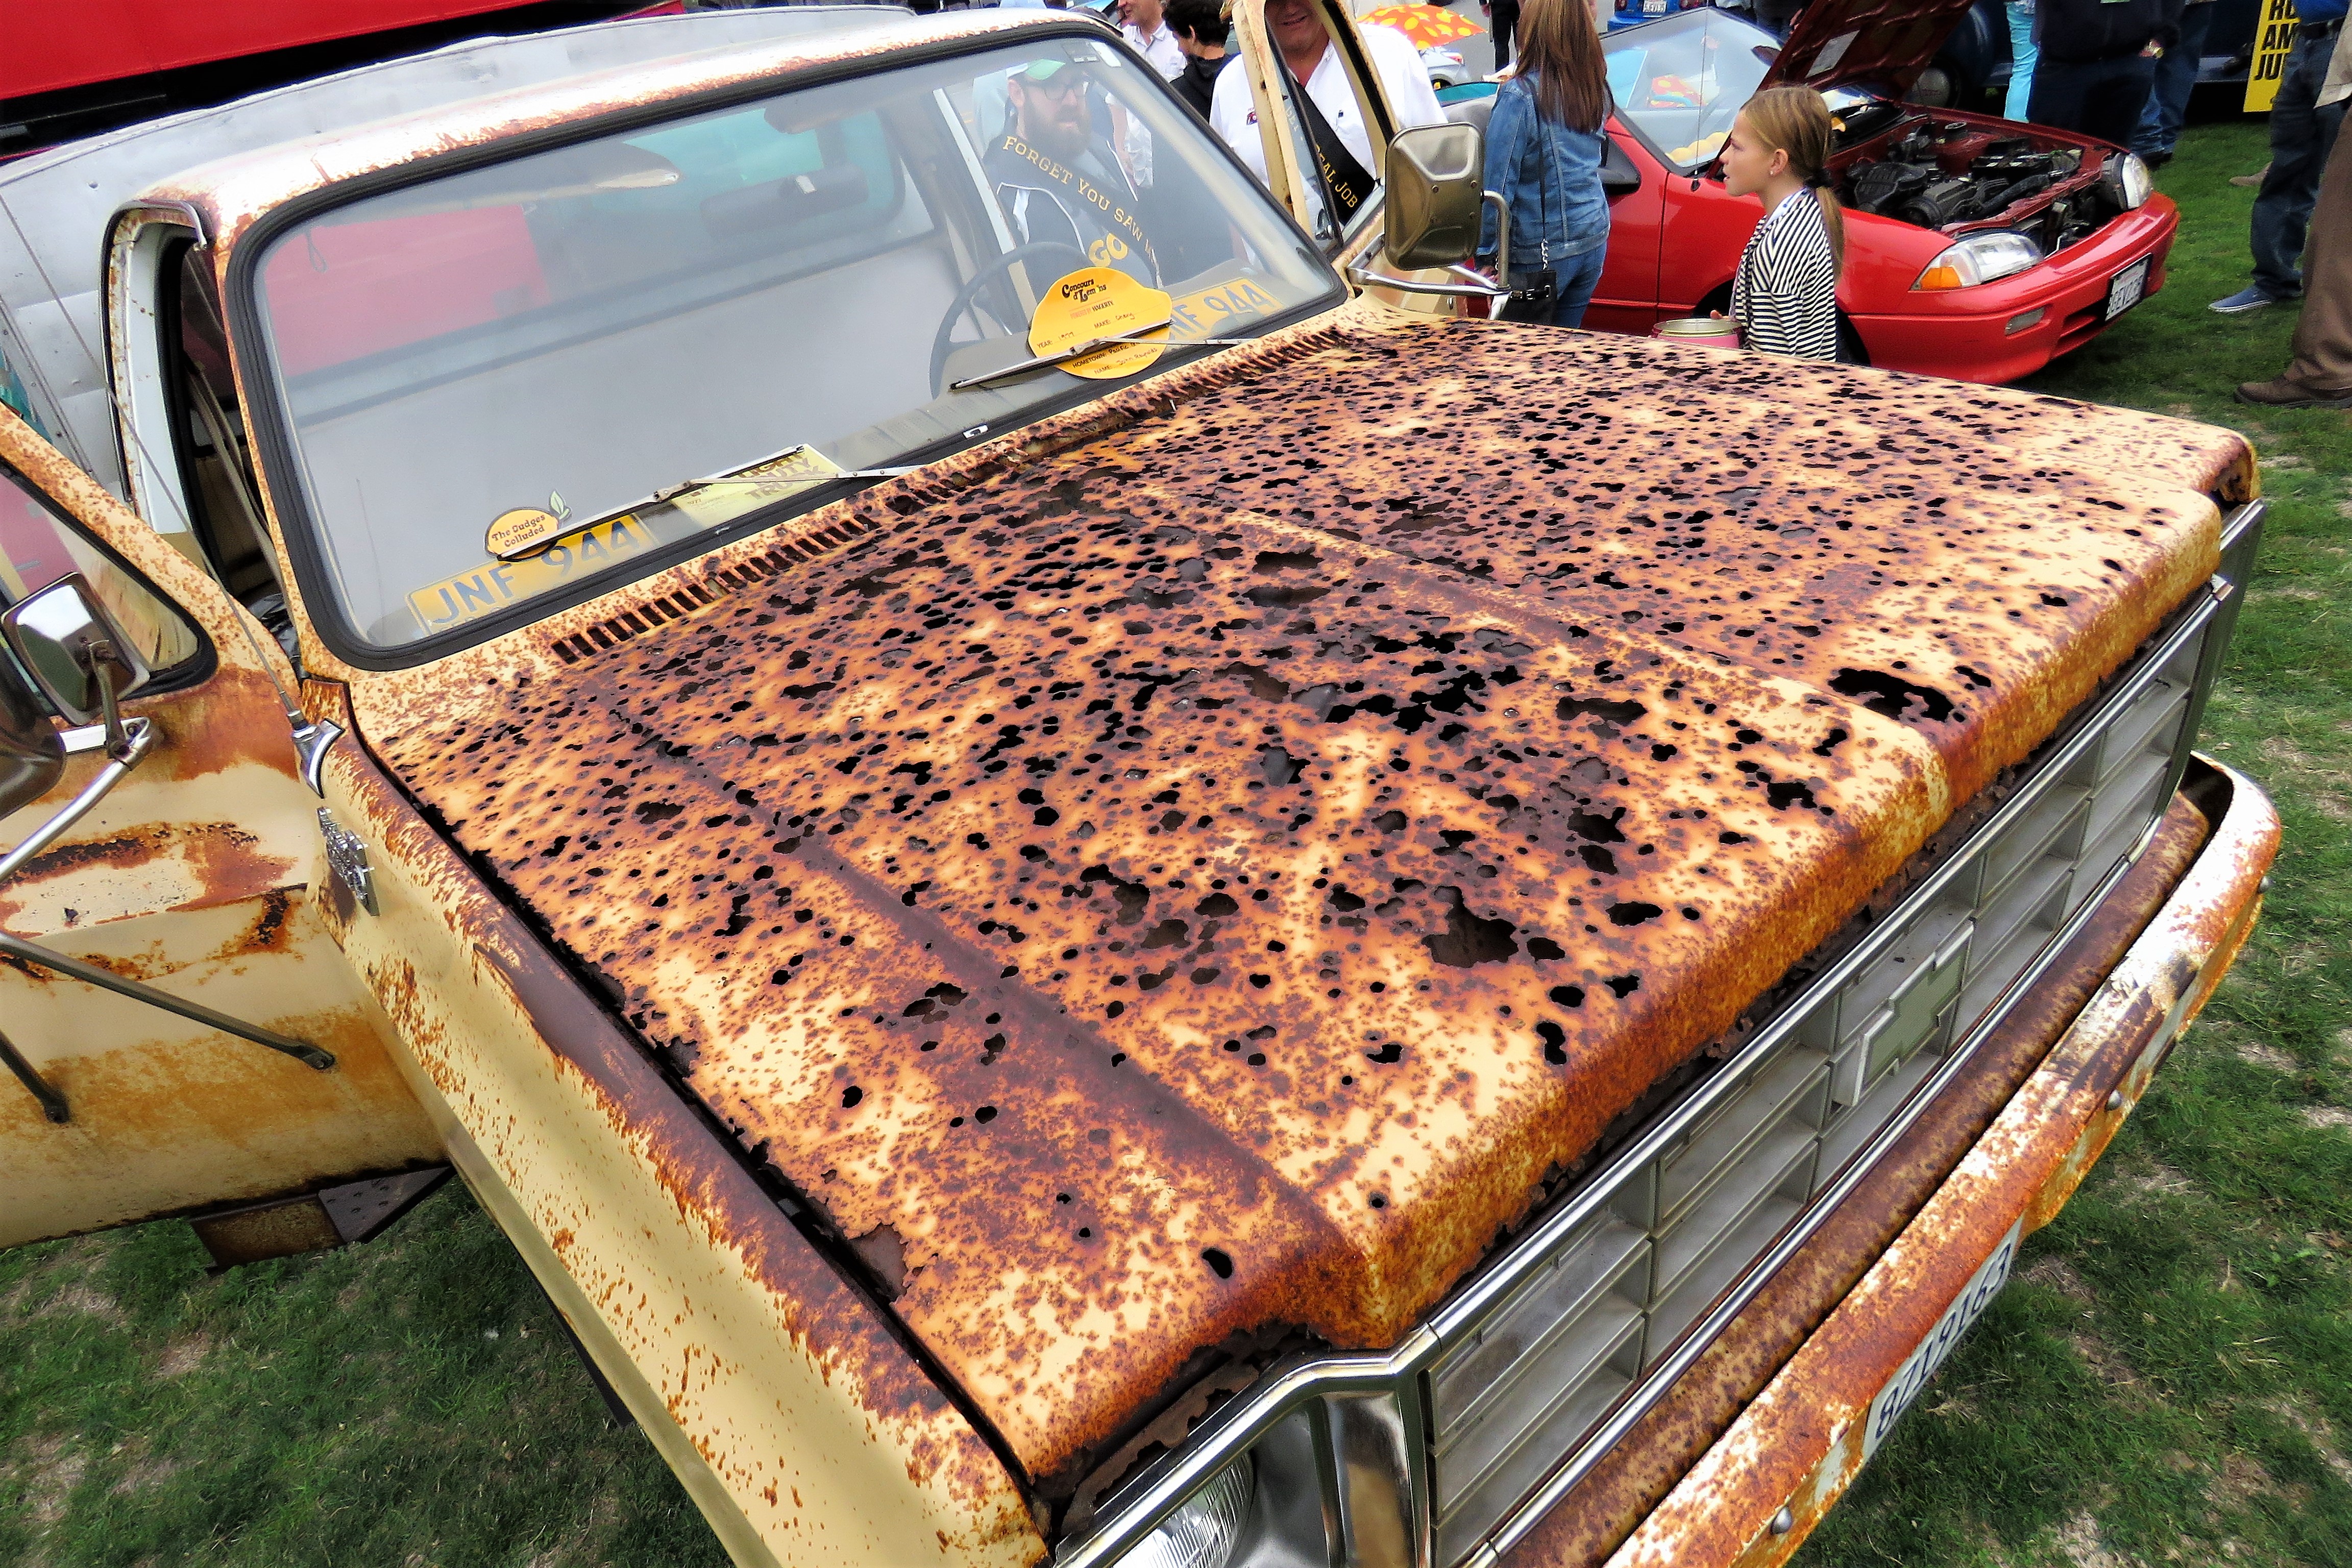 Rust on a car
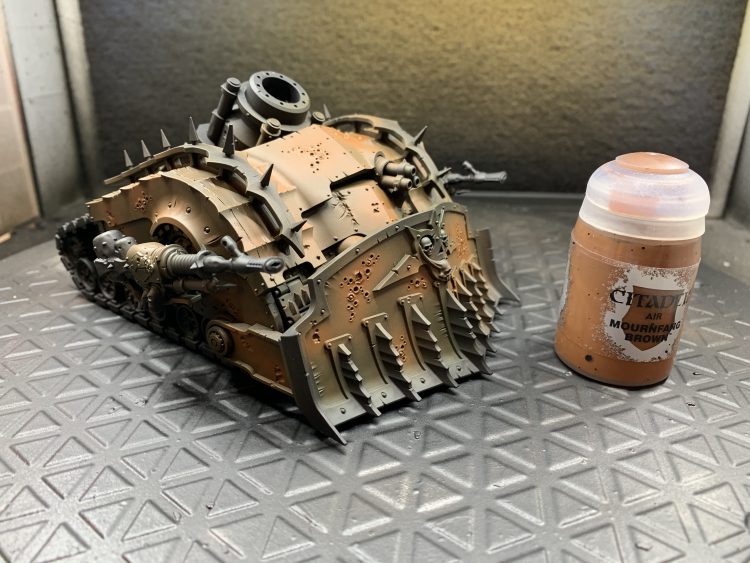
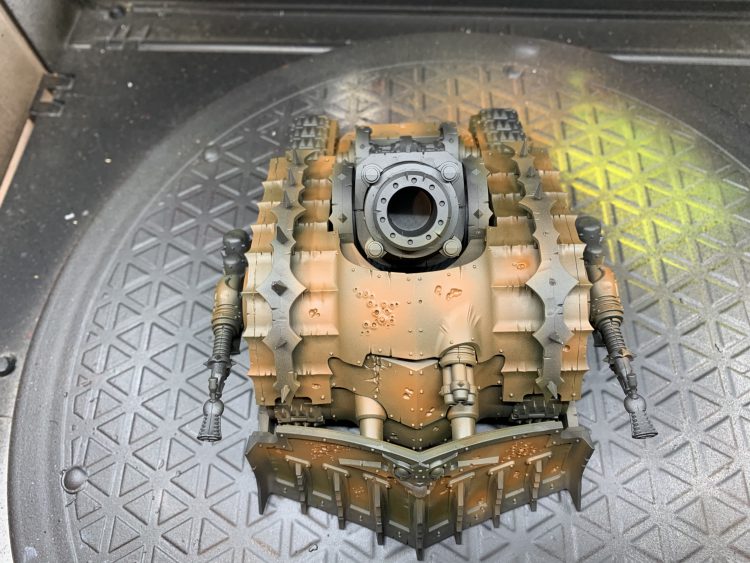
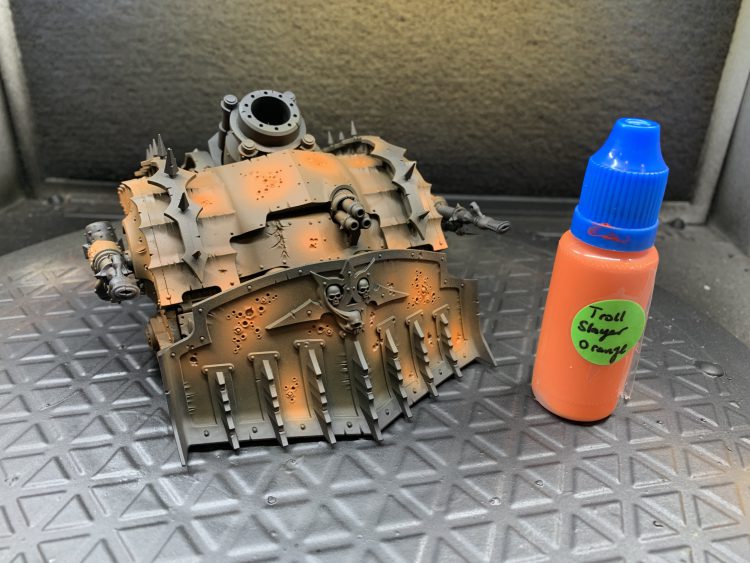
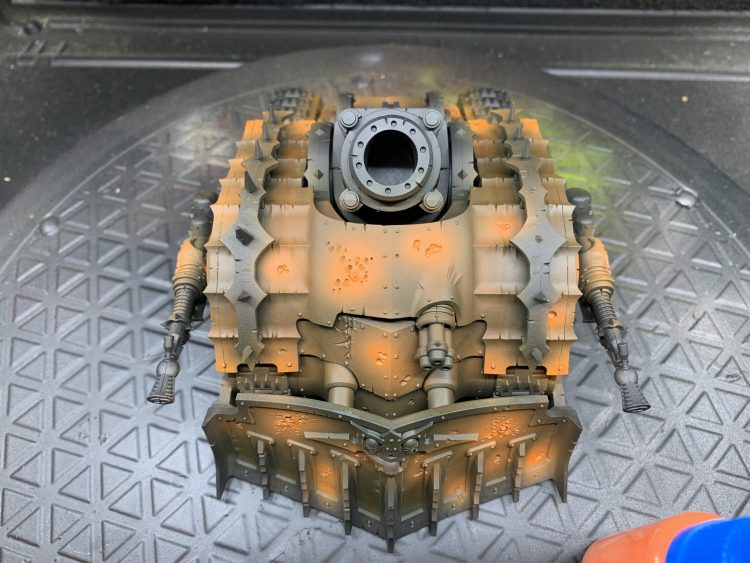
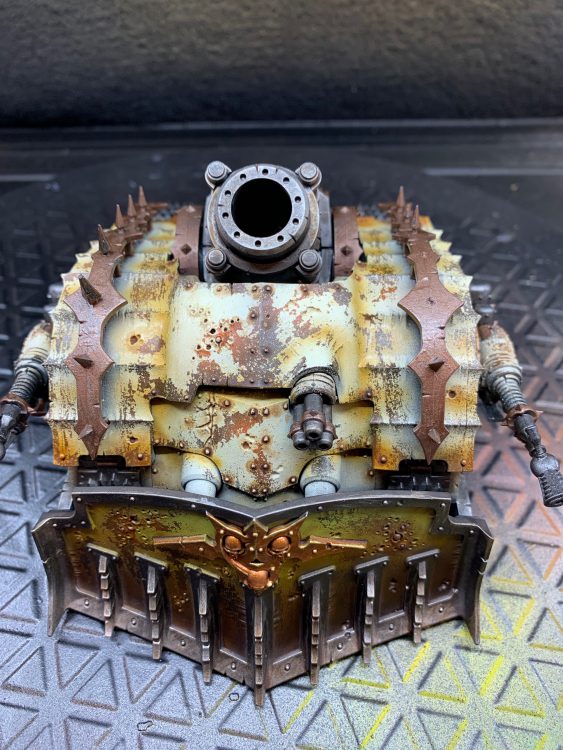
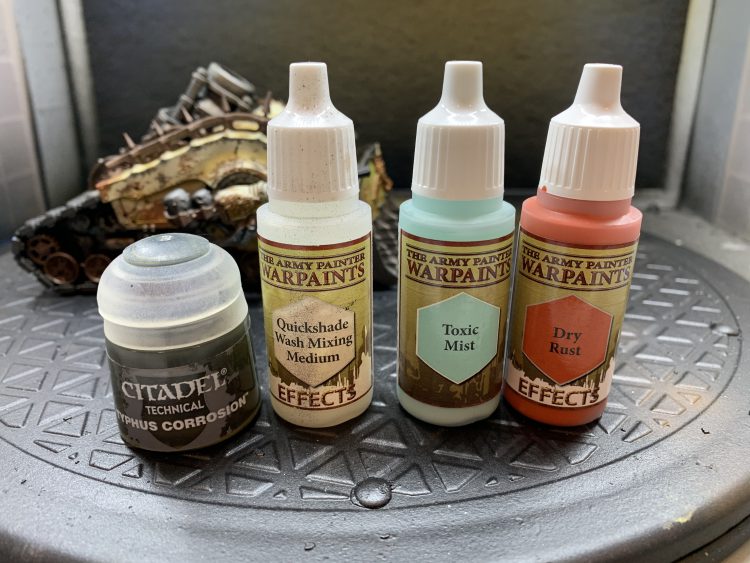
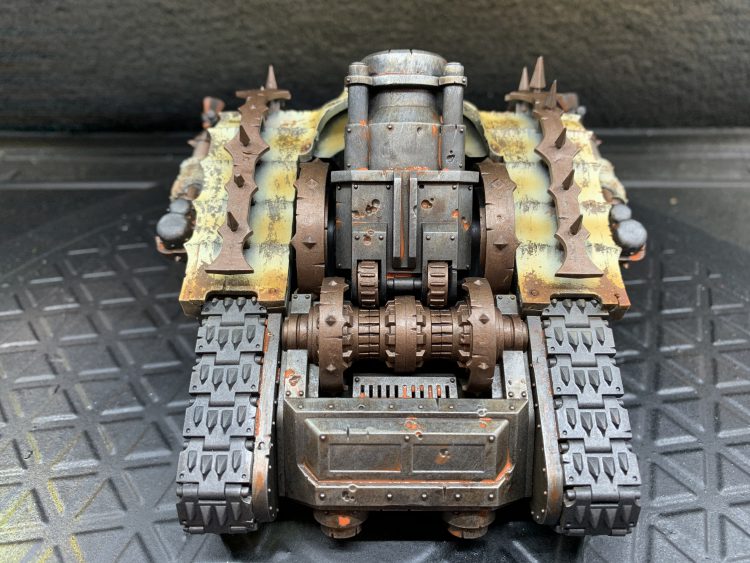
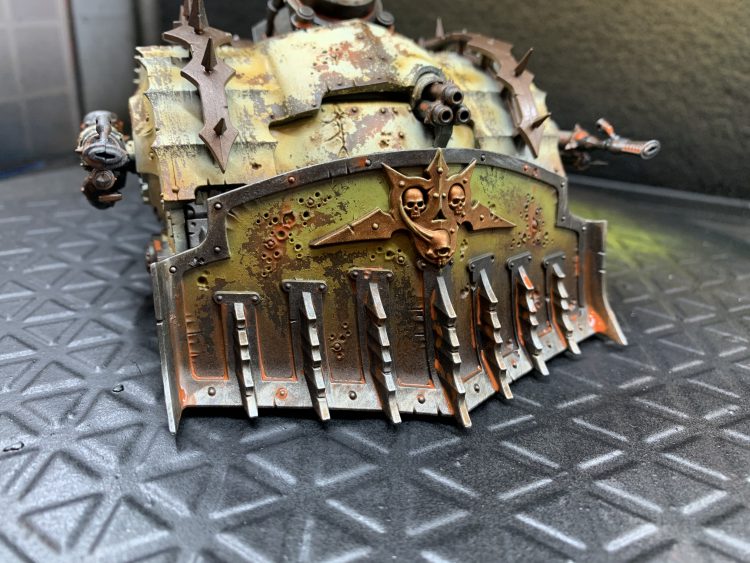
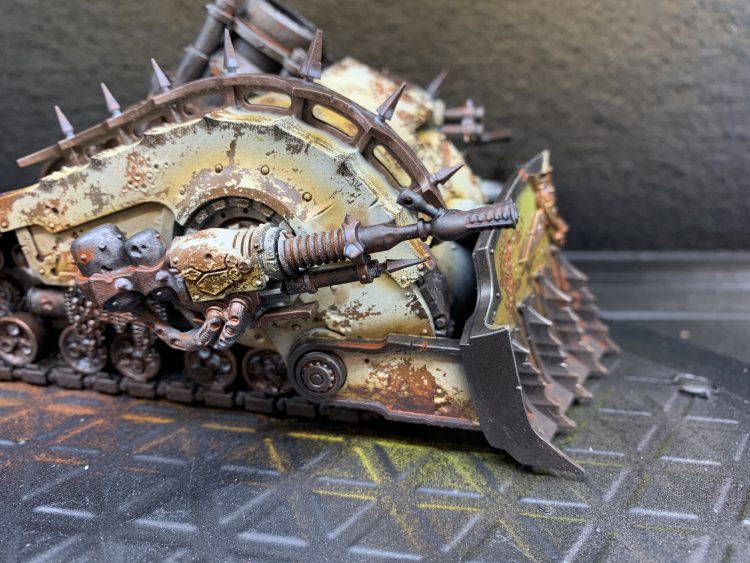
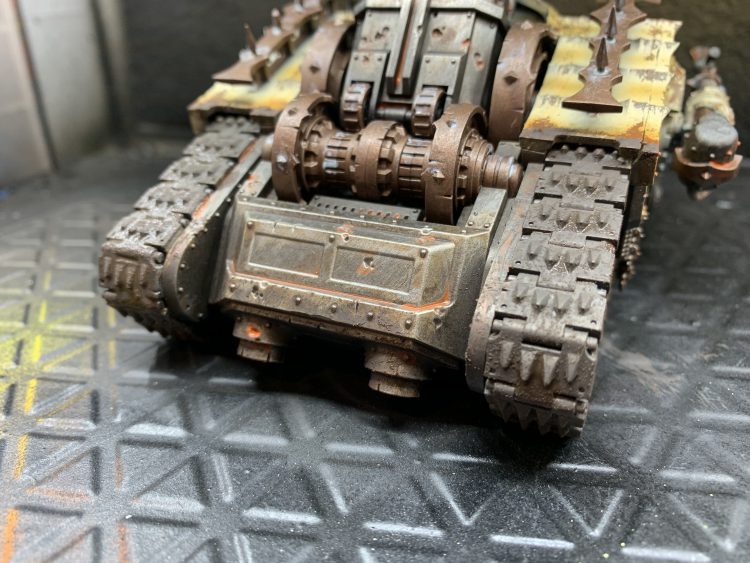
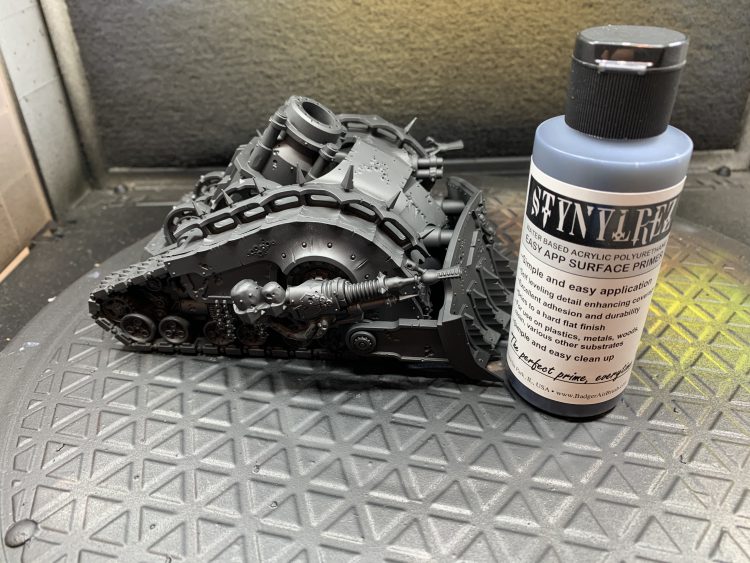 Plagueburst Crawler - credit Charlie A
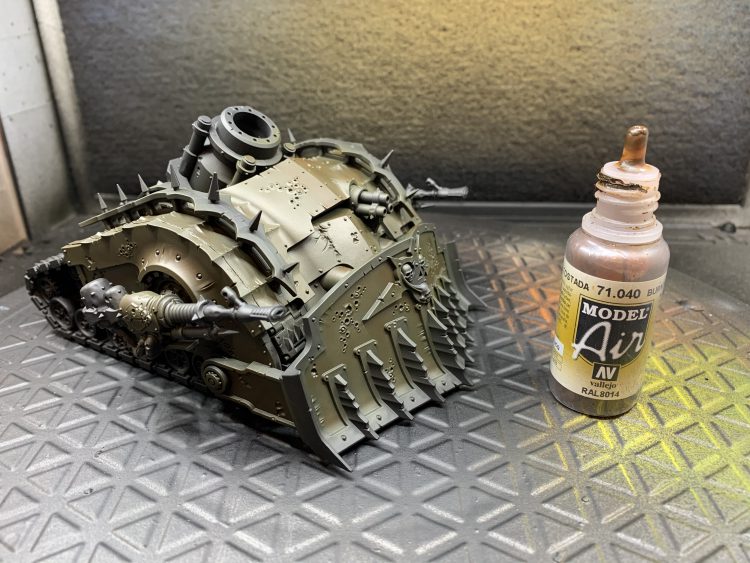 Plagueburst Crawler - credit Charlie A
 Plagueburst Crawler - credit Charlie A
 Plagueburst Crawler - credit Charlie A
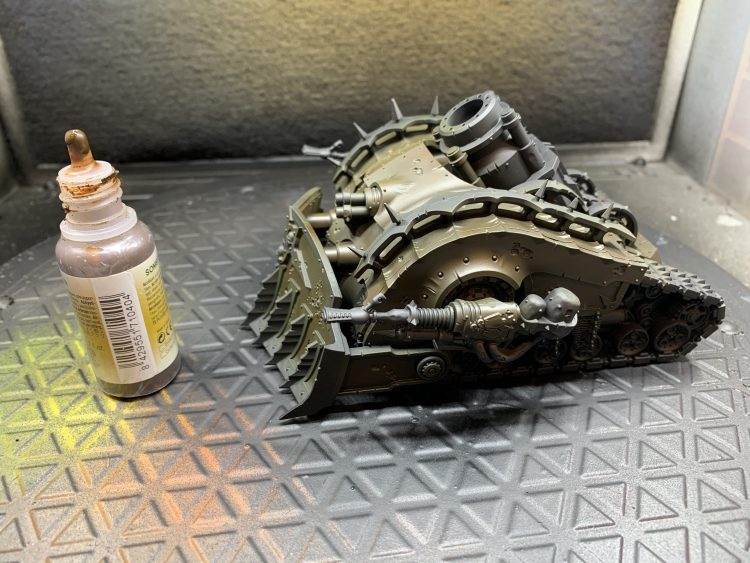
 Plagueburst Crawler - credit Charlie A
 Plagueburst Crawler - credit Charlie A
 Plagueburst Crawler - credit Charlie A
 Plagueburst Crawler - credit Charlie A
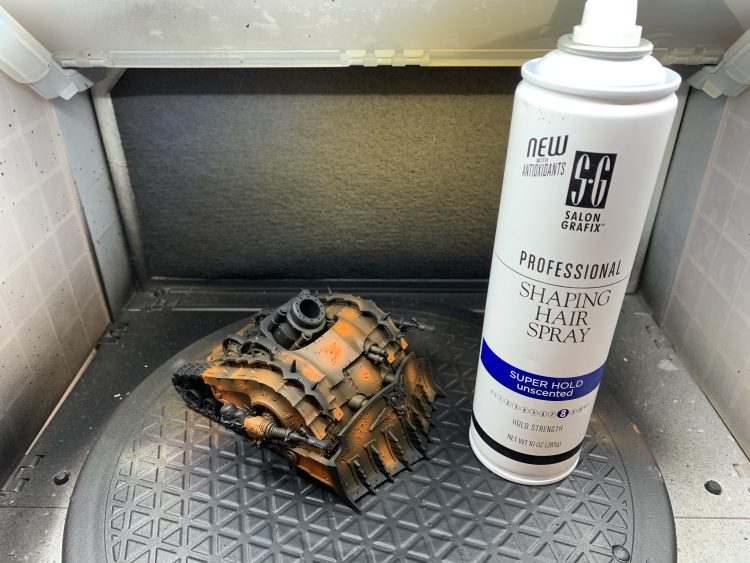 Plagueburst Crawler - credit Charlie A
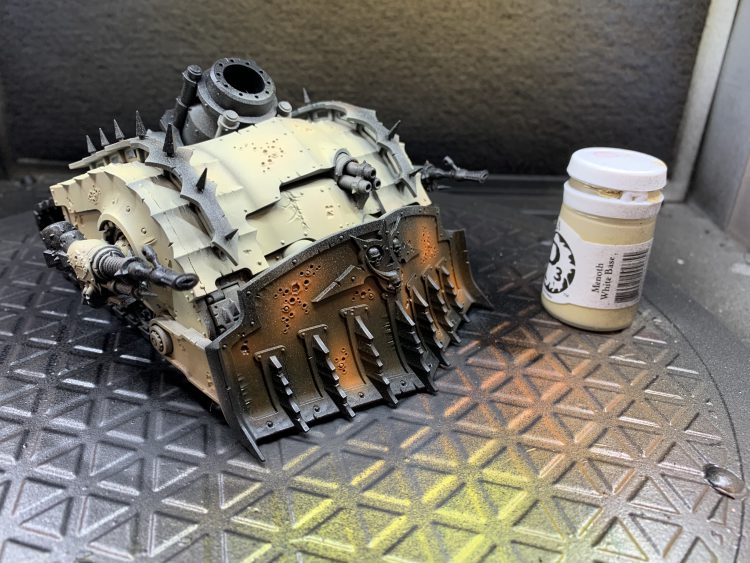 Plagueburst Crawler - credit Charlie A
 Plagueburst Crawler - credit Charlie A
 Plagueburst Crawler - credit Charlie A
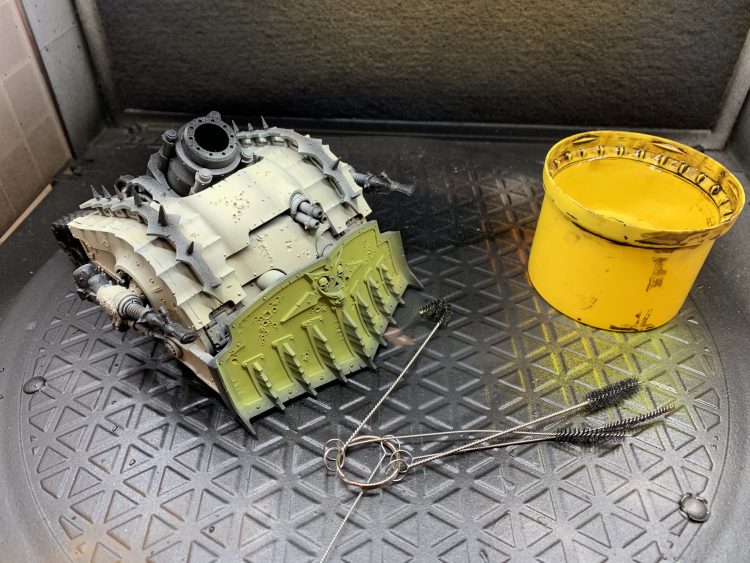 Plagueburst Crawler - credit Charlie A
 Plagueburst Crawler - credit Charlie A
 Plagueburst Crawler - credit Charlie A
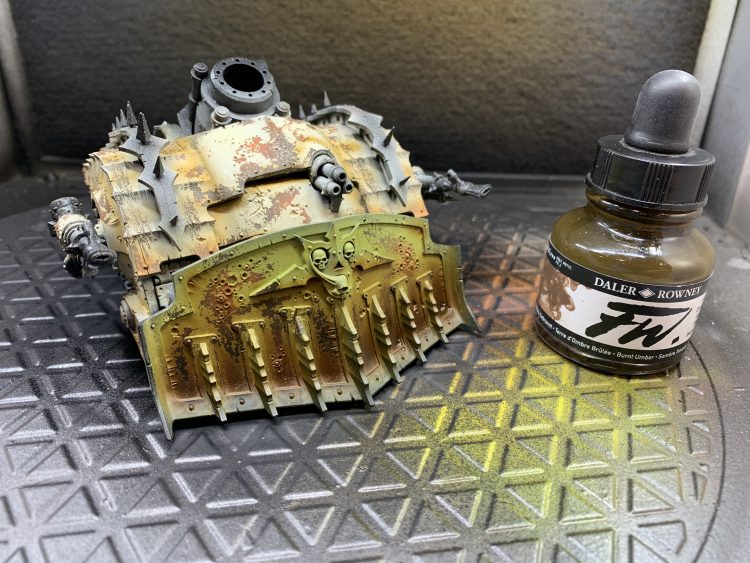 Plagueburst Crawler - credit Charlie A
 Plagueburst Crawler - credit Charlie A
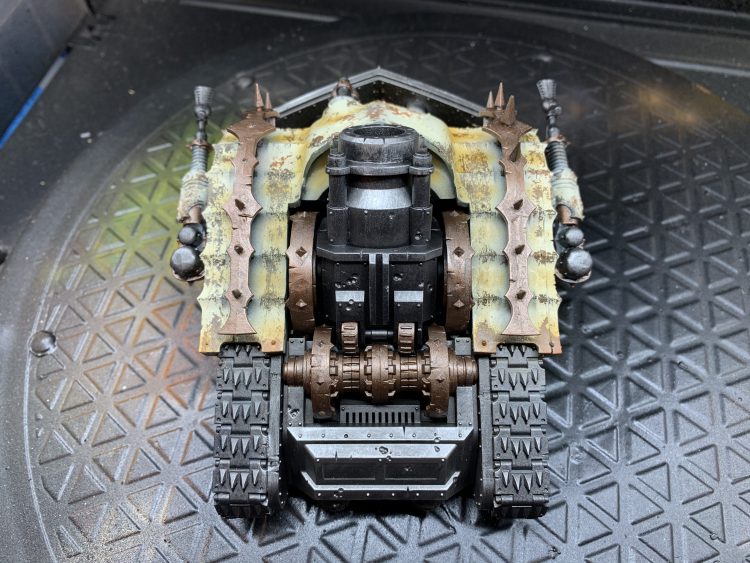 Plagueburst Crawler - credit Charlie A
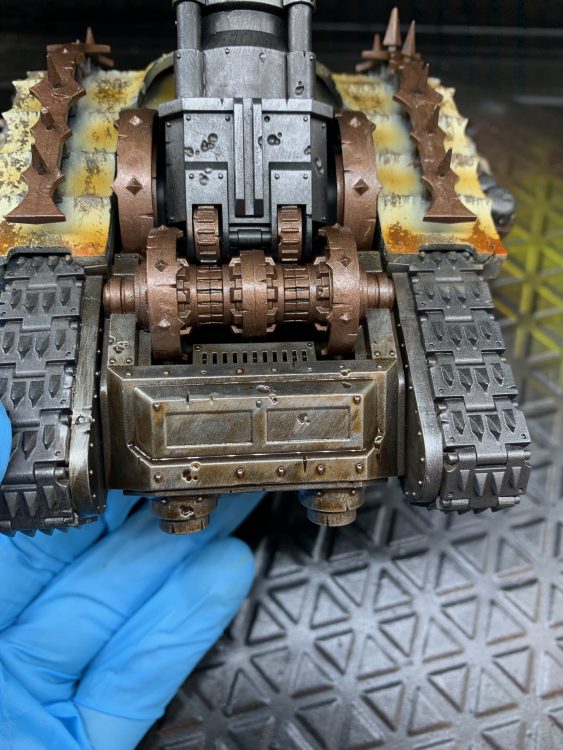 Plagueburst Crawler - credit Charlie A
 Plagueburst Crawler - credit Charlie A
 Plagueburst Crawler - credit Charlie A
 Plagueburst Crawler - credit Charlie A
 Plagueburst Crawler - credit Charlie A
 Plagueburst Crawler - credit Charlie A
 Plagueburst Crawler - credit Charlie A


 The last bit of weathering I’ll usually do on a vehicle is dry brushing. It can give you a quick, dusty, and dirty look in no time. Usually what I’ll do is start with a drybrush going up about a third of the model with Steel Legion Drab, starting heavier at the bottom and getting lighter going up. I’ll follow that up with a second drybrush about a quarter of the way up the model with Tallarn Sand, going over the areas I already hit before. Finally, I’ll do a third drybrush, roughly a fifth of the way up the model with Karak Stone, following the same process I’ve followed before. Depending on how muddy you want your vehicle to look, you can mess with these ratios or focus around some parts of the vehicle that would contact the ground more (the tops of Rhino ramps, for instance) but experiment with what works best for you. If you’re really in a rush like me, you can even skip edge highlighting the bottom half of a tank if you’re just going to drybrush it! It’s the painting equivalent of putting your essay in 13 point font and pushing the margins in a quarter-inch to hit the page count requirement, but it works here as well as it did in 10th grade.
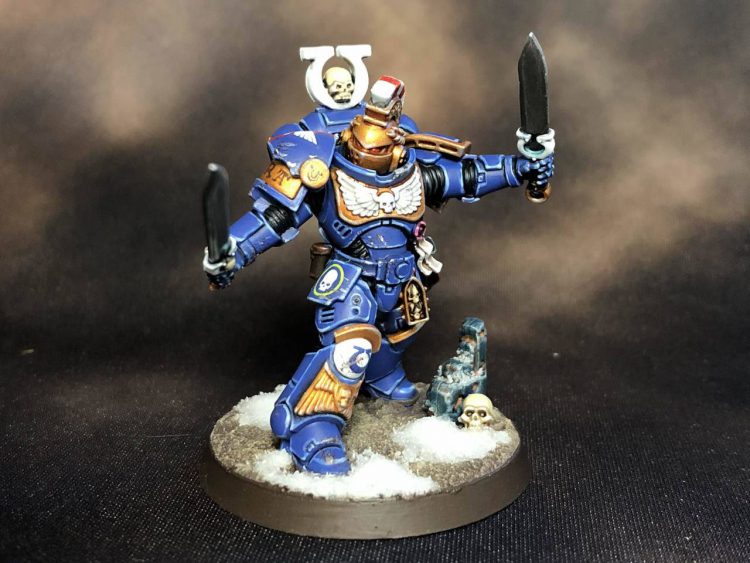 Ultramarines Chapter Champion. Credit SRM

 Goonhammer App and Patron Updates: April, 2026
 Kill Team Tournament Report: Engage, Party, Repeat's March Madness 2026
 Goonhammer Reviews: Tribal Conquest