In a world seemingly beset on all sides by one flavor of Satan or another, it falls down to the little guy to hold the line and fight for what they believe in. Oh there's also this game called Trench Crusade that does something similar, I guess. Today I'm going to walk you through how I painted my New Antioch troops, from the littlest Yeoman to the most towering Machine Armor.
What You'll Need
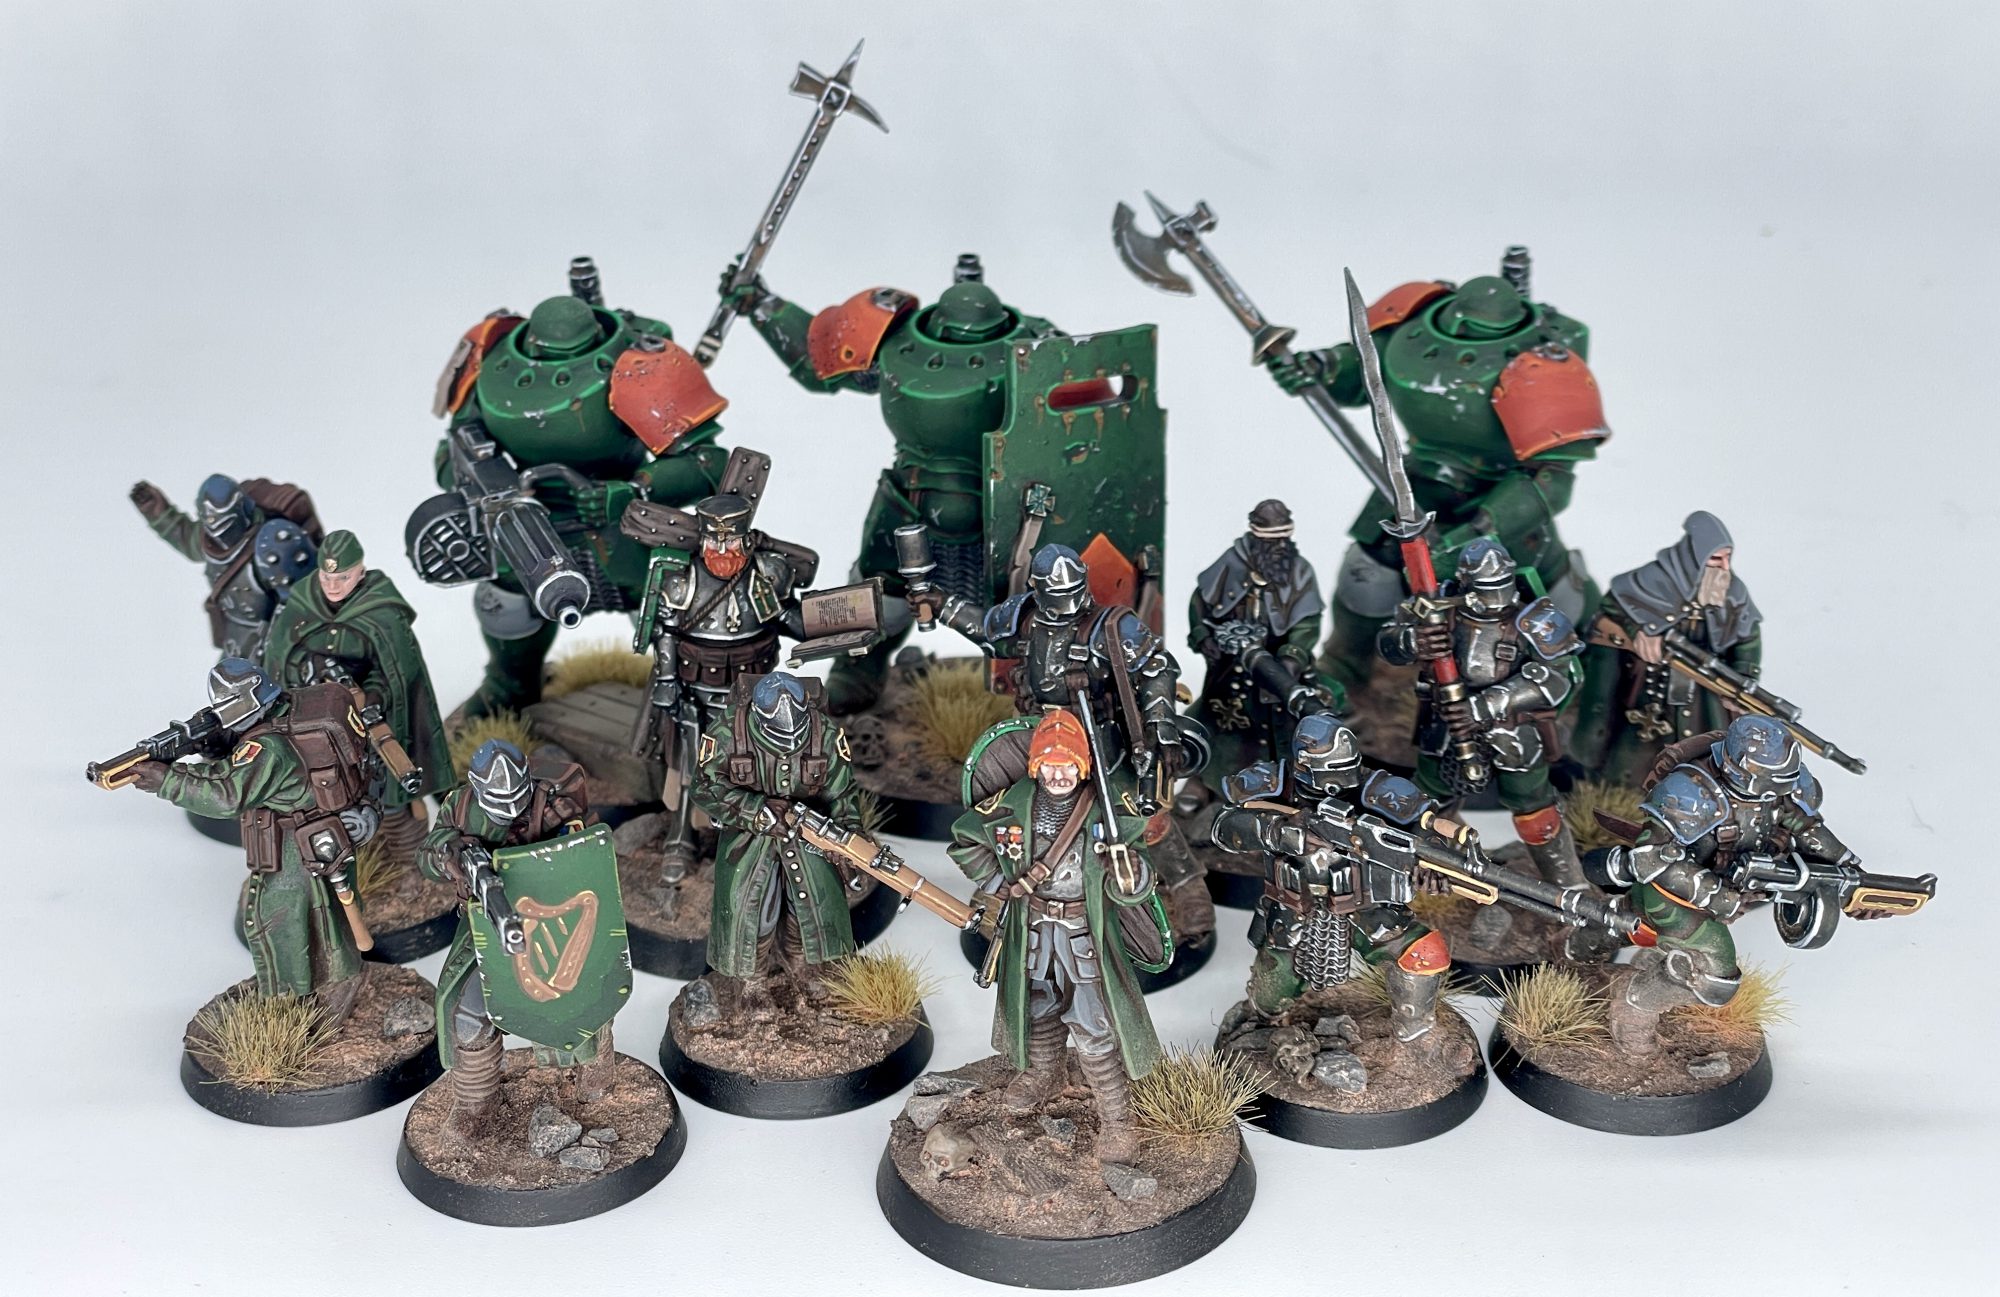 New Antioch warband. Credit: SRM
I'd set a challenge for myself to almost exclusively use ProAcryl paints for these, as I preferred their matte finish. I'd also gotten their
starter set to review a while ago, and as this was a new project I wouldn't have to worry about matching what came before. There would also be a fair bit of mixing colors here, so a wet palette was also important to the process. By also starting with a brown primer, I was able to leave dark brown in the recesses, giving them a dirty look and a nice, warm color to give them some shading right off the bat. The goal was to get a warband done quickly, utilizing a limited palette and simple layering techniques to get them done without too much trouble. If you want to read more about my personal journey with this warband, I wrote up
some words last year, but for now, let's focus on painting!
Cloth, Wood, and Infantry Details
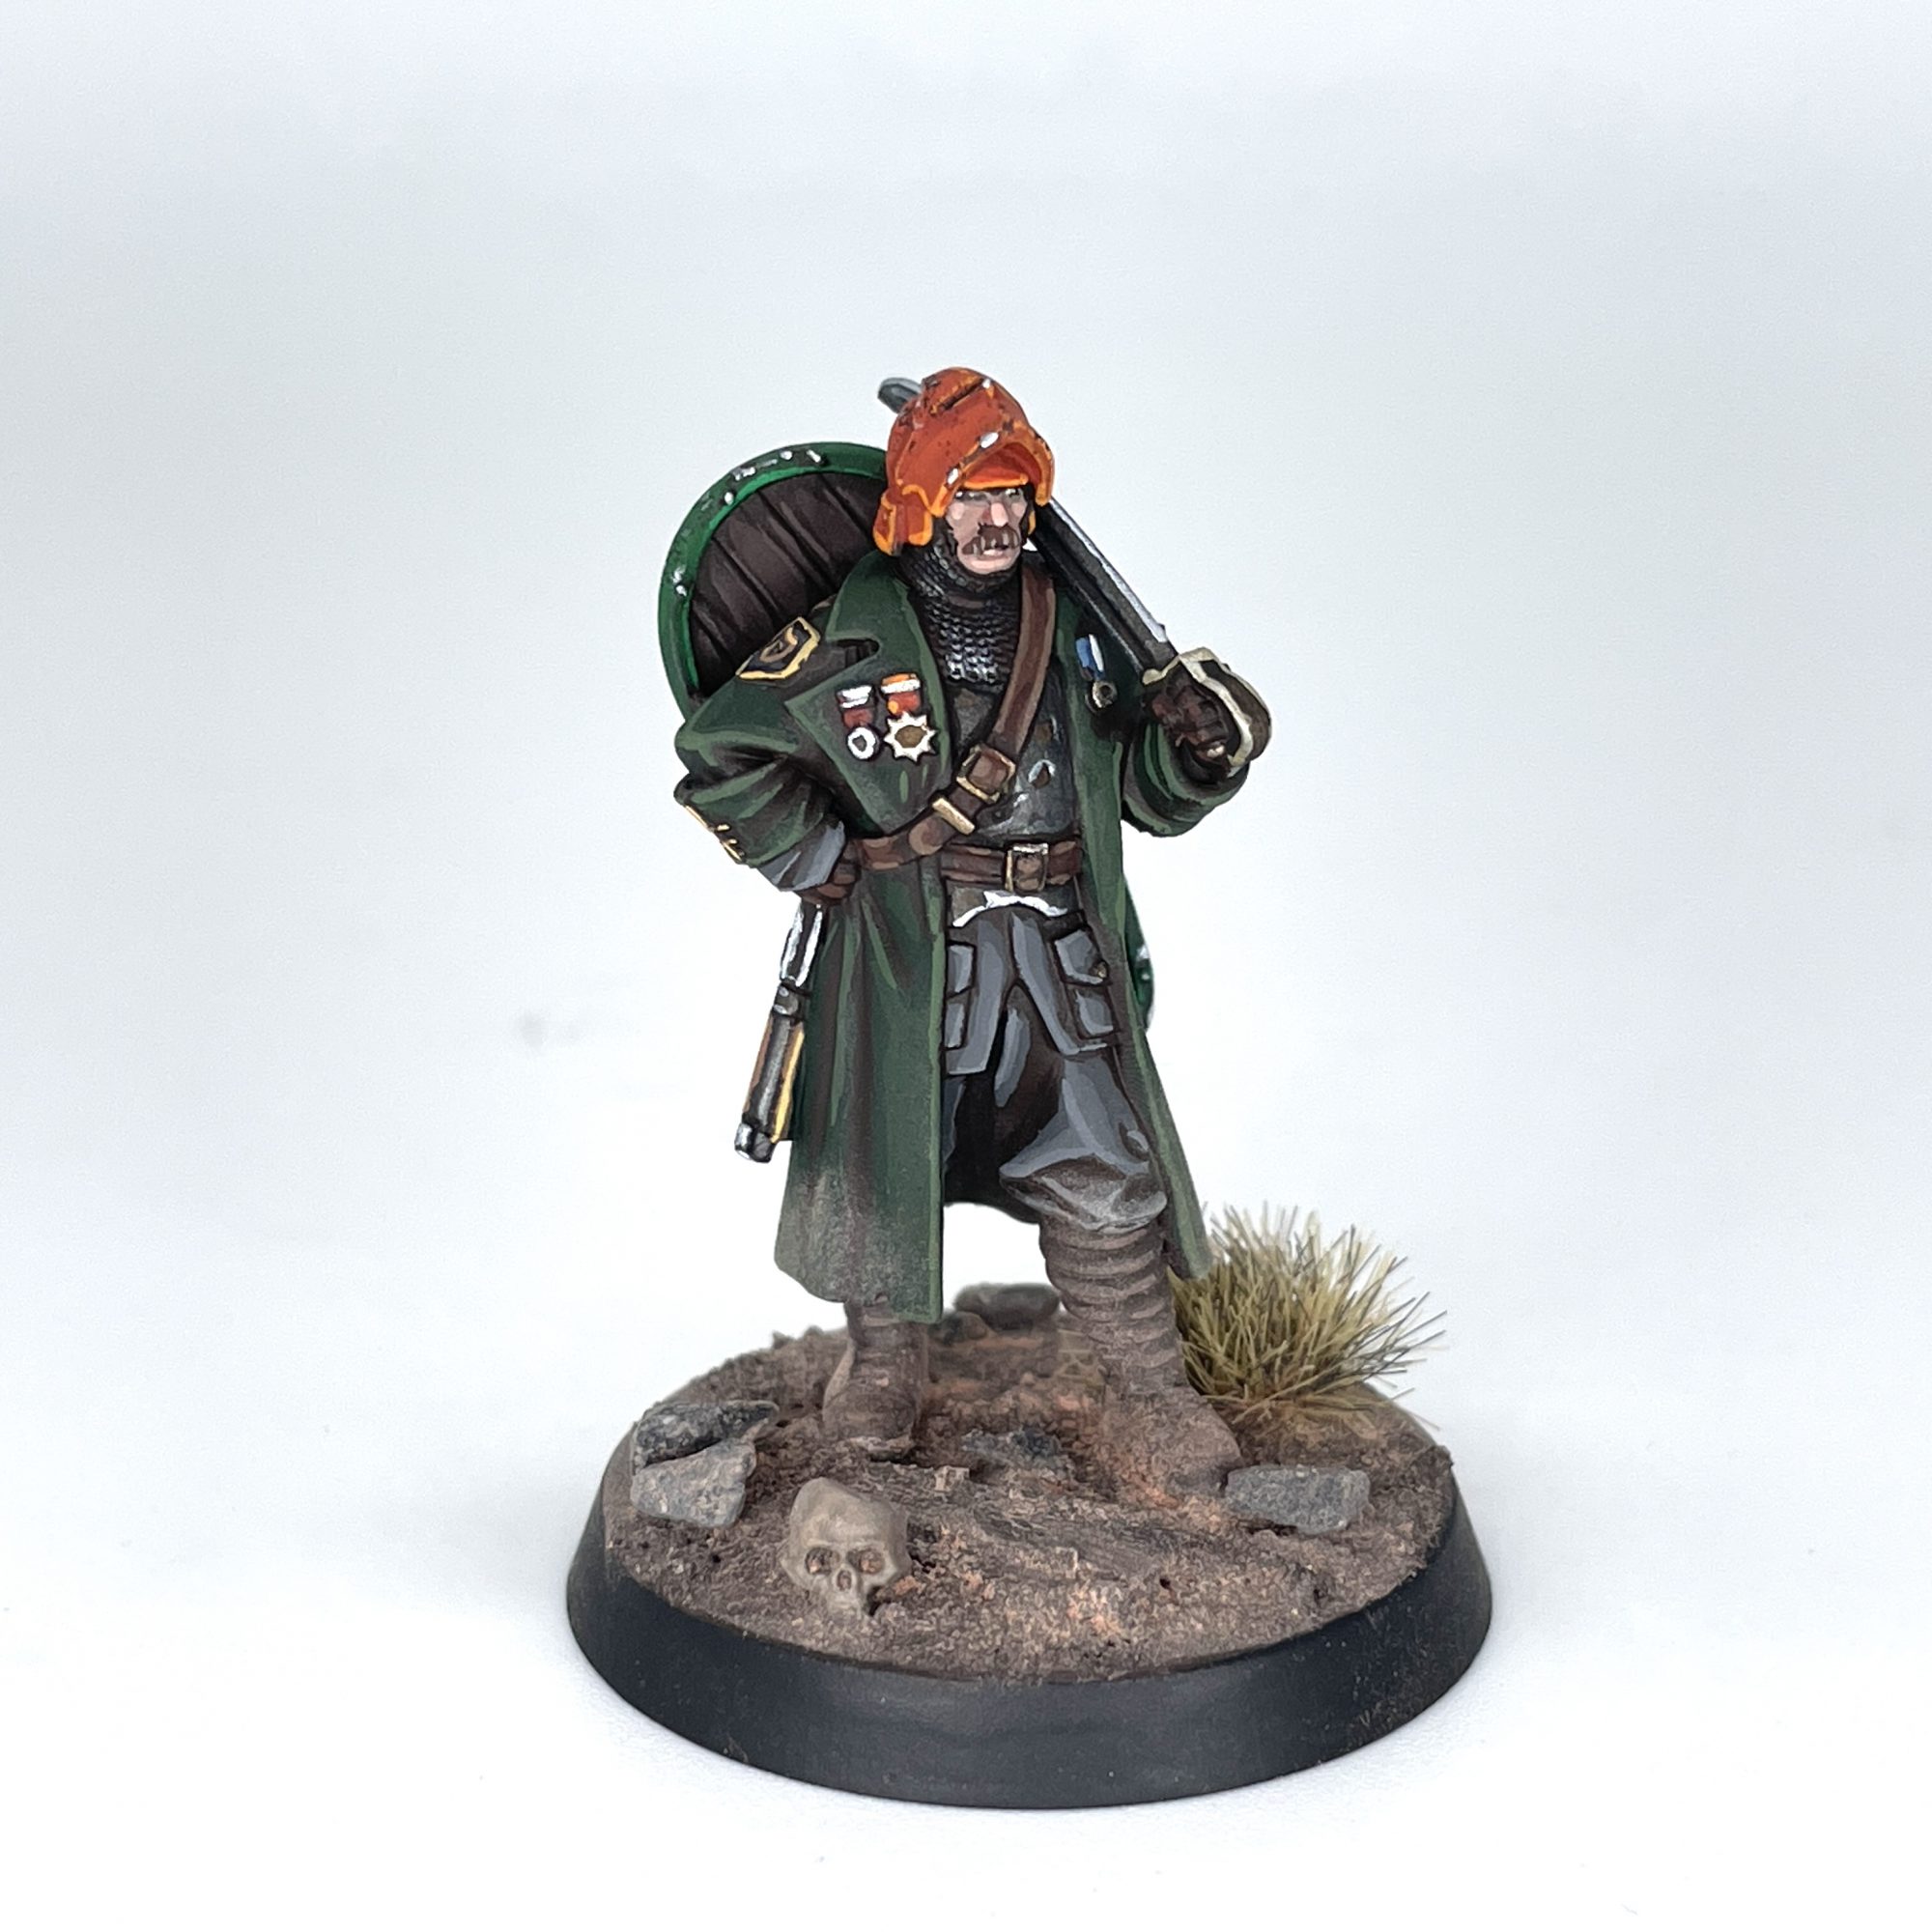 New Antioch Lieutenant. Credit: SRM
I'm using the Lieutenant here, as he's got most of the textures you'll see across these models. The difference between him, Shocktroopers, and Yeomen is largely just the proportions of one material to another. This is all starting from a Colour Forge Hyrax Brown spray, but you could also start with black primer and paint the whole model with GW's Rhinox Hide for a similar warm brown. All paints used are Pro Acryl unless otherwise mentioned.
Green Cloth (Trench Coats)
This is the predominant color on these models, so you'll want to make sure it's smooth and even. You also might want to do a second mixed layer before the final highlight for a more gradual color transition, or mix in some yellow afterwards for a final, final highlight.
- Layer on Black Green, leaving brown in the recesses.
- Make a 1:1 mix of Black Green and Camo Green and apply a second layer, concentrating on raised areas.
- Apply a final edge highlight of pure Camo Green to the sharpest corners and highest areas.
Grey Cloth (Trousers, BDUs)
You can typically only see a bit of this on the normal Yeomen and the like, and can maybe even skip the middle or final step if there's not much cloth showing.
- Layer on Dark Warm Grey, leaving brown in recesses.
- Make a 1:1 mix of Dark Warm Grey and Light Warm Grey and apply a second layer, concentrating on raised areas.
- Apply a final edge highlight of pure Light Warm Grey to the sharpest corners and highest areas.
Leather (Straps, Pouches, Gloves)
The leather areas are pretty thin so I kept the mixing to a minimum, but you could always go a step further and do a final highlight with
Light Umber, or have more mixing midtones before the final highlight. That might come in handy on larger leather surfaces like the Combat Engineer's backpack.
- Layer on Mahogany, leaving brown in recesses.
- Make a 1:1 mix of Mahogany and Light Umber and highlight the edges of the straps.
Puttees (Leg Wraps)
As these would get a bunch of pigment on them from the basing process, I didn't want to spend too much effort on them. It's also just a fun word to say out loud.
- Layer on Dark Umber, leaving brown in recesses.
- Highlight with Light Umber.
Dark Wood (Shield Interior, Trench Cleric Cross)
As there isn't much of this in the range and the bits rarely touch, I actually painted the darker wood with the same colors as the Puttees above! I ran highlights along the boards to simulate wood grain.
- Layer on Dark Umber, leaving brown in recesses.
- Highlight with Light Umber.
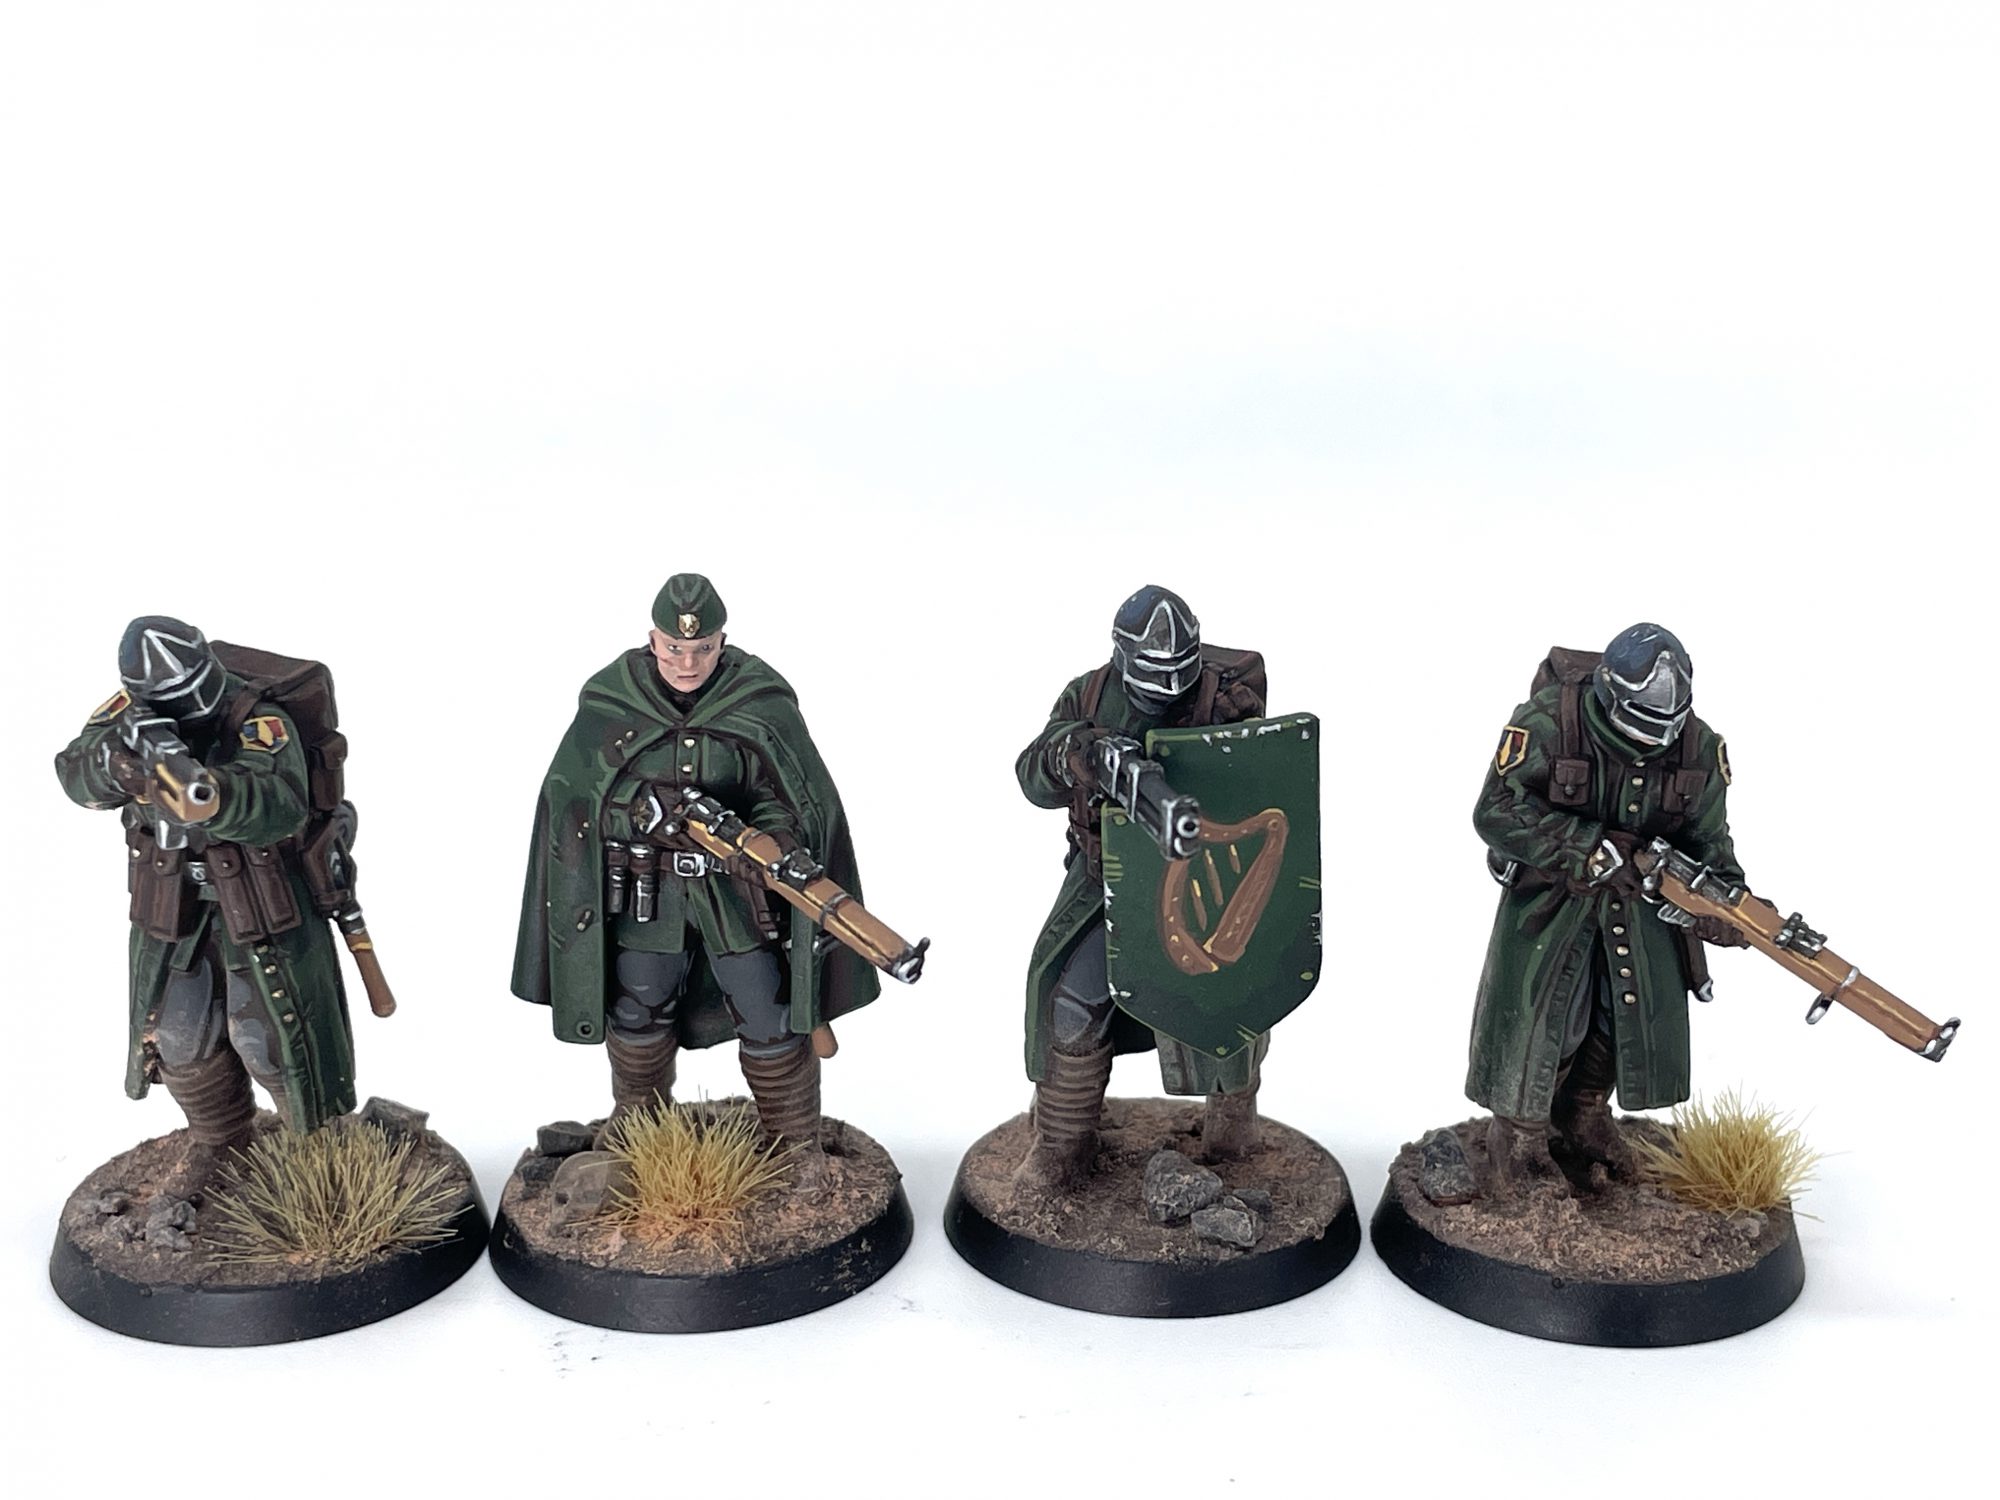
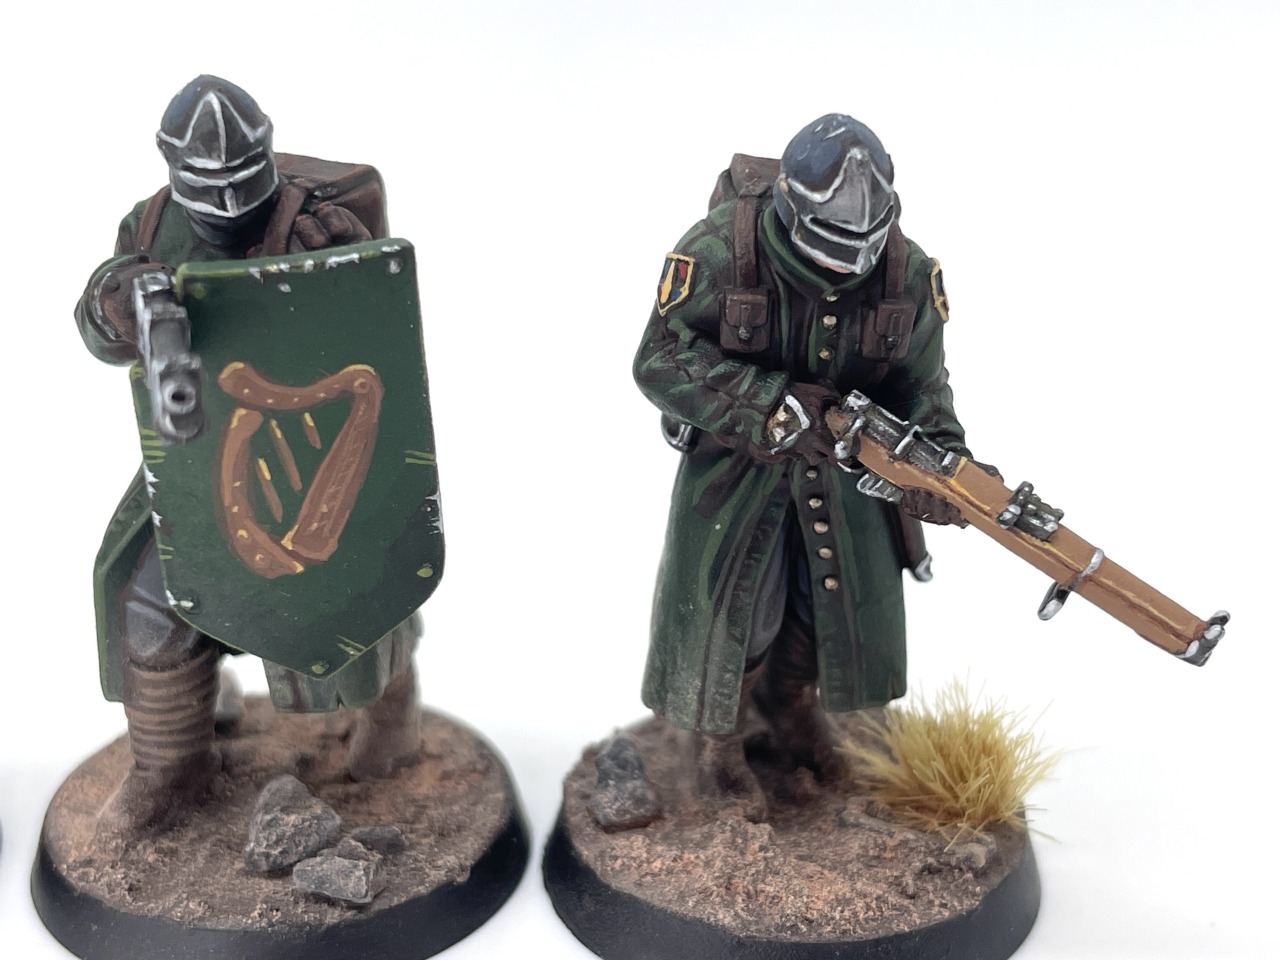
New Antioch Yeomen. Credit: SRM
Light Wood (Rifles)
There's probably a better color to start from, but I was working with a limited palette here. I went for the typical light wood tone I see in images of Lee Enfield rifles, as it would stand out from the darker models and make their weapon choices clear. These were also the colors I used to freehand the harp on the shield and on the Lieutenant's badge, though I didn't write down what proportion of each color I used.
- Layer on a 1:1 mix of Mahogany and Golden Brown, leaving brown in recesses.
- Edge highlight with pure Golden Brown.
Armor and Metallics
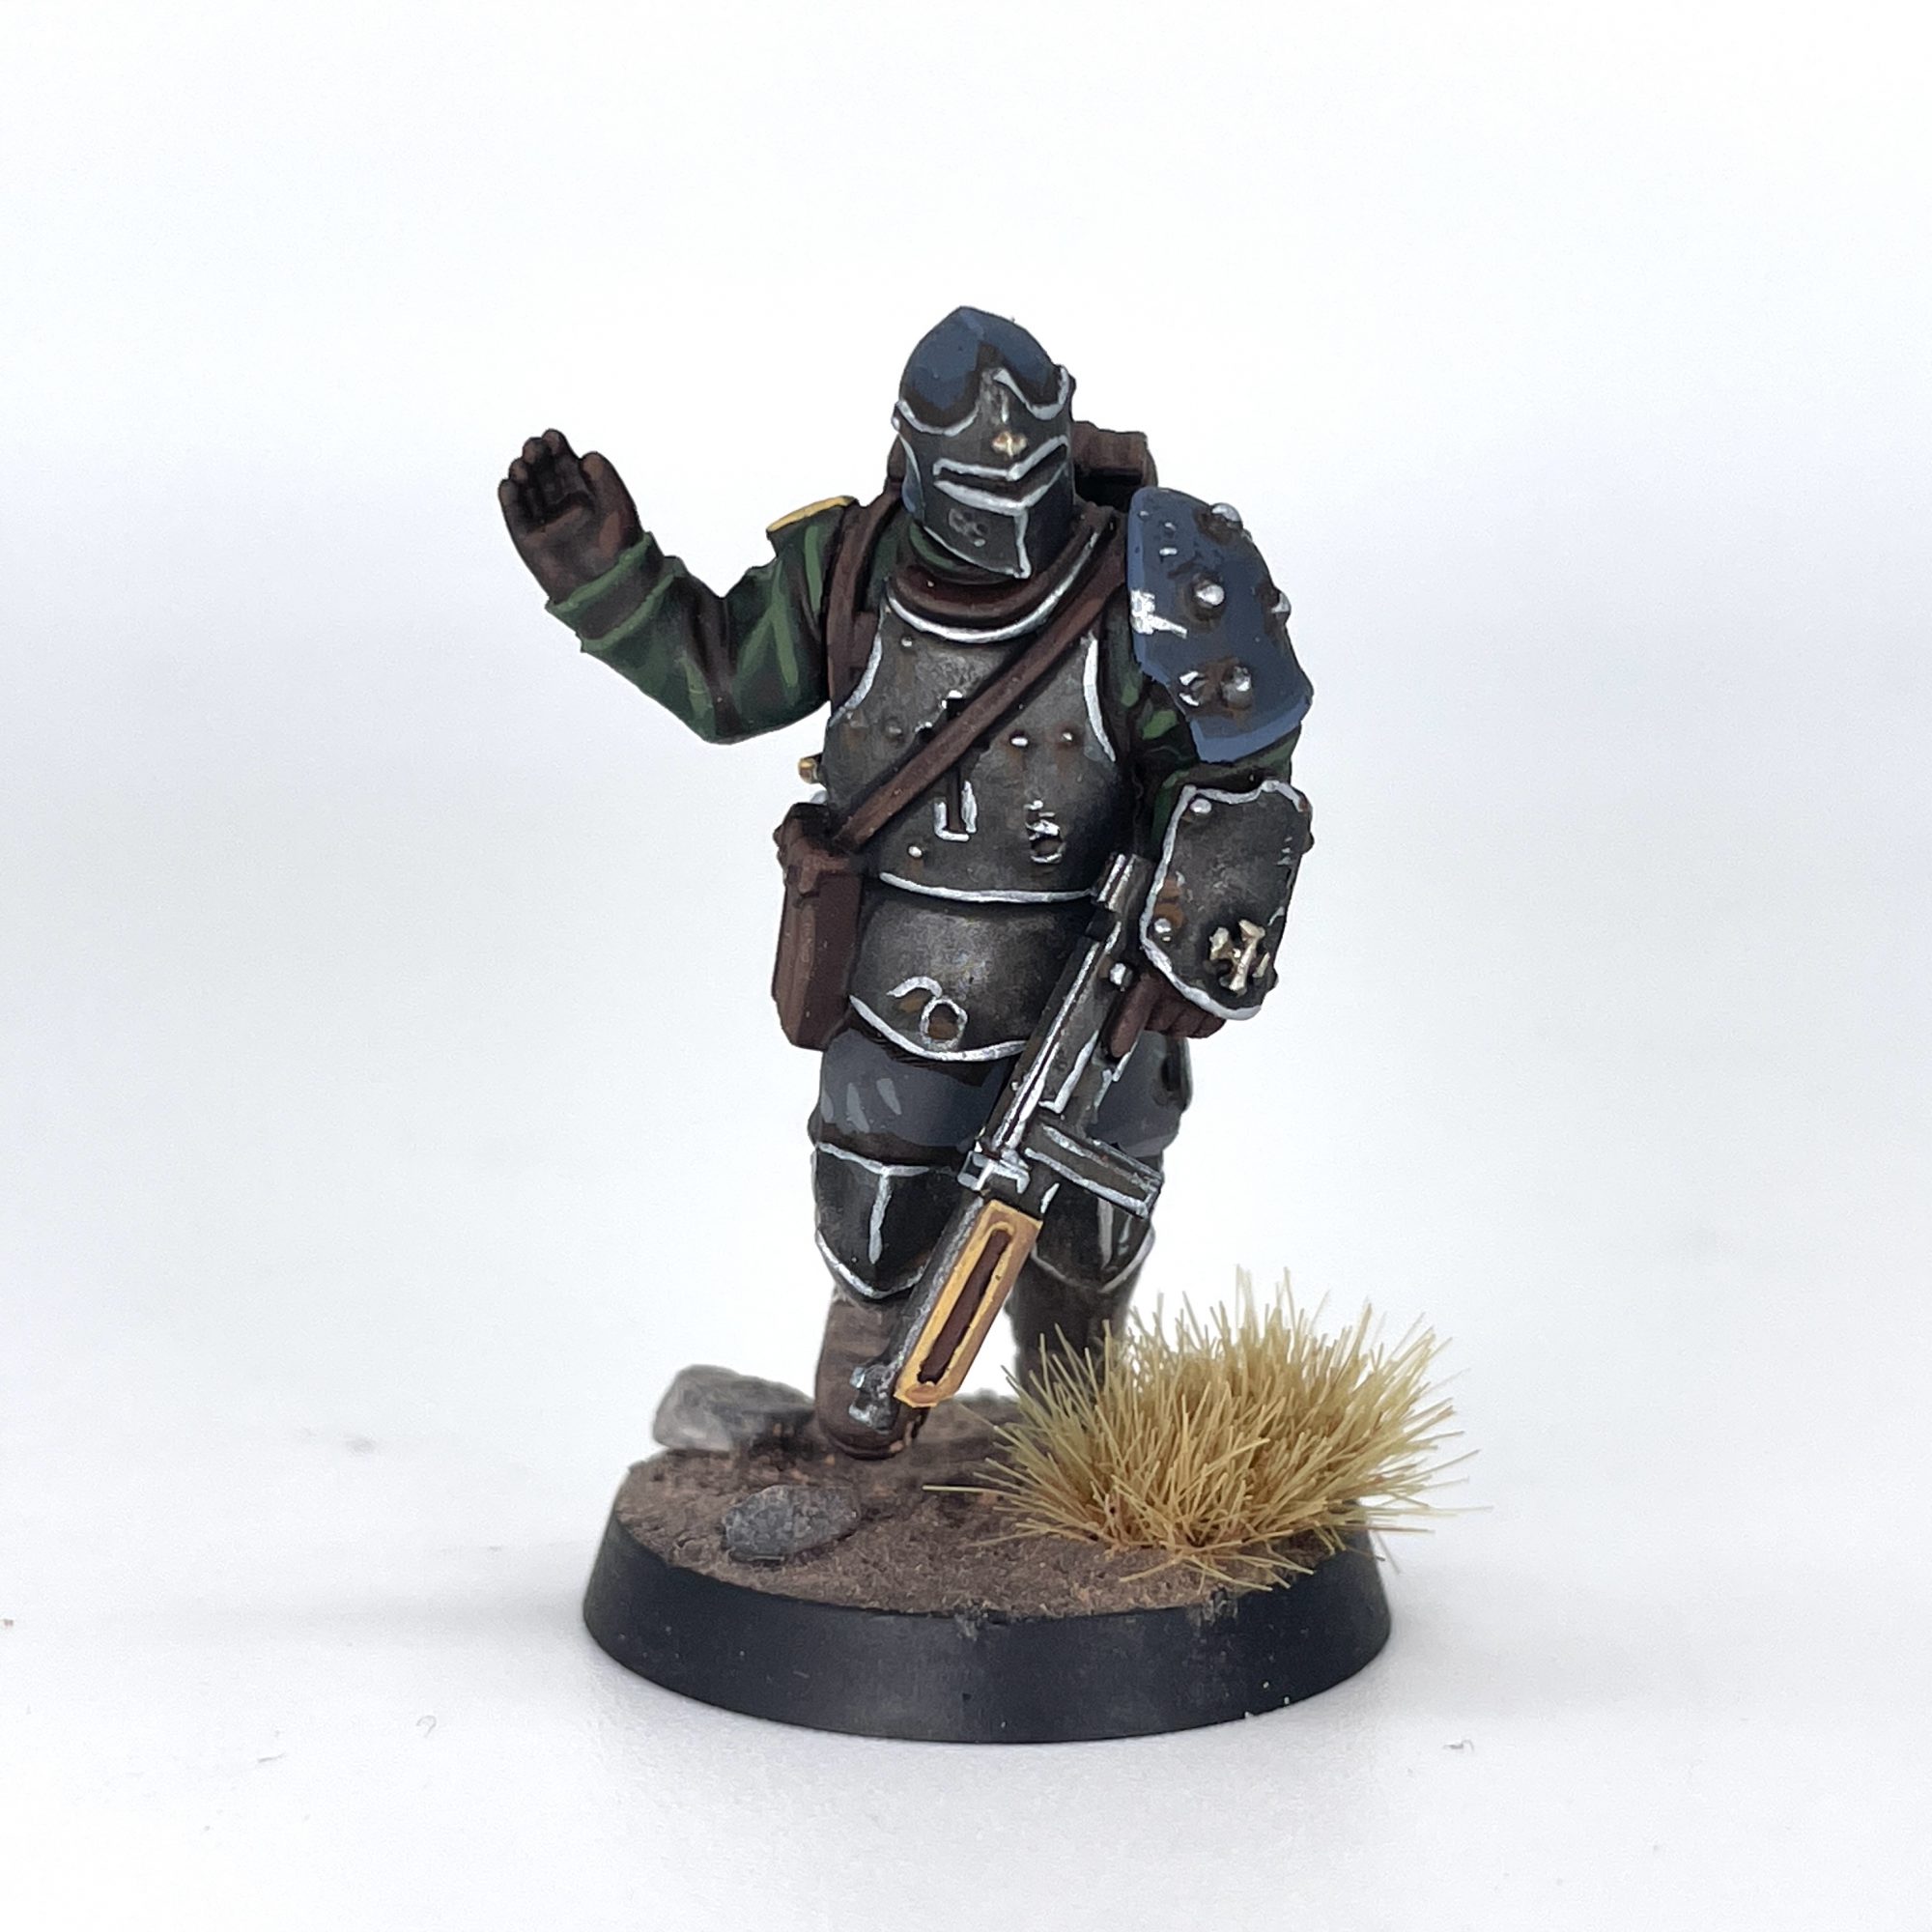 New Antioch Combat Engineer. Credit: SRM
Blue Black Armor (Helmets, Pauldrons on Shock Troopers and Combat Engineers)
I wanted some color variation and the opportunity to save green armor for later, so went with a blue-black tone to pick out some armor. If I ever do Heretic Legion, this'll probably be their base. You could go a step further with a pure
Faded Ultramarine Blue at the end if you really wanted to pop, but I wanted them a bit more drab.
- Layer on Blue Black, leaving brown in recesses.
- Make a 2:1 mix of Blue Black and Faded Ultramarine Blue and apply a second layer, concentrating on raised areas.
- Apply a final edge highlight of 1:1 Blue Black and Faded Ultramarine Blue to the corners and edges.
Steel (Weapons, Body Armor, Visors)
There's a fair bit of metallic metal on these guys, and in a rare move I don't leave brown in the recesses here. I also use GW washes, and naturally it's a mix of two of them, but Army Painter
Strong Tone might also work. You can add rust later when we get to weathering.
- Paint the entire metallic area Dark Silver.
- Wash all over the area with a 1:1 mix of Citadel Nuln Oil and Agrax Earthshade.
- Apply a final edge highlight of Silver.
Bronze (Weapon Details, Buttons)
This is about as simple as they come, since the actual bronze details on these models tend to be rather small. If they're bigger details like the engine blocks on your Machine Armor, consider using the same wash recipe from above, but I wouldn't bother washing the buttons on jackets and the like. Verdigris can also be added later.
- Paint the desired area Bronze.
- Highlight with Light Bronze.
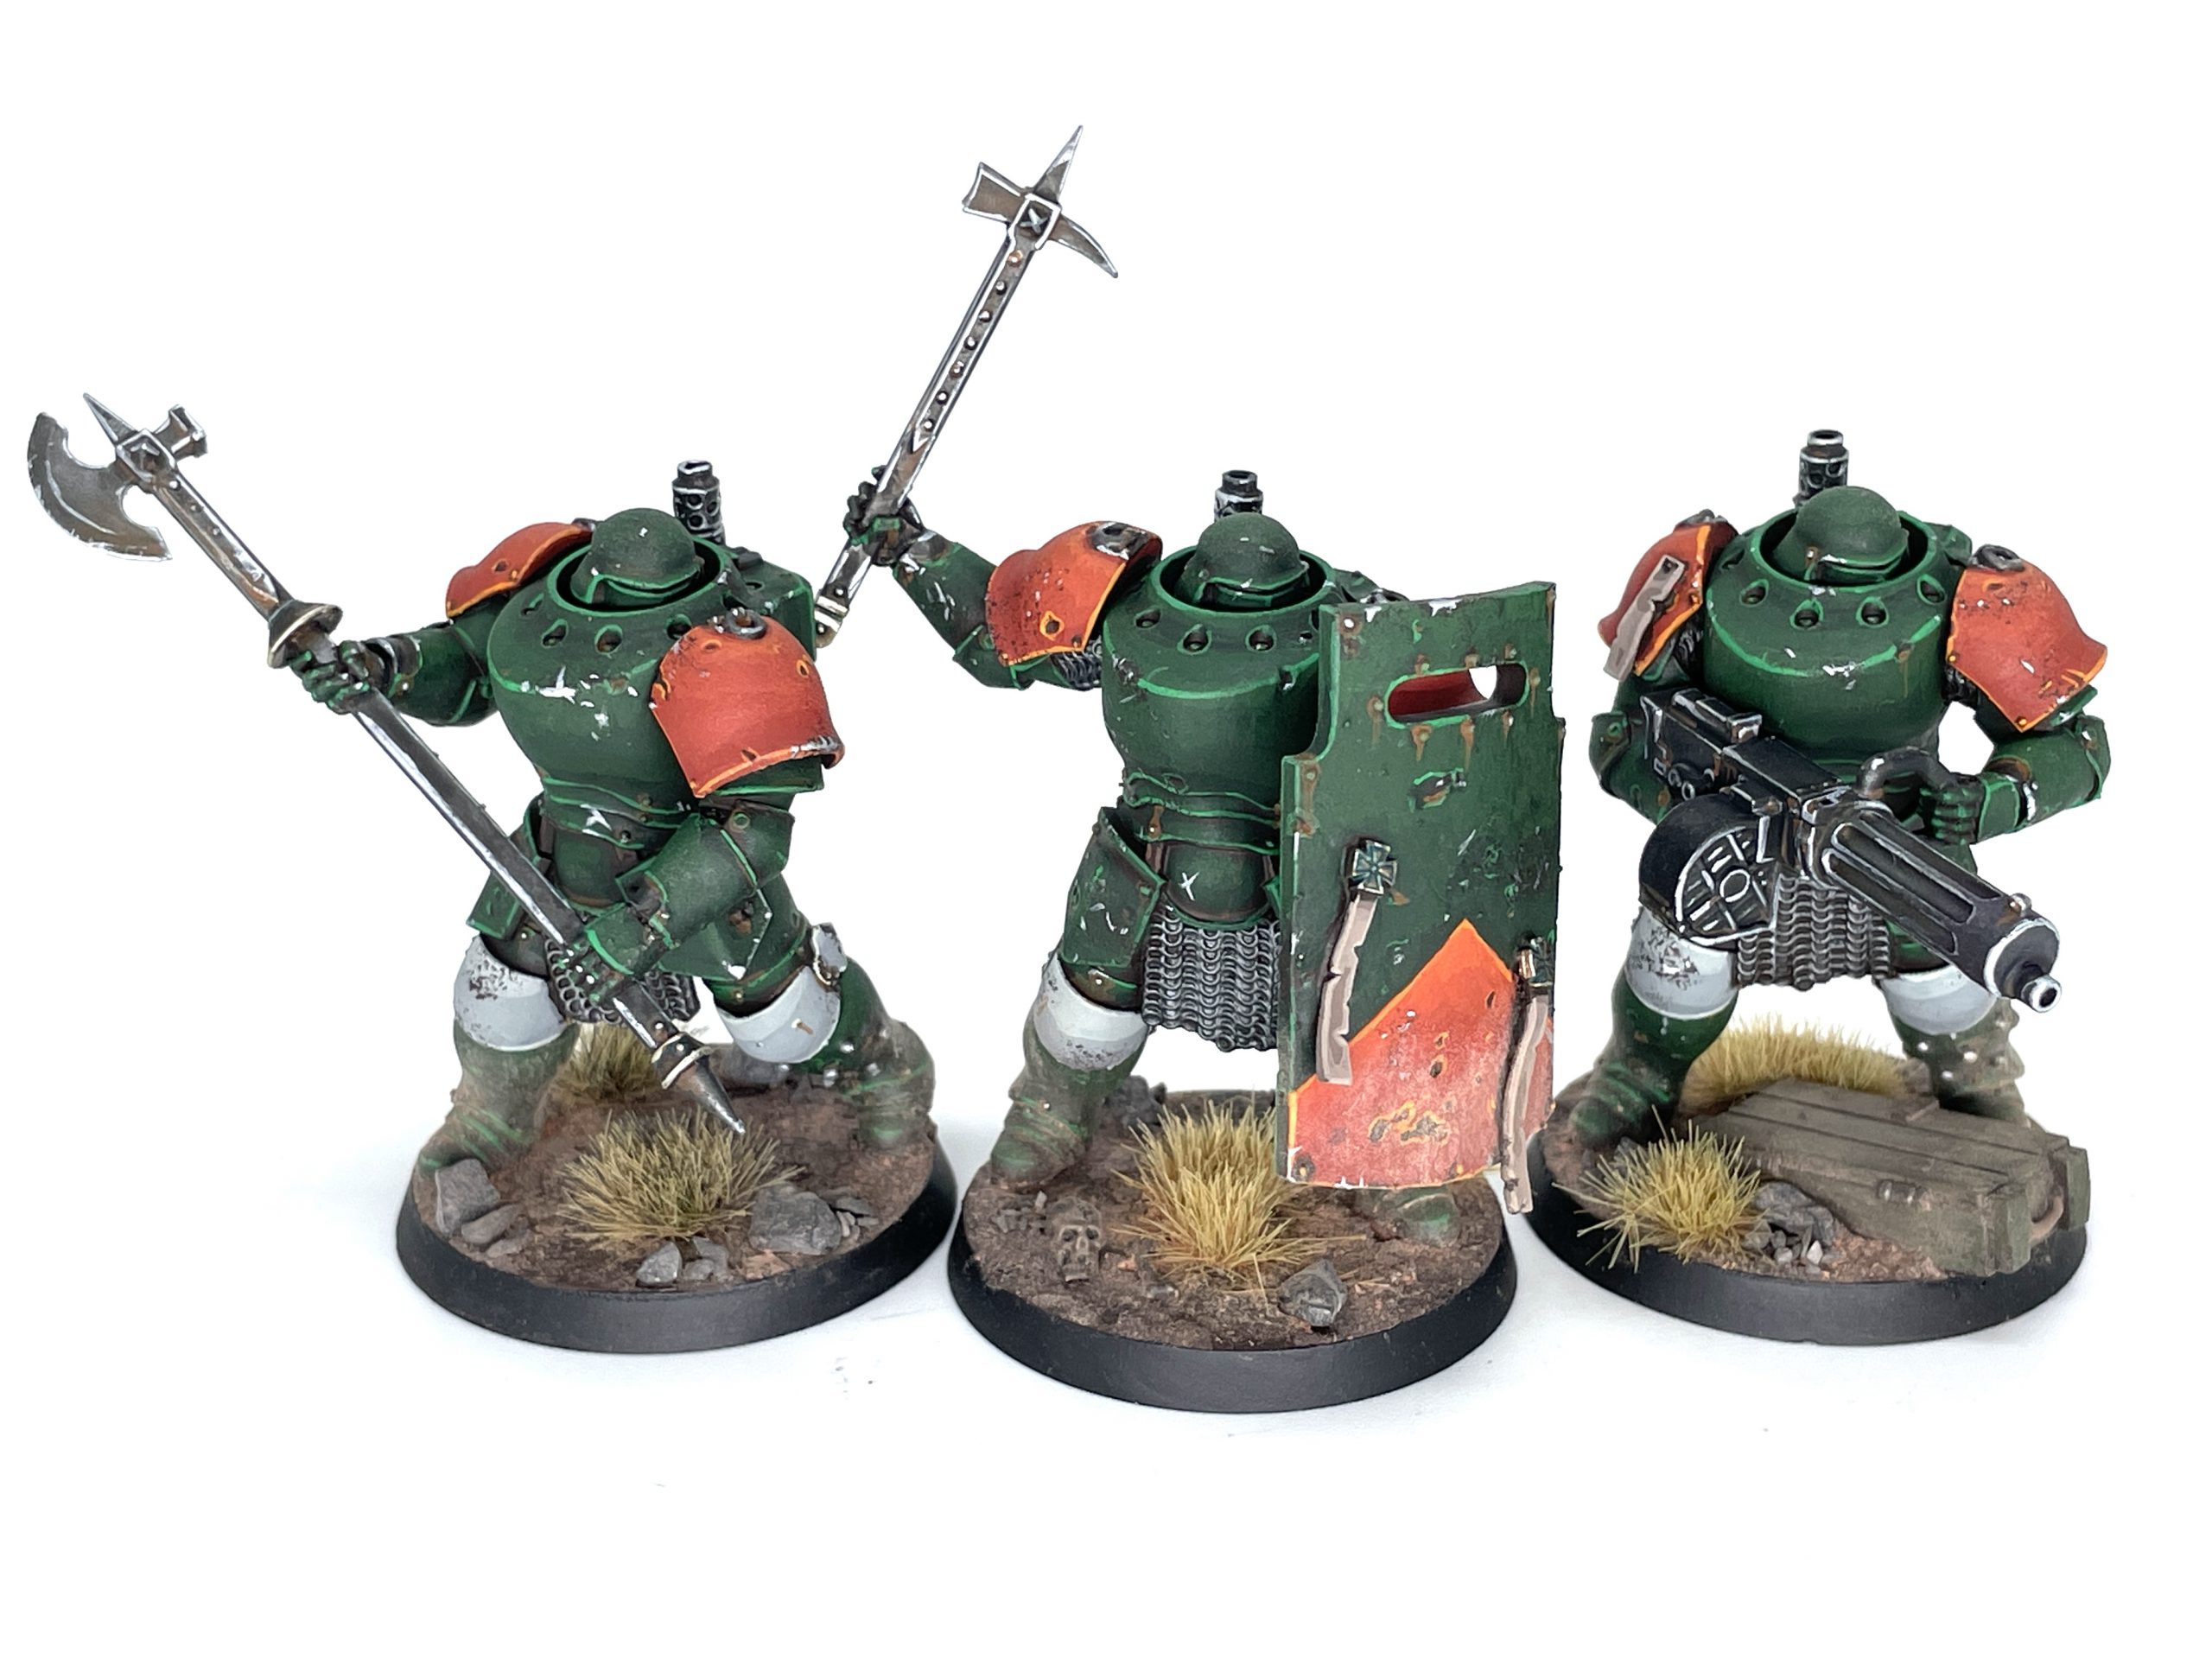
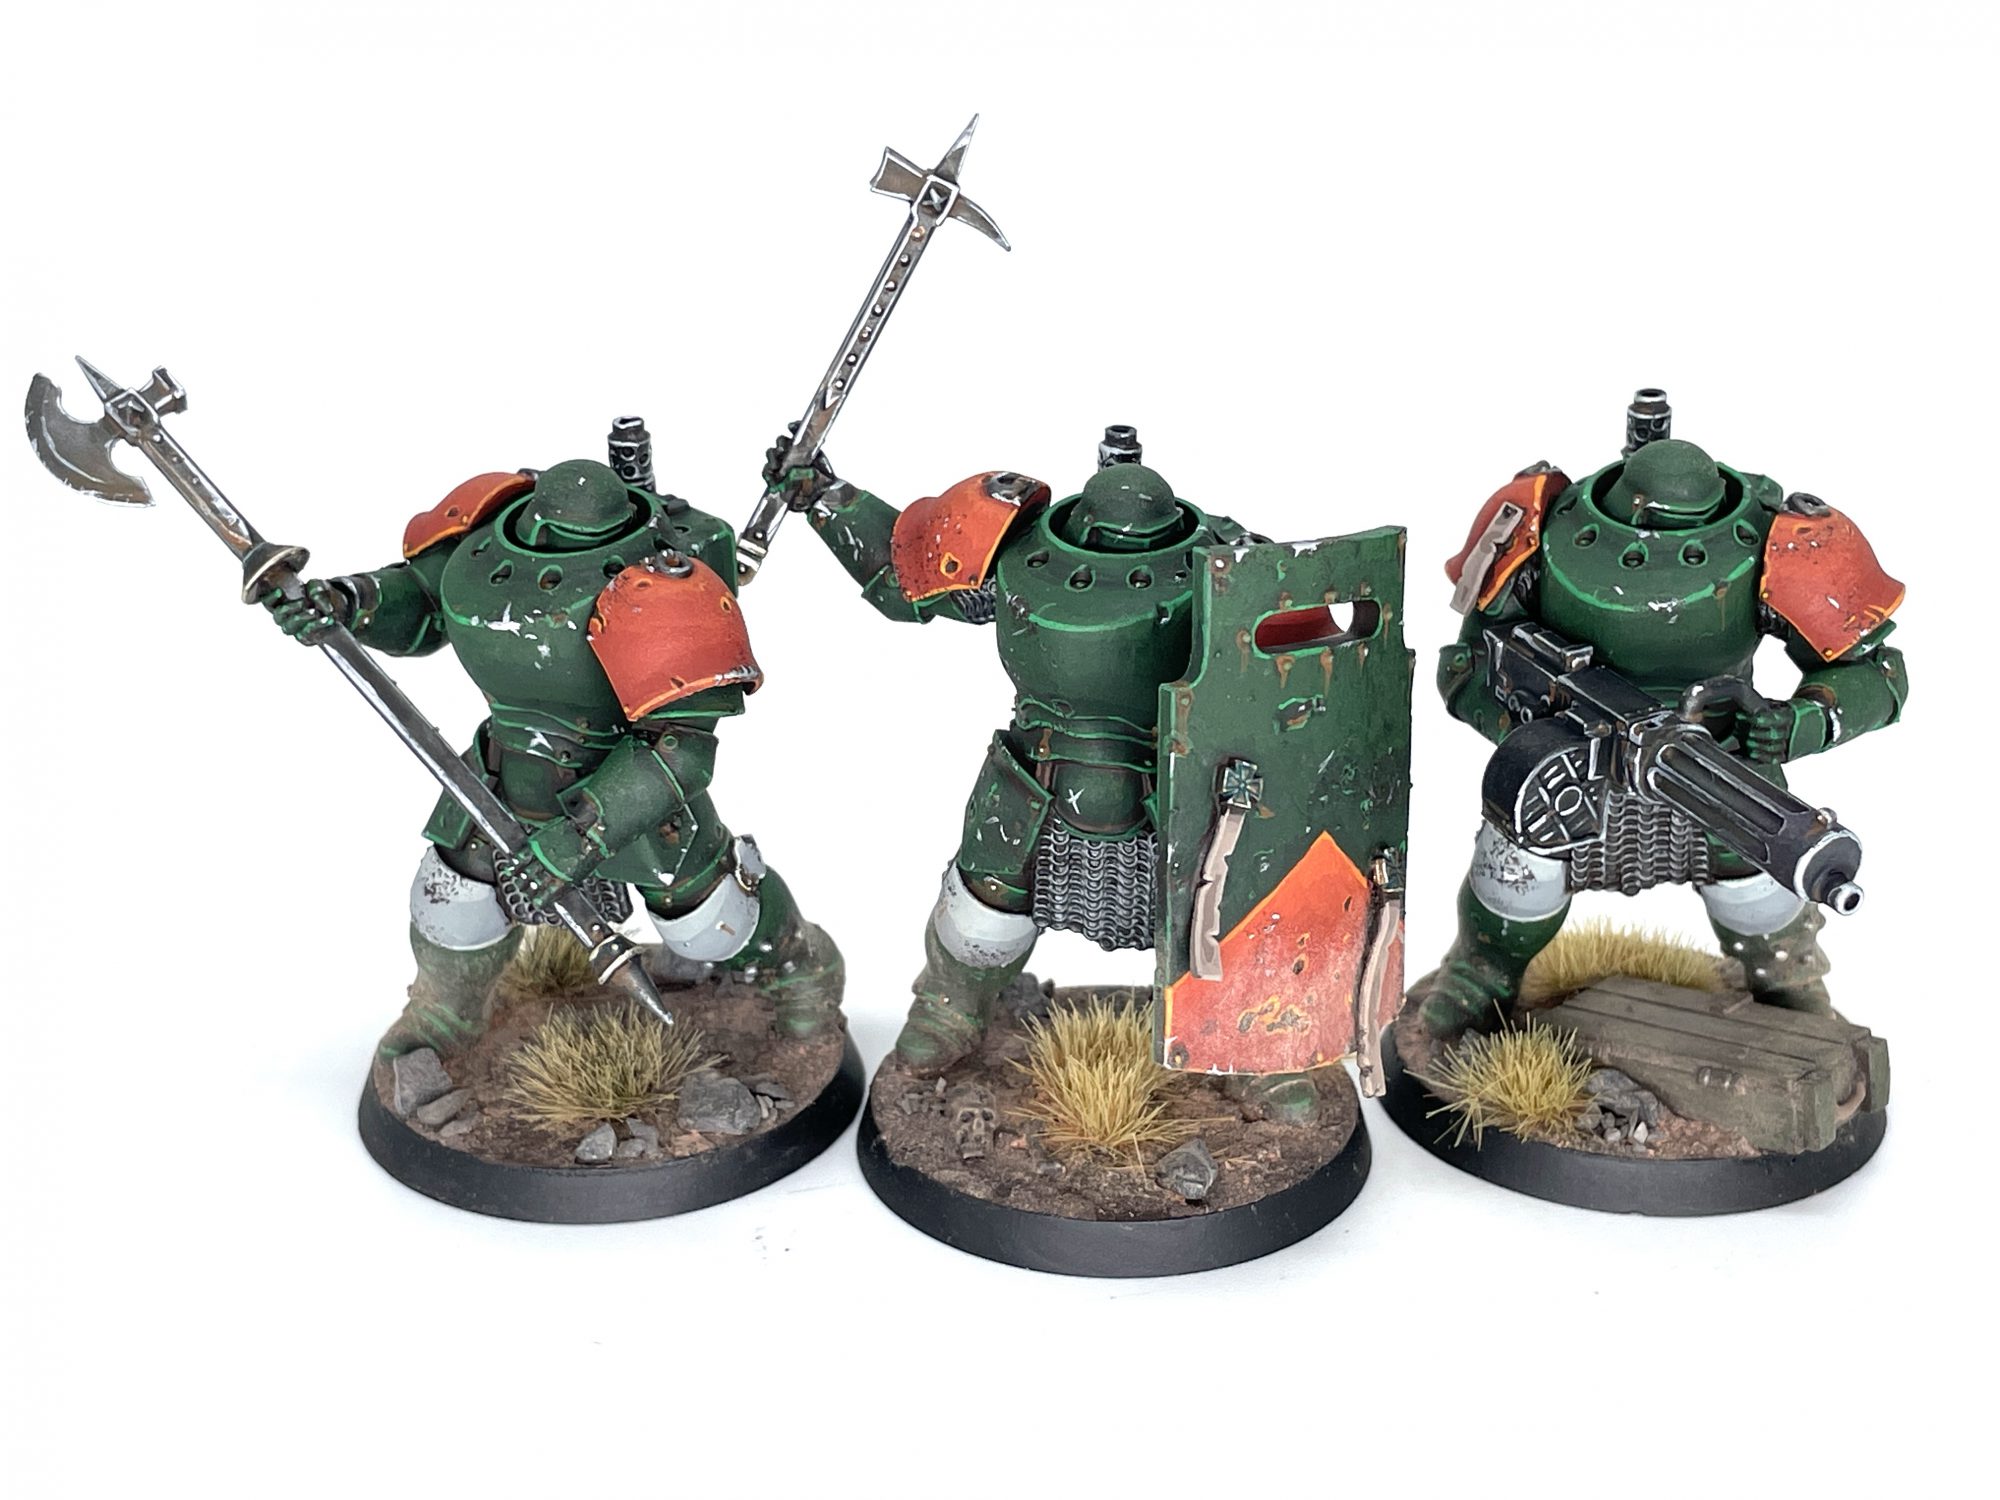 New Antioch Mechanized Heavy Infantry. Credit: SRM
Green Armor (Machine Armor, Trench Shields)
This somewhat depends on how large the area you're painting is. For the larger areas we're looking at, you'll want more layers of mixed colors to make for a smoother transition between shades. You can just keep adding
Green to your mix as you work your way up if you don't want to have too much on your palette.
- Layer on Black Green, leaving brown in recesses.
- Layer up with a 3:1 mix of Black Green and Green, concentrating on raised areas and areas towards to the top of the model.
- Layer up with a 2:1 mix of Black Green and Green, concentrating on further raised areas and ones closer to the top of the model.
- Layer up with a 1:1 mix of Black Green and Green, concentrating on the highest raised areas and ones closest to the top of the model.
- Apply a final edge highlight of Green to the corners and edges.
Orange Armor (Machine Armor Pauldrons, Details)
I added a smidge of orange to sell the Irish theme and also get a bit of variation in the models. I also used this on the Lieutenant's helmet as he needed a clear "Shoot me!" sign on his head. If you were doing this over a larger area than just the pauldrons, you could absolutely add more steps mixing colors, but this was all mine took.
- Layer on a 1:1 mix of Orange and Burnt Red, leaving brown in recesses.
- Layer up with a 2:1 mix of Orange and Burnt Red, concentrating on further raised areas and ones closer to the top of the model.
- Layer up with a 3:1 mix of Orange and Burnt Red, concentrating on the highest raised areas and ones closest to the top of the model.
- Apply a final edge highlight of Orange to the corners and edges.
 New Antioch Combat Medic. Credit: SRM
White (Machine Armor Kneepads, Combat Medic Armor)
Completing the Irish tricolor is white, a color I used sparingly. The challenge was keeping it distinct from the grey clothes earlier. You're really just adding more
Light Warm Grey and
Bold Titanium White to the same base color.
- Layer on a 1:1 mix of Dark Warm Grey and Light Warm Grey, leaving brown in recesses.
- Layer up with a 1:2 mix of Dark Warm Grey and Light Warm Grey, concentrating on further raised areas and ones closer to the top of the model.
- Layer up with a 1:2:1 mix of Dark Warm Grey, Light Warm Grey, and Bold Titanium White, concentrating on the highest raised areas and ones closest to the top of the model.
- Apply a final edge highlight of Bold Titanium White to the corners and edges.
Extra Details
 New Antioch Yeomen. Credit: SRM
New Antioch Badge
It doesn't come up too often, but there are little badges on your Yeomen that are surprisingly colorful, if the art is anything to go by. I'll break it down by area, since it has fields of blue and red with a yellow border. I still kept it a bit desaturated, so didn't go for the brightest colors I could. Highlights were really just the upper area of the field I was painting.
- Red
- Paint the area Burnt Red.
- Highlight with a 1:1 mix of Burnt Red and Golden Yellow.
- Blue
- Paint the area Dark Grey Blue.
- Highlight with a 1:1 mix of Dark Grey Blue and Bright Warm Grey.
- Yellow
- Paint the border and detail Golden Brown.
- Highlight with a 1:1 mix of Golden Brown and Bright Warm Grey.
Weathering (Rust, Verdigris, Chipping, Dust)
Weathering can be applied as heavily as you'd like here. If the ratios of water to paint don't seem right, you can always try adjusting the ratio until it looks how you want. Really, you want a fine brush and a thin, runny paint for the rust and verdigris, and a rough, crummy old brush for applying the weathering powders. Those powders will often blow away with varnish though, so be mindful of that. Also Secret Weapon is out of business, so you'll likely need an alternative from Mig or Vallejo.
- Chipping
- Using a piece of sponge or foam from a case, dab the foam in Citadel Rhinox Hide then dab the excess off on a paper towel. Now dab the brown onto areas where you want wear and tear.
- Highlight these areas with Silver, painting scratches and chips towards the center of the brown markings.
- Rust
- Make a 3:1 mix of water and Citadel Skrag Brown and paint it into any areas you want to have some rust. Ideal areas would be around rivets or in pockmarks. You can draw your brush down to simulate water runoff.
- Verdigris
- Make a 3:1 mix of water and Jade and paint it into any areas you want to have verdigris.
- Dust
- Jam weathering powder onto the feet of your models, as well as any area you want dusty, such as the bottom of their coats. I used Secret Weapon Clay Brown.
- Exhaust
- You could use weathering powder here, in which case you could find something like Secret Weapon Exhaust Black powder, and also jam that onto and around the pipes sticking out of your Mechanized Infantry, or anywhere you want to look burnt.
- Alternatively, given how matte Pro Acryl paints are, drybrushing Coal Black can also work here.
- Basing
- Apply Citadel Stirland Mud all over the base, paying attention not to get it on their boots.
- Glue any tufts, rocks, or other debris you'd like down for character. I used Army Painter Wasteland Tufts and pebbles from my yard.
- Apply weathering powder over the entire base, running a slightly damp brush over it and jabbing the now-wet powder into any recesses. I used Secret Weapon Clay Brown.
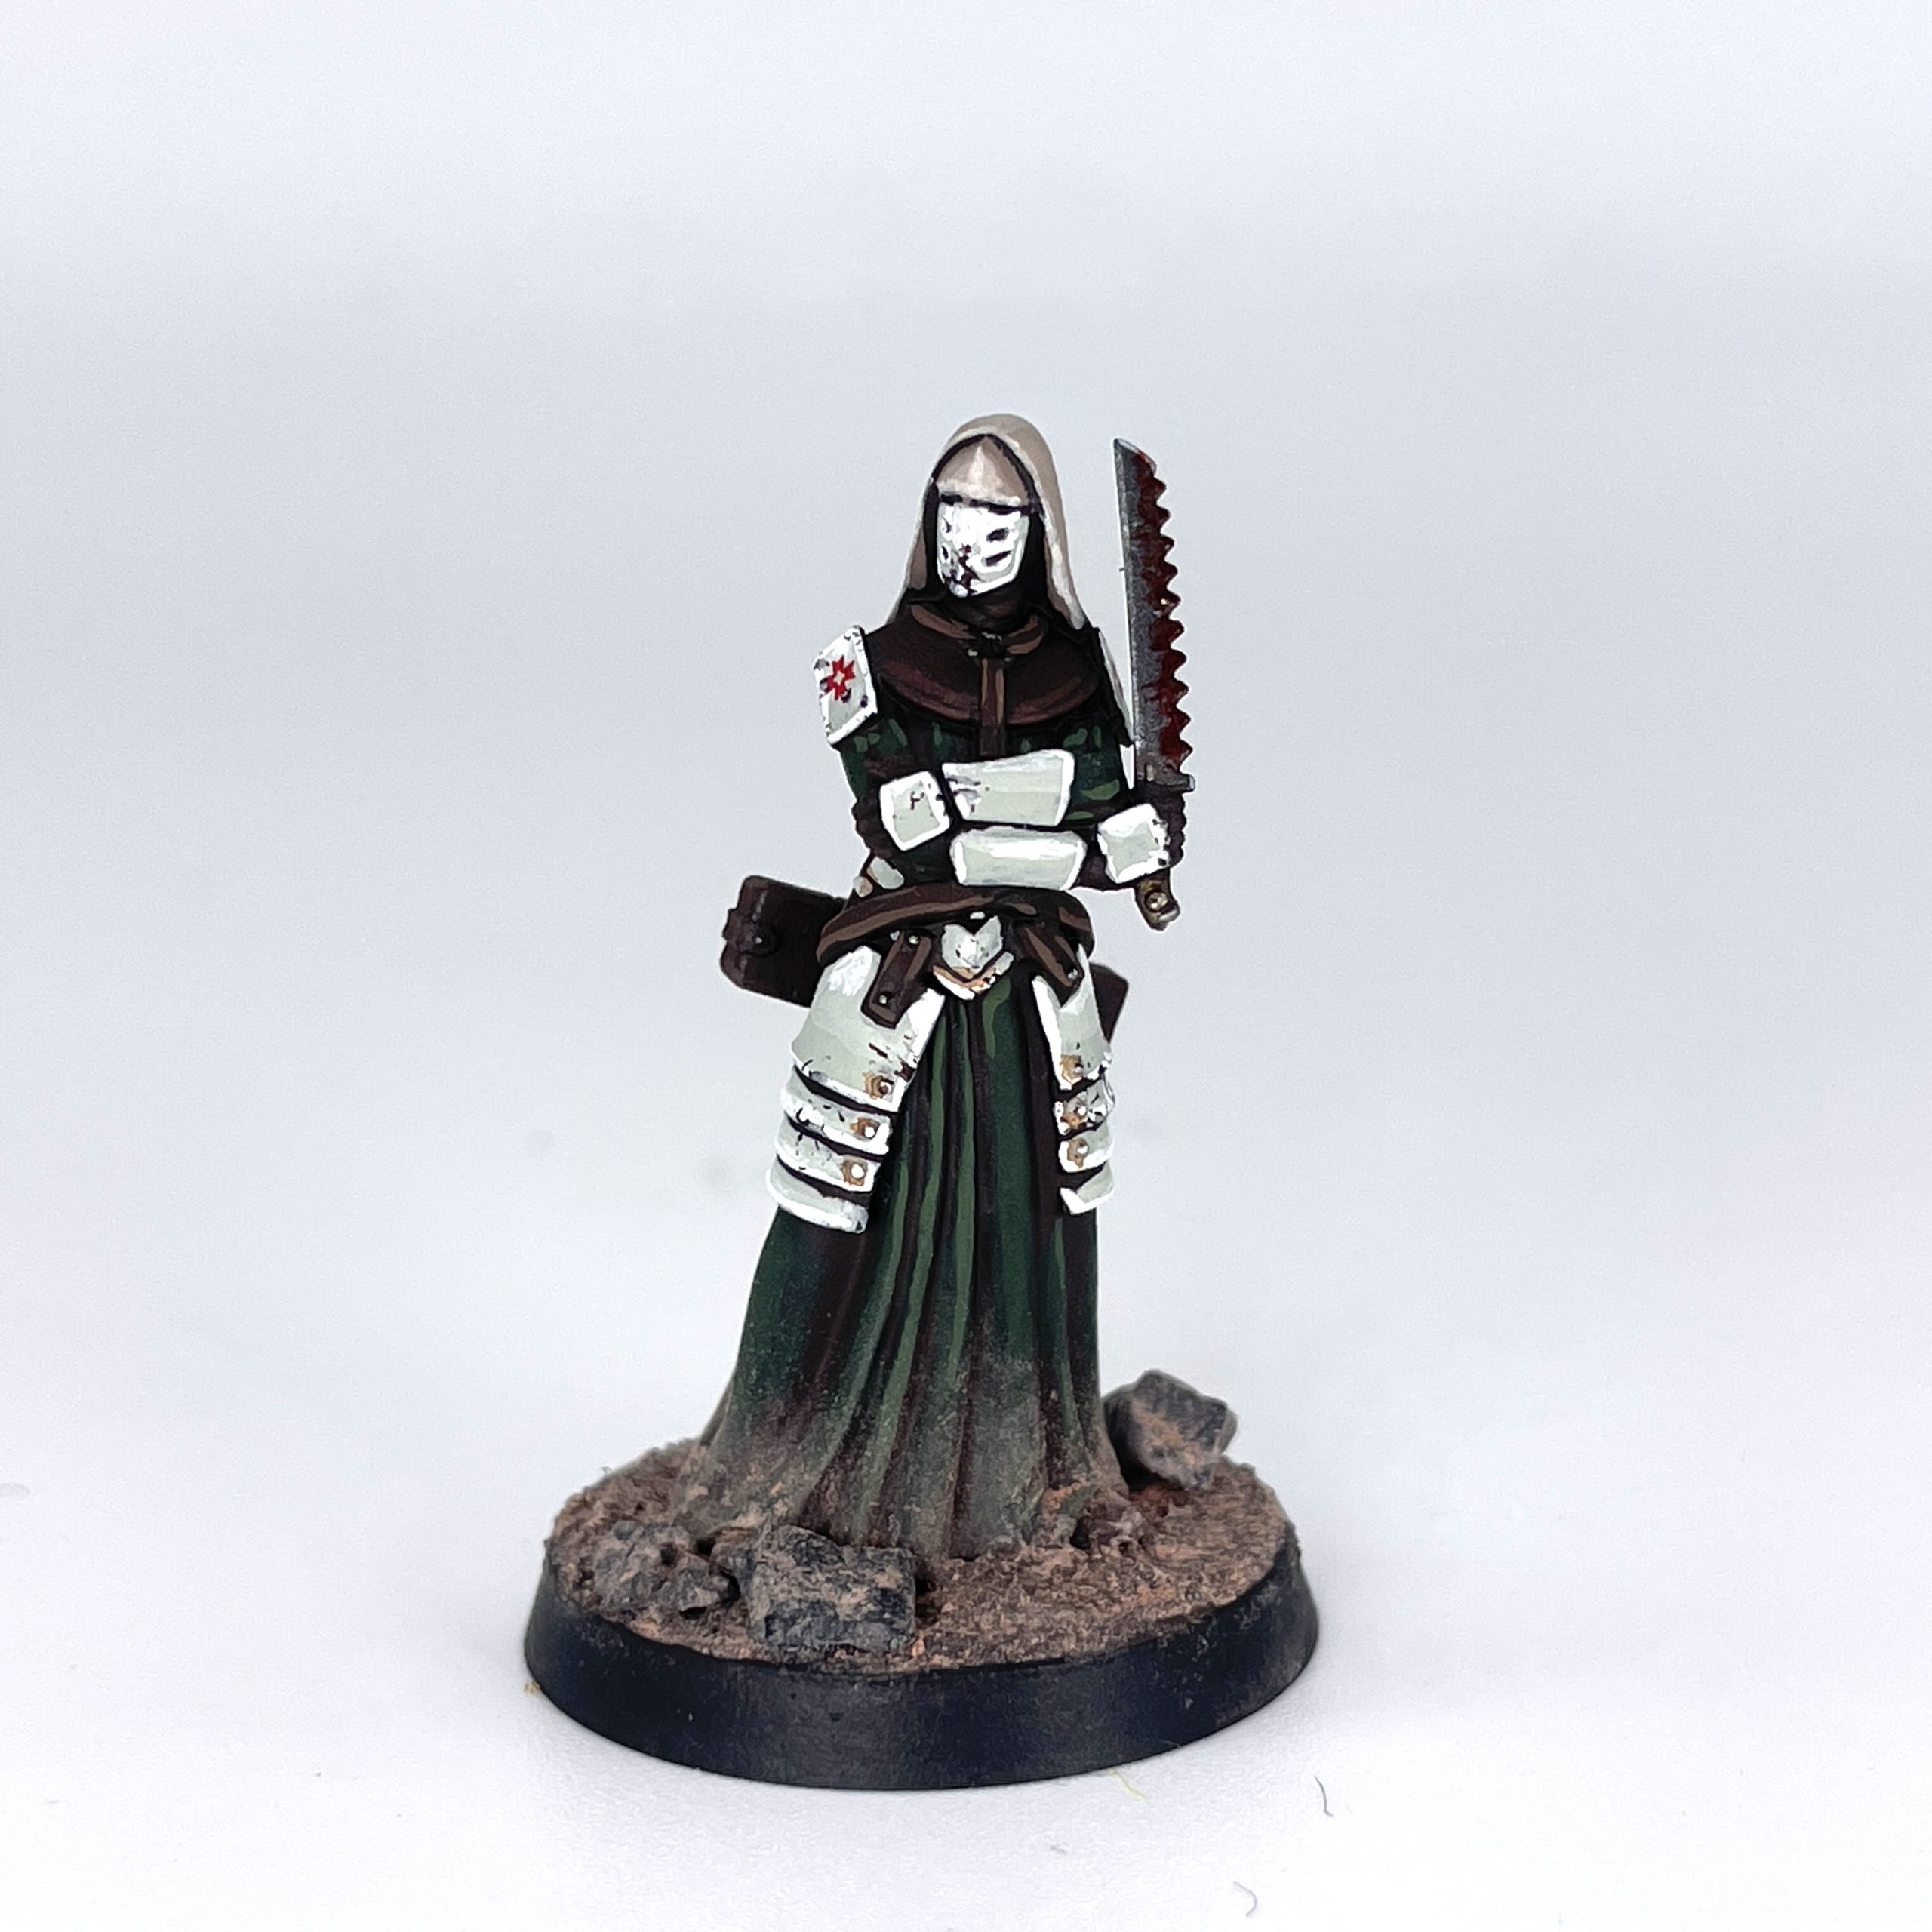
Over the Top
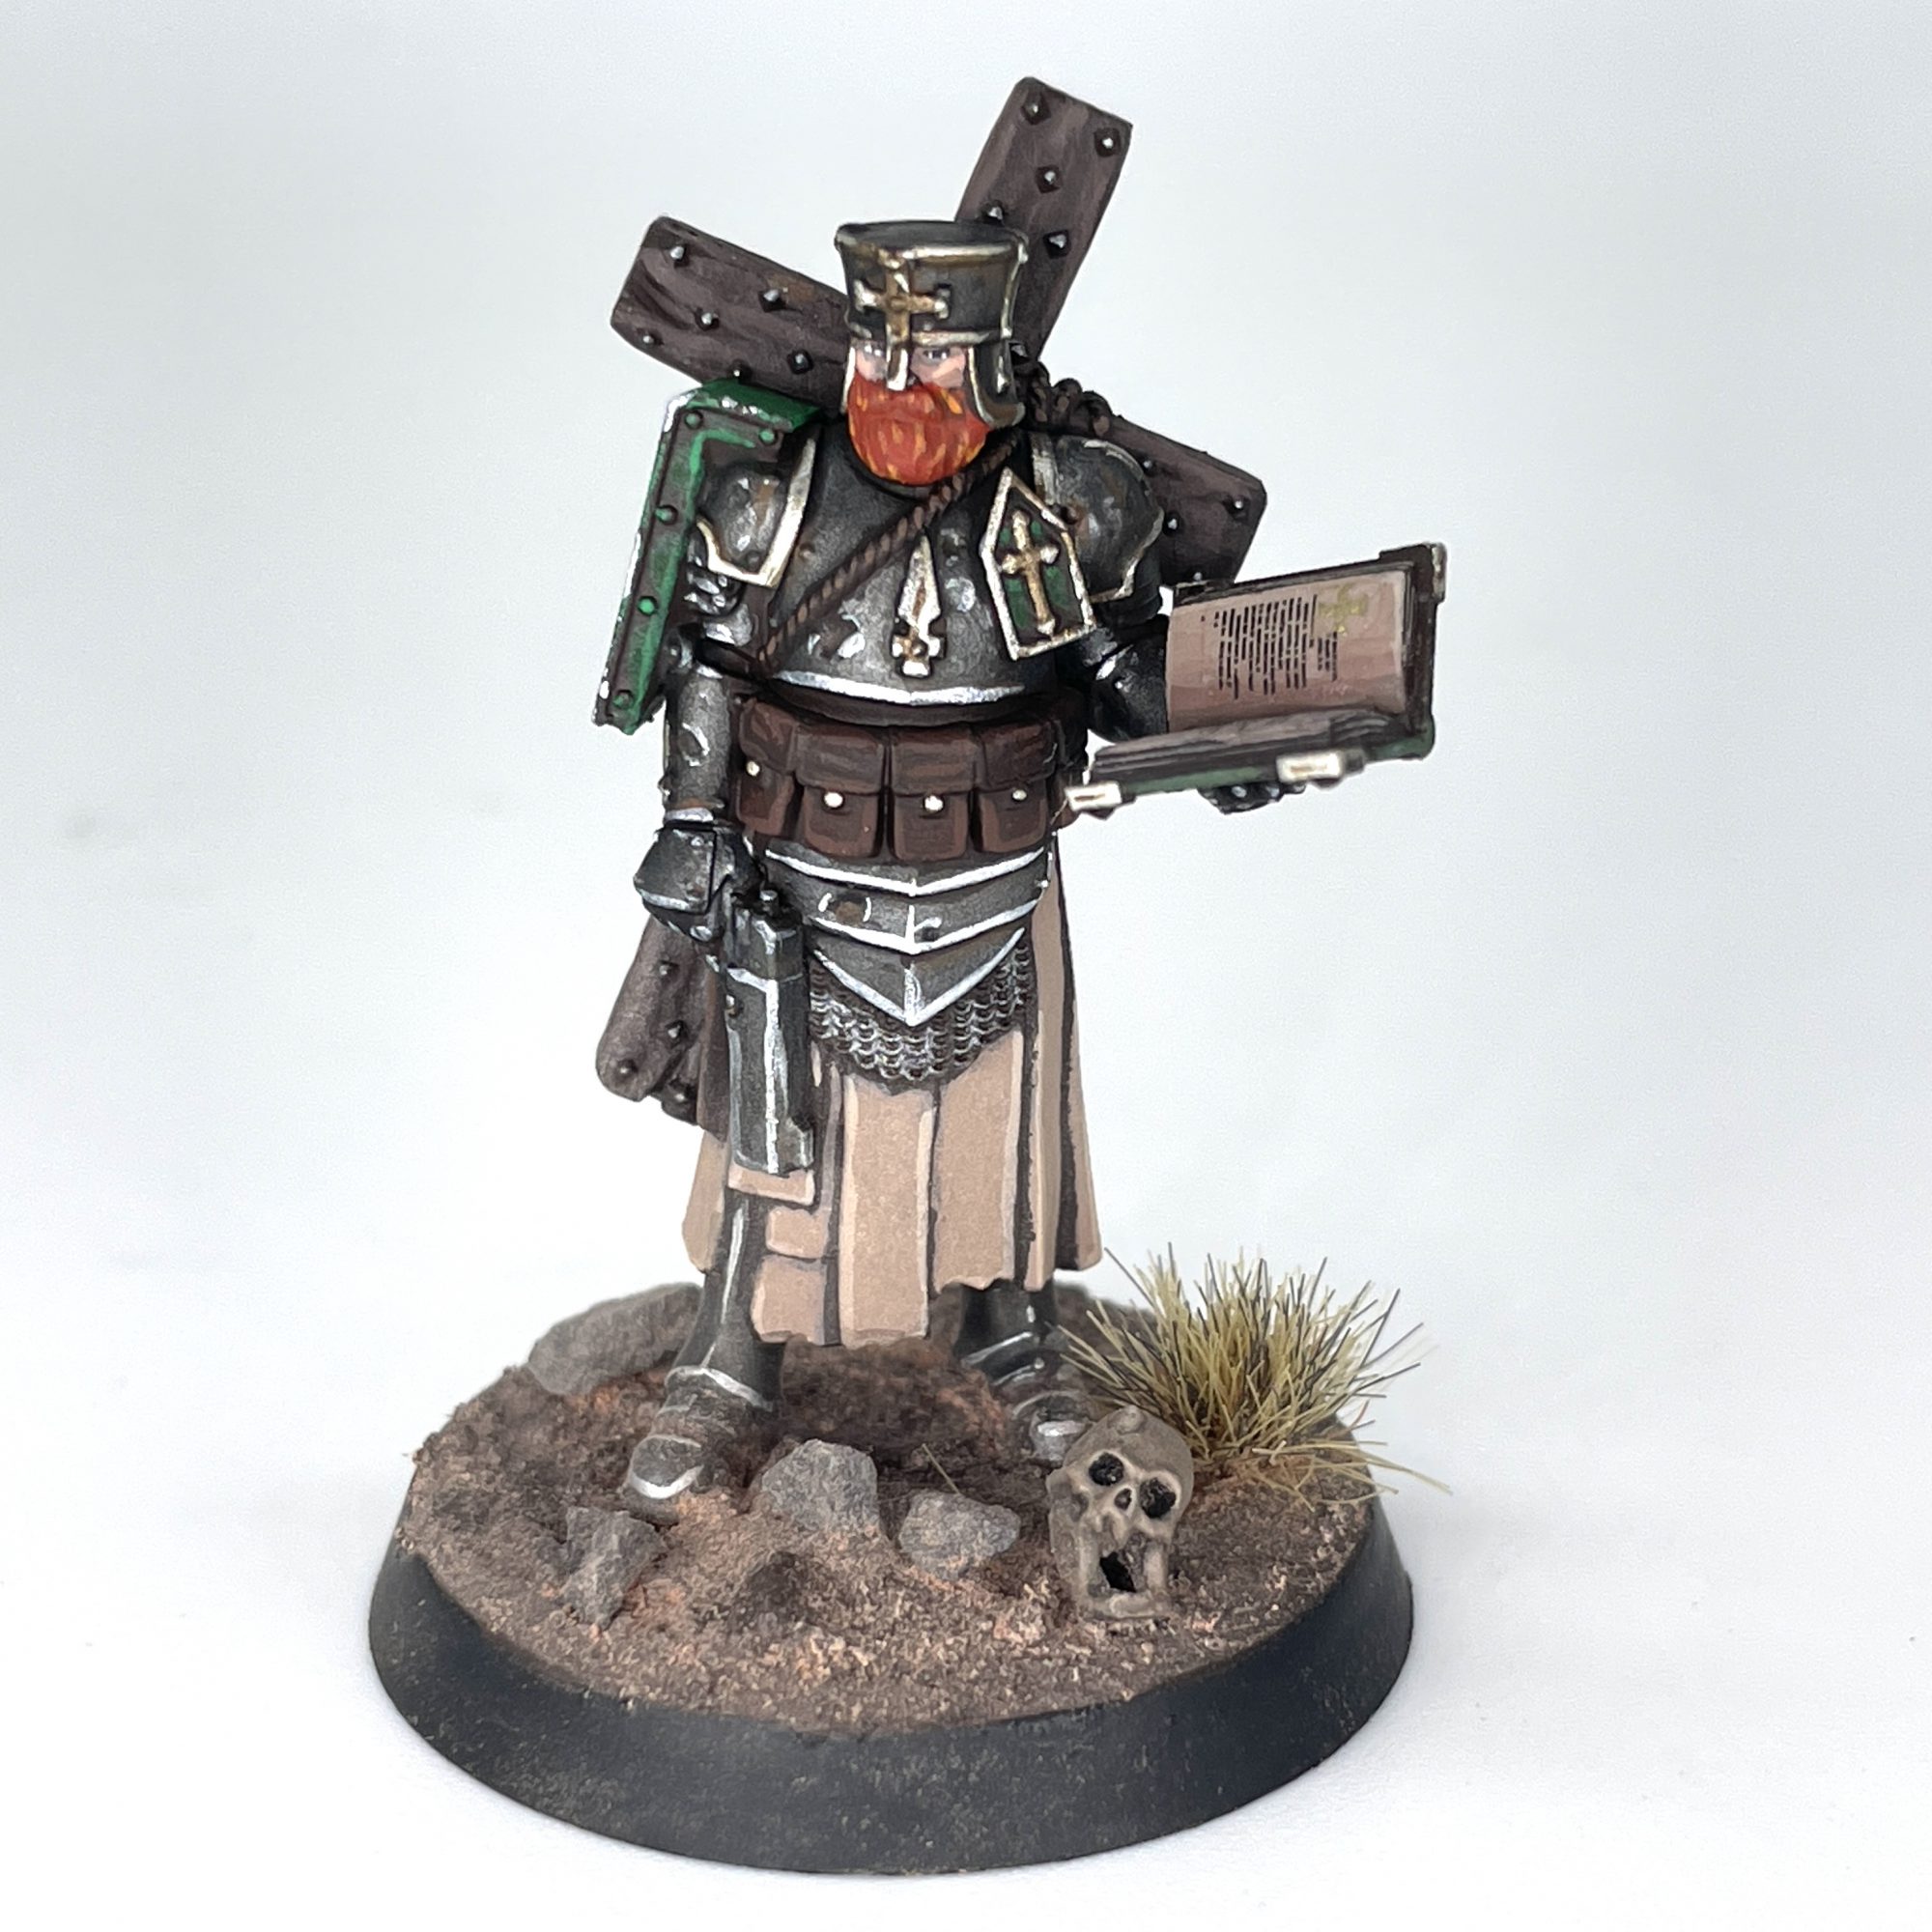 New Antioch Trench Cleric. Credit: SRM
If these notes seem exhaustive, I apologize. In practice, actually following this method of painting, mixing colors left and right is hugely freeing. I was able to paint this entire warband in just three weeks,
all while moving house, and still found the time to knock out a few layers a day and get these guys on the table. The key is to break it down into chunks; painting just the Yeomen, then the Shock Troopers, and so on, instead of trying to knock out twenty dudes at the same time. Progress comes quickly, and if things are a little messy, who cares? They're in the trenches! Now get mixing, and make New Antioch proud.
Have any questions or feedback? Drop us a note in the comments below or email us at contact@goonhammer.com. Want articles like this linked in your inbox every Monday morning? Sign up for our newsletter. And don’t forget that you can support us on Patreon for backer rewards like early video content, Administratum access, an ad-free experience on our website and more.Thank you for being a friend.

 New Antioch warband. Credit: SRM
 New Antioch Lieutenant. Credit: SRM

 New Antioch Combat Engineer. Credit: SRM
 New Antioch Mechanized Heavy Infantry. Credit: SRM
 New Antioch Combat Medic. Credit: SRM
 New Antioch Trench Cleric. Credit: SRM

 Goonhammer App and Patron Updates: April, 2026
 Kill Team Tournament Report: Engage, Party, Repeat's March Madness 2026
 Goonhammer Reviews: Tribal Conquest