Welcome back to our series on painting everything across the Trench Crusade universe. Today, we'll be going over painting up the essential for Court of the Seven-Headed Serpent: the more dour and demonic side of the fallen forces. I'm going to focus on a few methods to get a fully painted warband up and ready in a reasonable time frame, so it goes without saying that you can push any of the techniques here a bit farther if you want to give your models some extra flair. Importantly, I'm going to be using a variety of techniques here, but all of them will be a great place to test them if you've never done them before - such as
Drybrushing,
Sponging, and
Glazing. This painting method will be done with less washing than usual and will be purely acrylic - if you want to see more "grimdark" methods using oil washes that are more typical for many Court forces, you can reference
our article on the Knights of Avarice which will have very similar colors and methods to what you'd use here.
A quick foreword - I mostly use Pro Acryl paints, which I'll abbreviate to PA. There are very few paints here that I think are absolutely necessary in terms of brand, so feel free to color match to what you have available to you.
Getting Started
We're going to start with priming our models black. This is pretty intentional for a few later steps, so I'd stick with black unless you don't have access to any black primer. If you have an airbrush or a bright red rattlecan, any models that are primarily wearing armor (Hell Knights, Goetic Warlocks, etc.) you can base coat red now. This isn't a zenithal - you want full coverage here. Don't worry if you don't have either of these, you can do this with a brush easily. I used a few layers of Moltow Red Ink on the Hell Knight for this.
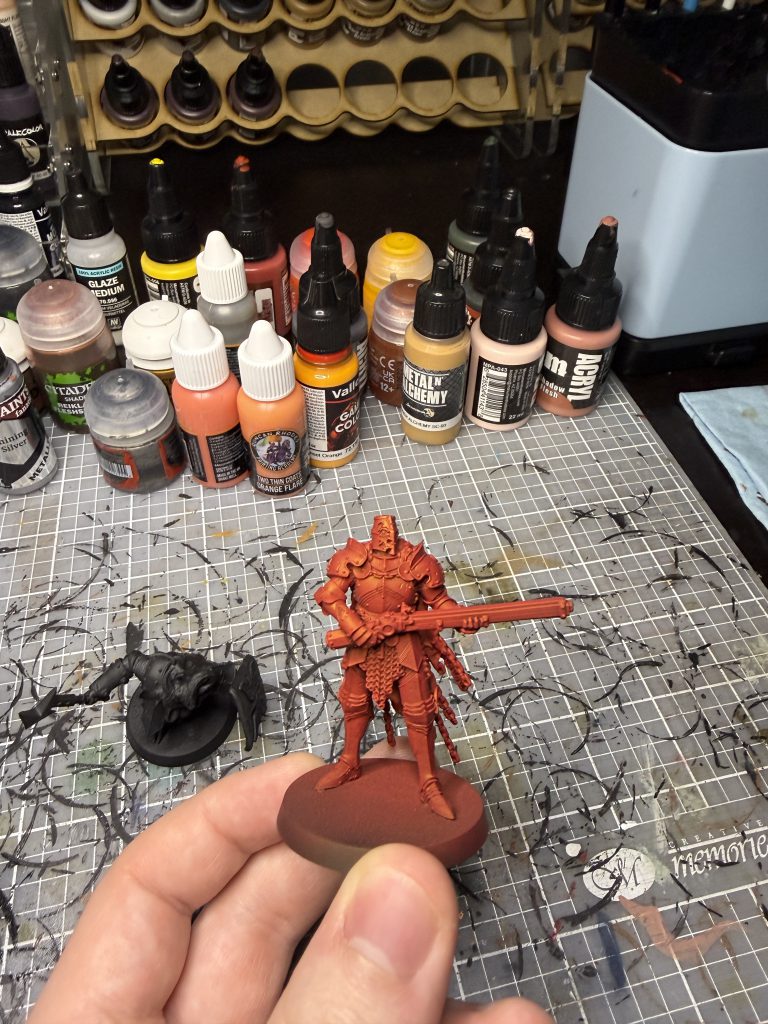
Hell Armor:
This covers anything you want to have a sort of heat-ridden, corrupted demonic armor effect. I use this on the majority of "suits of armor" such as the armor on Yoke Fiends & Hell Knights, but I don't bother doing this on small pieces such as the spinal section of the Sorcerer. This is going to use sponge painting to do a sort of "reverse highlight" where we build up to a darker color from the base red, then go back and do highlights on that darker color. You can check our guide on this linked above for details on sponging - I use tweezers and a piece of foam to do this.
- If you didn't start with basing the model red, cover any panels of armor in PA Bold Pyrrole Red or the another bright, punchy red.
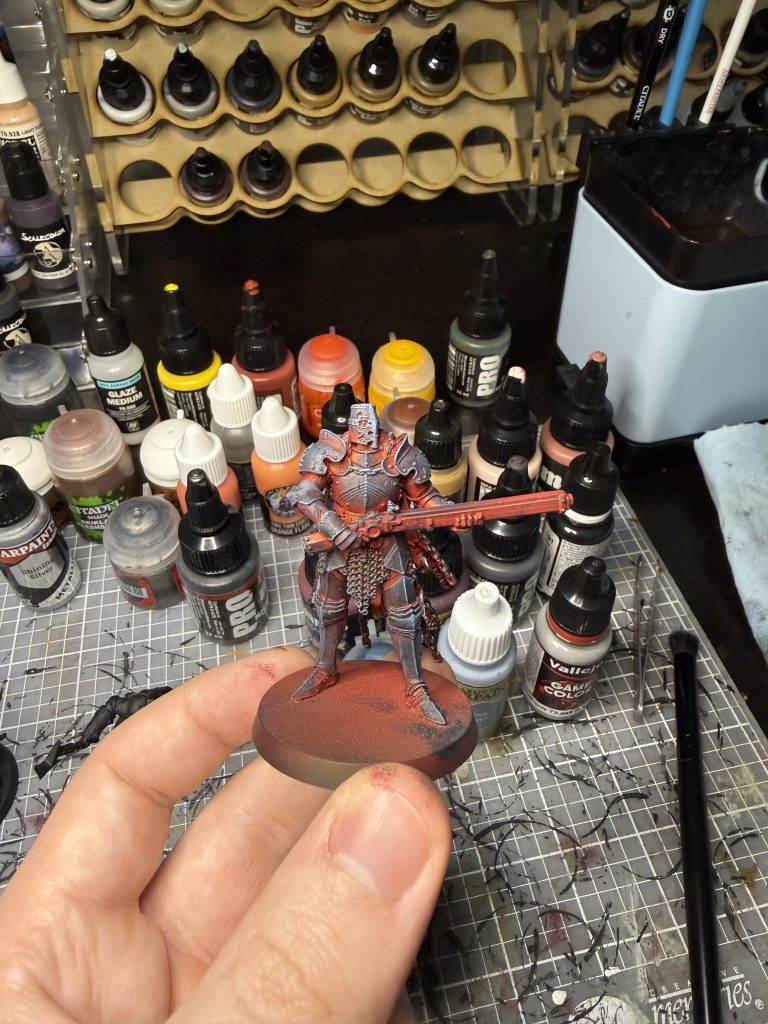
- Sponge in the following order, almost like you're highlighting, getting lighter with each layer: PA Black Red -> Dark Burgundy -> Black Brown -> Black. You want to leave some of the red showing from the initial layer.
- Drybrush all of the armor with Citadel Thunderhawk Blue, trying to keep out of any red areas that remain in the crevasses.
- Do an even lighter drybrush highlight of Army Painter Fog Grey, sticking more towards the edges.
- Go in with a regular brush and do some fine edge highlights with a light grey of choice, I use Vallejo Stonewall Grey.
If you want to take this a step farther, you can go in and glaze some of the areas that are still exposed with red with a bit of orange. I do usually this a bit later when I paint the other fire effects since I already have orange on my palette, but if your model doesn't have other fire, I'd do it now.
Chainmail
- Base coat the mail in PA Magnesium. On larger sections of chainmail, I just drybrush it. If it's a small segment, I'd go in with a regular brush instead. This also leaves some of the heat effect on your Hell Armored models.
- If it's a smaller section of mail that you didn't drybrush, you can add a brown wash of choice here (such as Agrax Earthshade) just to add some shadows into the segments.
- Add a drop of silver (I use Army Painter Fanatic Shining Silver but this doesn't matter much) to your magnesium, then go in with another lighter drybrush to highlight it.
- Drybrush PA Black Brown on the edges of the section of mail.
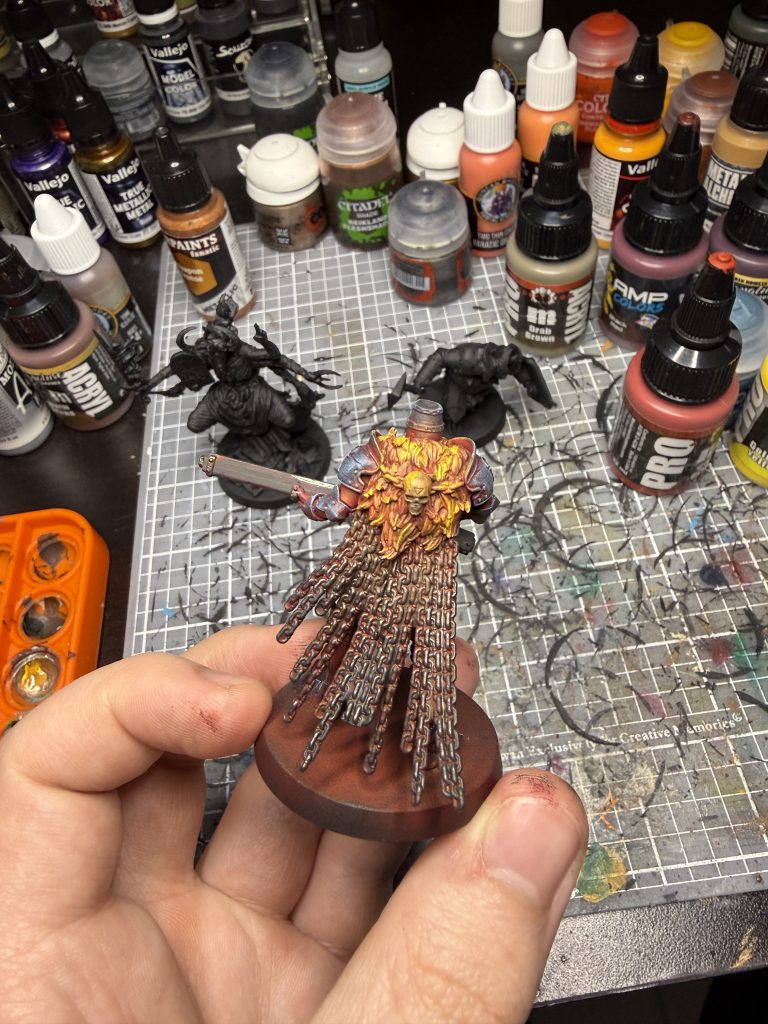
Hellfire
I separate "hellfire" from "regular fire" by doing it backwards. For normal, logical fire, you would want the brightest color to be closest to where the burning is occurring, with the deeper red colors being farther away from the root of the flame. Both for visual interest and to work well with our methods we've been doing, we'll go in reverse and have the brighter colors towards the tips, almost like a piece of burning fabric.
- If you aren't working from a red base, base coat in Bold Pyrrole Red or PA Oxide Red, depending on how bright you want it.
- Sponge up highlights in this order: Red-orange -> Orange -> Sunset yellow. I use Two Thin Coats Fanatic Orange, Two Thin Coats Orange Flare, and Vallejo Sunset Yellow.
- Go back with a brush and highlight the very tips in a bright punchy yellow, I use PA Golden Yellow.
Dead Skin
This is the flesh used on things like Yoke Fiends, the "body" part of a desecrated saint, and so on. Things that aren't the true "demon flesh" and are more mortal forms. I do use some washes here, mostly because I really like the initial color and haven't really found a "darker" version of it.
- Base with PA Red Grey.
- Wash with brown wash of choice/Agrax Earthshade.
- Water down a bit of Magos Purple Contrast paint, then wash it again with that.
- Sponge highlight with PA Red Grey again.
- Add a touch of PA Bright Neutral Grey to the previous Red Grey, then sponge a final Highlight.
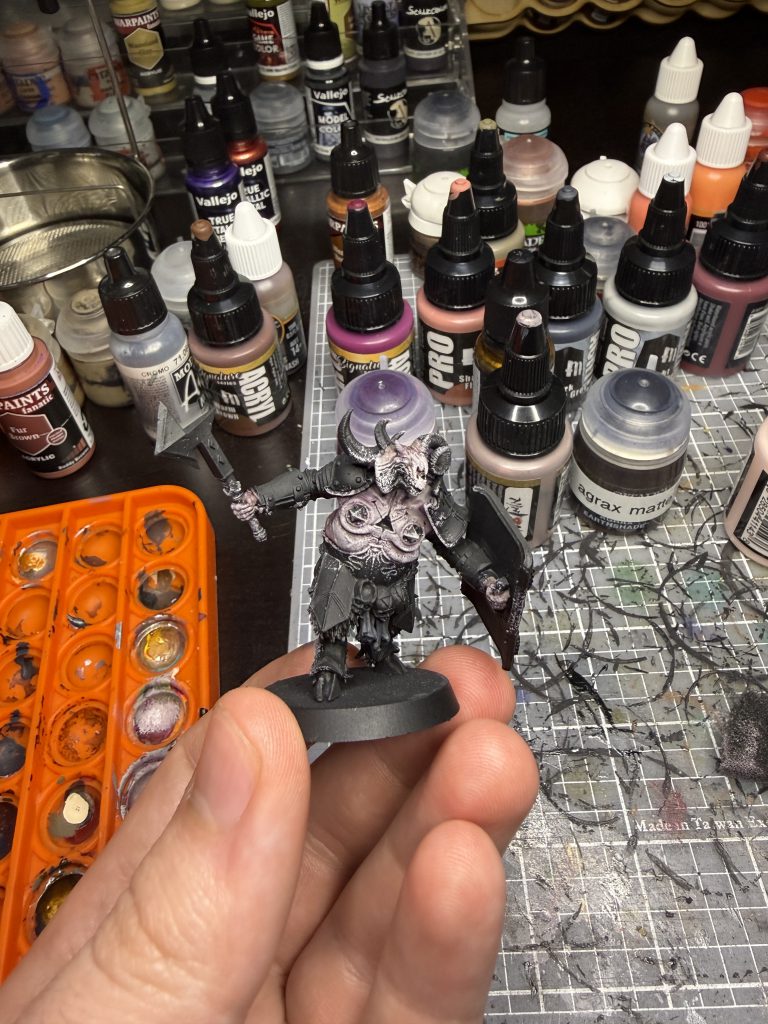
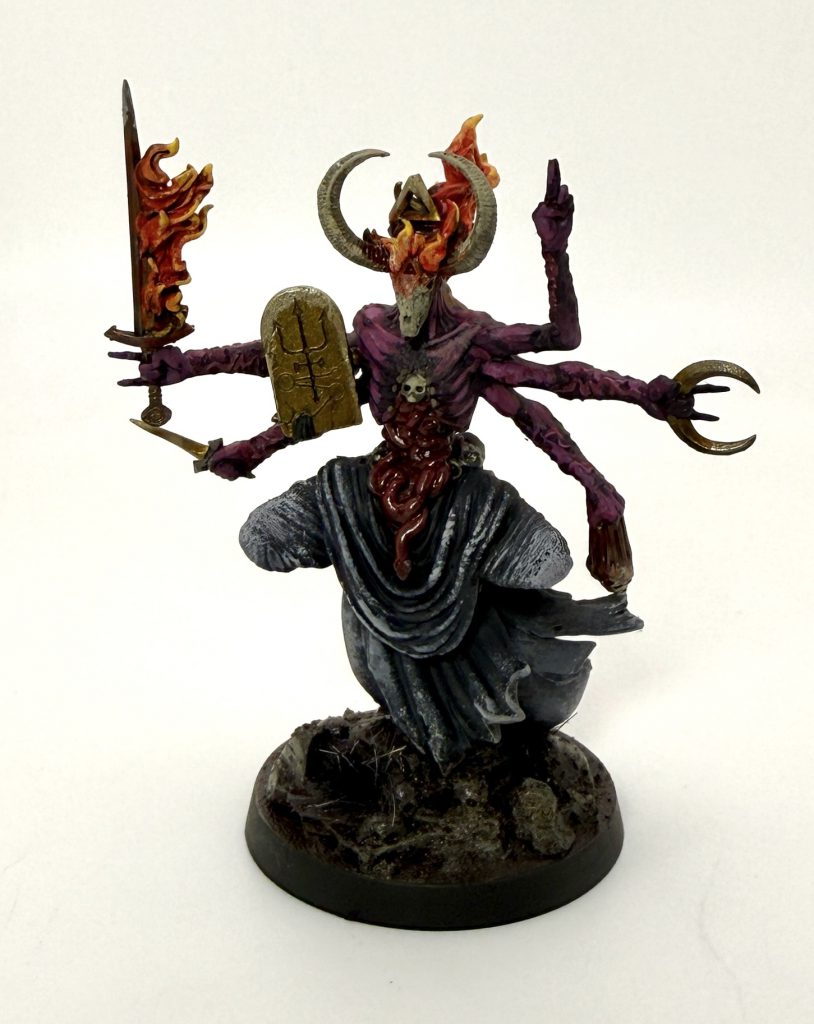
Demon Skin
I depart from sponging for this, mostly due to how the musculature is more defined on the Sorcerer I used for an example here. If you prefer to keep doing that or drybrushing, go for it. You can use the same paints and achieve a similar outcome. On the flipside, you can do cleaner blends for a much smoother look -
I went for quick and dirty layers.
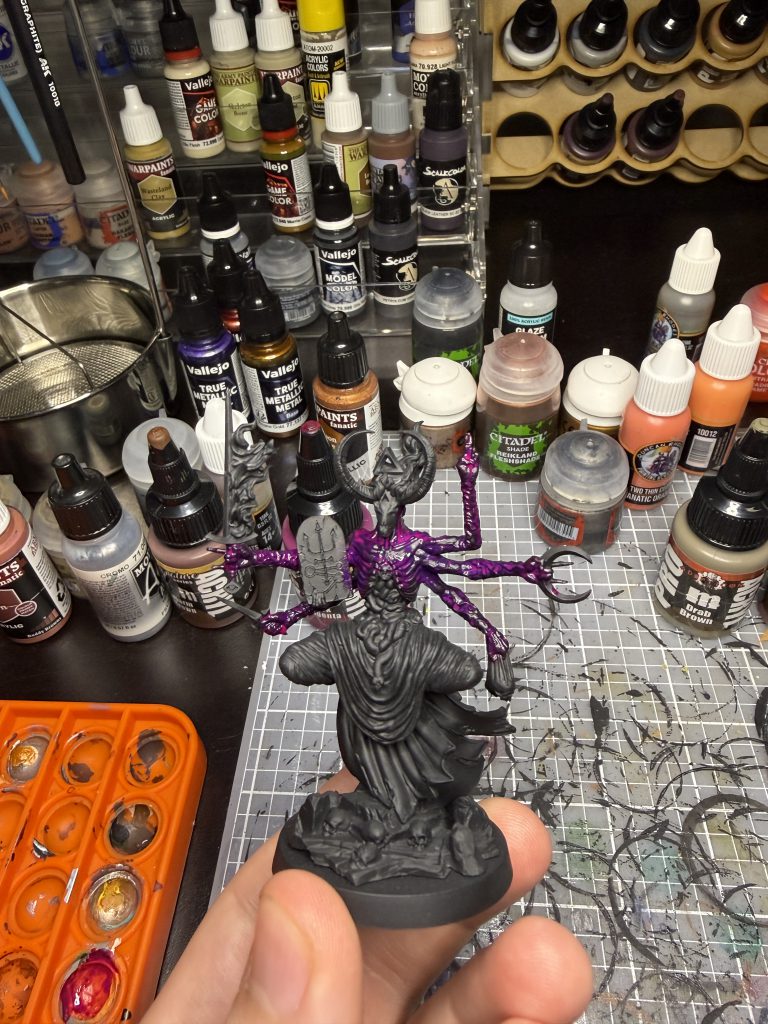
- Base coat with PA Dark Magenta. I do just one layer - it won't be perfectly opaque and that's fine, this is part of the reason we wanted to work from black.
- Highlight up in layers, starting from PA Dark Magenta again. I add bits of PA Shadow Flesh to the Magenta and keep highlighting, then add a tiny drop of Bright Neutral Grey for the final highlight. You can do this in as many layers as you want, I did 4 different layers, then touched up the final highlight.. Ideally you want to work up to an "almost flesh, but still a little unsettling" color.
- Finally, water down some Magos Purple Contrast and wash the whole model just to filter it and bring the blends together.
Guts/Gore
The thing about gore is that it's
very easy to go too far; less is more here. Obviously the Sorcerer's midsection is going to apply here, but things like the wounds on Yoke Fiends and Desecrated Saints will also use this well.
- Paint any actually exposed parts in PA Oxide Red.
- Highlight up, adding a pink of your choice to the red and either sponging or layering it. I add a drop of Magenta to the red, then a bit of Pale Pink. A bit of variety in different sections helps sell this effect, so don't worry about it all being the same.
- Make a "wash" by mixing 50/50 Blood for the Blood God and Glaze Medium, then pin wash it in all the recesses between the sections of guts. I also use this wash on sections of Yoke Fiend skin - in the wounds, under the folds of the skin, on the weird faces, etc.
- Lastly, for any exposed organs and guts, give it a thin coat of Gloss Varnish just to make the texture stand out a bit against the rest of the skin.
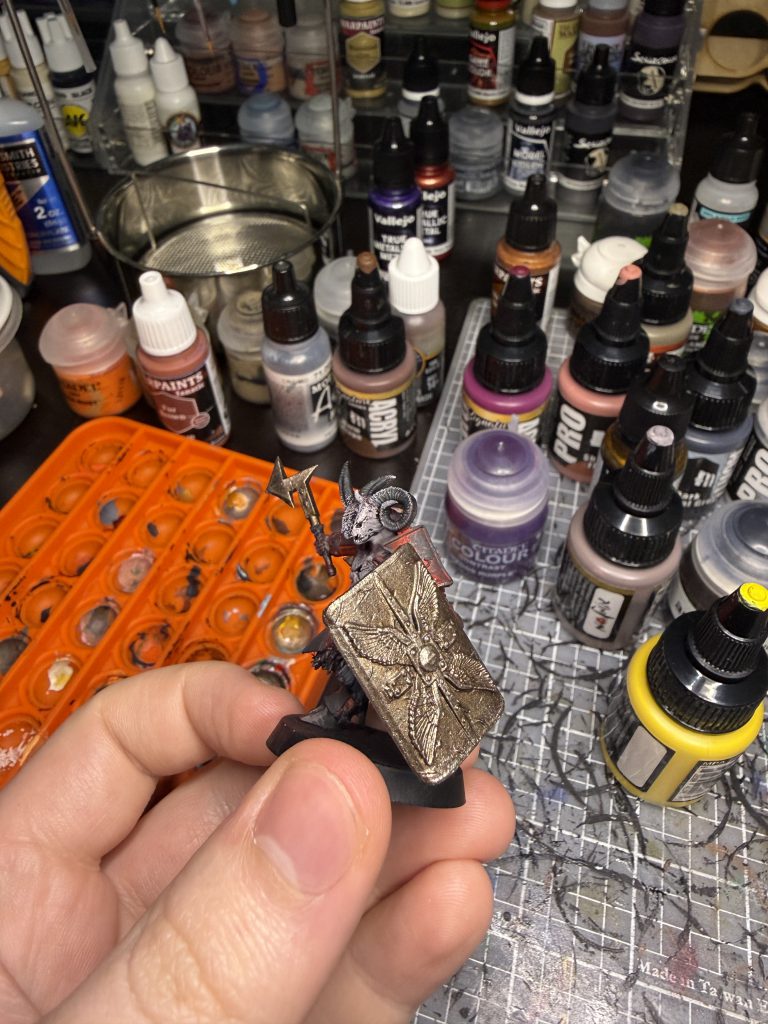
Corroded/Ancient Gold Metals
This can be used on armor plates, shields, and weapons. Anything you don't want to do the Hell Armor for or want to just break up some sections and add variety.
- Base in Vallejo True Metallic Metal Arcane Gold. I LOVE this paint but it's something brand new, so if you don't have this on hand you can use Citadel Balthazar Gold as a solid stand-in.
- Wash in a brown wash of choice. I have mentioned Agrax Earthshade a lot (which is perfect here) but even watering down brown contrast paint is fine as well. I often like Two Thin Coats Battle Mud.
- Sponge with the gold you used as a base again, then made a 50/50 mix of that gold and your preferred silver paint. Sponge that on, being a bit lighter and sticking to raised surfaces.
- Do a final edge highlight in pure silver.
Miscellaneous Things
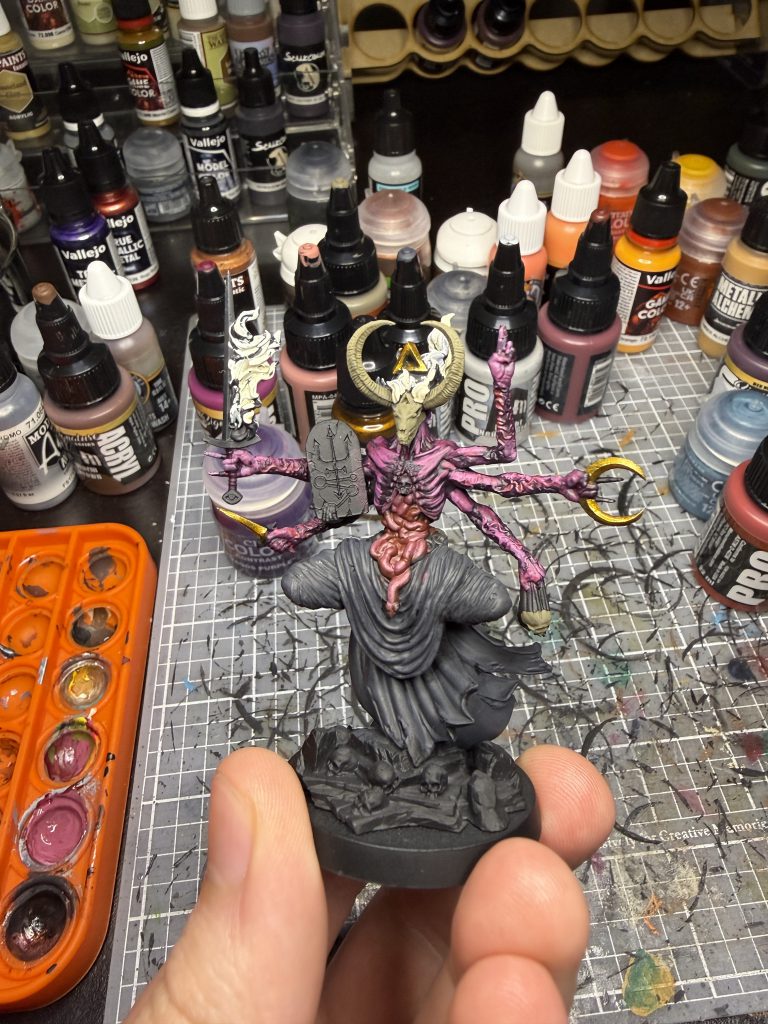
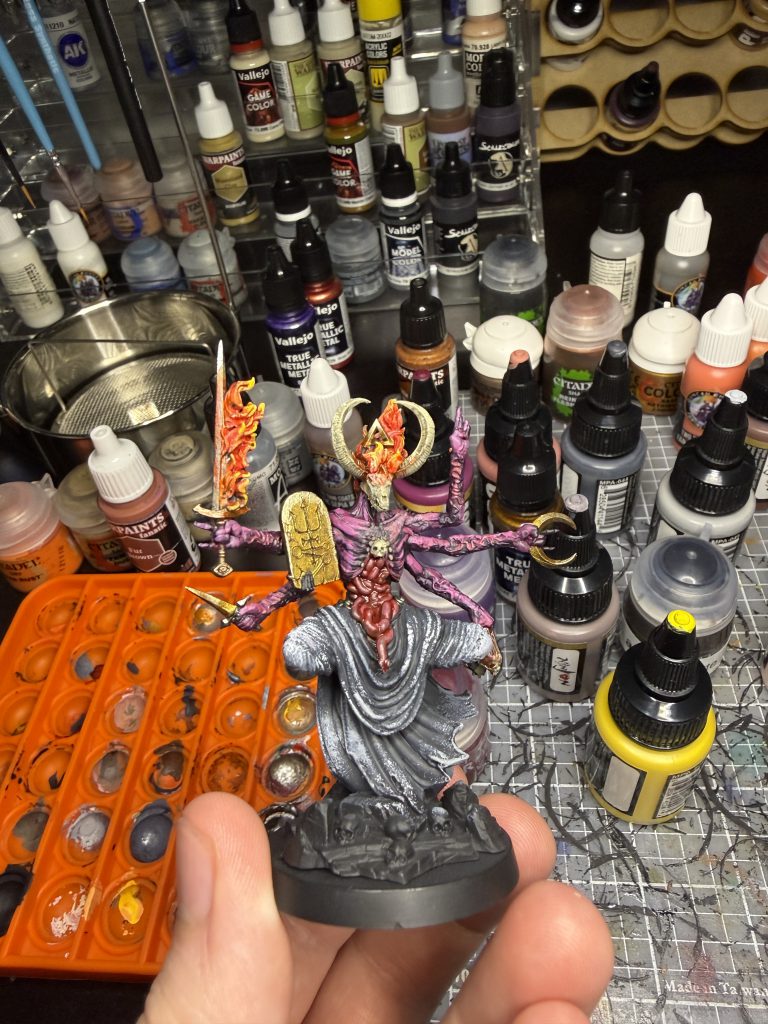
 Court of the Seven Headed Serpent Sorcerer. Credit: Loxi
- Bone areas are base coated in PA Drab Brown, Washed with a Sepia Wash, then highlighted (sponge or brush) with Citadel Karak stone -> Army Painter Skeleton Bone.
- Cloth areas are Base coated in PA Dark Neutral Grey, then highlighted up to Bright Neutral Grey. I had tried sponging for cloth here and I wasn't thrilled about it, but you can do any method you like. I also think mixing up the cloth colors is a good call on a model-to-model basis, but grey felt nice and neutral here.
- Wood areas are based in Black Brown, then highlighted up to Drab Brown with some rough drybrushing.
- Other metals used for variety are Citadel Leadbelcher, PA Dark Bronze, PA Dark Silver, and more bits of PA Magnesium. These are for small metal details and weapon handles to add variety.
- Fur is based in PA Dark Flesh, then washed in a brown wash and highlighted with 50/50 Dark Flesh/Shadow Flesh.
- Leather bits are Black Brown highlighted up to PA Warm Brown.
- One neat trick to the Hellfire is also to use an Orange contrast like Magmadroth Flame to already have a pre-thinned glaze you can use - I use this to add some slight OSL to the fire near weapon blades.
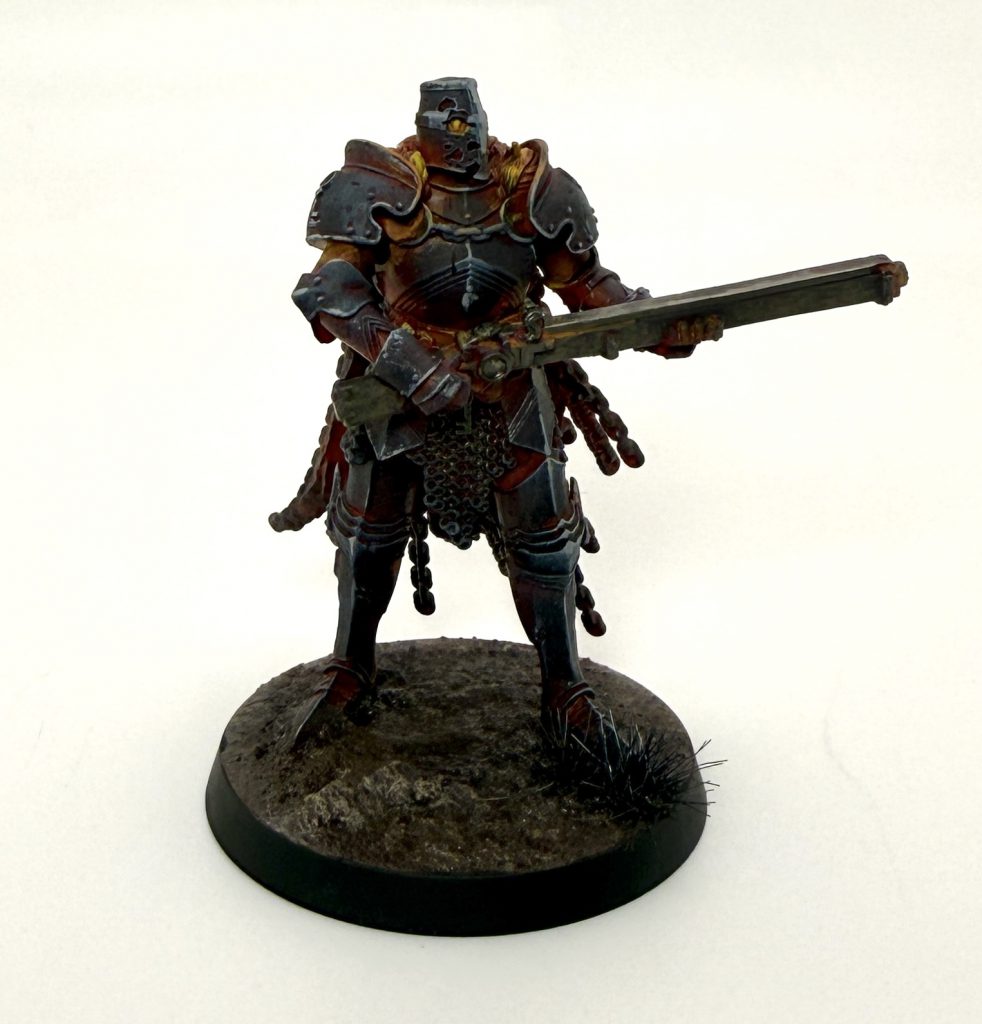 Court of the Seven Headed Serpent Hell Knight. Credit: Loxi
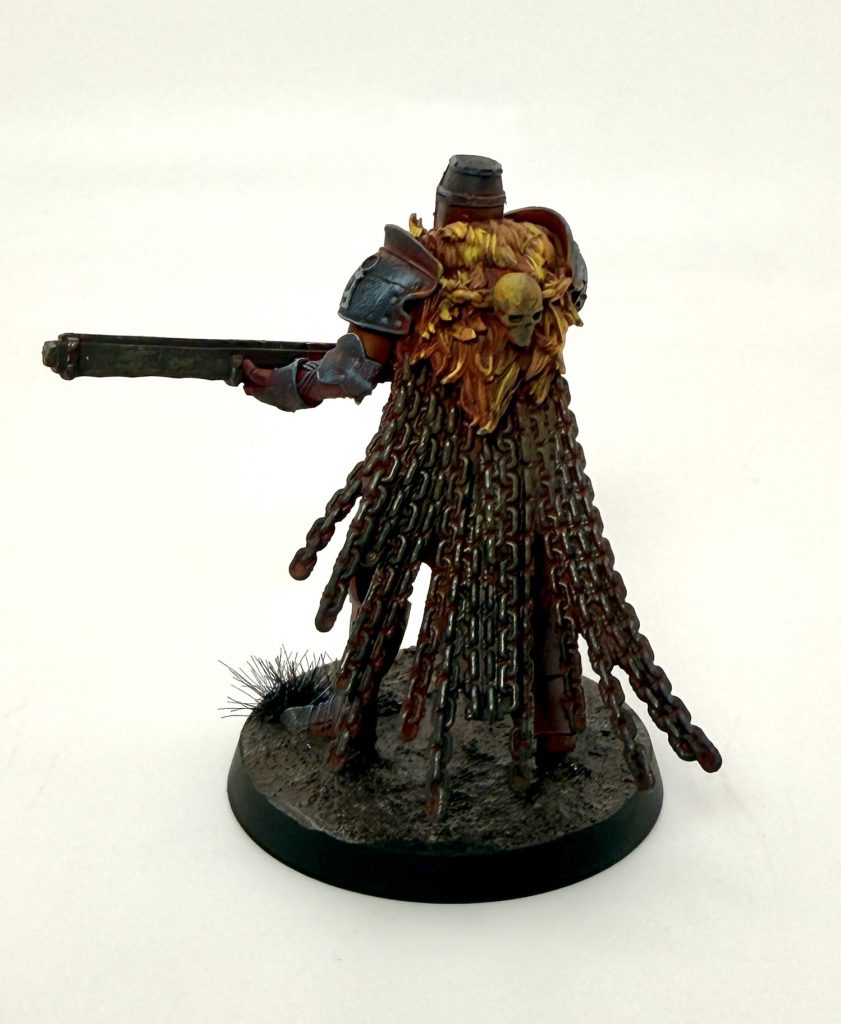 Court of the Seven Headed Serpent Hell Knight. Credit: Loxi
Bases
For bases, I went with a pretty basic muddy trench base. I think grassier green bases or even burnt grassy bases would be great here as well, but if you want to go quick and easy here's what I did.
- Coat everything in Citadel Stirland Mud.
- Drybrush with a leather brown color, then with Citadel Zandri Dust
- Wash everything with a glossy brown wash or gloss varnish.
- Finish with some dark tufts of your choosing.
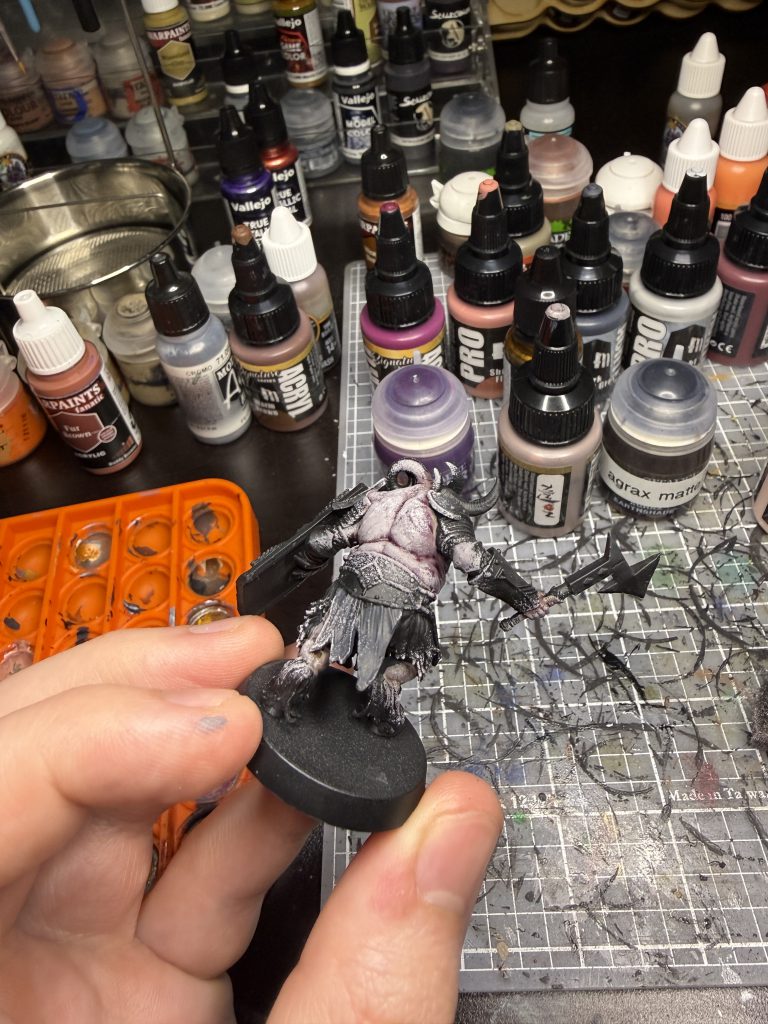
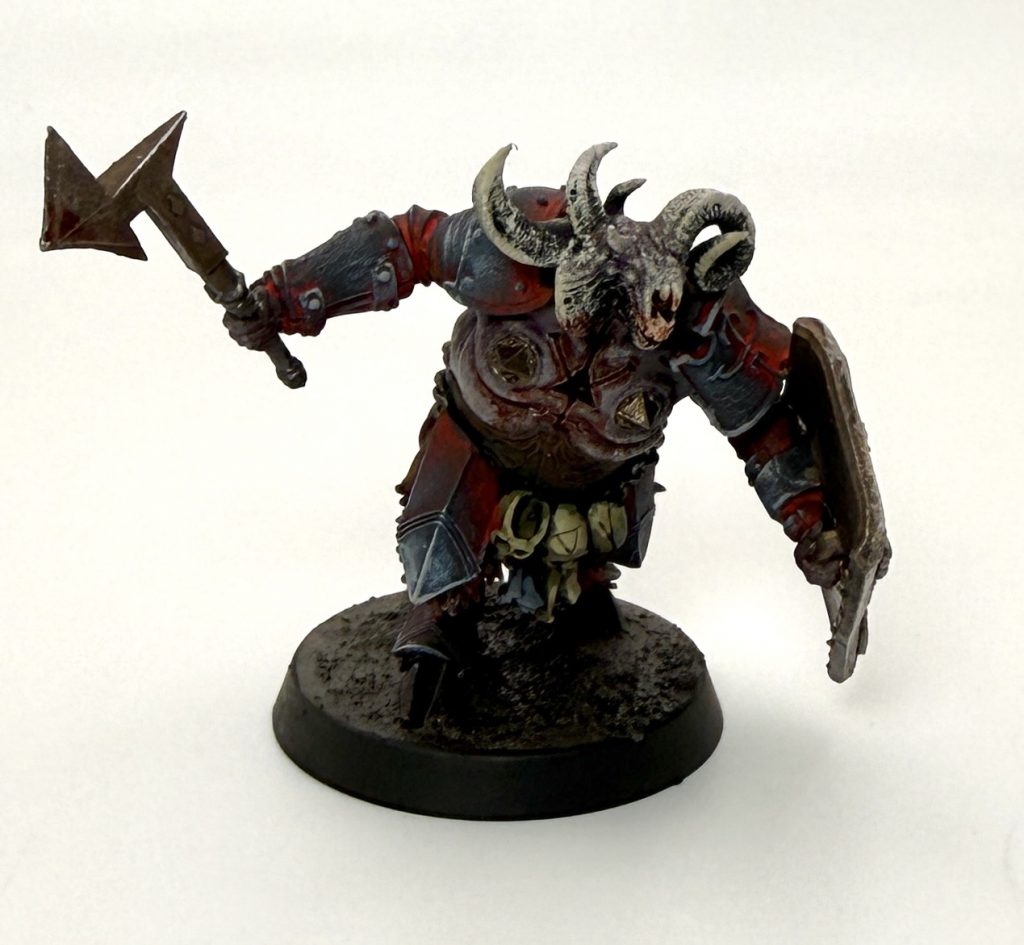 Court of the Seven Headed Serpent Yoke Fiend. Credit: Loxi
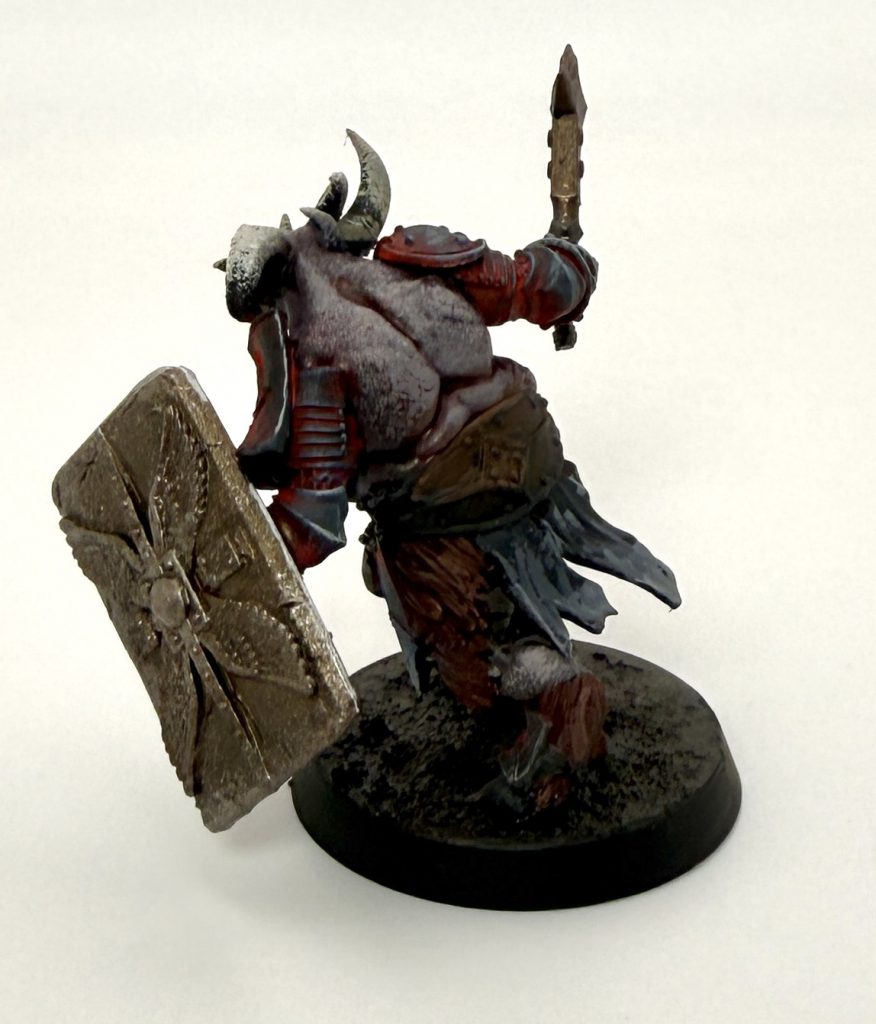 Court of the Seven Headed Serpent Yoke Fiend. Credit: Loxi
That's a wrap on painting your hellish Court members! Be sure to check out our other painting and hobby tutorials if you want more inspiration to add variety and depth to your new minis.
Have any questions or feedback? Drop us a note in the comments below or email us at contact@goonhammer.com. Want articles like this linked in your inbox every Monday morning? Sign up for our newsletter. And don't forget that you can support us on Patreon for backer rewards like early video content, Administratum access, an ad-free experience on our website, and subscriber-only content covering competitive Warhammer 40K!Thank you for being a friend.


 Goonhammer App and Patron Updates: April, 2026
 Kill Team Tournament Report: Engage, Party, Repeat's March Madness 2026
 Goonhammer Reviews: Tribal Conquest