Welcome, children of the fly, to another How To Paint Everything. In this article we’ll be going over quick and dirty methods of painting the decayed followers of Beelzebub, specifically looking at painting skin, gore, and decayed metallics. All of these schemes are meant to provide a fast way to get your warband painted and ready for the table, while also providing a great base to build from for more advanced detail work.
Skin and Gore
We’re going to start with the model primed white. These schemes lean heavily on contrasts/SpeedPaints to help speed along the process, but that means you’ll need to be careful with where you’re applying your paints. I recommend starting with your lighter colors (skin) then moving to the darker ones (gore and such) since that will cover any mistakes you made much better.
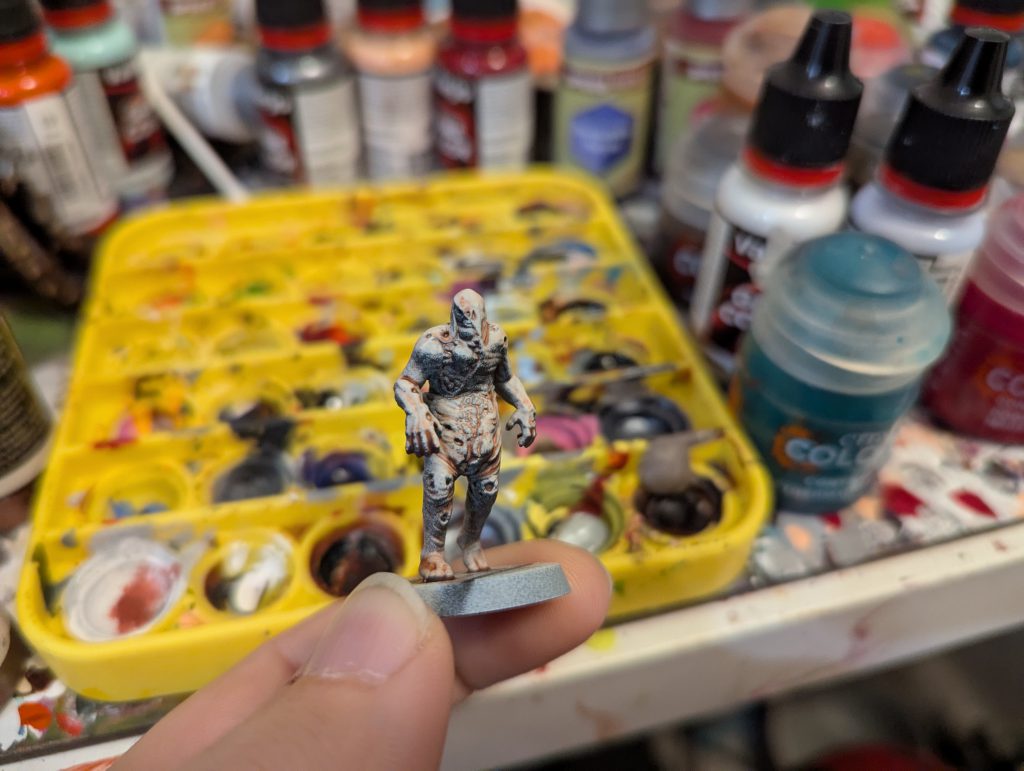
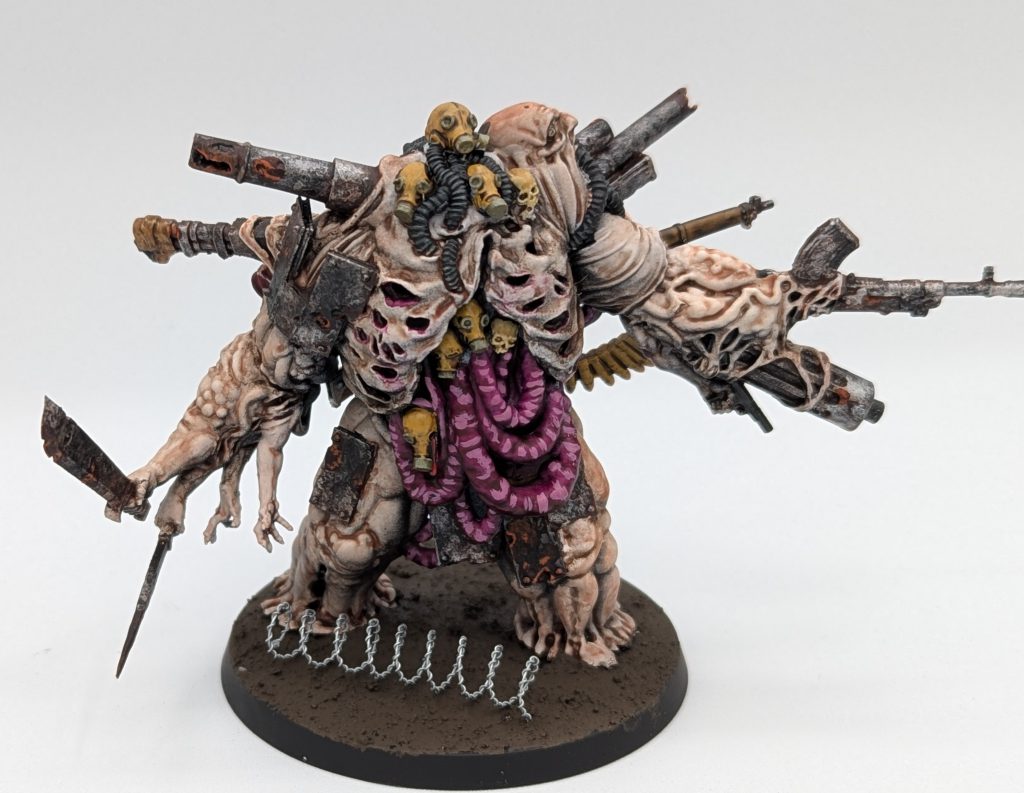
Our first step is an all over coat of Army Painter Crusader Skin. If you’re painting gross guys, I cannot recommend this paint enough. It leaves the raised areas looking pale while adding just enough warmth to the recesses to create a very pallid complexion
Next up, take Citadel’s Sigvald Burgundy and apply it to the all of the areas you want to look bloody and gory. This means all the tears in the skin and the exposed ribcage. This is a VERY strong paint, so be careful as you apply it. That said, if you get a bit on the edges of the wounds, use your thumb to wipe up the excess and it’ll look like blood smears seeping from the wounds. If you want to cover any areas up, a lighter skin tone like Vallejo Elfic Flesh or Citadel’s Kislev Flesh can act as a good color match to the raised areas.
Next we’ll do some highlights to help the mini look a bit more alive. Areas you want to keep bloody should be highlighted with a bright red like Citadel’s Evil Suns Scarlet, whereas I like to use something like Dechala Lilac on the exposed intestine. For the skin, a very light drybrush of Citadel’s Pallid Wych Flesh will help add some more definition to the folds.
If you want to step it up a bit, take some of Citadel’s Berzerker Bloodshade and hit the recesses with it, this will add a bruising effect to the folds in the skin. You can also glaze some of Citadel’s Poxwalker shade on some of the raised areas to add a bit more visual interest to the skin tone. I also recommend adding some gloss varnish to the exposed intestine and bloody areas, as it’ll make it look nice and wet.
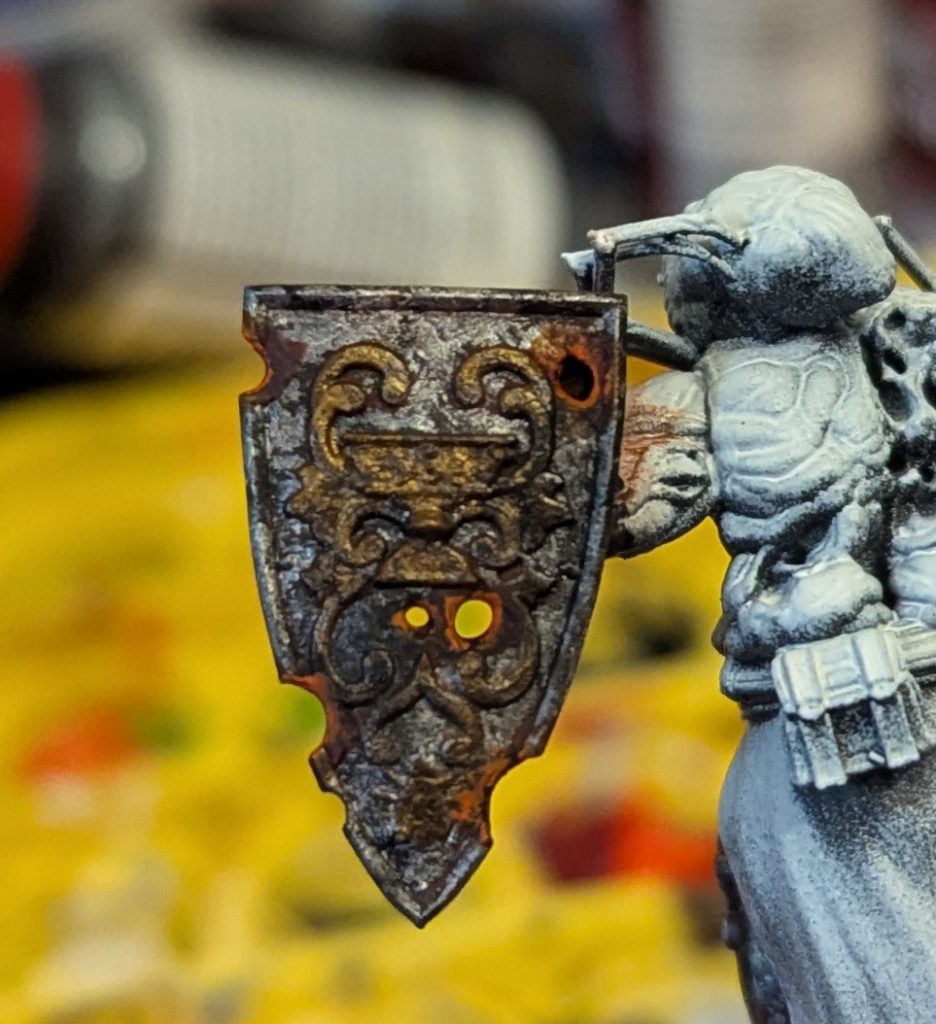
Decayed Metallics
A lot of this recipe is inspired by a video I saw on the Grimdark Compendium YouTube channel (which you can find style="font-weight: 400;">here). If you like this style of painting and want to see it with a more oils first approach, be sure to check it out.
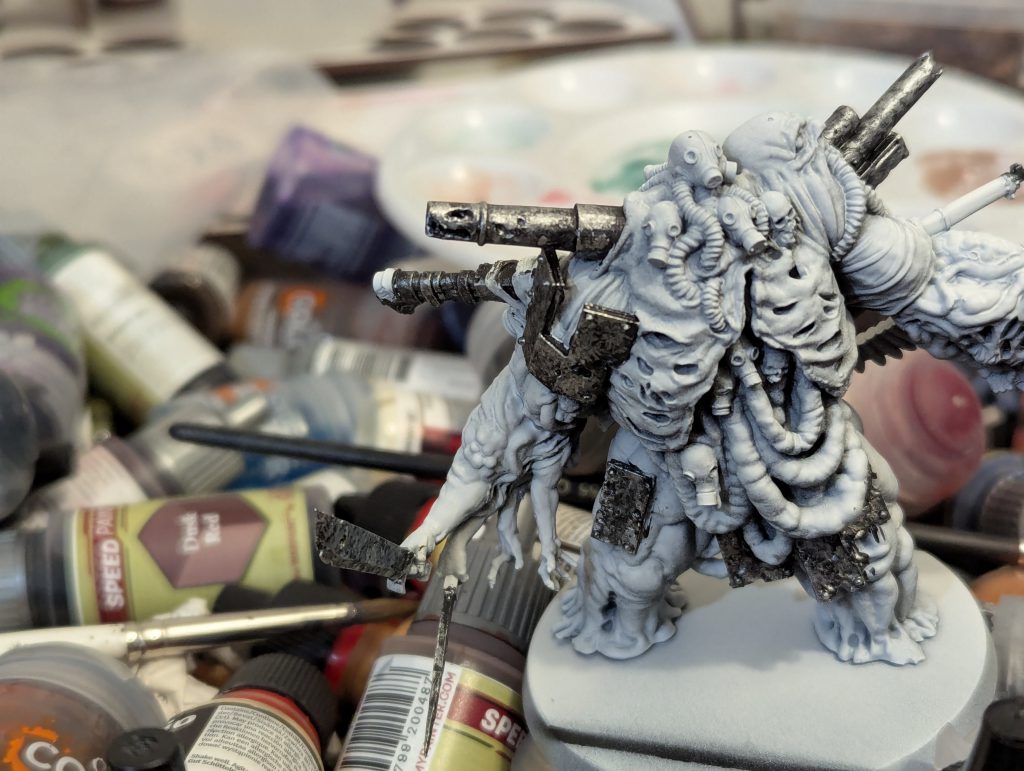
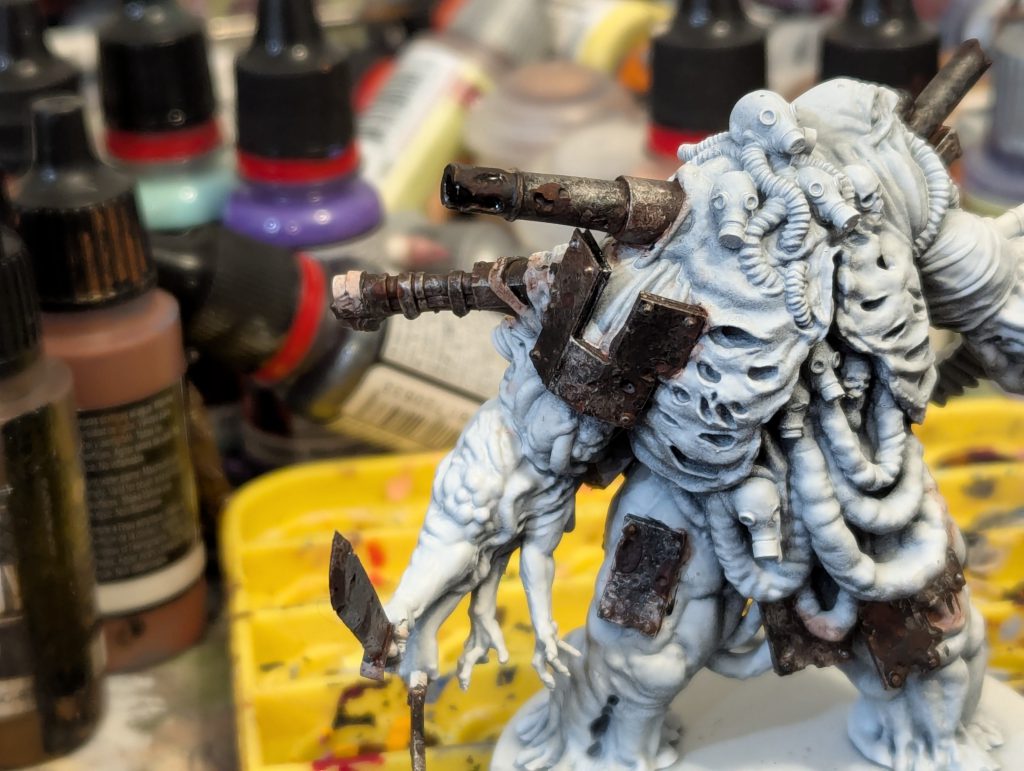
First we start off black. Yes, this is the opposite of the white we primed the model. Yes, this is a pain in the ass. The best way I’ve done to get there is to just hit it with a coat or two of Black Templars Contrast paint and be very careful. Once you have the black down, start stippling or sponging on a neutral tone silver like Leadbelcher. You don't want to cover all the black, but you want it to cover most of the surface area.
Next step is to do a more concentrated stippling of silver. For this I used Vallejo Silver but something like Stormhost Silver will work just fine. Focus on hitting the raised areas and areas that would catch the light, but you can be a little wild with it. Just be careful, it's easy to go overboard with this step so make sure you take a step back every so often and see where you’re at.
Next step is to hit all the pitted areas or really any area you want to be rusty with Dryad Bark or any neutral brown. Have fun with this step, as you can use it to create the illusion of more weathering on the model than what's actually sculpted there.
Lastly, we're gonna hit all the edges of those brown areas, or innermost parts of any blotches with Citadel’s Kindleflame. This is a bit more of a cartoony version of what rust would look like, but I find its more striking and immediately jumps out.
If you want to take this to the next level, enamels like Villany Ink’s Sector Rust are fantastic for adding a grimy filter to your metallics. You can also start even darker with your metallics. Starting at something like Iron warriors and slowly building to silver. You can also highlight the oranges used for the rust, making them pop that much more.
This method also works with other types of metallics. I used the steel recipe on the shield above, as well as a decayed gold recipe that works from Army Painter’s Rough Iron up to Scale 75s Viking Gold.
And that should give you the tools you need to make some icky goopy guys! Wanna see more gross painting tips? Check out our How To Paint Everything: Great Hunger for more tips for skin tones and how to paint the gross folded skin of the Gregori Gula.
Have any questions or feedback? Drop us a note in the comments below or email us at contact@goonhammer.com. Want articles like this linked in your inbox every Monday morning? Sign up for our newsletter. And don't forget that you can support us on Patreon for backer rewards like early video content, Administratum access, an ad-free experience on our website and more.


 Goonhammer App and Patron Updates: April, 2026
 Kill Team Tournament Report: Engage, Party, Repeat's March Madness 2026
 Goonhammer Reviews: Tribal Conquest