How To Paint Everything | Hobby

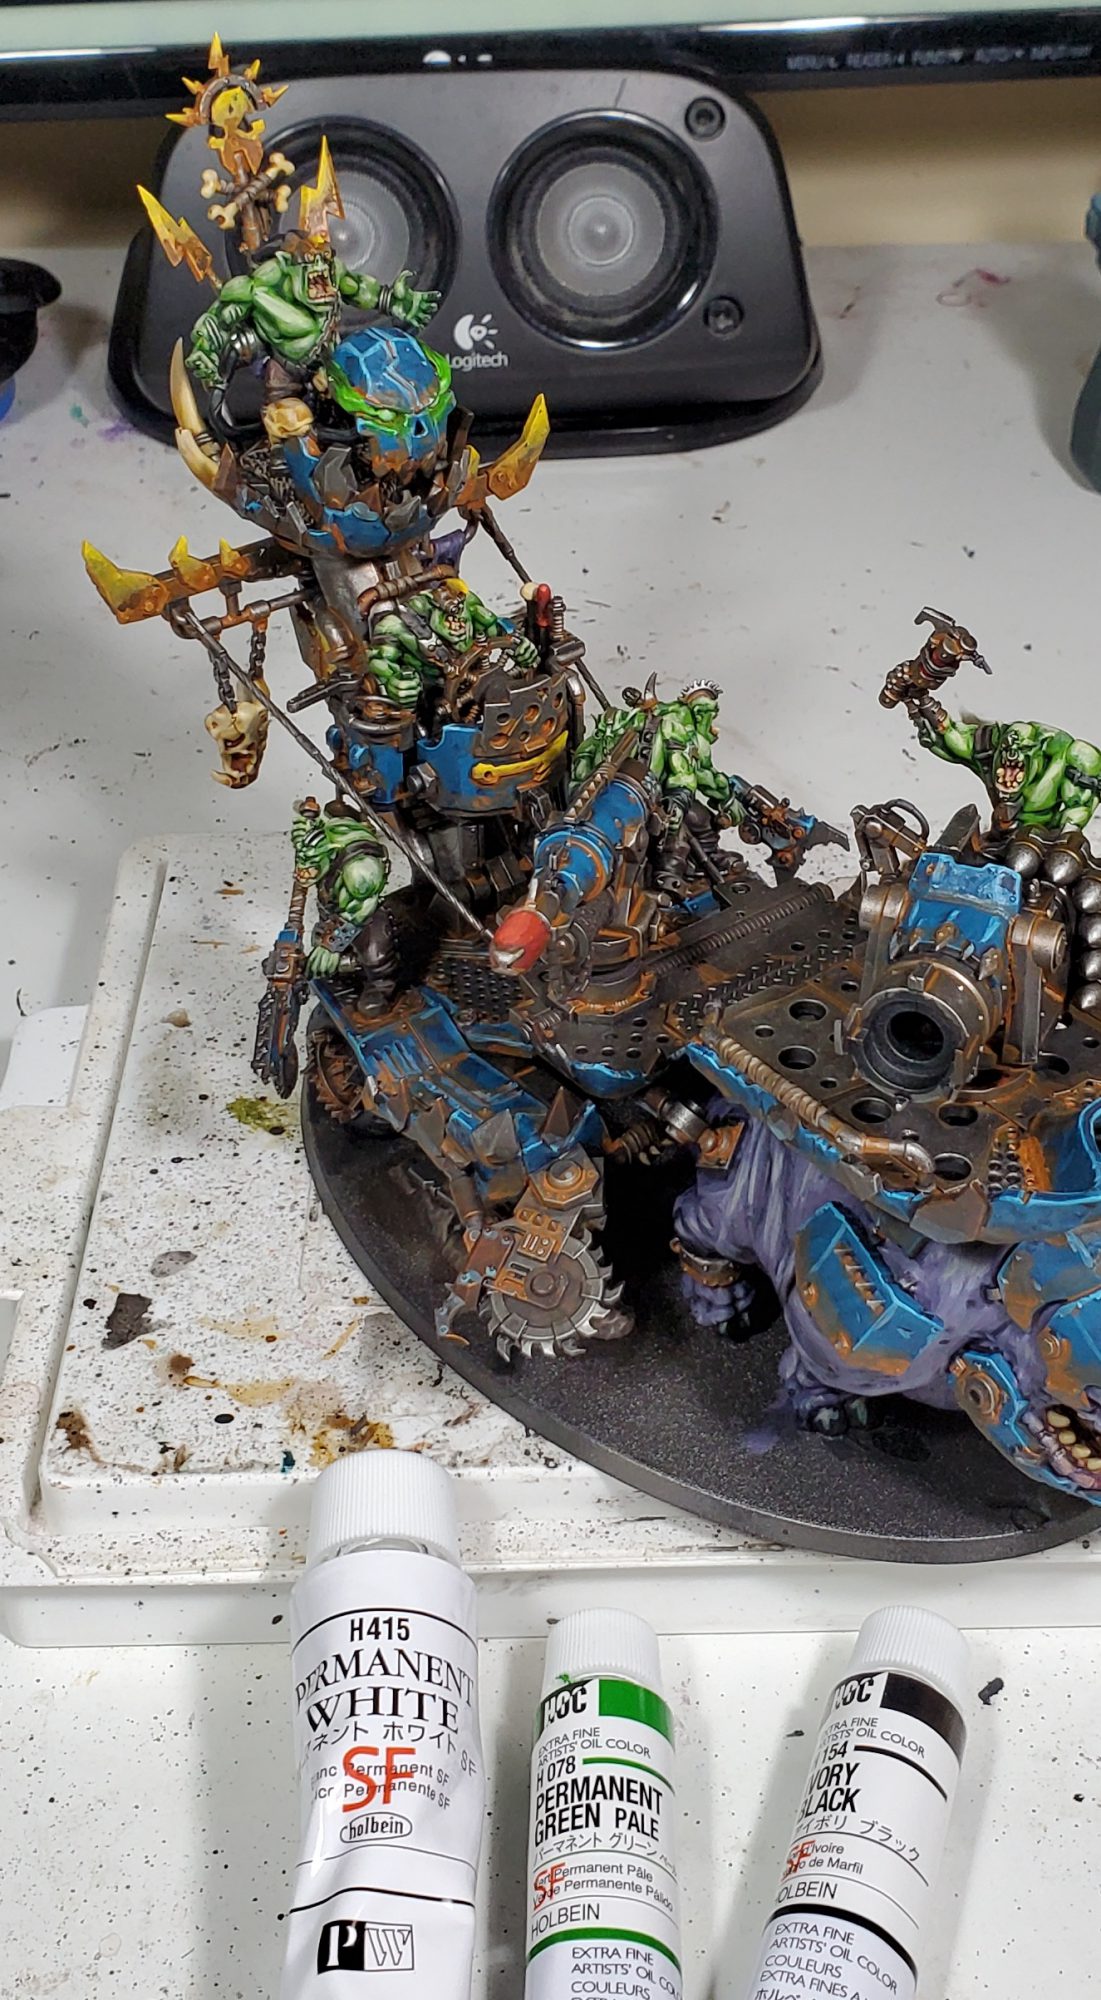
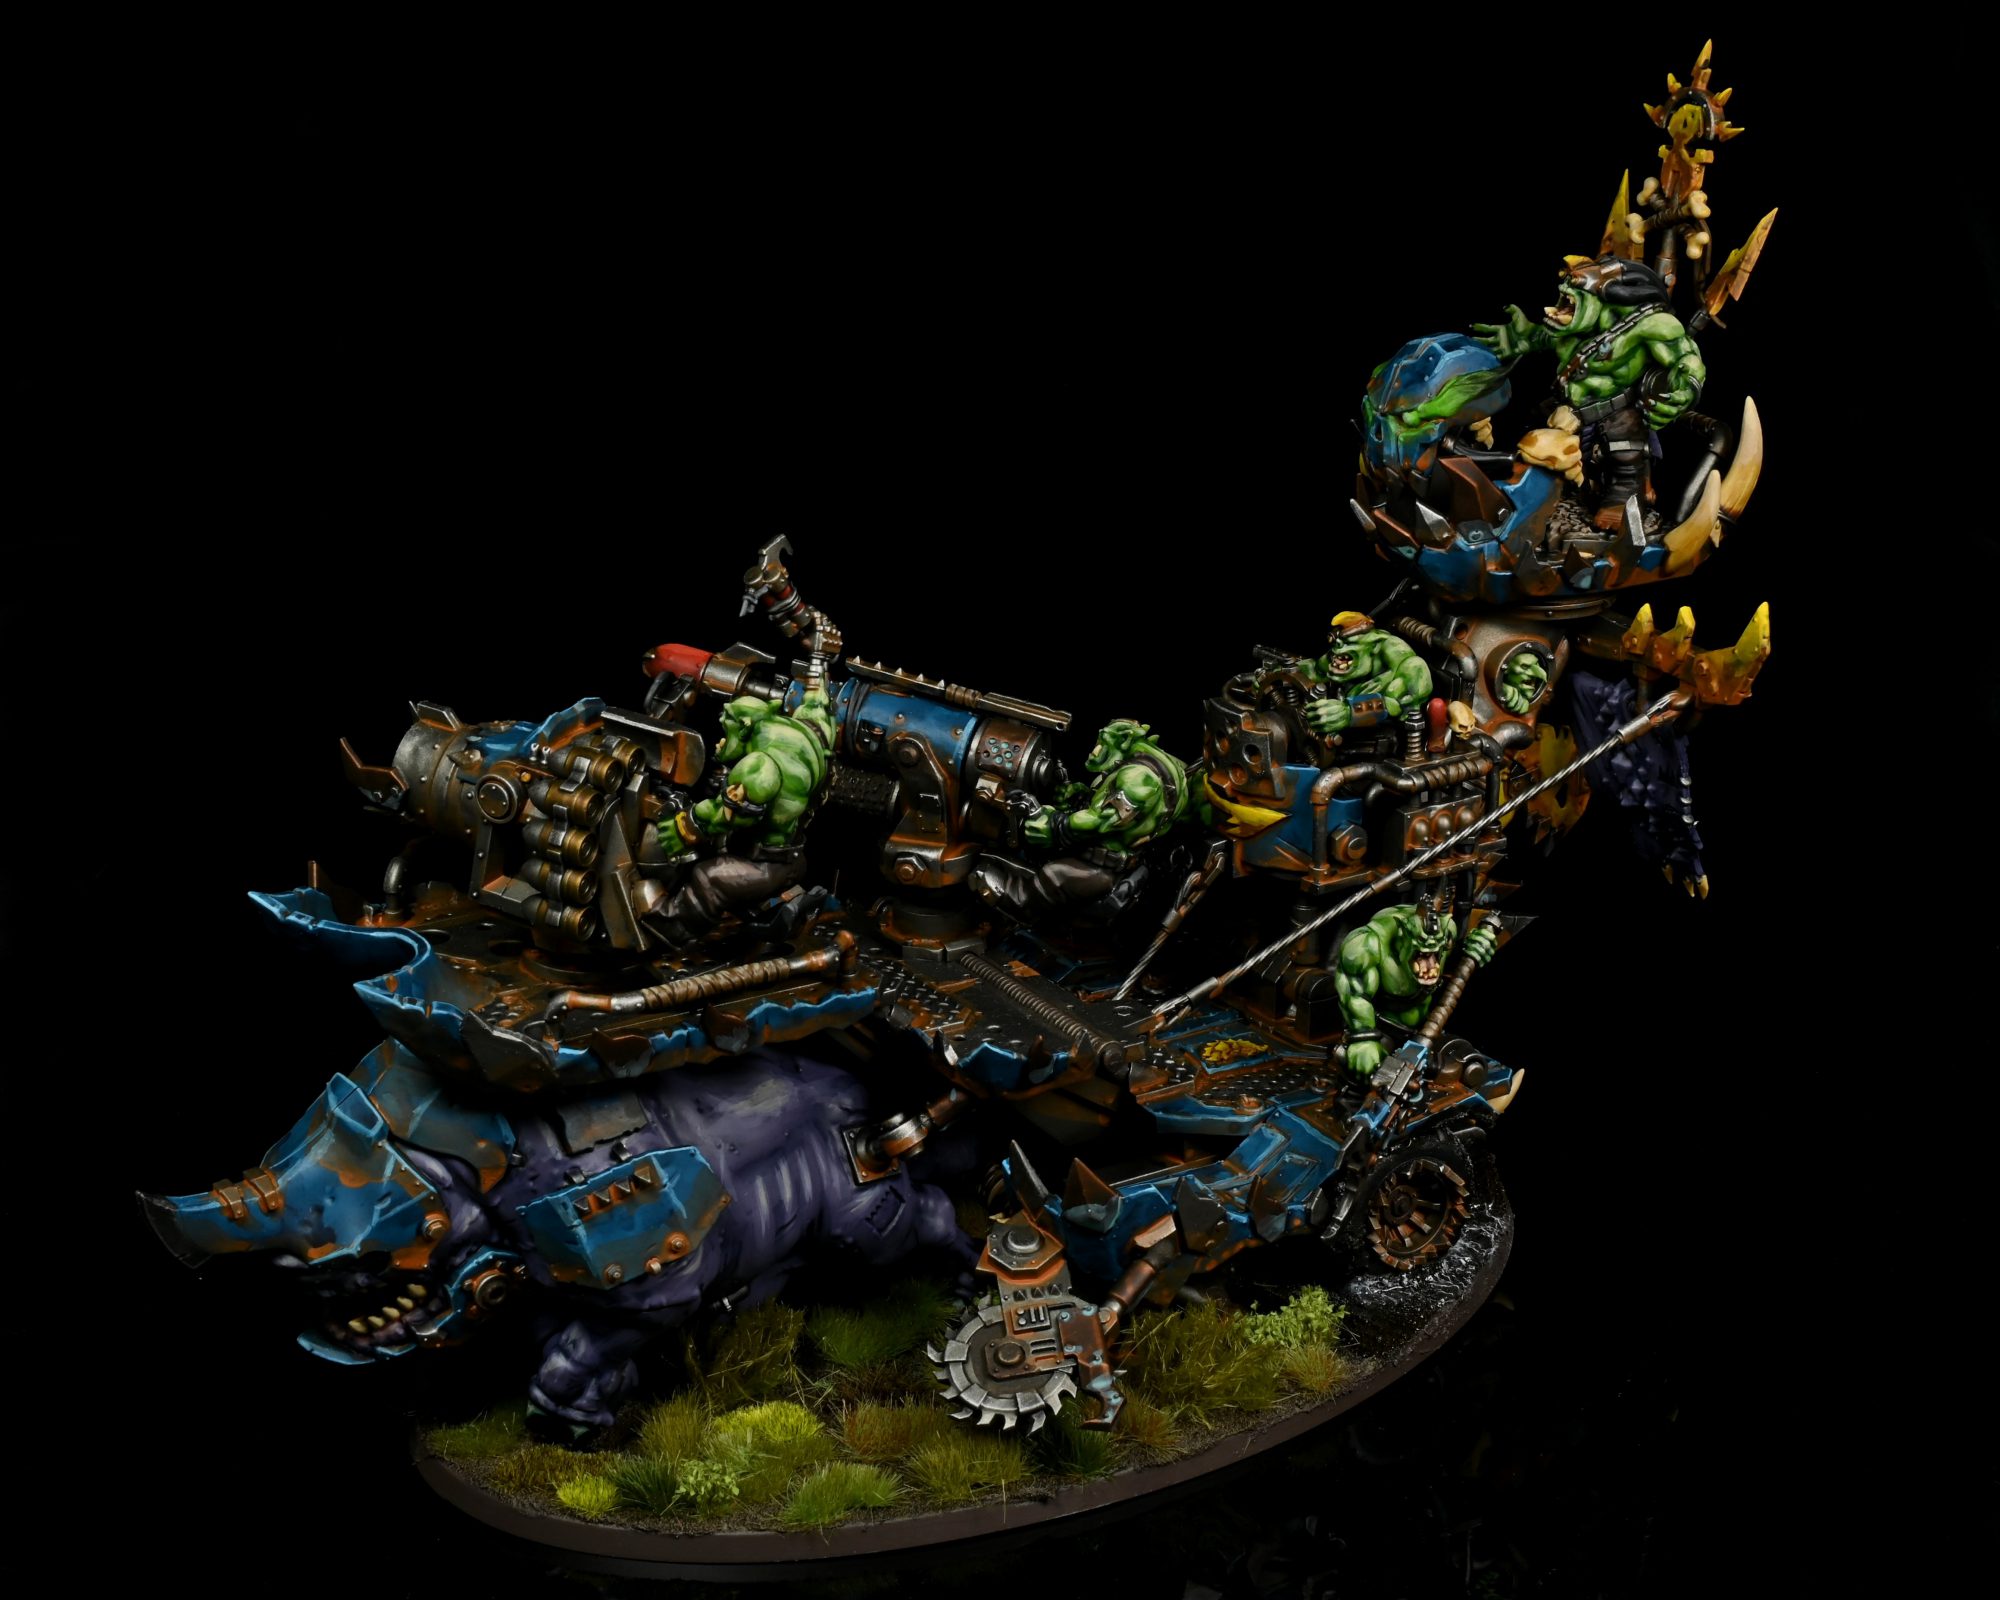
As mentioned in our preview article for the Kill Rig, this model was sent my way to get painted and I made sure to get enough pictures for a HTPE! This is going to kind of be a slightly more sane version of my ork scheme, if you've seen my Kommandos you will know I am a wee bit mad when it comes to excessively complex ork models. As it was, this model still took a whole six evenings to paint, almost twice as long as my Silent King!
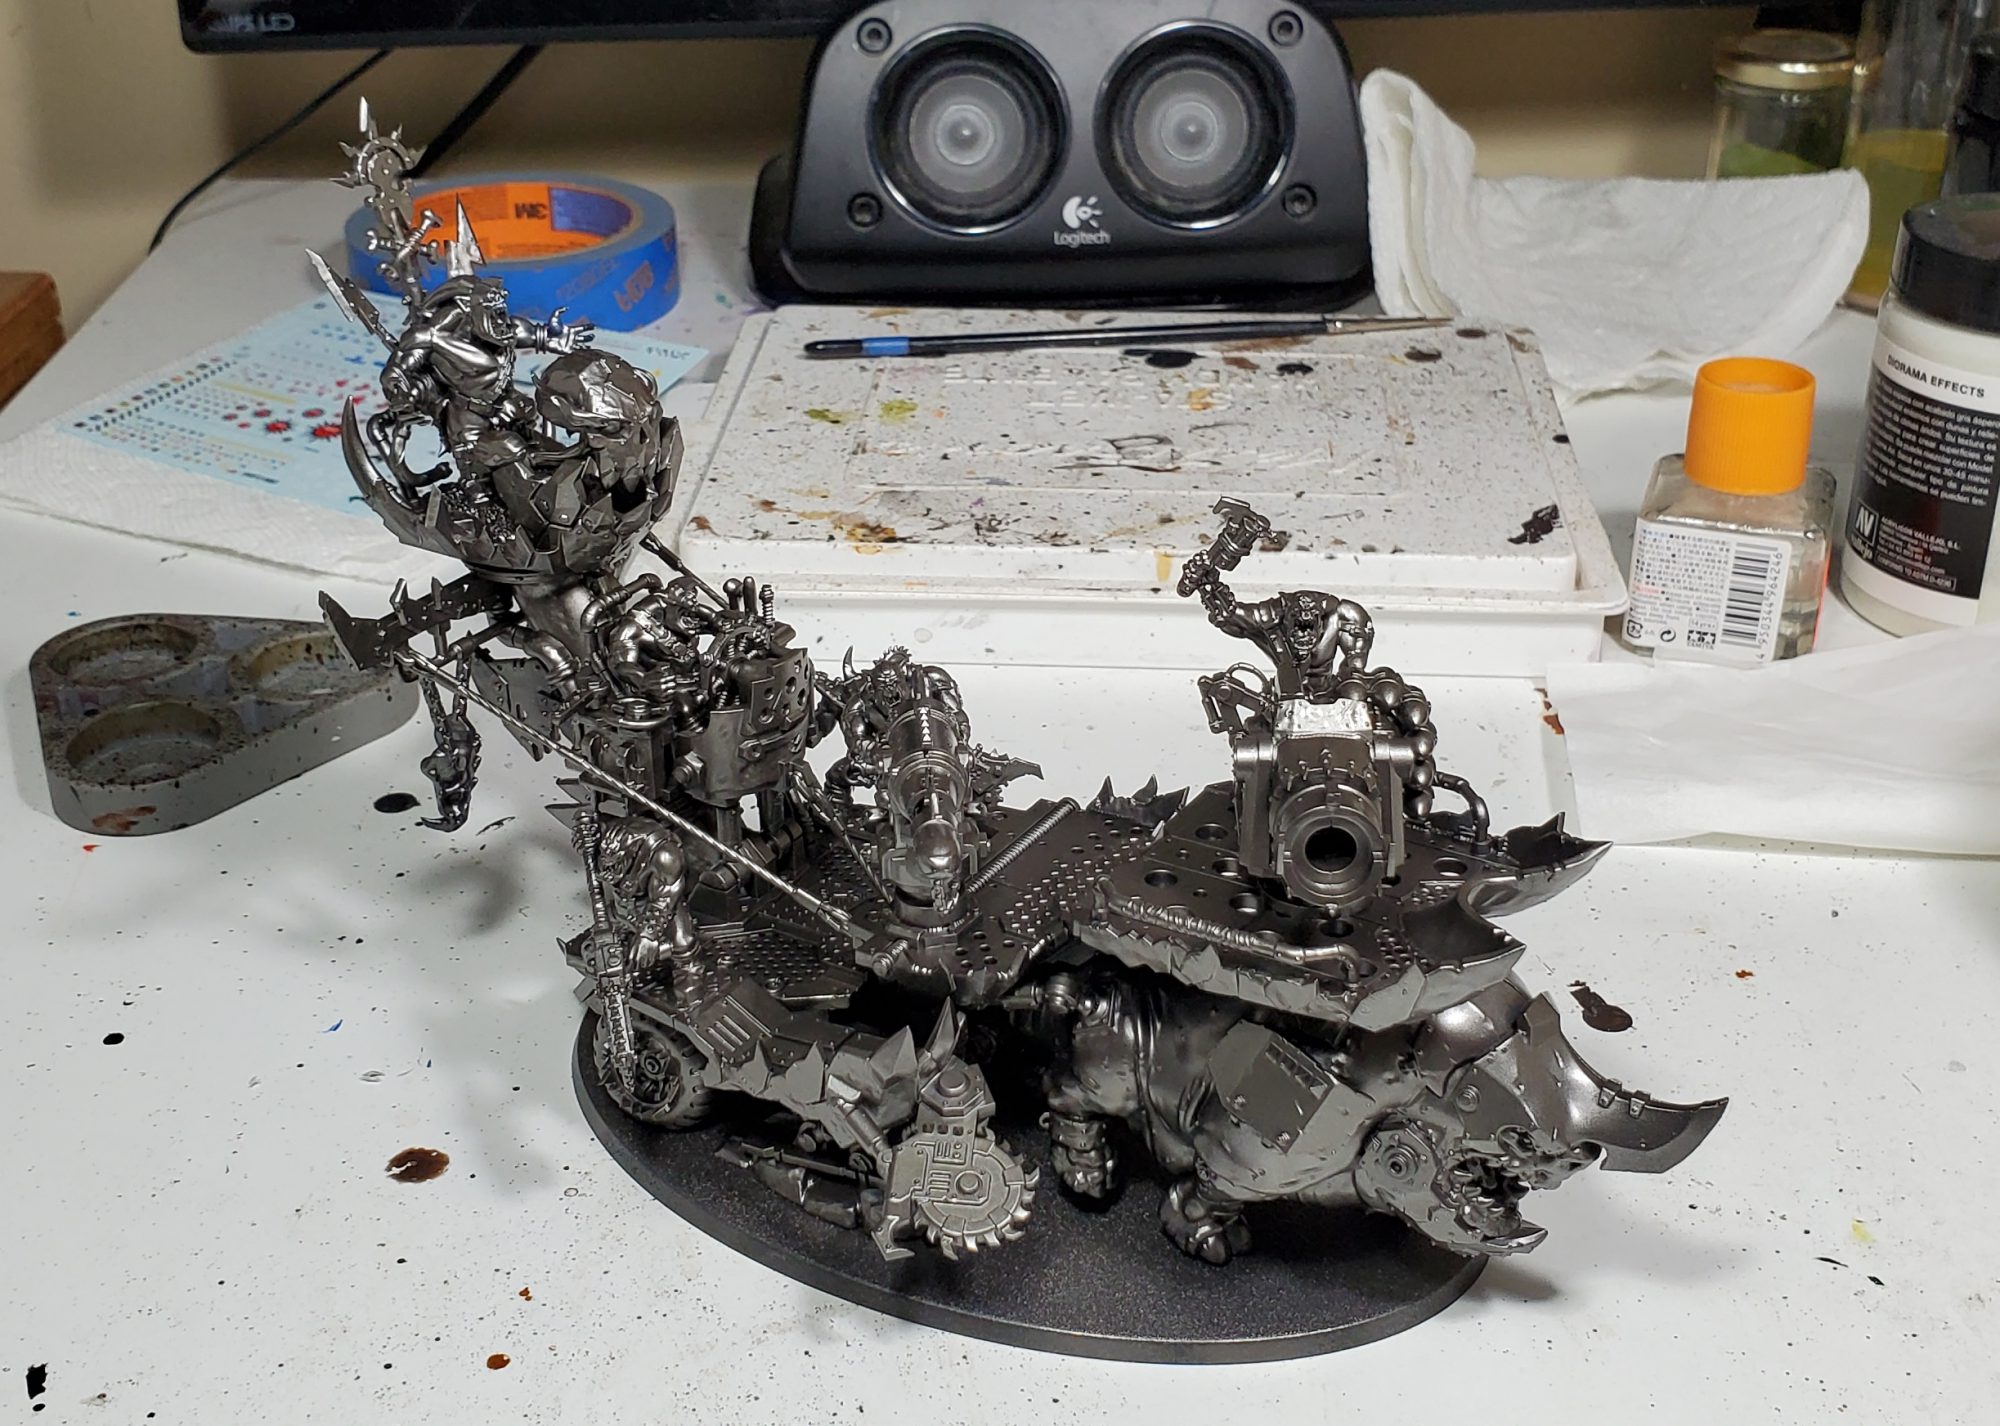
We begin by getting a basic metal coat down, I am using Vallejo Metal Color Exhaust Manifold for this, but your choice is mostly just defining how shiny you want the metals to end up. Rattlecanning Leadbelcher or something similar would work well too as well.
After this there are a lot of colours, so for this guide I will be mostly breaking down each part into subsections so there are mearly a large number of colours used in any given step.
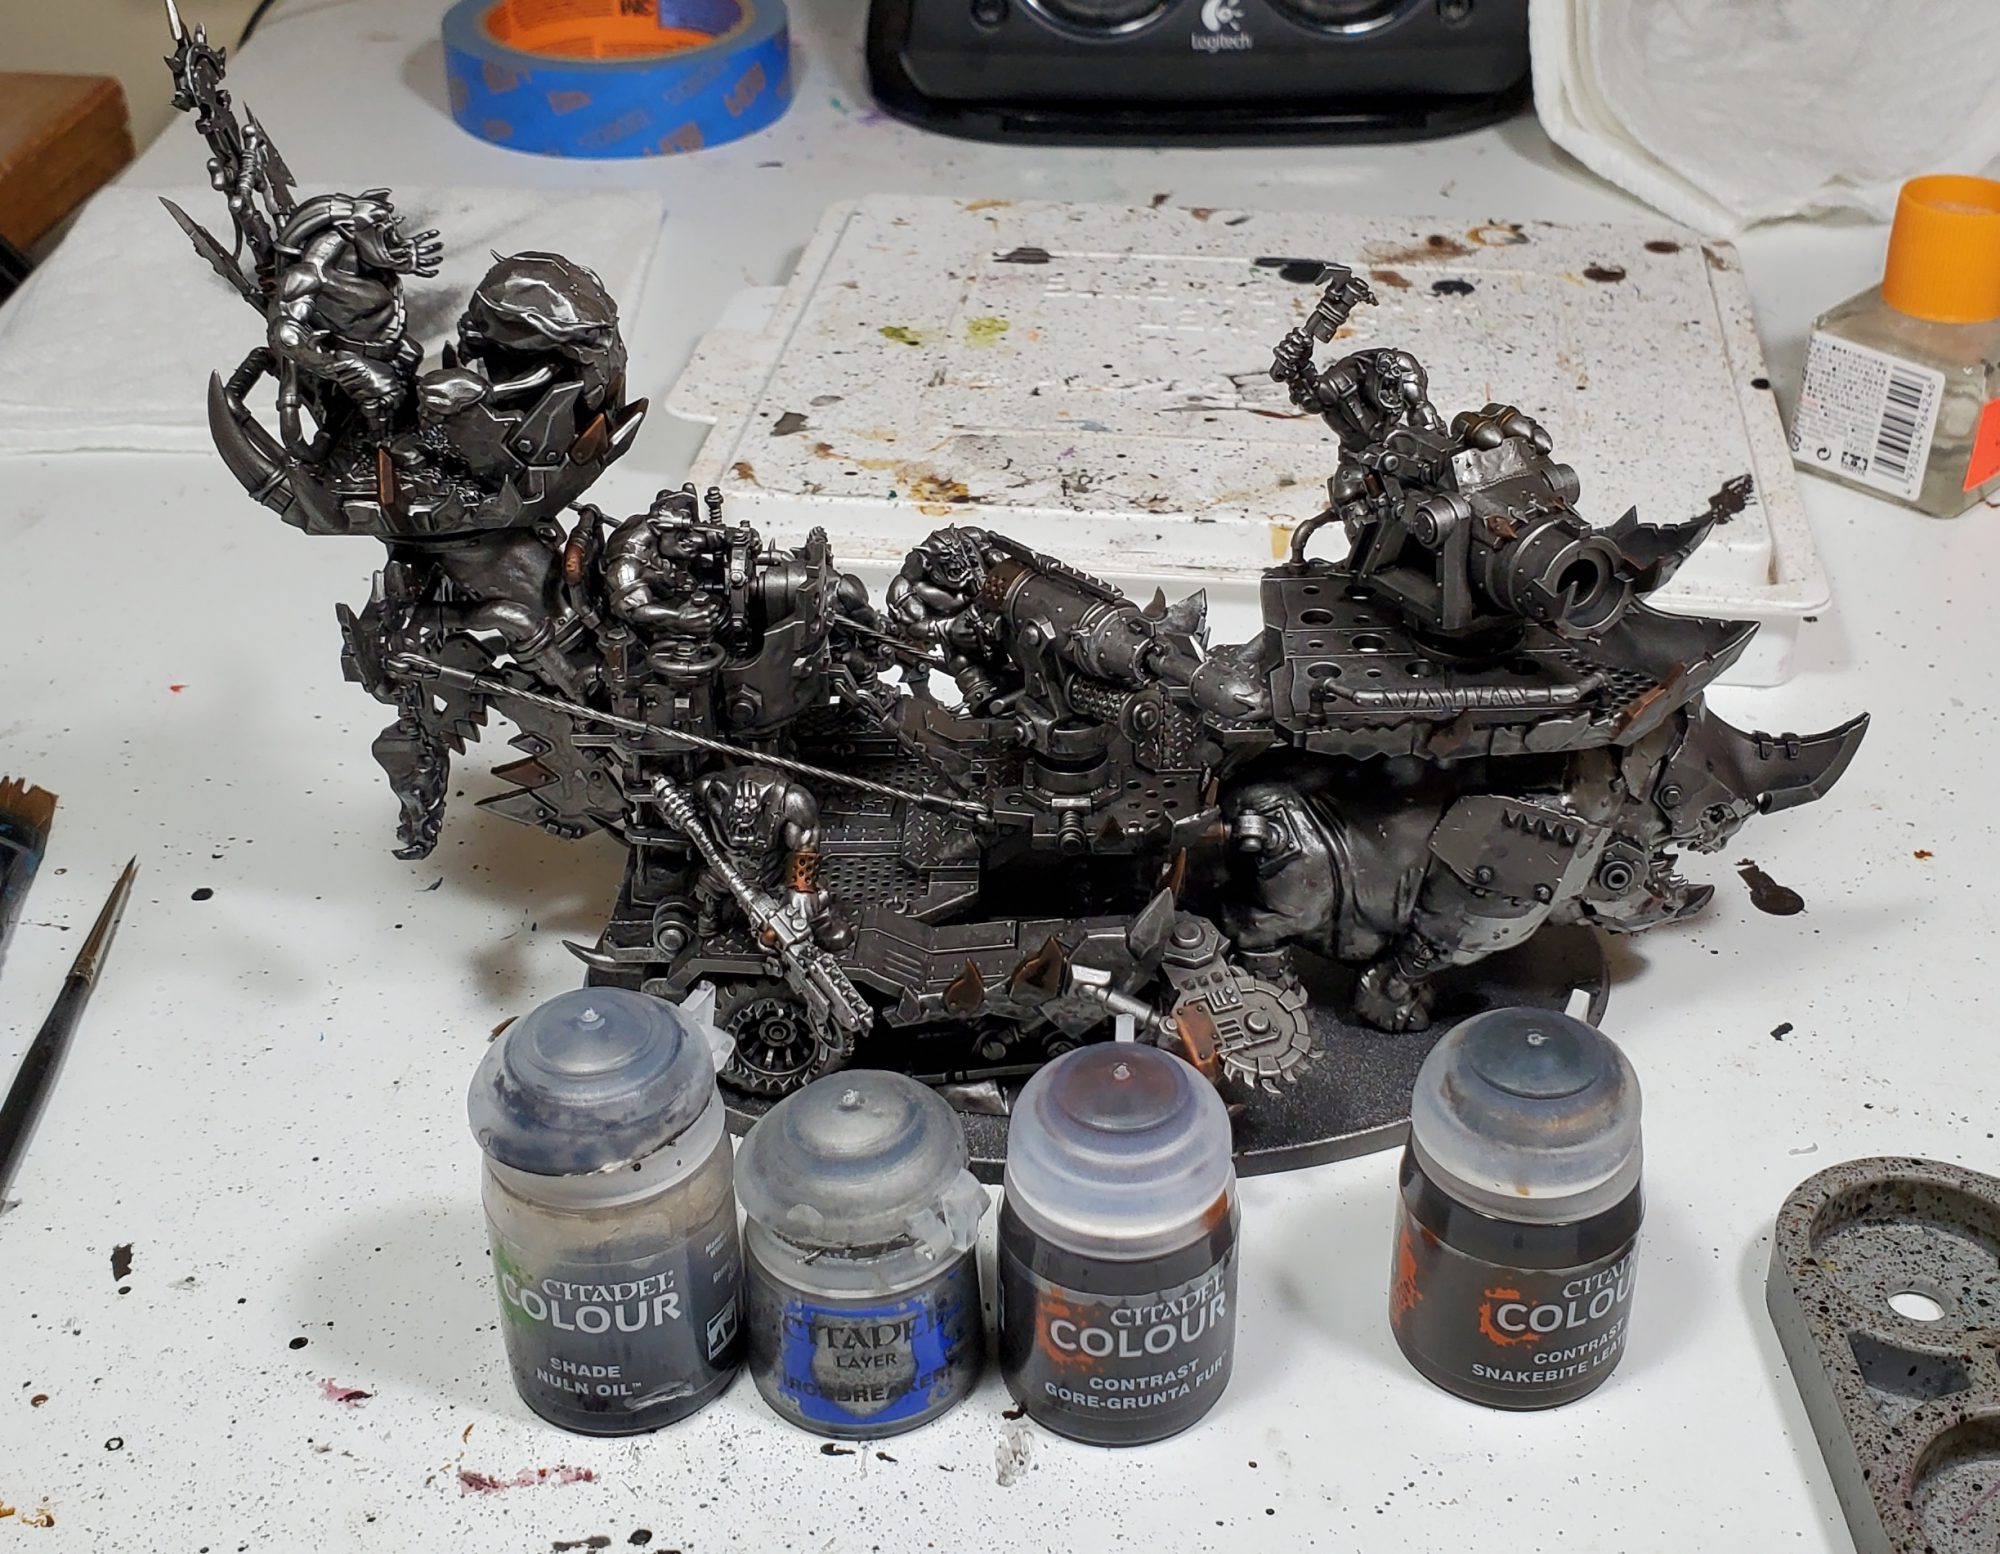
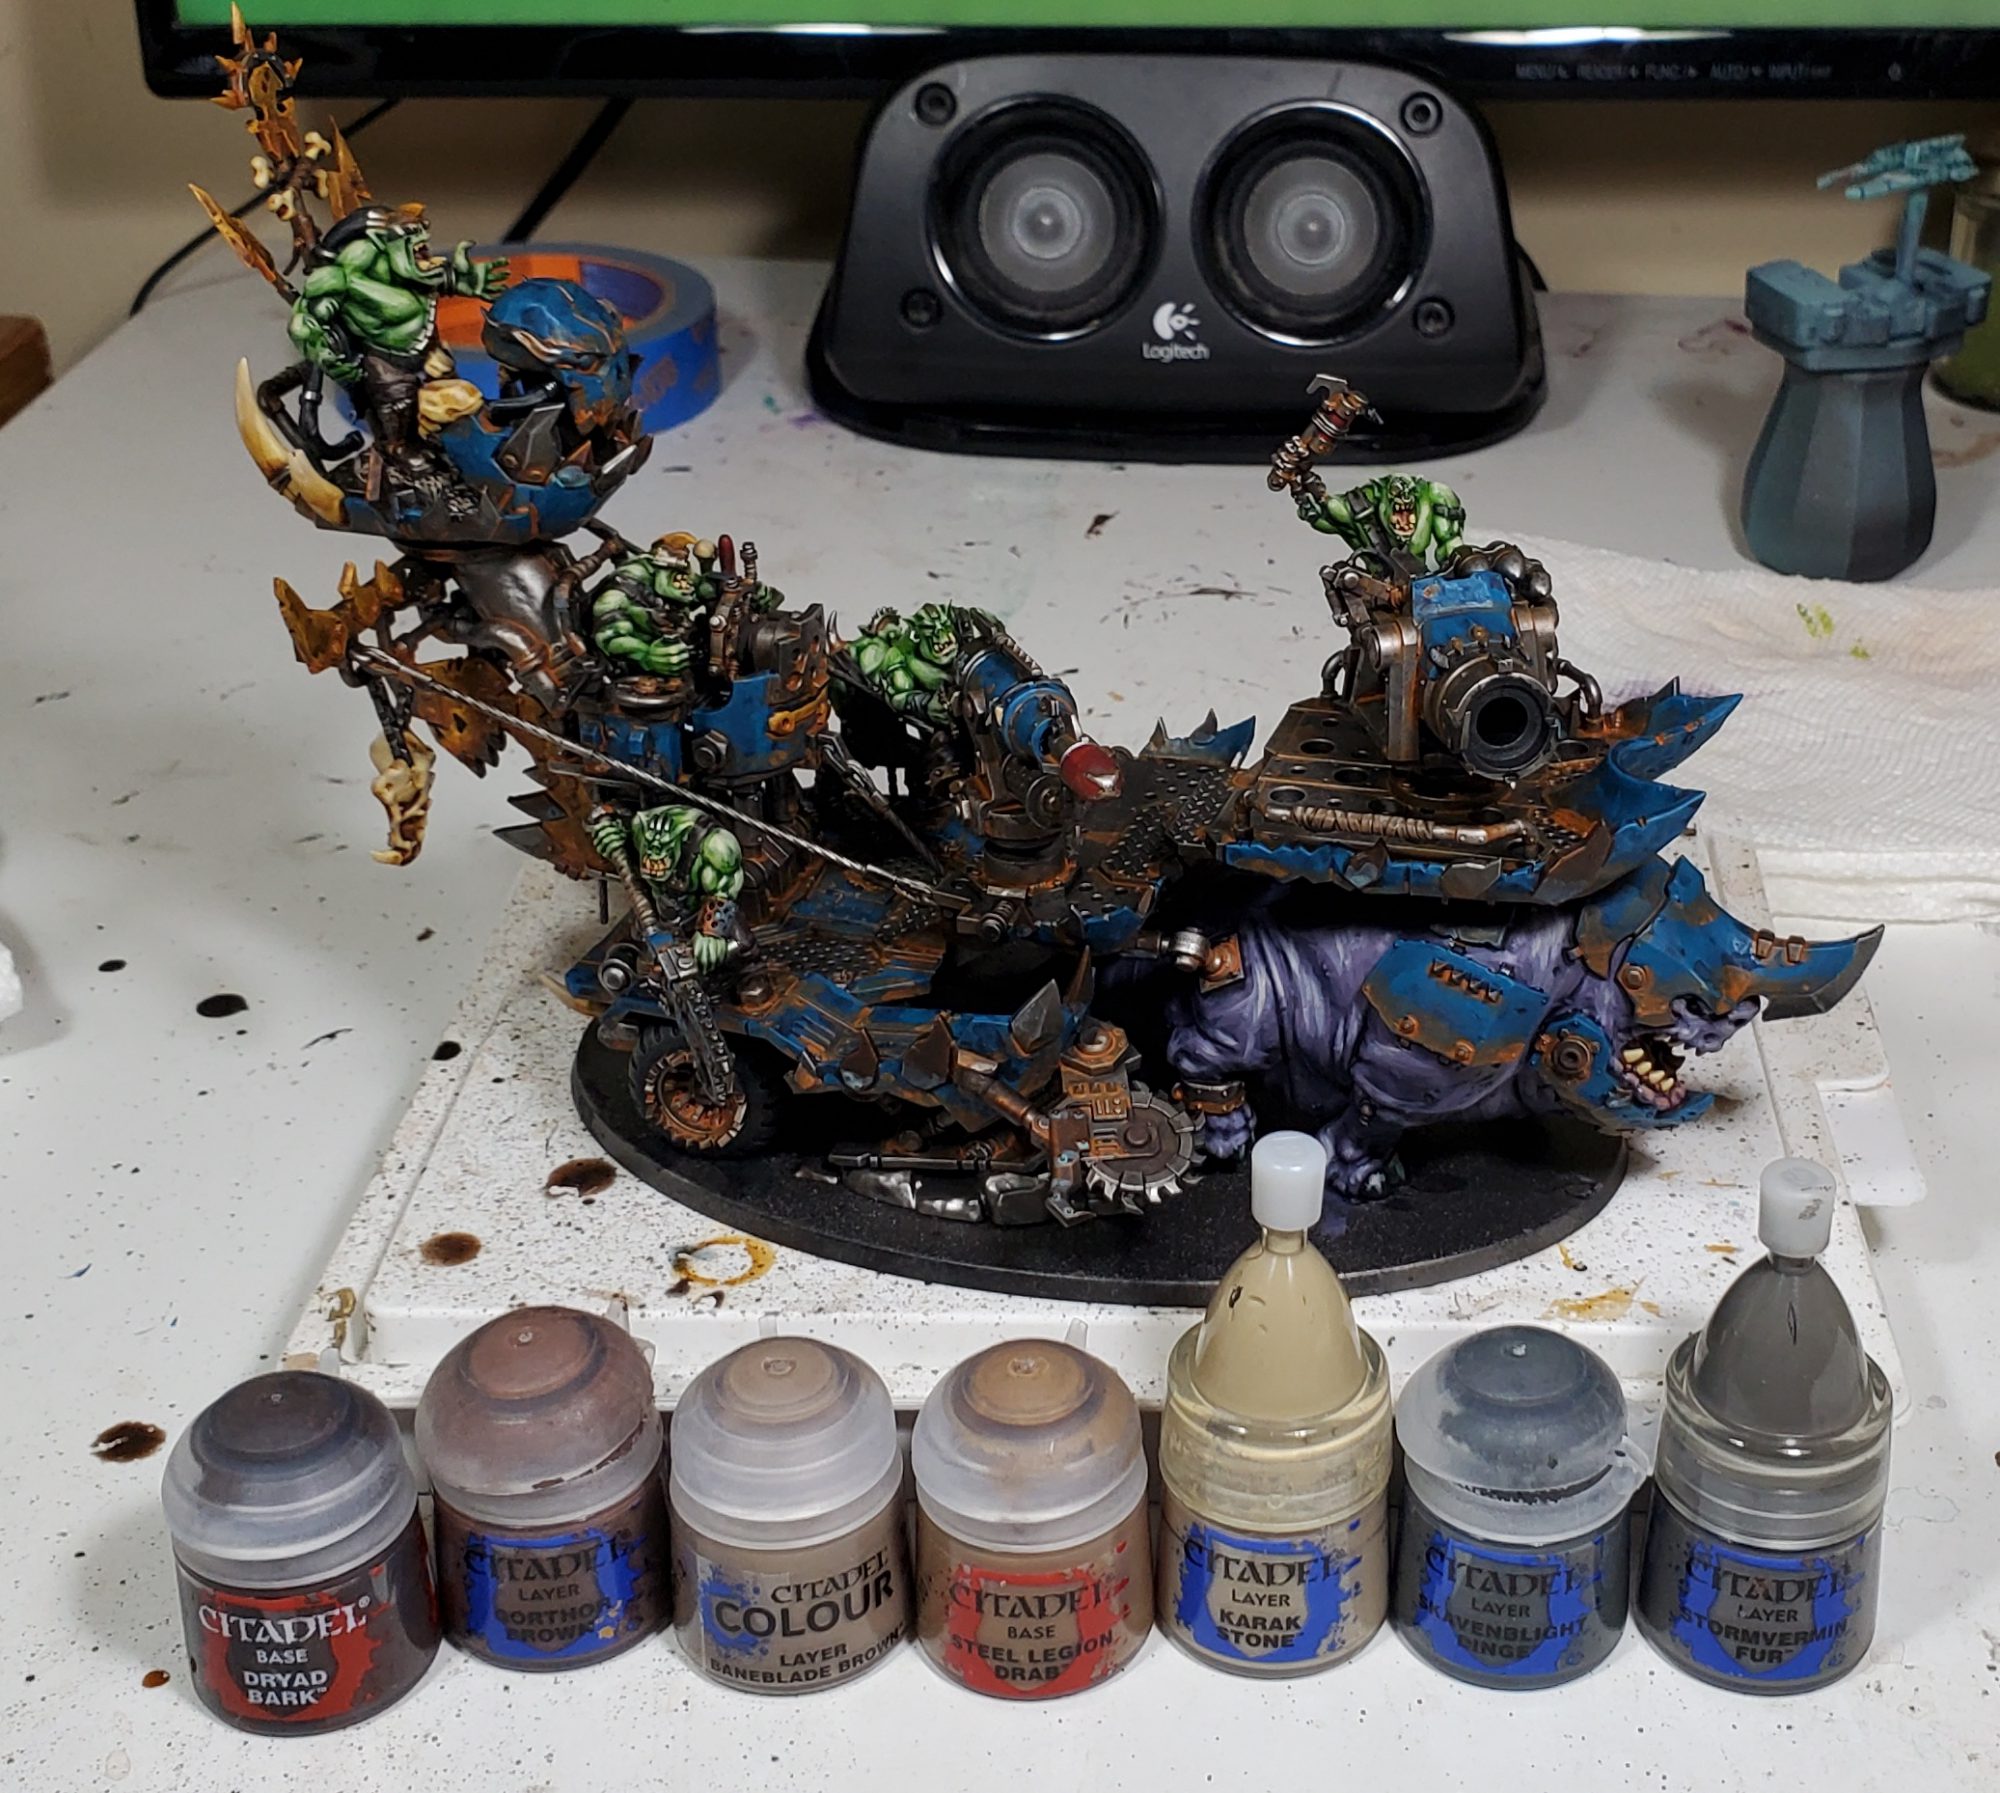
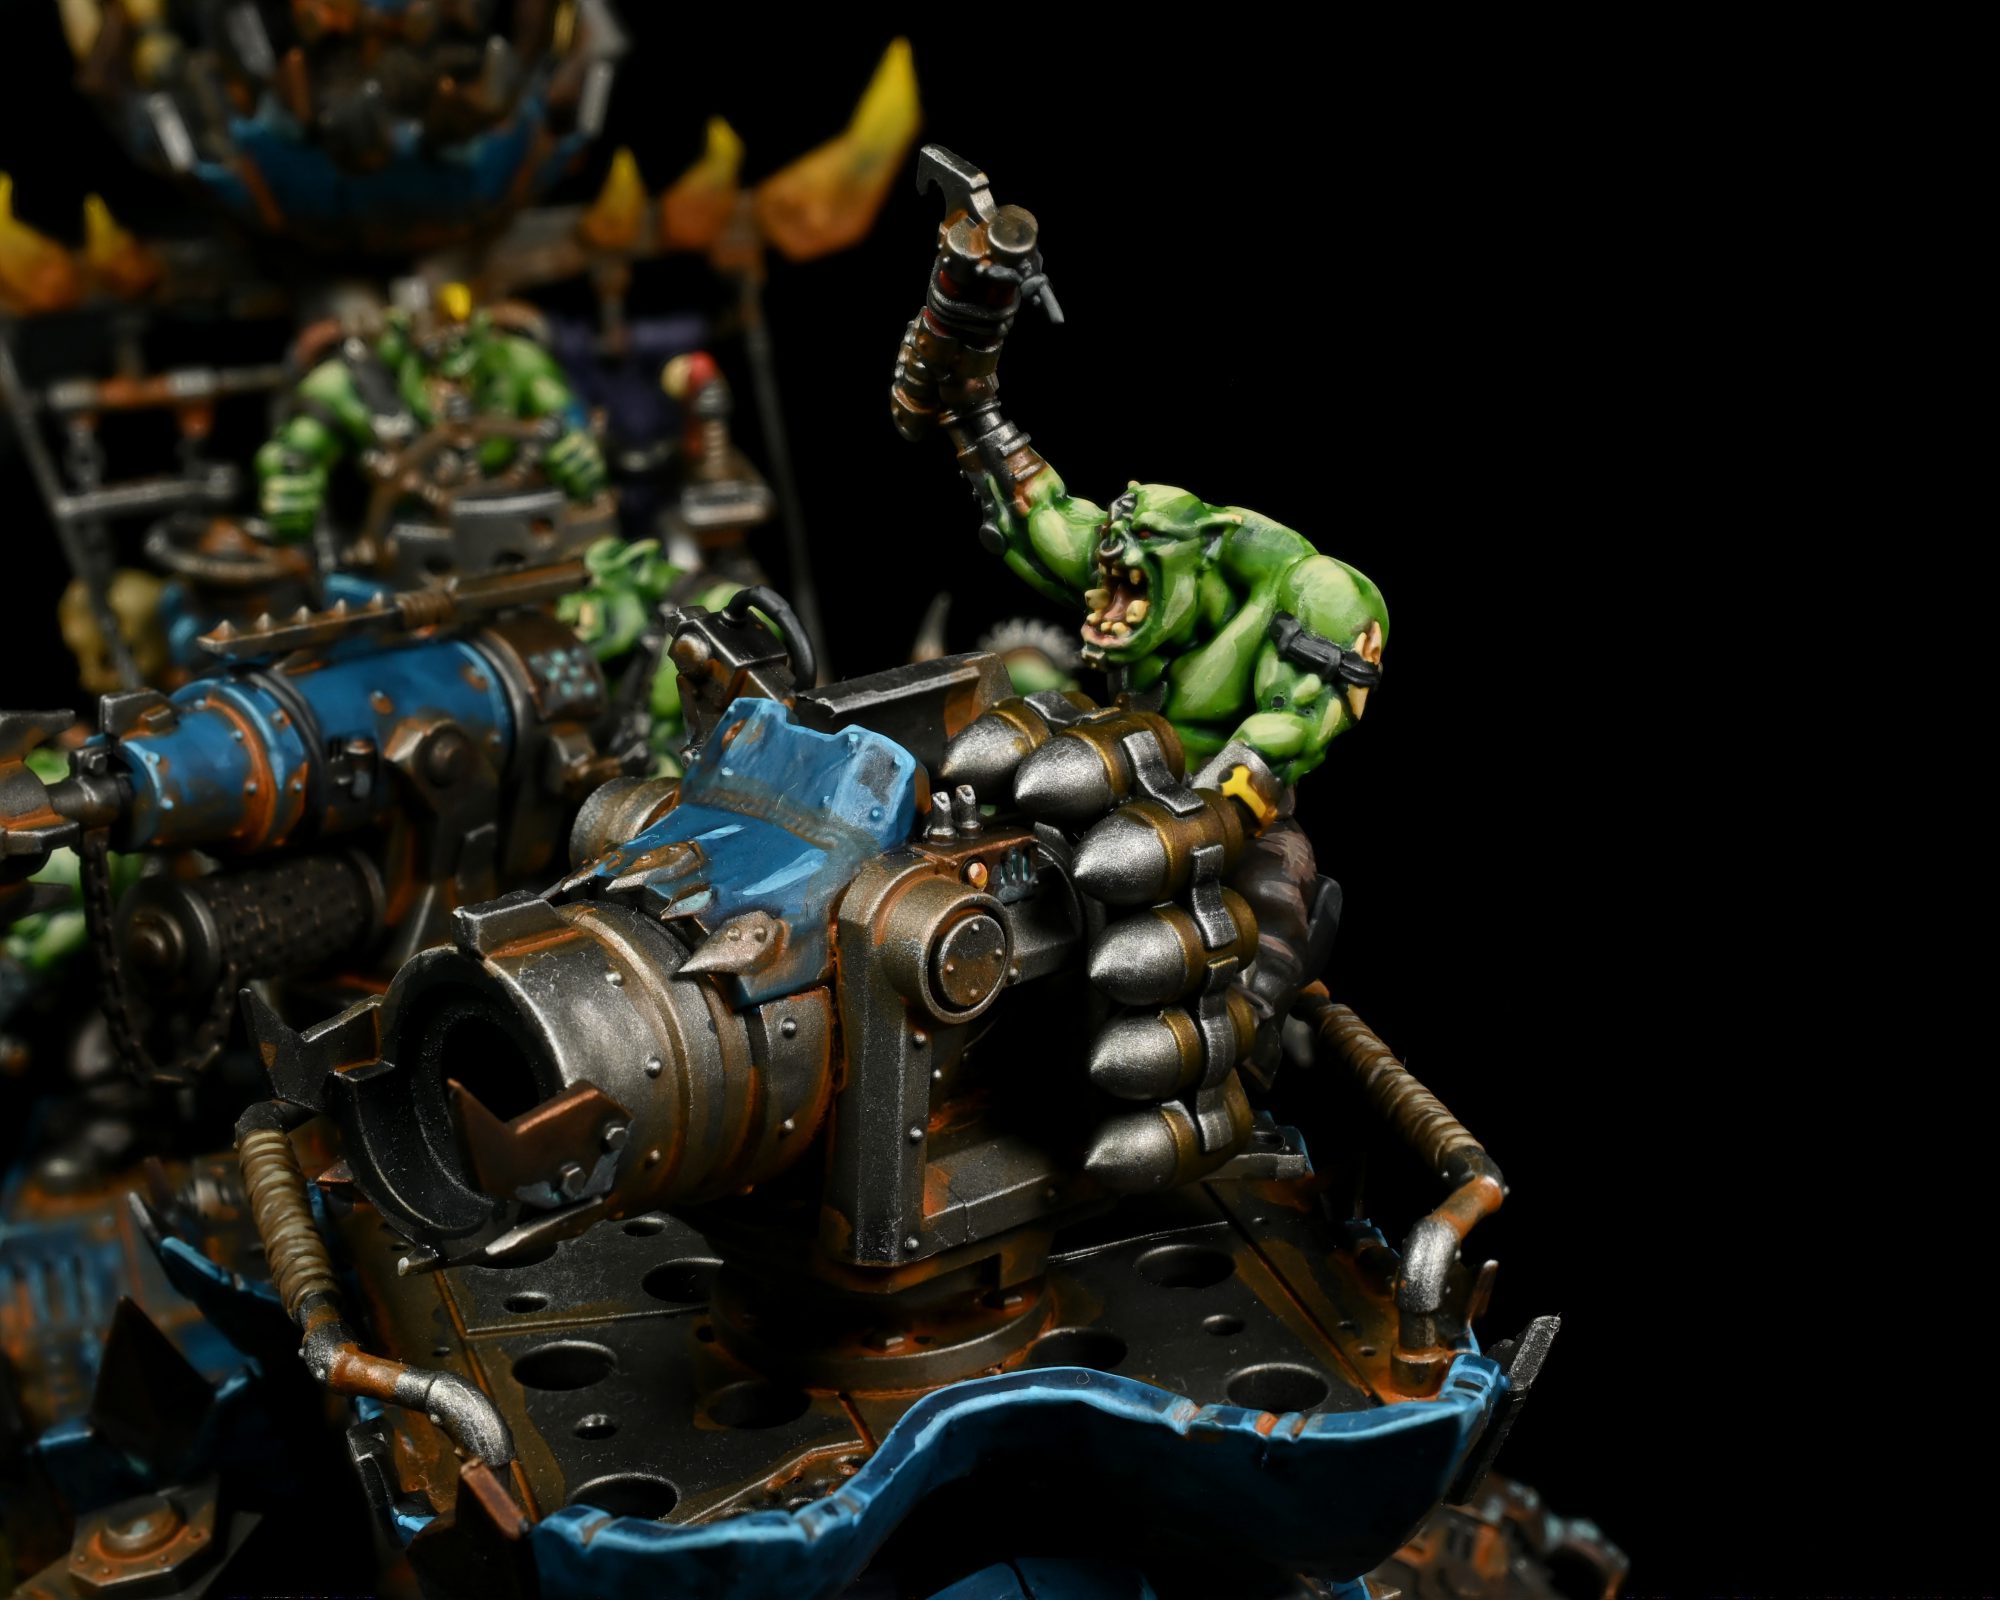
I don't really feel like doing a bunch of work on the absolute ton of metal on this model, so we are gonna leverage contrast to make it a bit more lazy. I started with washing all the metal in Nuln before a heavy drybrush of Ironbreaker, after that I picked out copper with Gore-grunta and brass with Snakebite. Neither will be super bright, but the drybrush mostly shows through and it saves a LOT of time, which we will need for the rest of the paintjob!
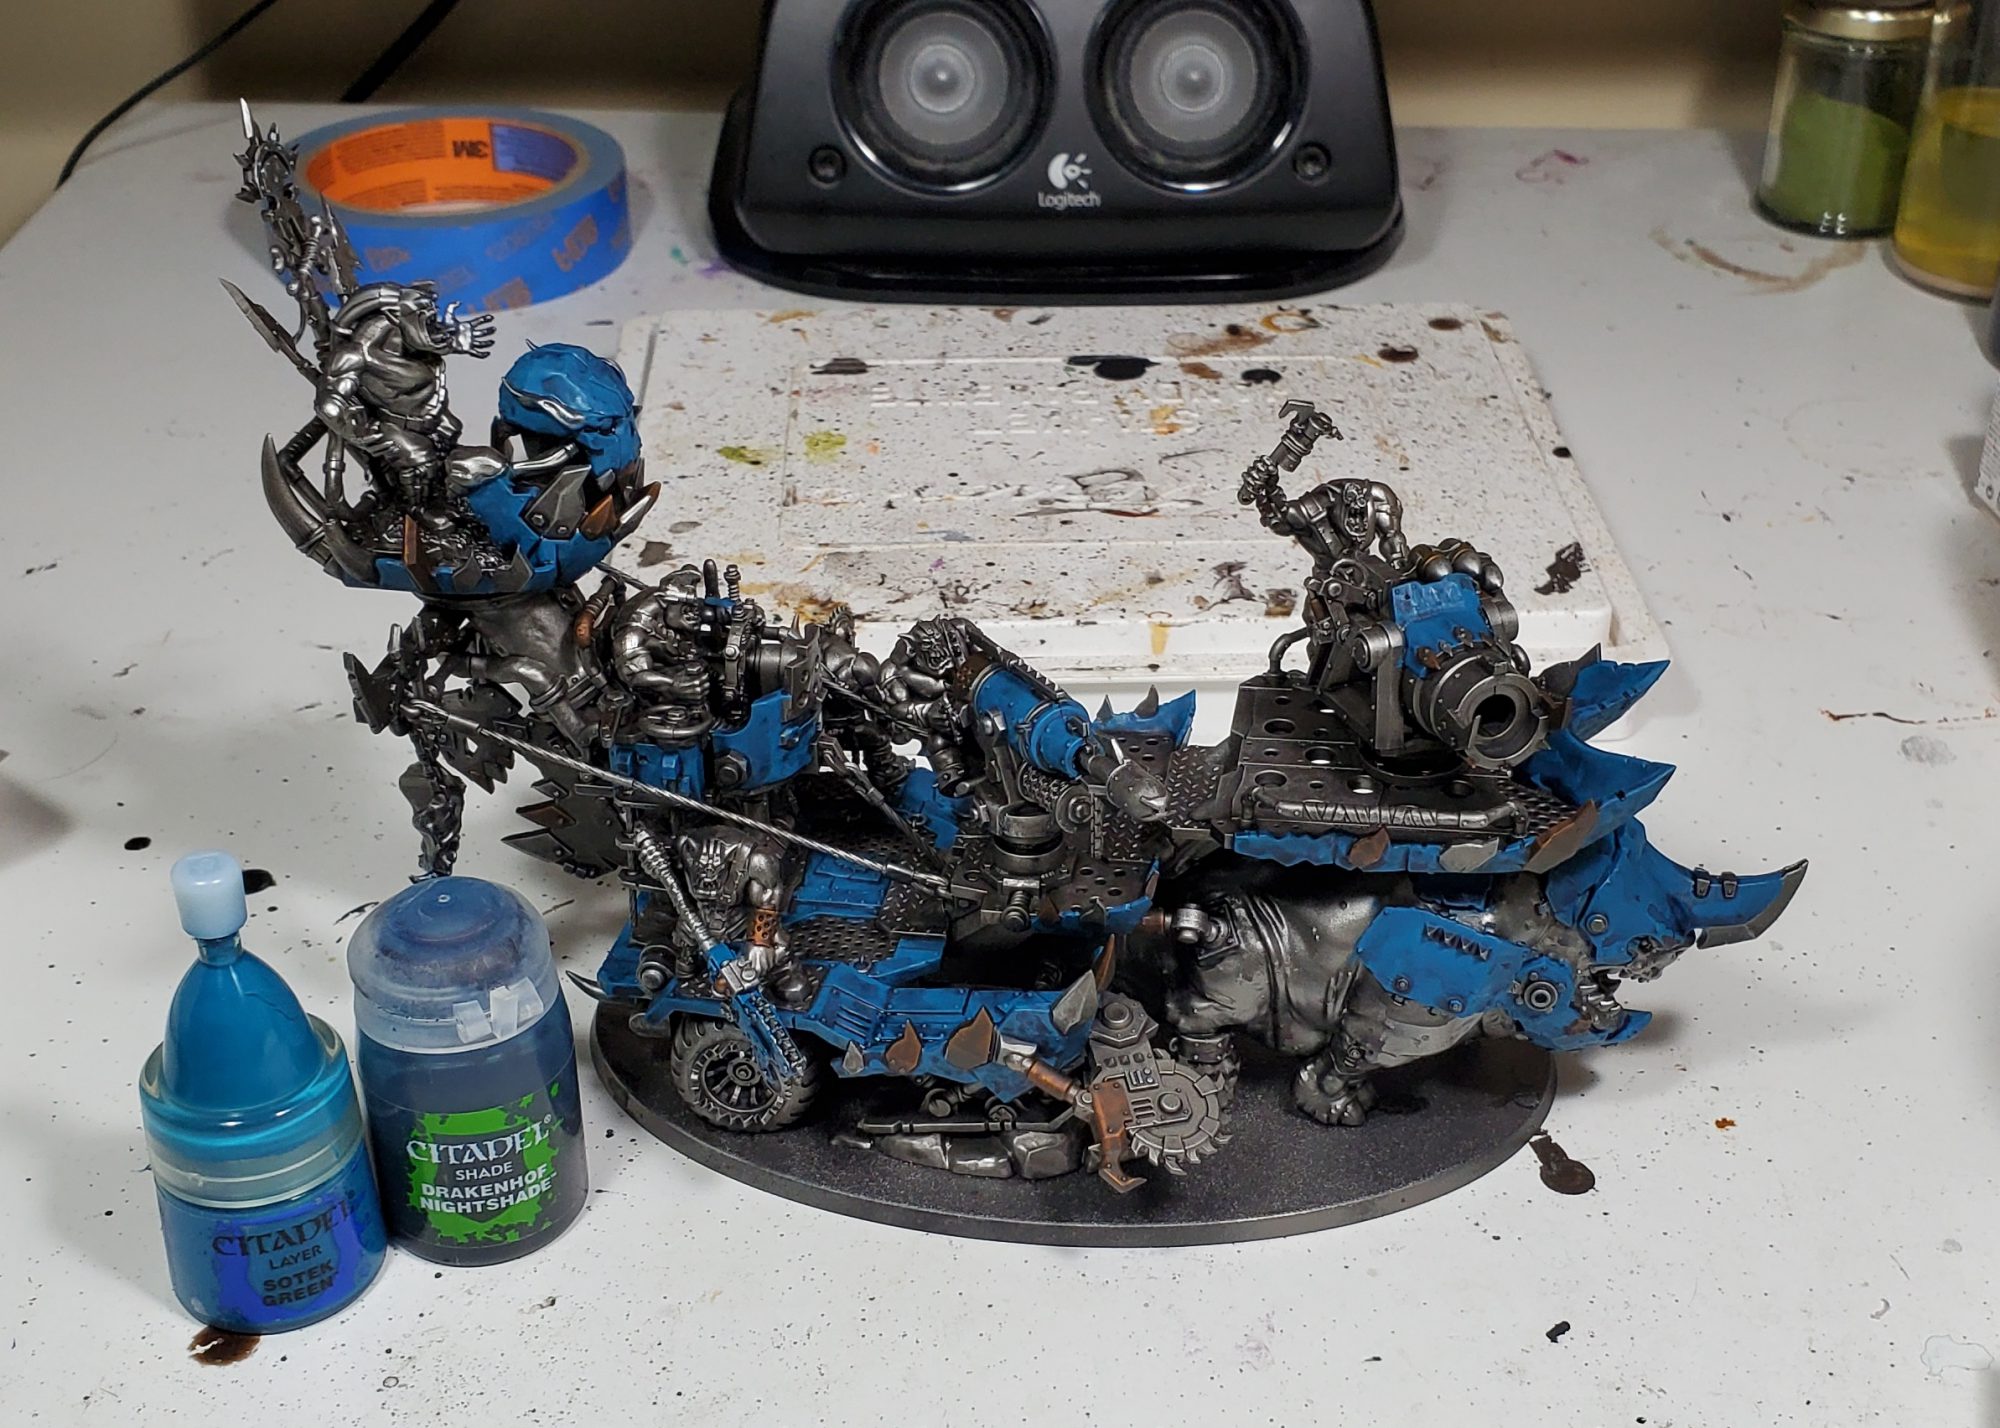
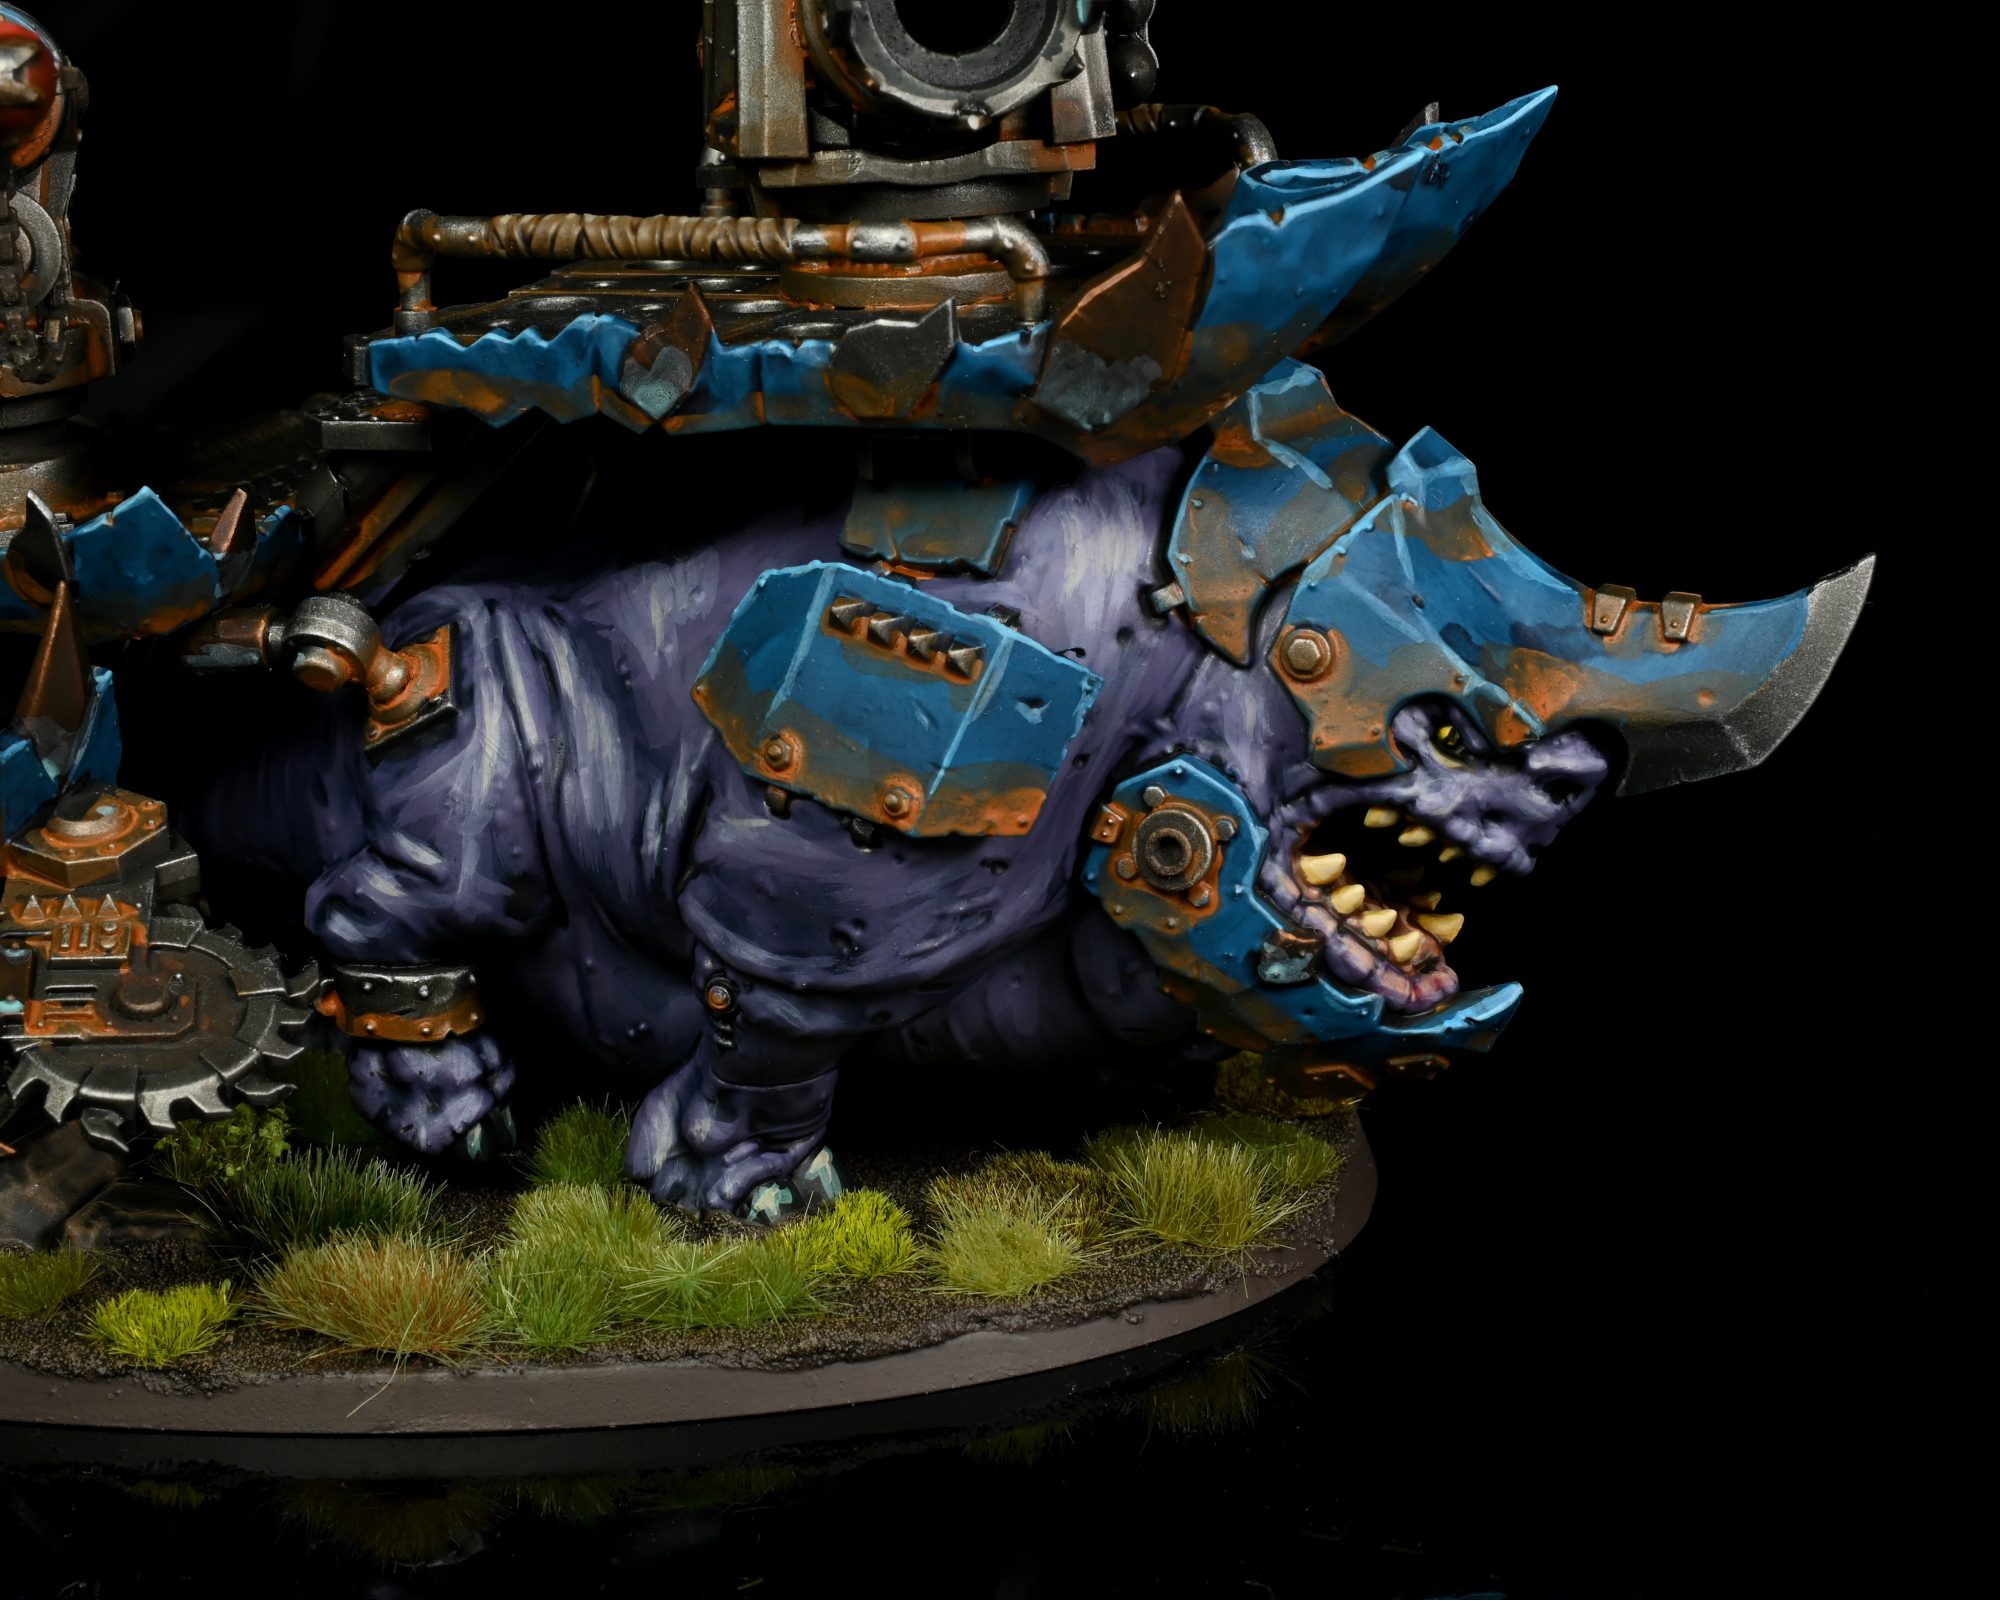
This bit is pretty simple just Sotek followed by Drakenhof, but before we get into the bright spot colours its helpful to get all the blue done so we don't have any of the wash bleed over or create a mess.
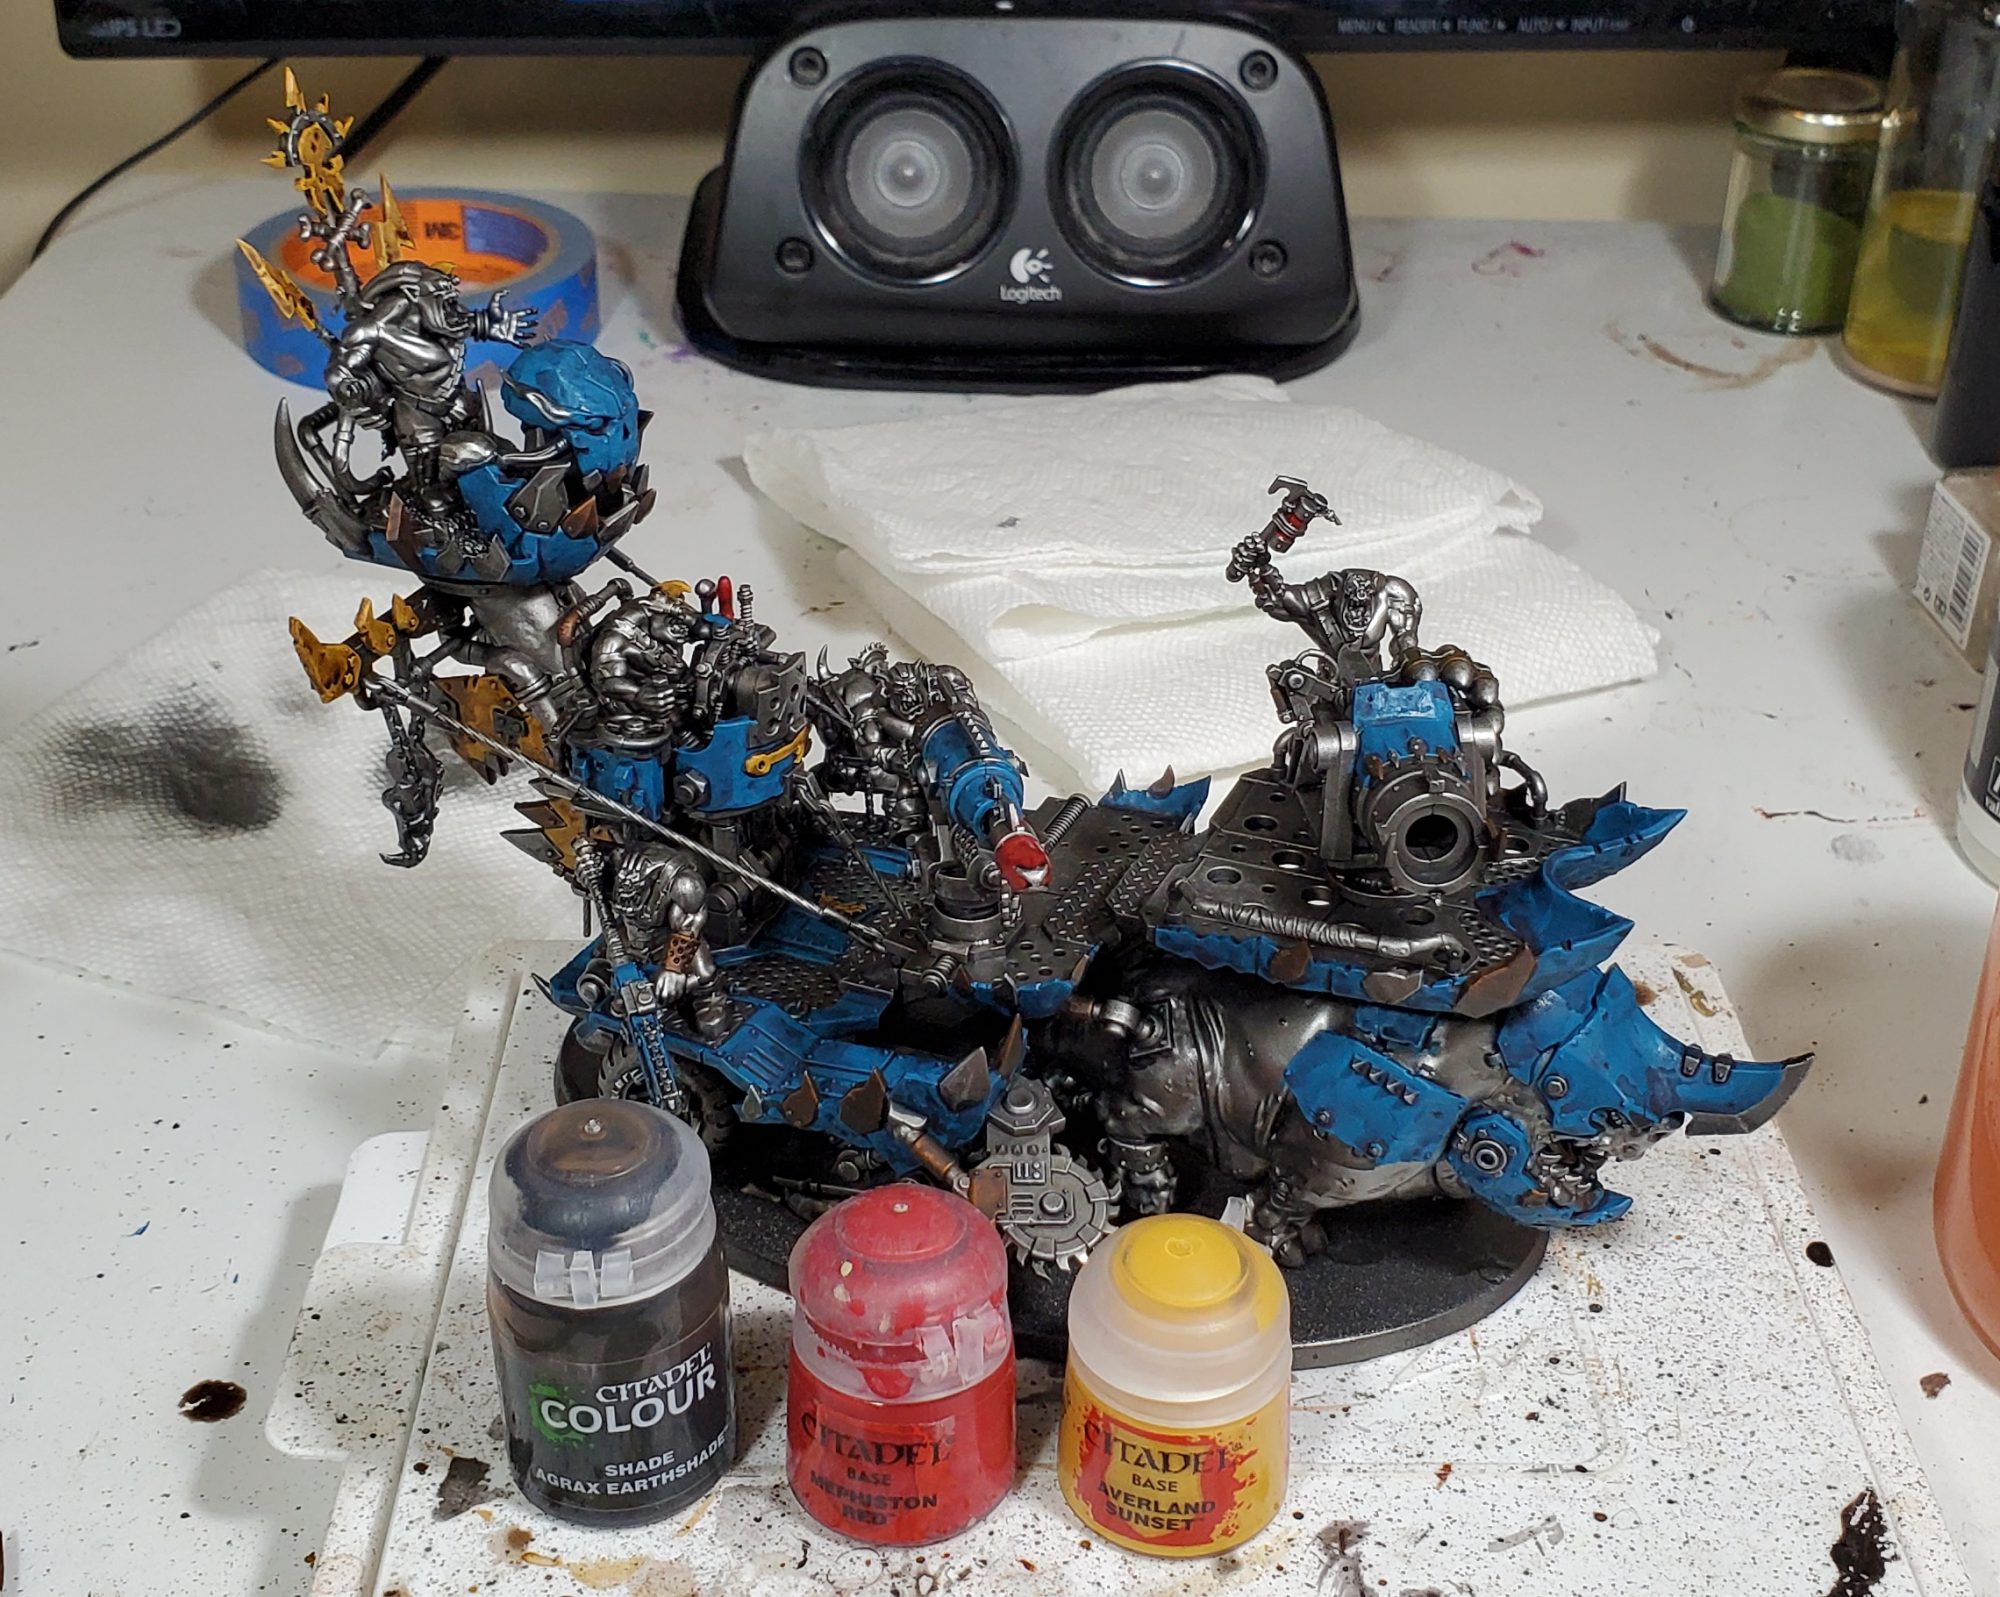
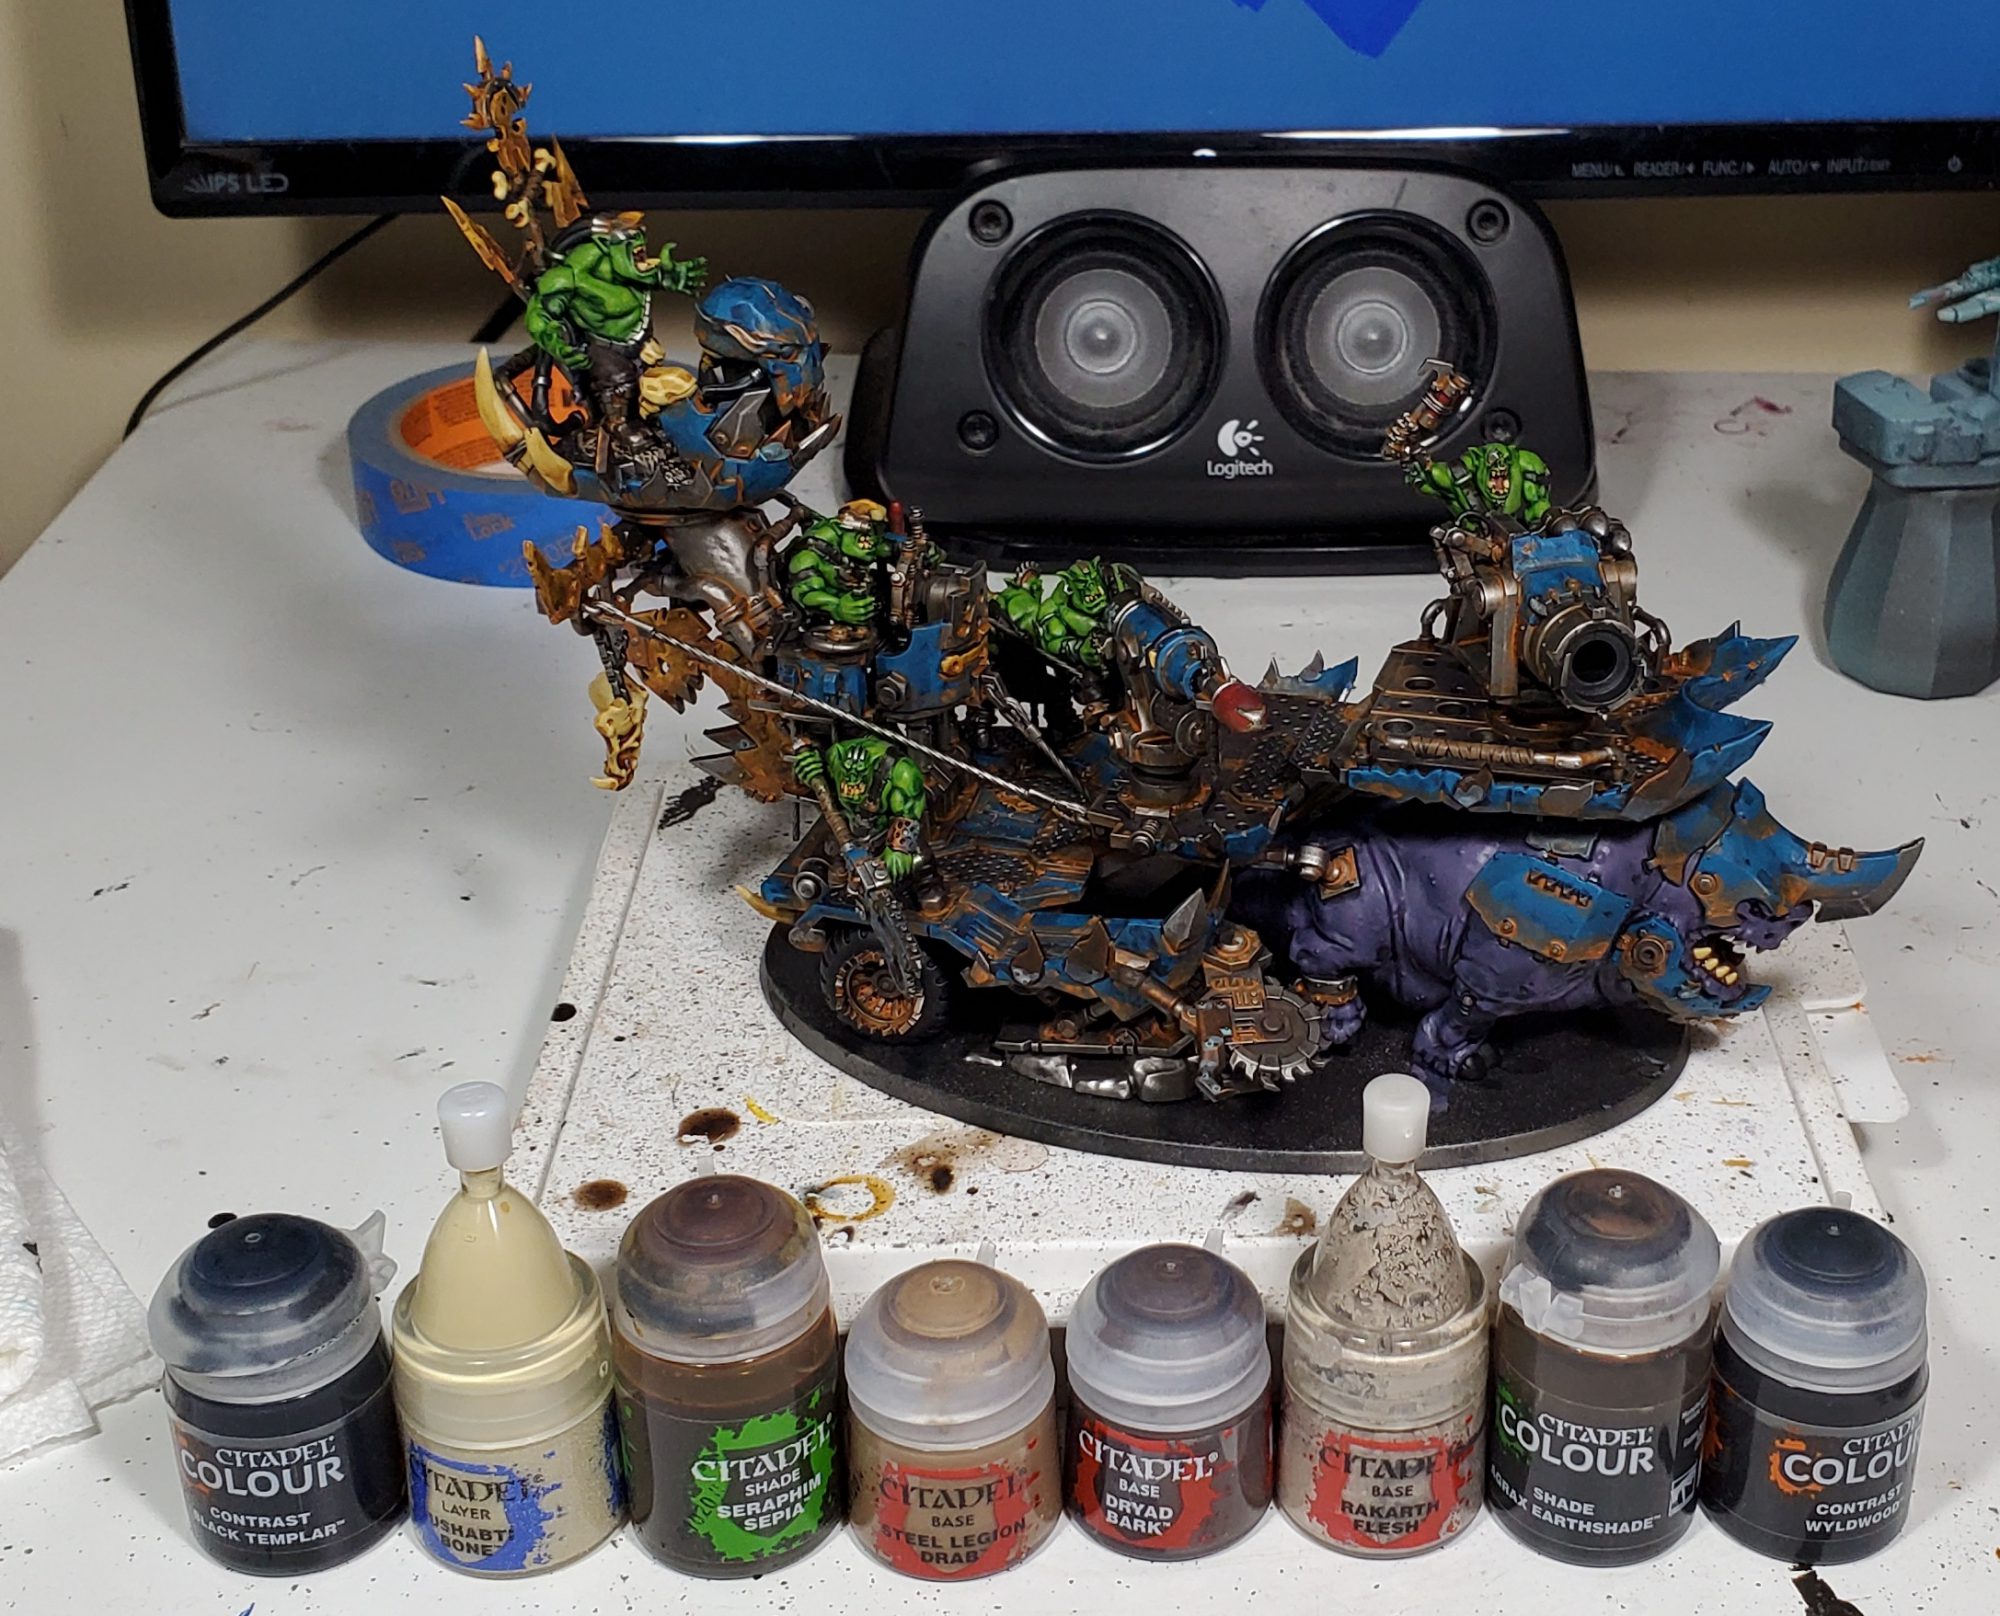
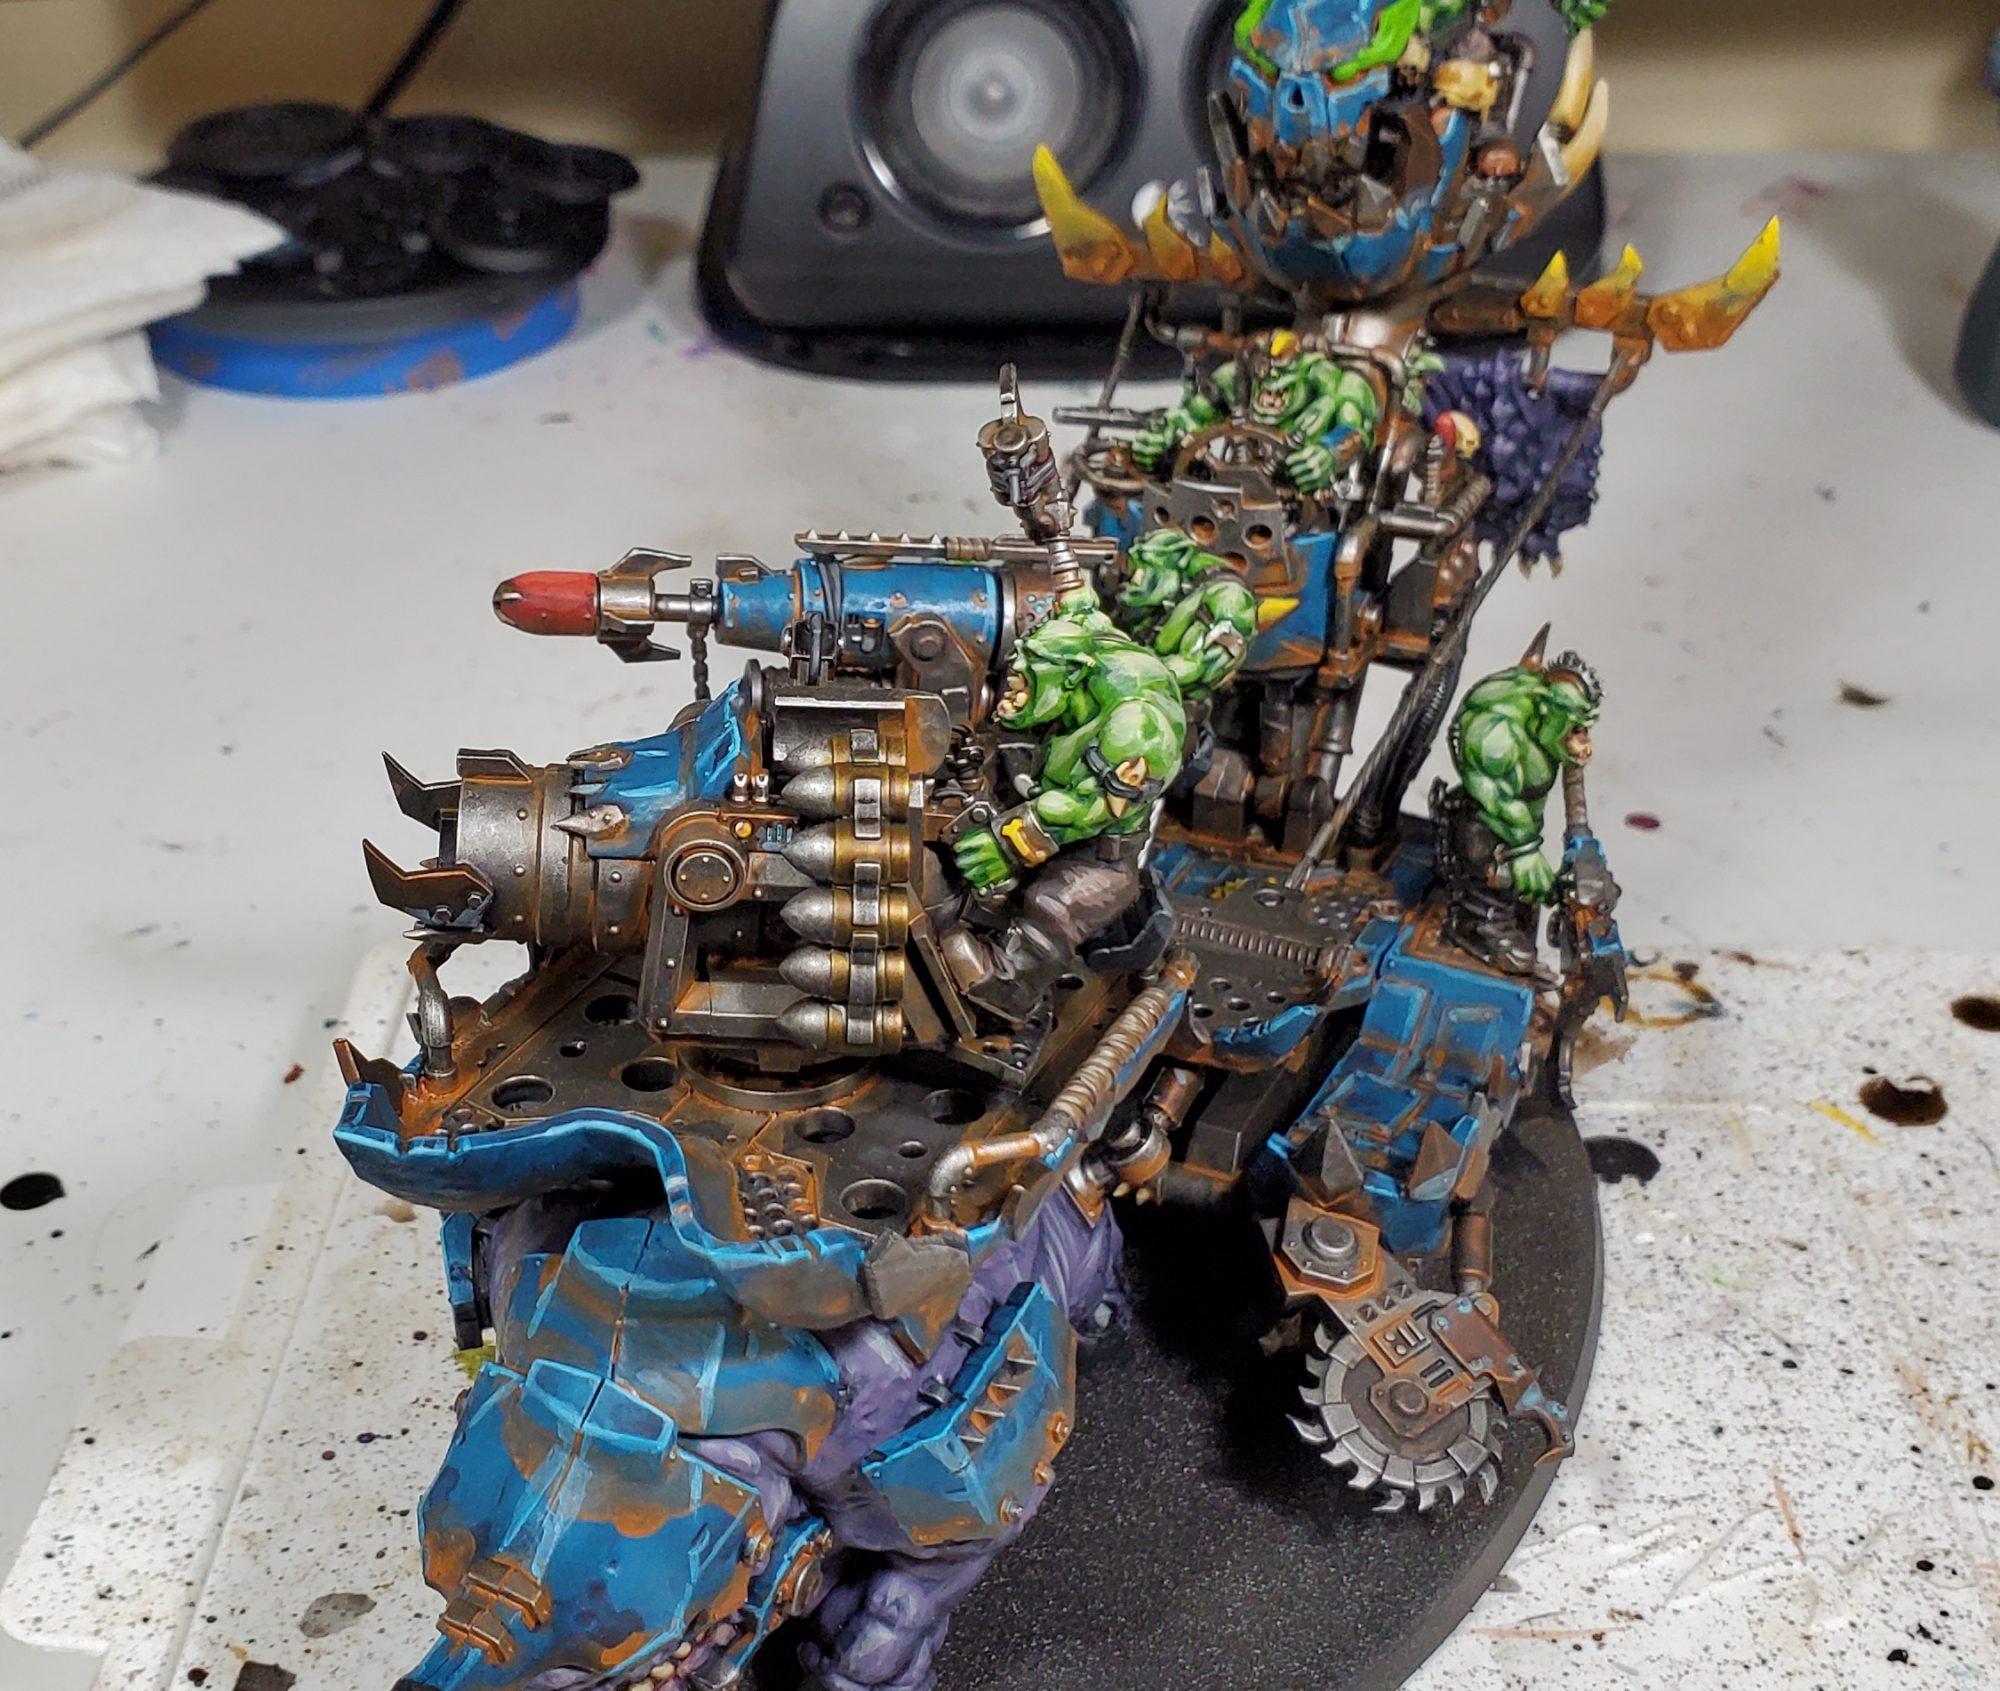
I like picking out explosives with red and any kind of iconography in yellow, then just a quick wash of Agrax will get us to the next step.
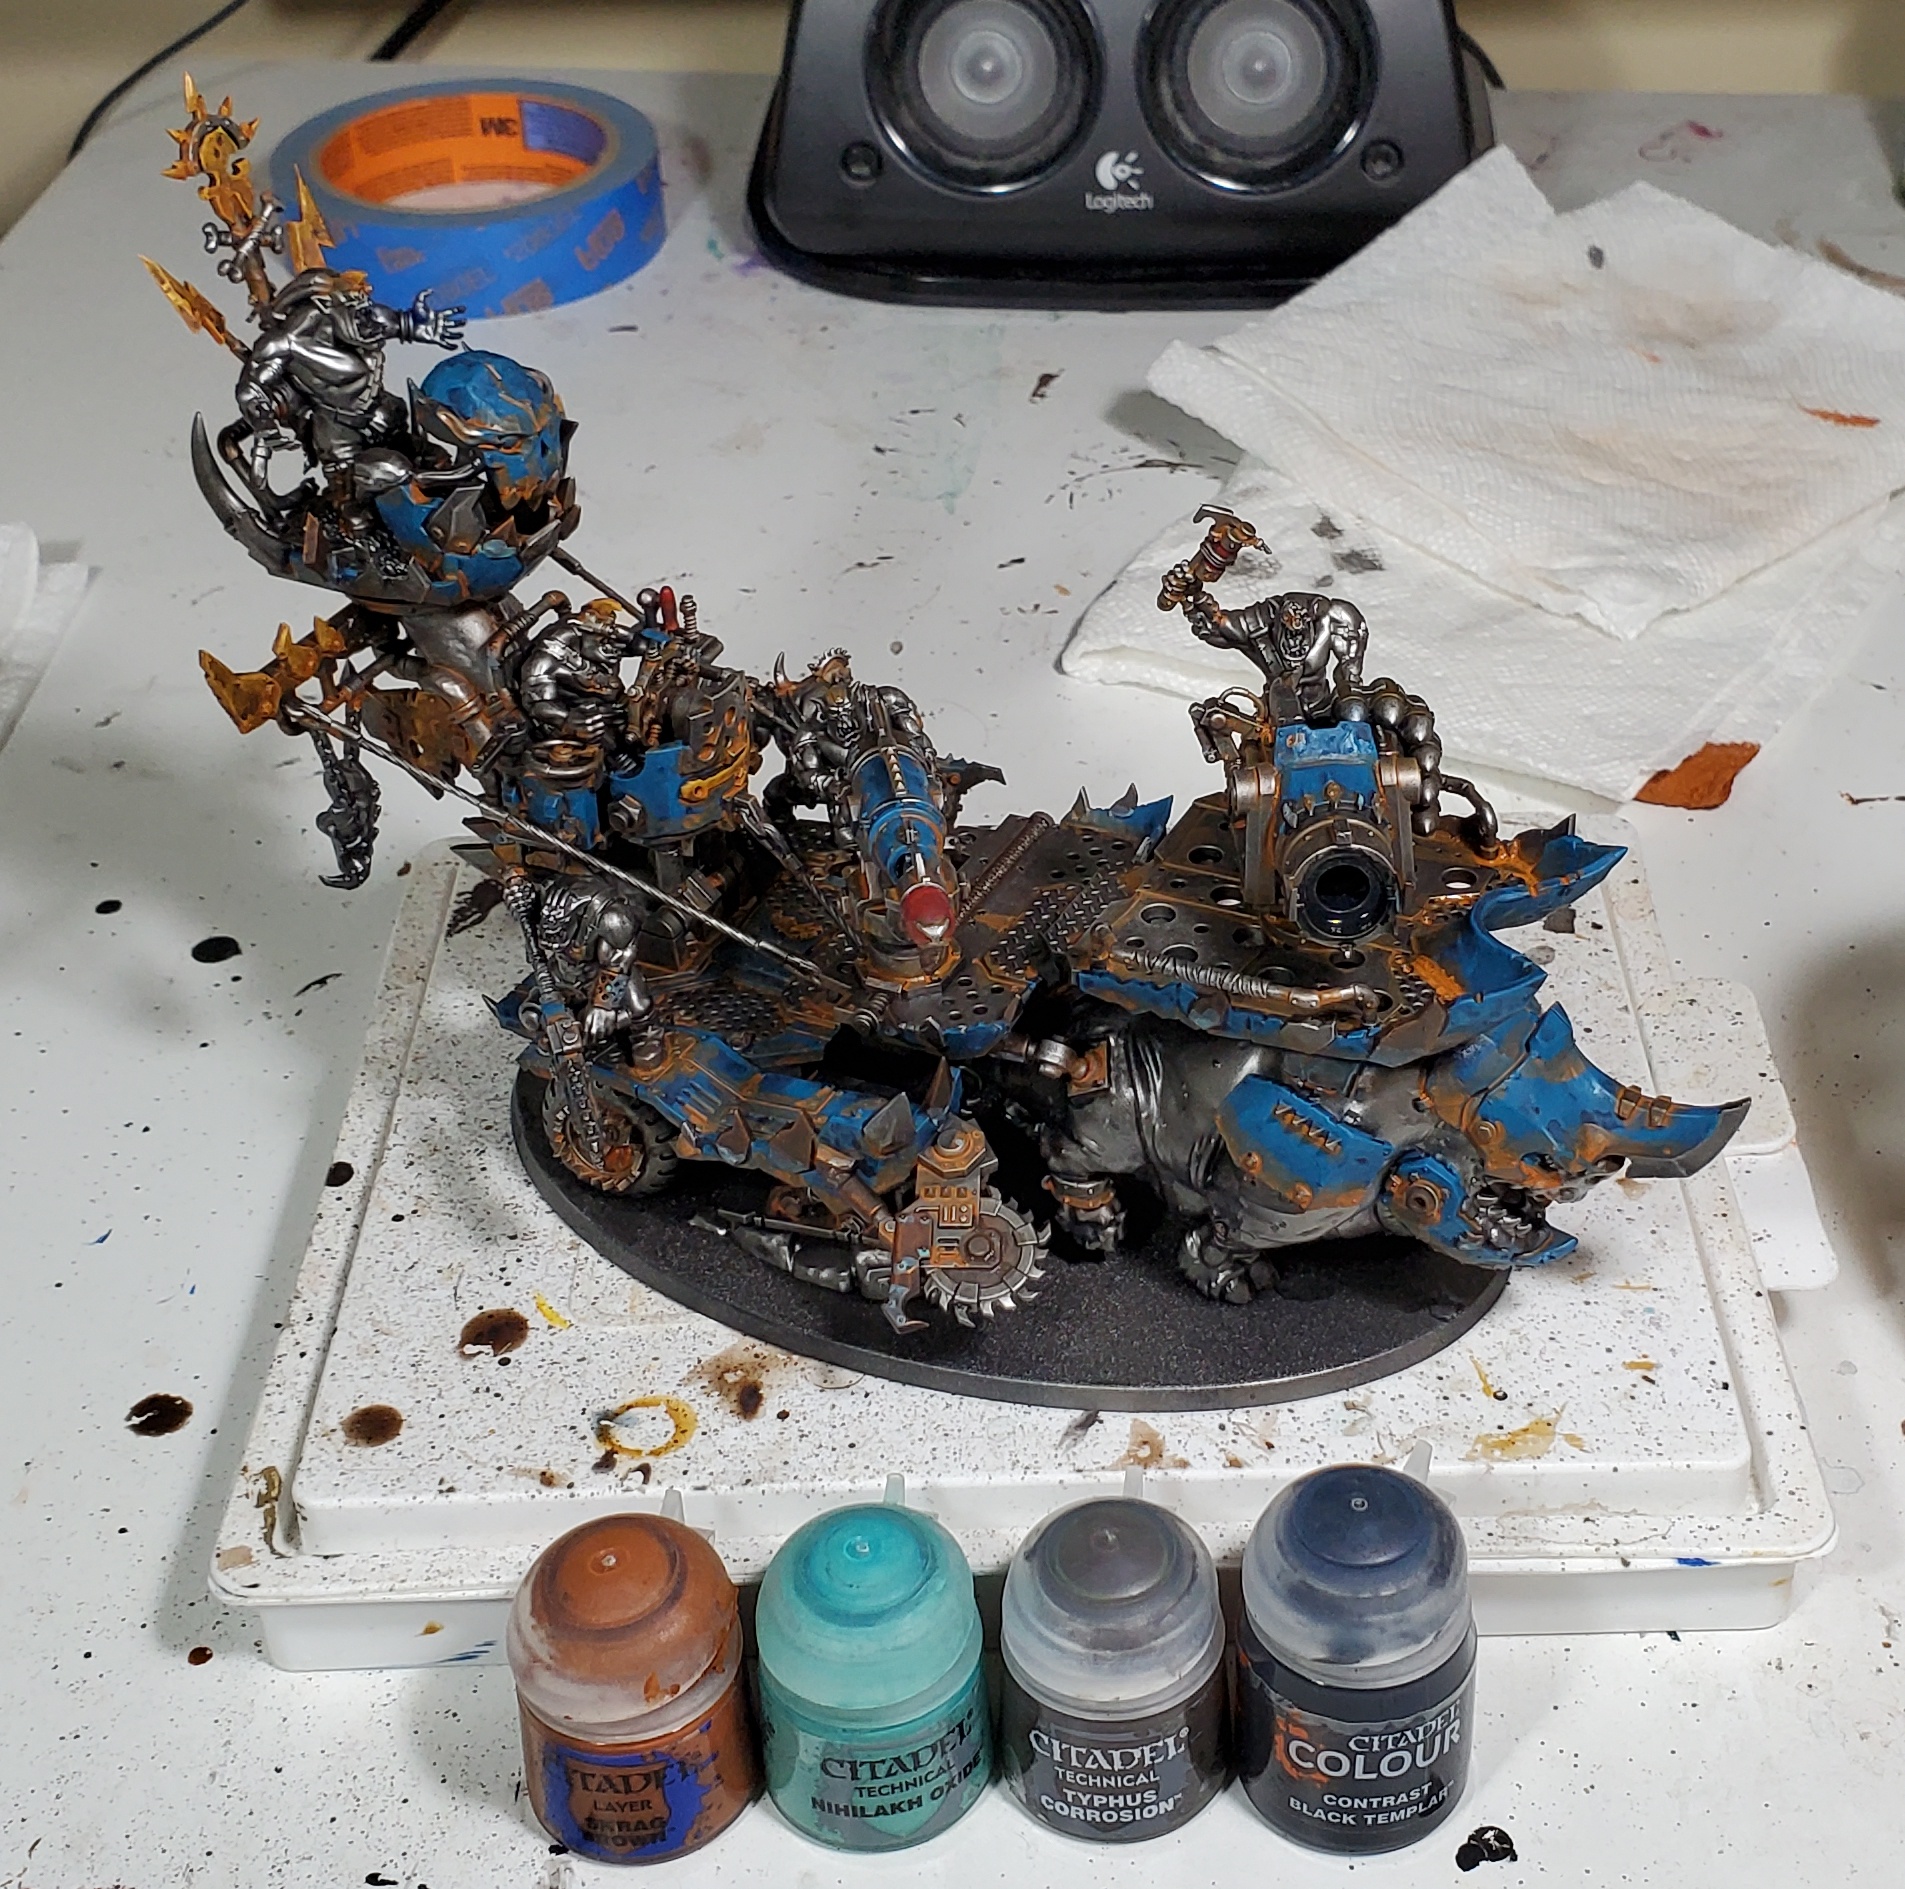
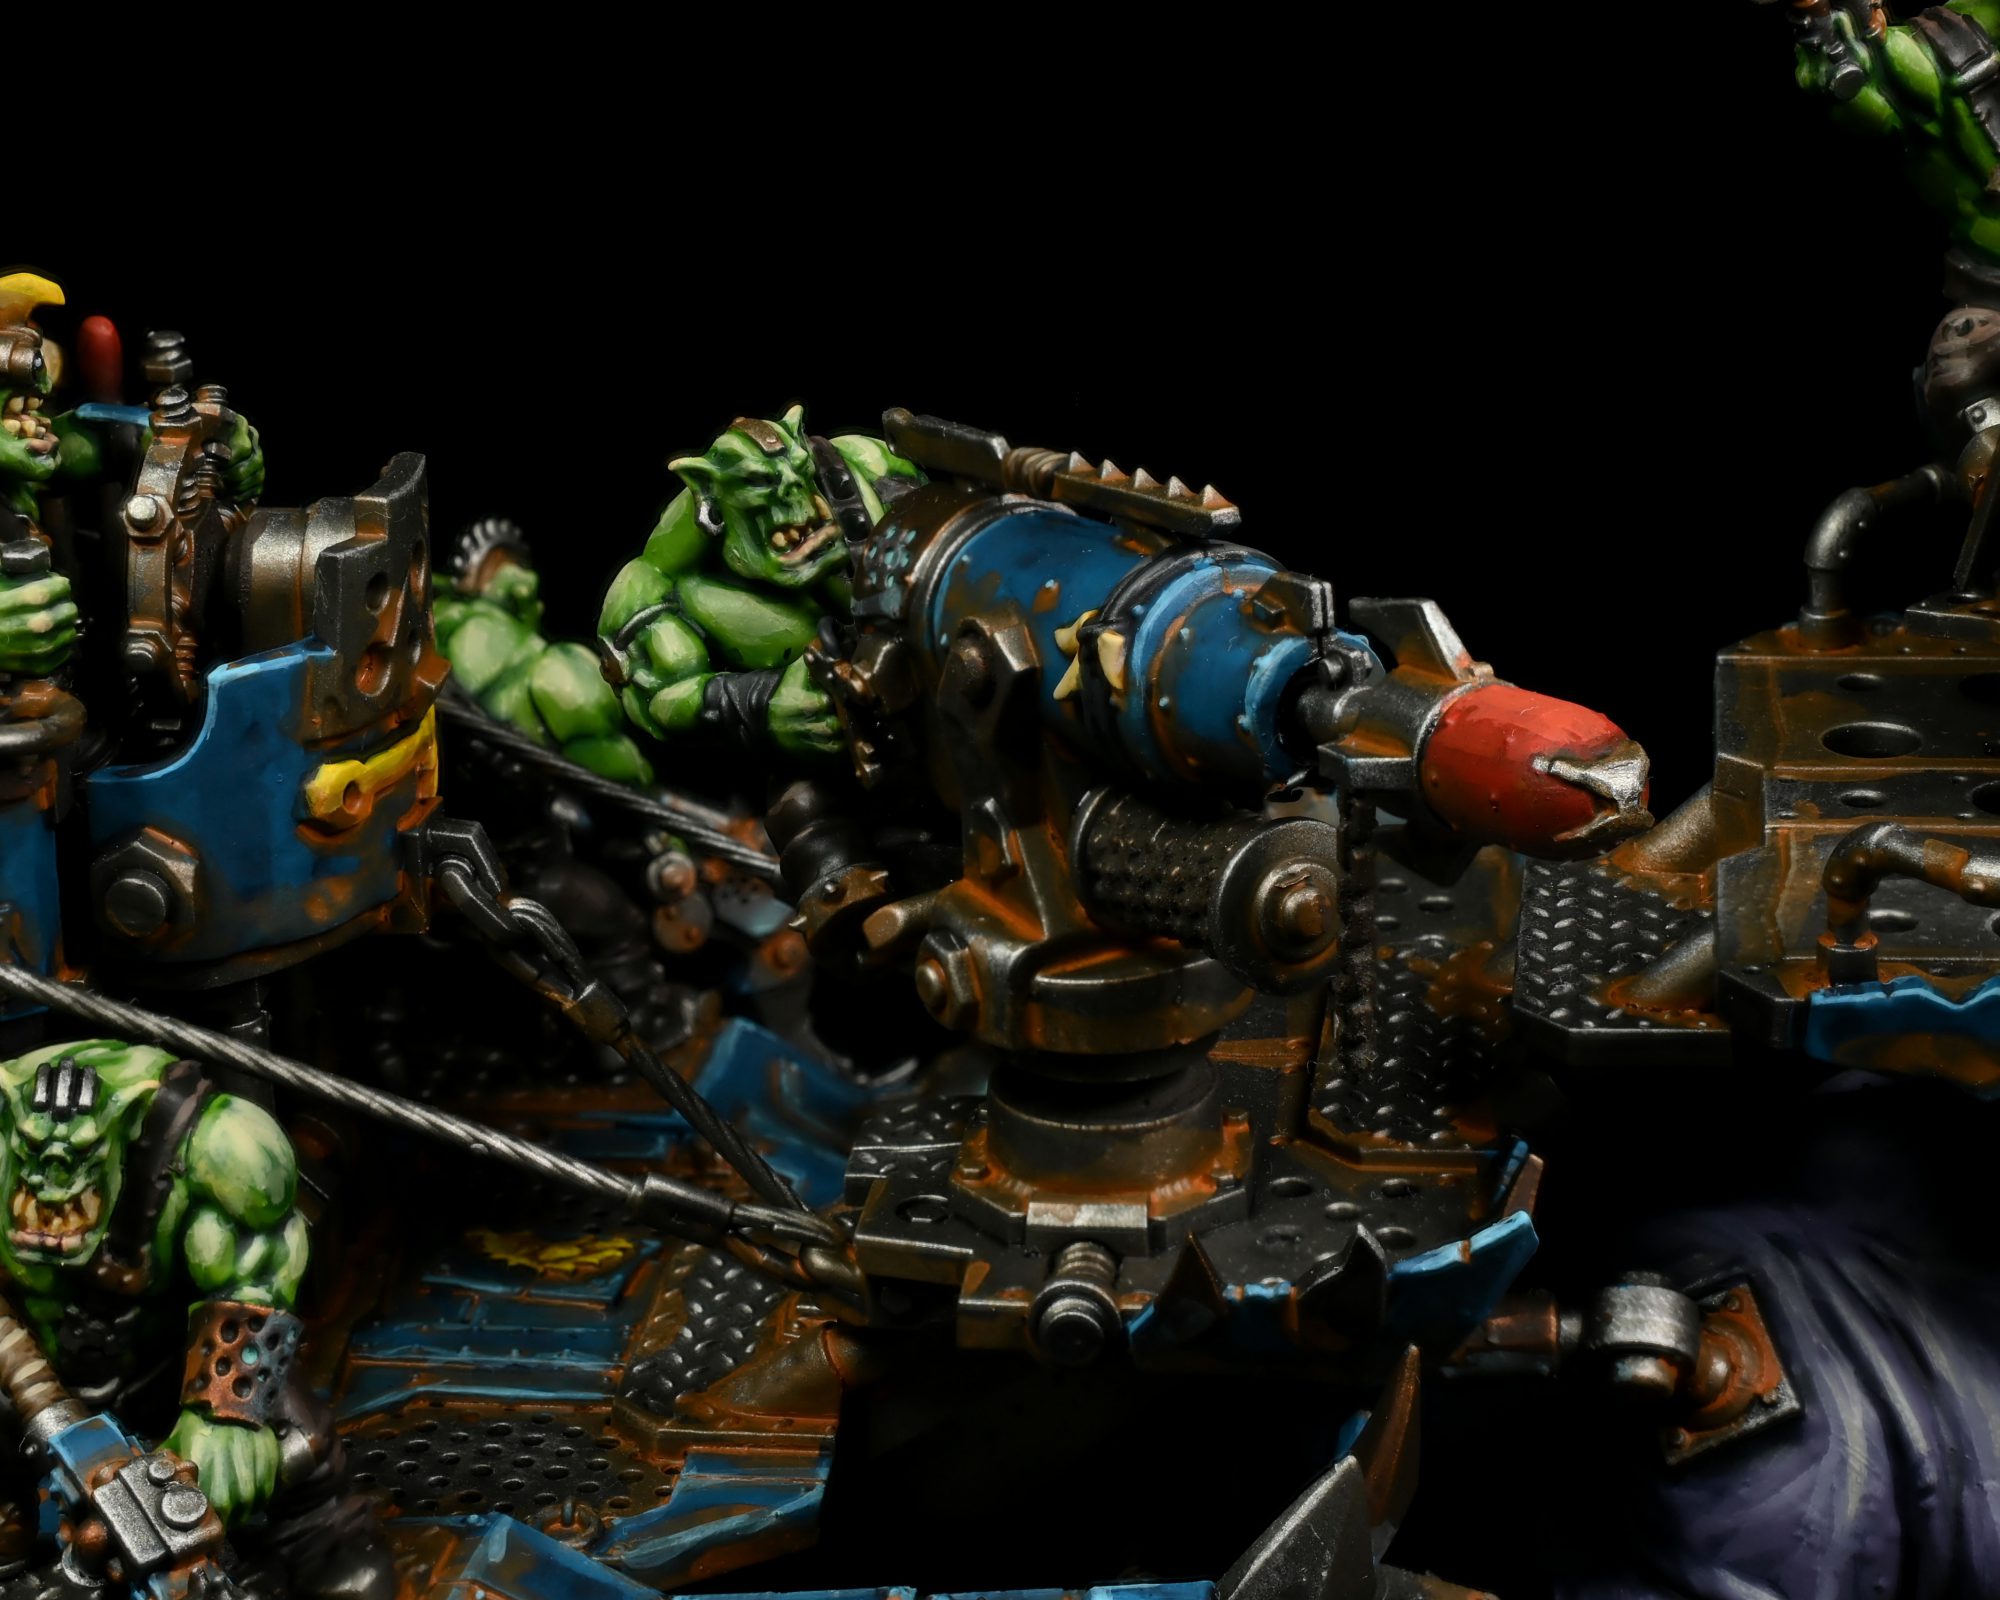
I like heavily watering down Skrag to use as rust, it works really well with the blue armour plates I think! I usually thin the Nihilakh before applying it to coppery bits, but it would work fine straight out of the box. Typhus is great for anything gross and oily, and can pull double duty with a coat of black templar changing it into heavy soot.
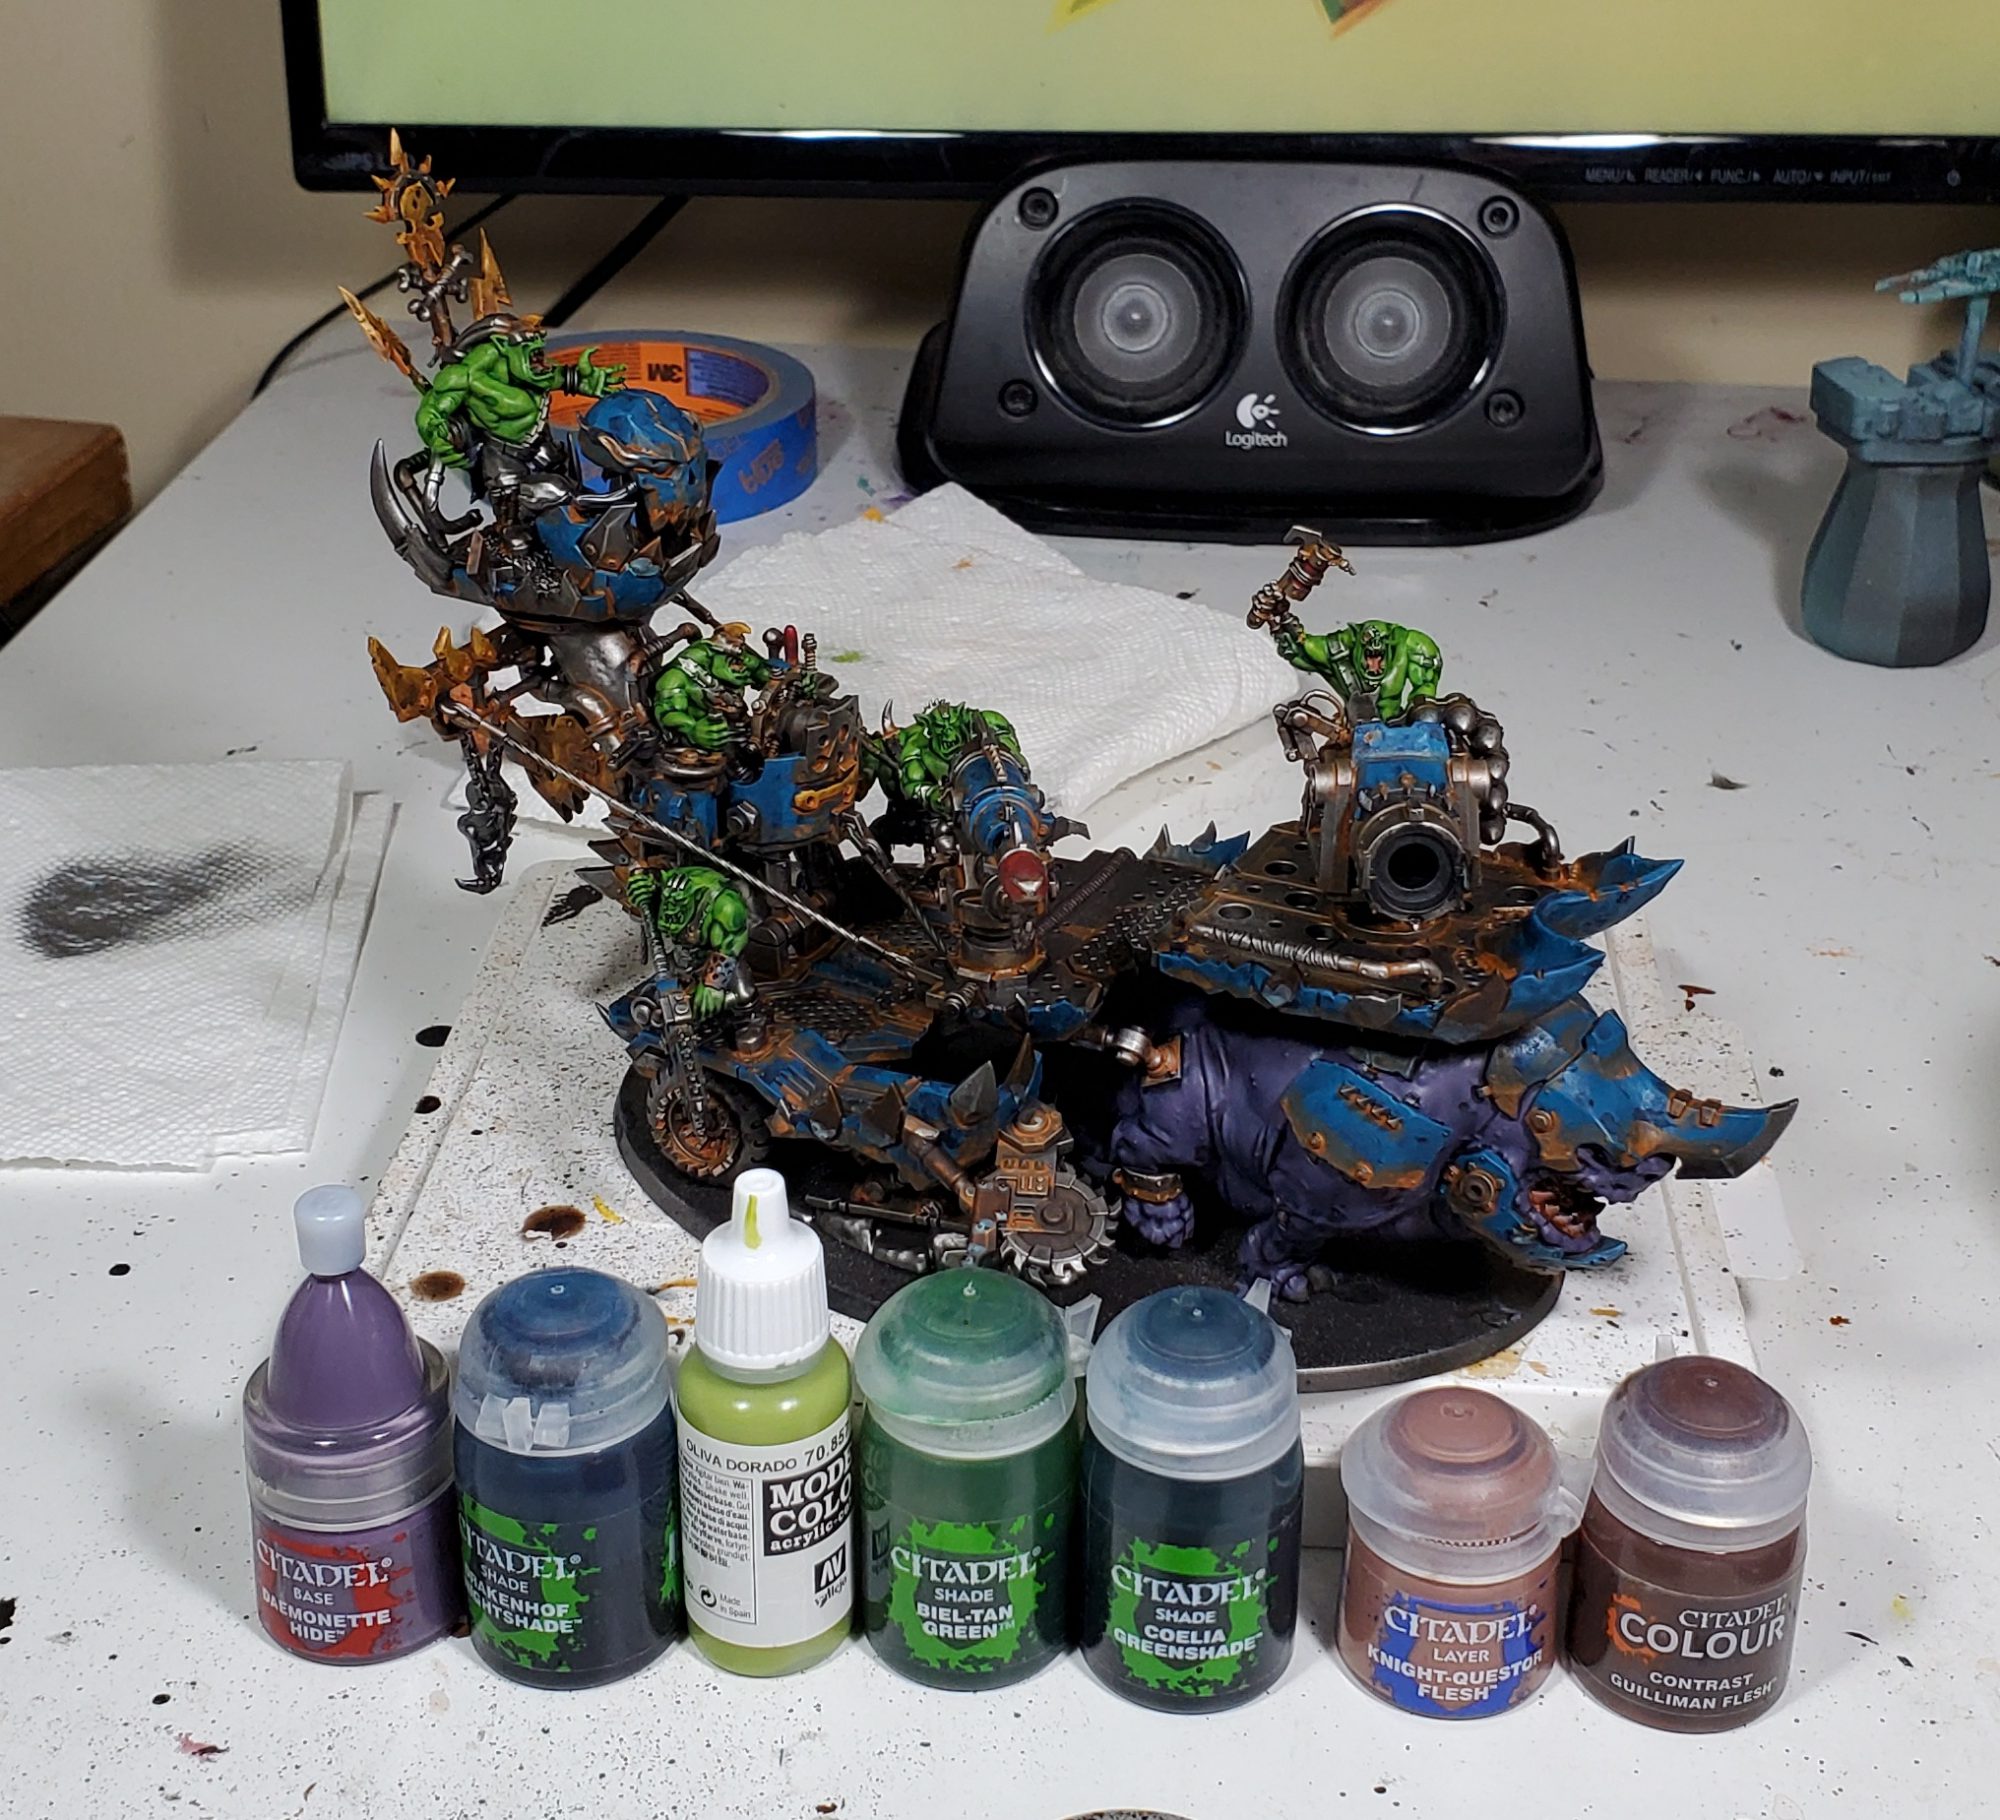
This is mostly straight forward, purple washed blue for the squig and a light flesh tone for the mouths. The ork skin starts with Golden Olive before it is then washed in two ways, once all over with Biel-tan and then the extreme recesses get Coelia to push them a little darker.
There are a bunch of different materials being done at this step:
With the boring stuff out of the way we can really start to get some life into the model! You might notice that my order with the highlights is to work inside out, as its a lot easier to hide any mistakes on easier to reach places later on.
There are a few different recipes going on here:
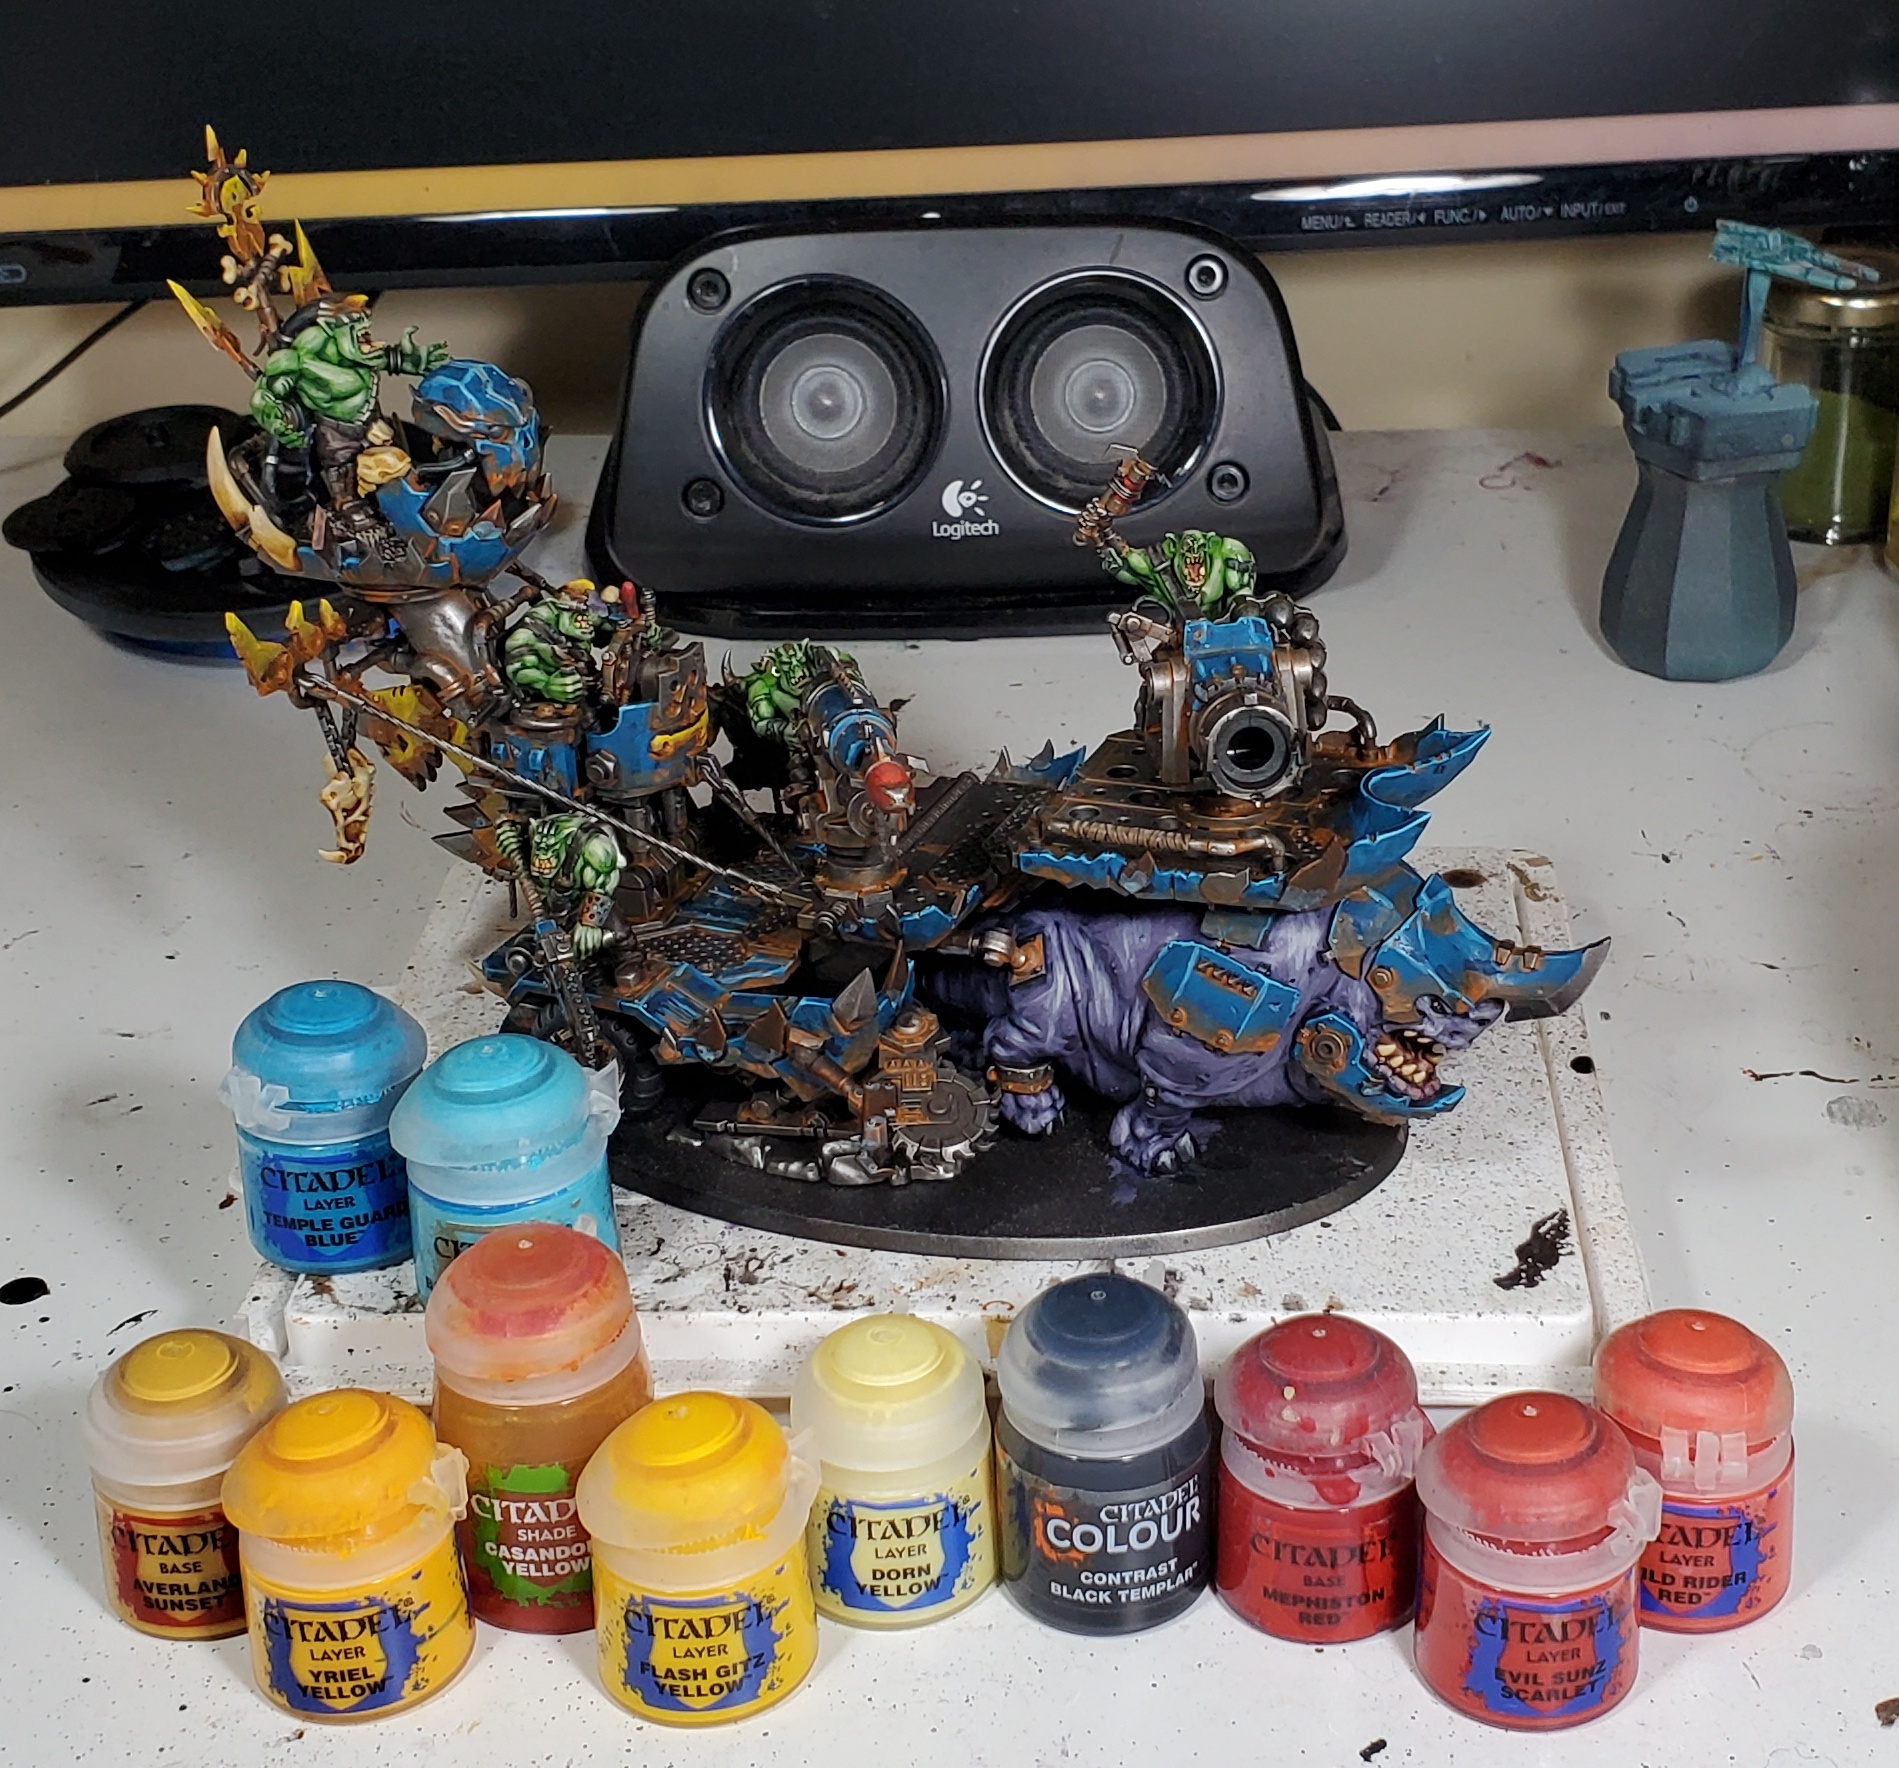
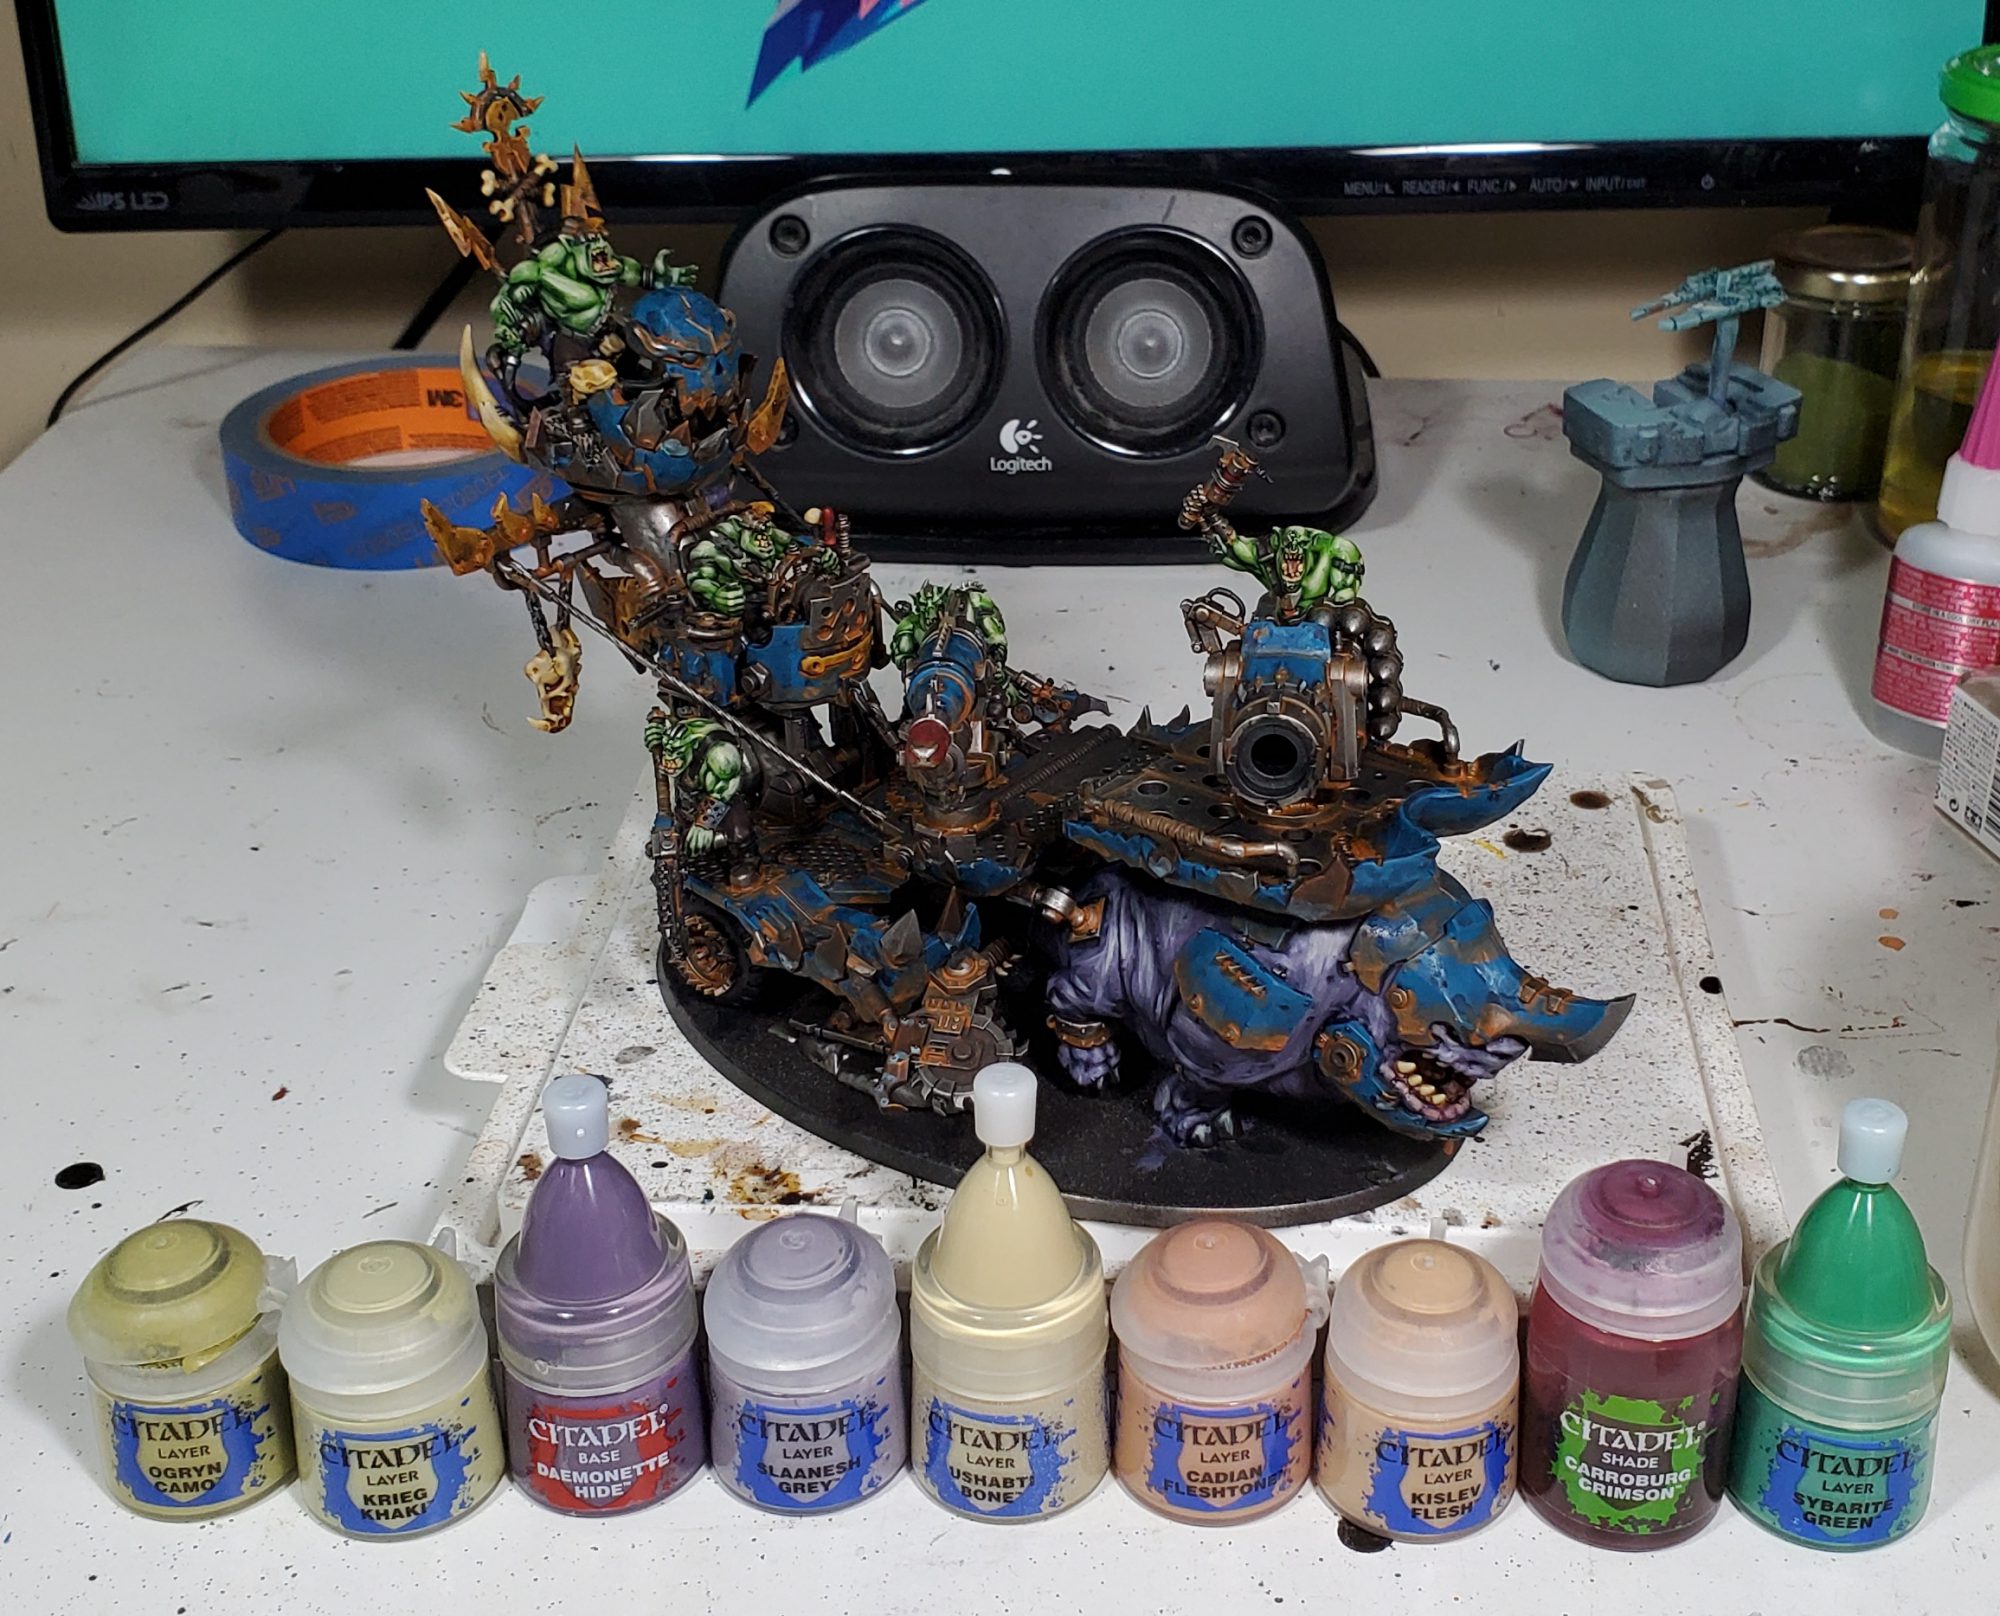
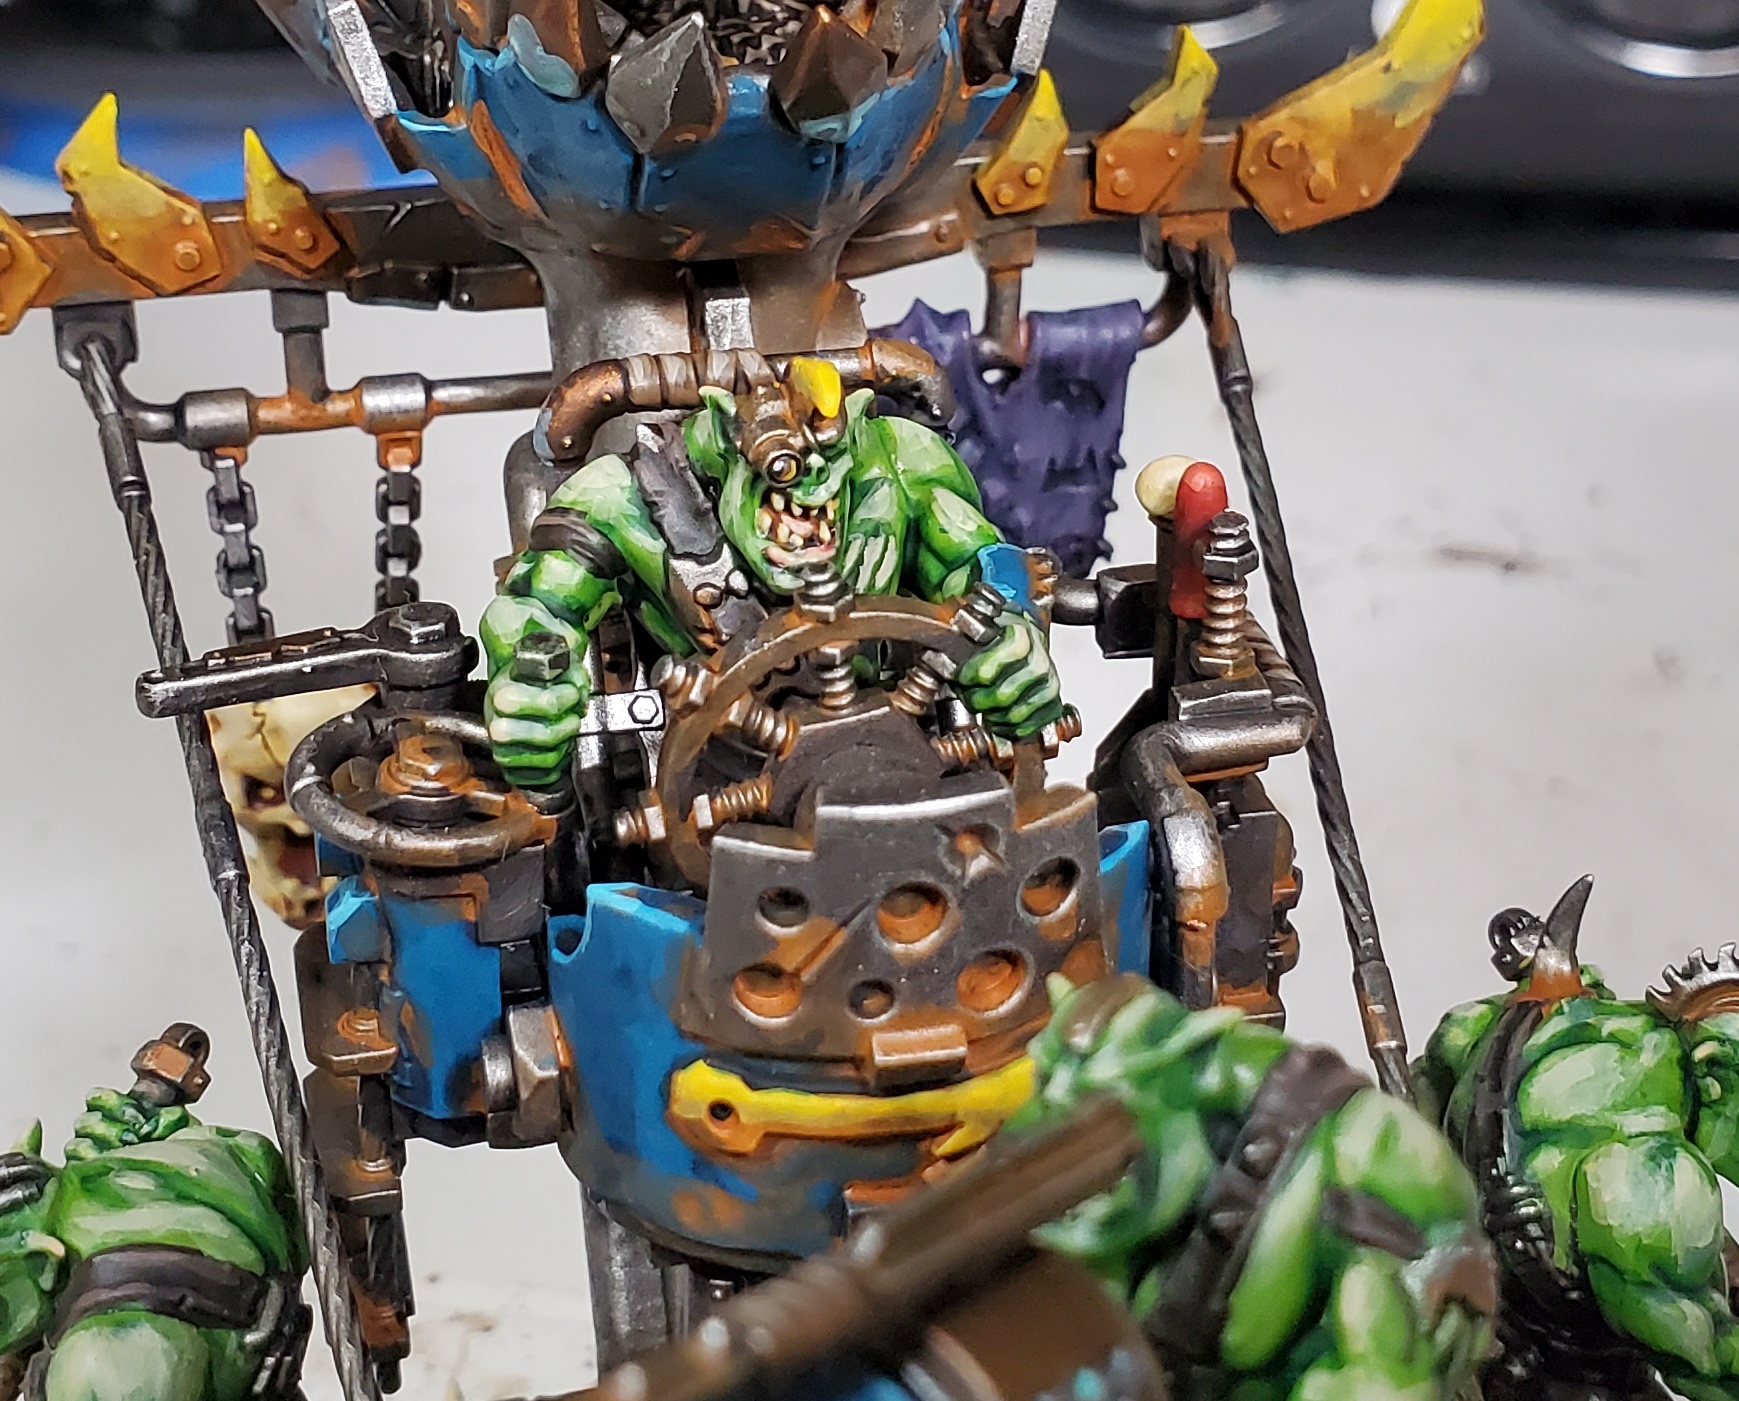
The eyes won't quite make sense until you realize they are just the same as the highlight colours used elsewhere. Squigs have eyes of Yriel washed Casandora then highlighted Flash Gitz and Dorn with pupils of black templar, where as the Orks just get Mephiston as I find more complex eyes can look really weird on them.
The rest of the stuff here is pretty simple, the main blue gets Temple Guard and Baharroth. Then for the spot colours the red is just highlighted with Mephiston, Evil Sunz and Wild Rider in big soft highlights, and the yellow is Averland, Yriel and Flash Gitz.
Not as many things going on here, so we just get right into it.
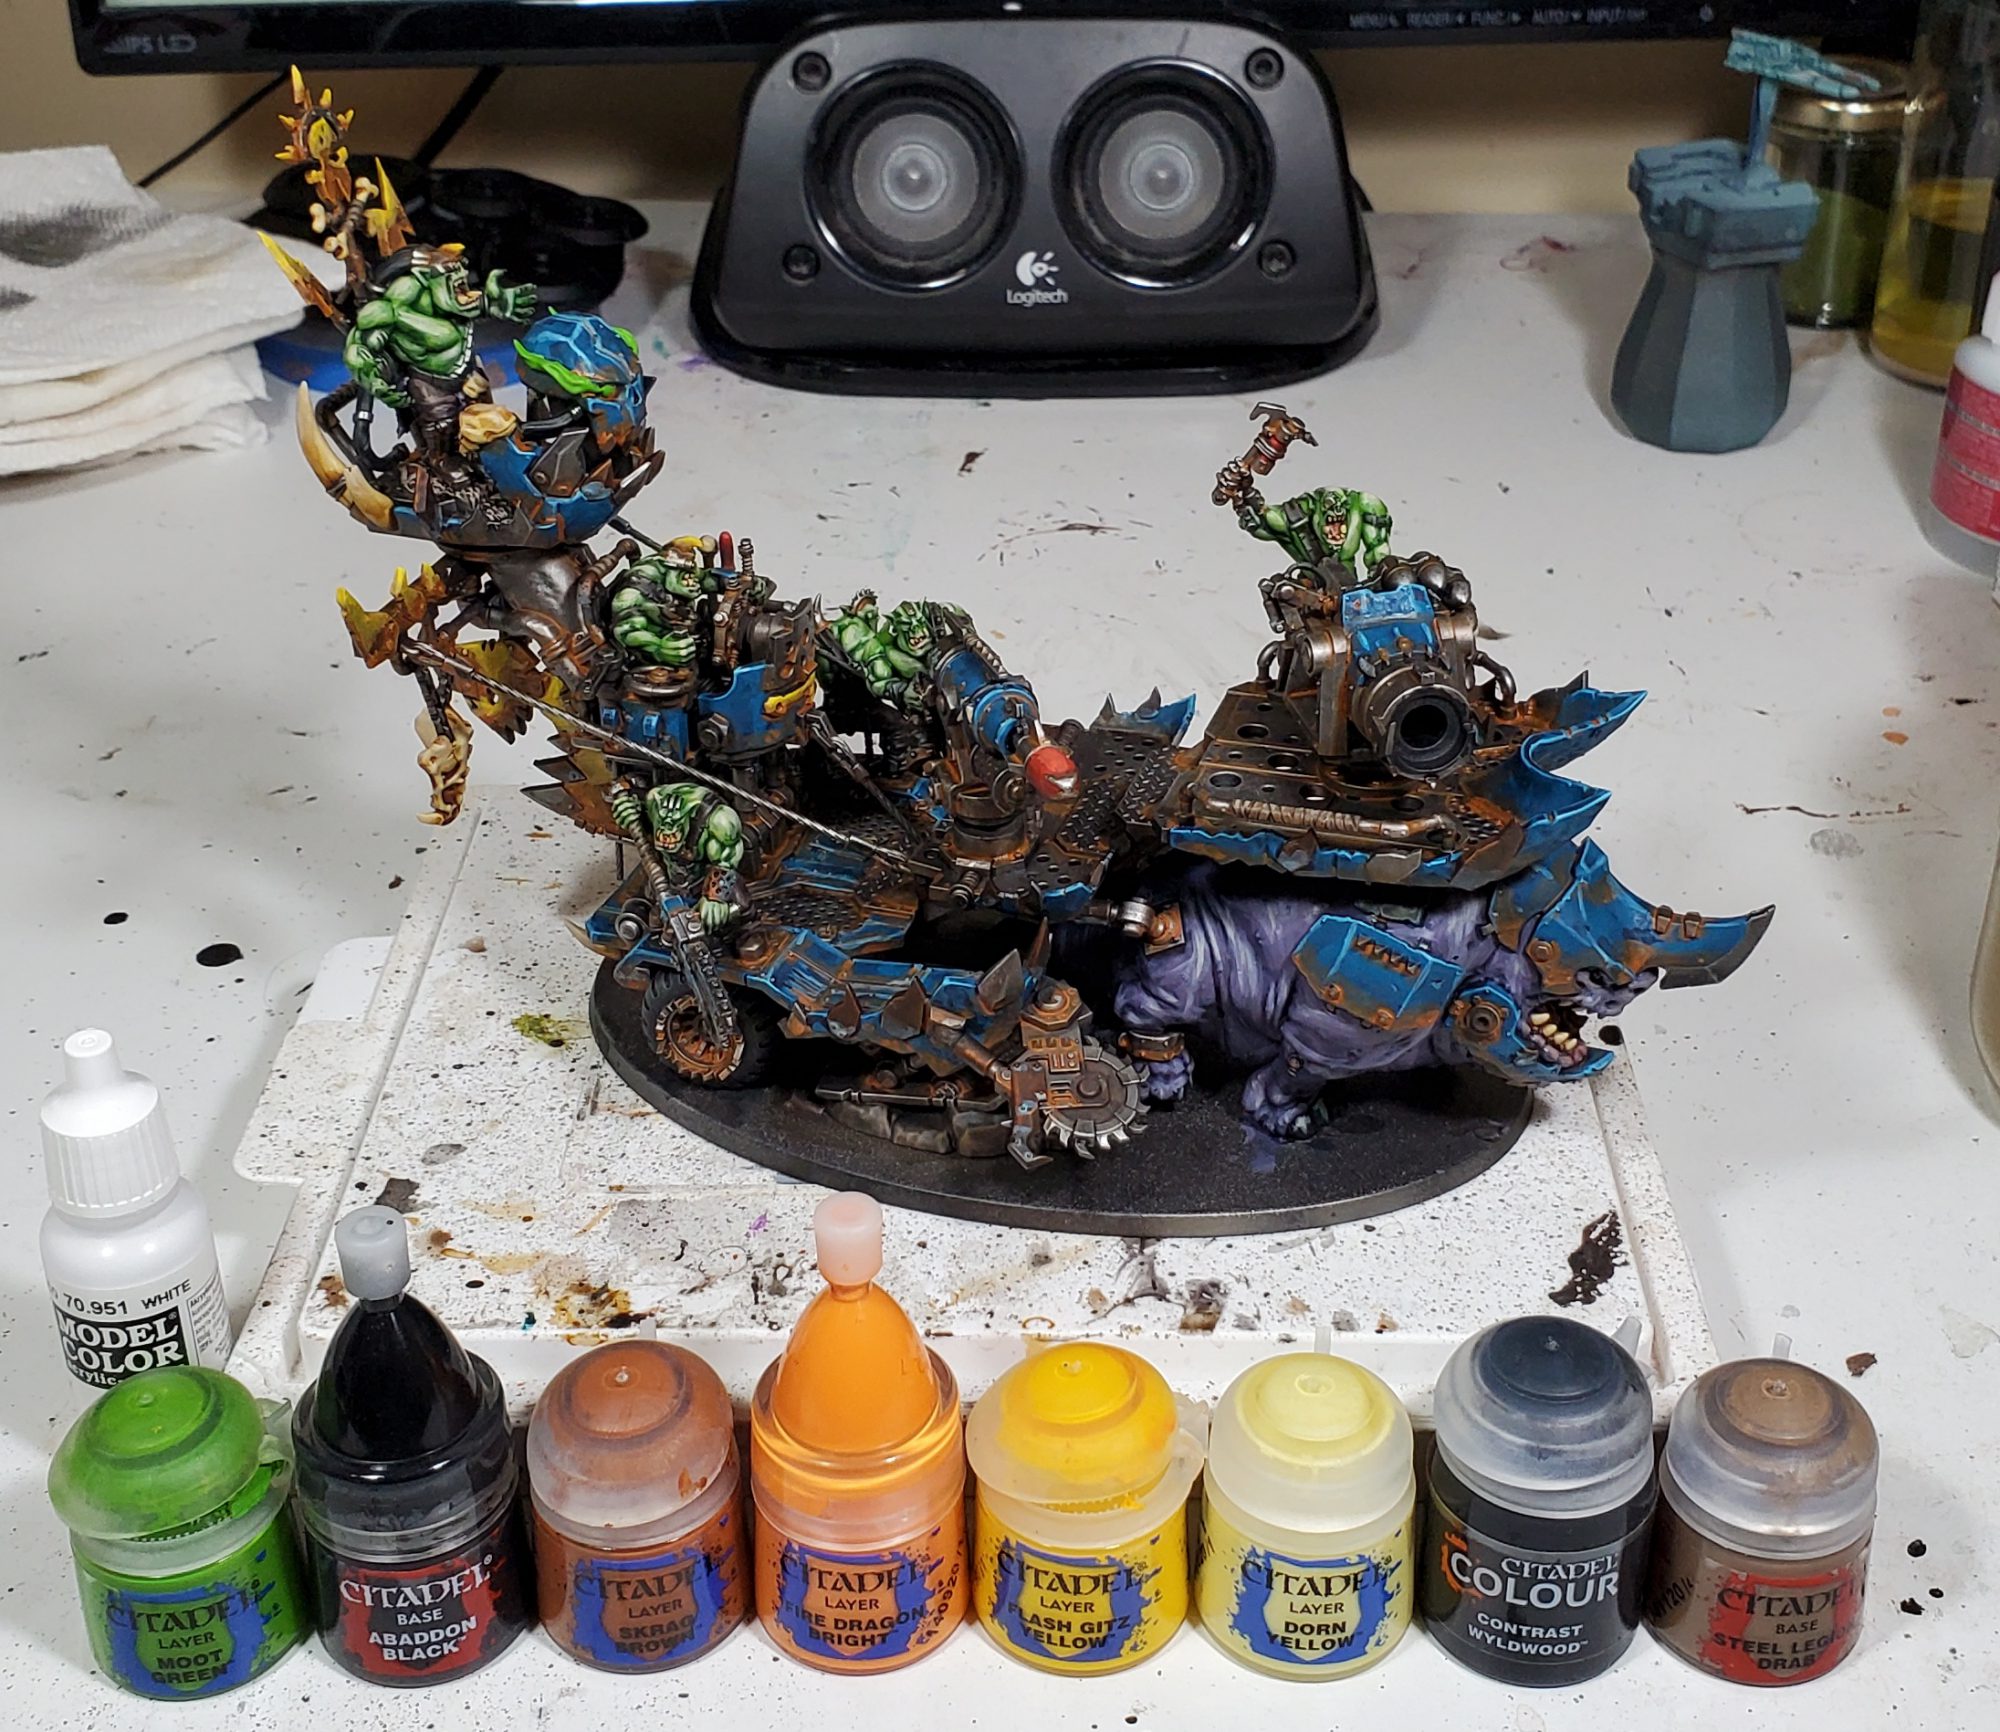
The rock under the sled is done super lazy with just Wyldwood and a extremely heavy drybrush of Steel Legion.
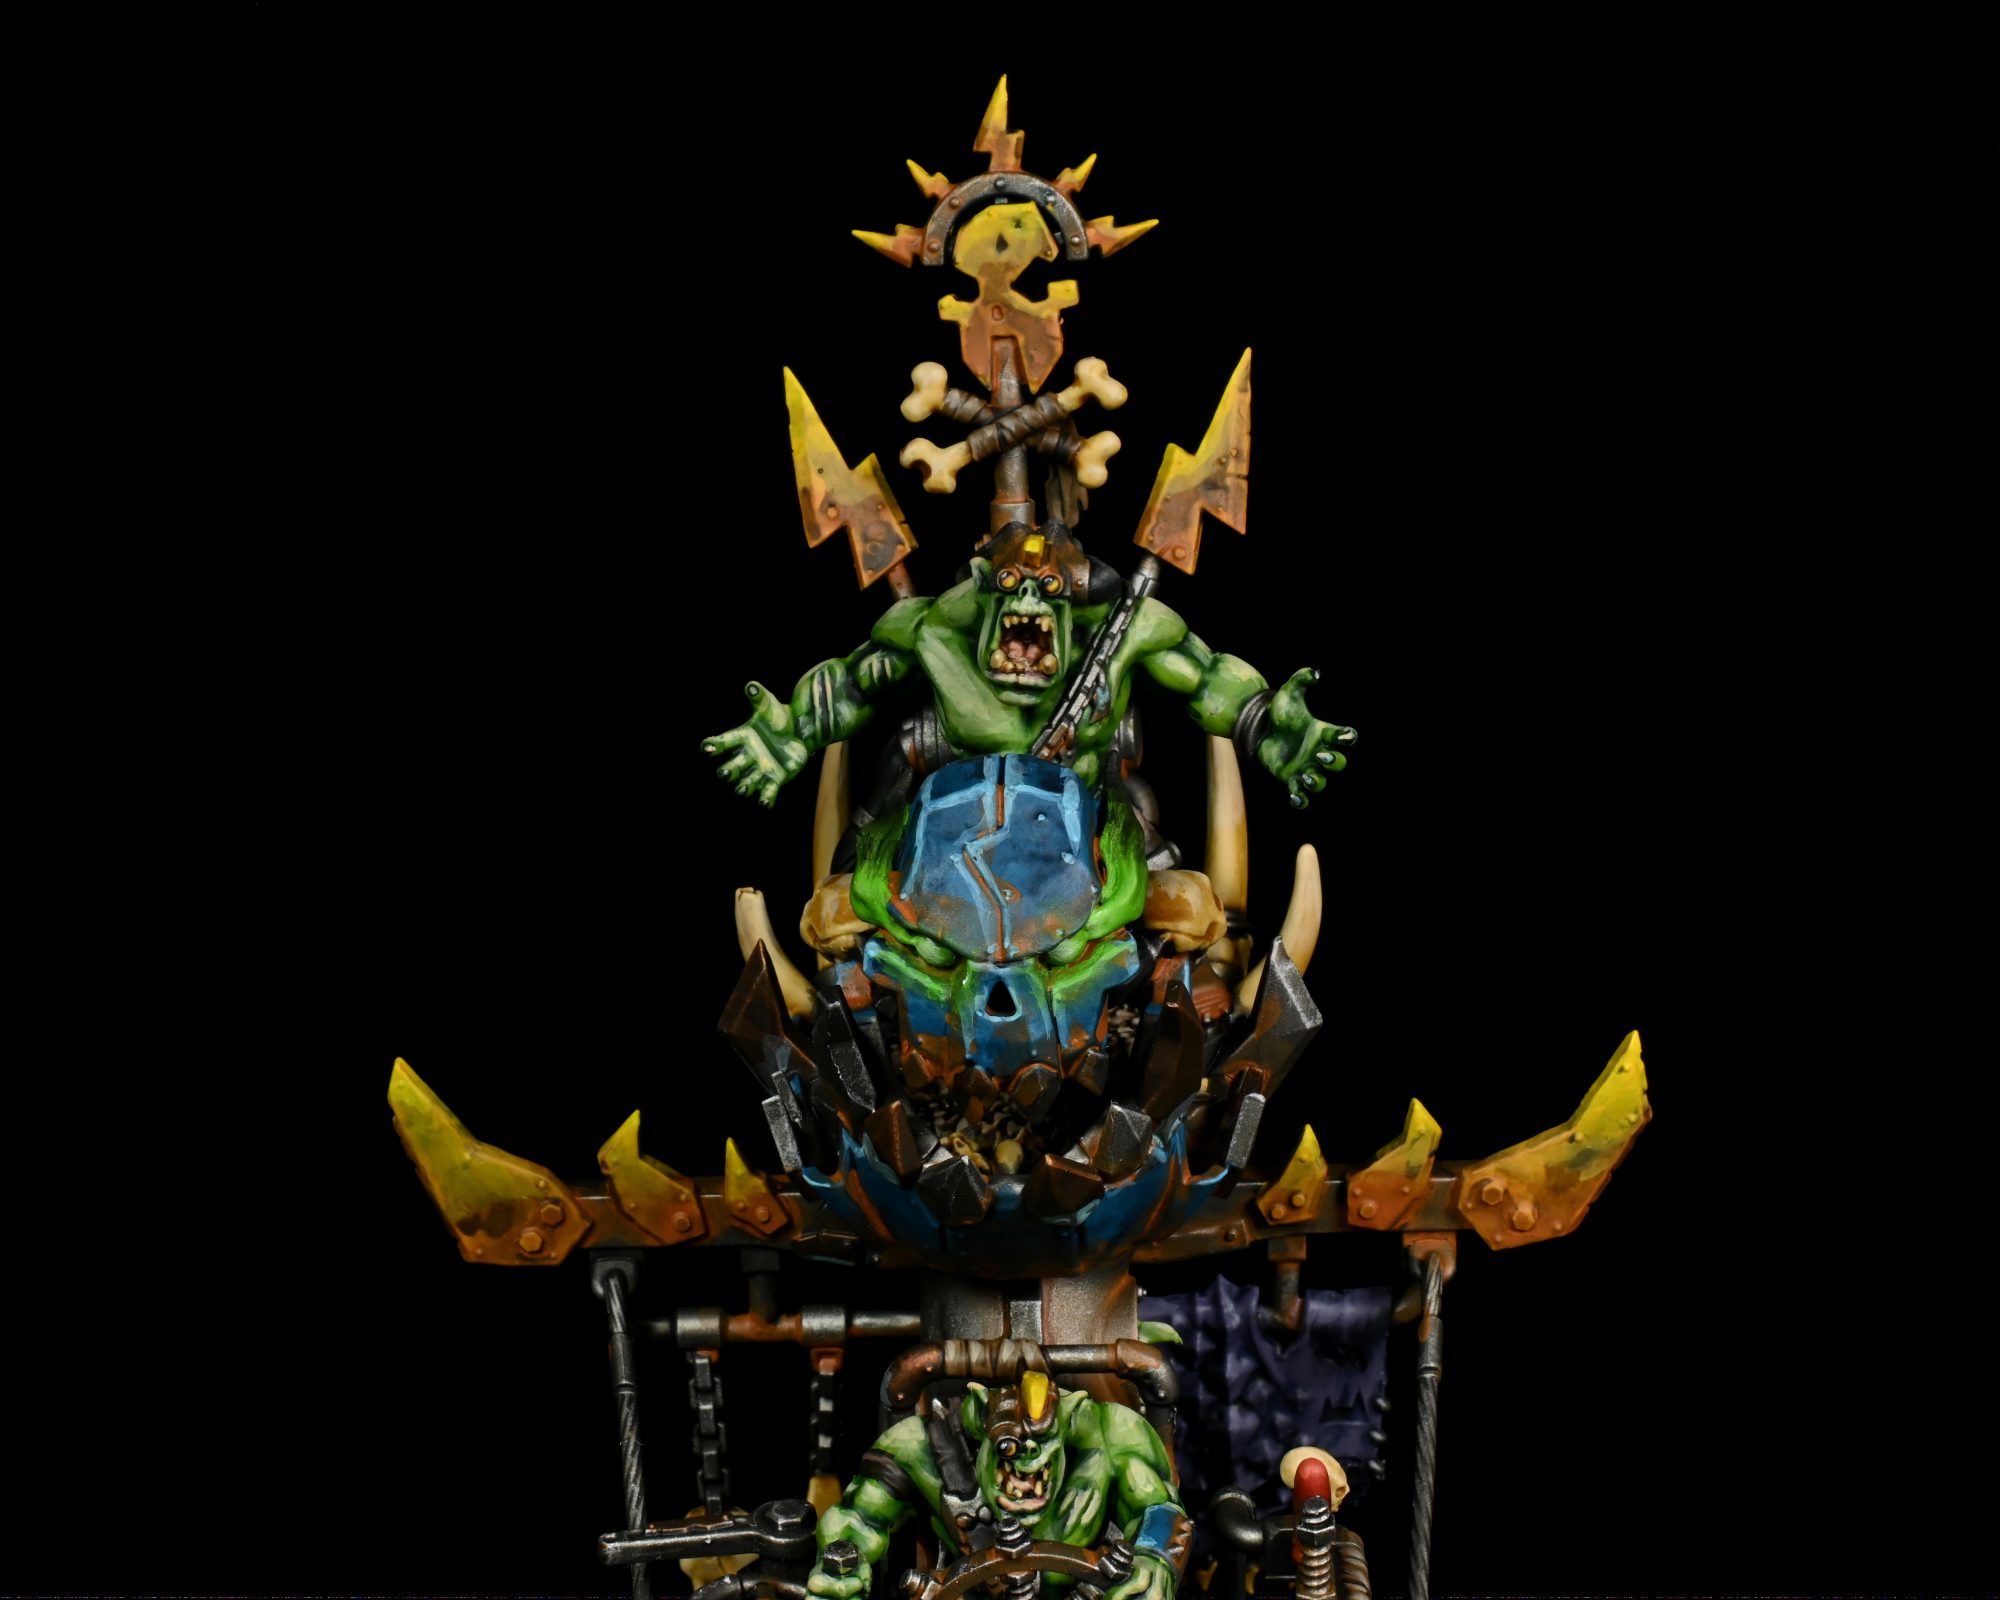
I do the lenses and any little glowing lights with the same approximate recipe; the lenses are based in Abaddon Black then get a simple gemstone effect where I just do a sequence of successively smaller crescents to the lower right in Skrag, Fire Dragon, Flash Gitz and Dorn. After that a small crescent in the opposing corner of white is done.
The glowing bulb is essentially just the middle three colours where I base in Skrag and stop the lower right crescents at Flash Gitz and use Dorn for the opposing 'reflection'.
I coat the psyker effects with Moot as a close enough undercoat to provide body to the oils we will get to in a moment.
What I am doing here is pretty crude, I just cover the whole thing with the green oil and then wet blend a bit of black into end by putting some on the tip and then feathering it back towards the source. I do the opposite with the white, blending from the from of the 'eyeball' only partially back towards the ends.
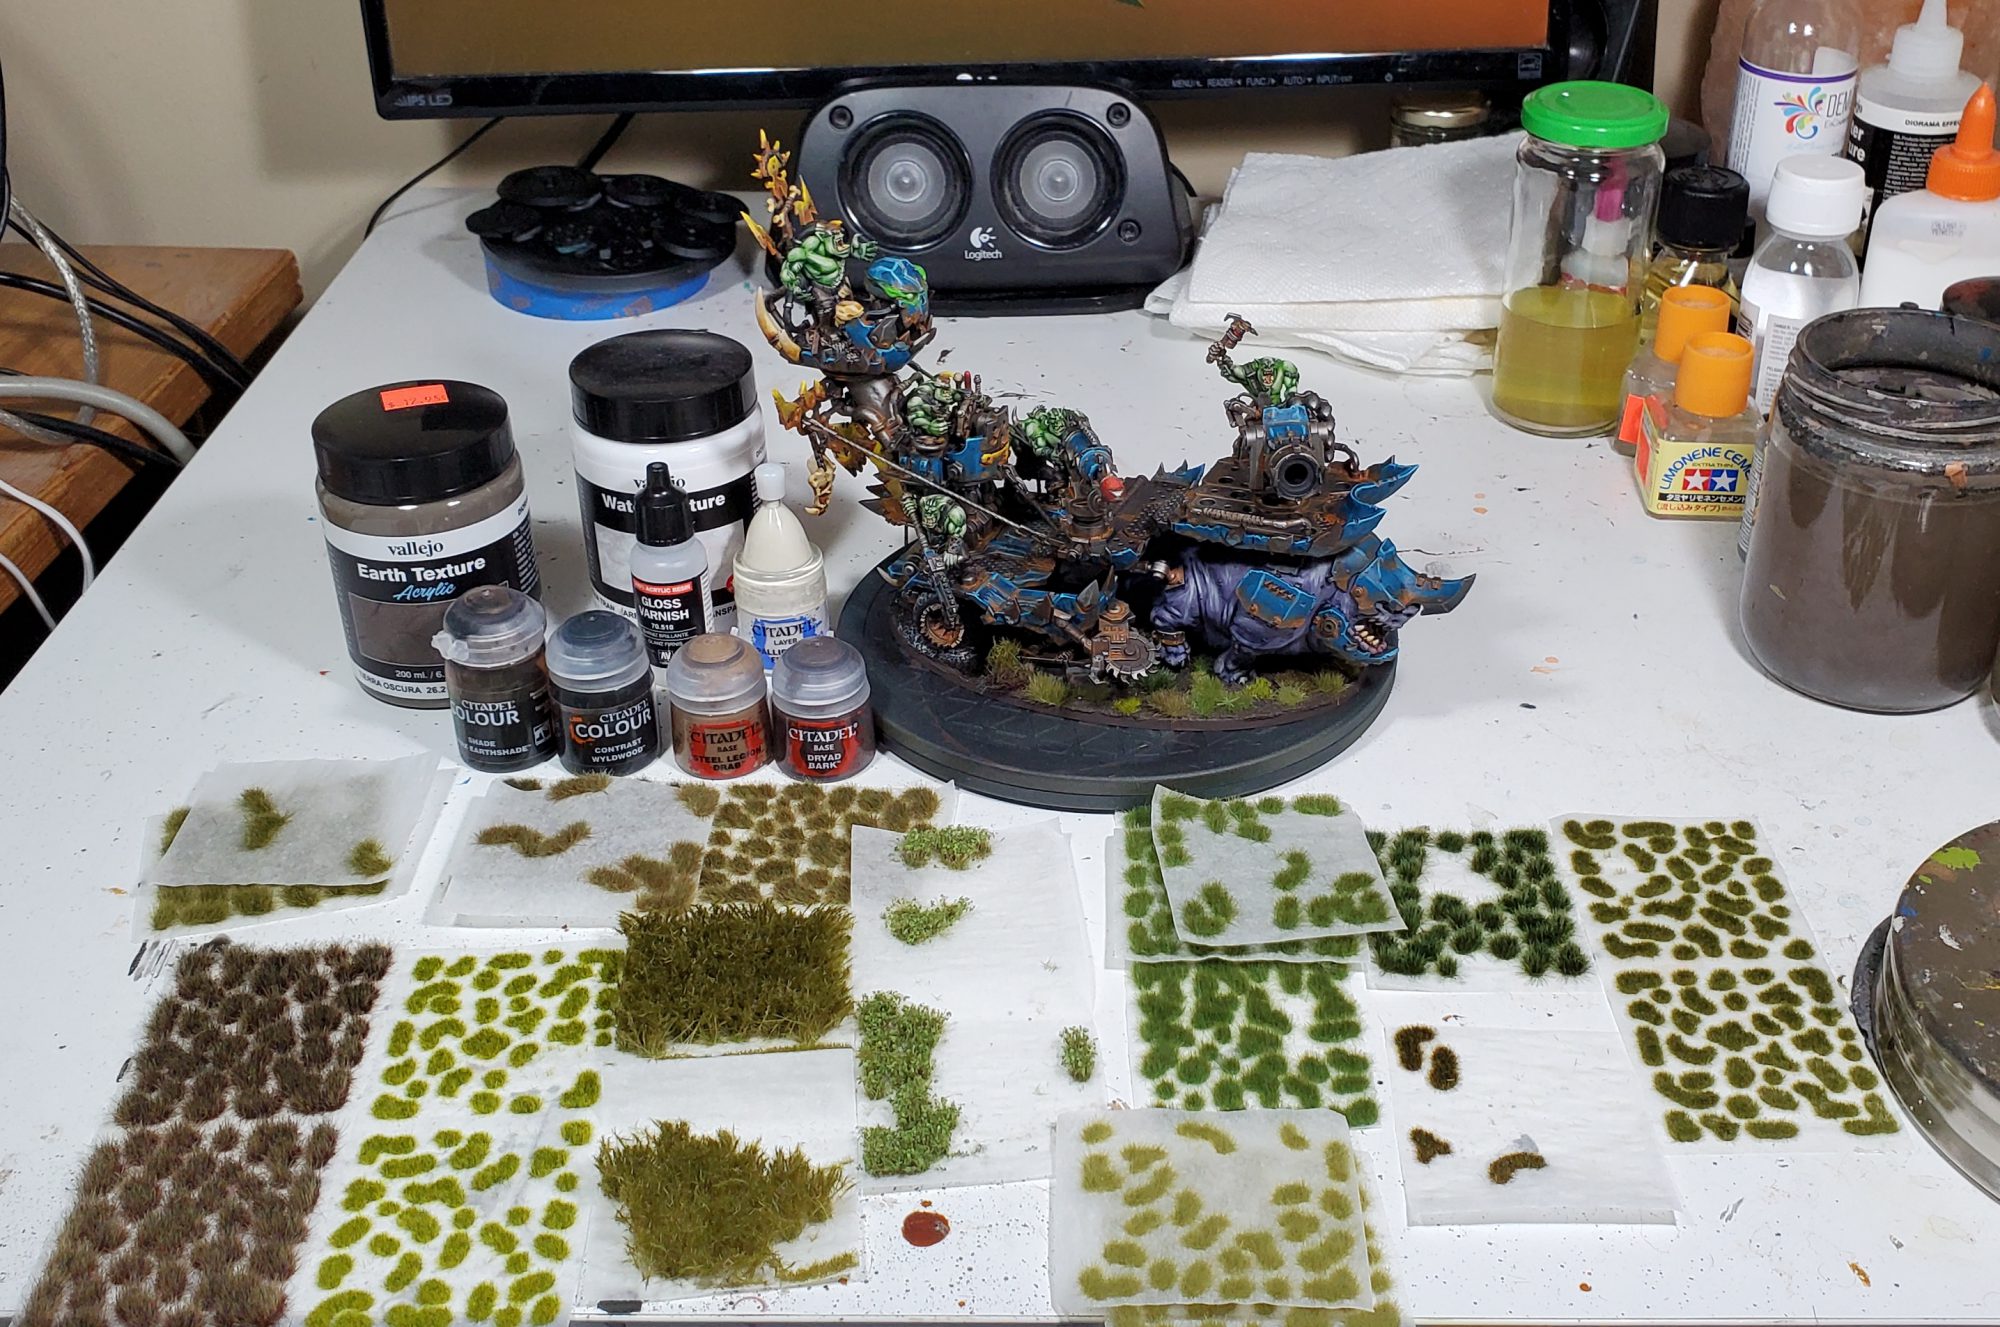
For this I cover the entire base of the mini with Vallejo dark earth texture paste, leaving the river/lake thinner and visibly lower then the bank. I then further differentiate the bank by using Agrax there and Wyldwood where it will be wet, after that I drybrush just the bank with Steel Legion before varnishing the model with vallejo premium air matte.
We make the water wet by applying a thick coat of gloss varnish, then once that's dry I sculpt in ripples with Vallejo Transparent Water Texture which is supposed to dry fully transparent but thats a bit unreliable I have found. Fortunately for out purposes thats not a big deal as anything which is supposed to be in motion gets a overloaded drybrush of Pallid Wych.
Once the water is done I apply Dryad to the rim of the base and throw on a big assortment of Gamers Grass tufts:
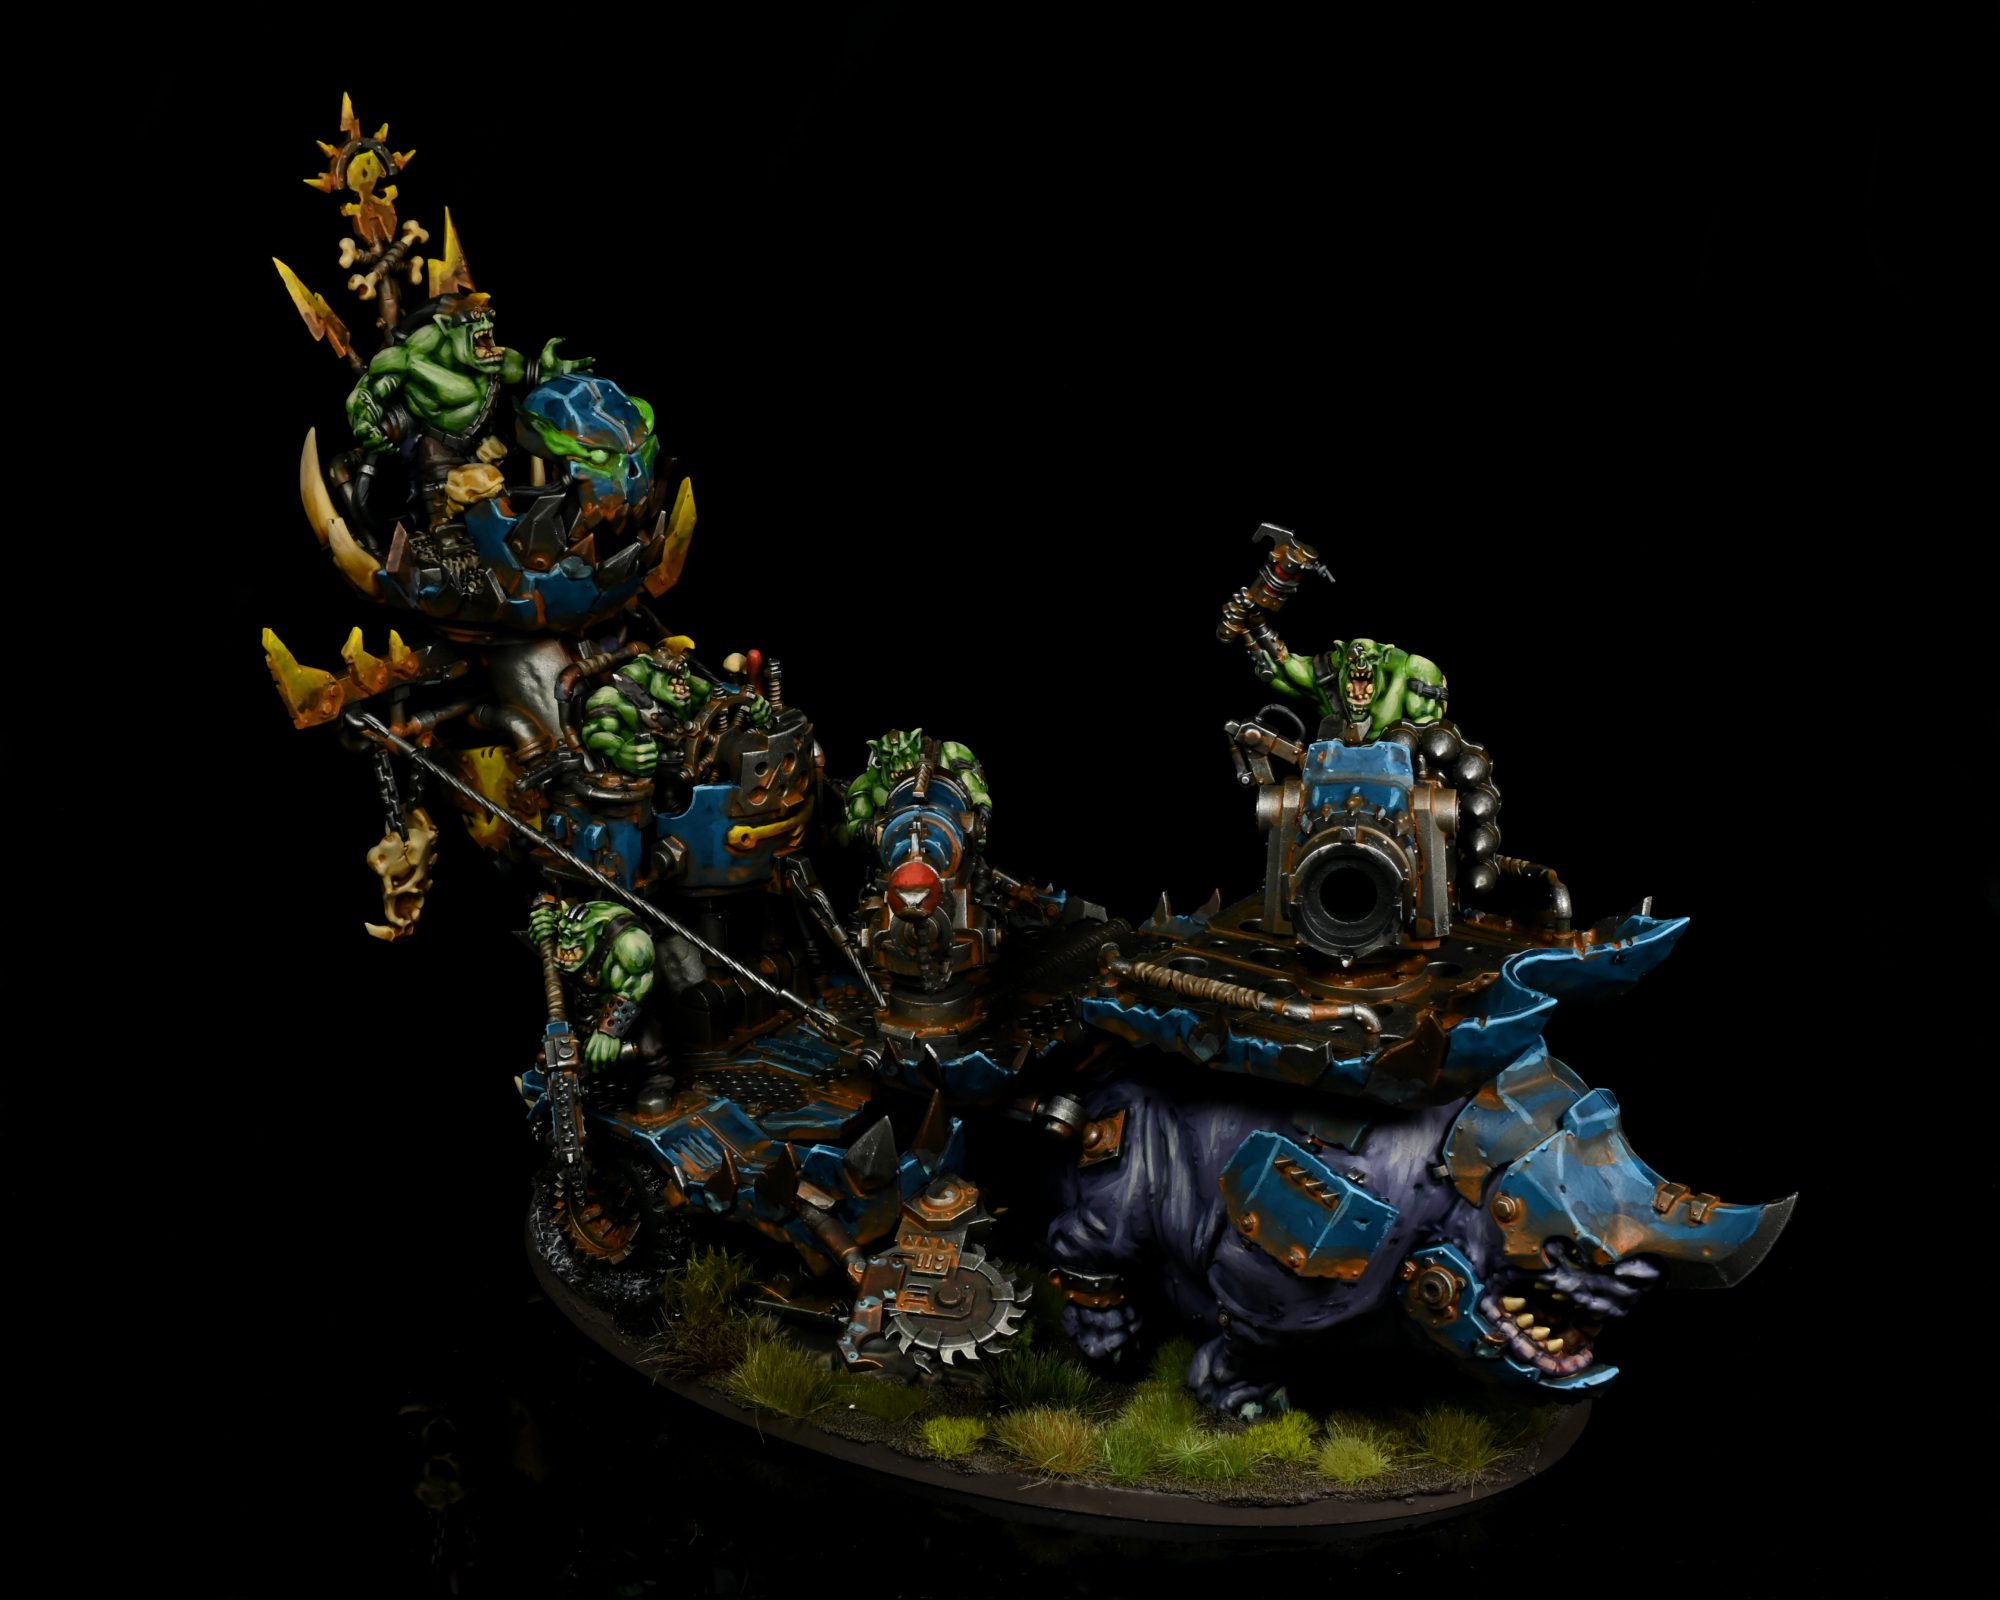
With that the model is done!
 Kill Rig. Credit: Rockfish
 Kill Rig. Credit: Rockfish
 Kill Rig. Credit: Rockfish
 Kill Rig. Credit: Rockfish
 Kill Rig. Credit: Rockfish
 Kill Rig. Credit: Rockfish
Tags: 40k | hobby | How to Paint Everything | Orks | Warhammer 04k

Thank you for being a friend.
 Goonhammer App and Patron Updates: April, 2026
 Kill Team Tournament Report: Engage, Party, Repeat's March Madness 2026
 Goonhammer Reviews: Tribal Conquest
Support us on Patreon to get access to our Discord and exclusive App features.
Thank you for being a friend.
Already a Patron? Login with Patreon.
Visit our incredibly official store on RedBubble.
![]()
![]()
Support us on Patreon to get access to our Discord and exclusive App features.
Thank you for being a friend.