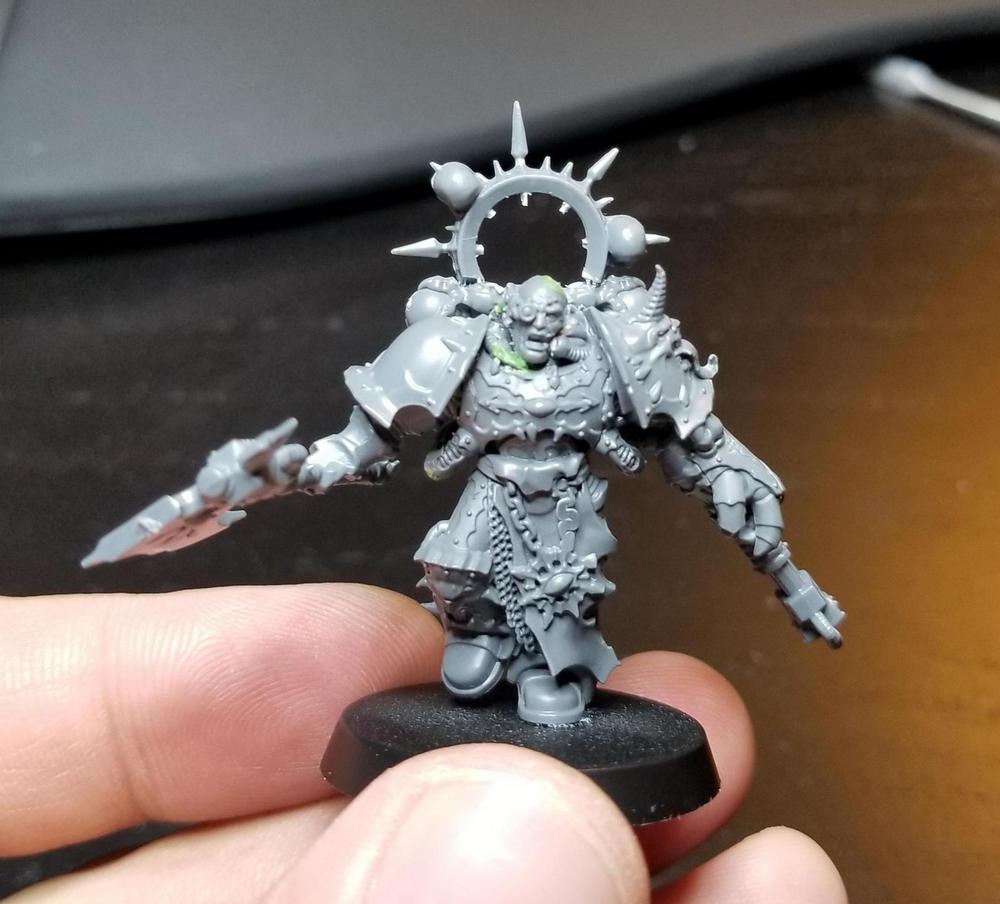
The Red Corsairs are a cool faction in the 40k lore and I'd wanted to do them for a long time, but they never really fit in with my plan to do the nine traitor legions. That changed back in 2019 when it turns out that every competitive CSM list in 8th edition needed a Red Corsairs Battalion detachment to proc an extra 3 CP. Truly wild times.
So I set out to paint a few squads of Red Corsairs for my army. This was right after the now-current plastic Chaos Space Marines had released, and I had a pretty fun time converting them and picking bits for them. For more on that process, check out the Heraldry section above.
I started by priming this model black.
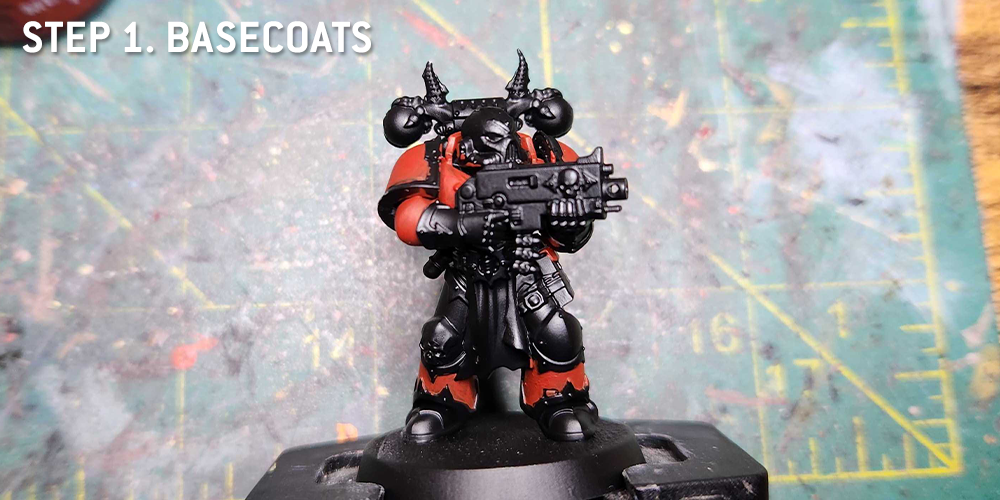
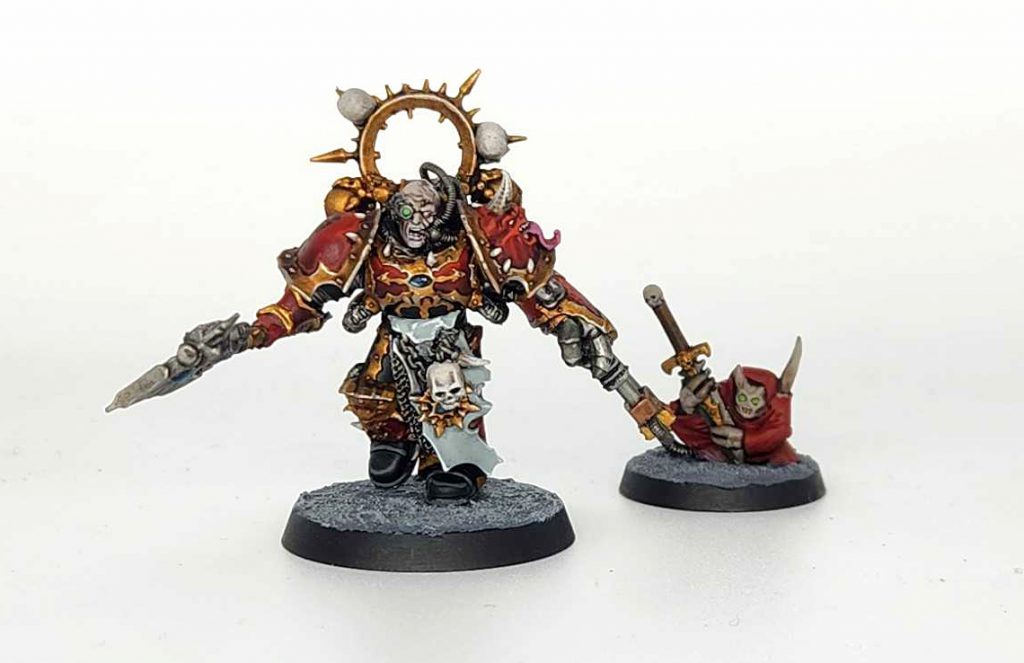
Step 1. Armor Basecoats
This starts by laying down the red basecoat. For this guy I went pretty simple, with red armor on the greaves, pauldrons, arms, and chest plate using
Mephiston Red. This is pretty much what I'd do as a "default" on my Red Corsairs. The general idea is to use black trim on red and gold trim on black. The other combos look OK but aren't really fitting the aesthetic I 'm goin for.
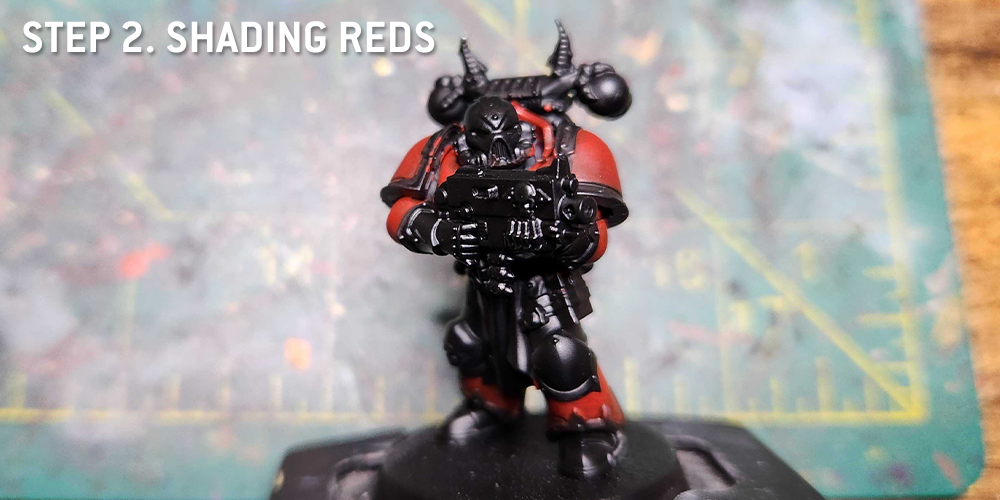
Step 2. Shading Reds
Next I shaded the red armor using a few thin coats of
Carroburg Crimson. The idea is to shade it by doing progressive layers moving downward on the armor to create a smoother transition from lighter red to darker red.
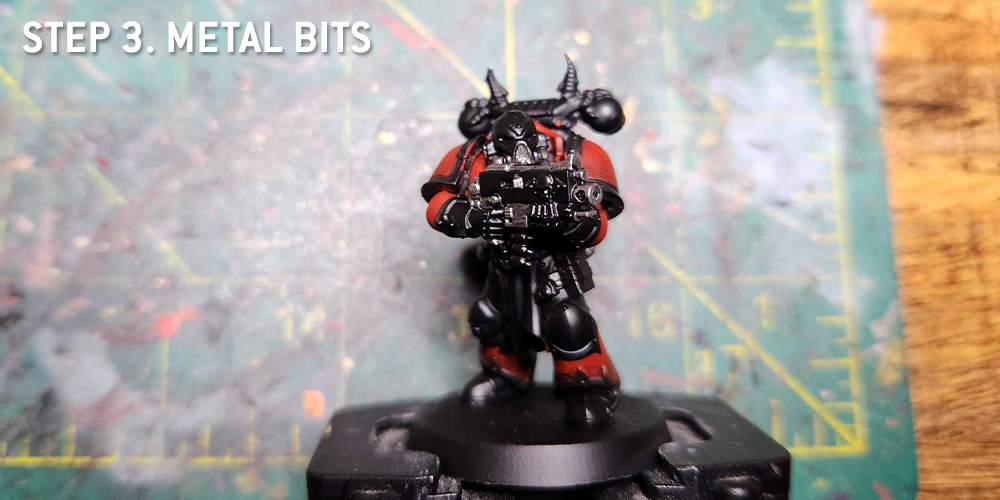
Step 3. Metal Bits
Next comes the metal bits - these are just painted
Leadbelcher. You can swap steps 2 and 3 if you want, but this step has to come before you highlight the black parts, as you want to get things like underarmor and the mouth grill painted before the black armor.
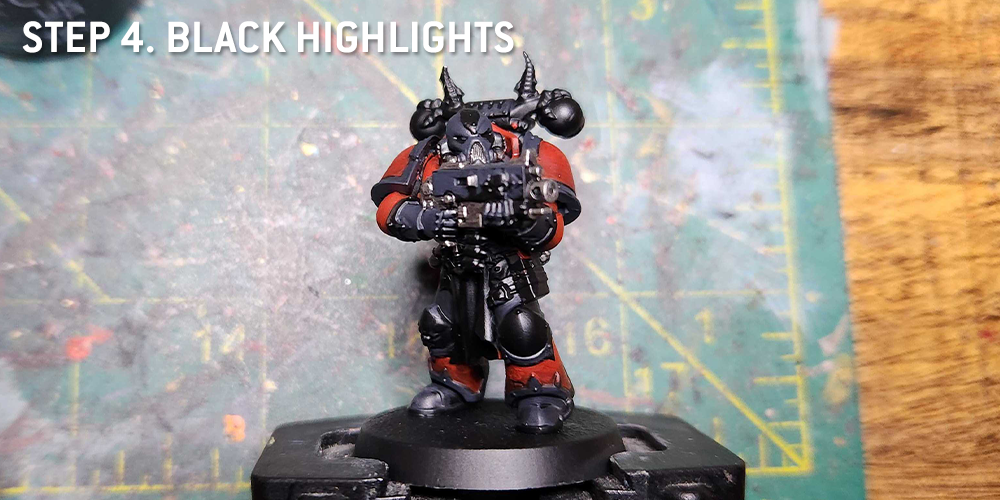
Step 4. Black Highlights
Now it's time to highlight the black parts. This is done with
Corvus Black, and I'll do this on not just the gauntlets and helmet but also the black trim on the red armor. In darker light you can't really see the transition from this to Abaddon Black, but it's worth smoothing the transitions, which I do with mixes of Corvus Black and Black Legion and some shades of Nuln Oil. I also shade the metal bits with Nuln Oil.
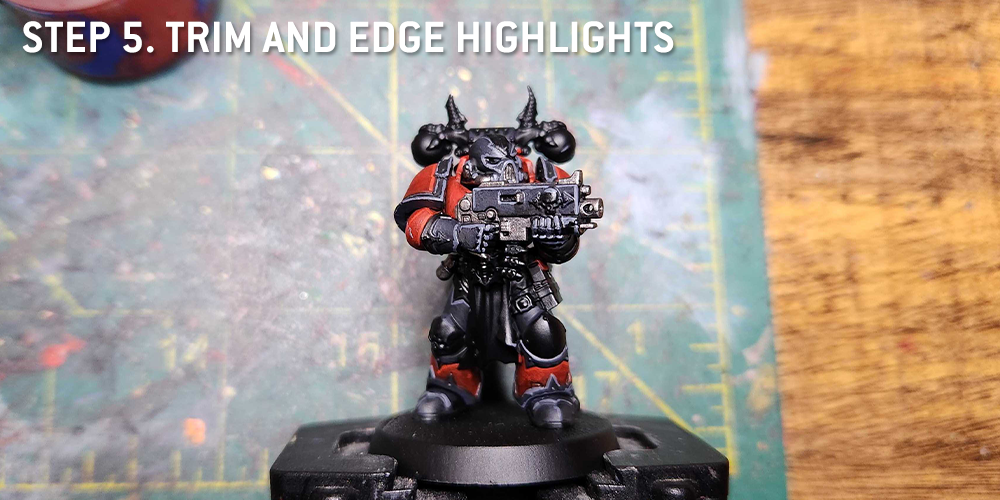
Step 5. Trim and Edge Highlights
Next up is to do all the edge highlights. On the red armor, this is done with
Evil Sunz Scarlet, doing interior panel lines around the trim. For the black armor, gun casing, and black armor trim, I'll do edge highlights with
Mechanicus Standard Grey. If you're going hard enough on these to do a second edge highlight, then I'd recommend
Wild Rider Red for an additional corner highlight on the red parts and
Celestra Grey for additional corner highlights on the black parts.
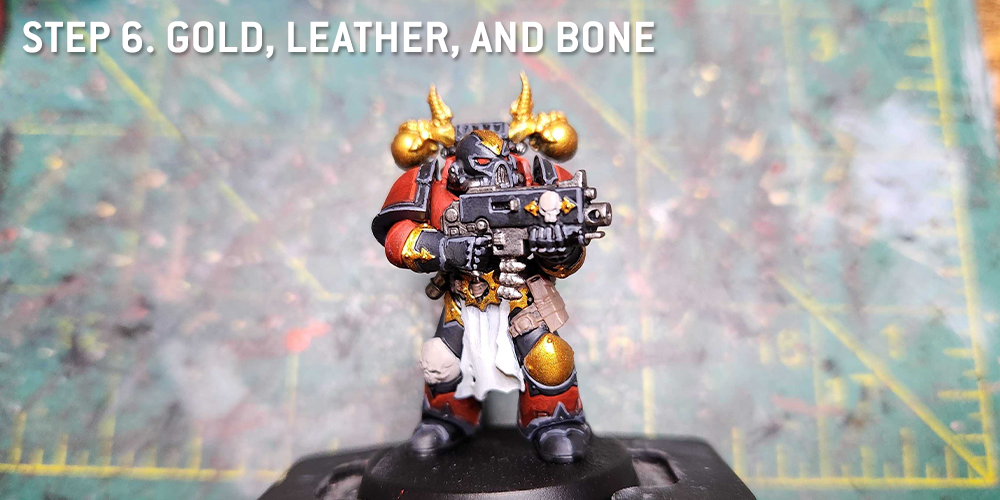
Step 6. Gold, Leather, and Bone
Next up is basically filling in the basecoats on all the other details. I paint the bone parts with
Rakarth Flesh, the leather with
Gorthor Brown, and the gold parts with
Retributor Armour. These all share a common element in that I'm going to wash them with the same color. I also paint the loincloth at this point, giving it a coat of
Grey Seer that I'll wash with
Apothecary White and highlight with Grey Seer and
Reaper Pure White.
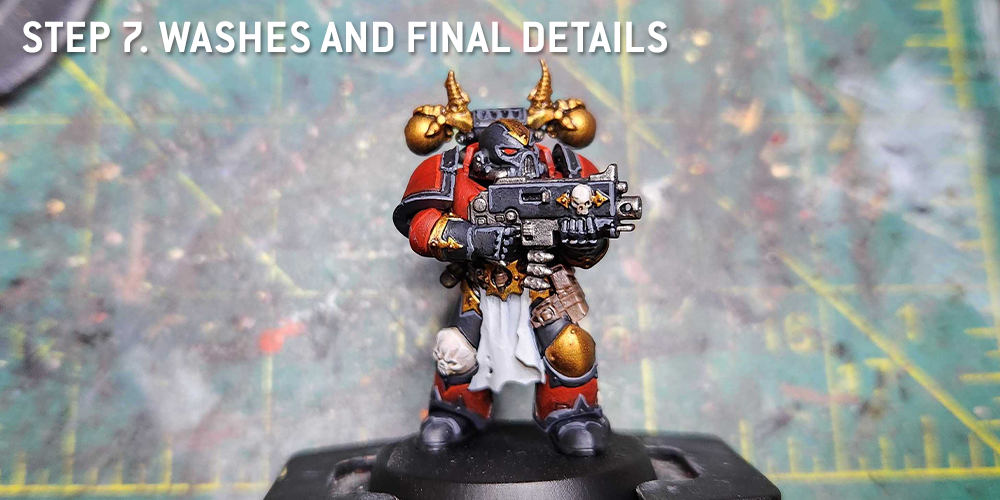
Step 7. Washes and Final Details
Time for the finishing touches. Those gold, bone, and leather elements all get a wash of
Agrax Earthshade, then they're highlighted with their base colors. For the bone parts, they'll get a second highlight pass of
Reaper Polished Bone. Depending on how hard I'm going, I'll also do rivets here. For gold trim and red armor, I'll do silver rivets with
Runefang Steel. For black armor and trim, I'll paint the rivets with
Retributor Armour, which just looks way better.
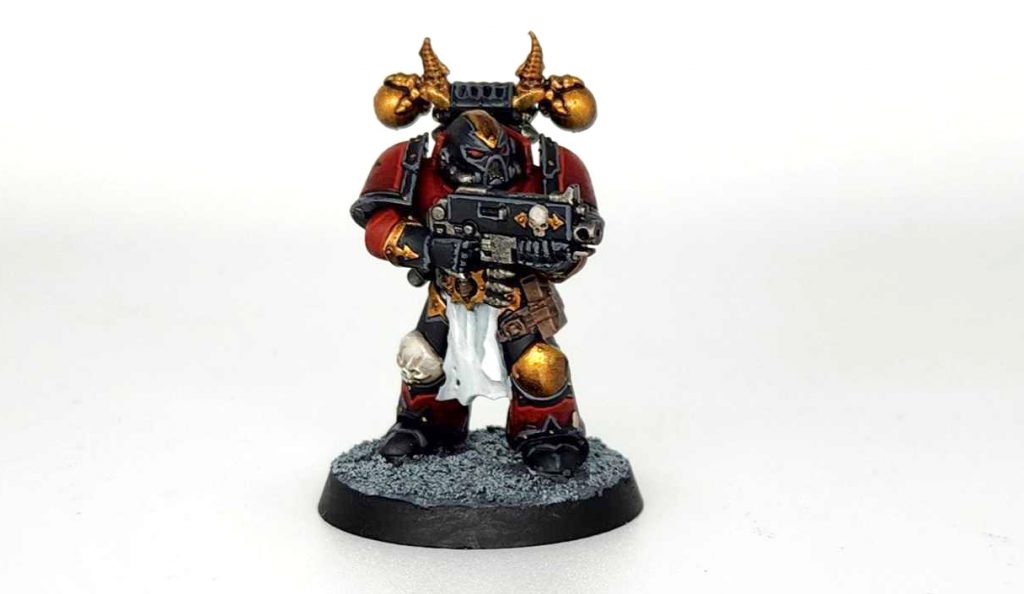
And that's it - I'm happy with the final model and I think the bit selection really goes a long way to communicating that this was a loyalist marine more recently. Now they just need a leader...
 Credit: Robert "TheChirurgeon" Jones


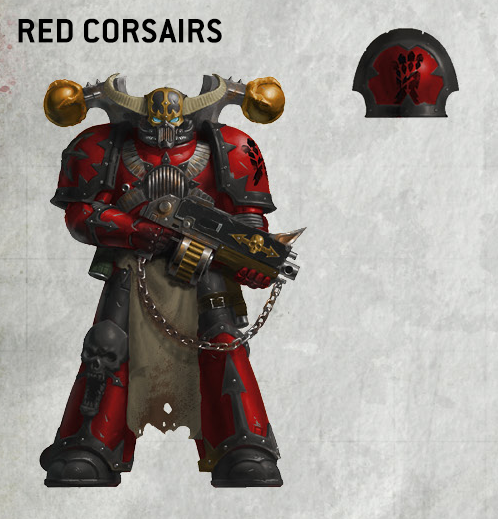 Credit: Games Workshop
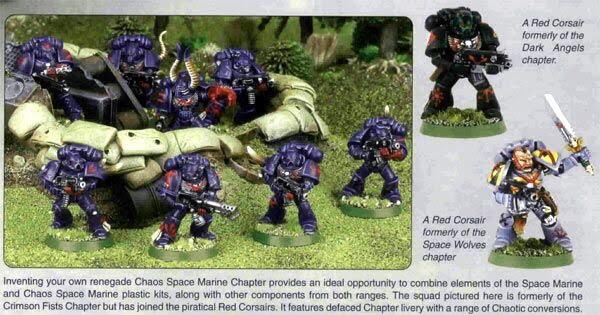
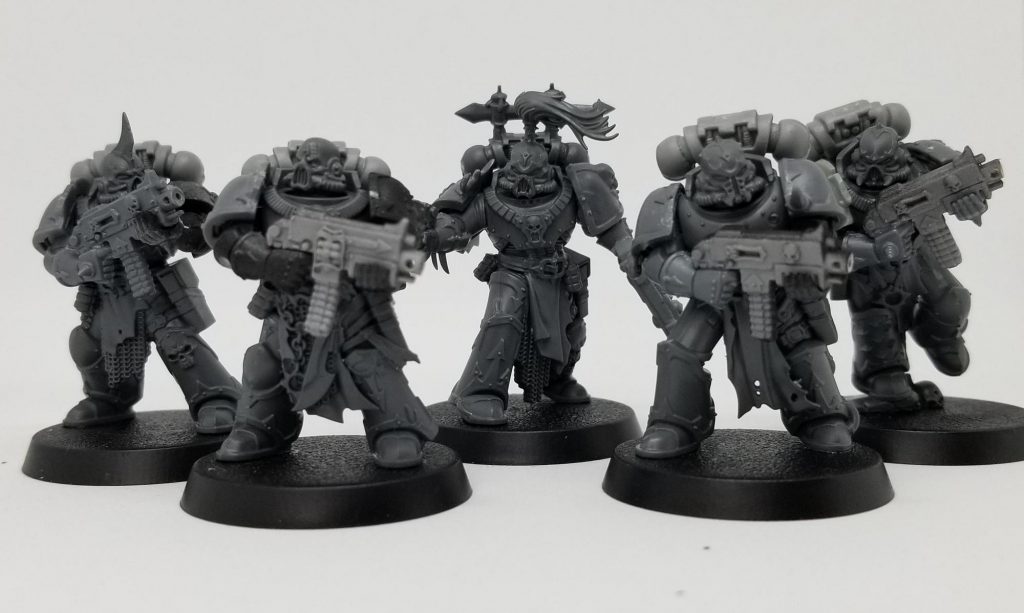 Red Corsair conversions using older Space Marine and CSM bits
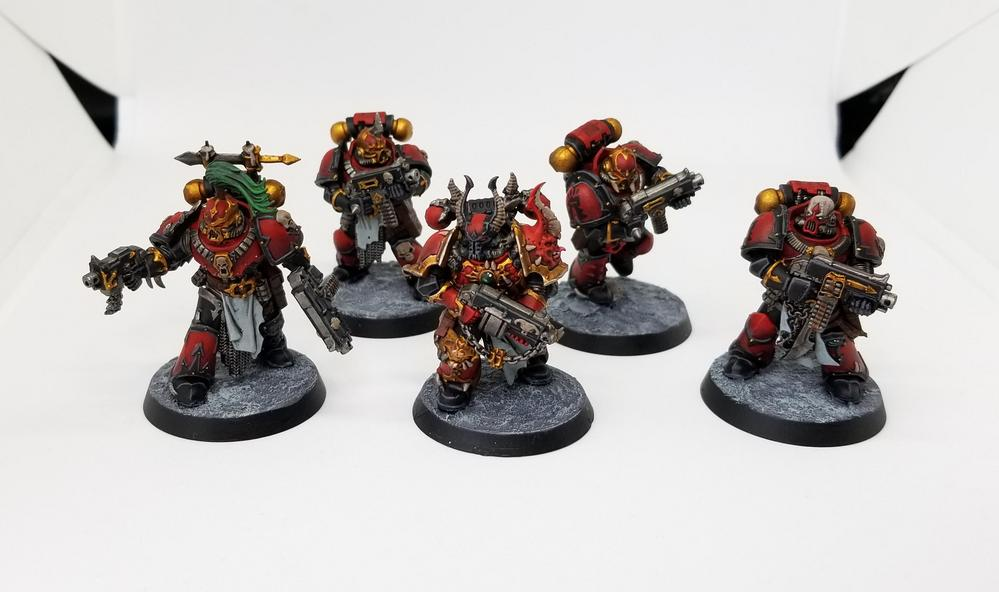 Photo & Models: TheChirurgeon
 Credit: Games Workshop


 Credit: Robert "TheChirurgeon" Jones

 Goonhammer App and Patron Updates: April, 2026
 Kill Team Tournament Report: Engage, Party, Repeat's March Madness 2026
 Goonhammer Reviews: Tribal Conquest