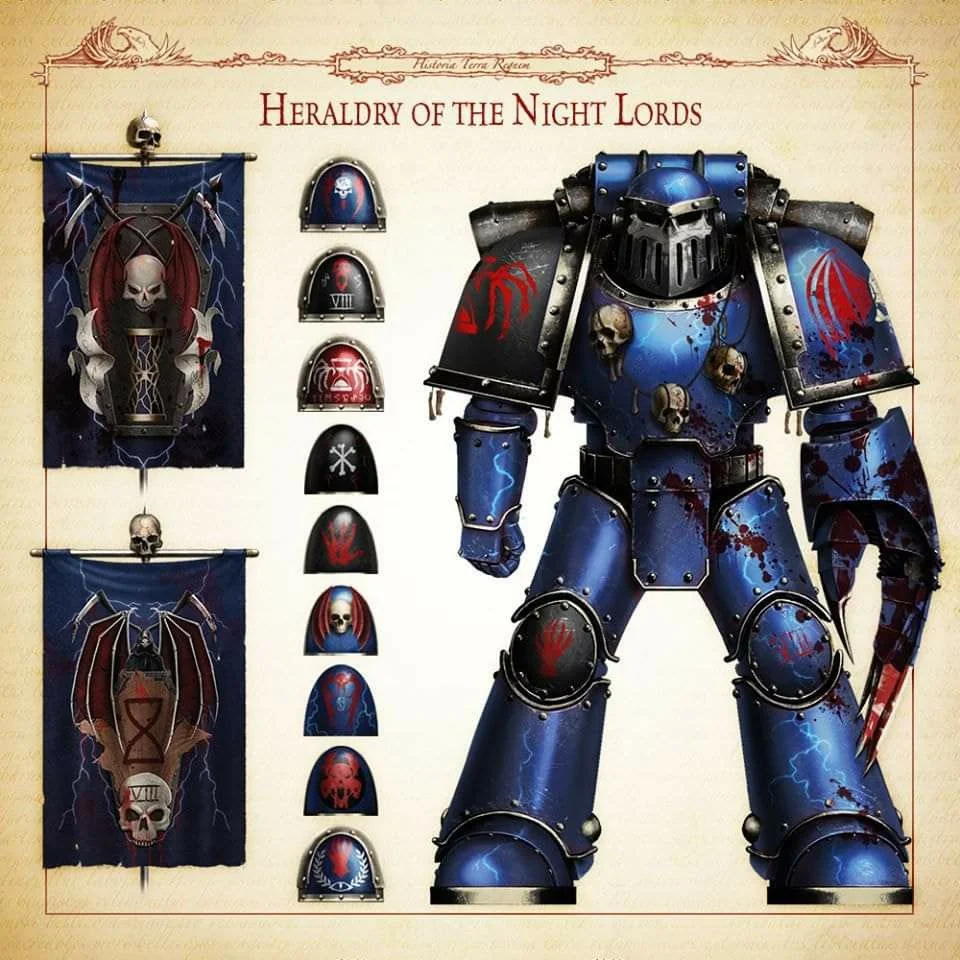
I fell in love with Night Lords back in 2nd edition, when they were inexplicably the studio army for Chaos Space Marines. In retrospect, they were an absolutely
terrible choice for a first army to paint, just because of the sheer difficulty of their paint scheme, but they've always been my favorites so I'm glad I started with them. Most of my Night Lords are
older, metal models at this point, but I occasionally paint some new stuff for the army. I also still scour ebay for decent 2nd edition metal finds to add to the army, though. Painting-wise, I've changed how I paint these guys significantly over the last few years. I used to paint them a much lighter blue, such that they almost resembled Ultramarines, then I started shading those marines with Drakenhof Nightshade and Nuln Oil to get a darker look. These days I've got a more reasonable, consistent way of painting them that starts with
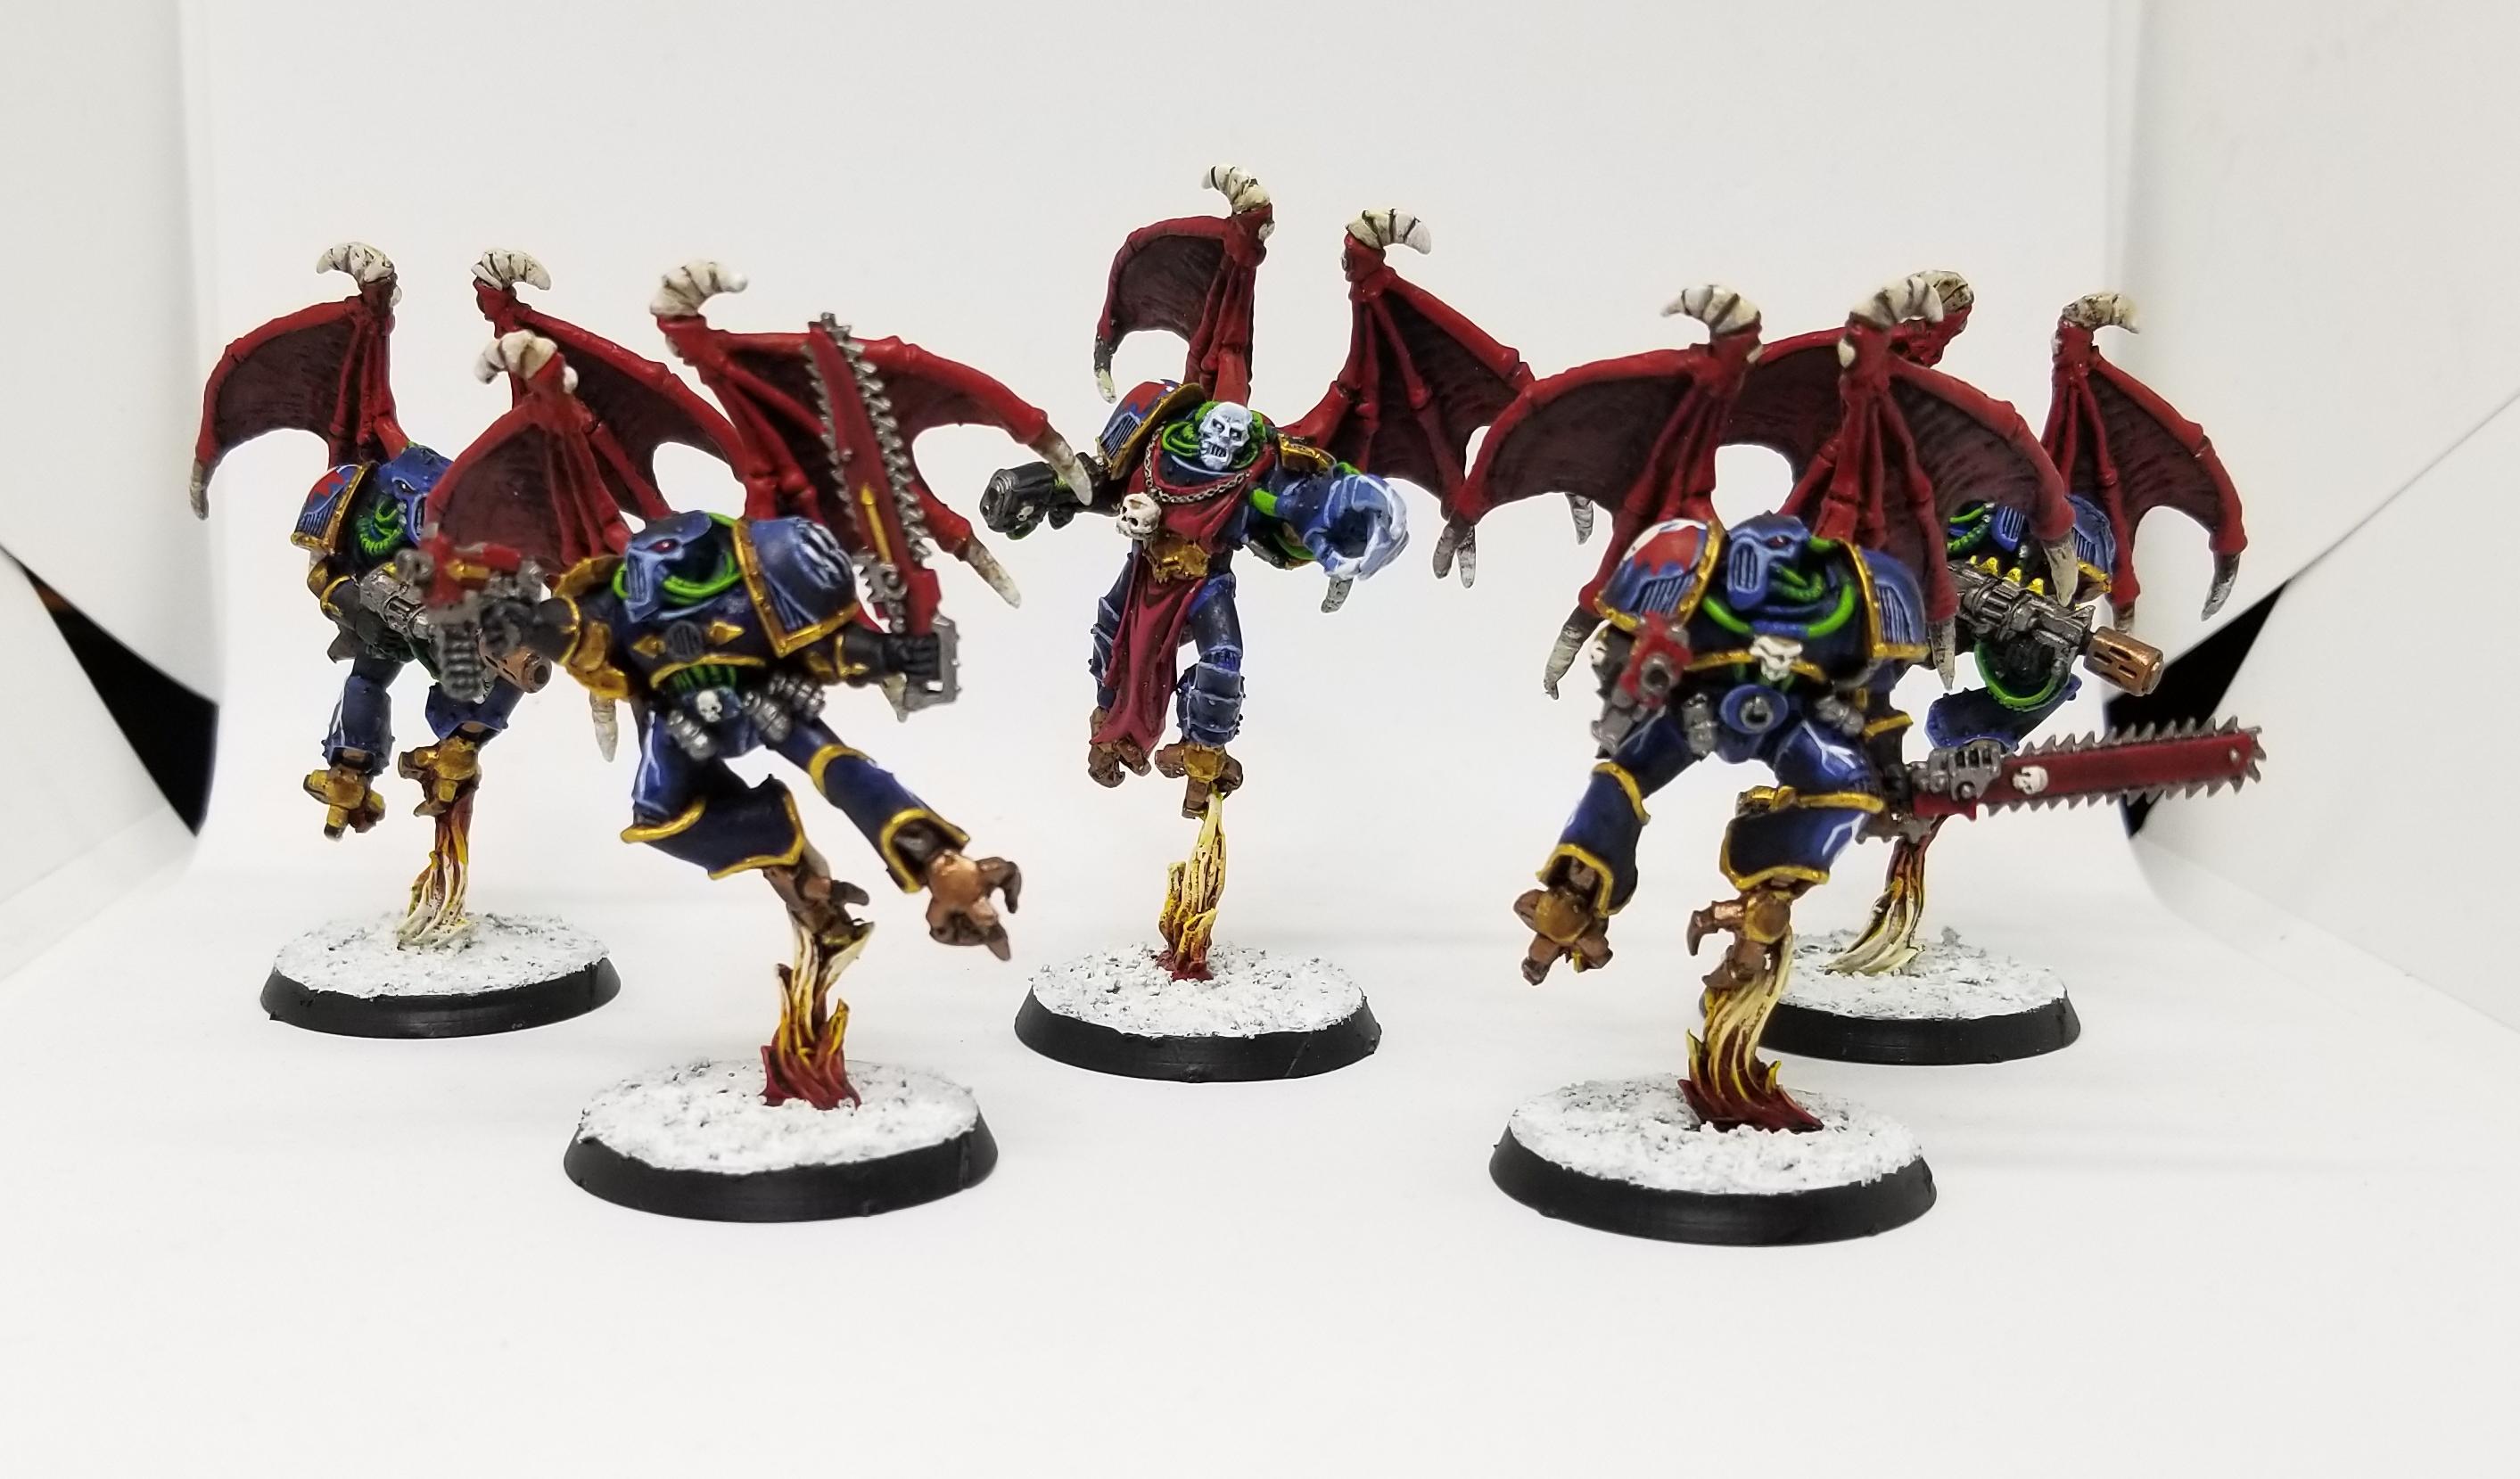
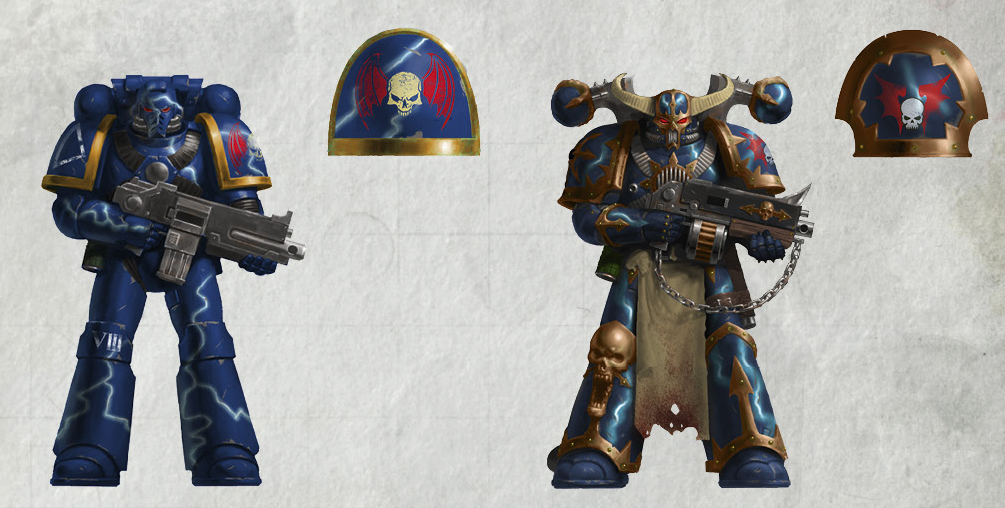
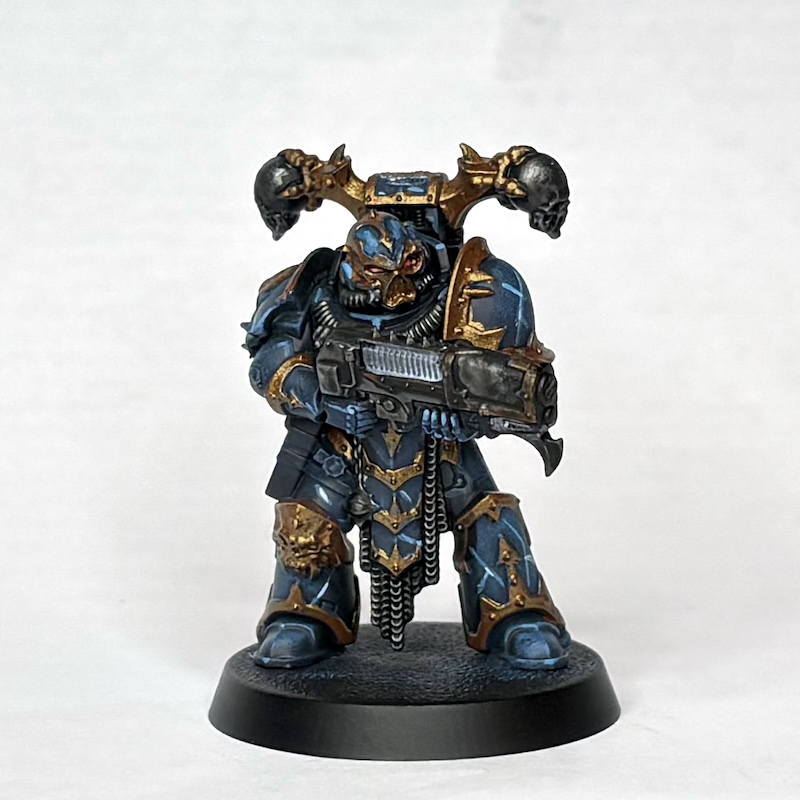
Night Lords Blue. Even with my new scheme, my Night Lords are modeled off the 2nd edition paint scheme, which means I use bright reds for their weapons and greens for their cabling.
 Credit: Robert "TheChirurgeon" Jones
Because this paint scheme requires a little more work than usual, I've got a full step-by-step planned today instead of just a quick color rundown. Note that I don't use an airbrush when I paint, and doing the lightning bolts and highlights with an airbrush is almost certainly easier, particularly when it comes to doing gradients.
So let's walk through this:
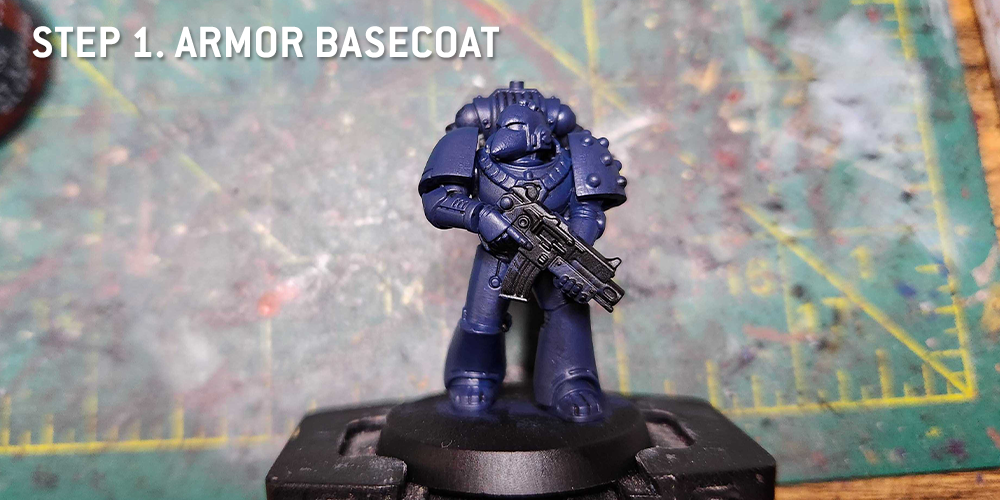
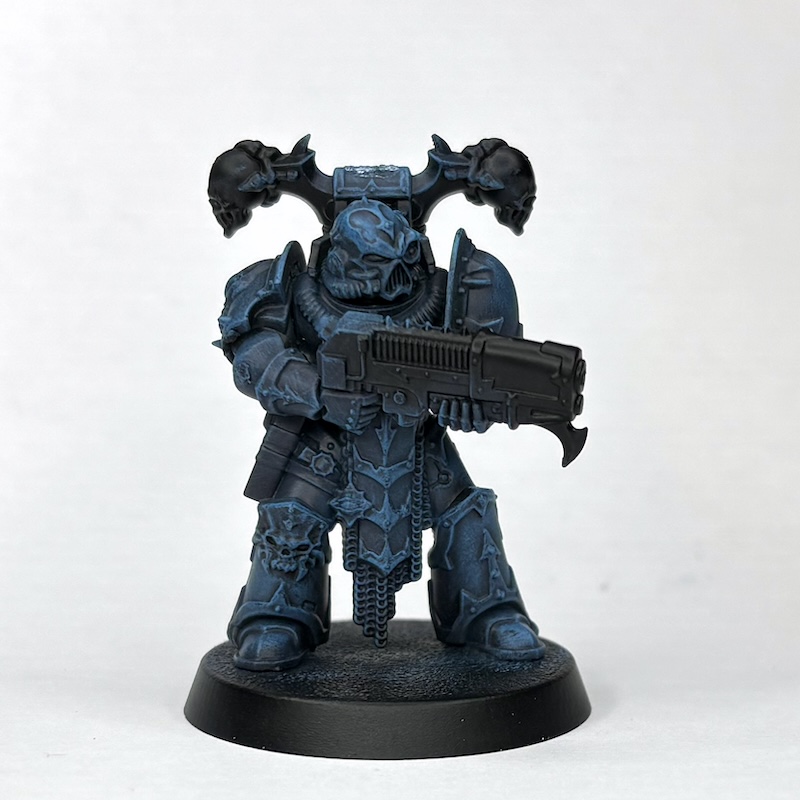
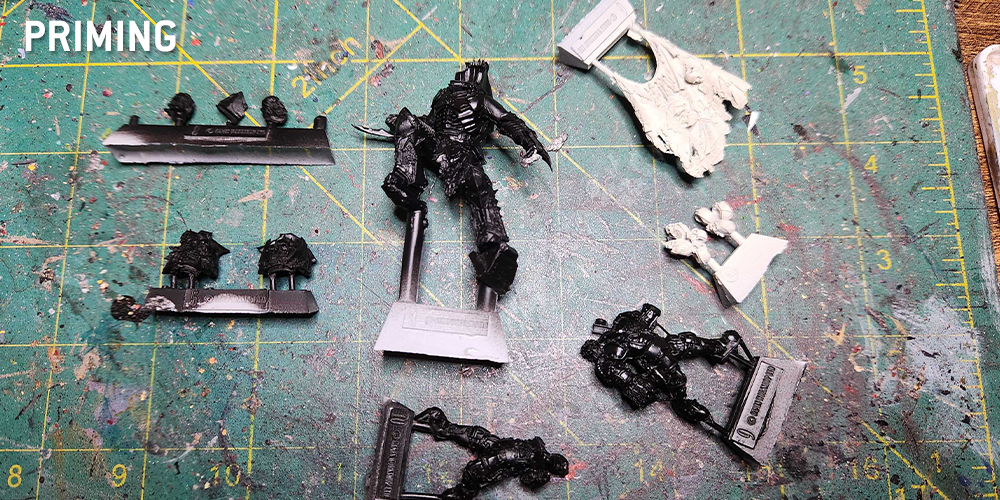
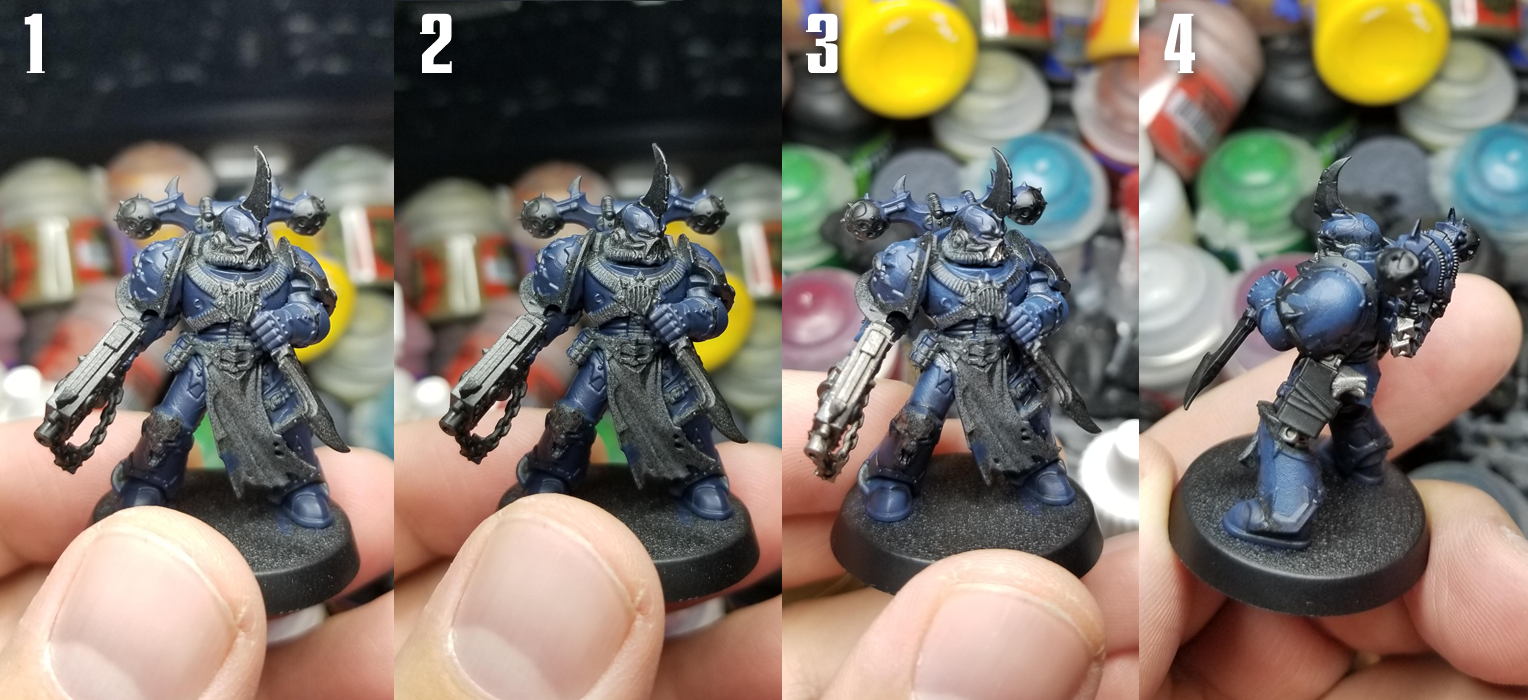 0. Prime Black
 - Always black, but this is especially true for Night Lords, whose armor is midnight blue.
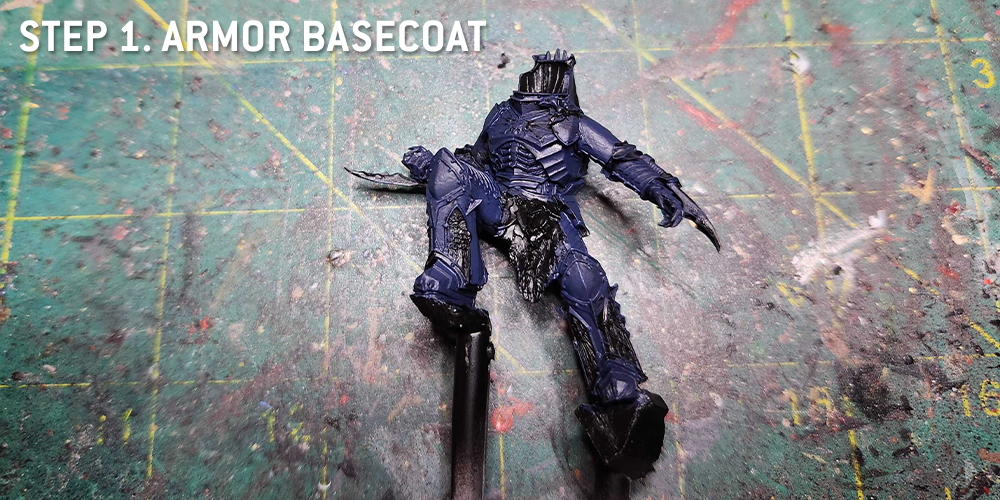
1. Basecoat with Night Lords Blue - The new Night Lords Blue is great. It's a little more saturated than Kantor Blue, and it's the right darkness level to start with. Give your primed mini two thin coats of Night Lords Blue, and put an extra thin layer on the top spots to make them a little bluer.
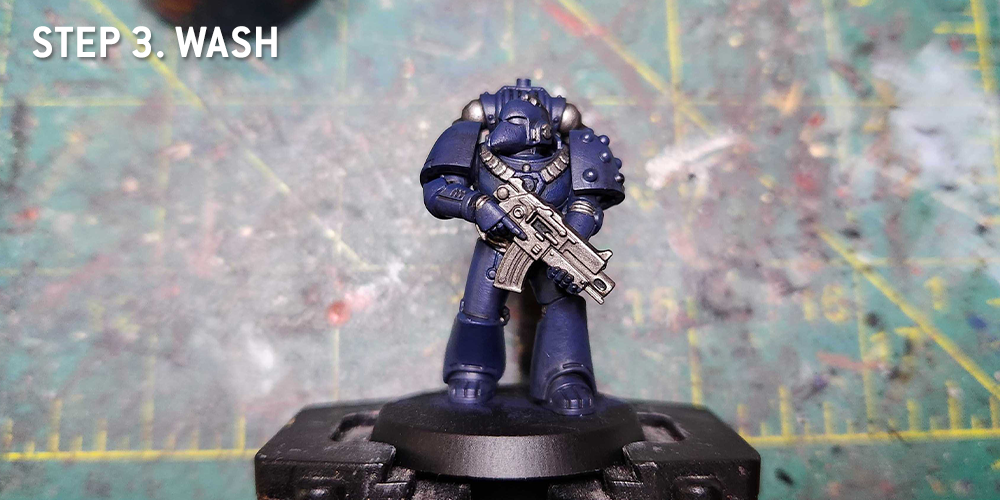
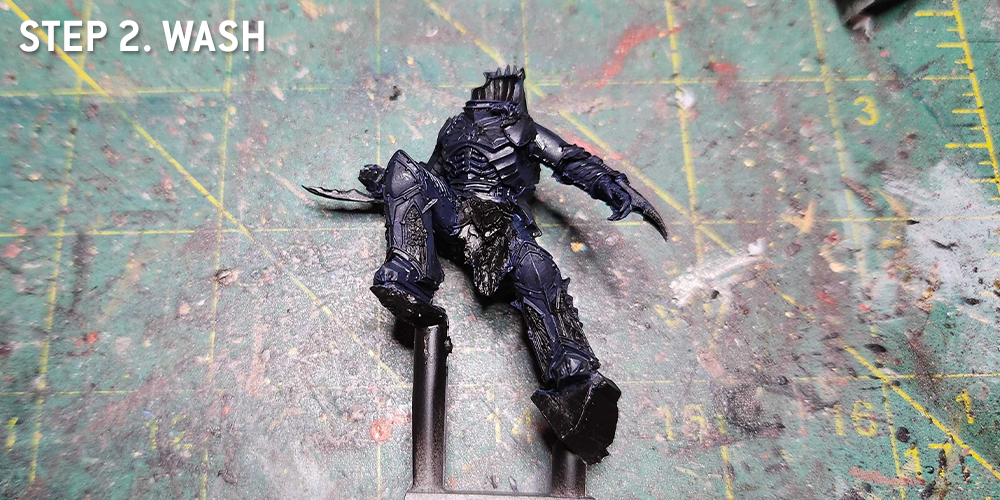
2. Coat with Nuln Oil - Most of the infantry I paint follows a basecoat > shade > coat > highlight process, and that's true here. Cover your model in Nuln Oil, and hit the lower areas and edges with a second coat of Nuln Oil.
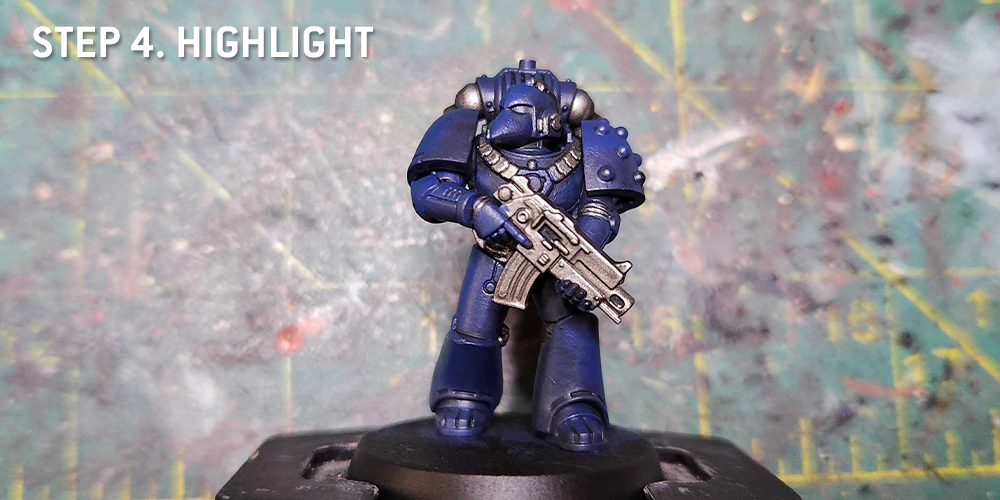
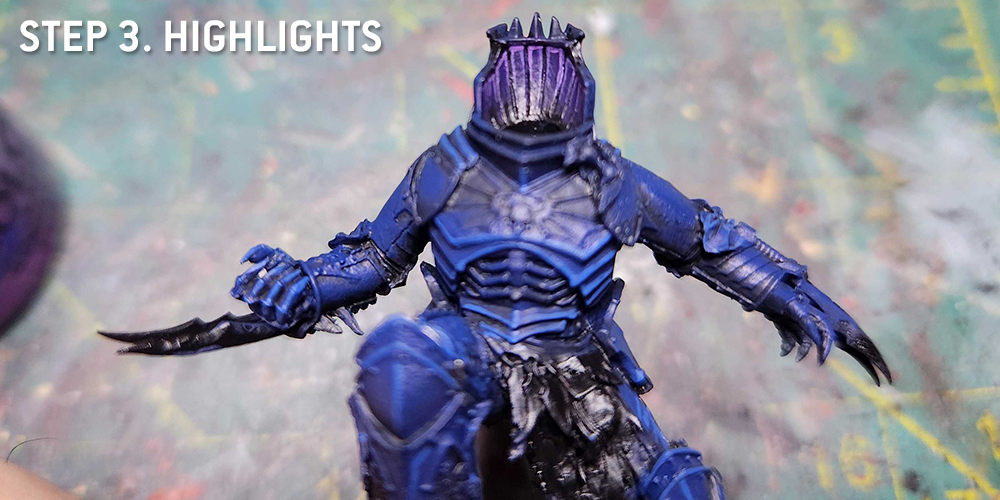
3. Layer on the blue again - Here's where I come back in with a second layer of Night Lords Blue, then I mix that with a few drops of
Reaper Snow Shadow (you could also use Ulthuan Grey or another light blue for this) and do a few passes of progressively lighter blue, moving upward on the model, to get a blended look that puts lighter blues on the raised spots.
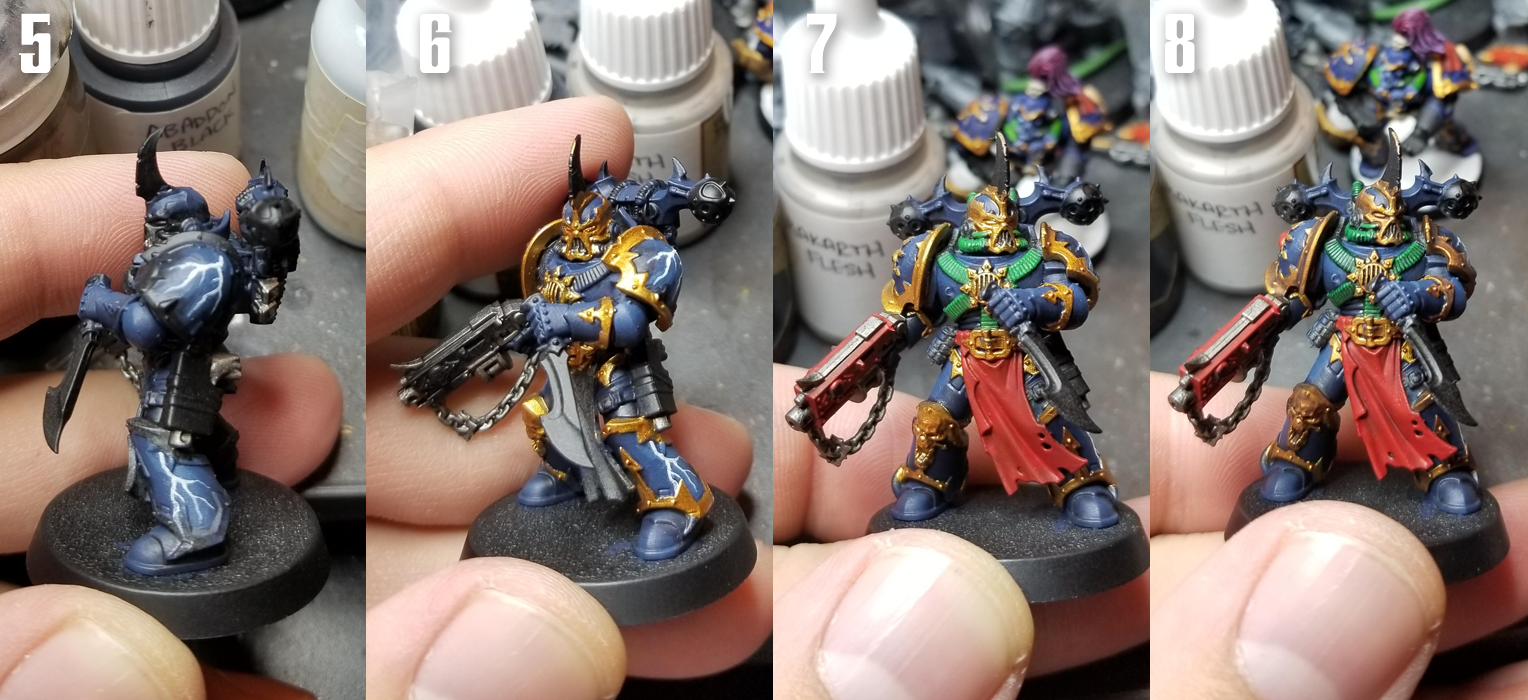
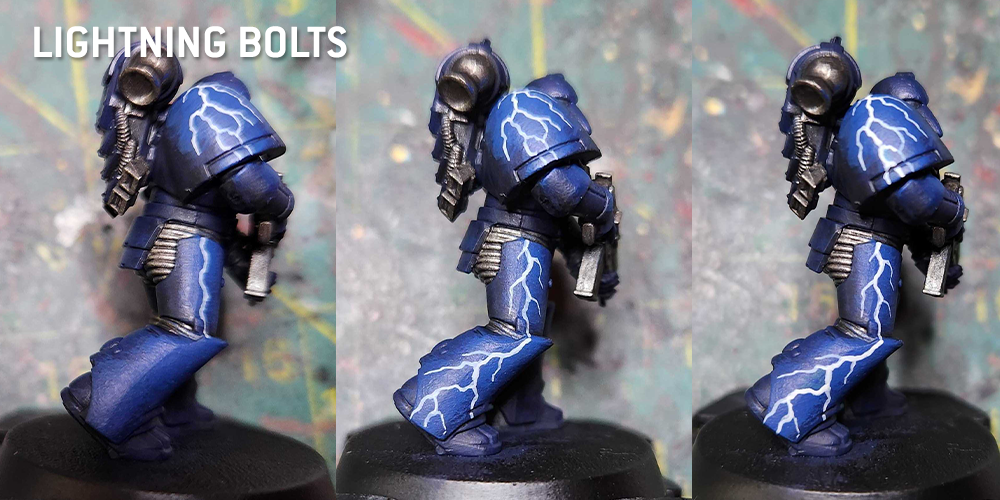
4. Block out the Lightning Bolt Auras - We're going to freehand in some lightning bolts, but we want to have lighter areas around where those bolts are going, so let's do that. At this step I use a lighter blue mix and I do a blobby blocking in around where the bolts will be. You can see this most readily on the shoulder pad.
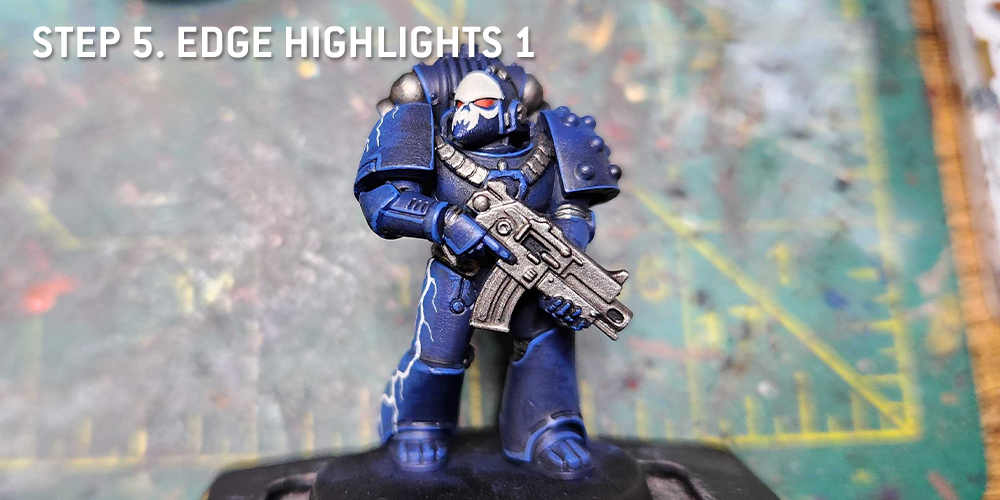
 5. Freehand in some Lightning Bolts
 - I do this using
Reaper Ghost White. If I'm doing larger bolts, I'll do a thinner bolt of
Reaper Pure White inside that, but for smaller models I just do the one off-white layer. I use a 10/0 brush for this. Put paint on your brush and start at the top, then drift downard using a light touch. Wherever your brush first touches the model is gonna get a drop of paint, so if you add branches I find it's easier to start higher up and go over the bolt center again. I do all this before I do the trim work, and I'll paint over the bolts a little as well. Generally, I do bolts on the shoulder pads, the sides of the thighs (if that space is open), and the sides of the greaves. On models with cleaner chest plates, I might add a bolt there as well, or on the tops of lightning claws.
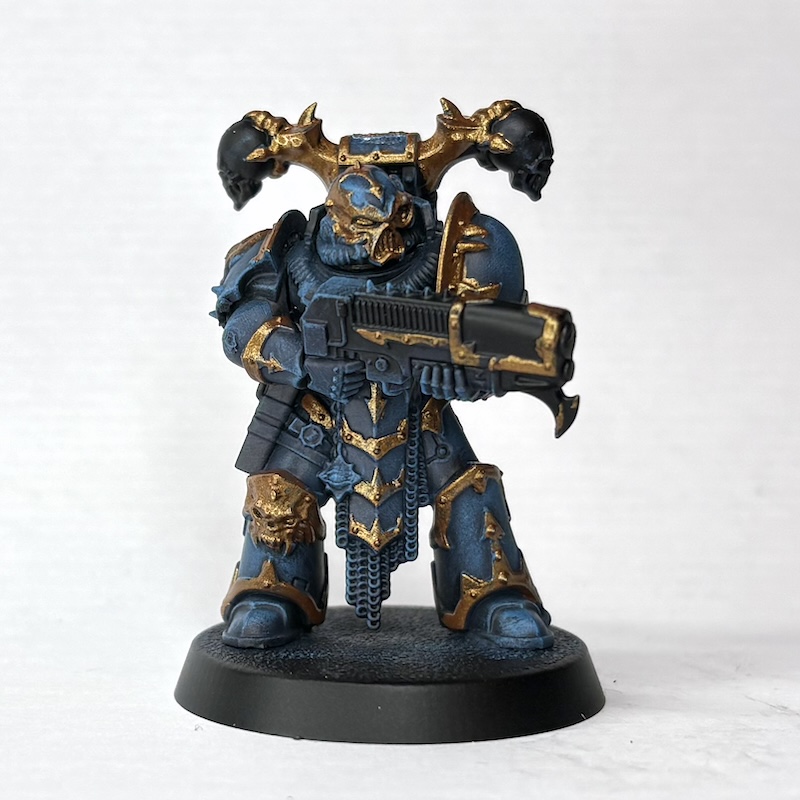
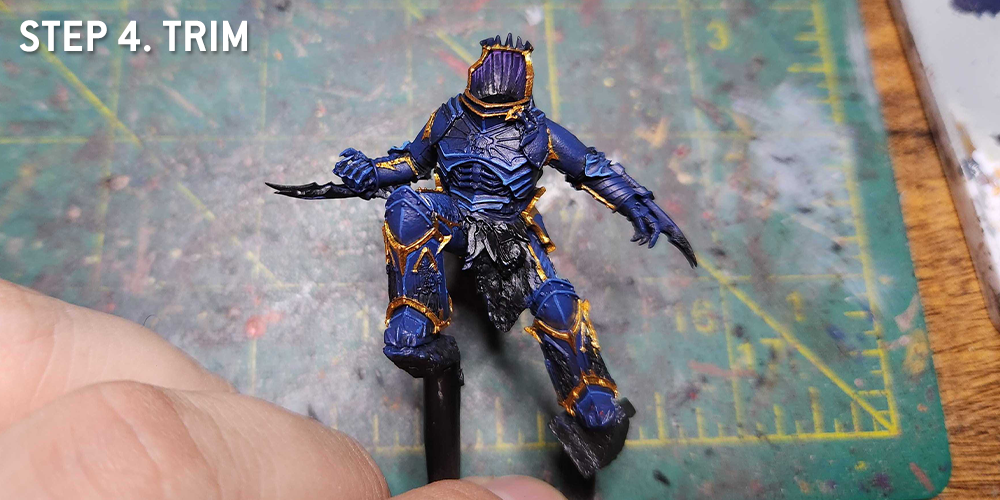
6. Gold Trim - I do my gold Trim with
Retributor Armour. I used to do it with Balthasar Gold, then a few layers of Auric Armour but that took forever and came out too yellow. This new method is faster and looks better. Basically I do Retributor then hit it with a couple coats of
Agrax Earthshade.
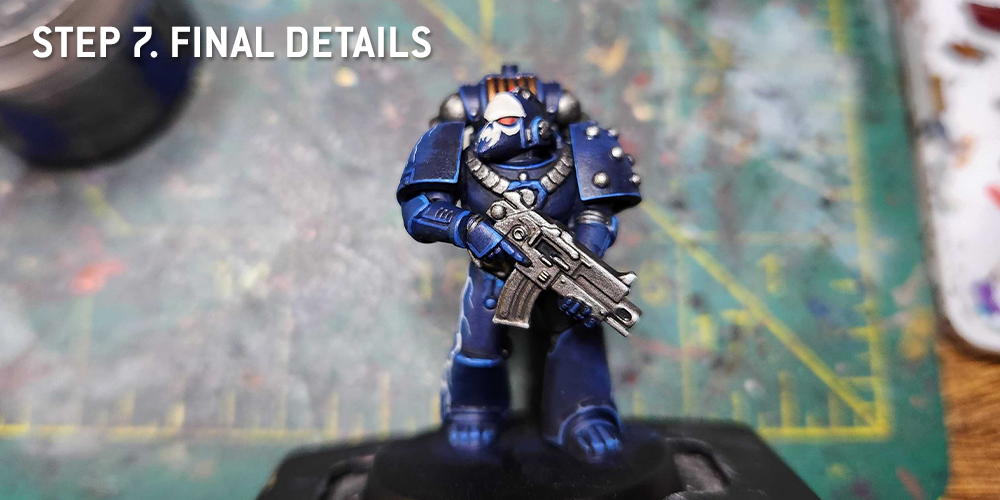
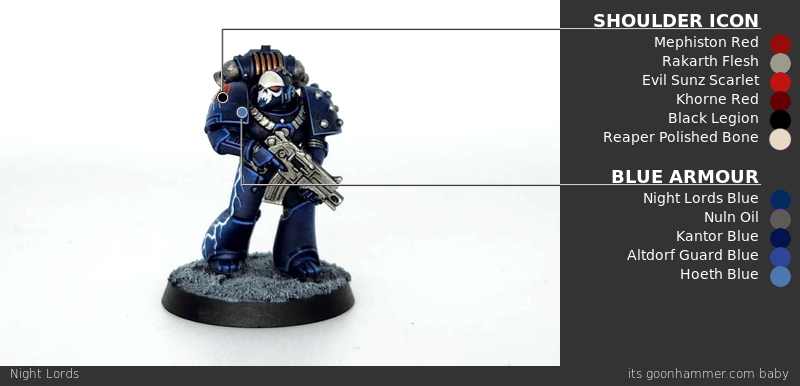
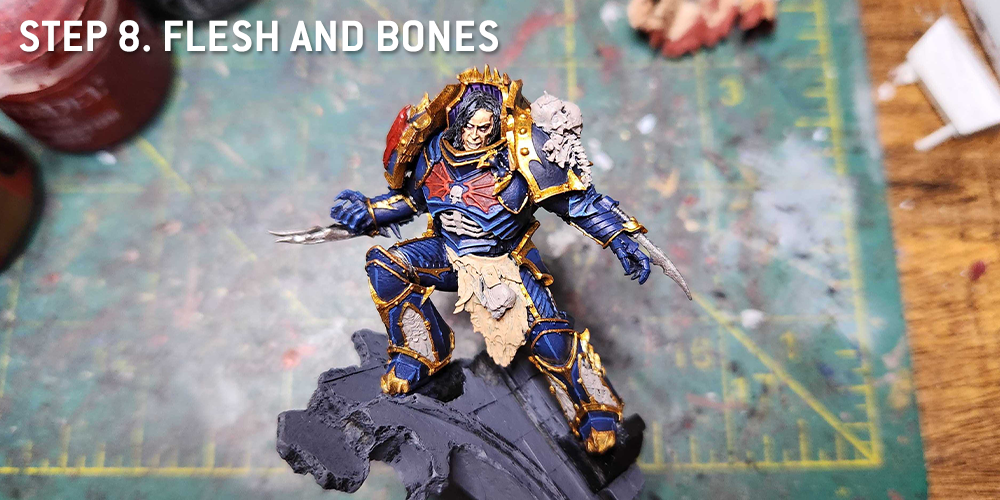
7. More Details - A good half the work on modern chaos models, particularly Night Lords, is filling in all the base colors. I use
Warpstone Glow for the cables,
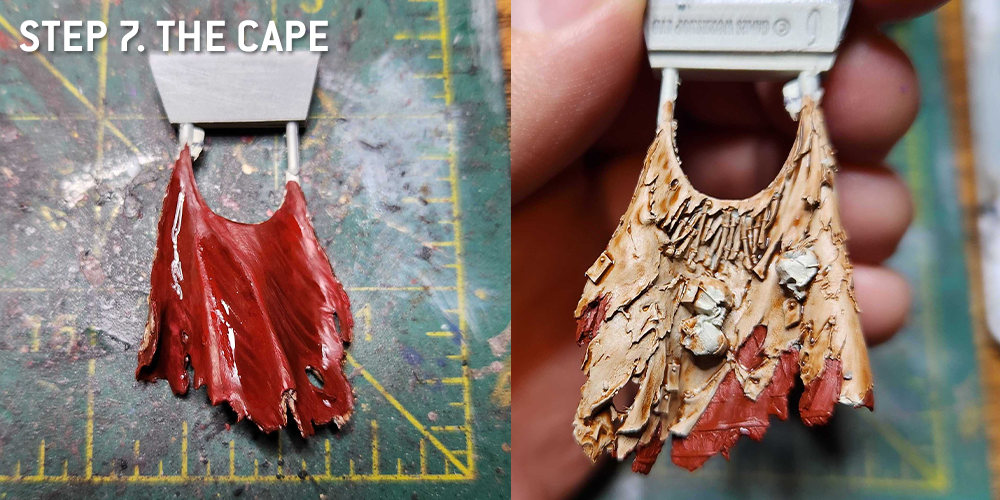
Mephiston Red for the cloth and bolter,
Rakarth Flesh for any bone parts,
Leadbelcher for the metals,
Balthasar Gold for the brass on the backpack exhaust parts, and
Mournfang Brown for the belts and holster. I used Mephiston Red for the gemstone too.
8. Washes - time to do some fast shading. I use
Carroburg Crimson on the red parts,
Nuln Oil on the metal parts,
Coelia Greenshade on the cabling, and
Agrax Earthshade on the gold trim and bone parts. I also use Carroburg Crimson and Nuln oil to shade the upper right corners of the gemstone.
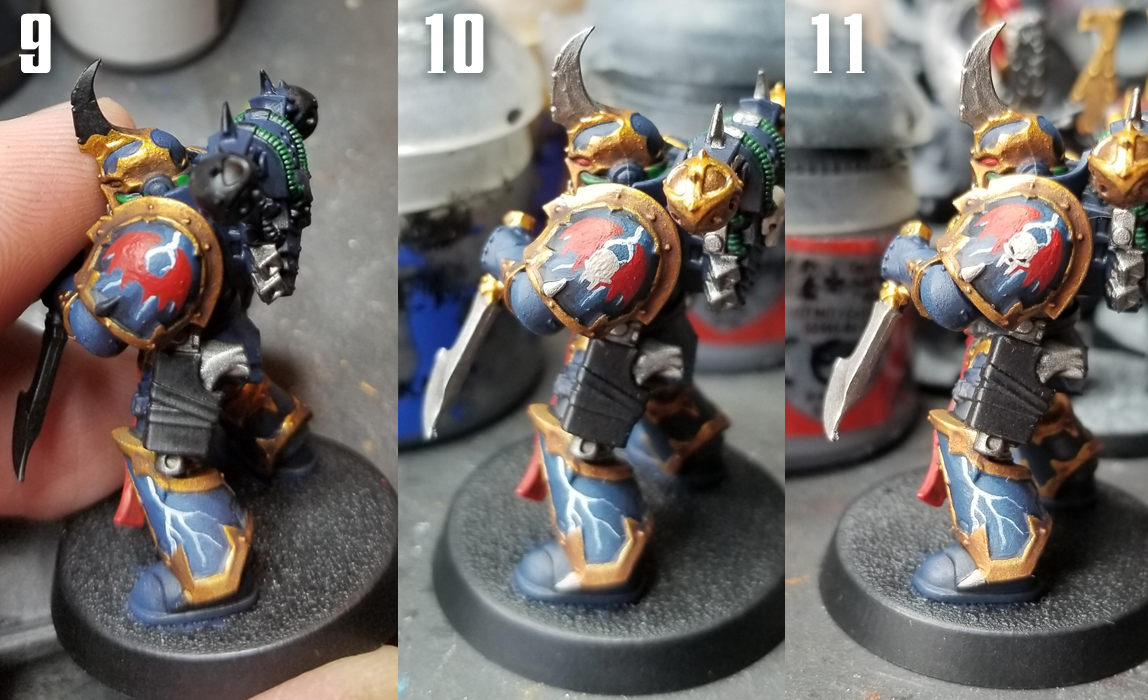
Ok, now it's time to paint the shoulder pad. I really dislike using transfers, and I hated how goofy the old Night Lords transfers looked and I hate trying to make transfers fit on rounded shoulder pads. So what I've been doing for the last few years is freehanding shoulder icons. And today, I'm going to show you how that process works for my night lords.
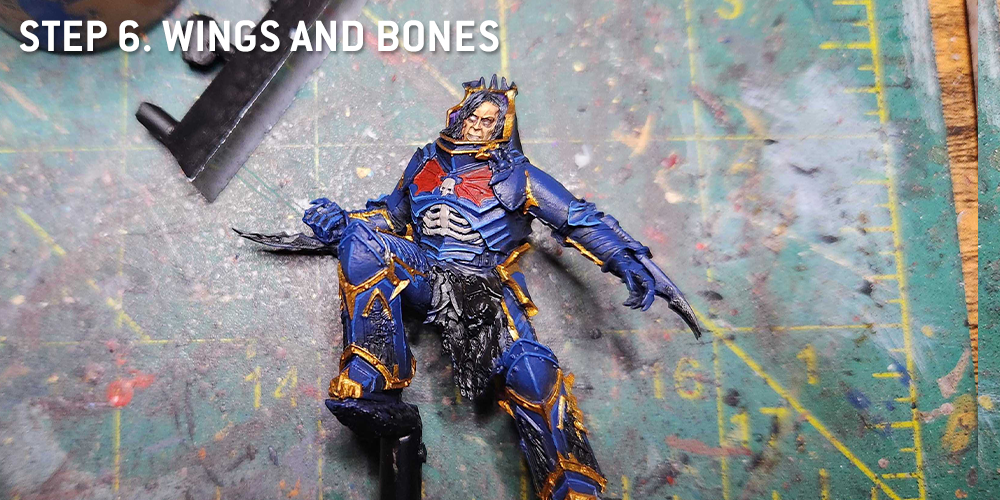
 9. The Wings first
 - Start by blocking in the wing shape. There are a few different ones you can use, but I'm going with the most basic shape here. We're gonna layer this up, so I start by painting the full set of wings that'll go here. For the wings, I use
Mephiston Red.
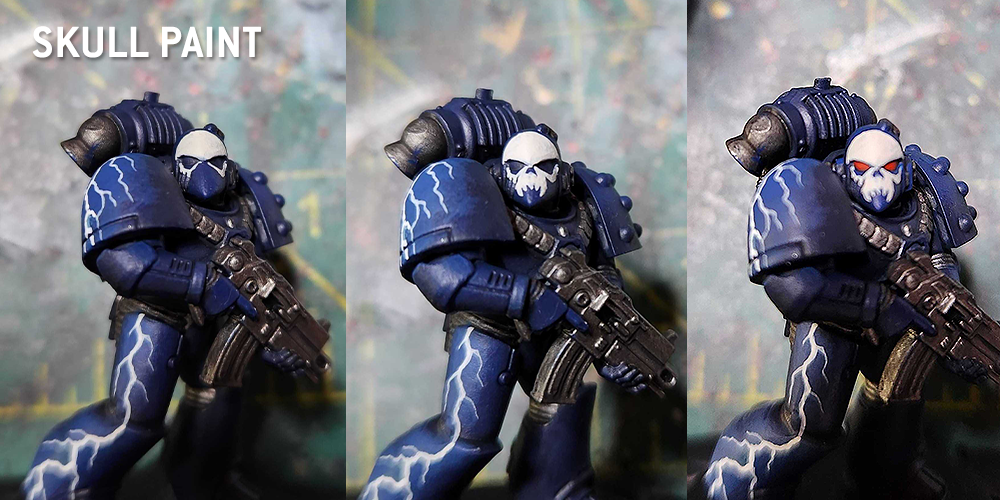
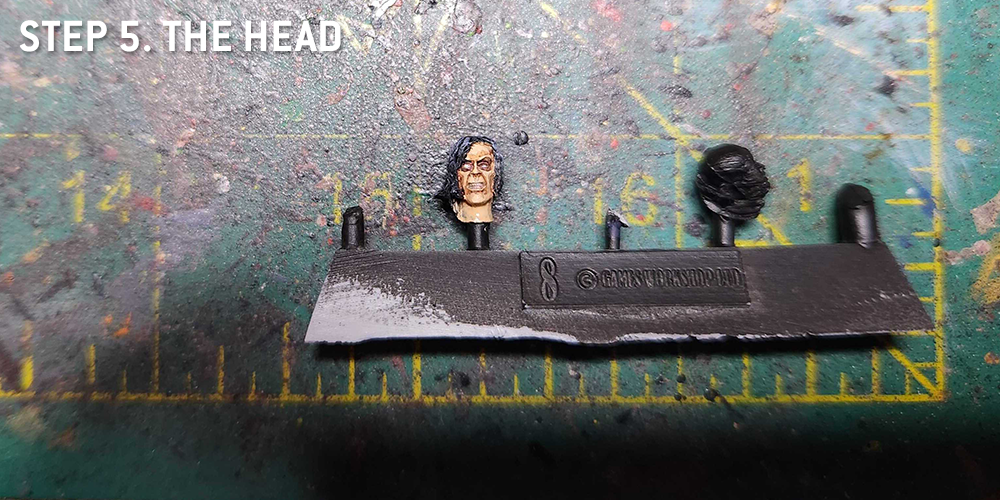
10. Now the skull - Next I block in the skull. There are several shapes to do here, but the basic top half of the skull with fangs is the easiest. I use
Rakarth Flesh for this.
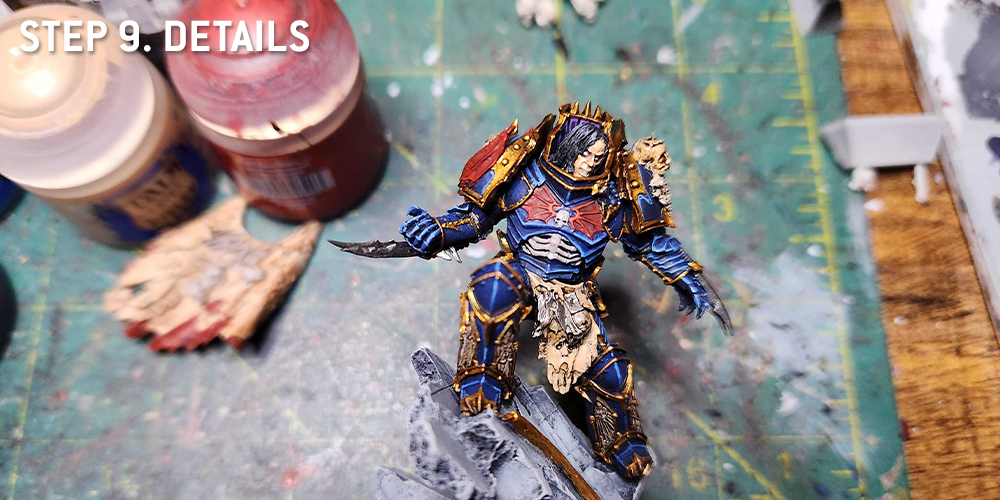
11. Details - Now it's time to add some details. I use
Evil Sunz Scarlet for the bony parts,
Abaddon Black for the eyes and nose, and then I use
Reaper Polished Bone to touch up and highlight the skull to give it a little depth.
Great, Icon finished. Let's finish painting this bad boy.
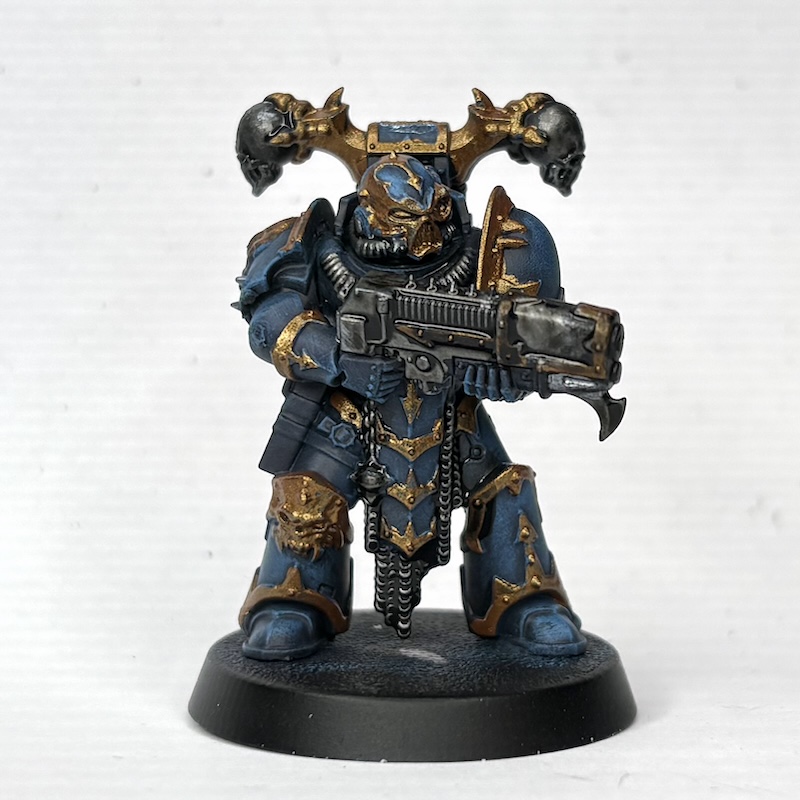
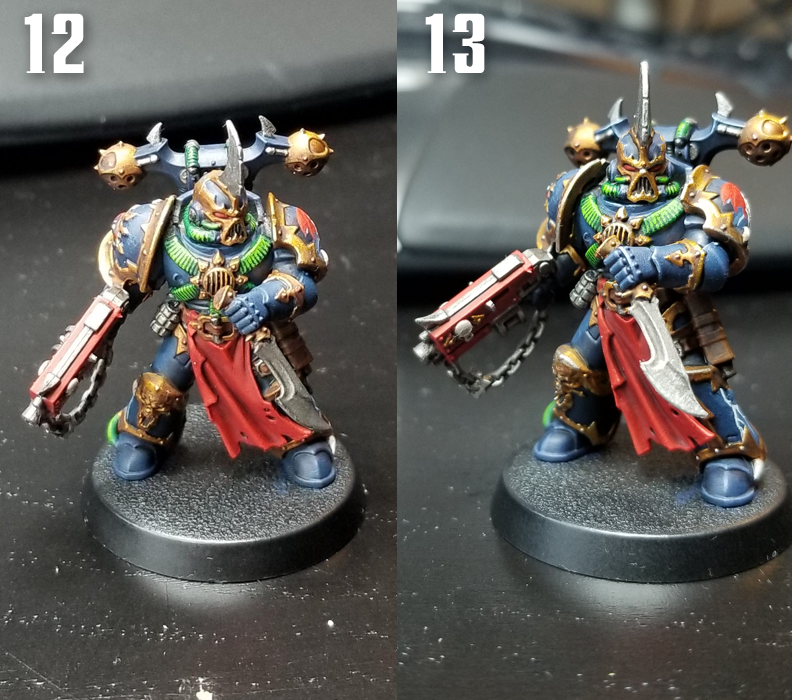 12. Adding more layers
 - I highlight the cabling with
Moot Green to give it a brighter look that pops against the dark armor. I edge highlight the Bolter with Evil Sunz Scarlet and use Mephiston Red and Evil Sunz Scarlet to build up the cloth tabard. The eye lenses are Mephiston Red with a spot of Evil Sunz Scarlet. I also wash the leather parts with Agrax Earthshade and Nuln Oil.
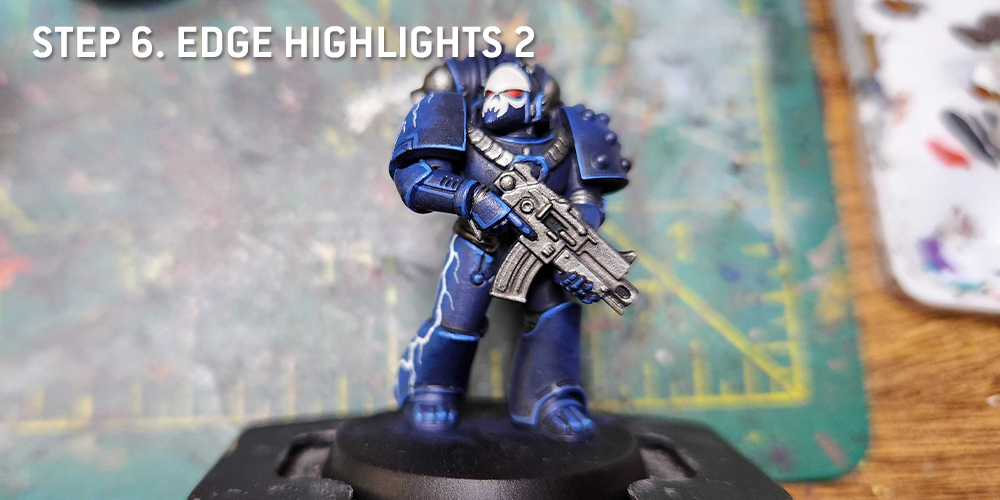
13. Edge highlighting - The metal and gold parts get an edge highlight of
Ironbreaker, and I use the same color for the rivets. For the armor, I do an edge highlight with
The Fang and the another smaller edge highlight with
Snow Shadow on the corners and top edges. I edge the leather parts with Mournfang Brown. I do a standard gemstone pattern on the gemstone on his shoulder pad.
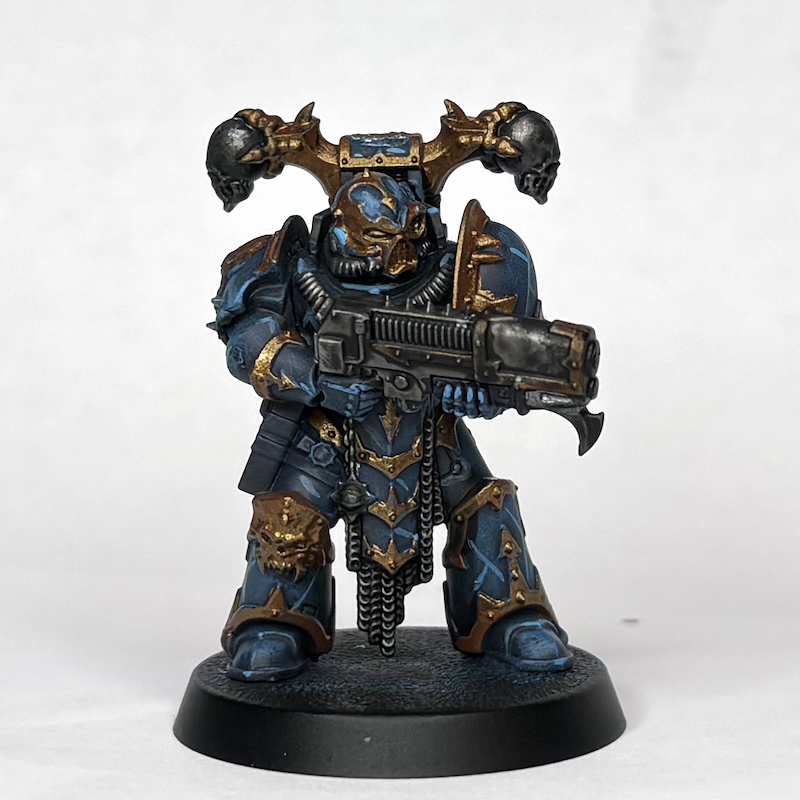
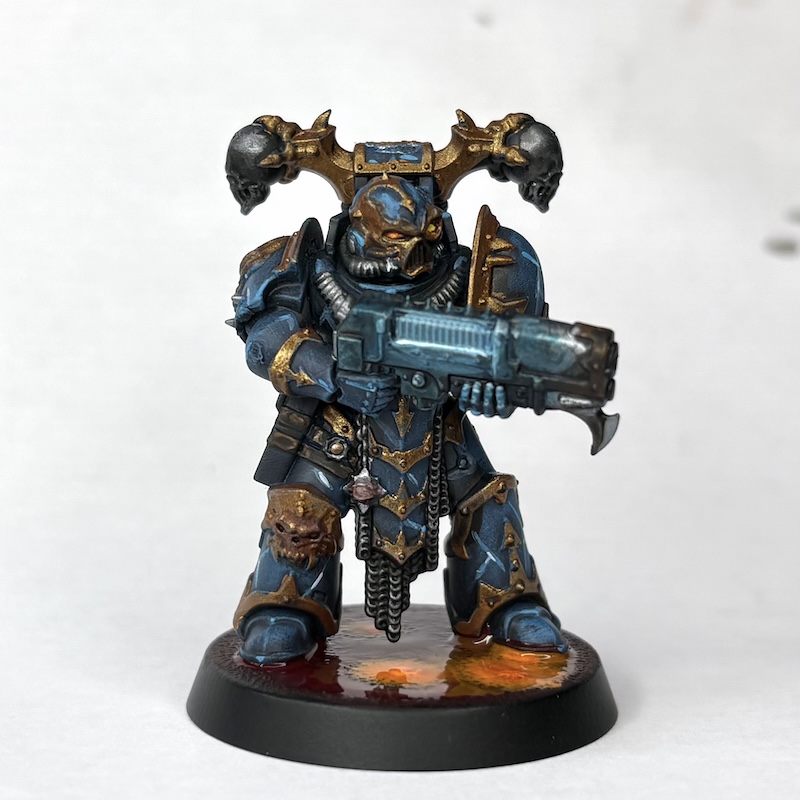
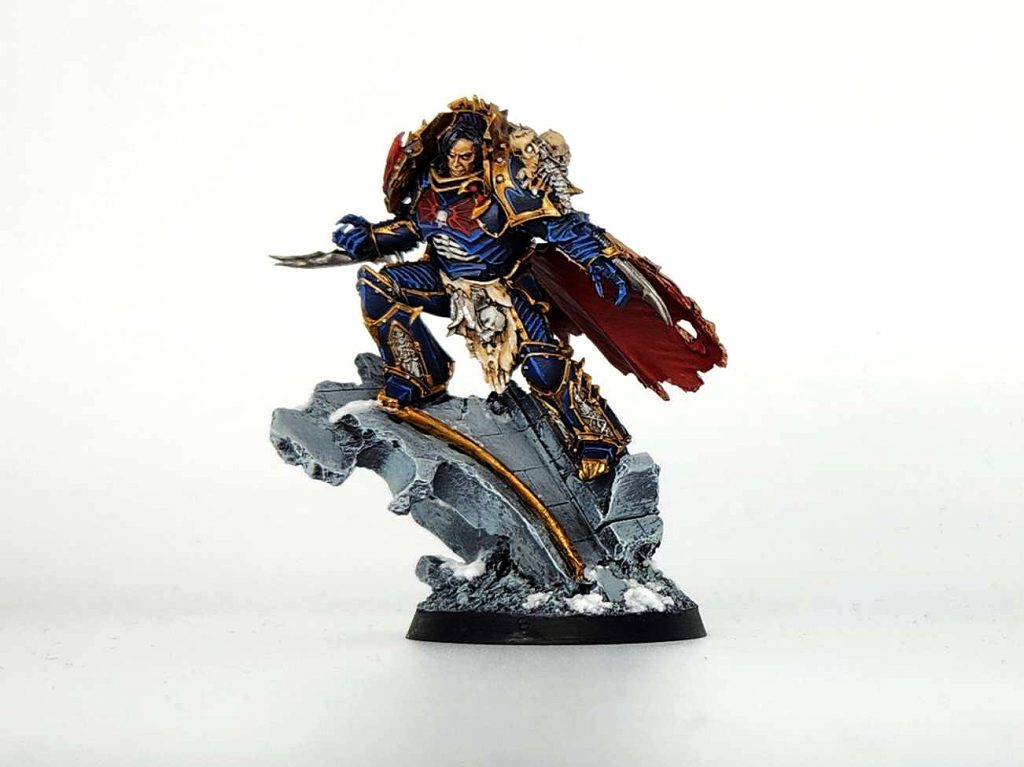
14. Finish the model off with some basing. I do all of my Night Lords with snow/winter bases. So for most of them, I paint the base with
Reaper Ghost White, then I cover the base with
Valhallan Blizzard texture paint. I used to use Mourn Mountain Snow for this but that stuff looked like white dirt, and the new texture paint looks much more like actual snow.
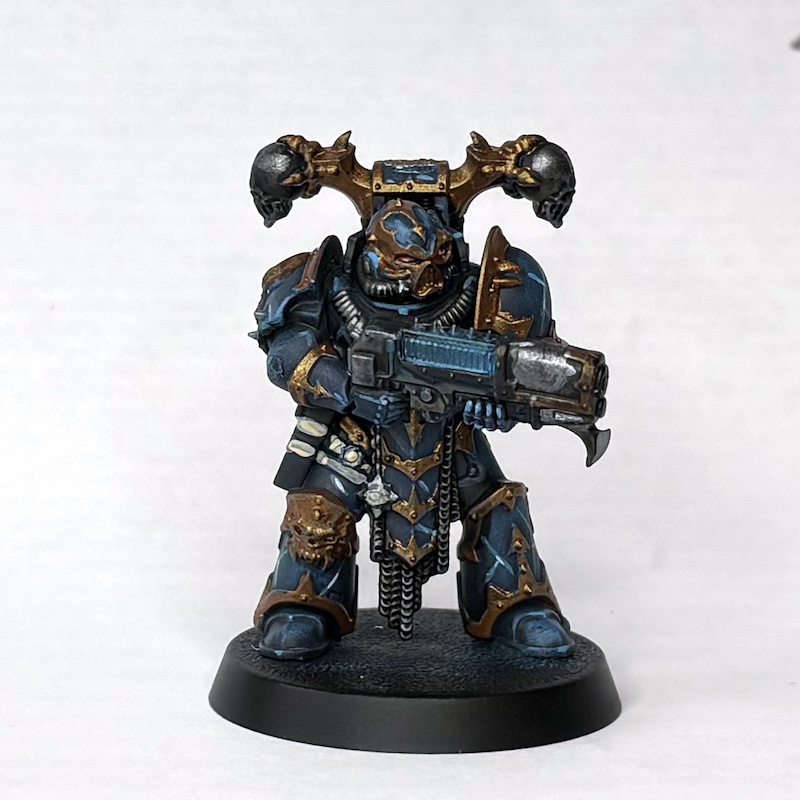
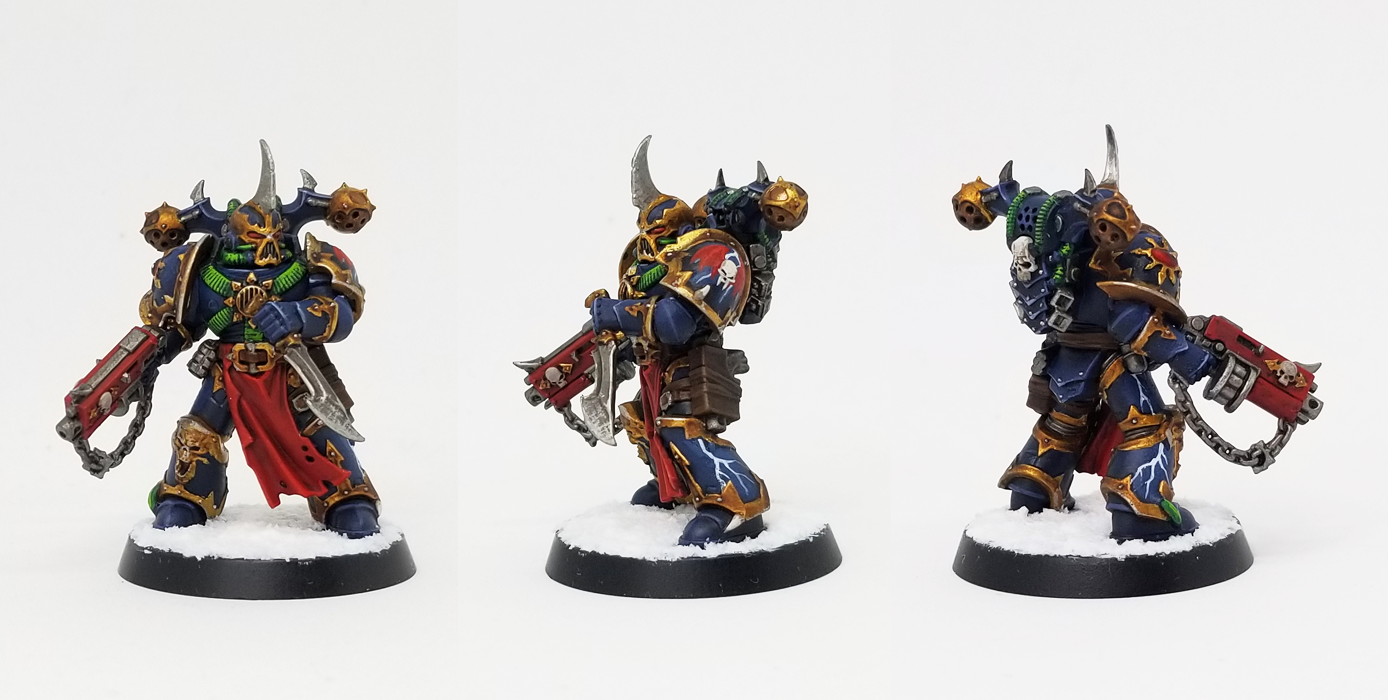 Credit: Robert "TheChirurgeon" Jones
I'm pretty happy with how this guy turned out, and I think the process is repeatable enough to do another three dozen times, not that I'm looking to do that. Working with Night Lords Blue is a lot easier than my prior methods, and it's a great paint to use for the base coats.


 Credit: Games Workshop
 Credit: Games Workshop


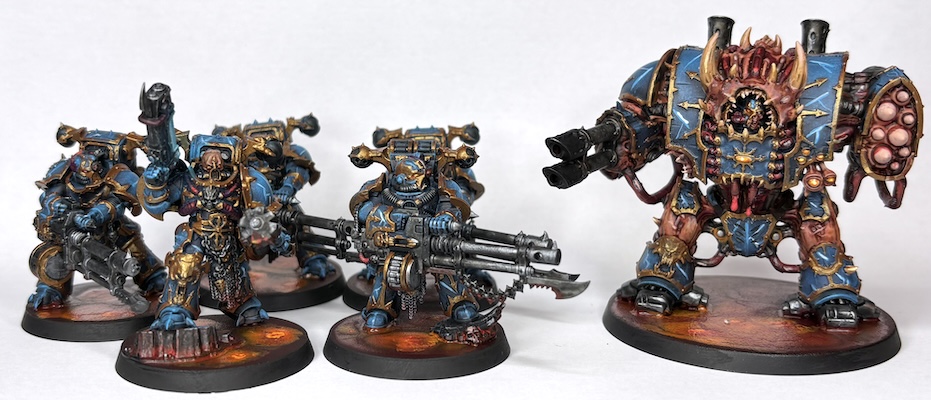 Night Lords' Helbrute and Havocs - Credit: RichyP
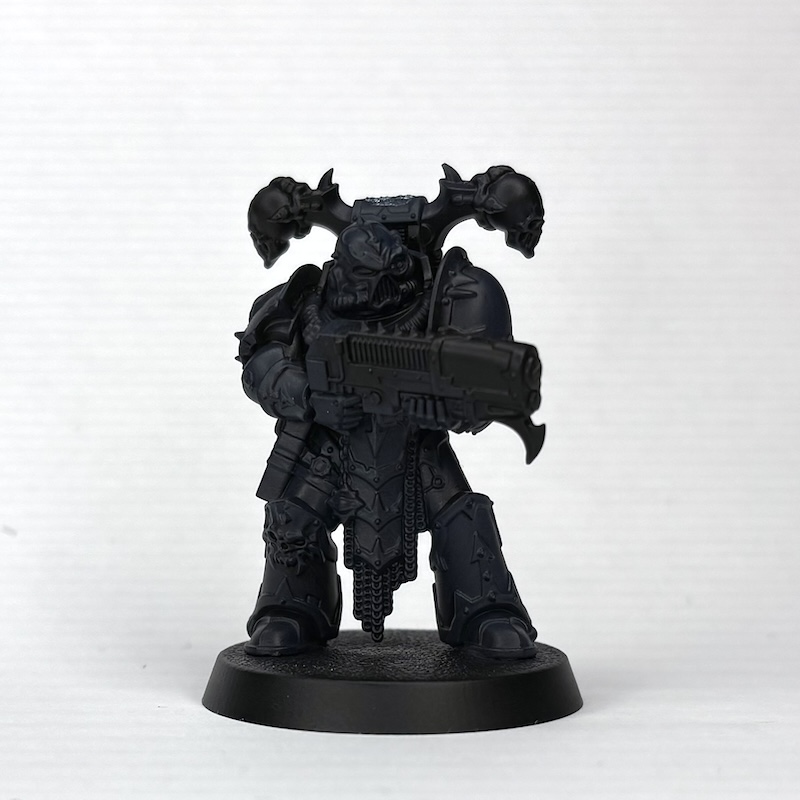 Citadel Night Lords Blue over Black - Credit: RichyP
 VGC Electric Blue over Night Lords Blue - Credit: RichyP
 S75 Viking Gold over Electric Blue - Credit: RichyP
 Vallejo Model Air Gunmetal over Night Lords Blue - Credit: RichyP
 Citadel Ratling Grime over Gunmetal - Credit: RichyP
 Electric Blue Lightning Markings - Credit: RichyP
 Vallejo Game Color Wolf Grey over Electric Blue - Credit: RichyP
 Citadel Frost Heart over Wolf Grey - Credit: RichyP
 Night Lord - Credit: RichyP
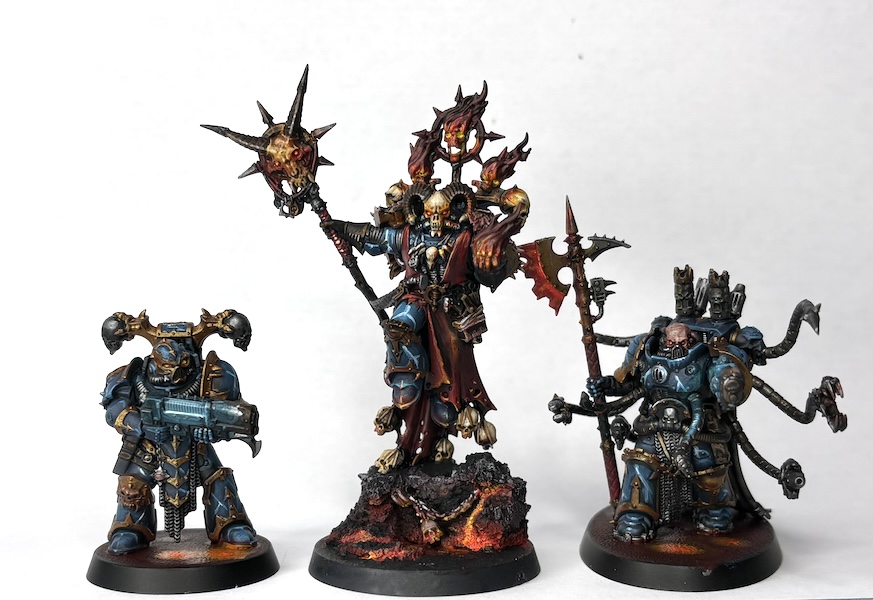 Night Lords - Credit: RichyP

 Credit: Robert "TheChirurgeon" Jones

 Goonhammer App and Patron Updates: April, 2026
 Kill Team Tournament Report: Engage, Party, Repeat's March Madness 2026
 Goonhammer Reviews: Tribal Conquest