
In our How to Paint Everything series, we take a look at how to paint different models, armies, and materials, and different approaches to painting them. In this article, we’re exploring how to paint leather.
Whether you're in the fantastical realms of the Age of Sigmar or walking the battle-ravaged wastelands of the 40k universe, there's a good chance you're going to come across the opportunity to paint something made out of leather. From straps to bandoliers to boots and gloves to holsters, this flexible hide material is used to create a variety of important clothing items and accessories, and today we're covering everything you need to know about the material and how to paint it.
Leather is, in the broadest terms, the skin of an animal that has been processed and treated so that it doesn’t rot. To do this, you get rid of all the junk you don’t want, like flesh and hair, apply a chemical treatment to stabilize the protein, then remove most of the water from the skin, which also helps prevent rotting. Afterwards you apply any dyes to the leather, and saturate it with stable oils to make it flexible again, and prevent it from reabsorbing water instead.
Undyed leather is typically a pale bone color without any oils applied to it to. Once oils are applied it darkens slightly to a somewhat pale tan, and as it ages and is continually conditioned, turns a warm, rich orange.
A treated cowhide is very thick, sometimes several centimeters for an adult cow. The top portion is dense and smooth, while below it is a large amount of fuzzier, less dense material. For most things, the leather is split into a top portion, which is what we’d normally recognize as leather, and the bottom, which is suede.
For the most part, in this article we’ll be talking about the top portion of this leather. Suede is not a particularly good material for stomping about the battlefields of the 41st millennium. It reacts poorly to mud and water and is typically found in more civilian applications.
We know what leather is, so let’s use some of that information to take a look at how it acts. Unlike metal, plastic, or fabric, leather is a natural material, and as it ages, is impacted in a lot of different ways by its environment and what is done to it. Let’s go over these ways, roughly in order of how big of an impact they will make at 28mm scale.
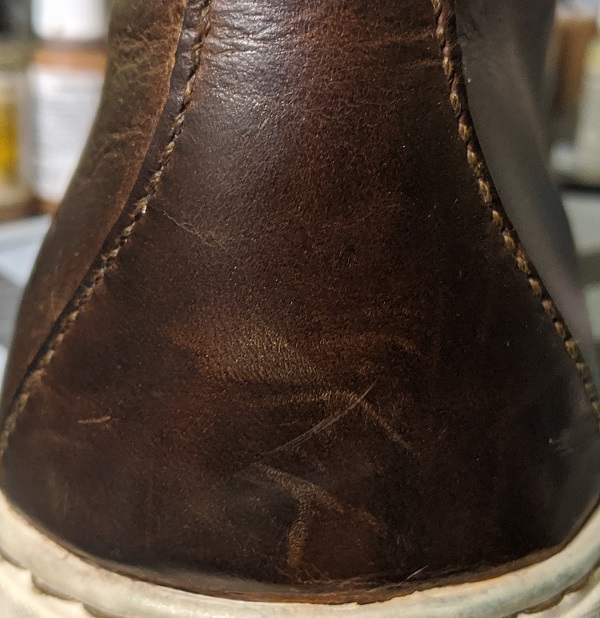 Slightly scuffed leather. Note the older scuffs that have nearly faded into into the background.
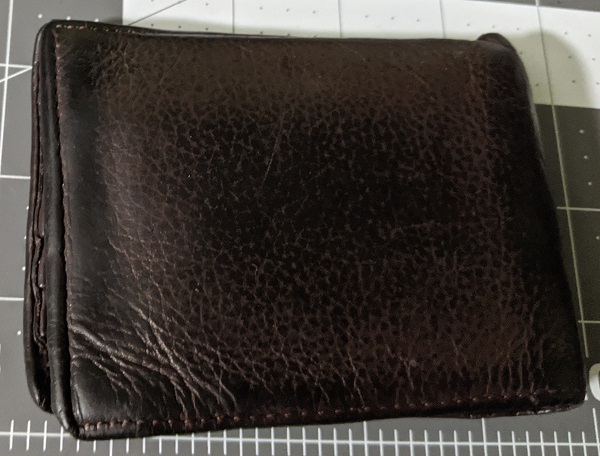 Leather wallet. Note that all the edges are rubbed smooth and dark from friction inside the pocket.
That’s a whole lot of information. Let’s cut to the chase and start looking at some ways all that knowledge can inform your painting choices.
There are a lot of different types of leather, so let's go over a few, and how they might impact how you paint them.
 An example of weathered leather showing less brown and orange, with only hints of brown in the highlights.
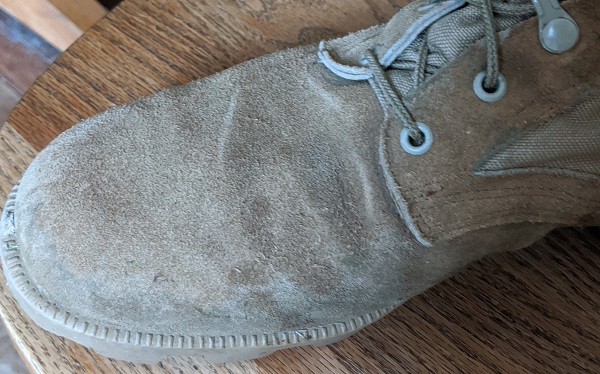 A roughout leather boot. Along the edges it has picked up brown and grey stains from rubbing against dust and dirt.
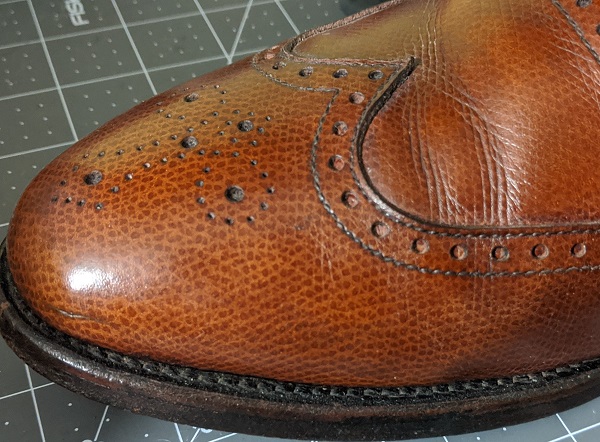 An example of pebble grain leather. Thanks for making me dig out dress shoes during quarantine, Rob. Good luck emulating this in 28mm scale.
Depending on what you're going for, there are a few ways to tackle painting leather on miniatures.
Before we go into step by step detail on exact methods, I'm going to use the test model I did for this article to show off a variety of different leather textures and colors, and broadly discuss the techniques used for each.
 Credit: Evan "Felime" Siefring
 Credit: Evan "Felime" Siefring
 Credit: Evan "Felime" Siefring
 Credit: Evan "Felime" Siefring
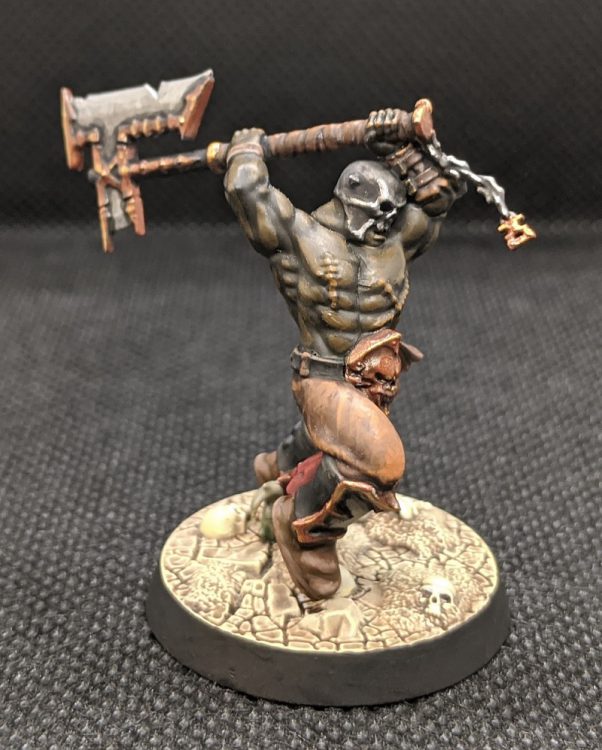
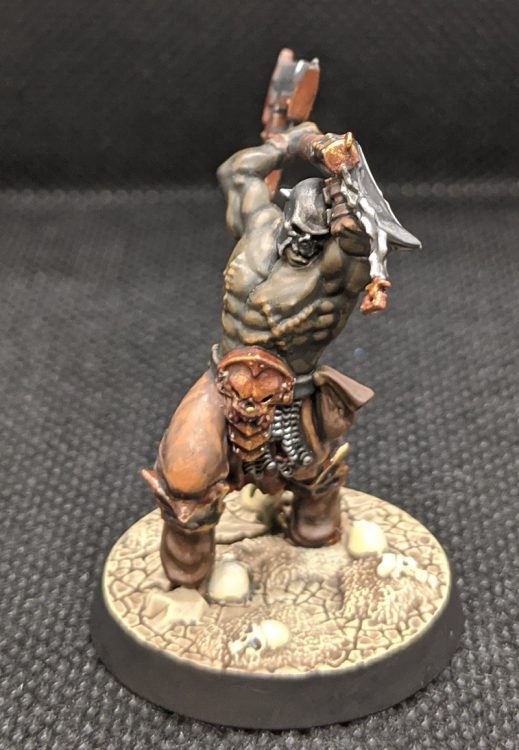
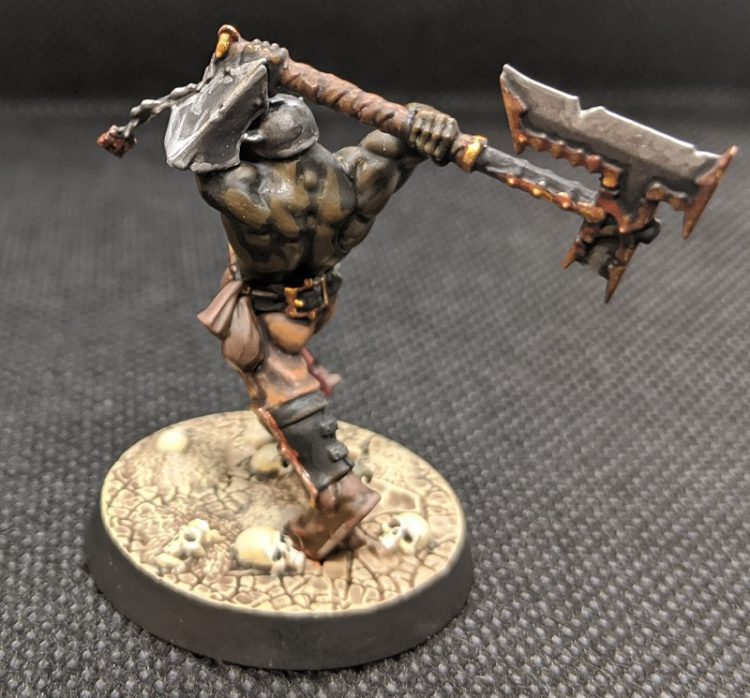
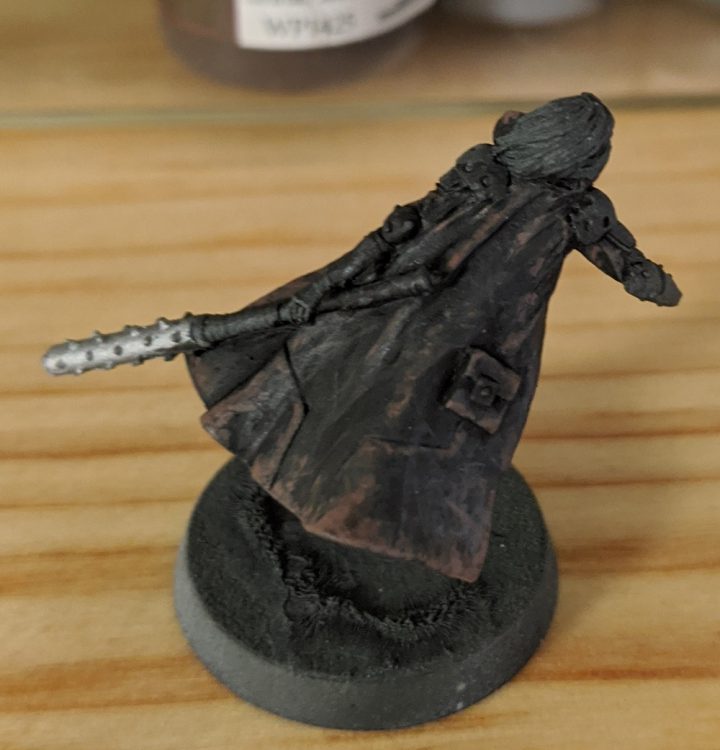
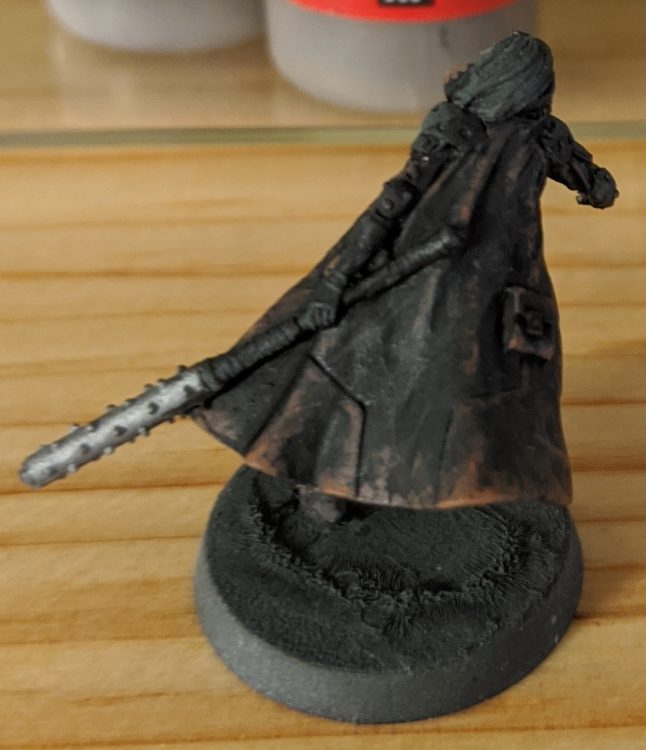
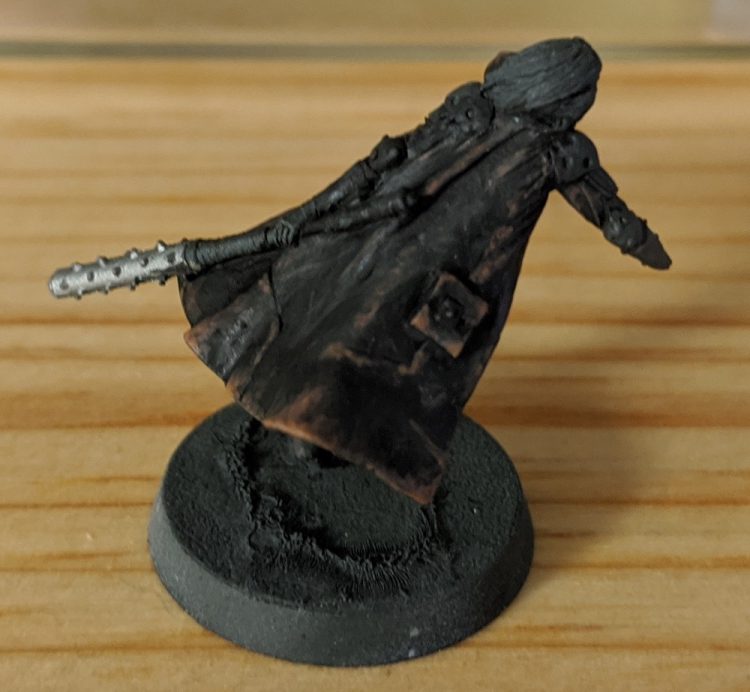
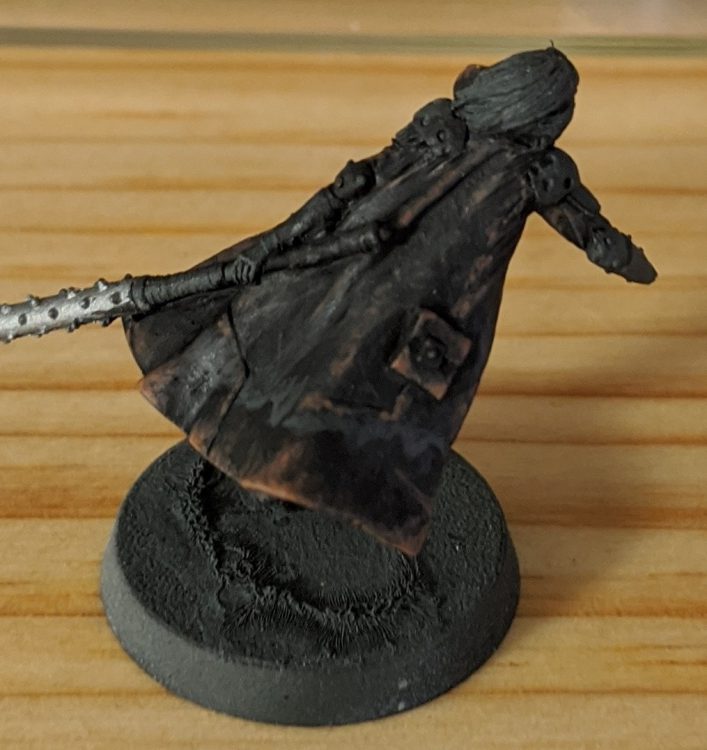
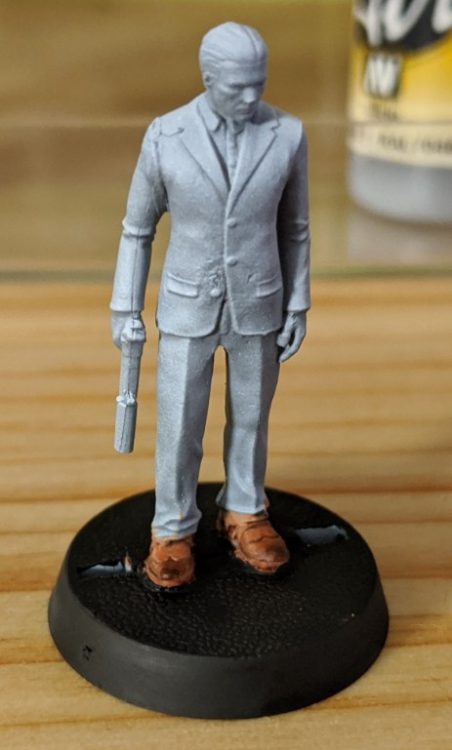
This is one of Garrek's Reavers from Warhammer Underworlds. I decided to go with three distinct types of leather on this model, Light Brown, Brown, and Black. When you're painting a model that has this much leather on it, it's important to separate the areas using different colors and textures. Otherwise you can end up with a model that is just a confusing sea of brown.
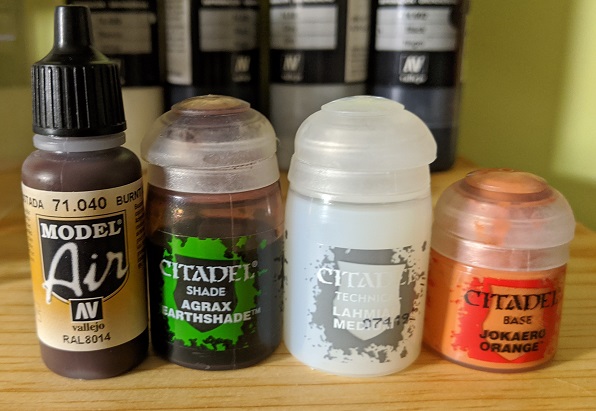
Now let's take a look at some of these techniques in far greater detail. For this exercise, I’m going to paint a long black leather coat. In the first portion, I’ll demonstrate a lot of the techniques for scratching and roughing up leather convincingly, then add some staining along the bottom for a bit of flair. As I will be mixing back and forth using a lot of the same colors, and using very thin paints, so a wet palette is very helpful if you're following along. Otherwise, you can see the paints I've used in the picture below.
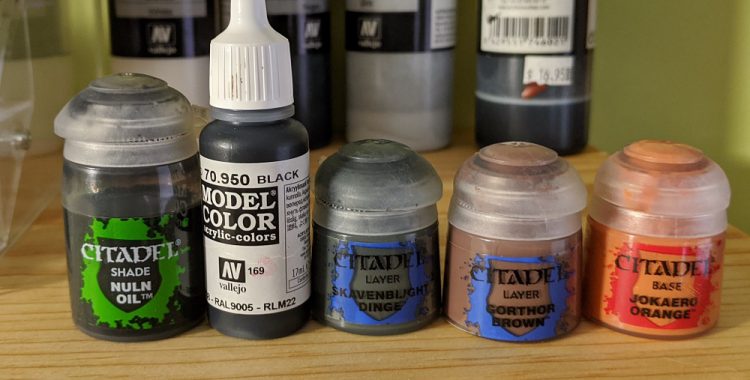 Credit: Evan "Felime" Siefring
First, toss down your black basecoat, I prefer VMC Black. Then add in some highlights I did a few layers, first with a mix of black and Skavenblight Dinge, then with more grey, then with pure Skavenblight Dinge. I follow the areas that would typically be highlighted, then work in the grey to high wear areas as well. The edged of the coat, pockets, etc. You do not have to be particularly precise at this stage of painting. You're mostly sketching in initial highlights right now.
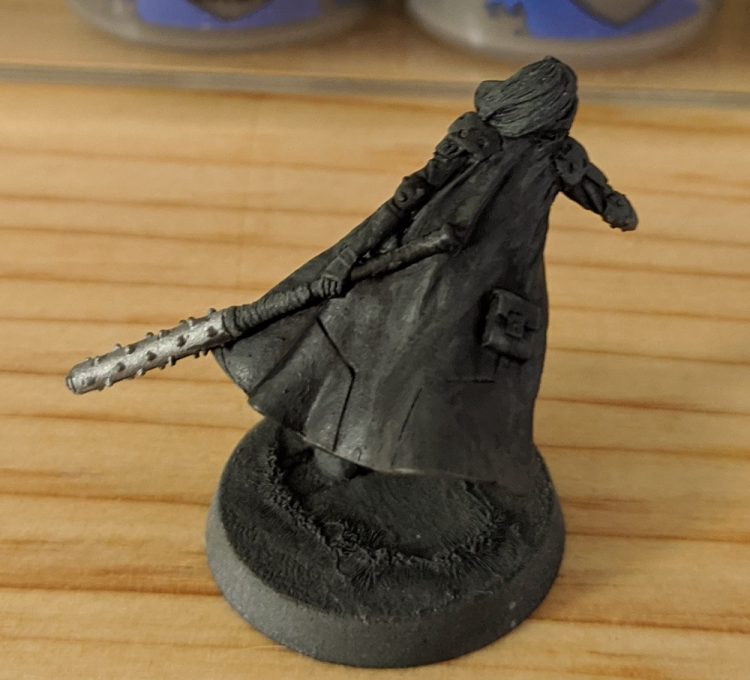 Credit: Evan "Felime" Siefring
Now, mix in a little bit of your Gorthor Brown into the Skavenblight Dinge, and add some scratches and highlights using this color, before finally using pure Gorthor Brown. With the pure Gorthor brown, focus mainly on areas that would see a lot of wear, rather than just highlighting with it. I also emphasized the seams slightly using these colors.
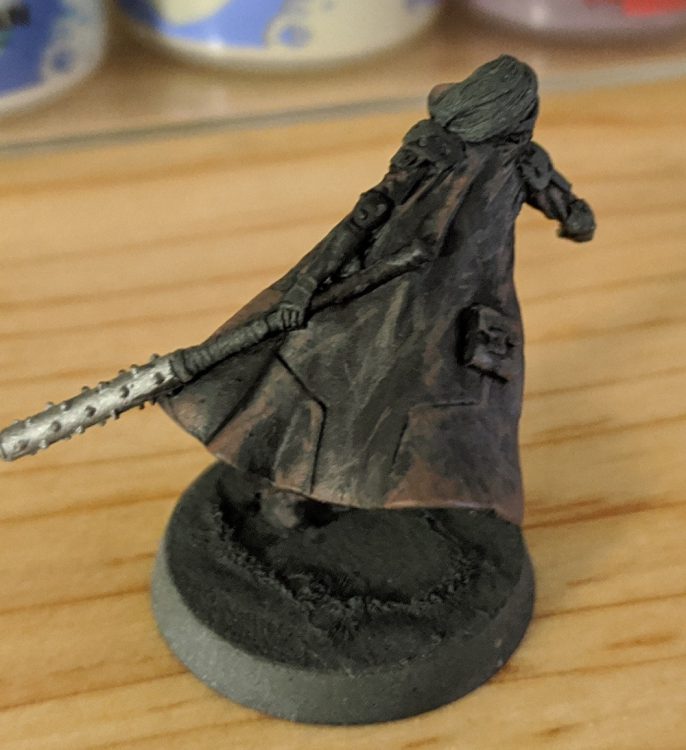 Credit: Evan "Felime" Siefring
Now just hit the entire coat with a wash of Nuln Oil. This will even out your messy, scratchy highlights a little bit, dull them down so you can add more layers on top of them, and form the main shade for the leather.
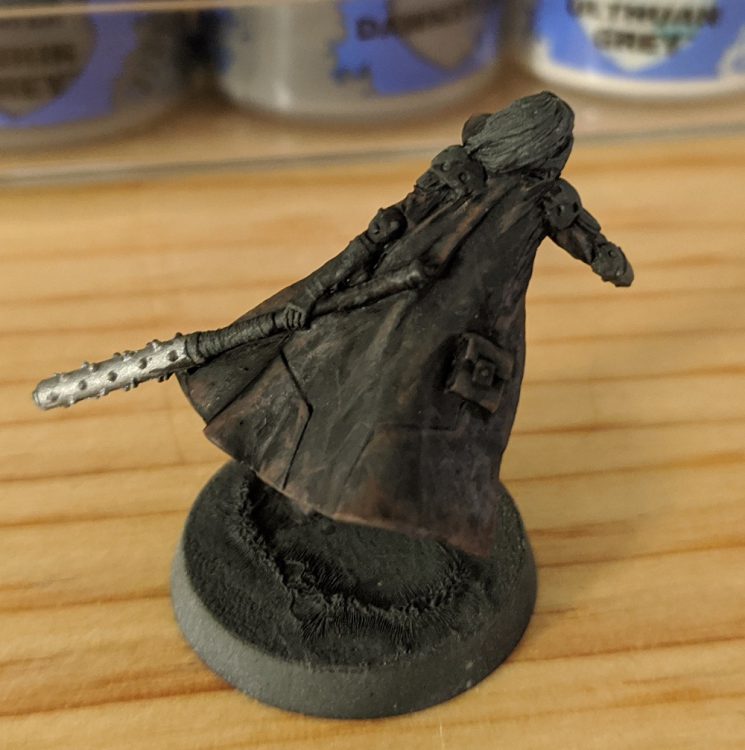 Credit: Evan "Felime" Siefring
Your highlights have now been dulled down a bit. Now add some new ones on top using Skavenblight Dinge, Gorthor Brown mix, and mixes of the two. You're roughly repeating your earlier steps at this point.
 Credit: Evan "Felime" Siefring
Now, it's time to get a little frisky and colorful! Add some Jokaero Orange to the Gorthor Brown and add some more scratches, focusing even further towards areas of high wear, and finally pure Jokaero Orange to highlight the most worn edges.
 Credit: Evan "Felime" Siefring
At this point, you could stop if you don't want to add any staining. You've got a heavily worn coat that has been through years of battles. If you do want to add staining, first paint along the bottom of the coat using Nuln Oil, leaving a ragged splotchy edge where the coat has been dragged through mud or water.
 Credit: Evan "Felime" Siefring
This has tinted the bottom edge, but it isn't all that defined. Once the Nuln Oil is dry, follow along the top edge to define your splatter pattern using either Skavenblight Dinge, or Skavenblight Dinge mixed with Black. You can also now make the splatter a bit more detailed and intricate than you could just using Nuln Oil.
 Credit: Evan "Felime" Siefring
At this point, it looks like the coat is wet. To turn this into a stain, take some of the same paints you used to define the upper edge, and glaze below your stain, leaving a slightly faded, feathered edge up to the darkest edge of the stain. I would recommend doing this in a stage or two, so you get a gentle fade rather than an abrupt line.
 Credit: Evan "Felime" Siefring
At this point the stain is done. All we have left to do is bring back the highlights and scratches we glazed over with grey. Using Gorthor Brown and Jokaero Orange, quickly bring back the color and brightness of your edges and scratches. As you've already got a guide in place and most of the work done, this last step goes quite quickly.
 Credit: Evan "Felime" Siefring
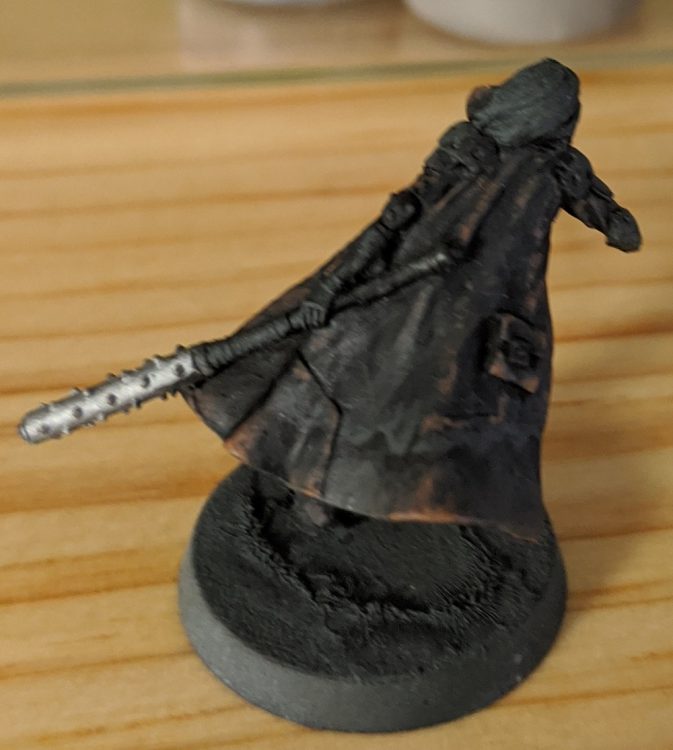
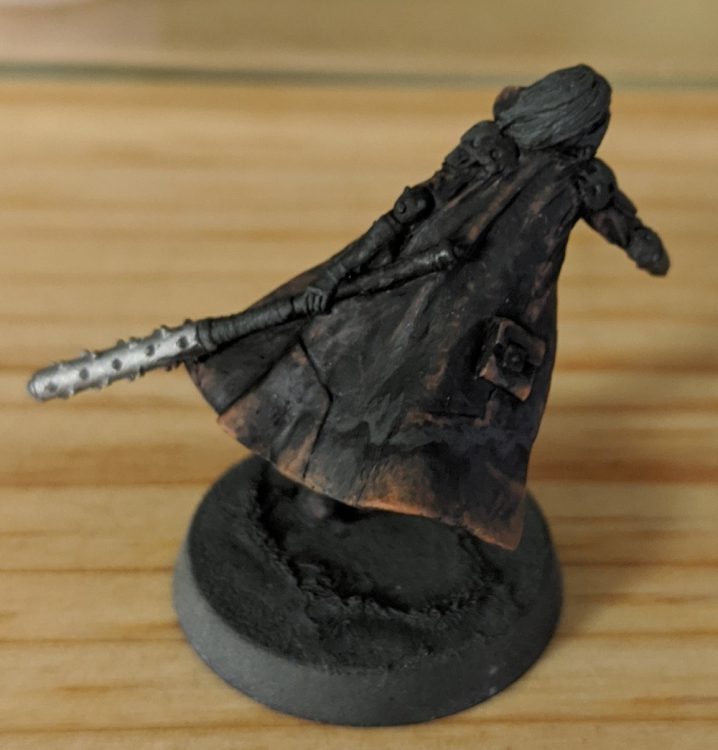
And you have your finished coat, ready to see more wear and tear on the battlefield. Most of my leather follows a very similar process, just using different colors and to different intensities.
We've taken a look at abrasion and staining explicitly, and incorporated some elements of conditioning through the fading and layers of scratches. Burnishing isn't something you'll be using often on 40k models. Most places that are constantly rubbing against soft surfaces, such the side of a leather bag pressed against the body, are hidden because they're pressed up against those soft surfaces. Old leather shoes can also become burnished on the toe and heel from years of polishing. However, you won't see this often on soldiers. Light leather, where it will be most visible, isn't popular for military footwear as it shows stains easily and is harder to maintain. The toes and heels of combat boots are also constantly getting beaten up, so abrasion will typically wipe out any burnishing that appears. That said, if you're painting a rogue trader, high commander, or other imperial noble, you might want to incorporate burnishing, as it can be quite pretty. Because of how pretty it can be, it's often emulated using dyes on dress shoes, rather than waiting for years of wear and polishing to do their magic.
To follow along, you will need the following paints:
 Credit: Evan "Felime" Siefring
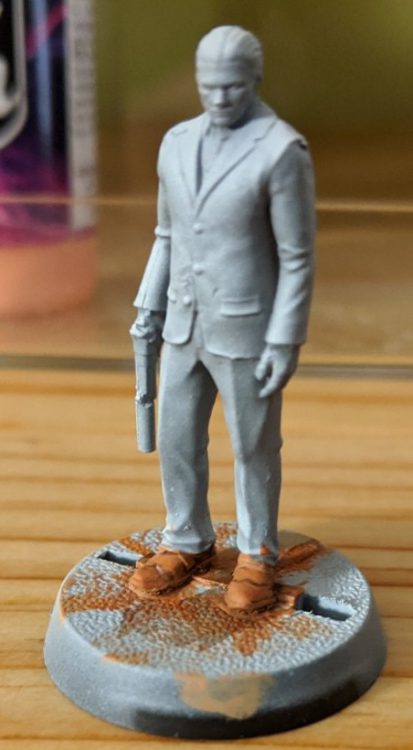
We're going to go for a light colored leather, so we're going to start with a base of Jokaero Orange. It's going to look really orange, because you just painted it orange, but the further steps will tone this down a bit.
Pure Agrax Earthshade is going to be a little bit too strong for our purposes, so mix it with Lahmian Medium on a (non wet) palette. Roughly a one to one ratio will do well. Then wash the Jokaero Orange.
 Credit: Evan "Felime" Siefring
Now take VMA Burnt Umber and water it down quite a bit, and gently glaze over the toe. Burnt Umber is a fairly transparent paint, so it works exceptionally for this. You'll want to do 2 or 3 coats to work up a nice fade. You may have to work some Jokaero Orange back into the edges to smooth it out and fine tune the shape, but luckily Jokaero Orange also thins down into a glaze quite well. If you're comfortable we blending this is also a place it works quite well.
 Evan "Felime" Siefring
If you've been reading closely, you've probably noticed that the same paints tend to come up again and again. I find that I keep coming back to the same paints for their versatility and how useful they are for leather. As a conclusion, I'd like to quickly go over these paints, and why I like them, so that you can look at the paints you have, and see if any fit the bill before buying extra paint.
 Credit: Evan "Felime" Siefring
That wraps up our look at painting leather. Hopefully you have everything you need now to tackle different types of leather, materials, and ages.
Have any questions or feedback? Drop us a note in the comments below or email us at contact@goonhammer.com. Want articles like this linked in your inbox every Monday morning? Sign up for our newsletter. And don’t forget that you can support us on Patreon for backer rewards like early video content, Administratum access, an ad-free experience on our website and more.
Tags: Painting | hobby | tutorials | How to Paint Everything | featured | felime | Materials | leather

Thank you for being a friend.
 Goonhammer App and Patron Updates: April, 2026
 Kill Team Tournament Report: Engage, Party, Repeat's March Madness 2026
 Goonhammer Reviews: Tribal Conquest
Support us on Patreon to get access to our Discord and exclusive App features.
Thank you for being a friend.
Already a Patron? Login with Patreon.
Visit our incredibly official store on RedBubble.
![]()
![]()
Support us on Patreon to get access to our Discord and exclusive App features.
Thank you for being a friend.