Games Workshop hit us up and offered us a review copy of the new Draconith to demonstrate painting on. I mean, how could I say no?
With the kit in hand, I got my building supplies together and dove in.
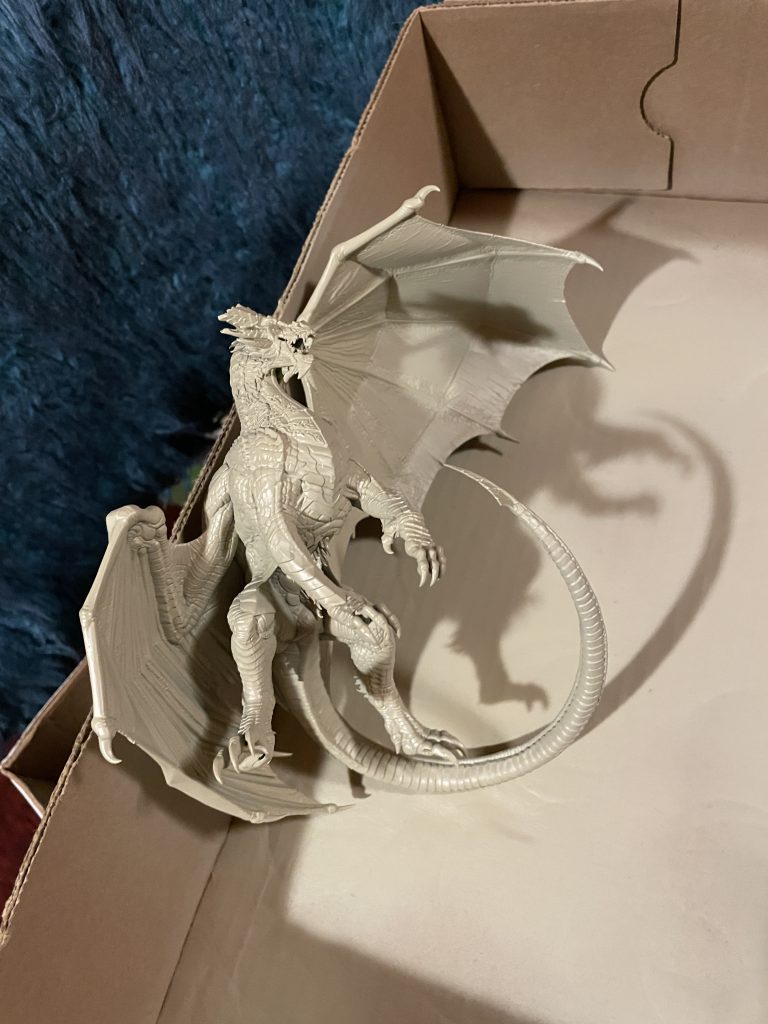
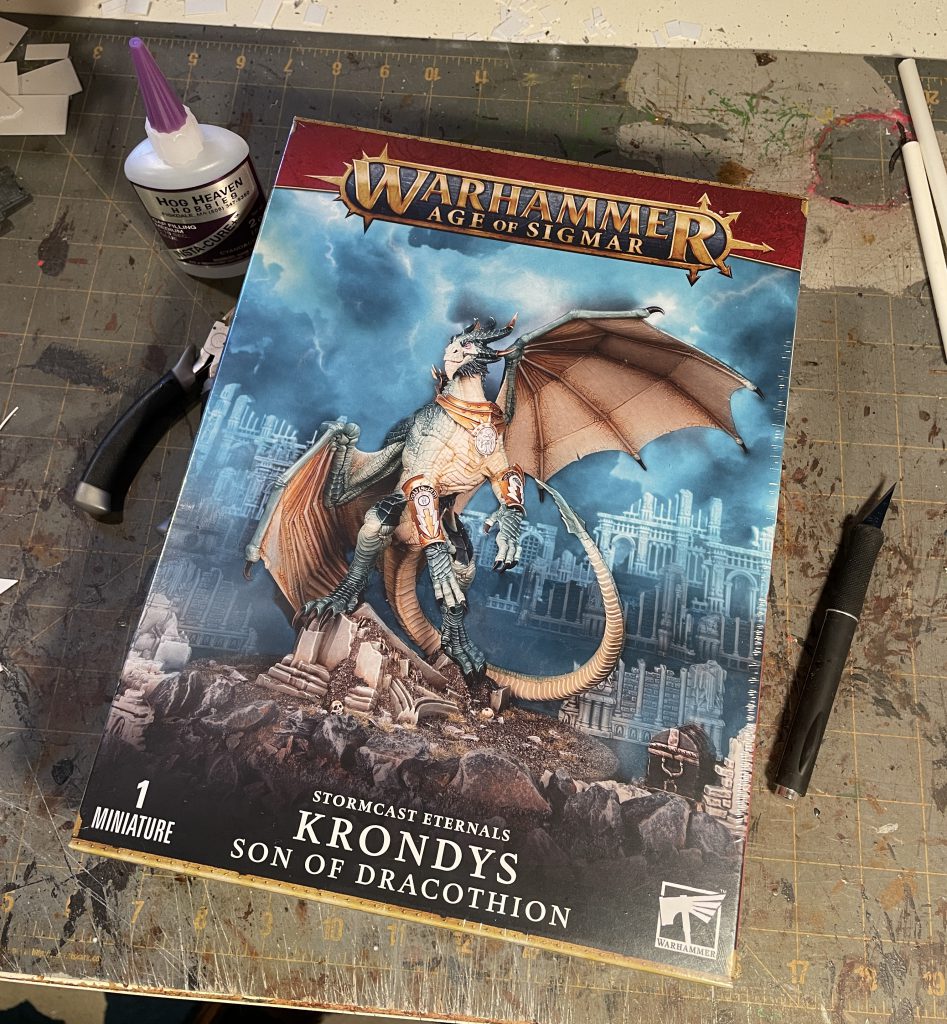 Draconith Box. Credit: Dylan Gould
I chose to assemble Karazai as I just don't like that smug blue one... The kit is a dream to put together, the way the designer split it up hides pretty much any join lines and there were very few mold lines. I took my time, dry fit everything and found nothing to be confusing.
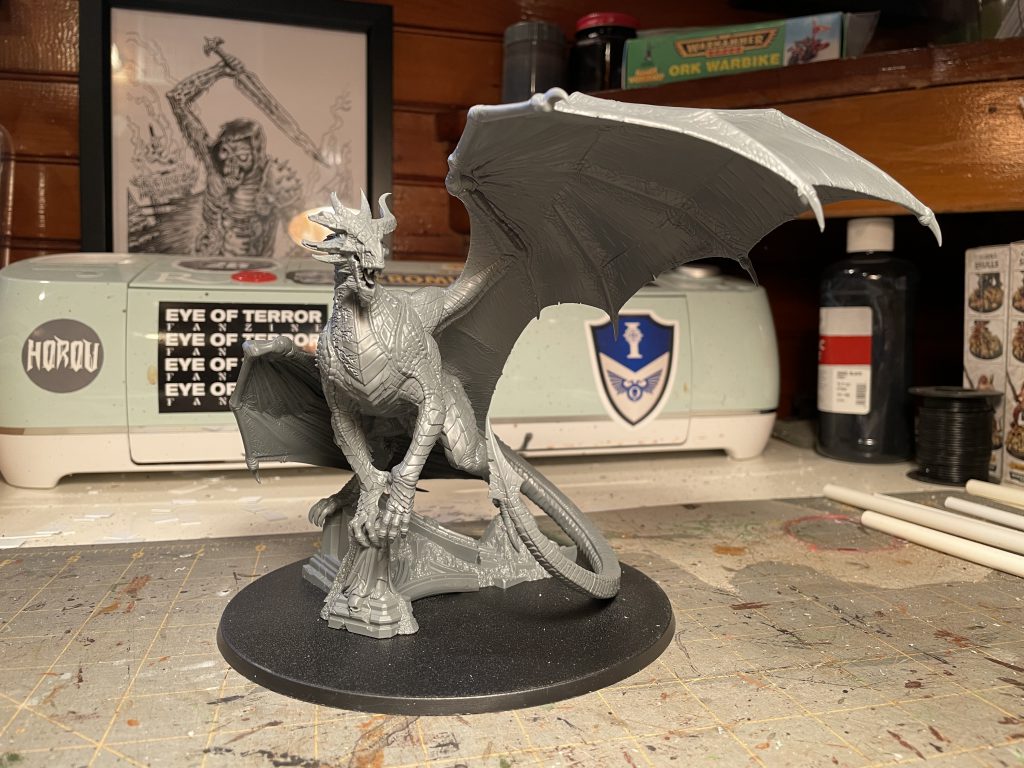 Karazai assembled. Credit: Dylan Gould
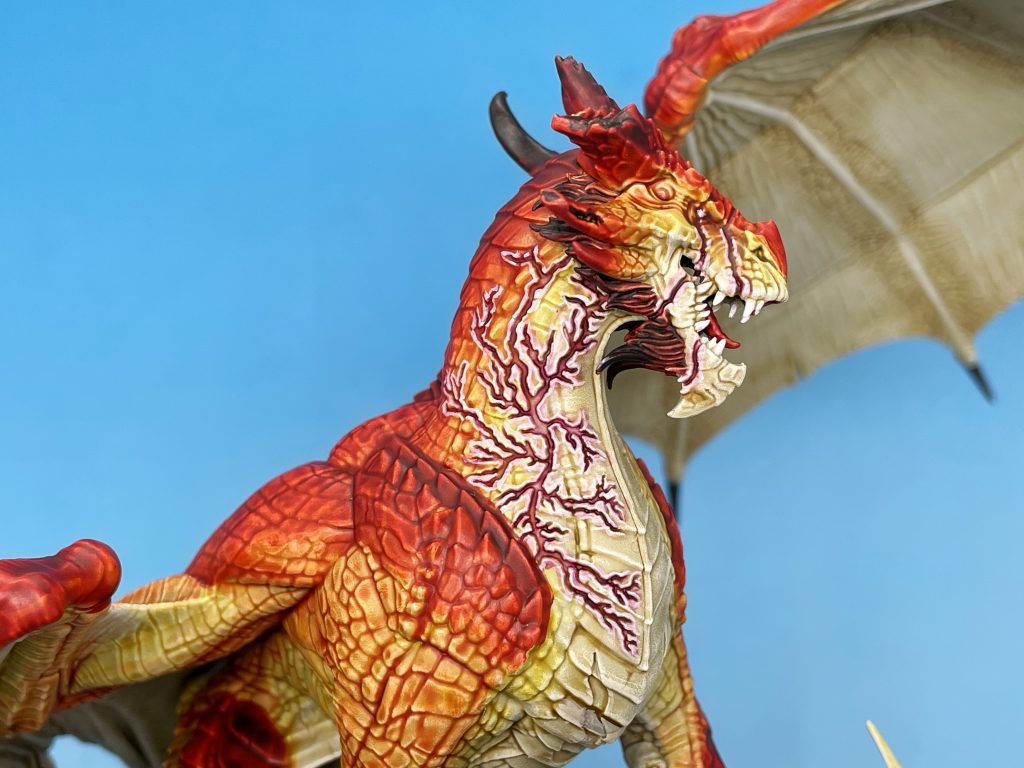
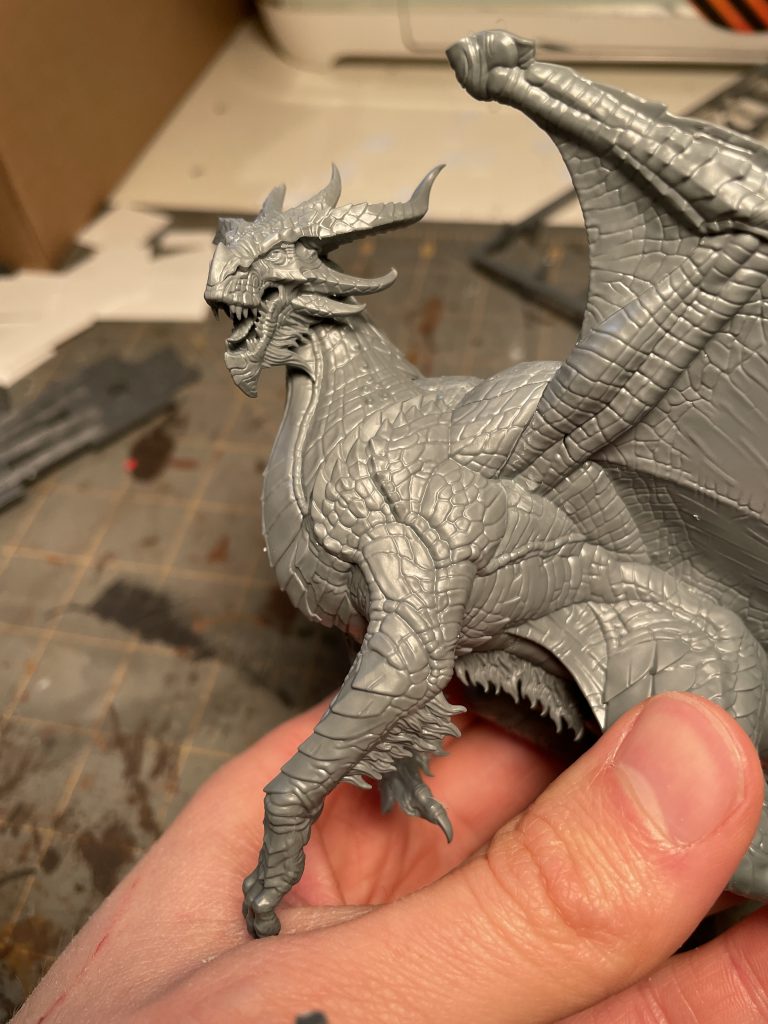 Karazai detail. Credit: Dylan Gould
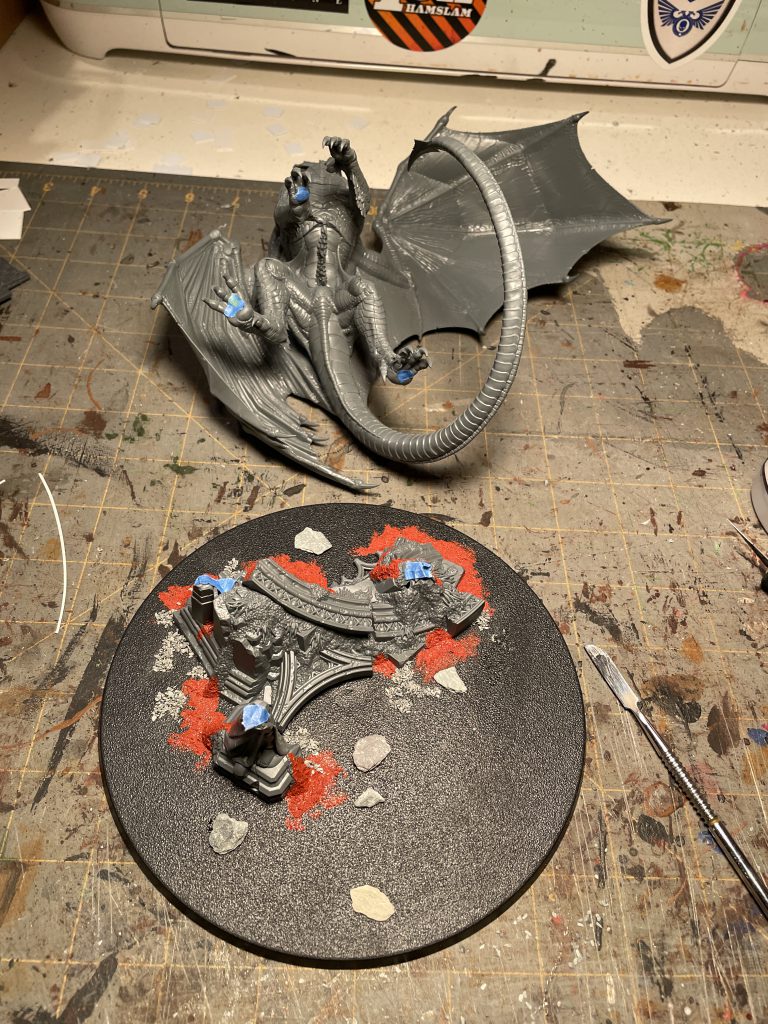
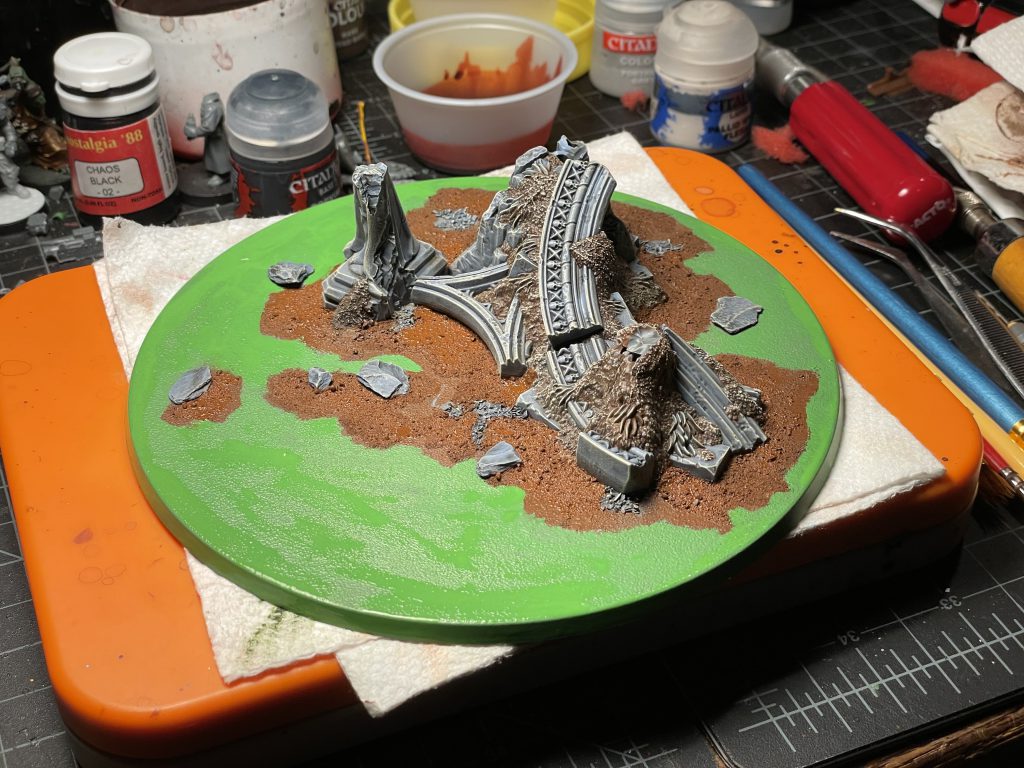
I got the base together and figured out where I wanted it to sit on the BIG (160mm) base and once down, added some slate and some oxide paste to hide a few joints and some spots of weak detail. I made sure to use little pieces of masking tape on the base and feet where they would connect so that the glue would actually work to hold him together.
 Karazai ready for priming. Credit: Dylan Gould
The day I had to assemble and prime the large lad was hovering around freezing, so I warmed up my cans with some hot water and quickly got outside to get him primed then ran him back inside to dry.
 Karazai primed. Credit: Dylan Gould
Once Primed and dry I started in on painting. I had an idea for my scheme, something that could be accomplished quickly and still get good results. I decided on using mostly Contrast and limiting myself to just 4 colors;
Skeleton Horde, Iyanden Yellow, Blood Angels Red and
Cygor Brown.
Step 1 was to dry brush the entire model with white over the bone spray.
Step 2 was an all over glaze of 40/60
Skeleton Horde and
Contrast Medium.
Step 3 was a glaze of 30/15/55
Skeleton Horde, Iyanden Yellow and
Contrast Medium targeted to all scales, wing ribs and some of the membrane of the outside of the wings.
 Step 3 front. Credit: Dylan Gould
 Step 3 top. Credit: Dylan Gould
Step 4
Step 3 top. Credit: Dylan Gould
Step 4 was a glaze of 20/40/40
Skeleton Horde, Iyanden Yellow and
Contrast Medium targeted to all scales and wing ribs of the outside of the wings, leaving a bit of the previous layer showing.
Starting with this layer I began careful blending the edges so the transition between colors was smooth. To do this I would apply my glaze to a small area, and then rinse my brush and go back and wet blend the edge into the previous layer. I did this with each layer after this, working with smaller and smaller areas as I targeted the color.
 Step 4 front. Credit: Dylan Gould
 Step 4 top. Credit: Dylan Gould
Step 5
Step 4 top. Credit: Dylan Gould
Step 5 was a glaze of 15/45/40
Blood Angels Red, Iyanden Yellow and
Contrast Medium on the scales and wing ribs of the outside of the wings, leaving a bit of the previous layer showing and wet blending to smooth them out.
 Step 5 front. Credit: Dylan Gould
 Step 5 top. Credit: Dylan Gould
Step 6
Step 5 top. Credit: Dylan Gould
Step 6 was a glaze of 60/40
Blood Angels Red and
Contrast Medium on the scales and wing ribs of the outside of the wings, leaving a bit of the previous layer showing and wet blending to smooth them out.
 Step 6 front. Credit: Dylan Gould
 Step 6 top. Credit: Dylan Gould
 Step 6 wing detail. Credit: Dylan Gould
Step 7
Step 6 wing detail. Credit: Dylan Gould
Step 7 was a glaze of 50/10/40
Blood Angels Red, Cygor Brown and
Contrast Medium on the scales and wing ribs of the outside of the wings, leaving a bit of the previous layer showing and wet blending to smooth them out. I used this same glaze on the inside of his mouth, being careful not to get it on the teeth or the front of tongue.
I painted the fur on his head, belly and legs with this same glaze with a layer of
Cygor Brown on the ends blended in.
 Fur details. Credit: Dylan Gould
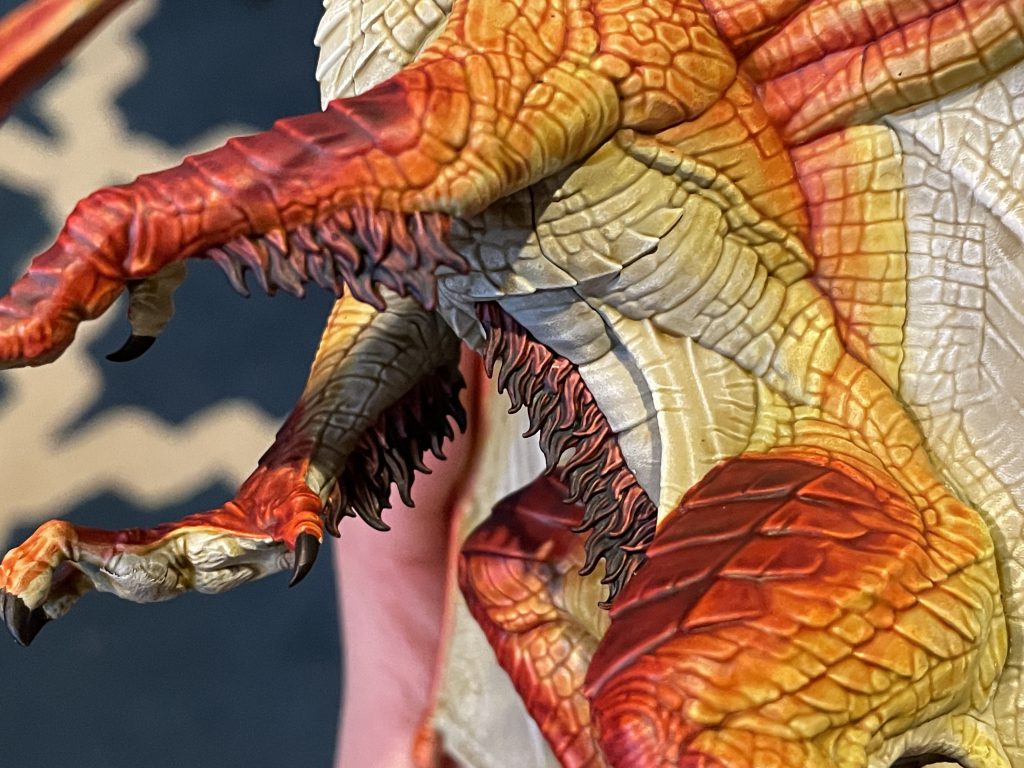
I then painted the eyes, teeth with white, the front of the tongue with
Blood Angels Red and highlighted the scarring on the side of his neck.
 Step 7 front. Credit: Dylan Gould
 Step 7 top. Credit: Dylan Gould
 Step 7 head and scars. Credit: Dylan Gould
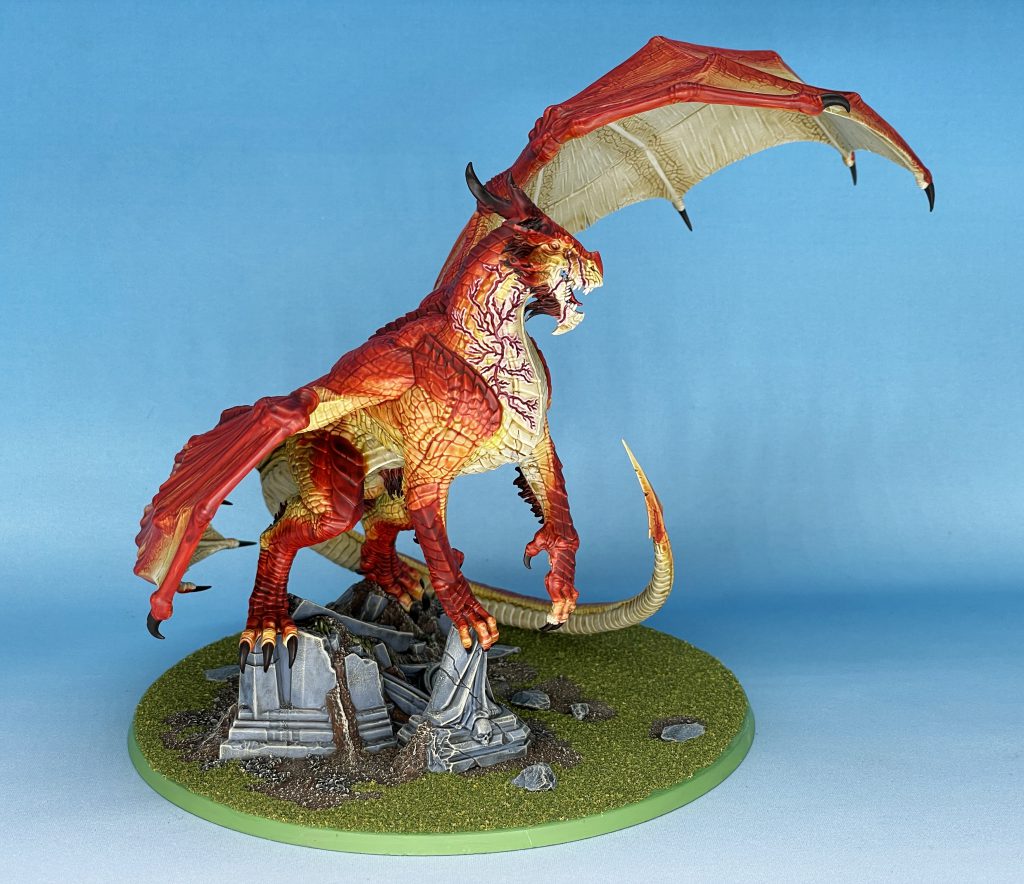
After dotting the left eye with a spot of
Corvus Black I glazed the scarring with a 50/50 mix of
Volupus Pink and
Contrast Medium, going back after it dried with a 80/20 mix of the same to strengthen the scars themselves. it was also at this stage a did little line highlights to his chest and took the opportunity to fix a tide-pool of Contrast the I'd allowed to happen.
 Detail of scars. Credit: Dylan Gould
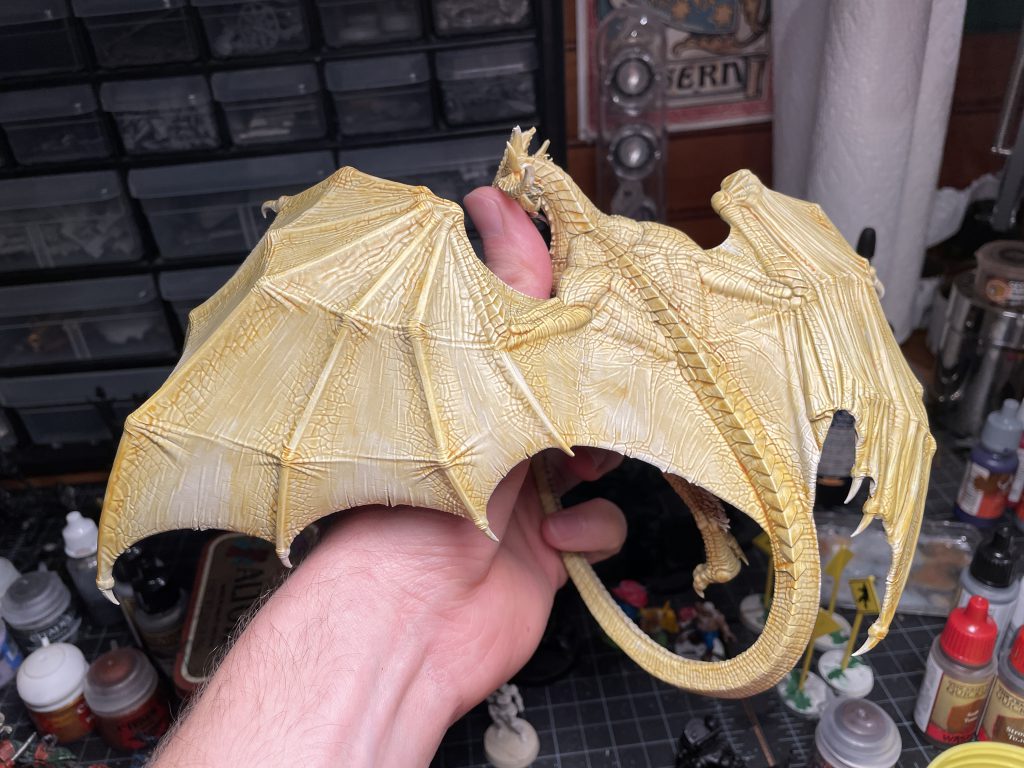
The last thing I did was to glaze the inside of the wings on either side of the ribs with a 50/50 mix of
Skeleton Horde and
Contrast Medium, blending it out to the centers.
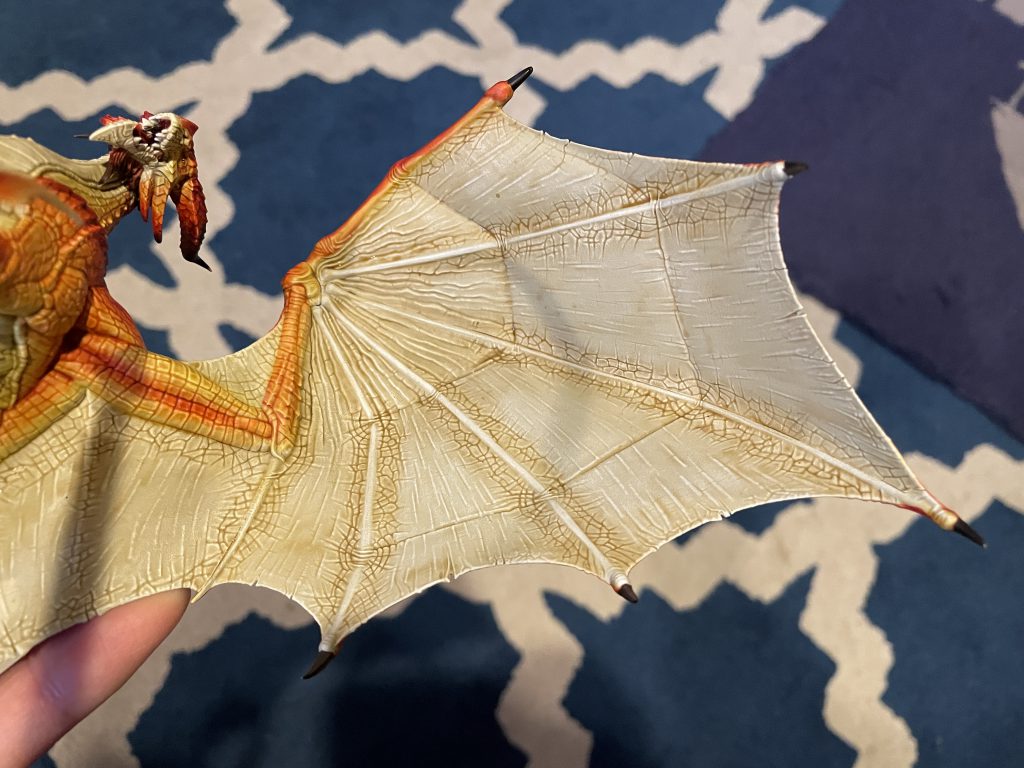 Final wing glaze. Credit: Dylan Gould
As far as the base goes, I base the stone with
The Fang, and the dirt with
Mournfang Brown.
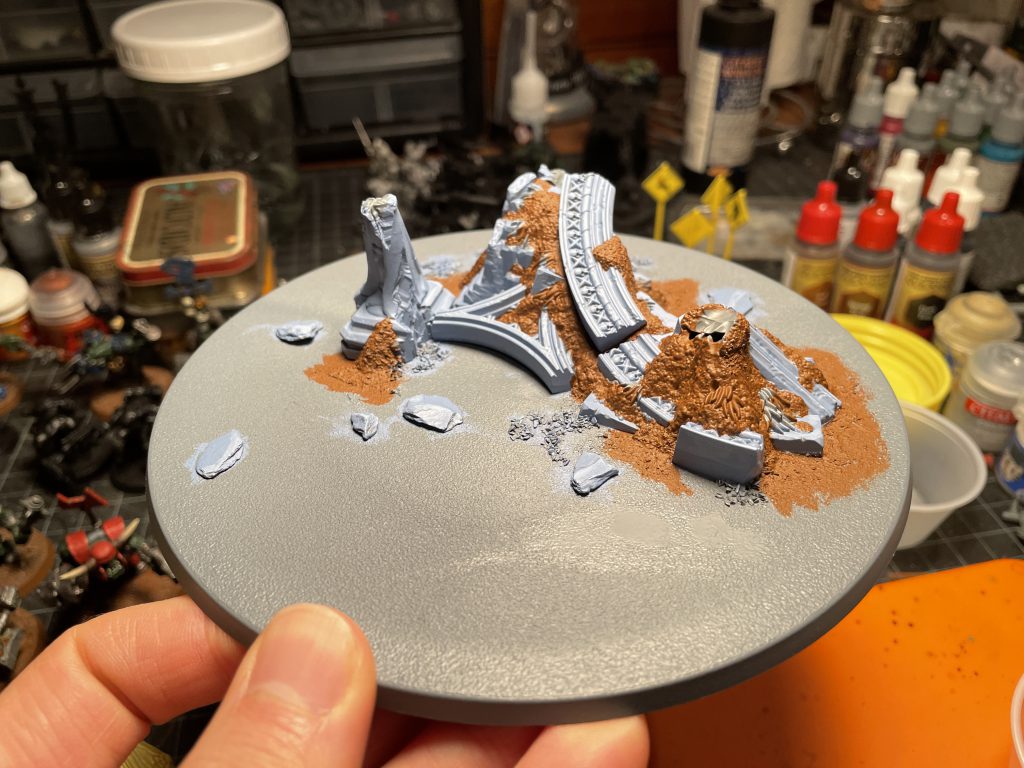 Base WIP. Credit: Dylan Gould
I did some highlights on the stone with old school
Space Wolves Grey. I put a Black wash over all of it and dry brushed it with Bone. I painted the weeds with the old Foundation Paint
Knarloc Green and glazed them with
Creed Camo. I painted the rest of the base with
Goblin Green.
 Base WIP. Credit: Dylan Gould
And that's basically it. I finished the base with a healthy dose of OnOne of mixed flock. And once that was dry, glued him onto the base.
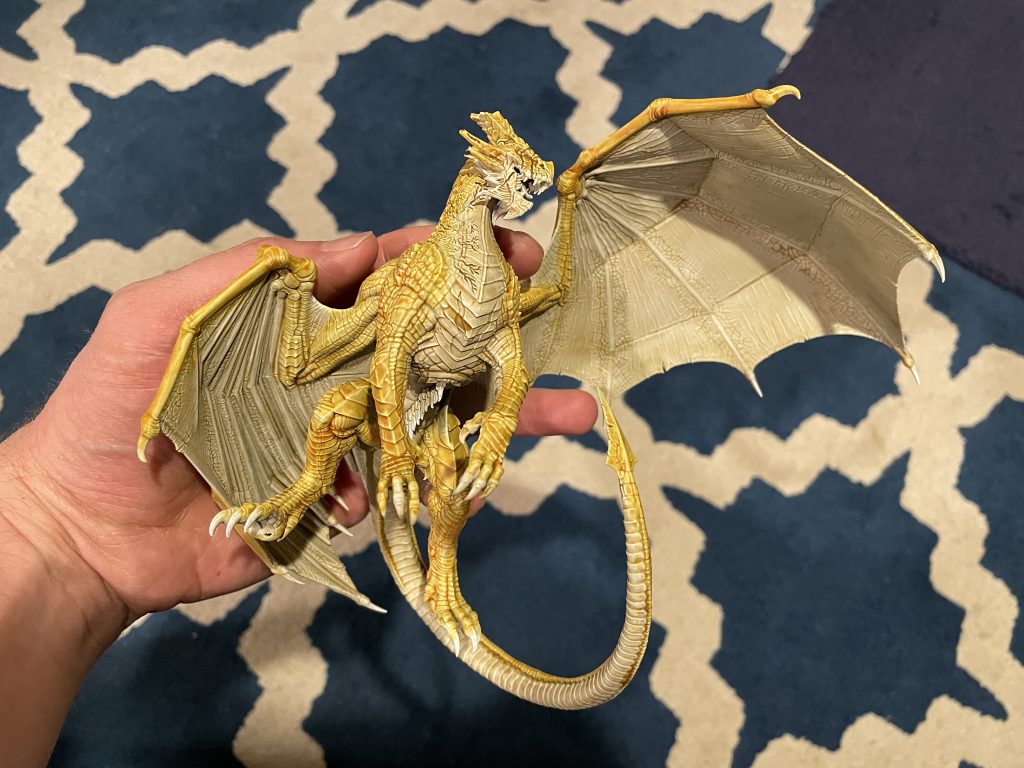
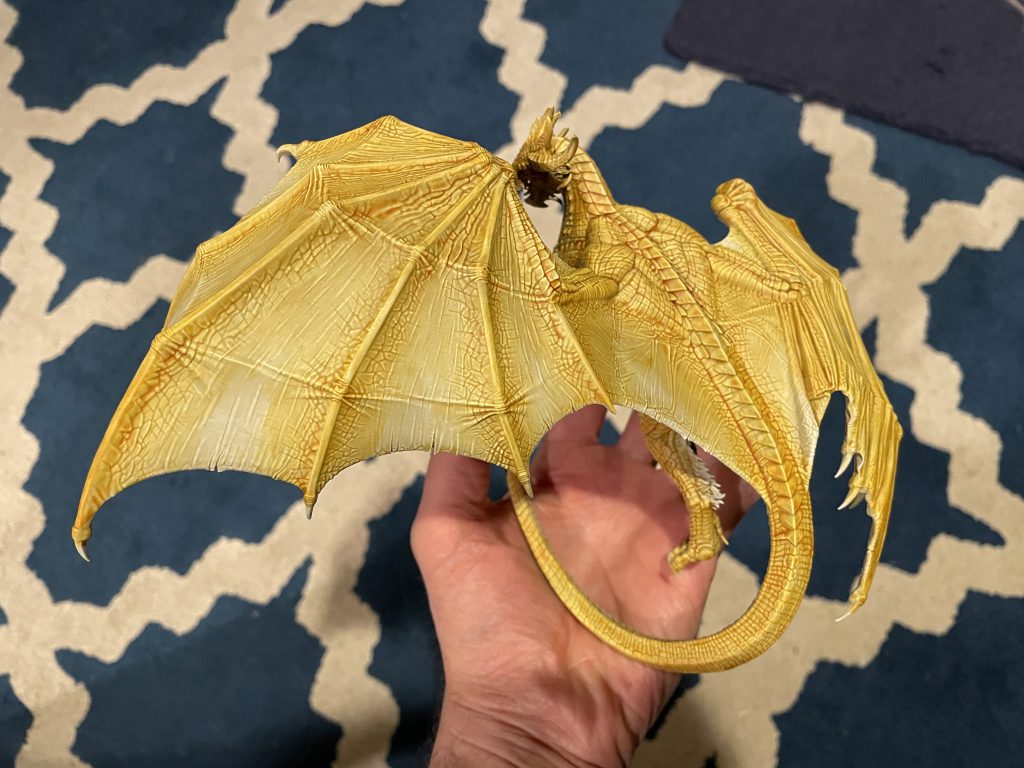
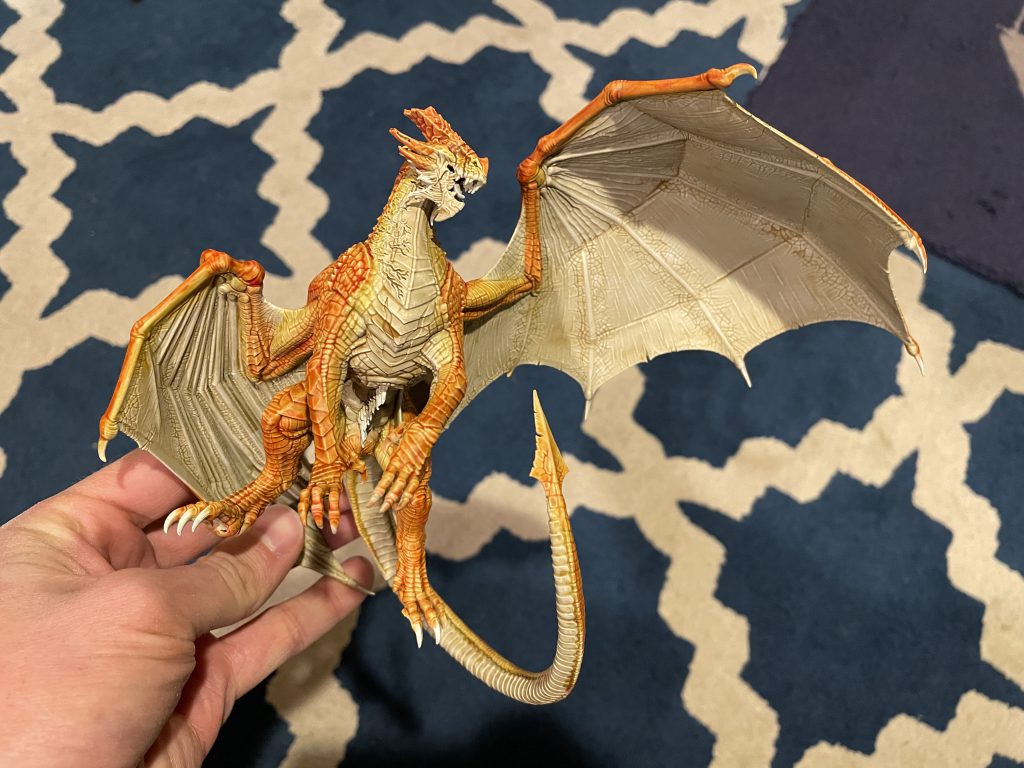
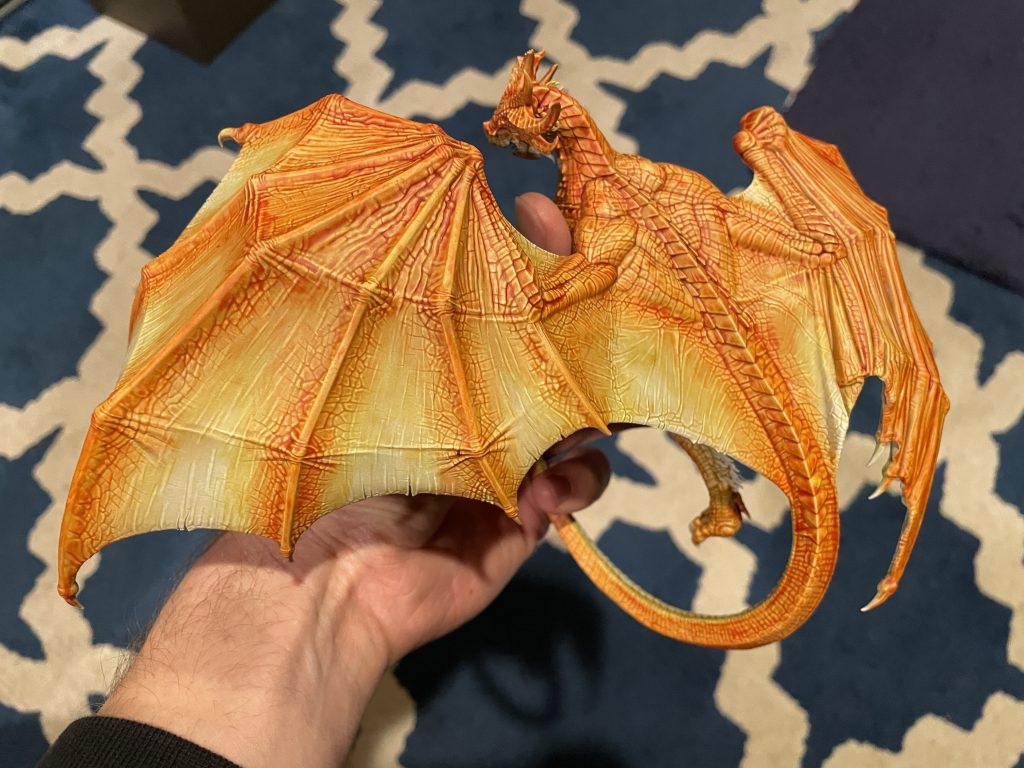
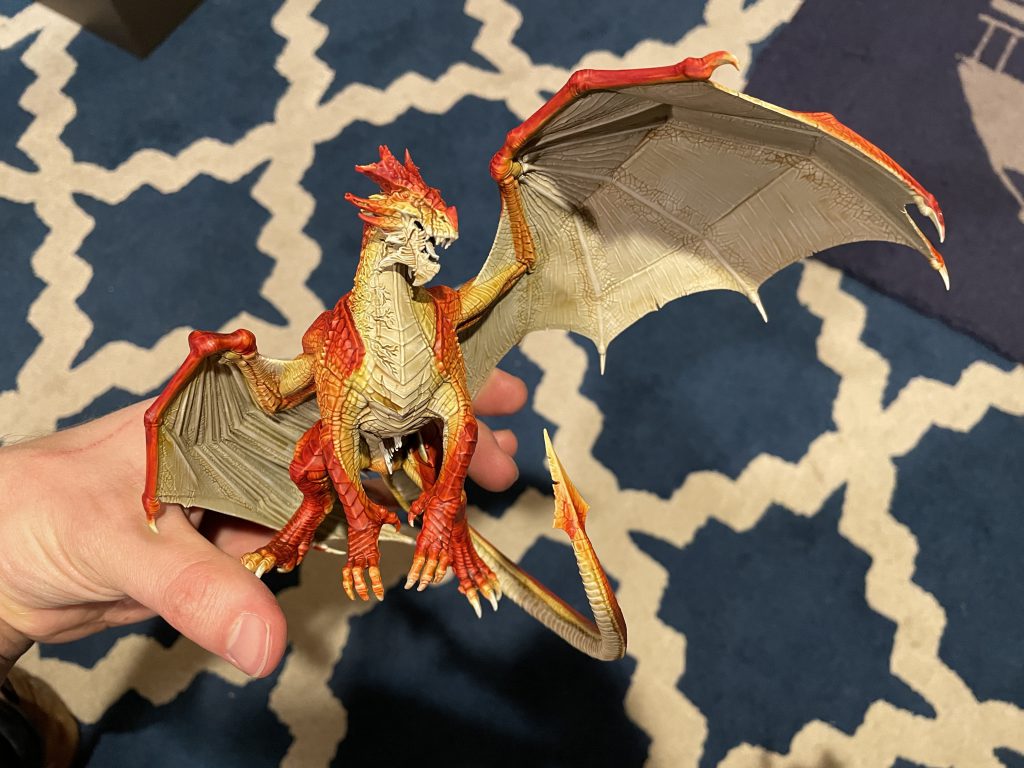
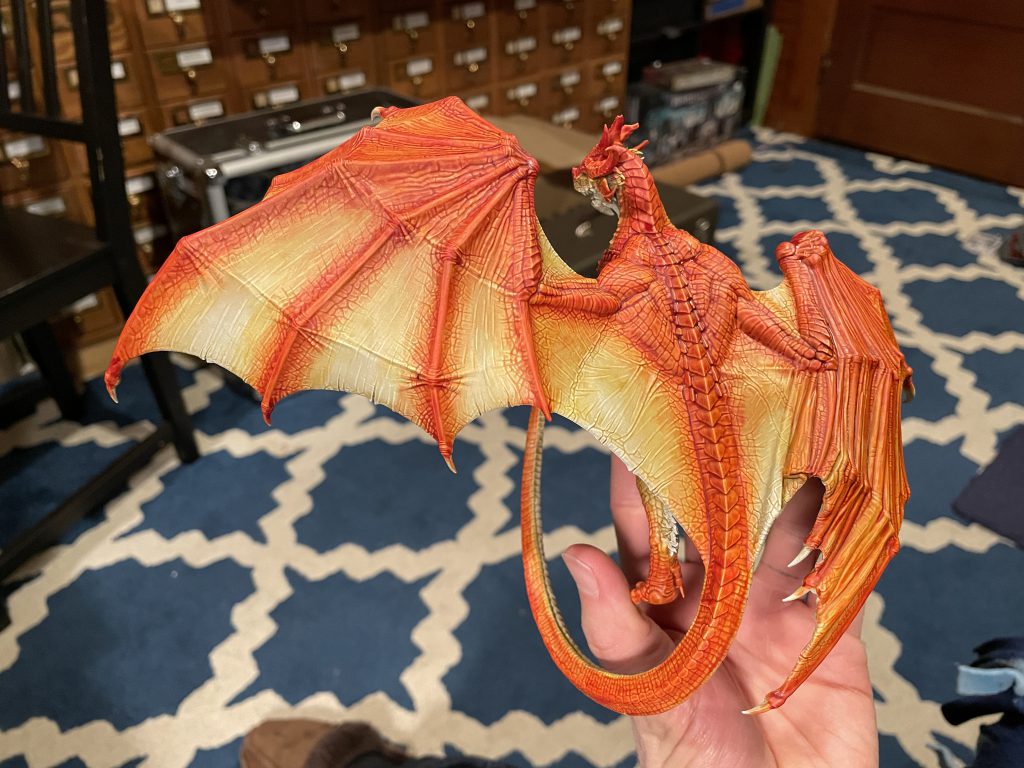
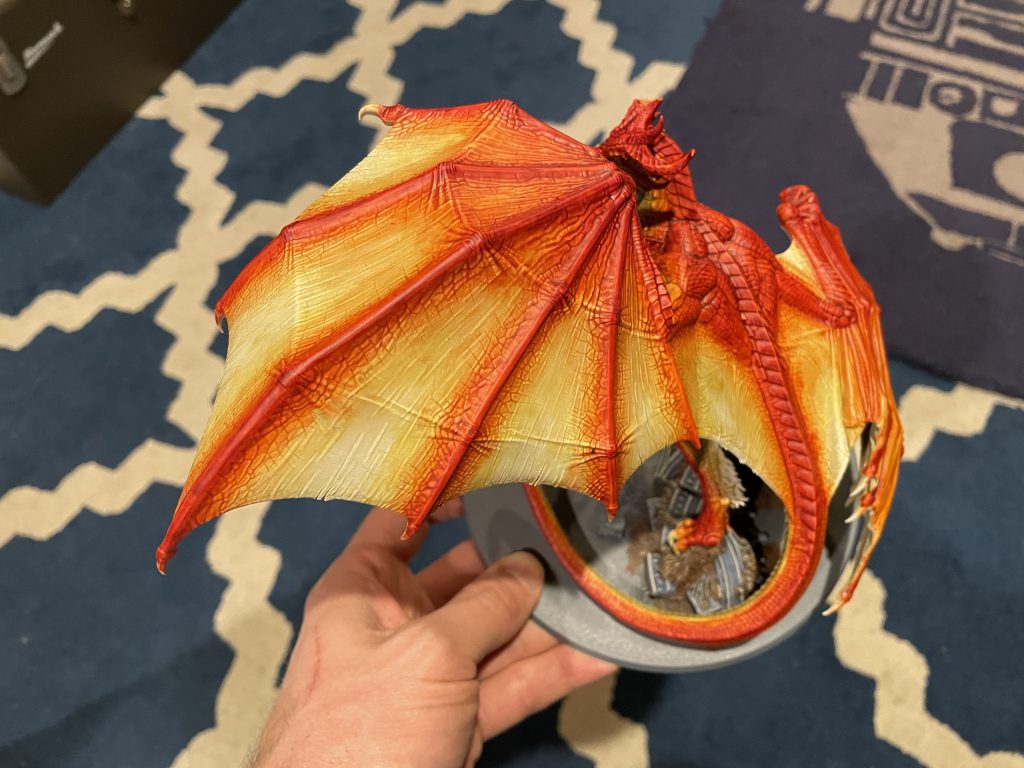
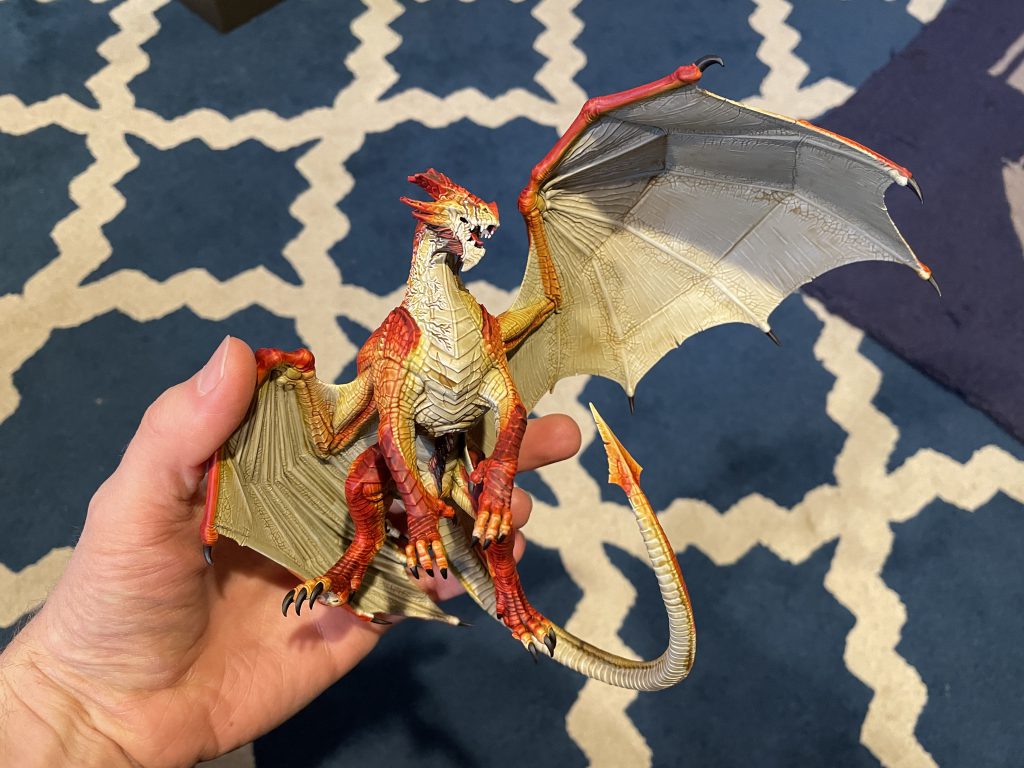
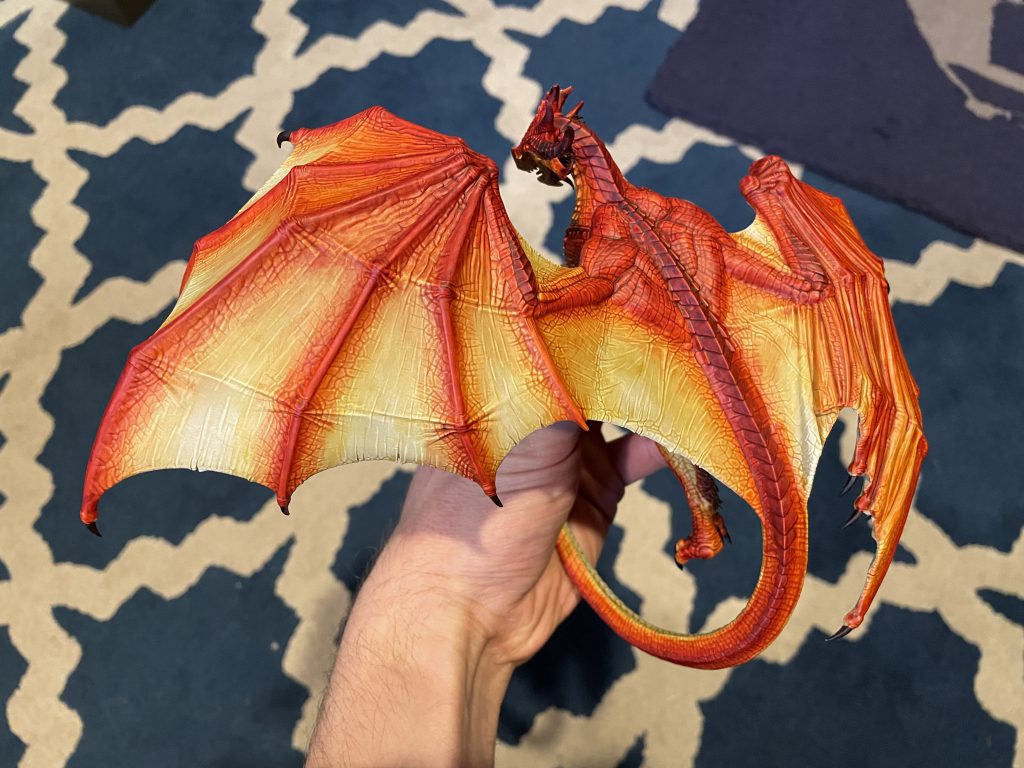
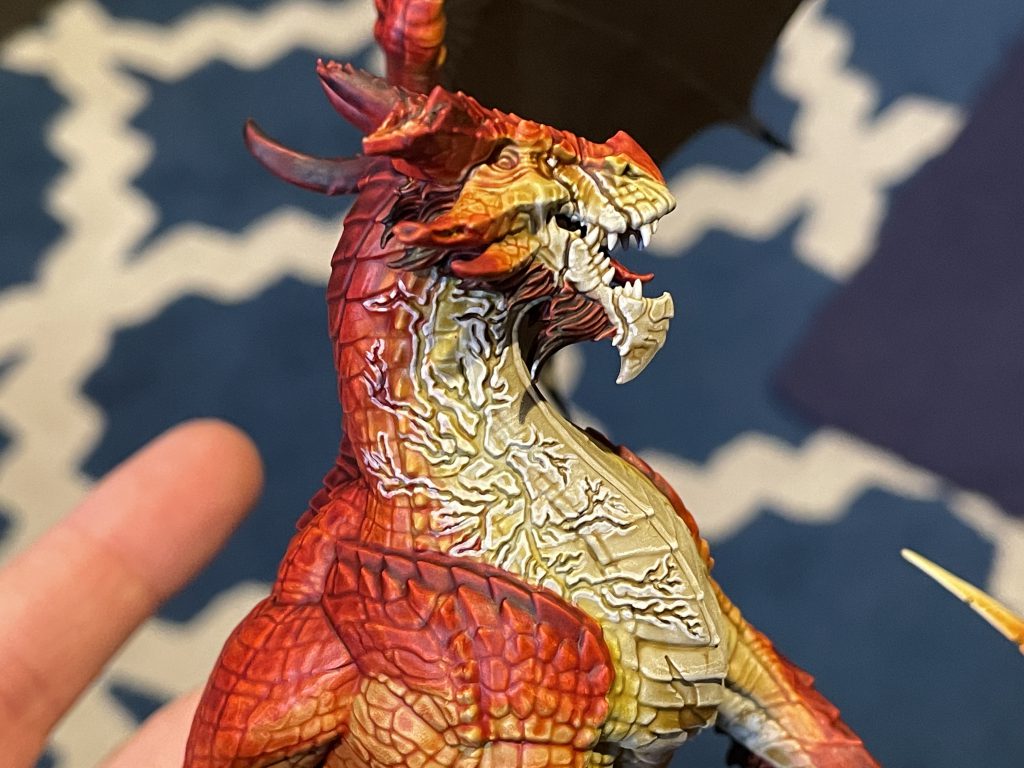
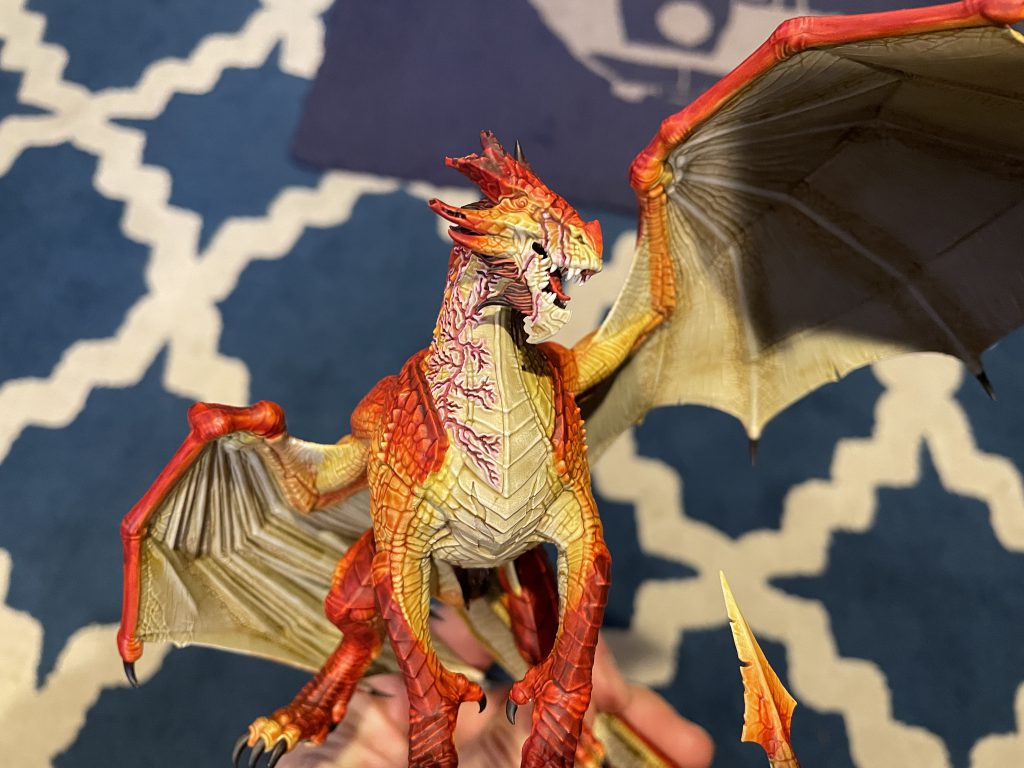
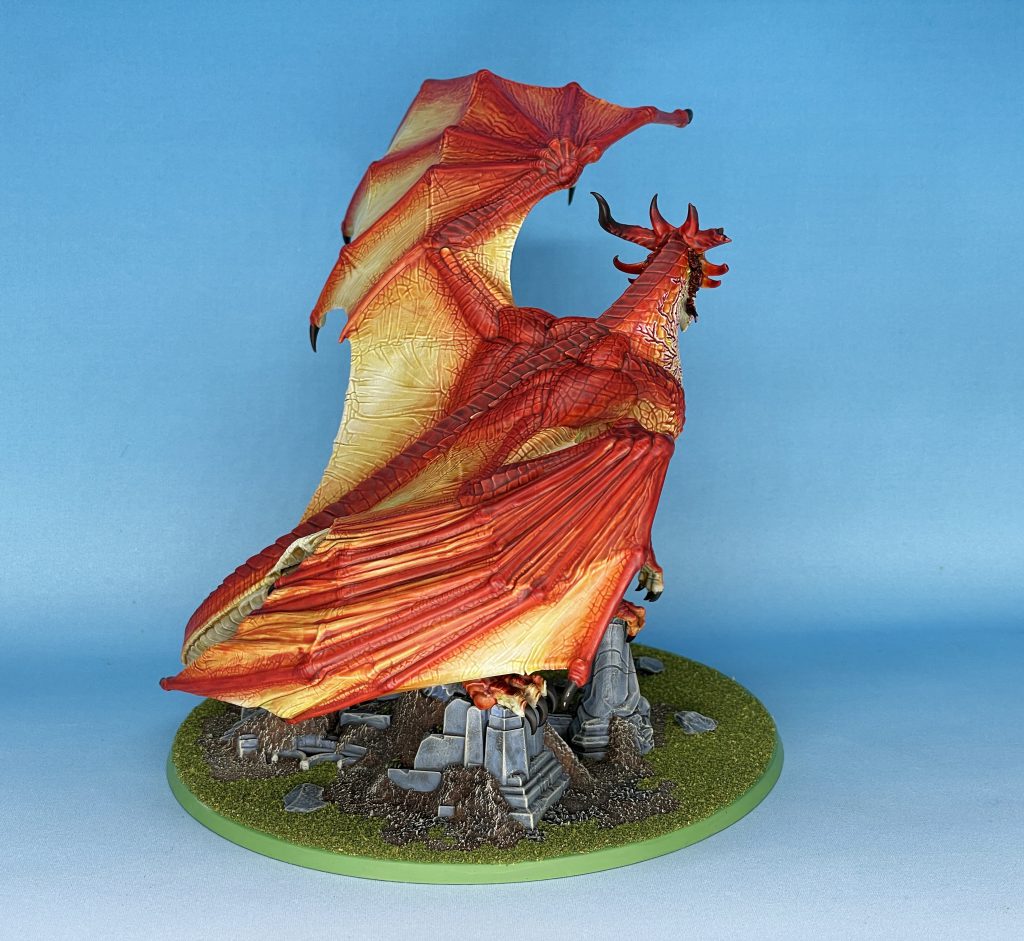
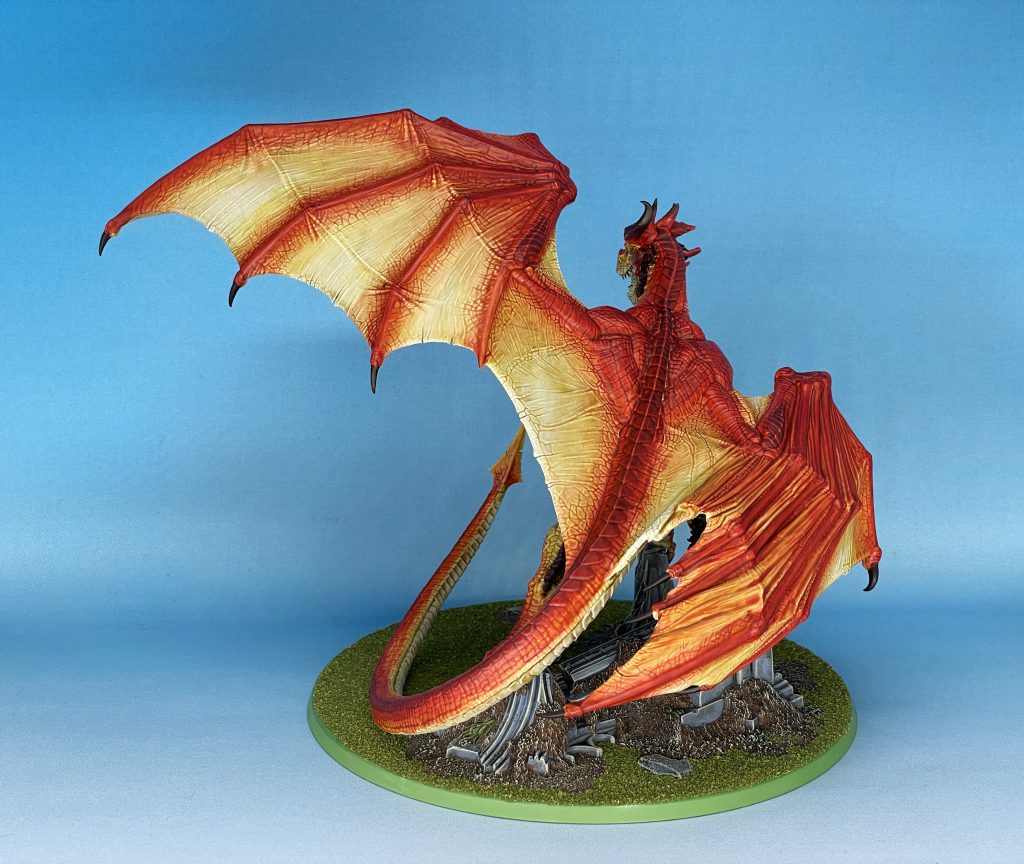
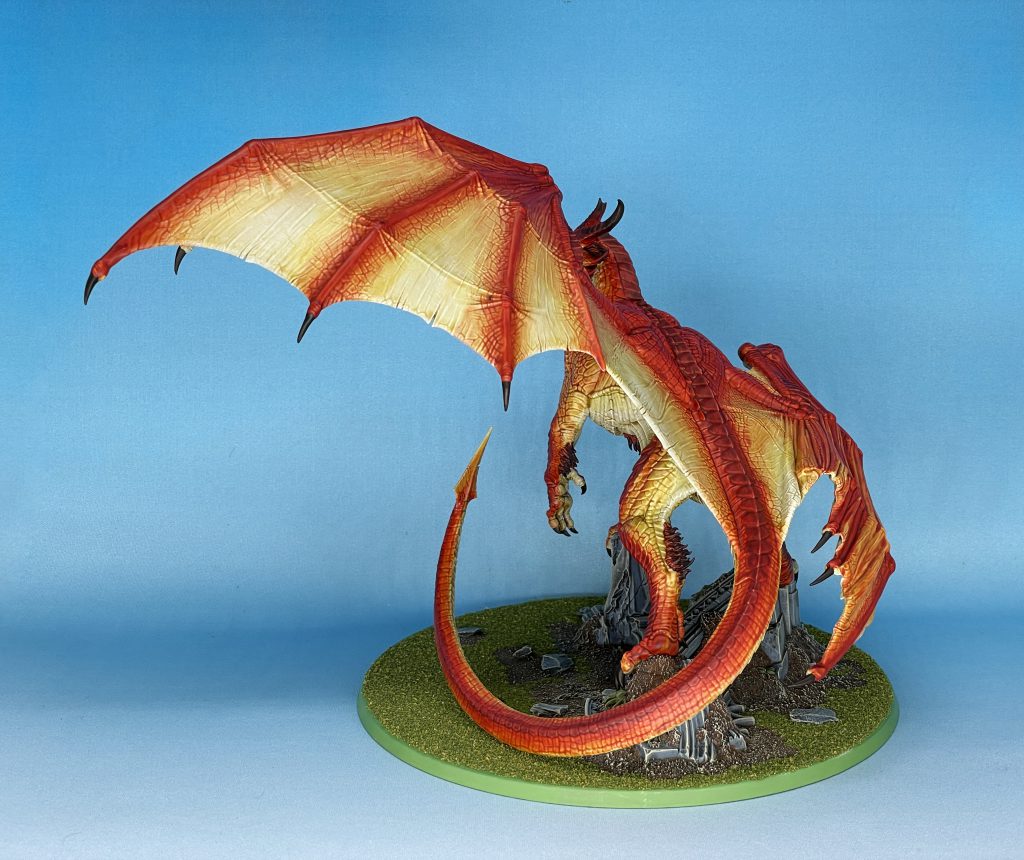
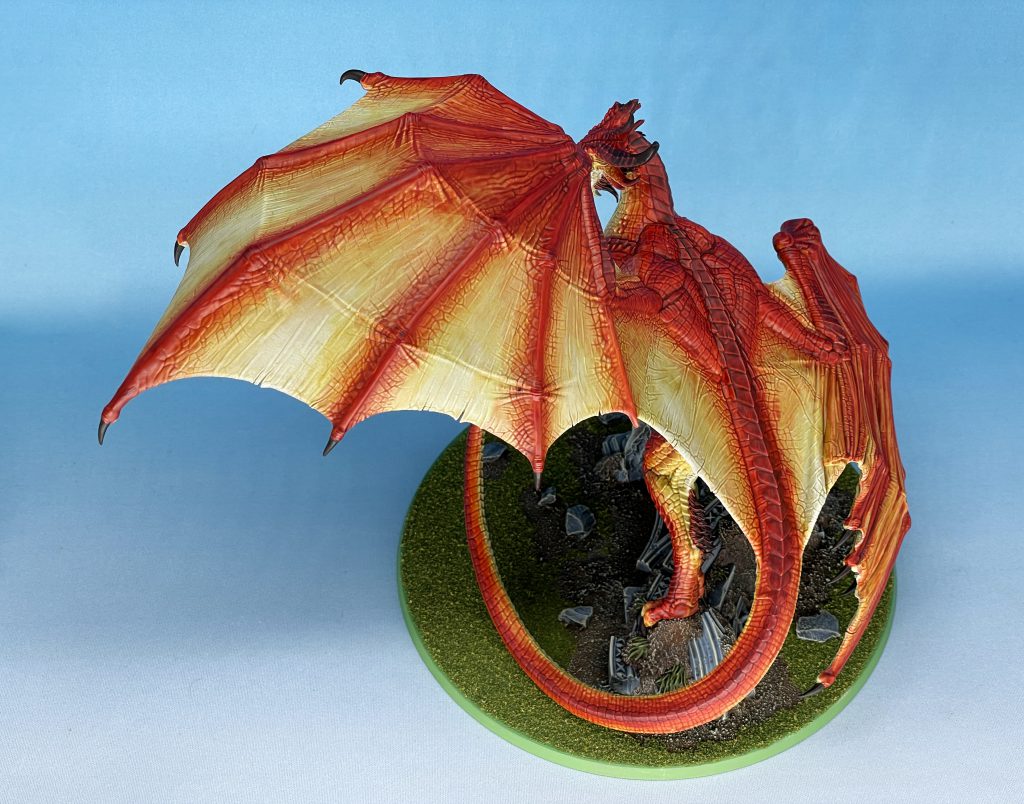
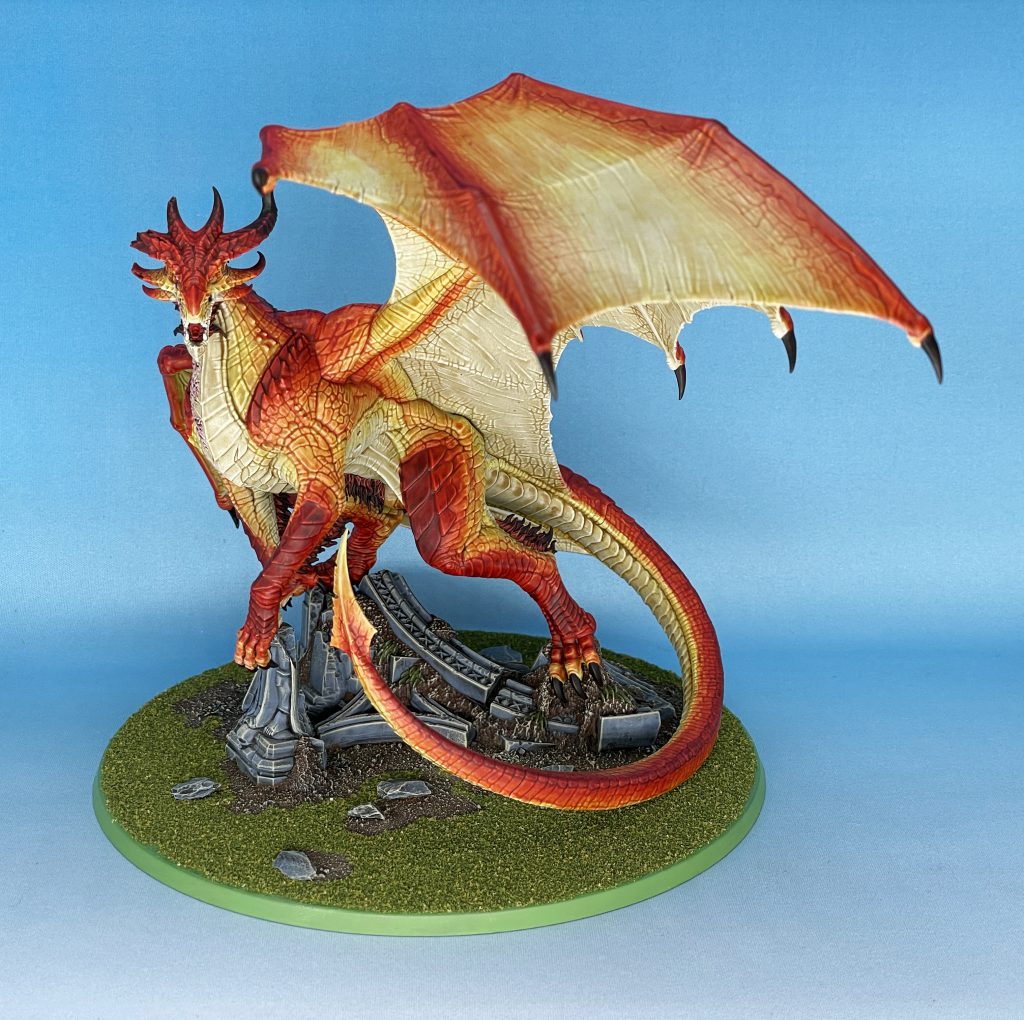 Karazai the Scarred. Credit: Dylan Gould
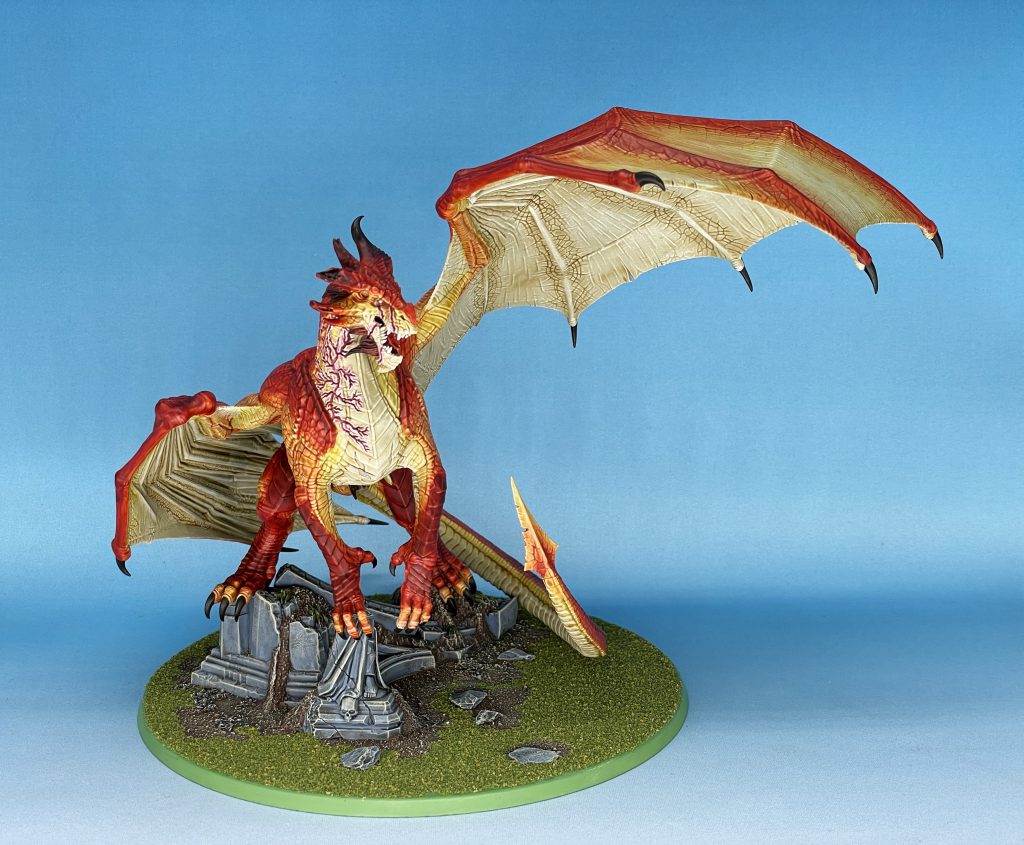 Karazai the Scarred. Credit: Dylan Gould
 Karazai the Scarred. Credit: Dylan Gould
 Karazai the Scarred. Credit: Dylan Gould
 Karazai the Scarred. Credit: Dylan Gould
 Karazai the Scarred. Credit: Dylan Gould
 Karazai the Scarred. Credit: Dylan Gould
 Karazai the Scarred. Credit: Dylan Gould
Have any questions or feedback? Drop us a note in the comments below or email us at contact@goonhammer.com. Want articles like this linked in your inbox every Monday morning? Sign up for our newsletter. And don’t forget that you can support us on Patreon for backer rewards like early video content, Administratum access, an ad-free experience on our website and more.
Karazai the Scarred. Credit: Dylan Gould
Have any questions or feedback? Drop us a note in the comments below or email us at contact@goonhammer.com. Want articles like this linked in your inbox every Monday morning? Sign up for our newsletter. And don’t forget that you can support us on Patreon for backer rewards like early video content, Administratum access, an ad-free experience on our website and more.Thank you for being a friend.


 Goonhammer App and Patron Updates: April, 2026
 Kill Team Tournament Report: Engage, Party, Repeat's March Madness 2026
 Goonhammer Reviews: Tribal Conquest