We've had Chaos and loyalist Space Marines from the 41st millenium, so lets take a trip back in time to the Horus Heresy! My painting talents lie in quantity, not quality (I've somehow painted about 6000 points of Iron Warriors since Horus Heresy second edition dropped...), and, knowing that going in, I recognised I'd need a simple, easily repeatable scheme where the priority is getting models on the table to be wasted and ignored by those that commanded them.
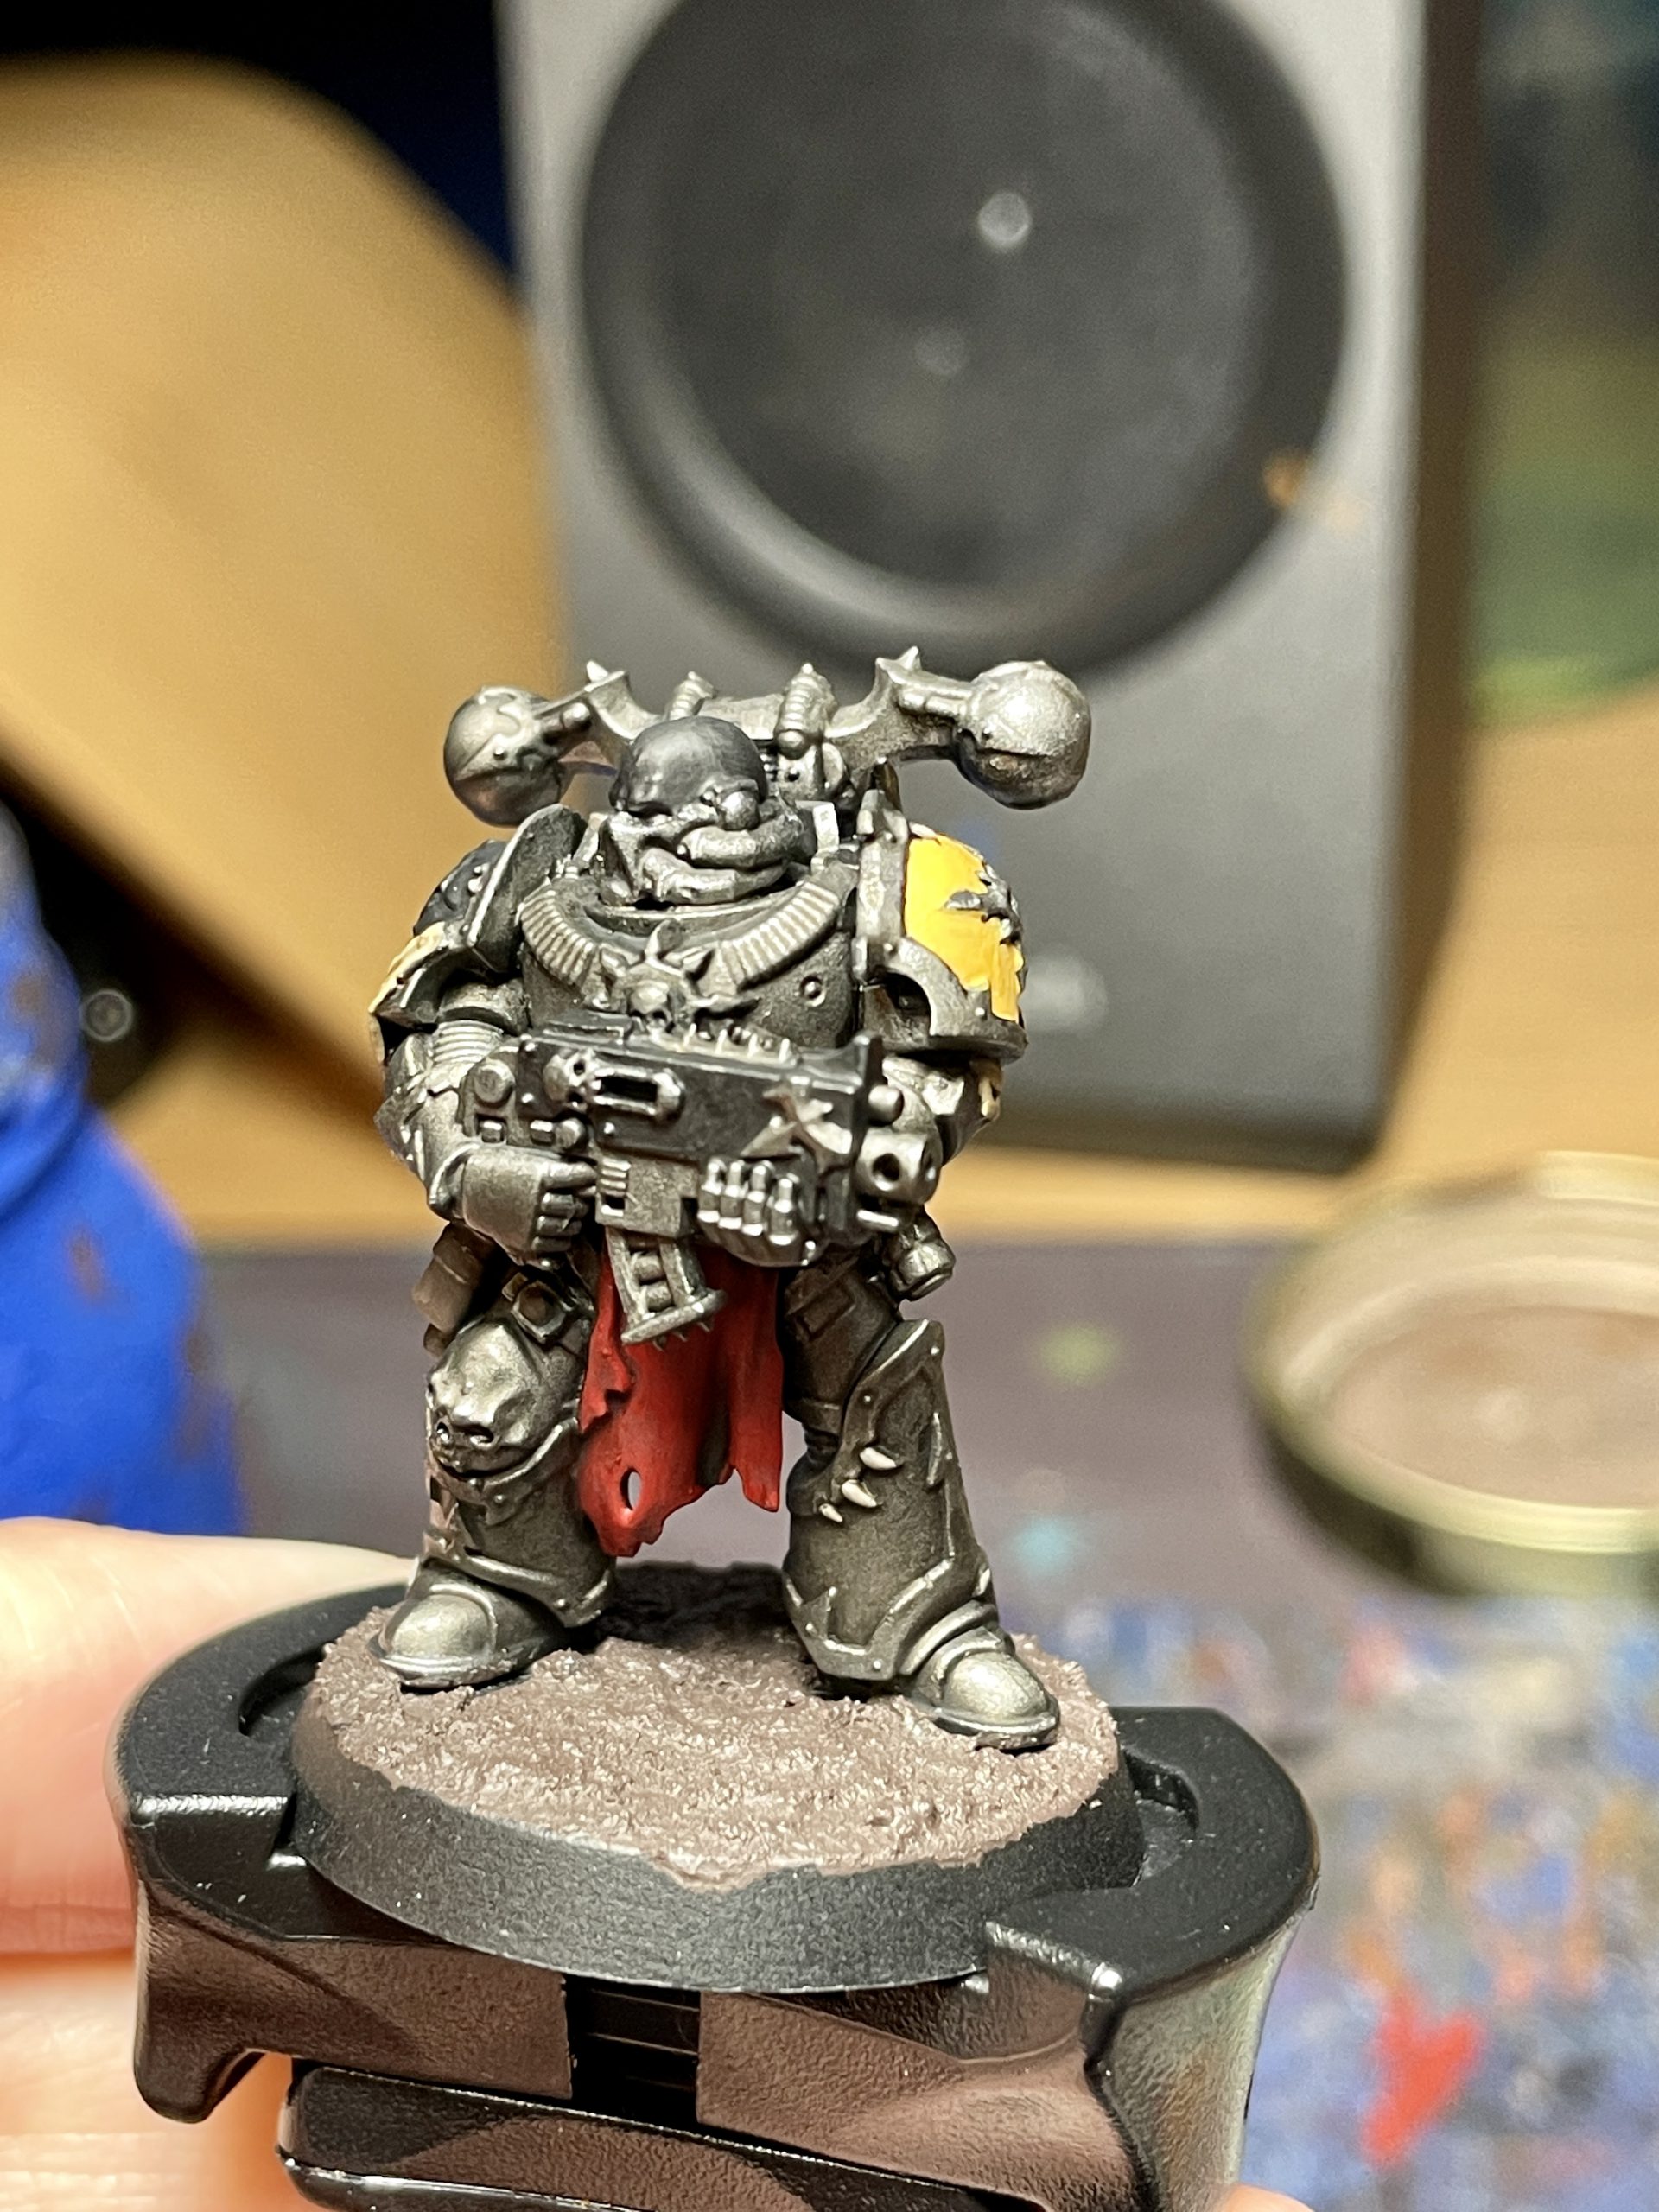
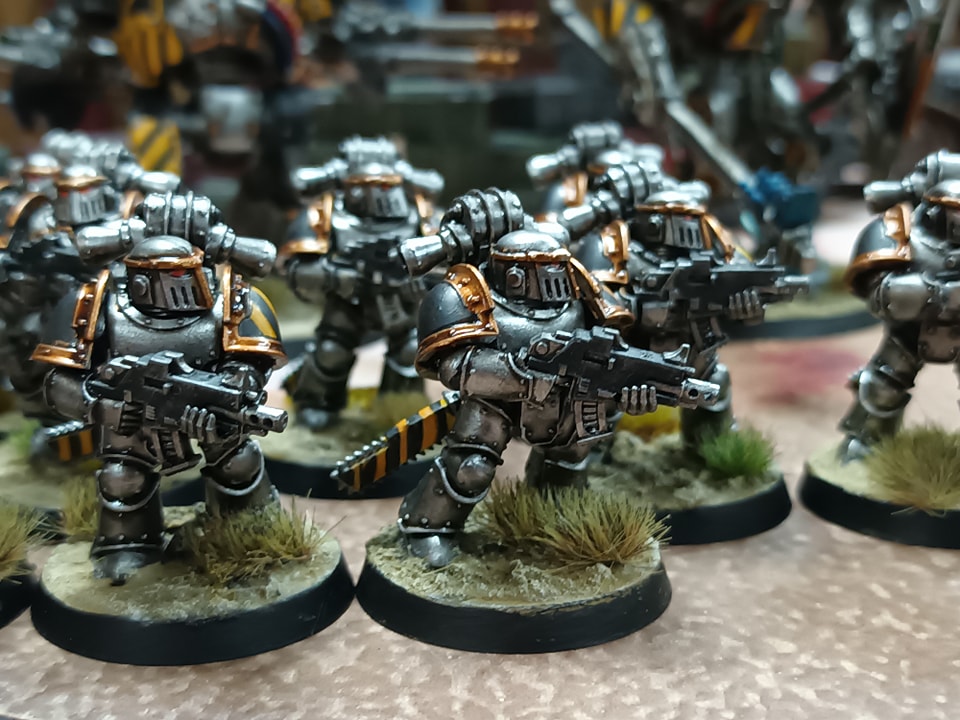 My first tactical squad. Aside from decals, this is a complete and simple scheme. Credit: Magos Sockbert
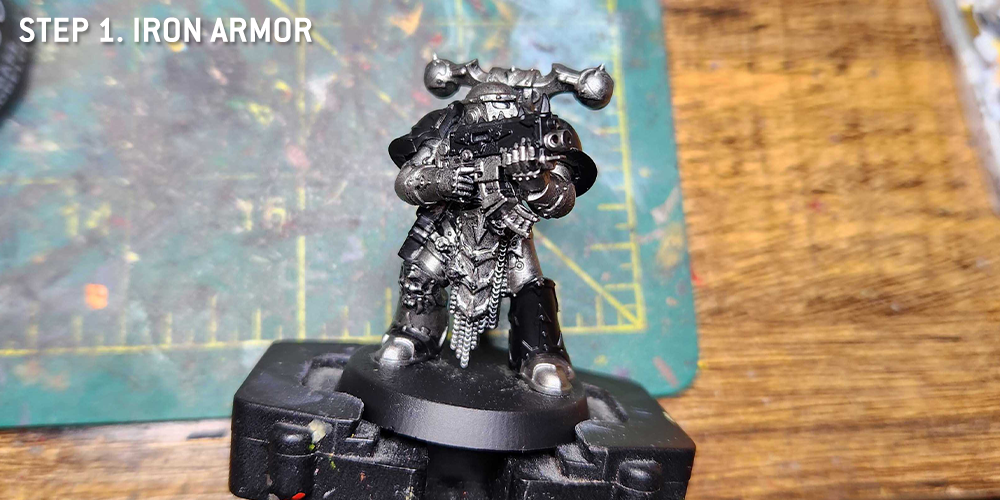
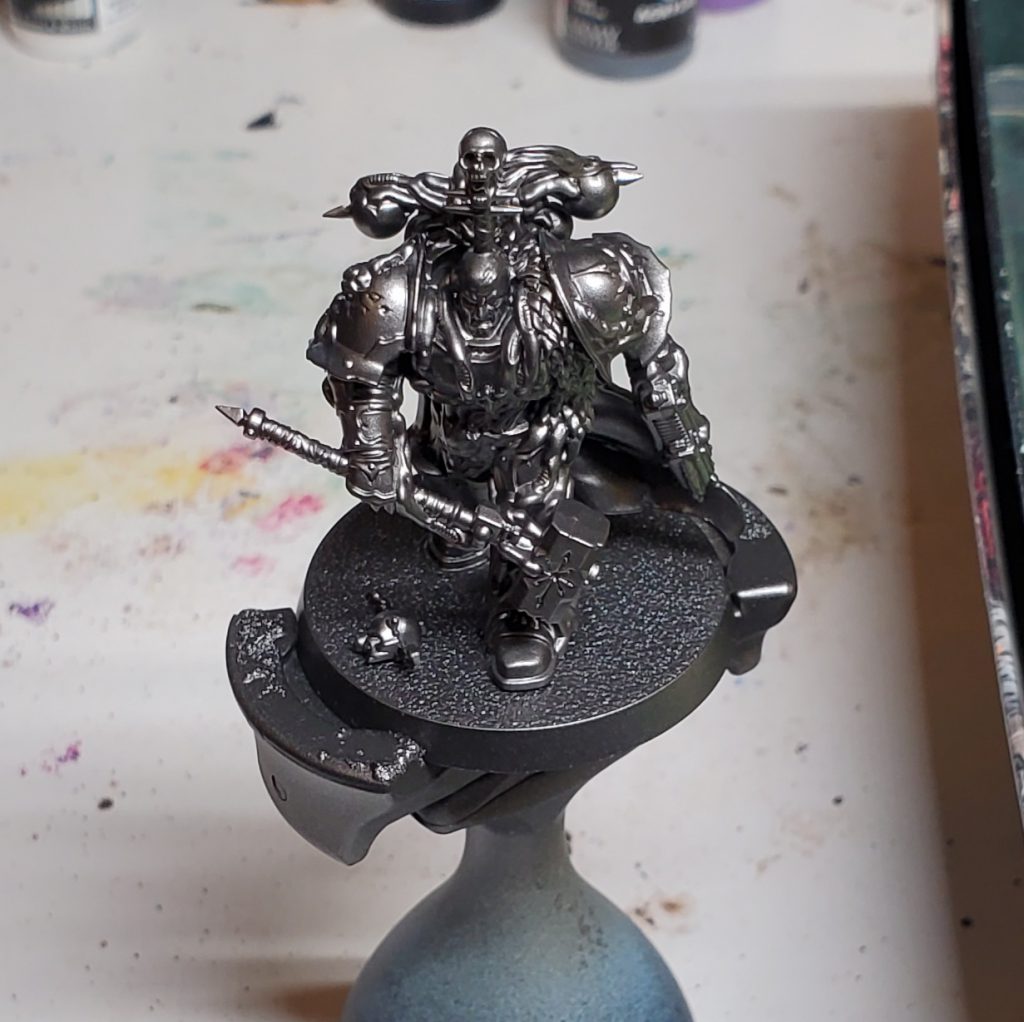
The steel is the most important part, and while a lot of people go with a very grimy look for this most grimdustrial of Legions, I wanted to go with something a bit brighter after the heavyily weathered look I went with for my Mechanicum. To get this gleam, I primed black before getting a nice even coat of
Vallejo Metal Dark Aluminium with my airbrush. I don't normally paint with an airbrush, and only use it here to ensure this layer was as smooth as possible so the next step works. You could use
Ironbreaker, or even a rattlecan of
Leadbelcher if you wanted a darker look, but I prefer the more metallic, gleaming finish of the excellent
Vallejo Metal range. This may take a few coats, and you
really need it to be even and smooth across the model, but the next step is simple: slather the model in
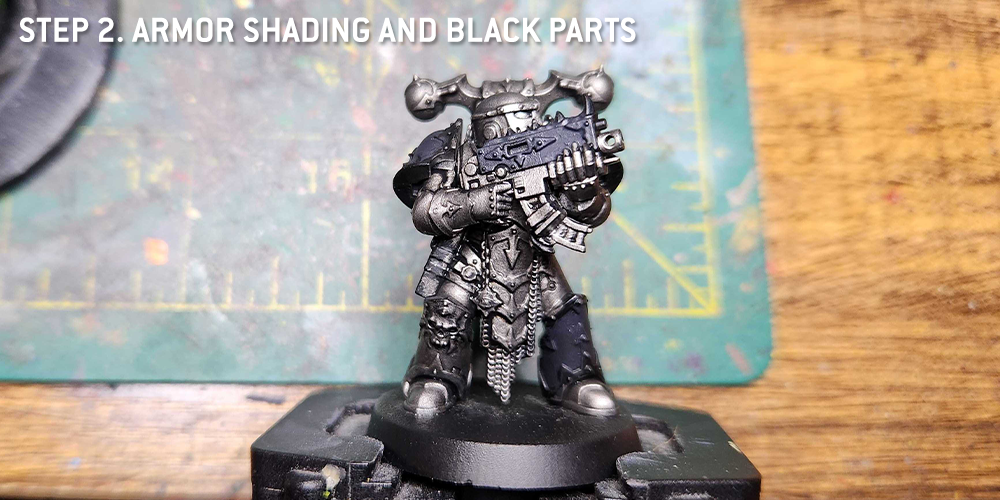
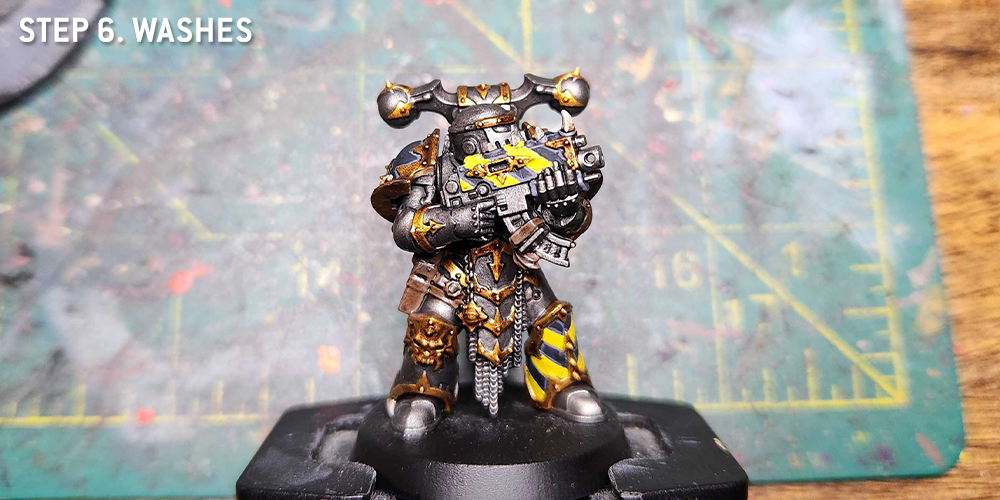
Nuln Oil Gloss. Make sure it doesn't pool too heavily anywhere, but after that you're done. The natural glint of the
Dark Aluminium combined with the gloss of
Nuln Oil, particularly flowing into and around all those cracks and crevasses, gives a finish that looks
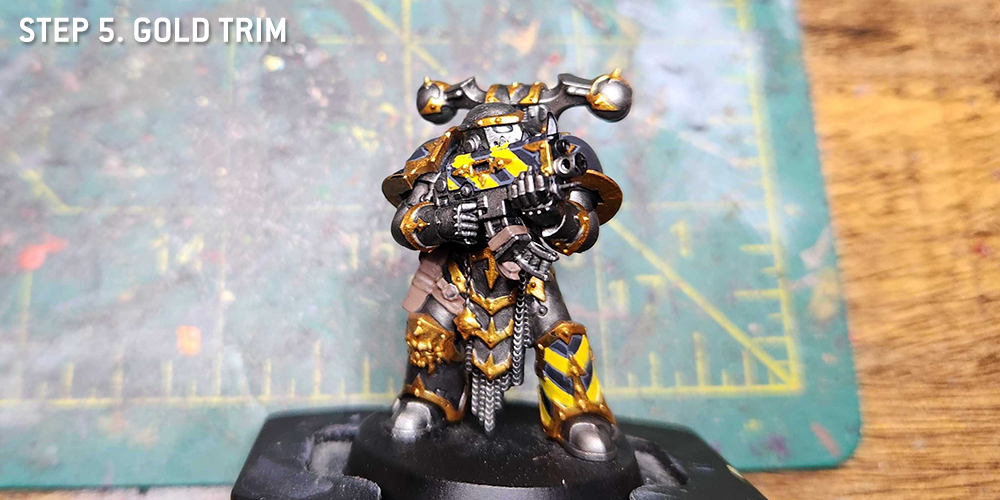
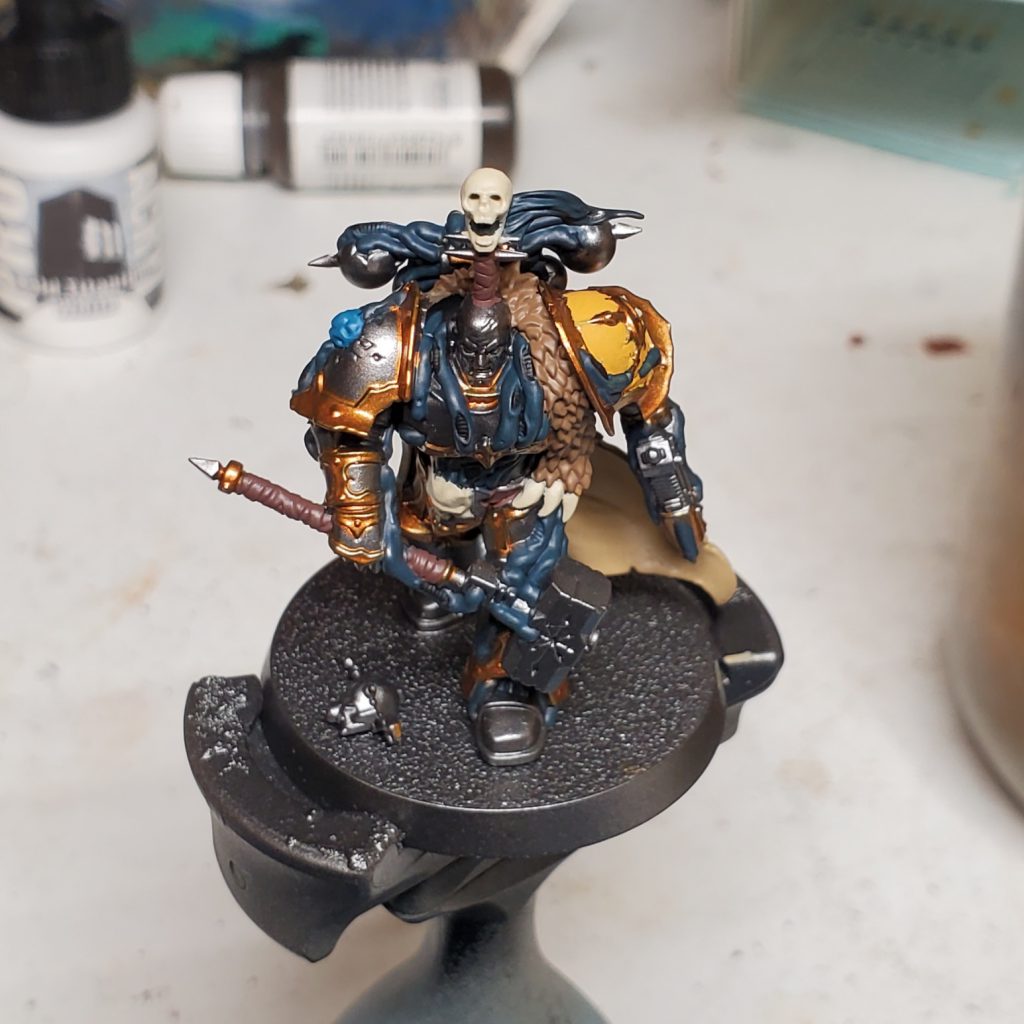
way better than it has any right to for how little work you just put in. The brass trim and spot colouring is pretty similar: basecoat with
Brass Scorpion, then wash with
Agrax Earthshade Gloss. You'll probably want to highlight the brass (I used
Runelord Brass), and if you want to pick out a few shinier spots on the steel, try
Vallejo Metal Silver; I don't use it as a line highlight, rather almost a smudge on high points where the light may hit. Sadly,
Nuln Oil Gloss and
Agrax Earthshade Gloss are both extinct in the wild, but there are a few alternatives I'm yet to check out.
Vallejo's Gloss Medium is a frontrunner, but I'd also like to try just a simple black wash using
Windsor & Newton ink.
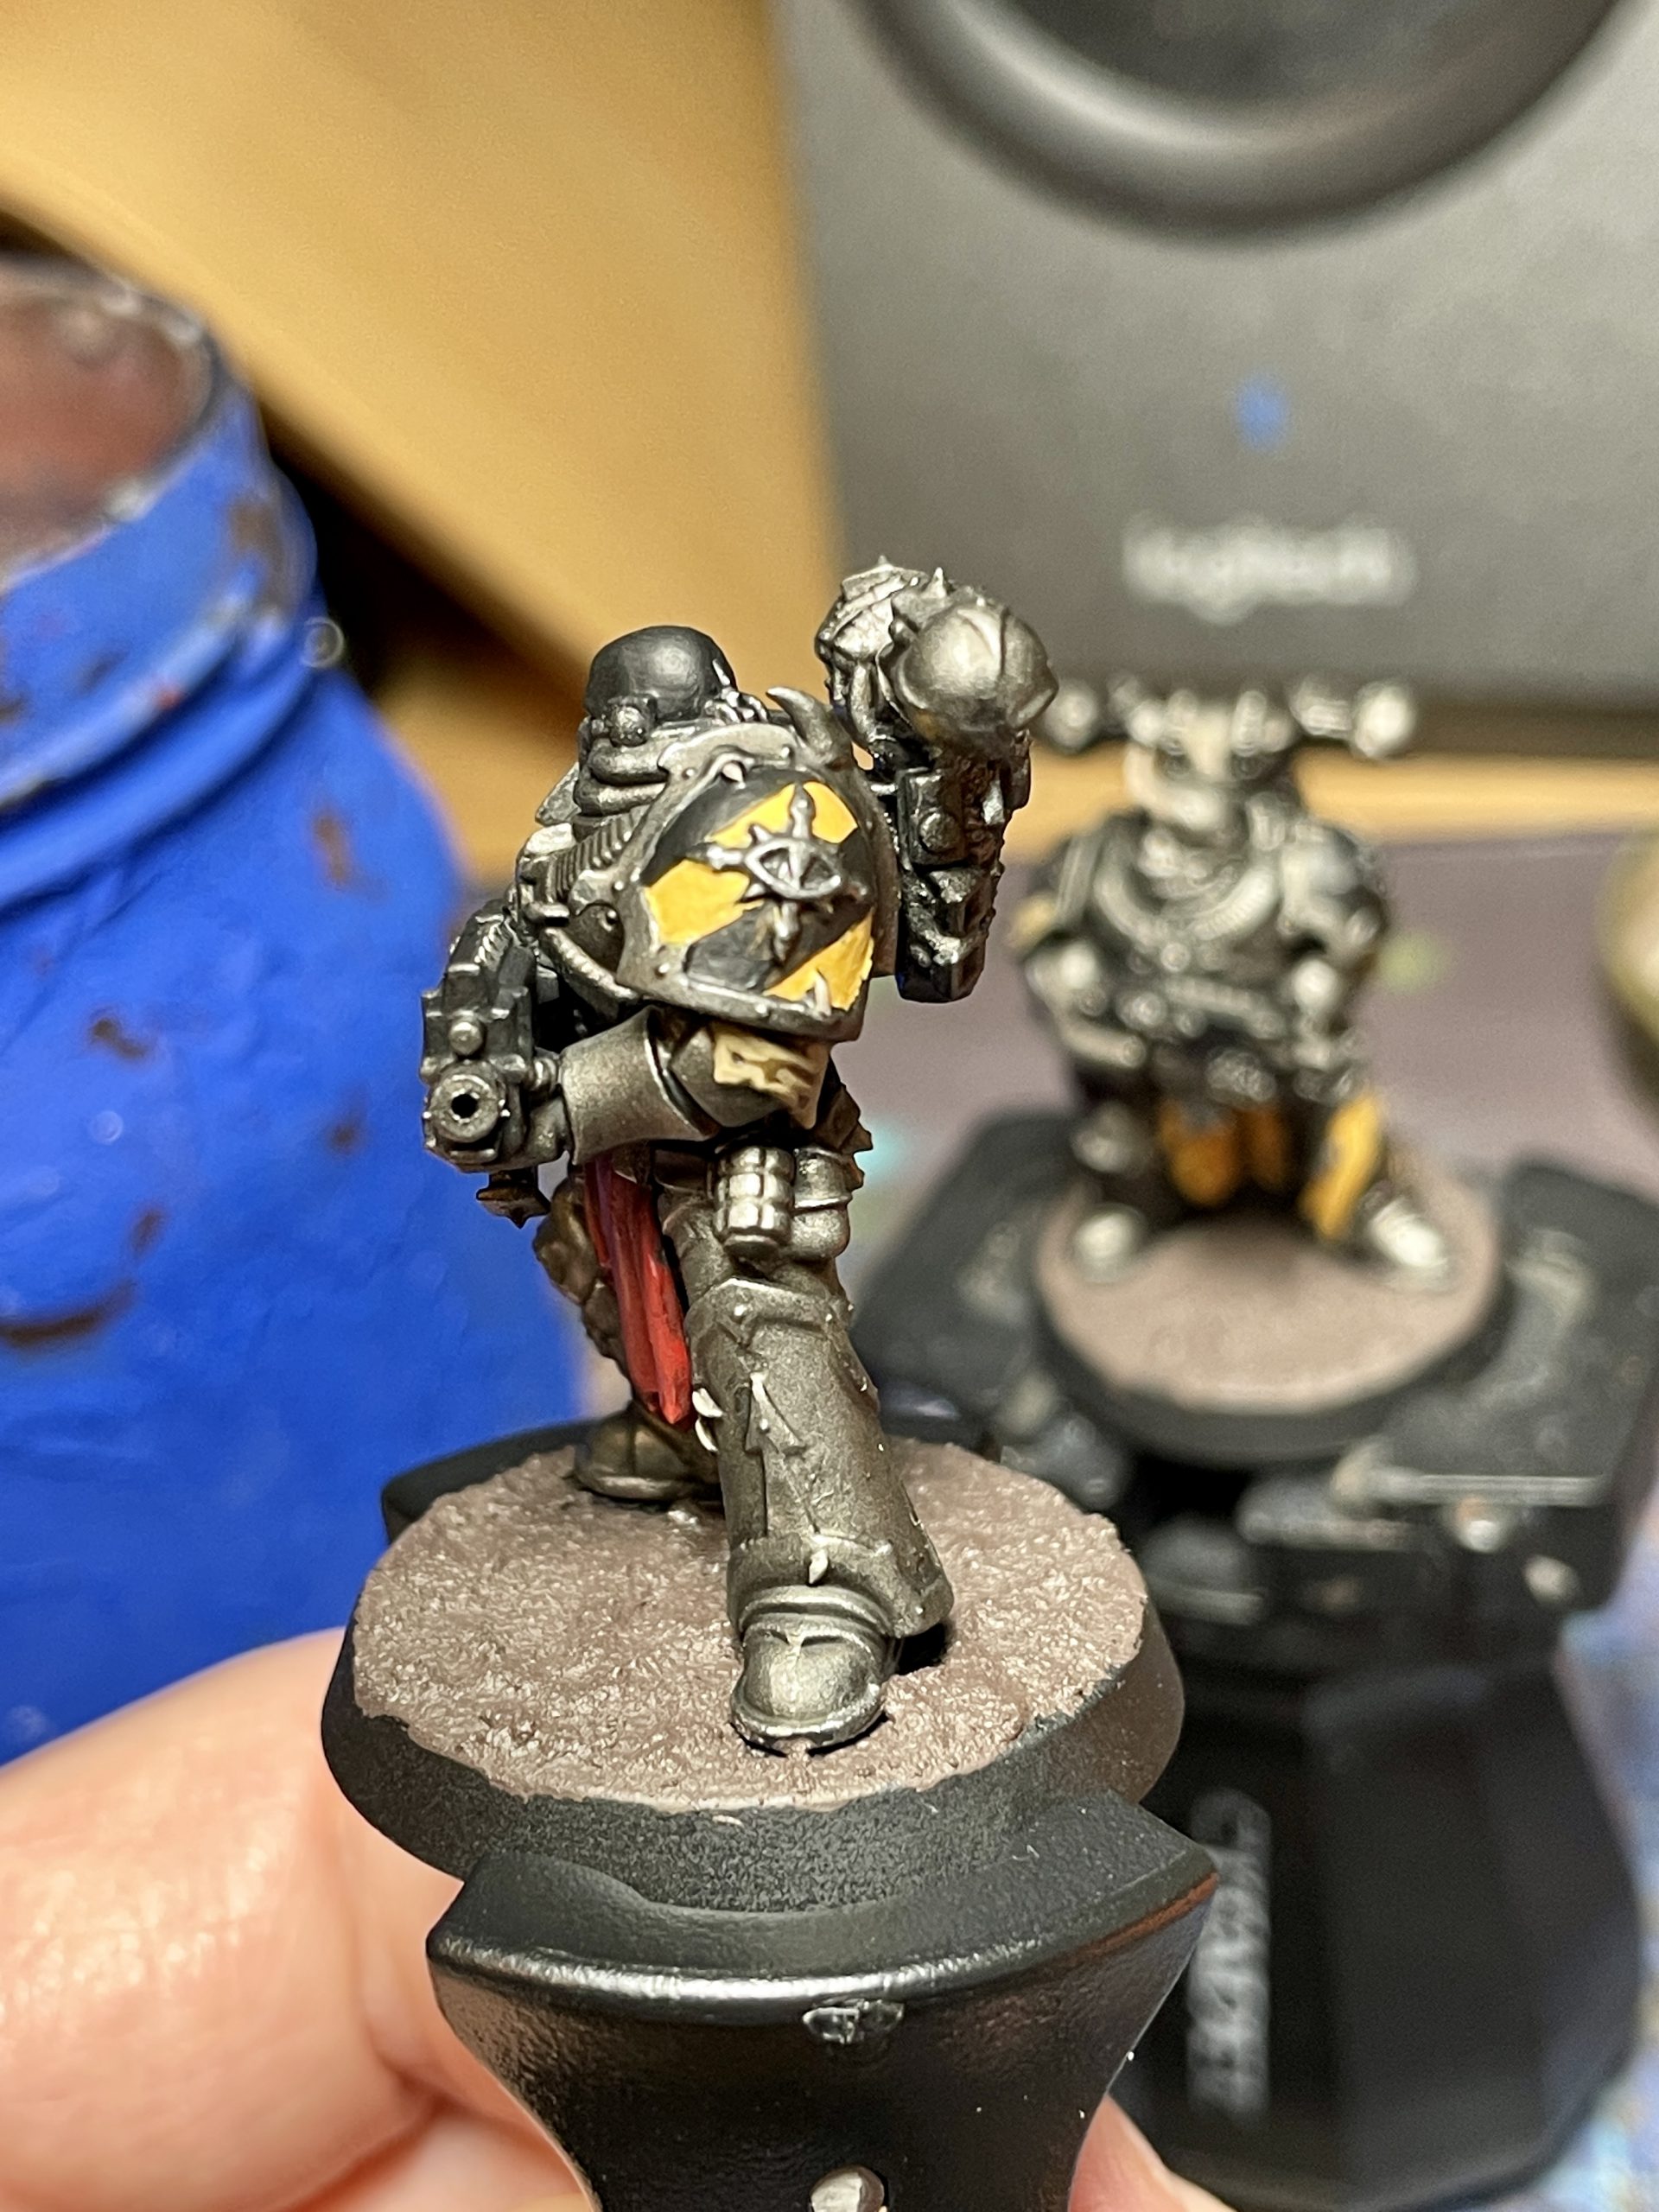
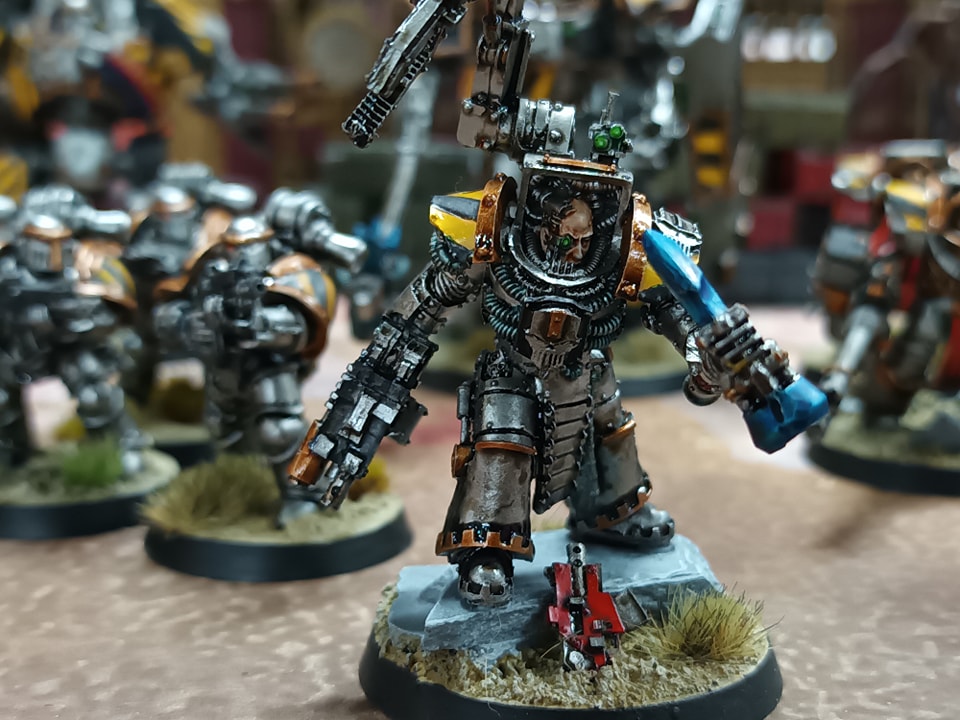 A Warsmith of the IVth Legion. Credit: Magos Sockbert
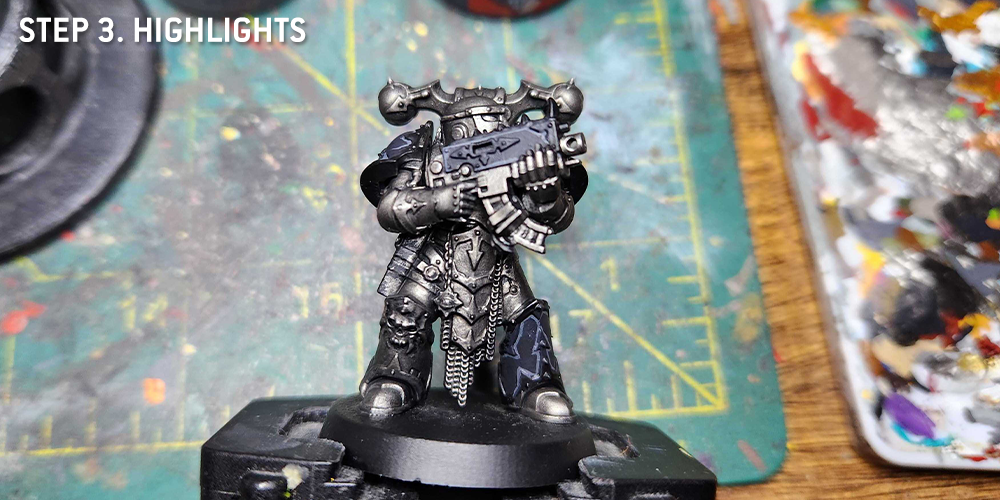
The guns are simply
Black Templar Contrast over however the metal of the guns has ended up (no need to neaten it up first!); it gives them enough definition at a distance to not look like just a blob, and doesn't draw away from the rest of the model. The red, which I used as a spot colour and for most eyes, was simply
Mephiston Red washed with
Carroburg Crimson, then relayered with
Evil Suns Scarlet. Green, used for lenses and screens, is
Moot Green washed with
Biel-Tan Green, then with spots of
Moot Green taking up less of the lens. You may find that the
Moot Green doesn't cover the now much darker base layer; this is fine, and you should lean into it. Do your next spot of
Moot Green much smaller inside, so you'll have a focused, bright spot of
Moot Green in the centre, fading outwards. Cables were simply washed with
Coelia Greenshade.
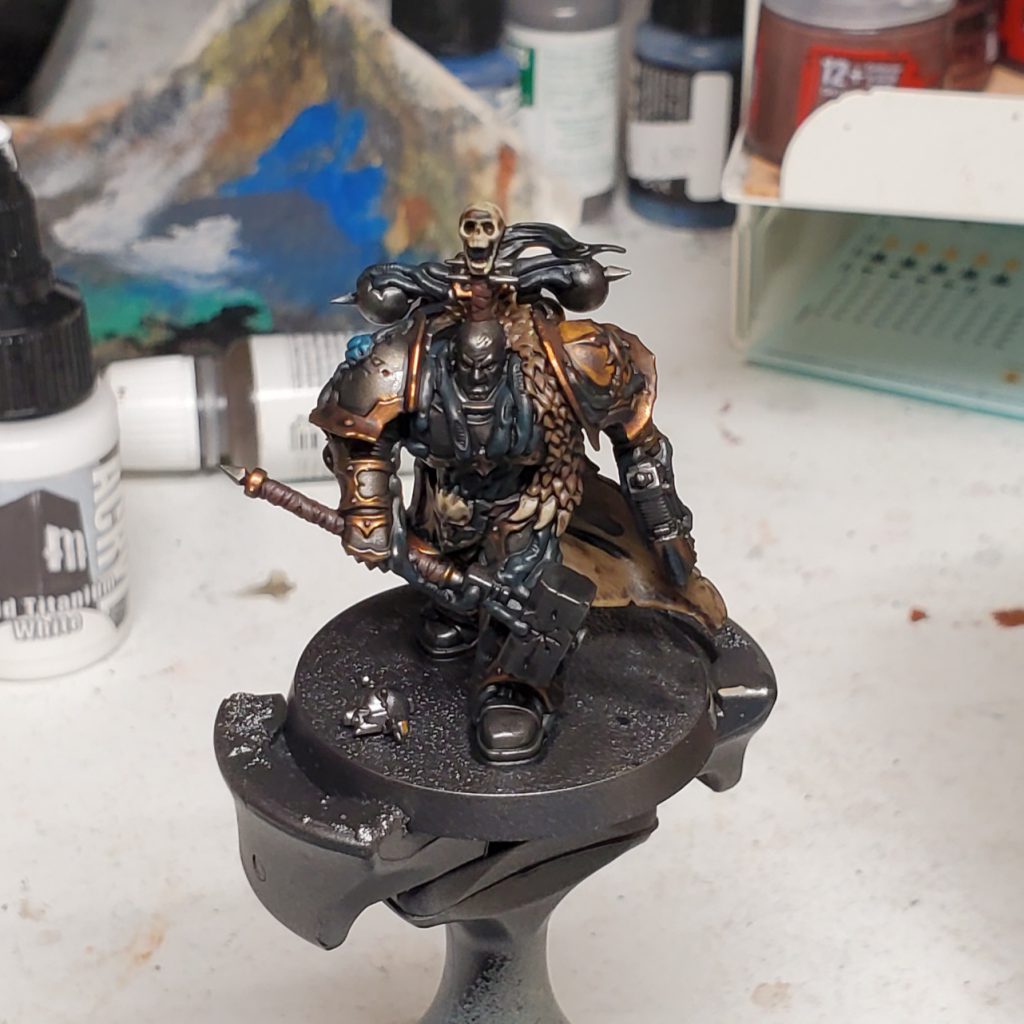
As for bases, a sand mixture was placed down and painted with
Tallarn Sand before being drybrushed with
Tyrant Skull and then
Terminatus Stone. Tufts were whatever I had lying around and, finally (before the fun of hazard stripes!), stones were painted with
Dawnstone before a rough drybrush of
Celestra Grey, and a lighter drybrush (or line highlight where possible) of
Ulthuan Grey. Big shout out to DeathWatch Studios for this trick, taken from their MCP bases painting guide.
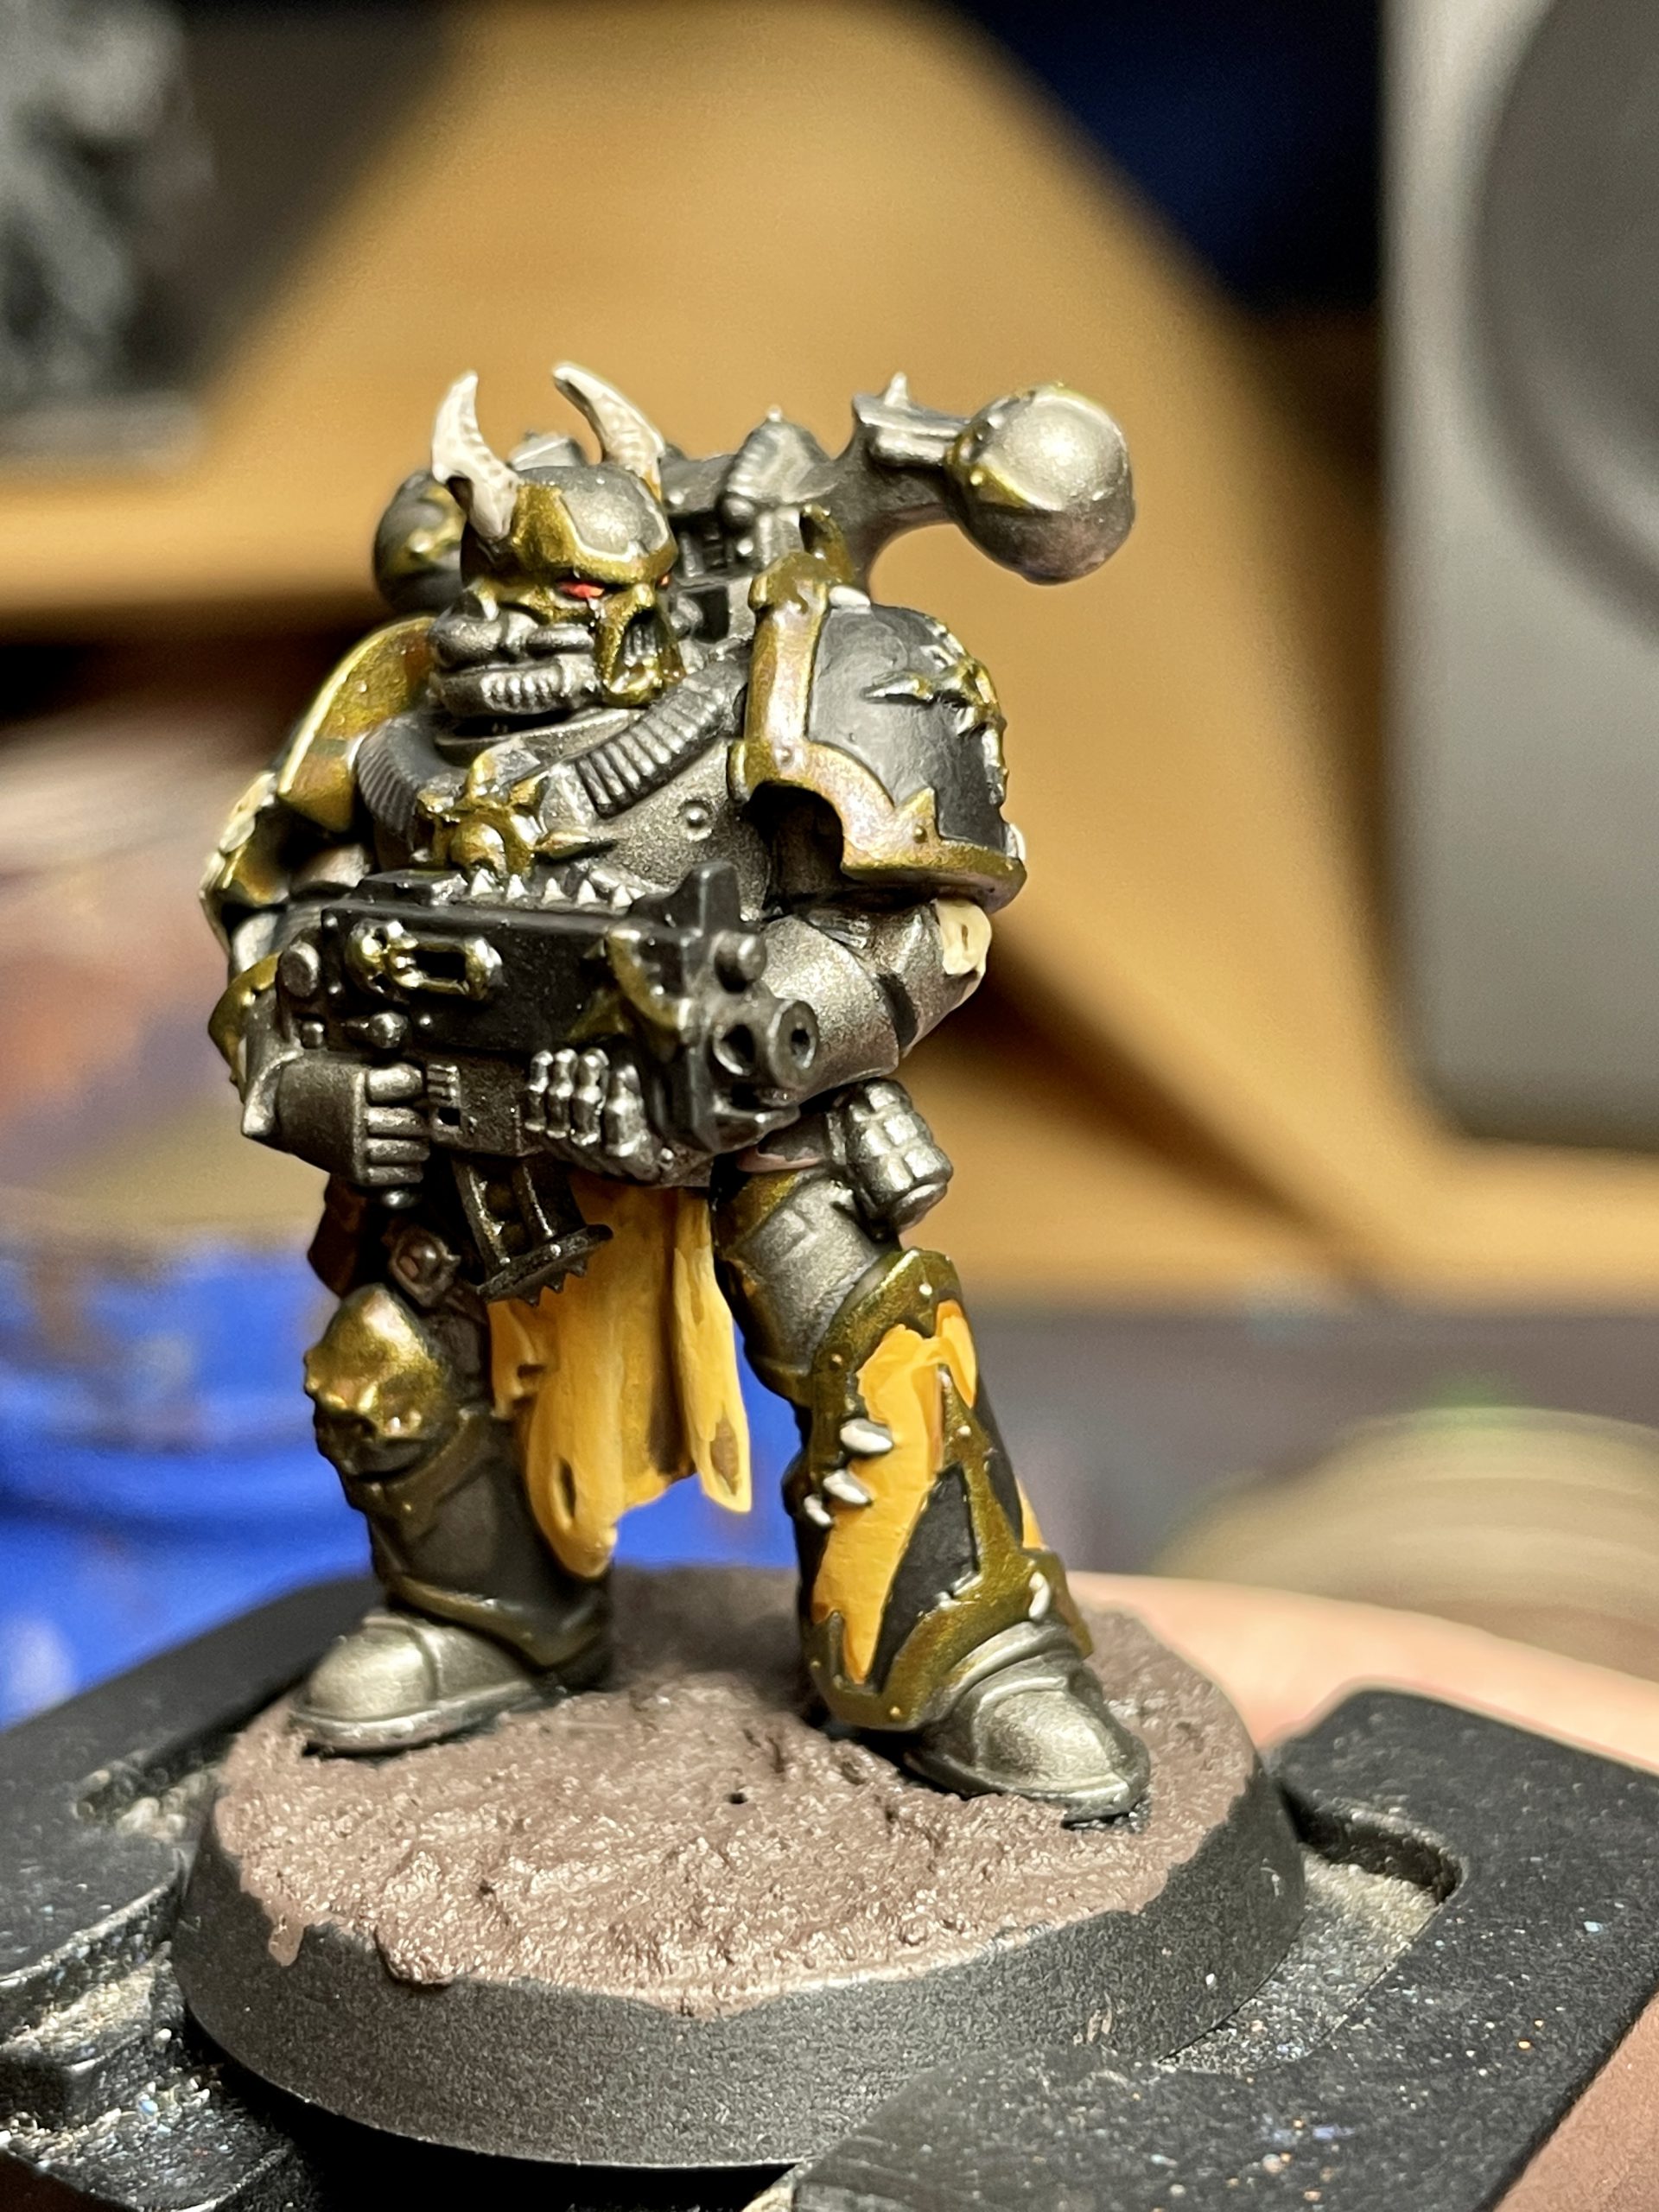
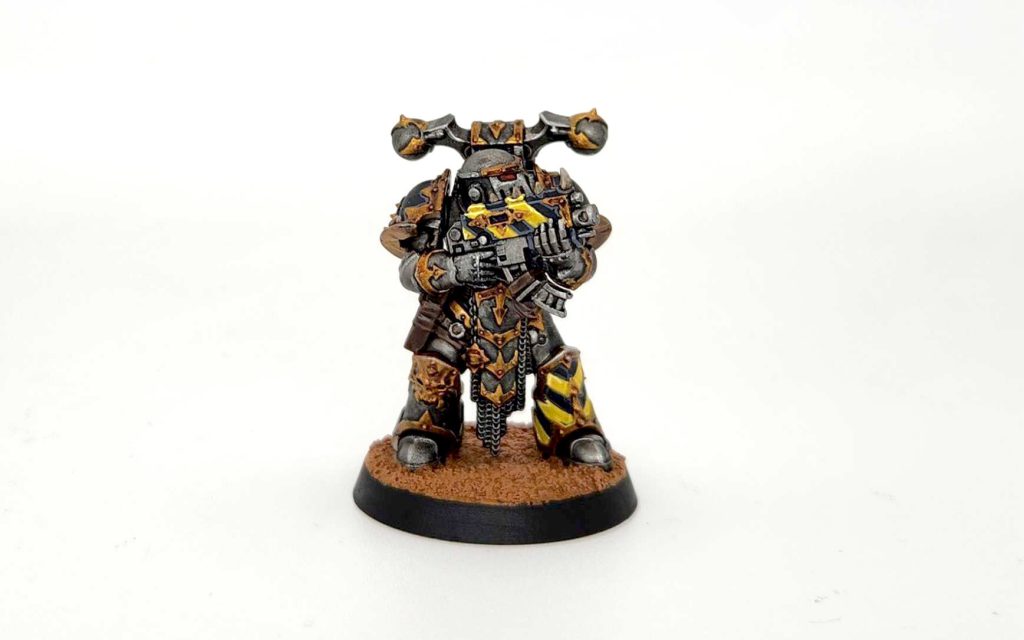
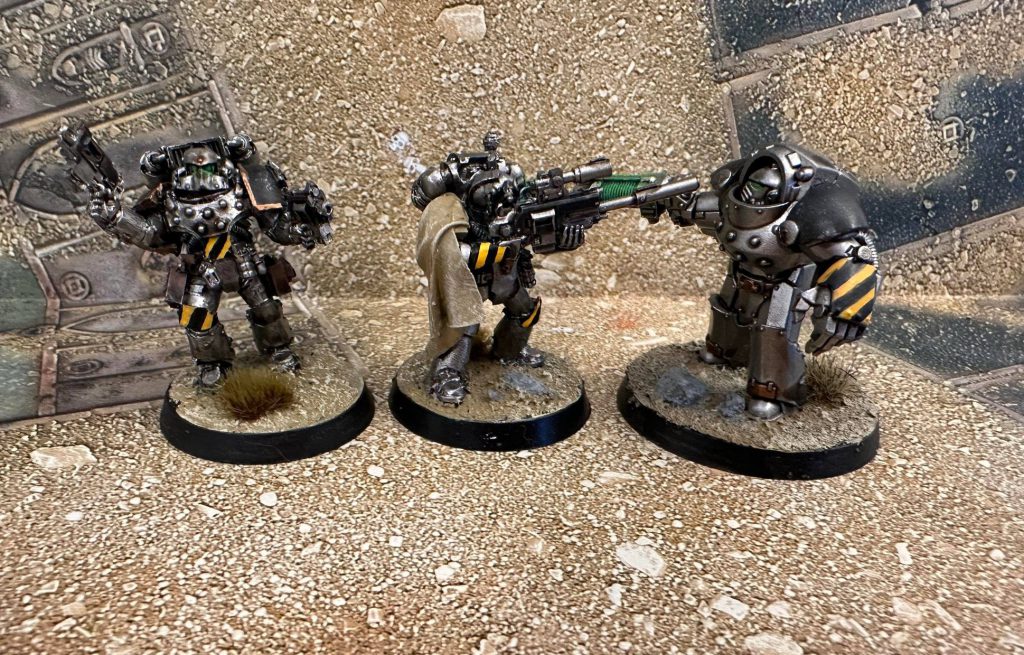 Hazard stripes should be used throughout your army. Credit: Magos Sockbert
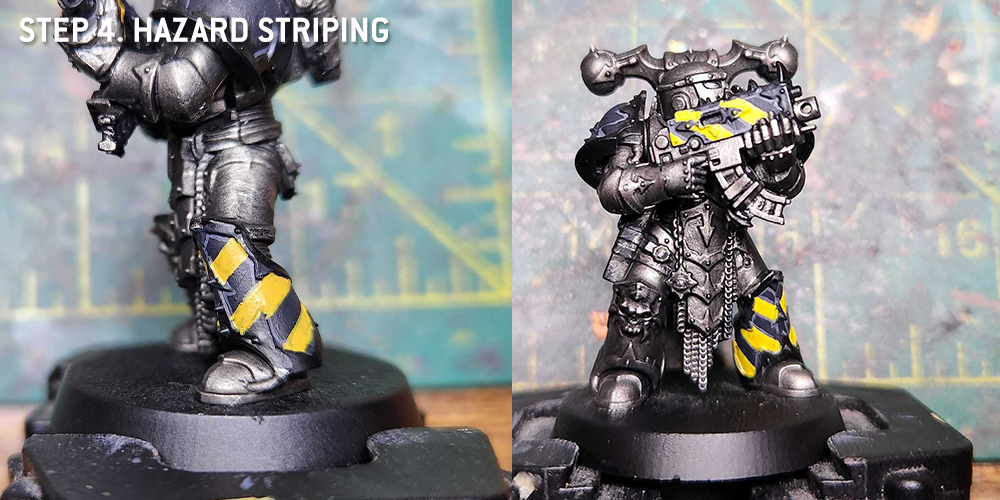
Hazard stripes aren't... well, they're not complex, but they're not exactly easy either. I've found that after a certain point you're losing a lot more time than you're gaining results, and for me the aim was an army that looked good across the table and in a cabinet, not one that was going to win a painting prize. Where possible, I used Iron Warriors pauldrons and parts which have hazard stripes moulded into the pauldron, but I don't think you should worry too much about precise smooth lines if you're army painting. I free handed a lot of these stripes (obvious, I know...), but you can also draw an outline on with a pencil or micron pen. I used
Zamesi Desert as a base, being a very yellowy brown, as it covers over whatever you've got there much,
much easier than any yellow I've found. Some people stop there, just neatining up with
Abaddon Black. I wanted somethin a bit brighter, so the next step was a thinner layer of
Averland Sunset, which covers just fine over
Zamesi. At this point I did all the neatening I could, including drawing a thin line with a micron pen around all the edges of the black, doing an almost black-on-black highlight. Finally, a heavily thinned
Yriel Yellow was applied down the middle of the yellow stripes, making the whole thing pop a little more.


 Credit: Games Workshop


 Iron Warriors WIP. Credit: SRM
 Iron Warriors WIP. Credit: SRM
 Iron Warriors WIP. Credit: SRM
 Iron Warriors WIP. Credit: SRM
 Iron Warriors. Credit: SRM
 Iron Warriors. Credit: SRM

 Credit: Robert "TheChirurgeon" Jones


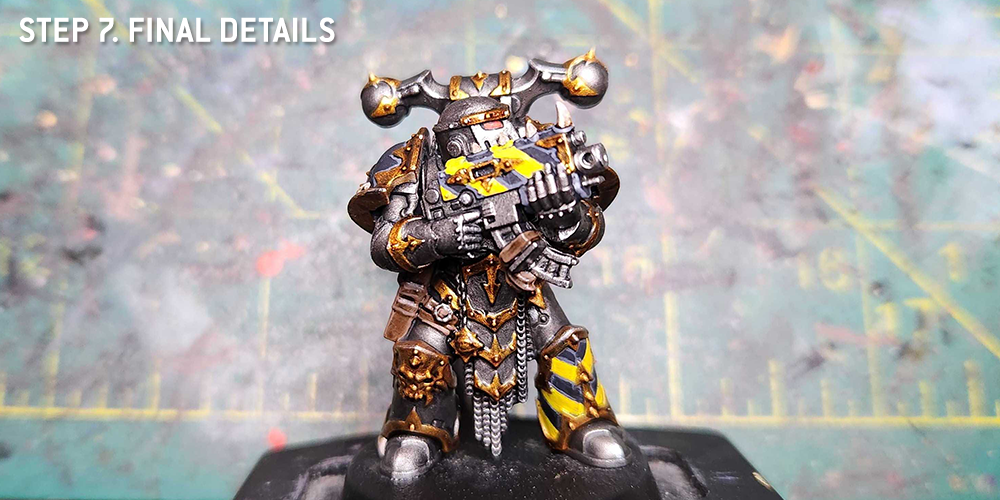
 Now we're in the home stretch! The details really get the model to the 'done' feeling state and I personally find a ton of fun. The simplest is also in someways the most annoying, as I just free-hand the black stripes on the shoulder pad on - you could use tamiya masking tape or advanced techniques to get accurate but all of that stuff is annoying so I just roughly throw stripes on and hope it looks ok once you get enough models around.

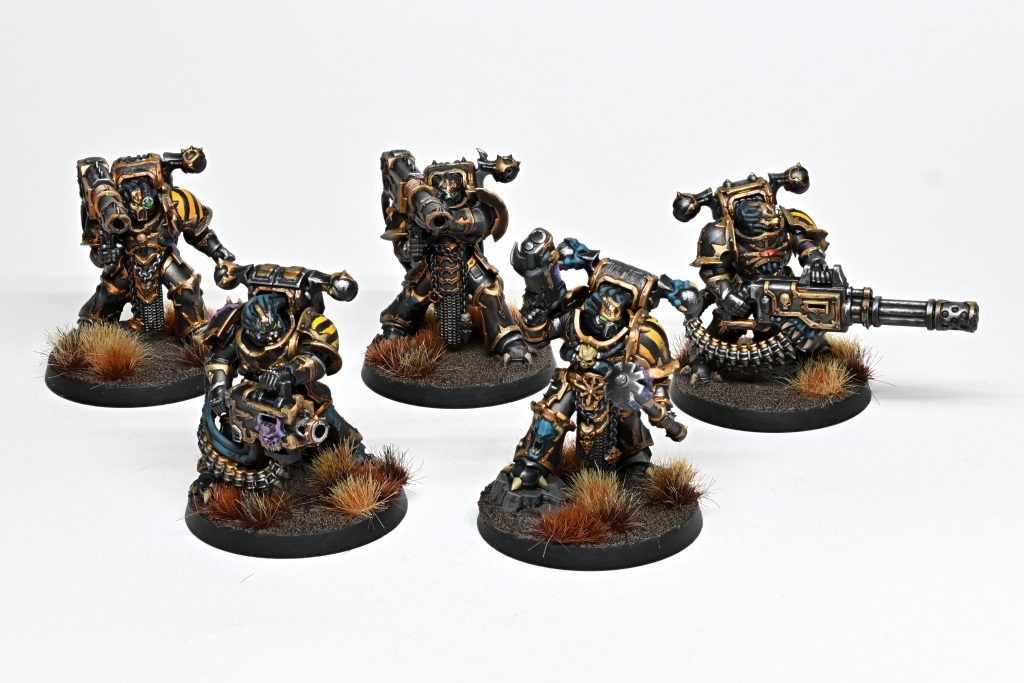 Havocs. Credit: Rockfish
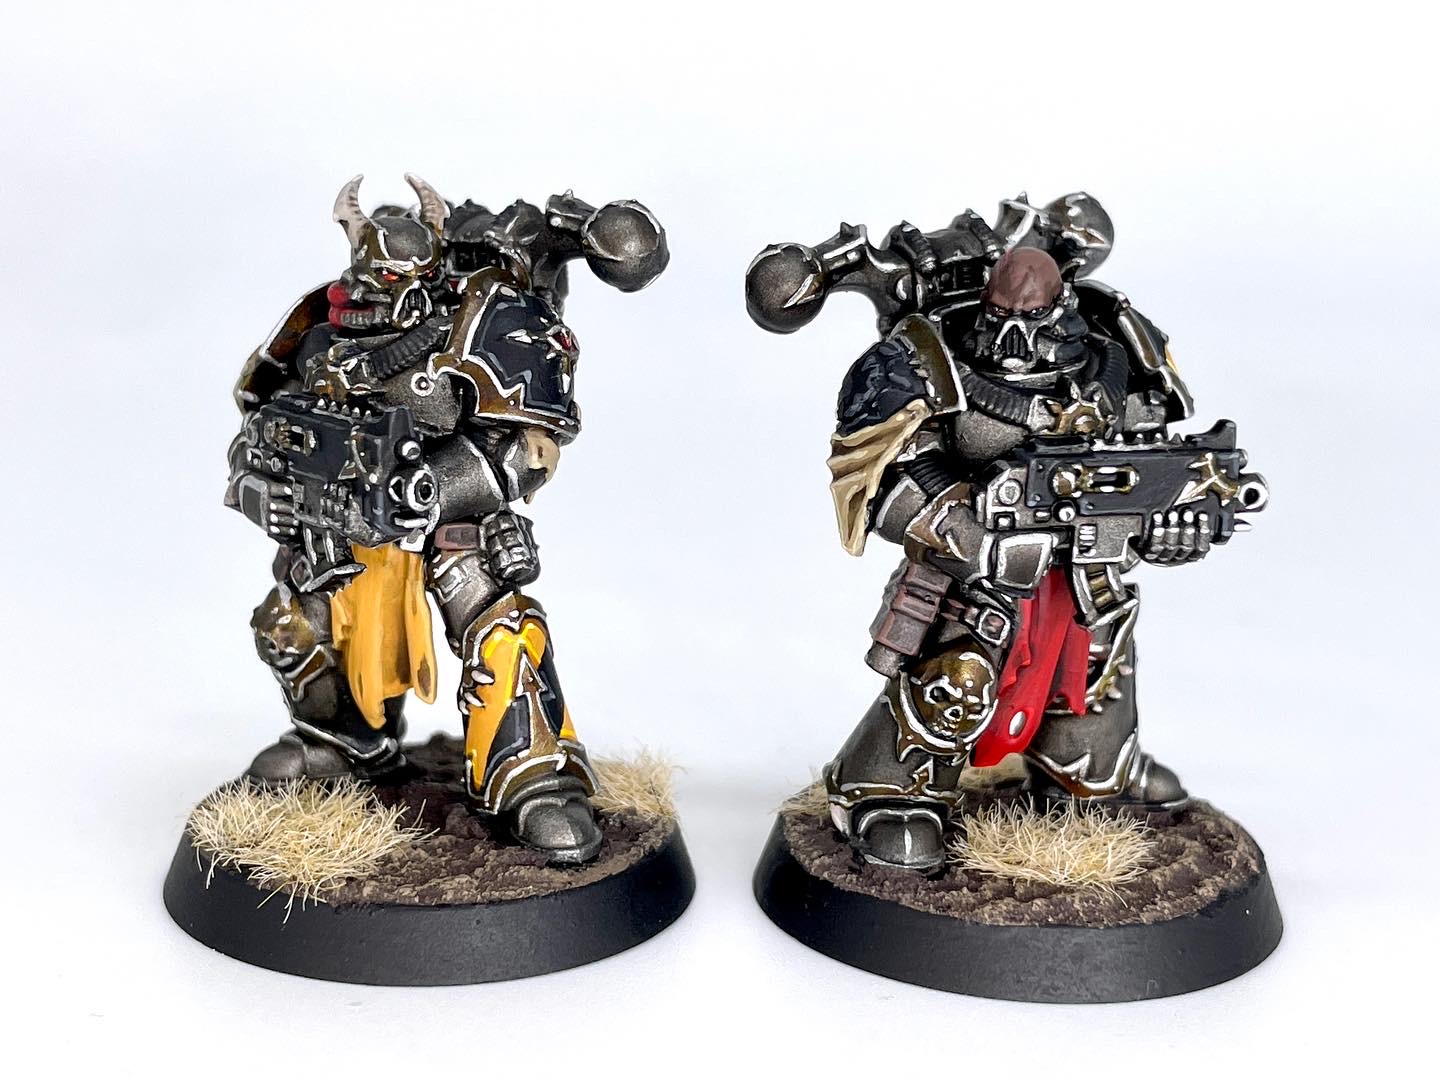
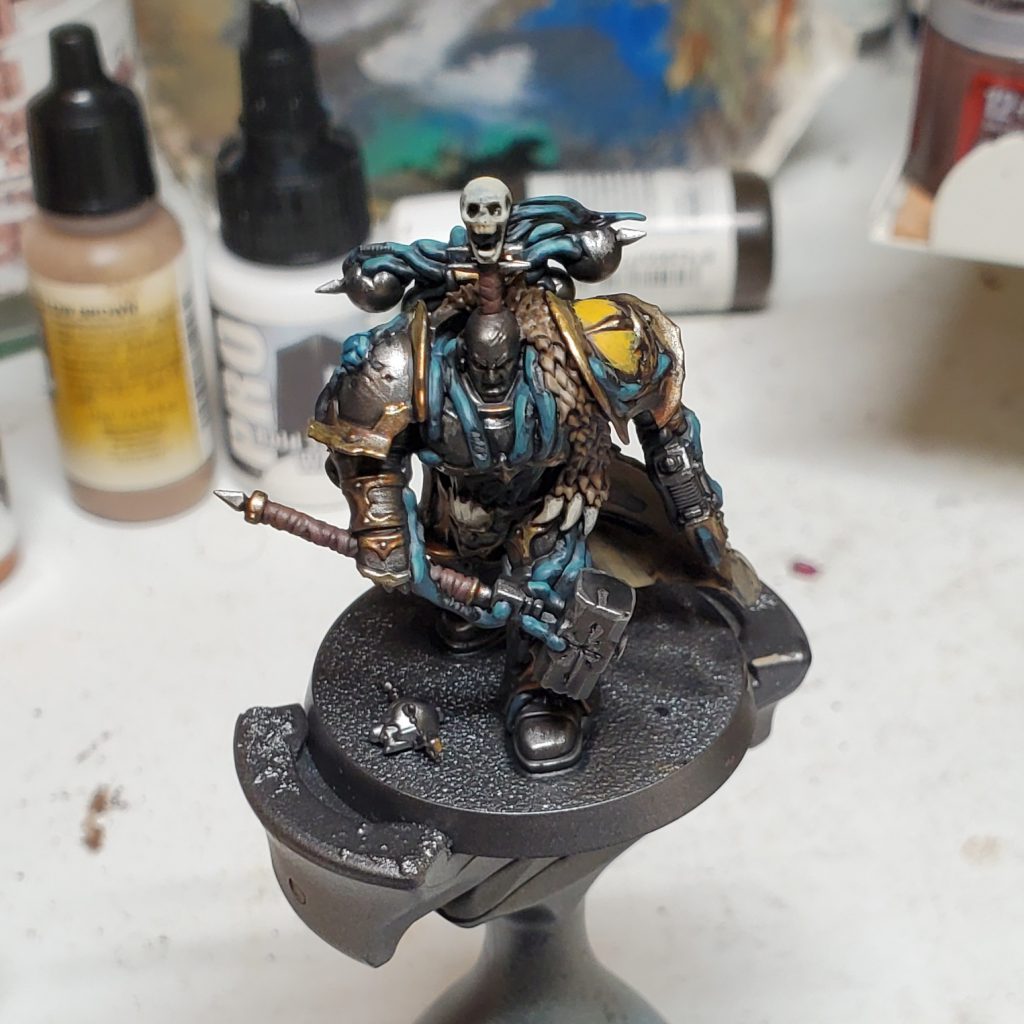
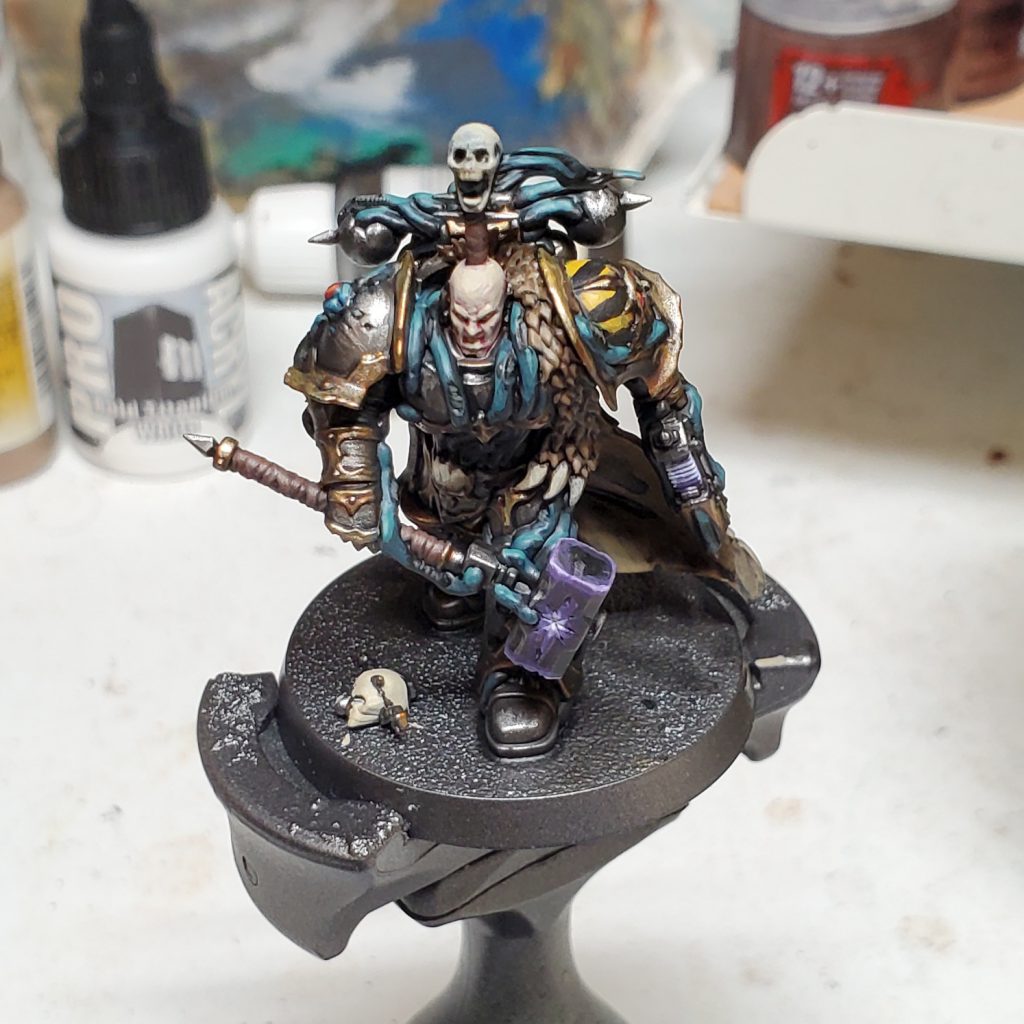
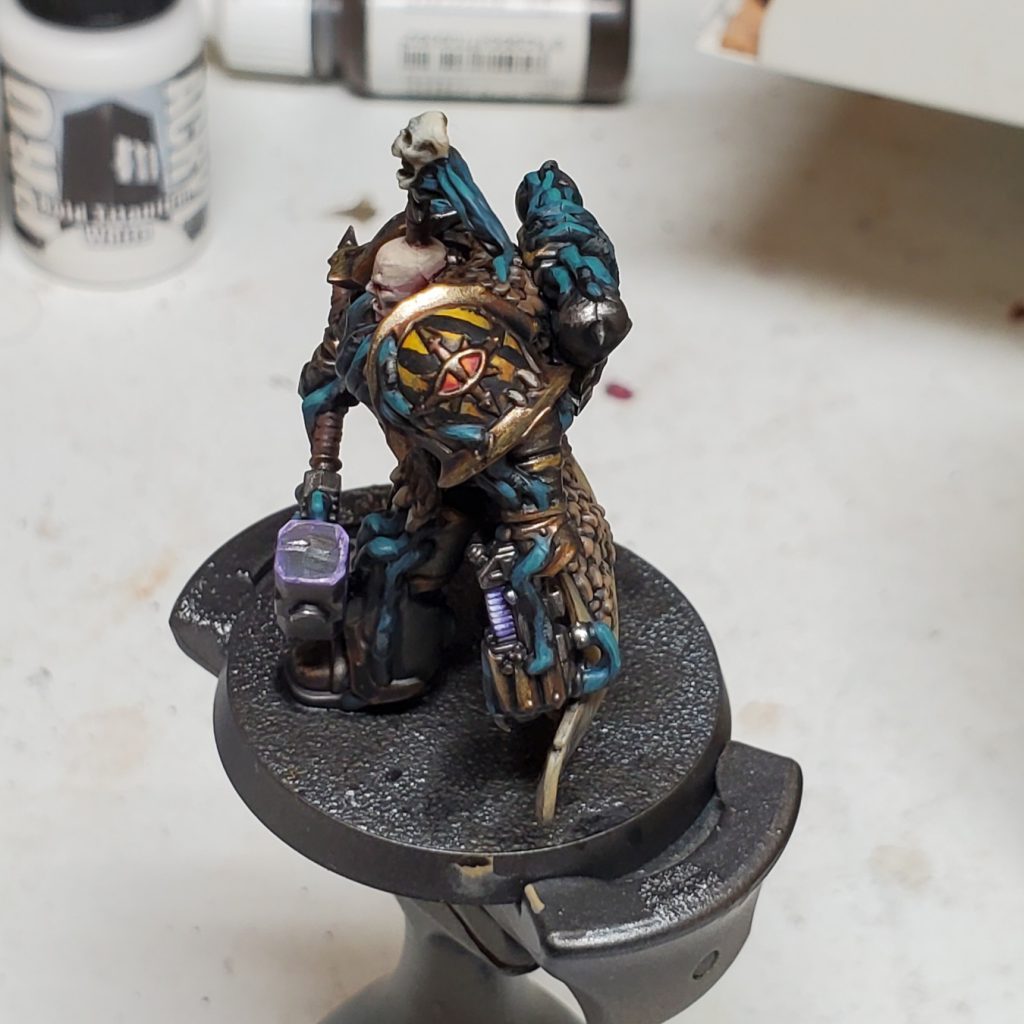
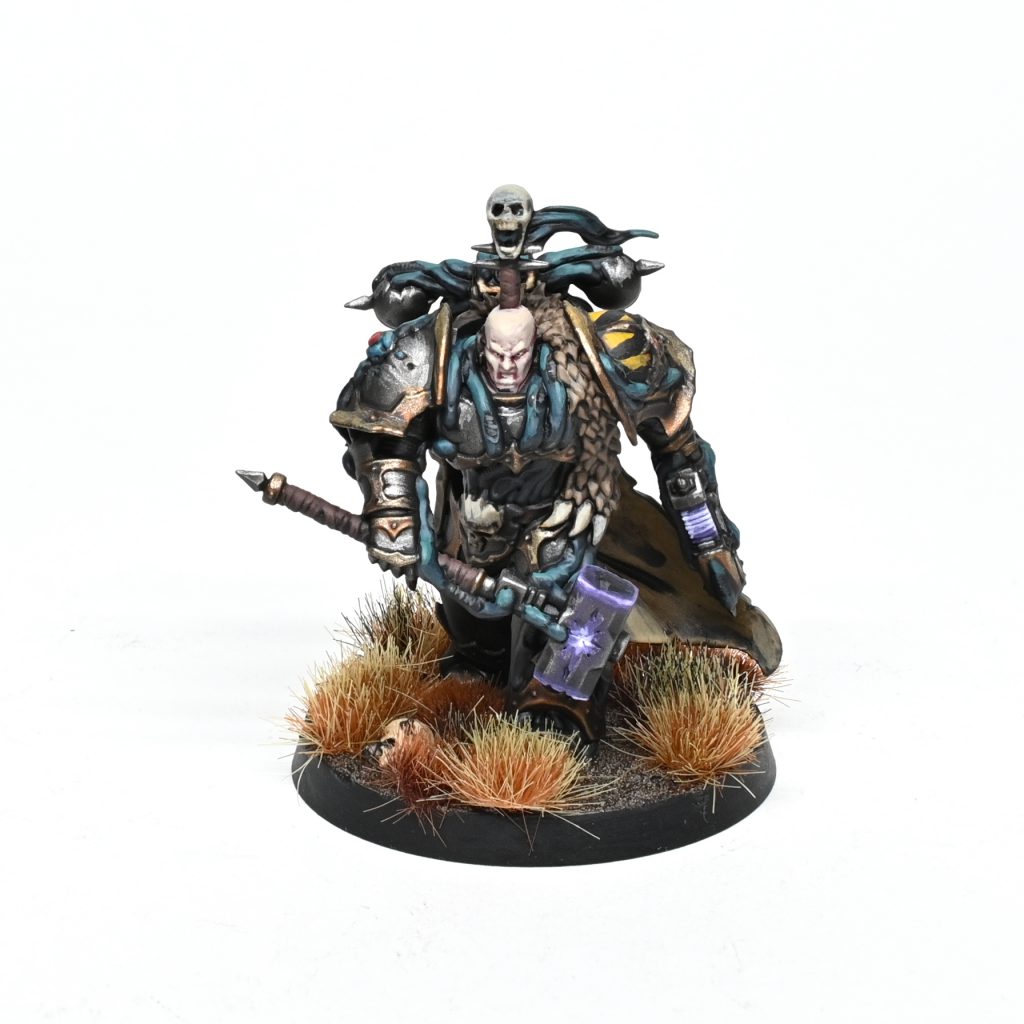 Chaos Lord. Credit: Rockfish
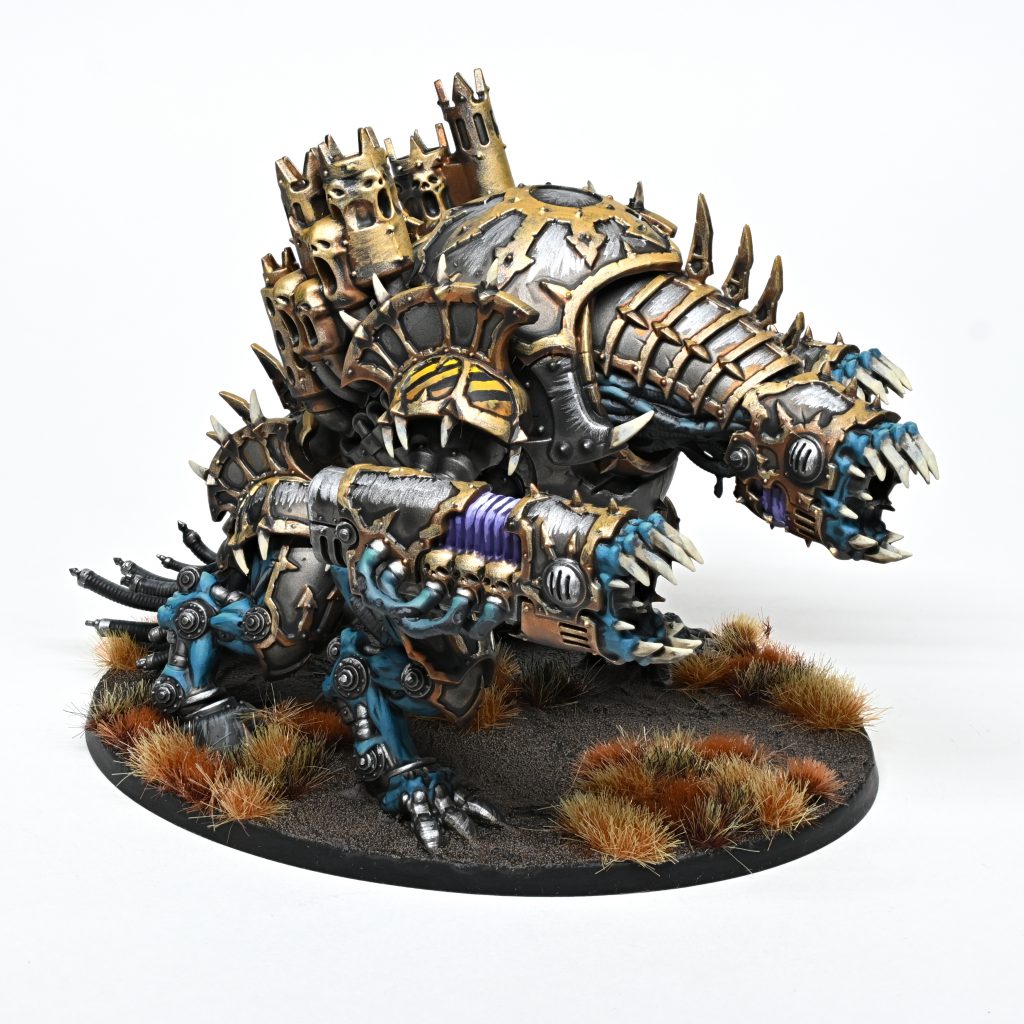 Forgefiend. Credit: Rockfish
 As always, if you have any questions or feedback, drop us a note in the comments below or email us at contact@goonhammer.com.
 Goonhammer App and Patron Updates: April, 2026
 Kill Team Tournament Report: Engage, Party, Repeat's March Madness 2026
 Goonhammer Reviews: Tribal Conquest