In our
round-up last week of our Indomitus progress, I talked about the way Jack and I had split up the contents to try and make sure we covered all bases early doors - making sure that we had plenty of the new models to feature on the site! We've now happily reached the point where Goonhammer has at least one painted example of everything in the box, giving us both some freedom to paint, well, everything else. This box is stuffed with great sculpts and everything has been a real pleasure to work on.
Most of the builds in the box are extremely simple - these are ultimately push-fit and monopose, though of course with plastic models the only thing standing between you and reposing them is a good knife and a bit of gumption. You can conceivably build the entire box without glue and have no issues, though I think the faring on the front of the bikes would suffer a bit without glue. My one other piece of build advice, as mentioned last week, is that the Bladeguard Veterans have a very simple join for the shield - the hand slides into the wrist on a pin, keeping it separate for painting and then attaching afterwards is a much smarter thing than what I did, which was paint them fully assembled.
In terms of painting, about half the box is fairly standard for Space Marines - the Intercessors, Eradicators, and the Outrider bikes. Speaking of keeping things separate, it's not a bad idea to attach the bikes to their bases after you've done the basing - they have the new-style hex pins front and back and will easily attach on later.
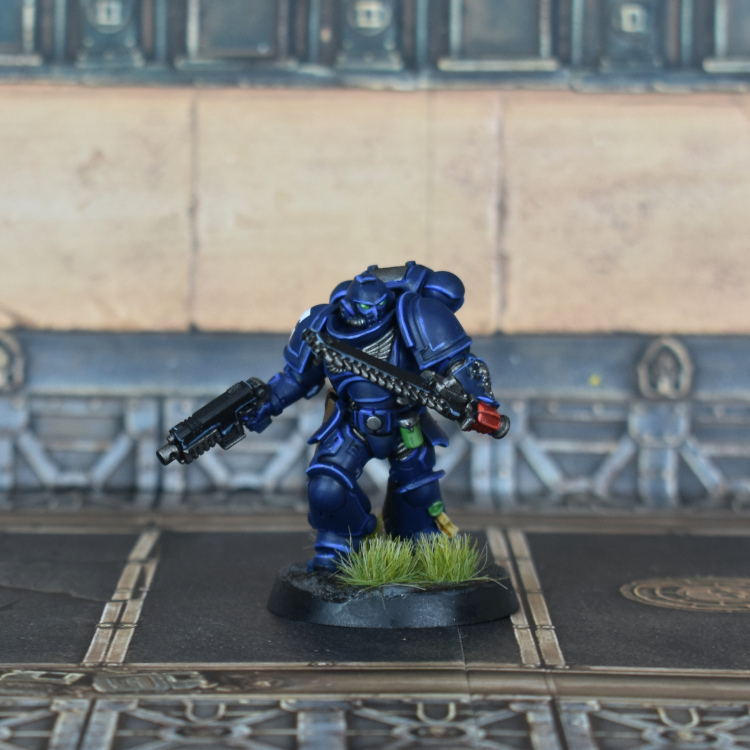
Other than that, the way I painted them is the same as all my other Crimson Fists, as per one of our
very earliest HTPEs and extracted below for convenience:
- Prime black
- Two layers of Kantor Blue on the armour
- One layer of Khorne Red and then another layer of Mephiston Red on the red bits (left gauntlet, shoulderpad)
- Leadbelcher basecoat then Ironbreaker layer on the metals – gun, chest eagle, and in this case the soft bits of the armour
- Rhinox Hide then Steel Legion Drab on the leather (pouches etc.)
- Purity seals in Waagh Flesh, Warboss Green, and Skarsnik Green on the wax, with the parchment being Rakarth Flesh and then Ushabti Bone
- Gun in VMC Black
- Eyes in Warpstone Glow, Moot Green, and then dotted with Gauss Blaster Green
- Astrogranite Debris on the base
Then wash as follows:
- Glaze Drakenhof Blue over the blues
- Reikland Fleshshade over the reds, and over flesh if there is any
- Nuln Oil over black and metal
- Agrax Earthshade on the base
- Seraphim Sepia on the pouches, and purity seals if there are any
Then it’s highlighting time!
- For the reds, I re-layer some Mephiston Red, then hit the edges with Wild Rider Red
- For the metals, I hit high points with Ironbreaker
- The gun gets an edge highlight of Russ Grey
- The pouches get an edge highlight of Steel Legion Drab, and seals get an edge of Ushabti Bone
That’s all nice and easy! The challenging bit comes after that – the armour. There are a
lot of edges to Mk 10 power armour, never mind Gravis, so this takes a fair amount of time. My first layer of highlighting comes from hitting all the edges with Altdorf Guard Blue, and then following up with a thinner highlight of Calgar Blue. This takes forever, but it also makes the edges really sharp.
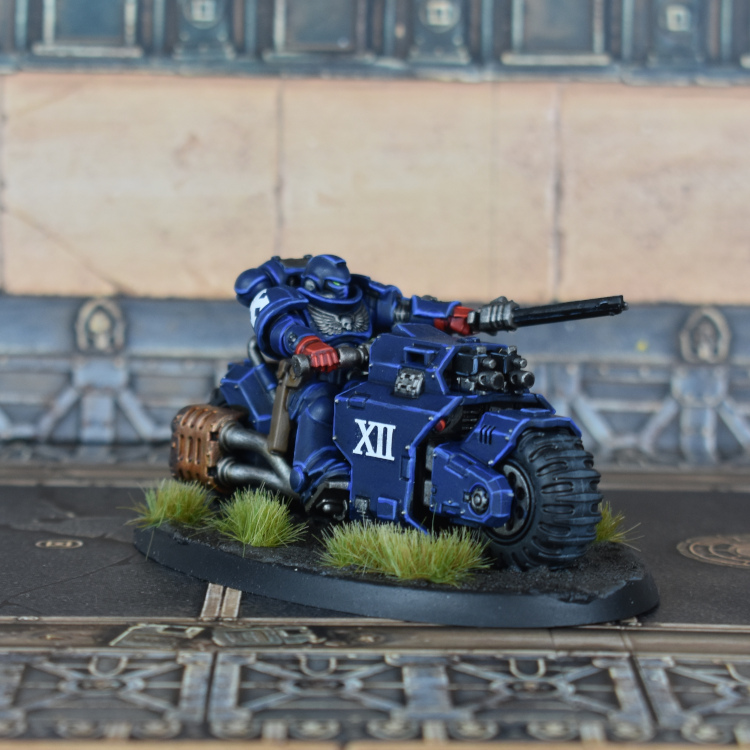 Crimson Fists Outrider. Credit: Corrode
On the Eradicators, I wanted to do something a little different with their melta rifles. The barrels are painted Brass Scorpion, then Sycorax Bronze, washed Seraphim Sepia, and then some Brass Scorpion re-layered at the business end of the barrel. This is a lazy way to simulate the heat-staining effect you can see on the
studio models. I did a similar thing on the engines for the Outrider's bikes.
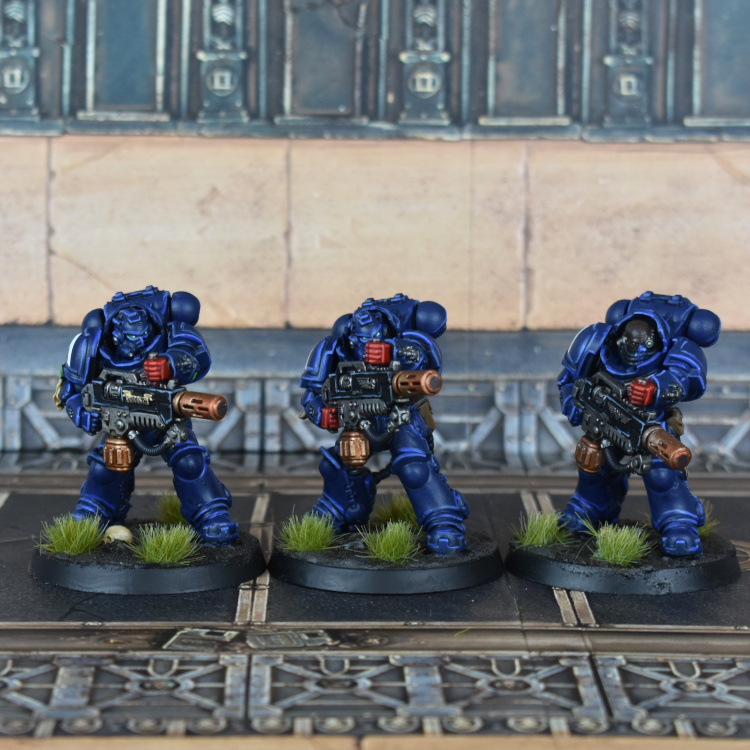 Crimson Fists Eradicators. Credit: Corrode
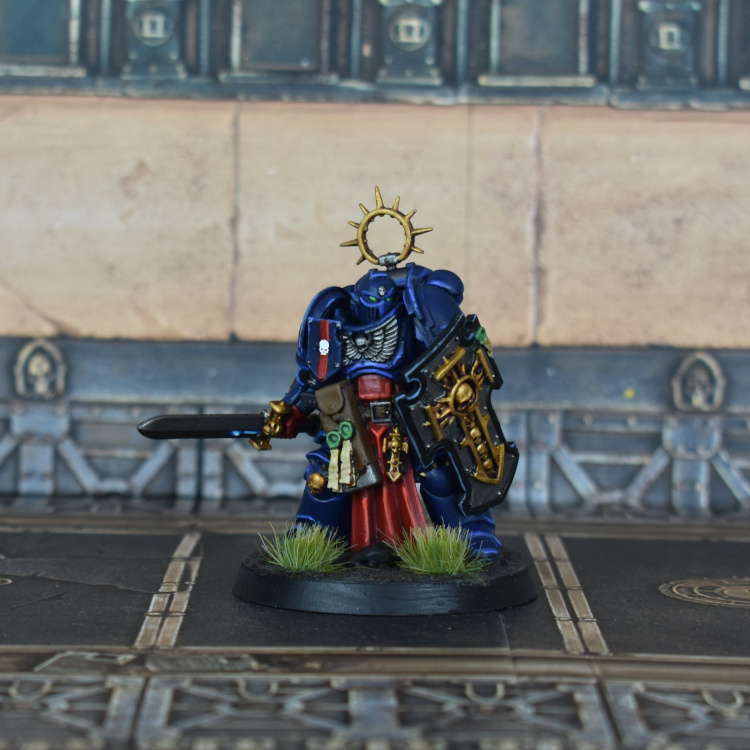
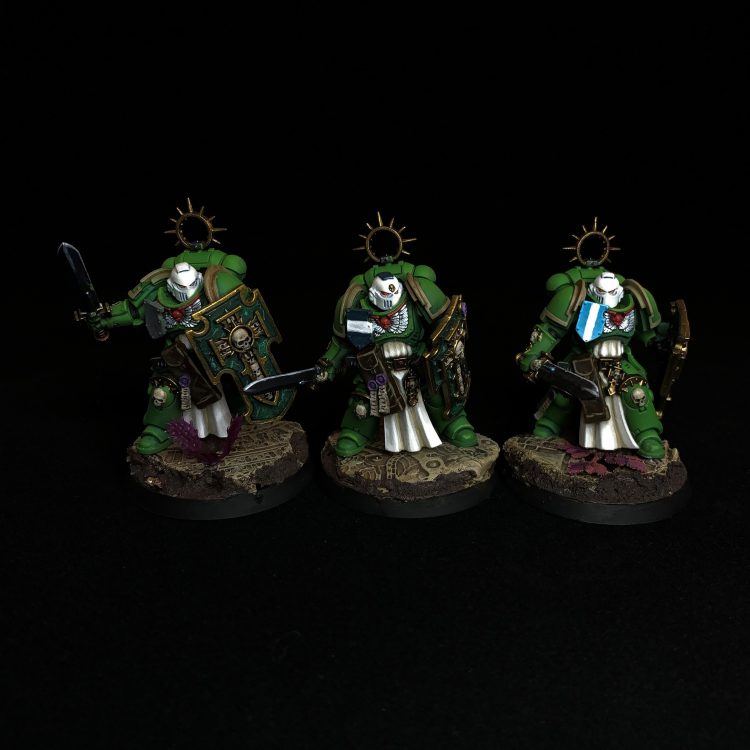
With the Bladeguard Veterans and their accompanying Ancient, we have some different considerations. First up, they have a ton of gold - for this I used a technique that Goonhammer's own richyp told me about, where you wash it with Druchii Violet which gives it a nice depth. My regular gold is Retributor Armour -> Auric Armour, the Druchii wash, and then re-layering some Auric on top.
 Credit: Corrode
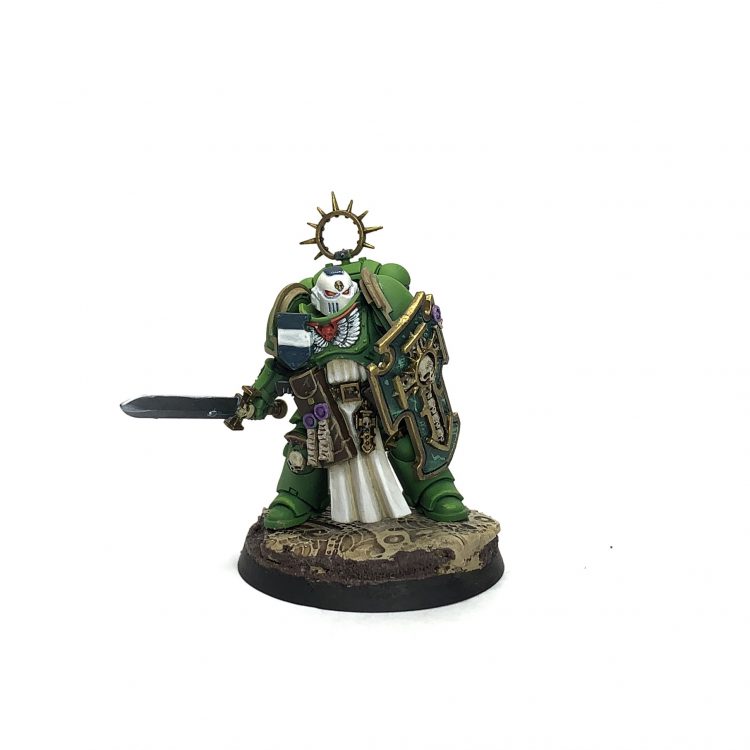
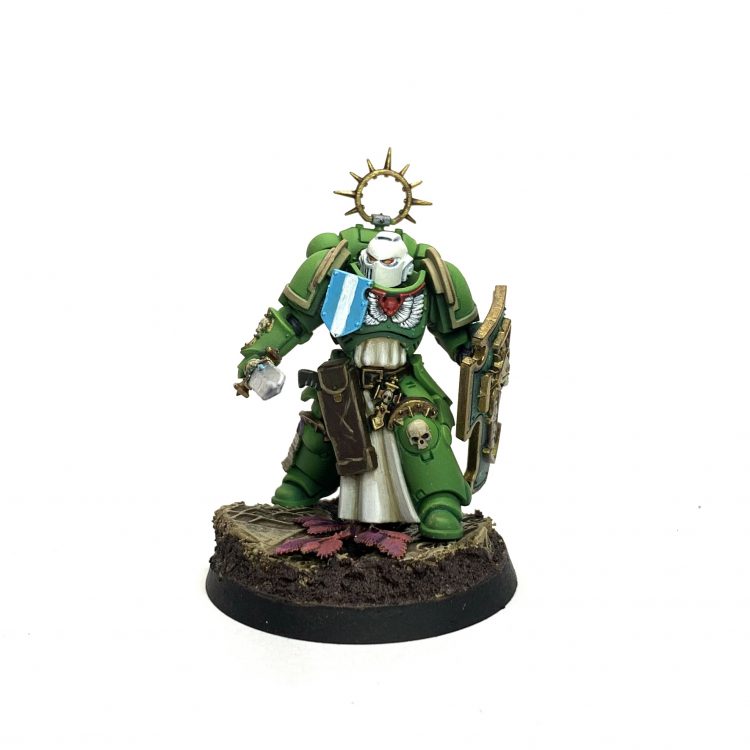
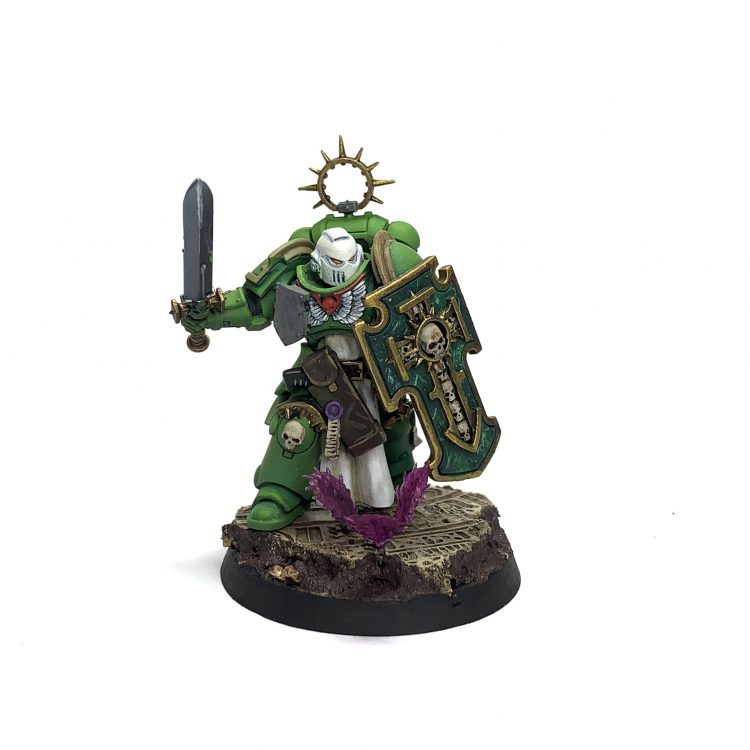
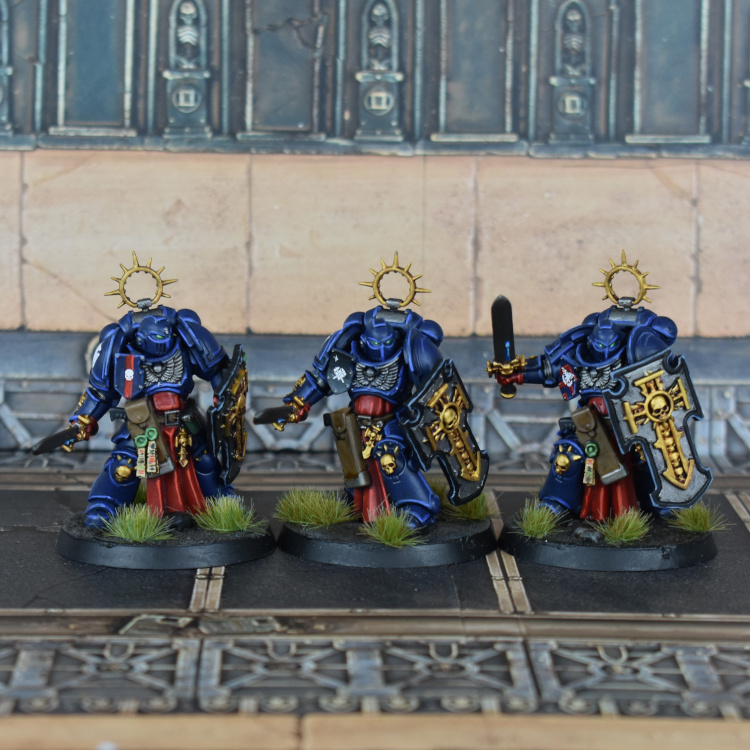 Bladeguard Veterans. Credit: Corrode
The robes are painted the same way as the red fists, and for this first Veteran I also added some heraldry to his badge in the quite simple form of a red stripe in the same colours and a skull from the Imperial Knights transfer sheet (the tiny Adeptus Titanicus version!) AT transfers are a good source for heraldry - Knights have a great variety of badges and a lot of the AT houses are unusual for 40k, so you can steal their iconography quite freely. I did the same for the other two Veterans. The shields are a fun place to play around with different things - I particularly like the Veteran with a night-sky kind of heraldry with a star at the top, and then the symbol of House Makabius re-purposed as his personal crest.
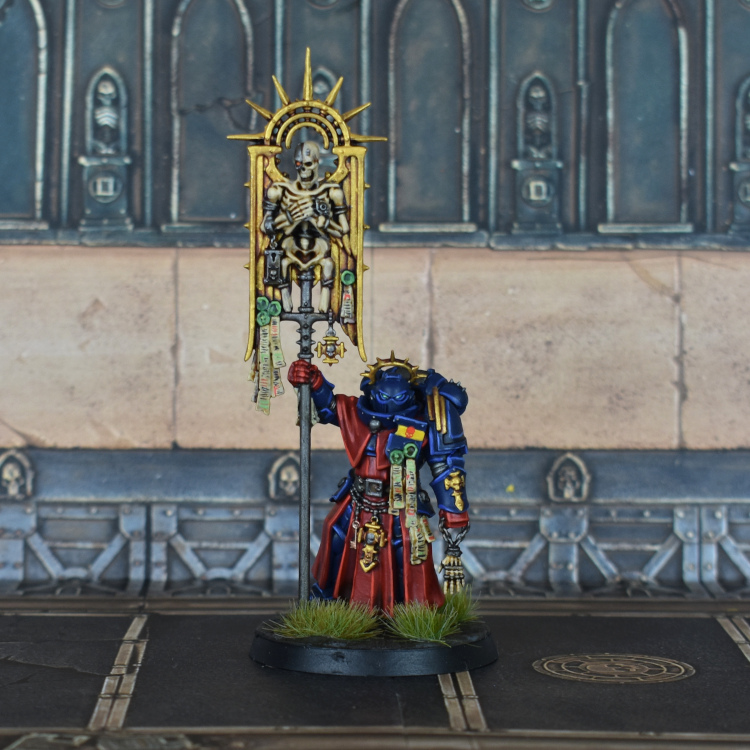
The Bladeguard Ancient is much the same as the above, just on a bigger scale - he has more robes than the others, and for his heraldry he gets a simple yellow stripe and a red skull. The banner is the same technique for the gold as described above. In the past I've done purity seals very simply, with just VMC Black Grey striped across for 'text', but after seeing a few other examples I decided to do something a bit different here and add some lines in Wild Rider Red and Skarsnik Green - this breaks them up and adds a bit extra to the, which his handy when there's so many. Ironically, given that the Marine skeleton is, well, a skeleton, I painted the seals as above with Ushabti Bone, and the skeleton itself is Rakarth Flesh and then Flayed One Flesh.
 Credit: Corrode
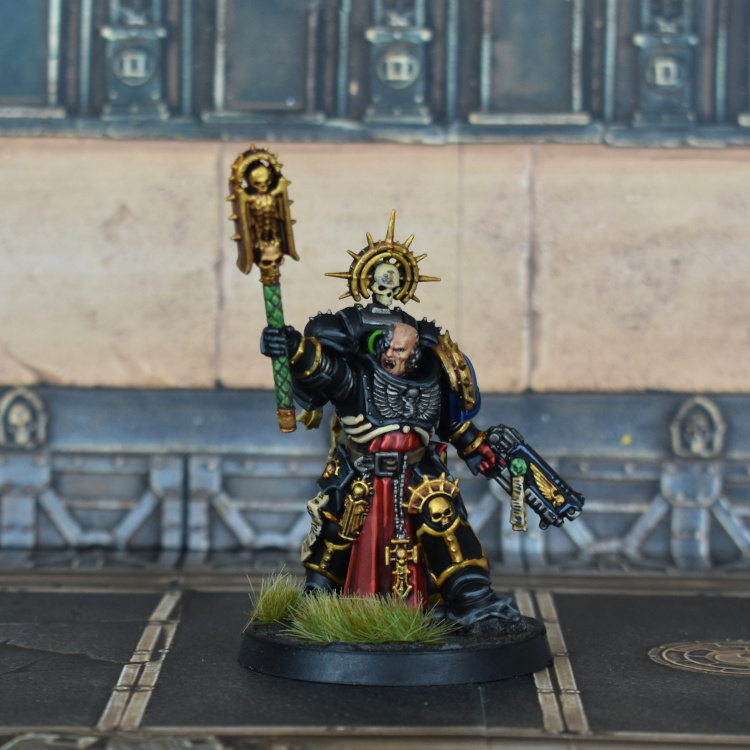
The Chaplain is similar in execution except that the armour is, obviously, black. The main part is straight VMC Black, edge highlighted with Eshin Grey, Mechanicus Standard Grey, and then just a touch of Dawnstone. The handle of his crozius is painted the same as the purity seals, being mostly Warboss Green and then the individual diamonds edged with Skarsnik Green, which takes a bit.
 The Chaplain's purity seals, as described above
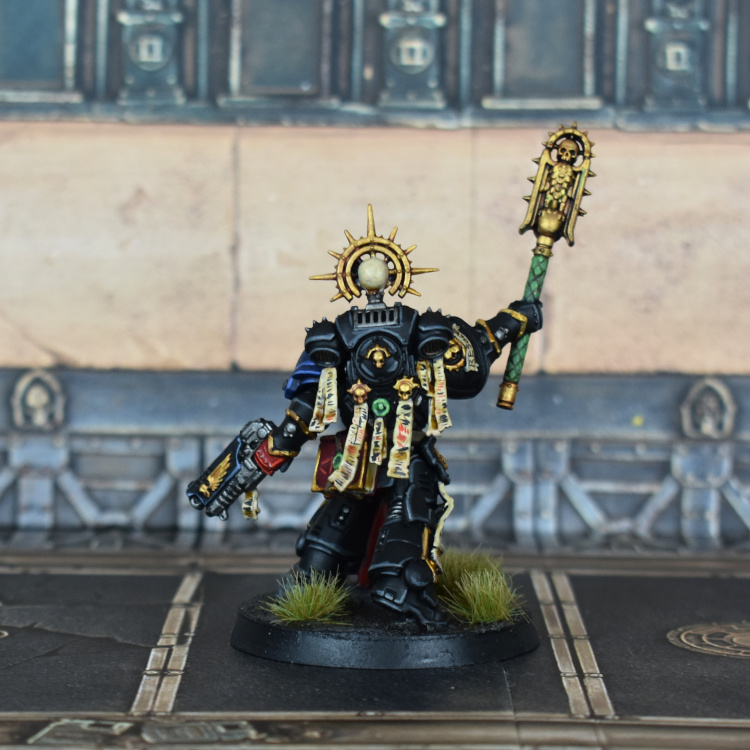
The Judiciar was painted very similarly, but he has a ton of different leathers - coat, gloves, mask - which I decided to do differently to break them up. They were all blocked in with Dryad Bark, and then the coat painted Doombull Brown, the gloves in Mournfang Brown, and the mask in Gorthor Brown. The mask and coat were washed Seraphim Sepia while the gloves were done in Agrax. I then highlighted them initially with the base colour, and then with thin highlights of Steel Legion Drab on the edges to sharpen them a bit and separate out the different materials.
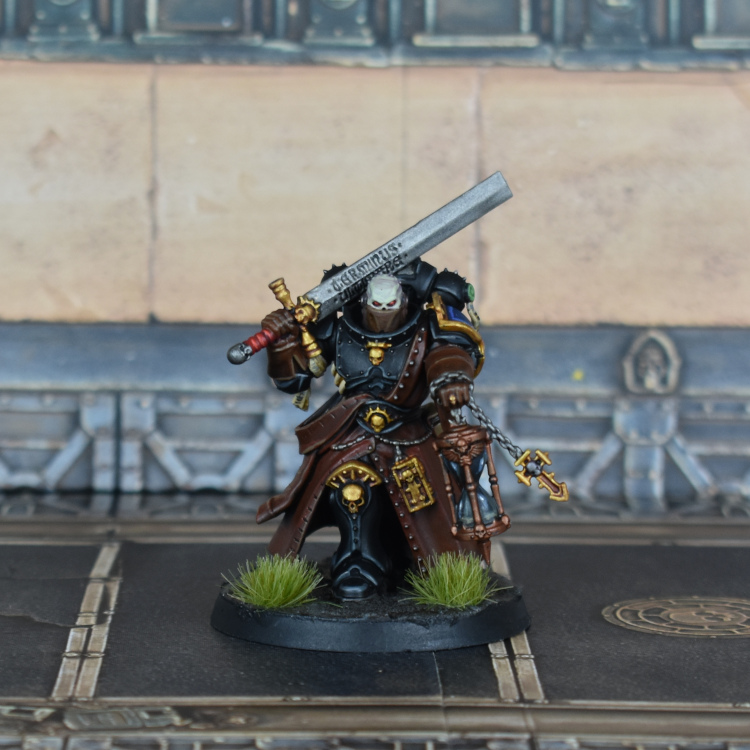 Crimson Fists Judiciar. Credit: Corrode
I also got a chance to use a colour I rarely try out, Balthasar Gold, which I used for the metals on the hourglass and as the base for the ring on the hand holding it (which then got some Auric Armour on top). For the hourglass itself I painted it in with VMC Black Grey initially, and painted in the glass effect, blocking in bits of Russ Grey, then some Dawnstone, and then just a touch of white as well. For the sand I used Zandri Dust, sketchily applied around the bottom of the glass. The helmet is done similarly to my Genestealer Cults Acolytes, with Ionrach Skin washed Druchii Violet and then re-layered over the top.
Both the Chaplain and the Judiciar had their skeleton ribs painted the same as the skeleton on the Ancient's banner, Rakarth Flesh and then Flayed One Flesh.
That's as far as I've gotten so far - I still have some Intercessors and bikers to finish up and then the last two characters. Technique-wise I don't expect these to be much different to any other of my Crimson Fists, though the Captain has a lot going on - I'm sure he'll look great when he's done, but the prospect of painting him is daunting! Happily, Jack's done the needful there, so check out his work below.


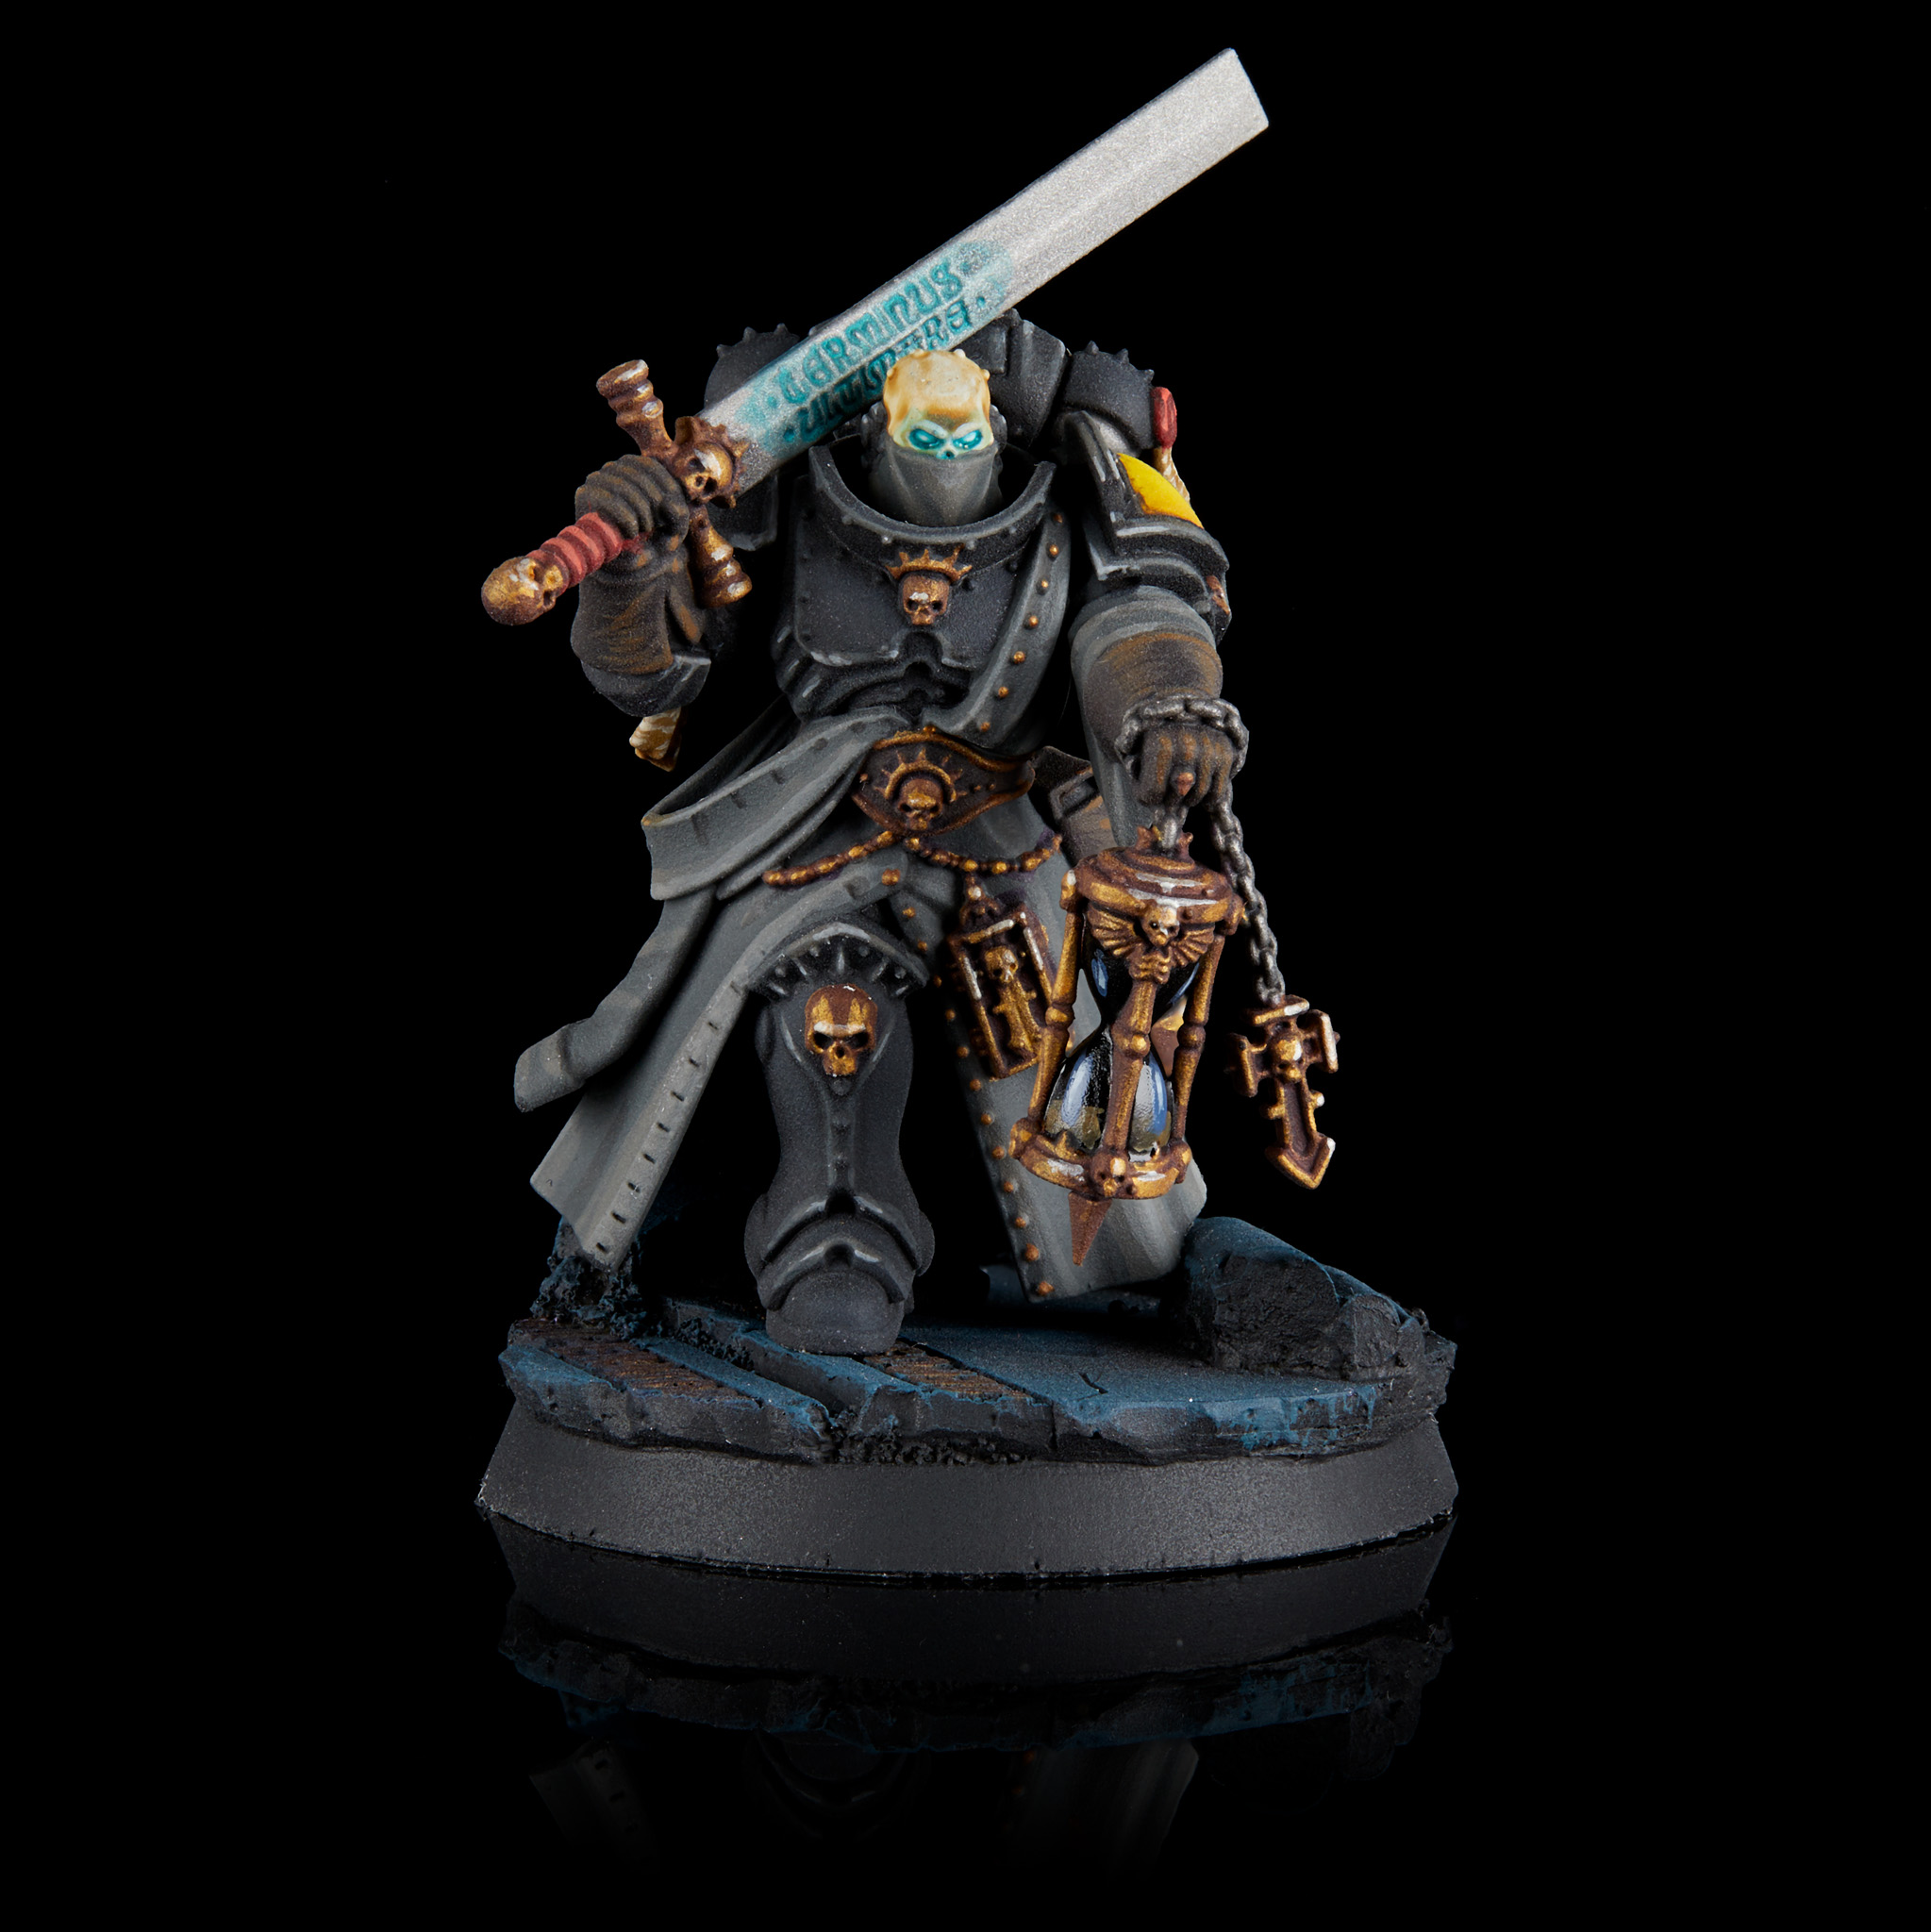 Imperial Fists Judiciar. Credit: Jack Hunter
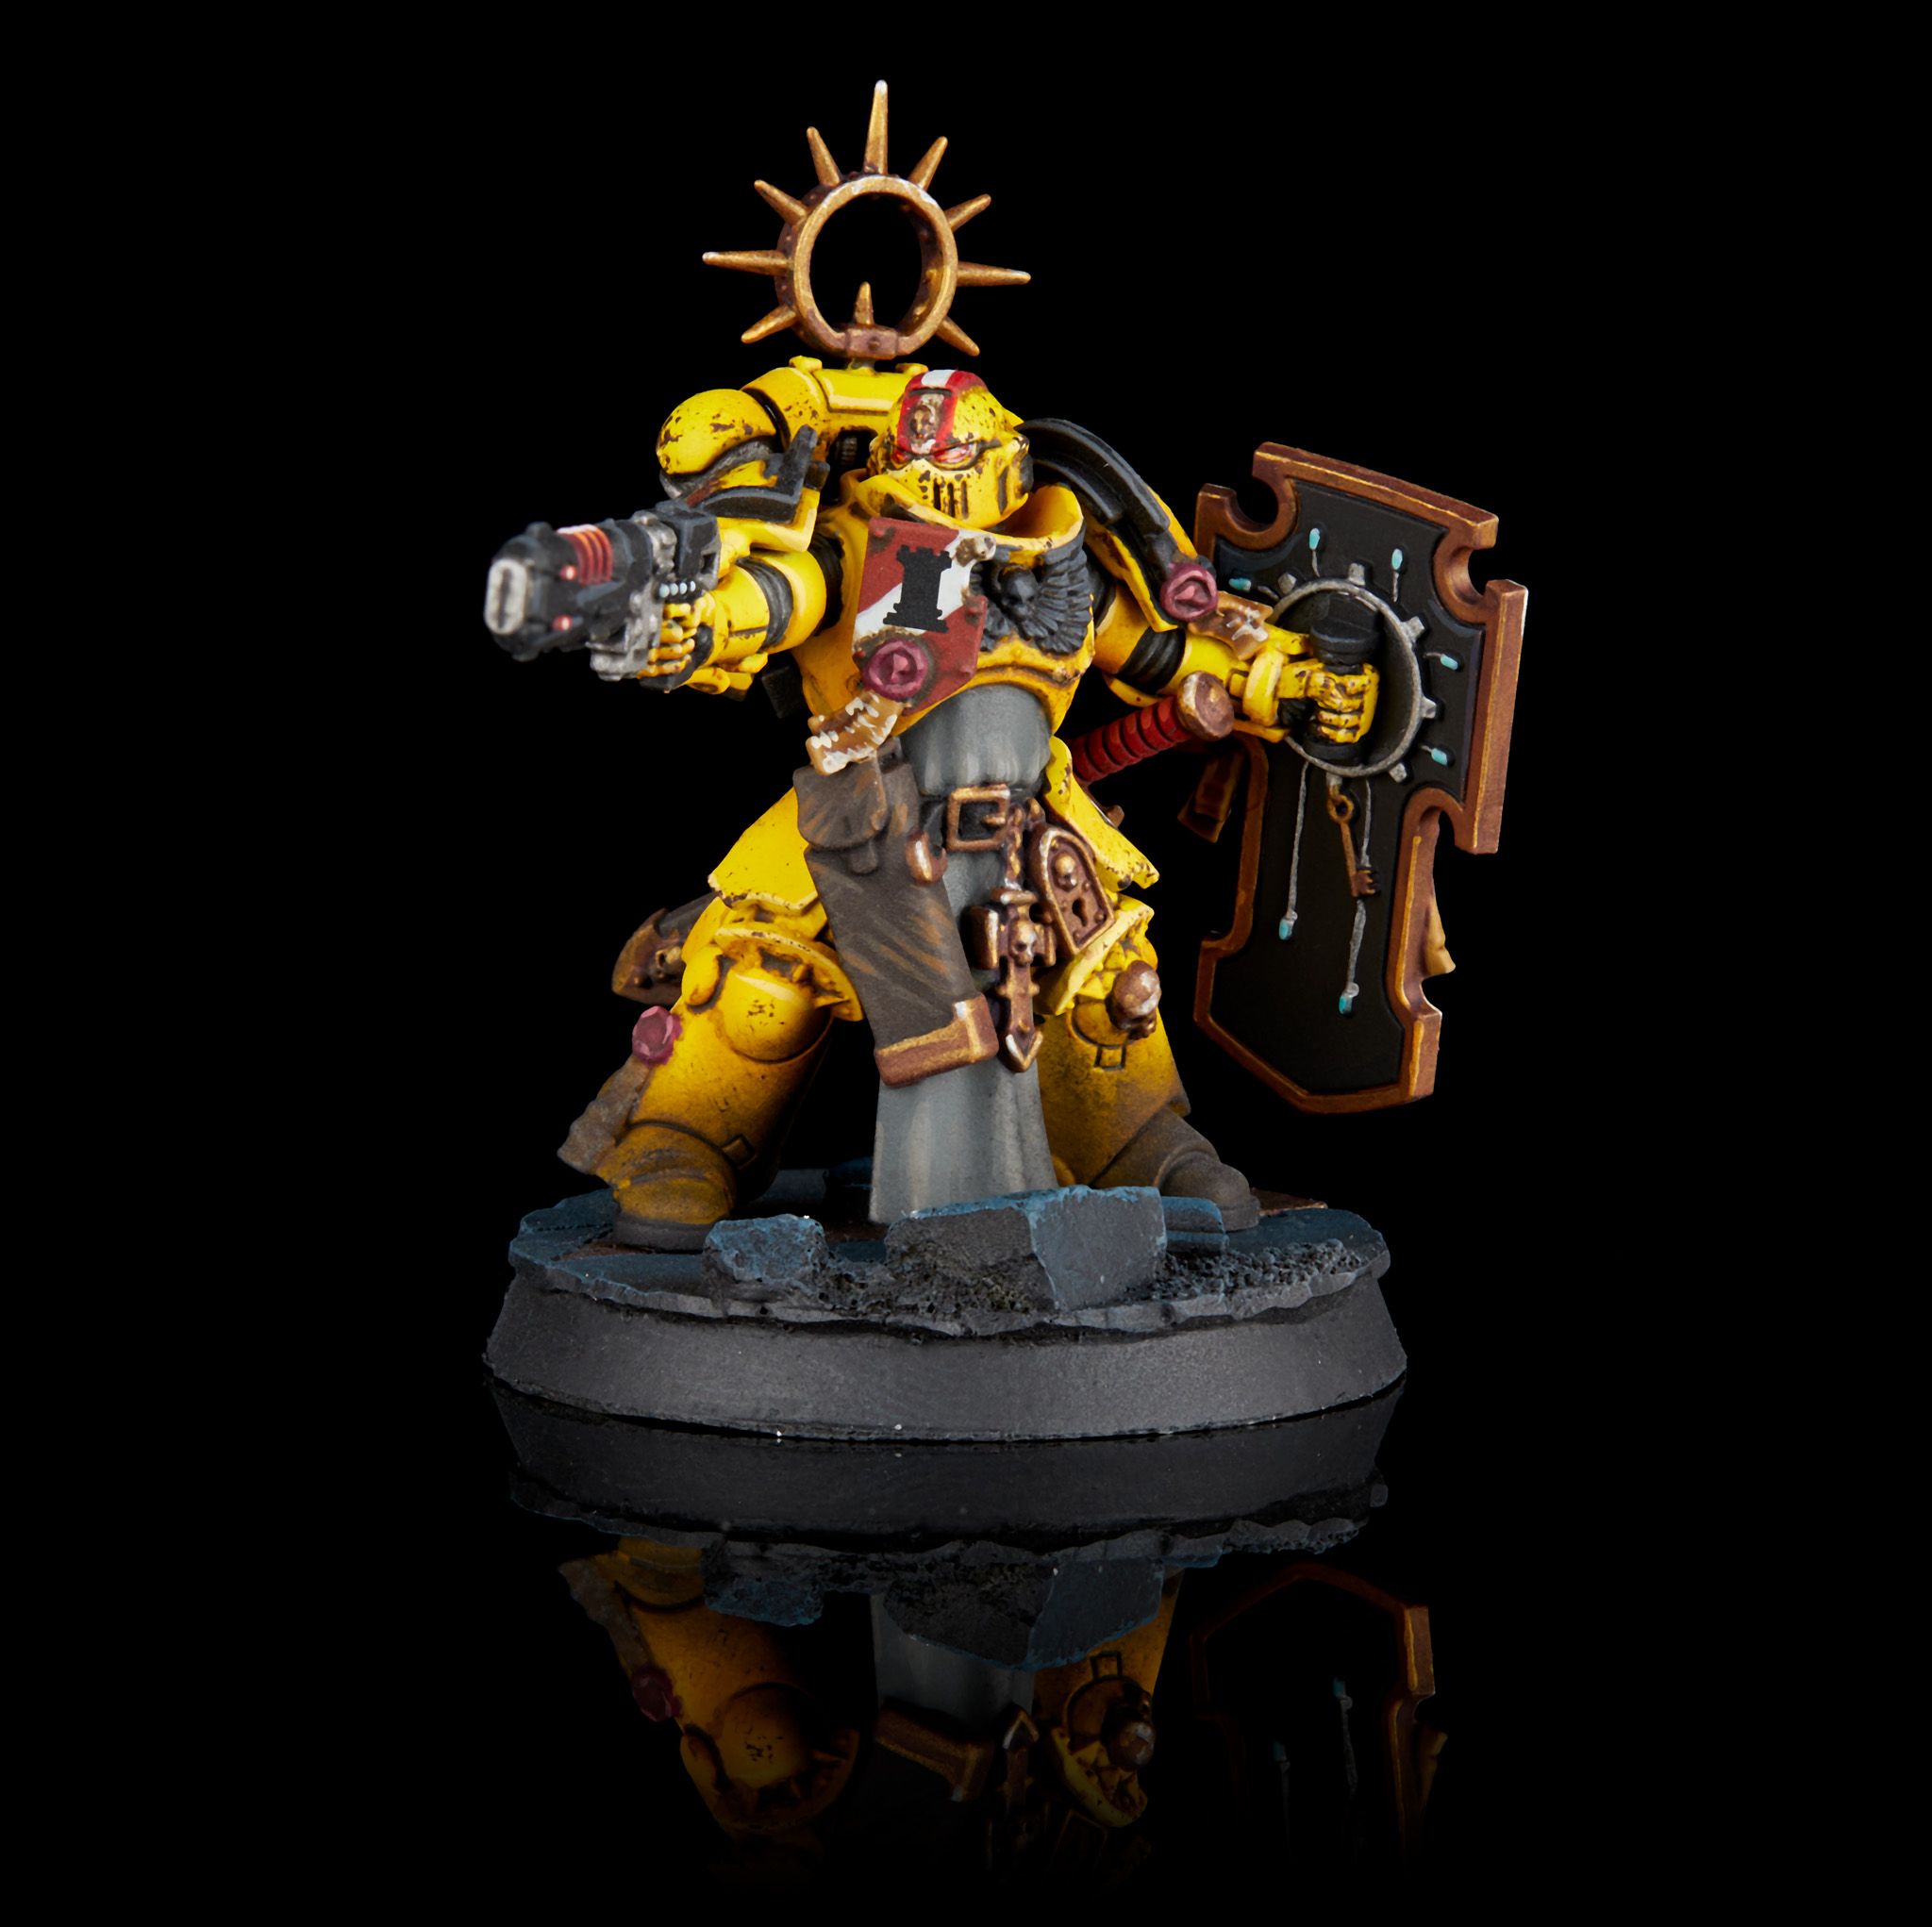
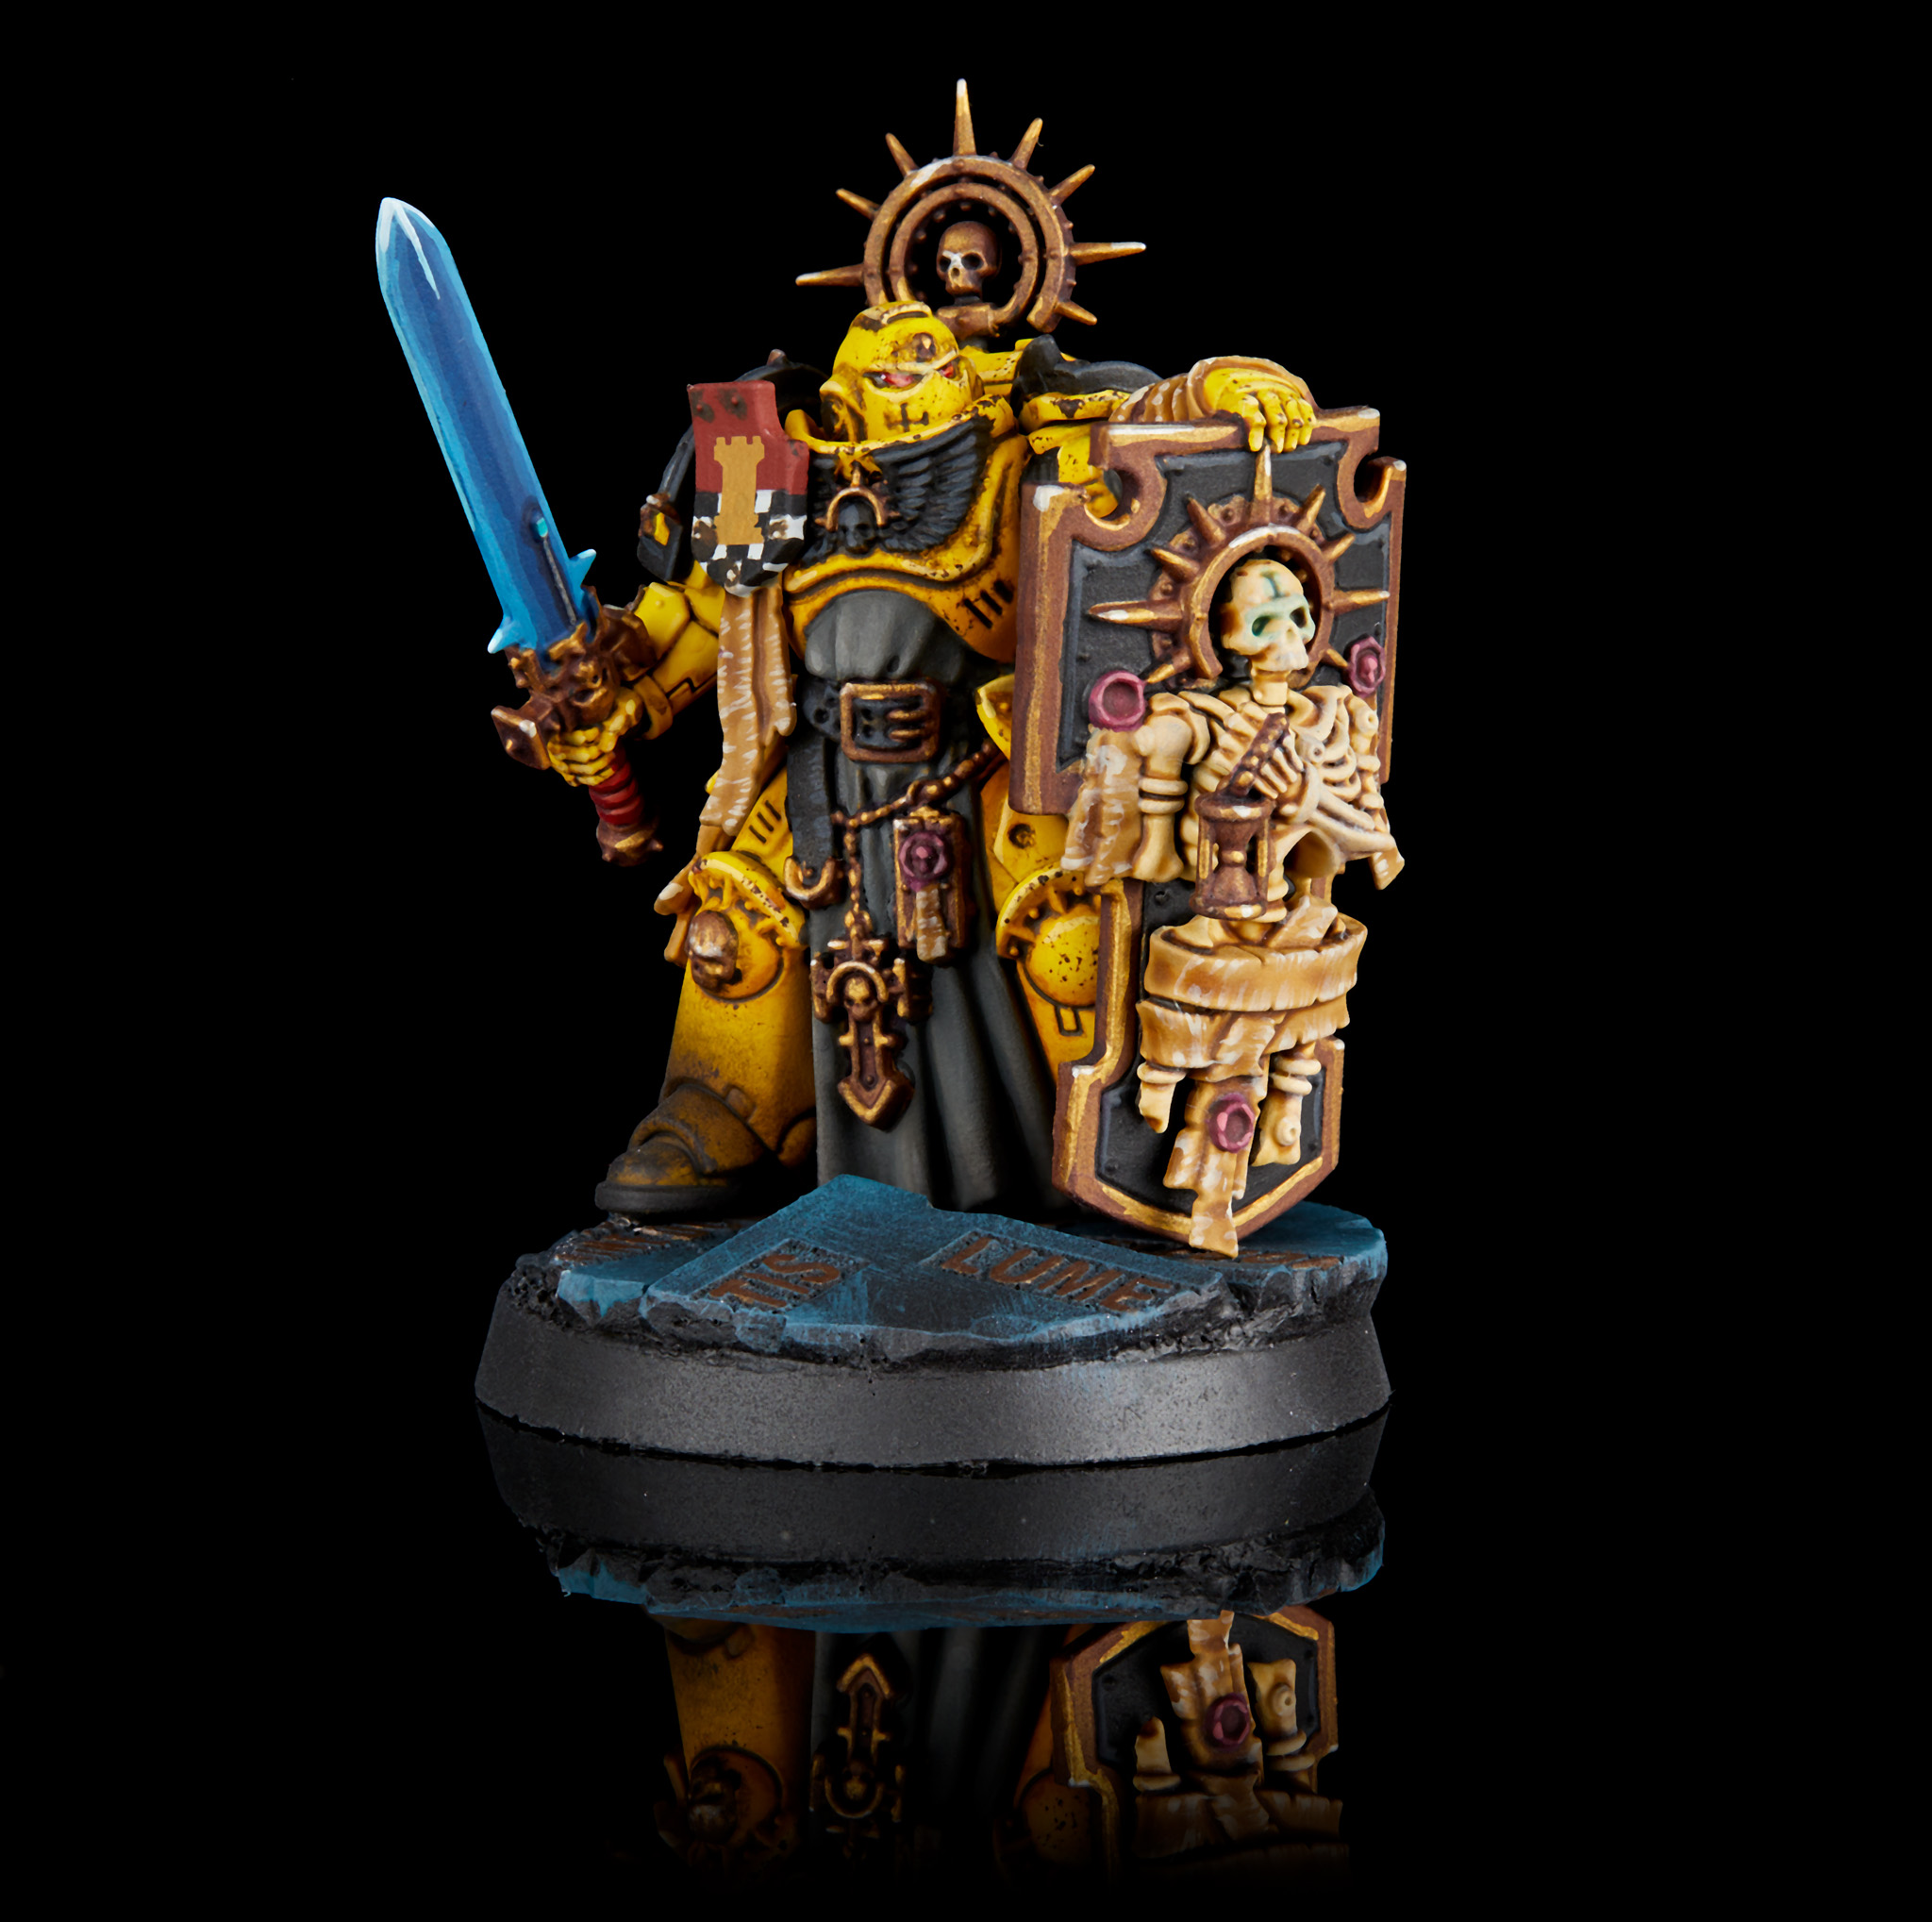 Imperial Fists Primaris Captain. Credit: Jack Hunter
 Imperial Fists Primaris Lieutenant. Credit: Jack Hunter
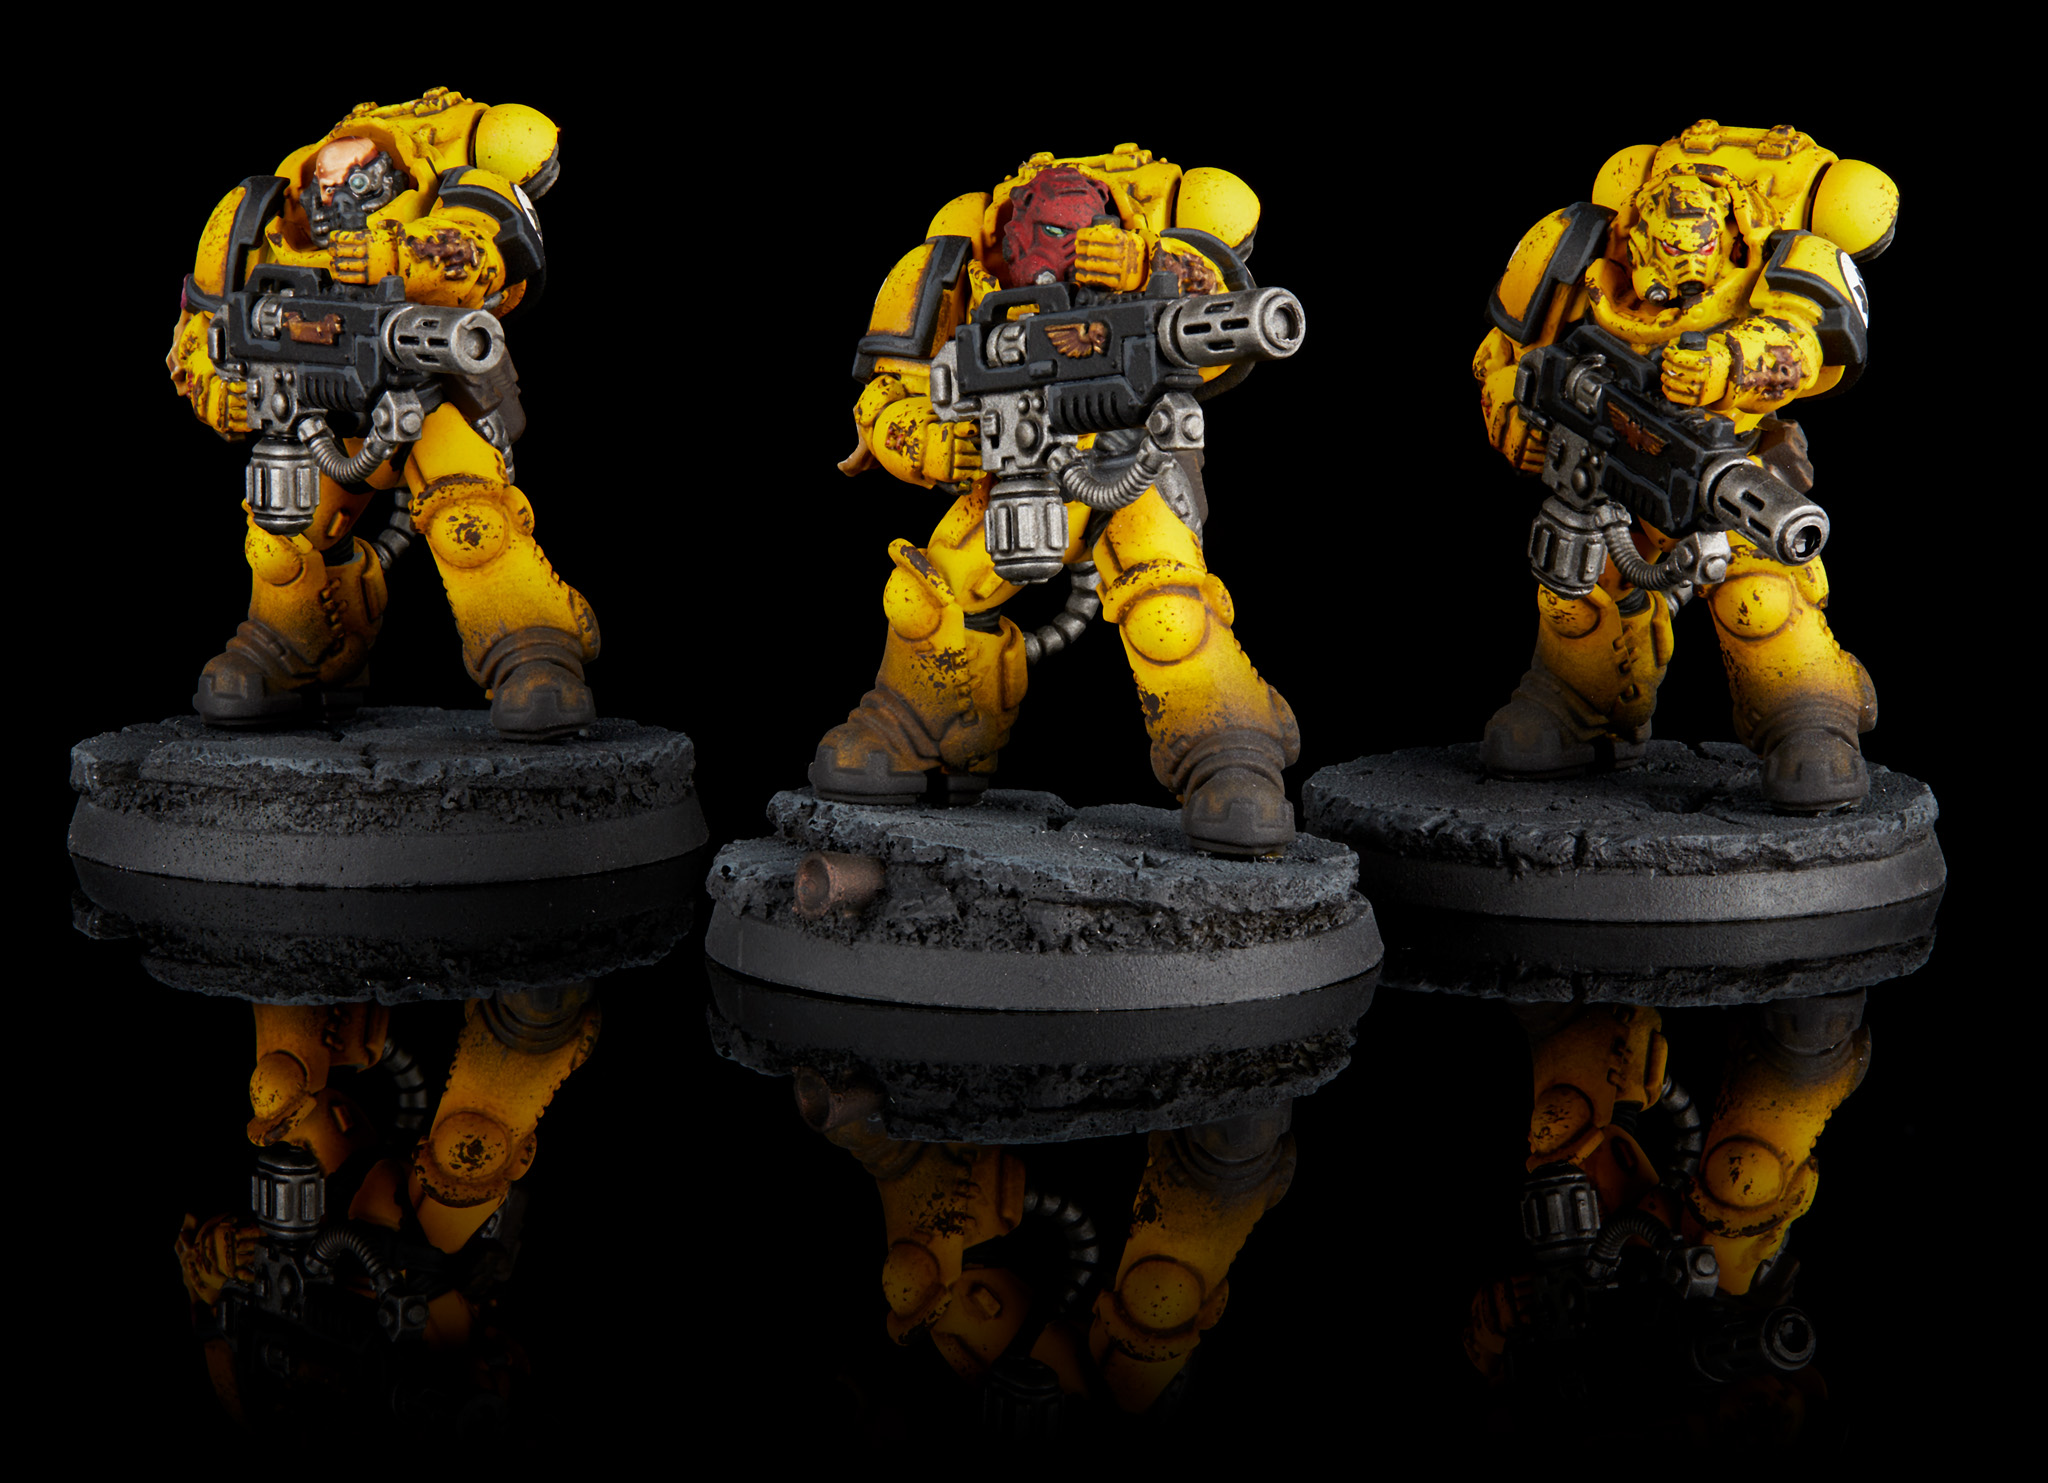 Imperial Fists Primaris Eradicators. Credit: Jack Hunter
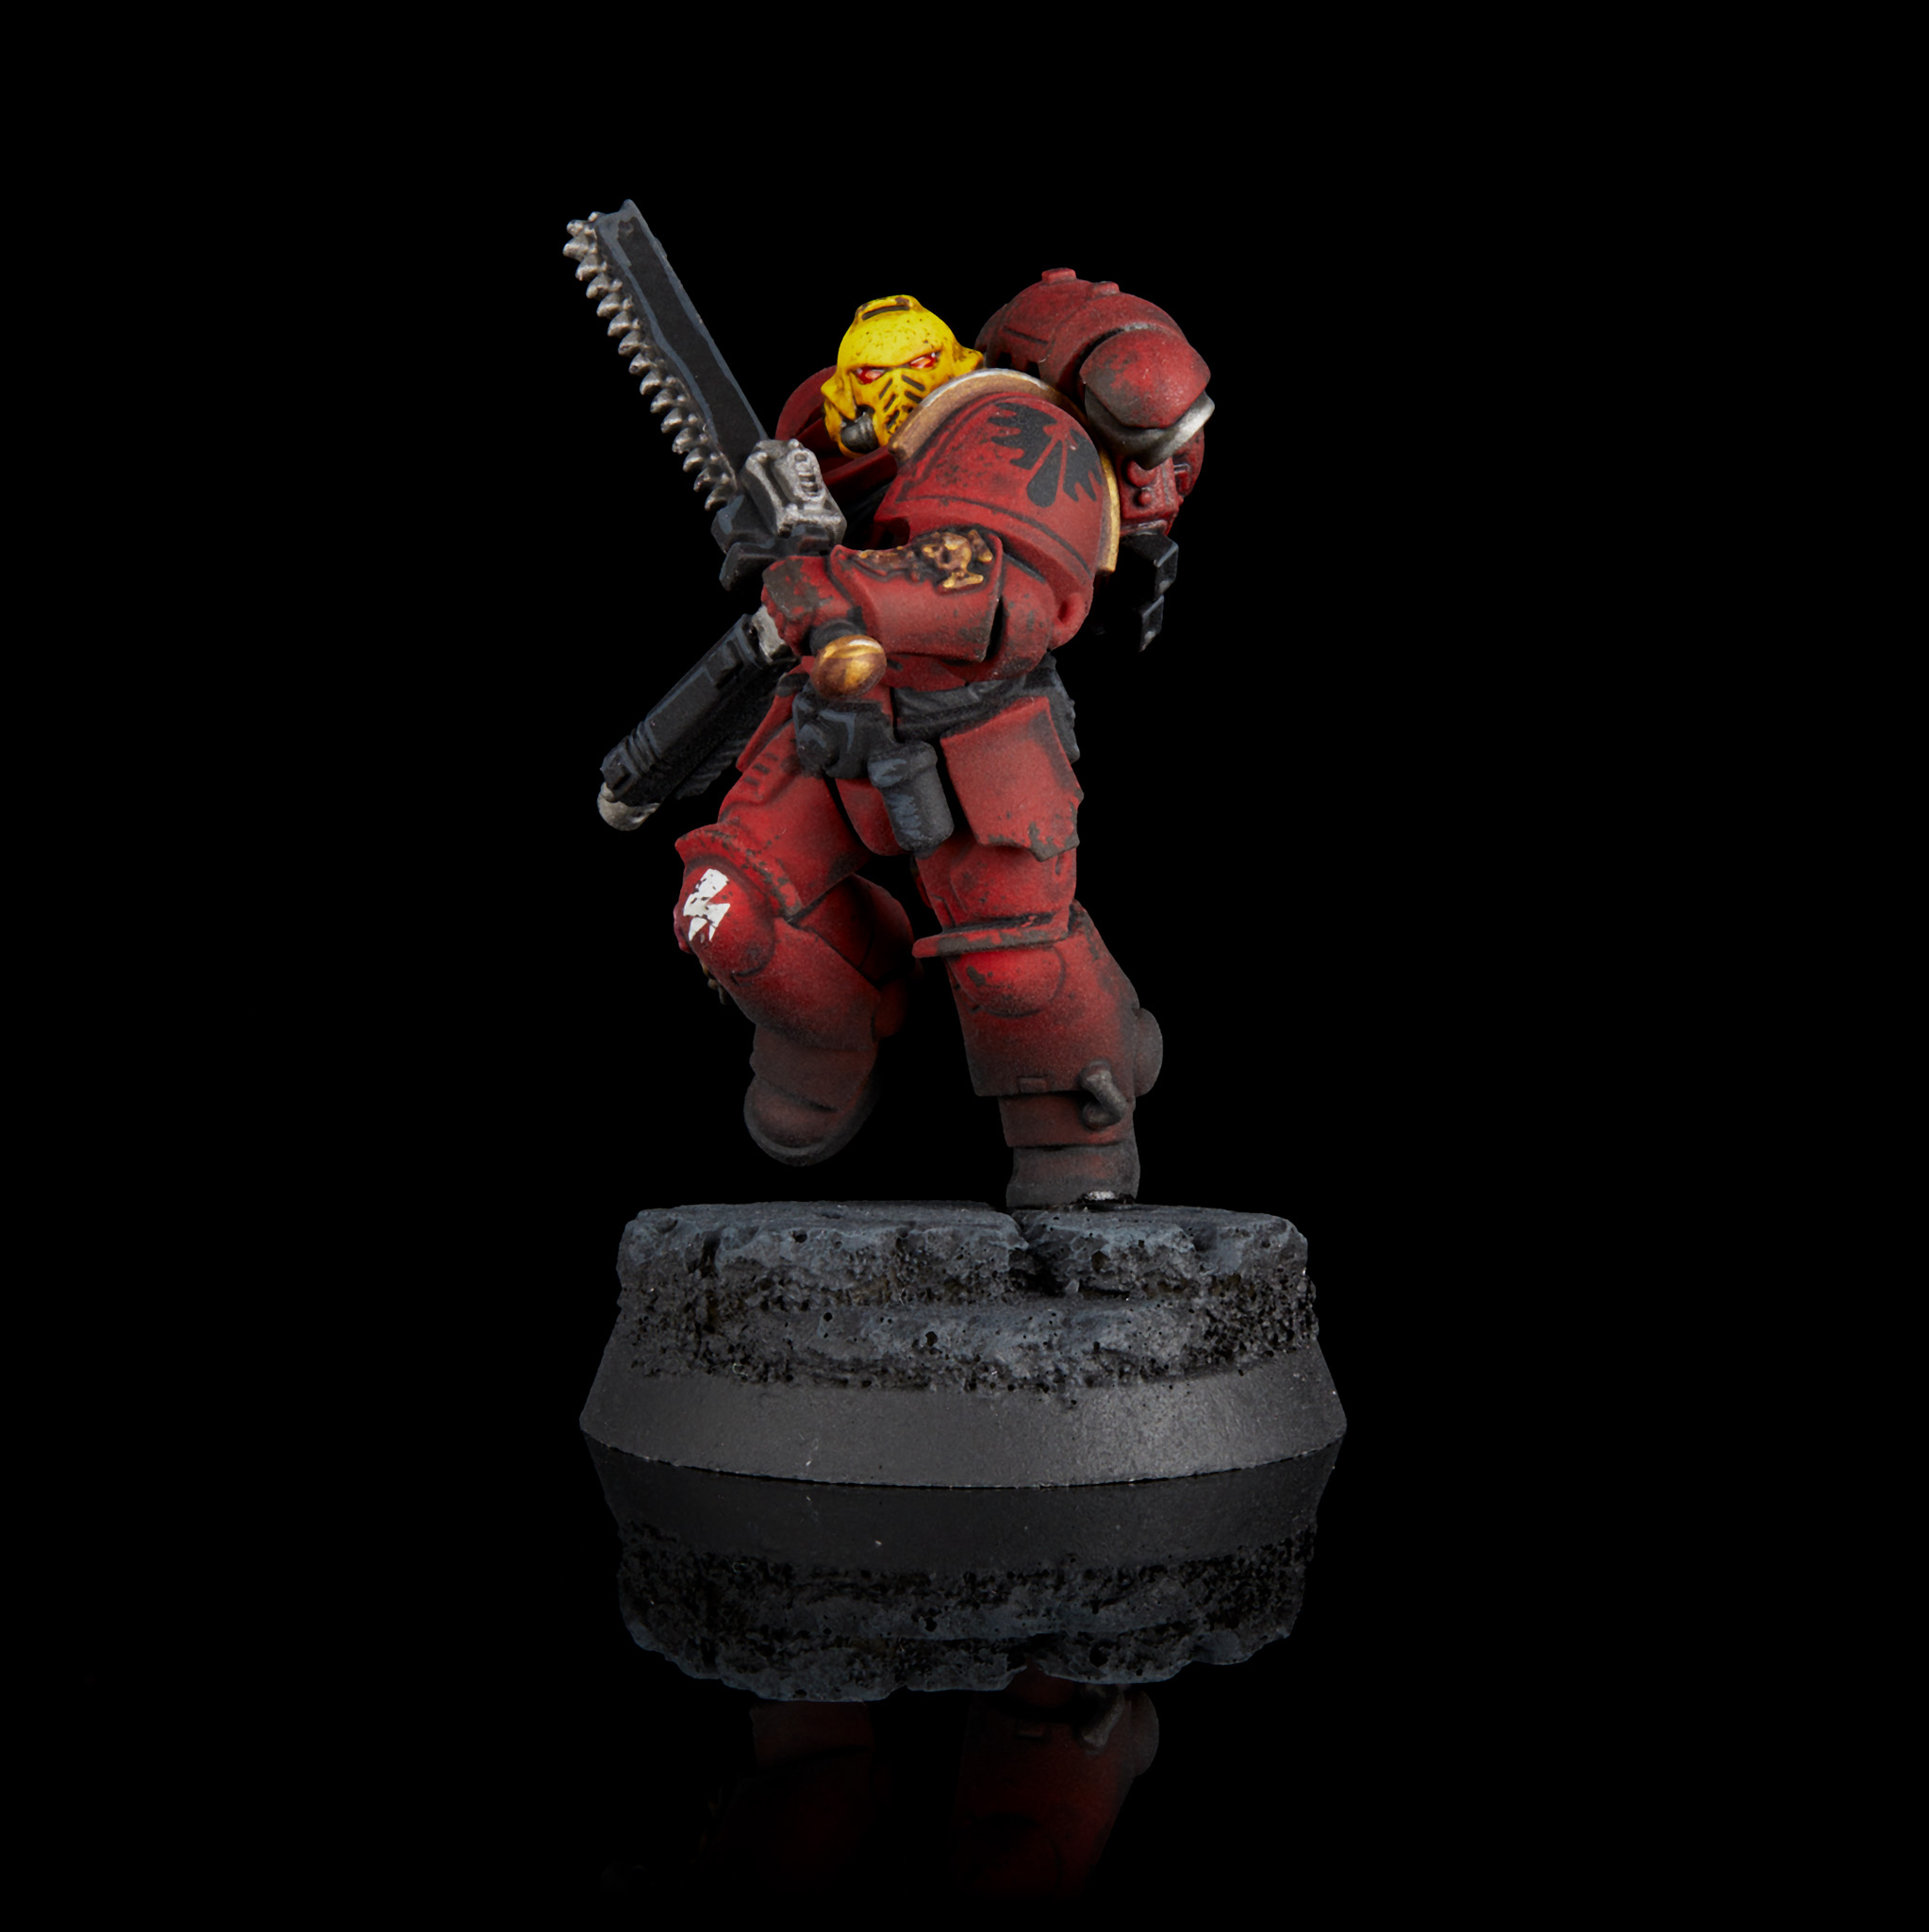 Blood Angels Assault Intercessor. Credit: Jack Hunter
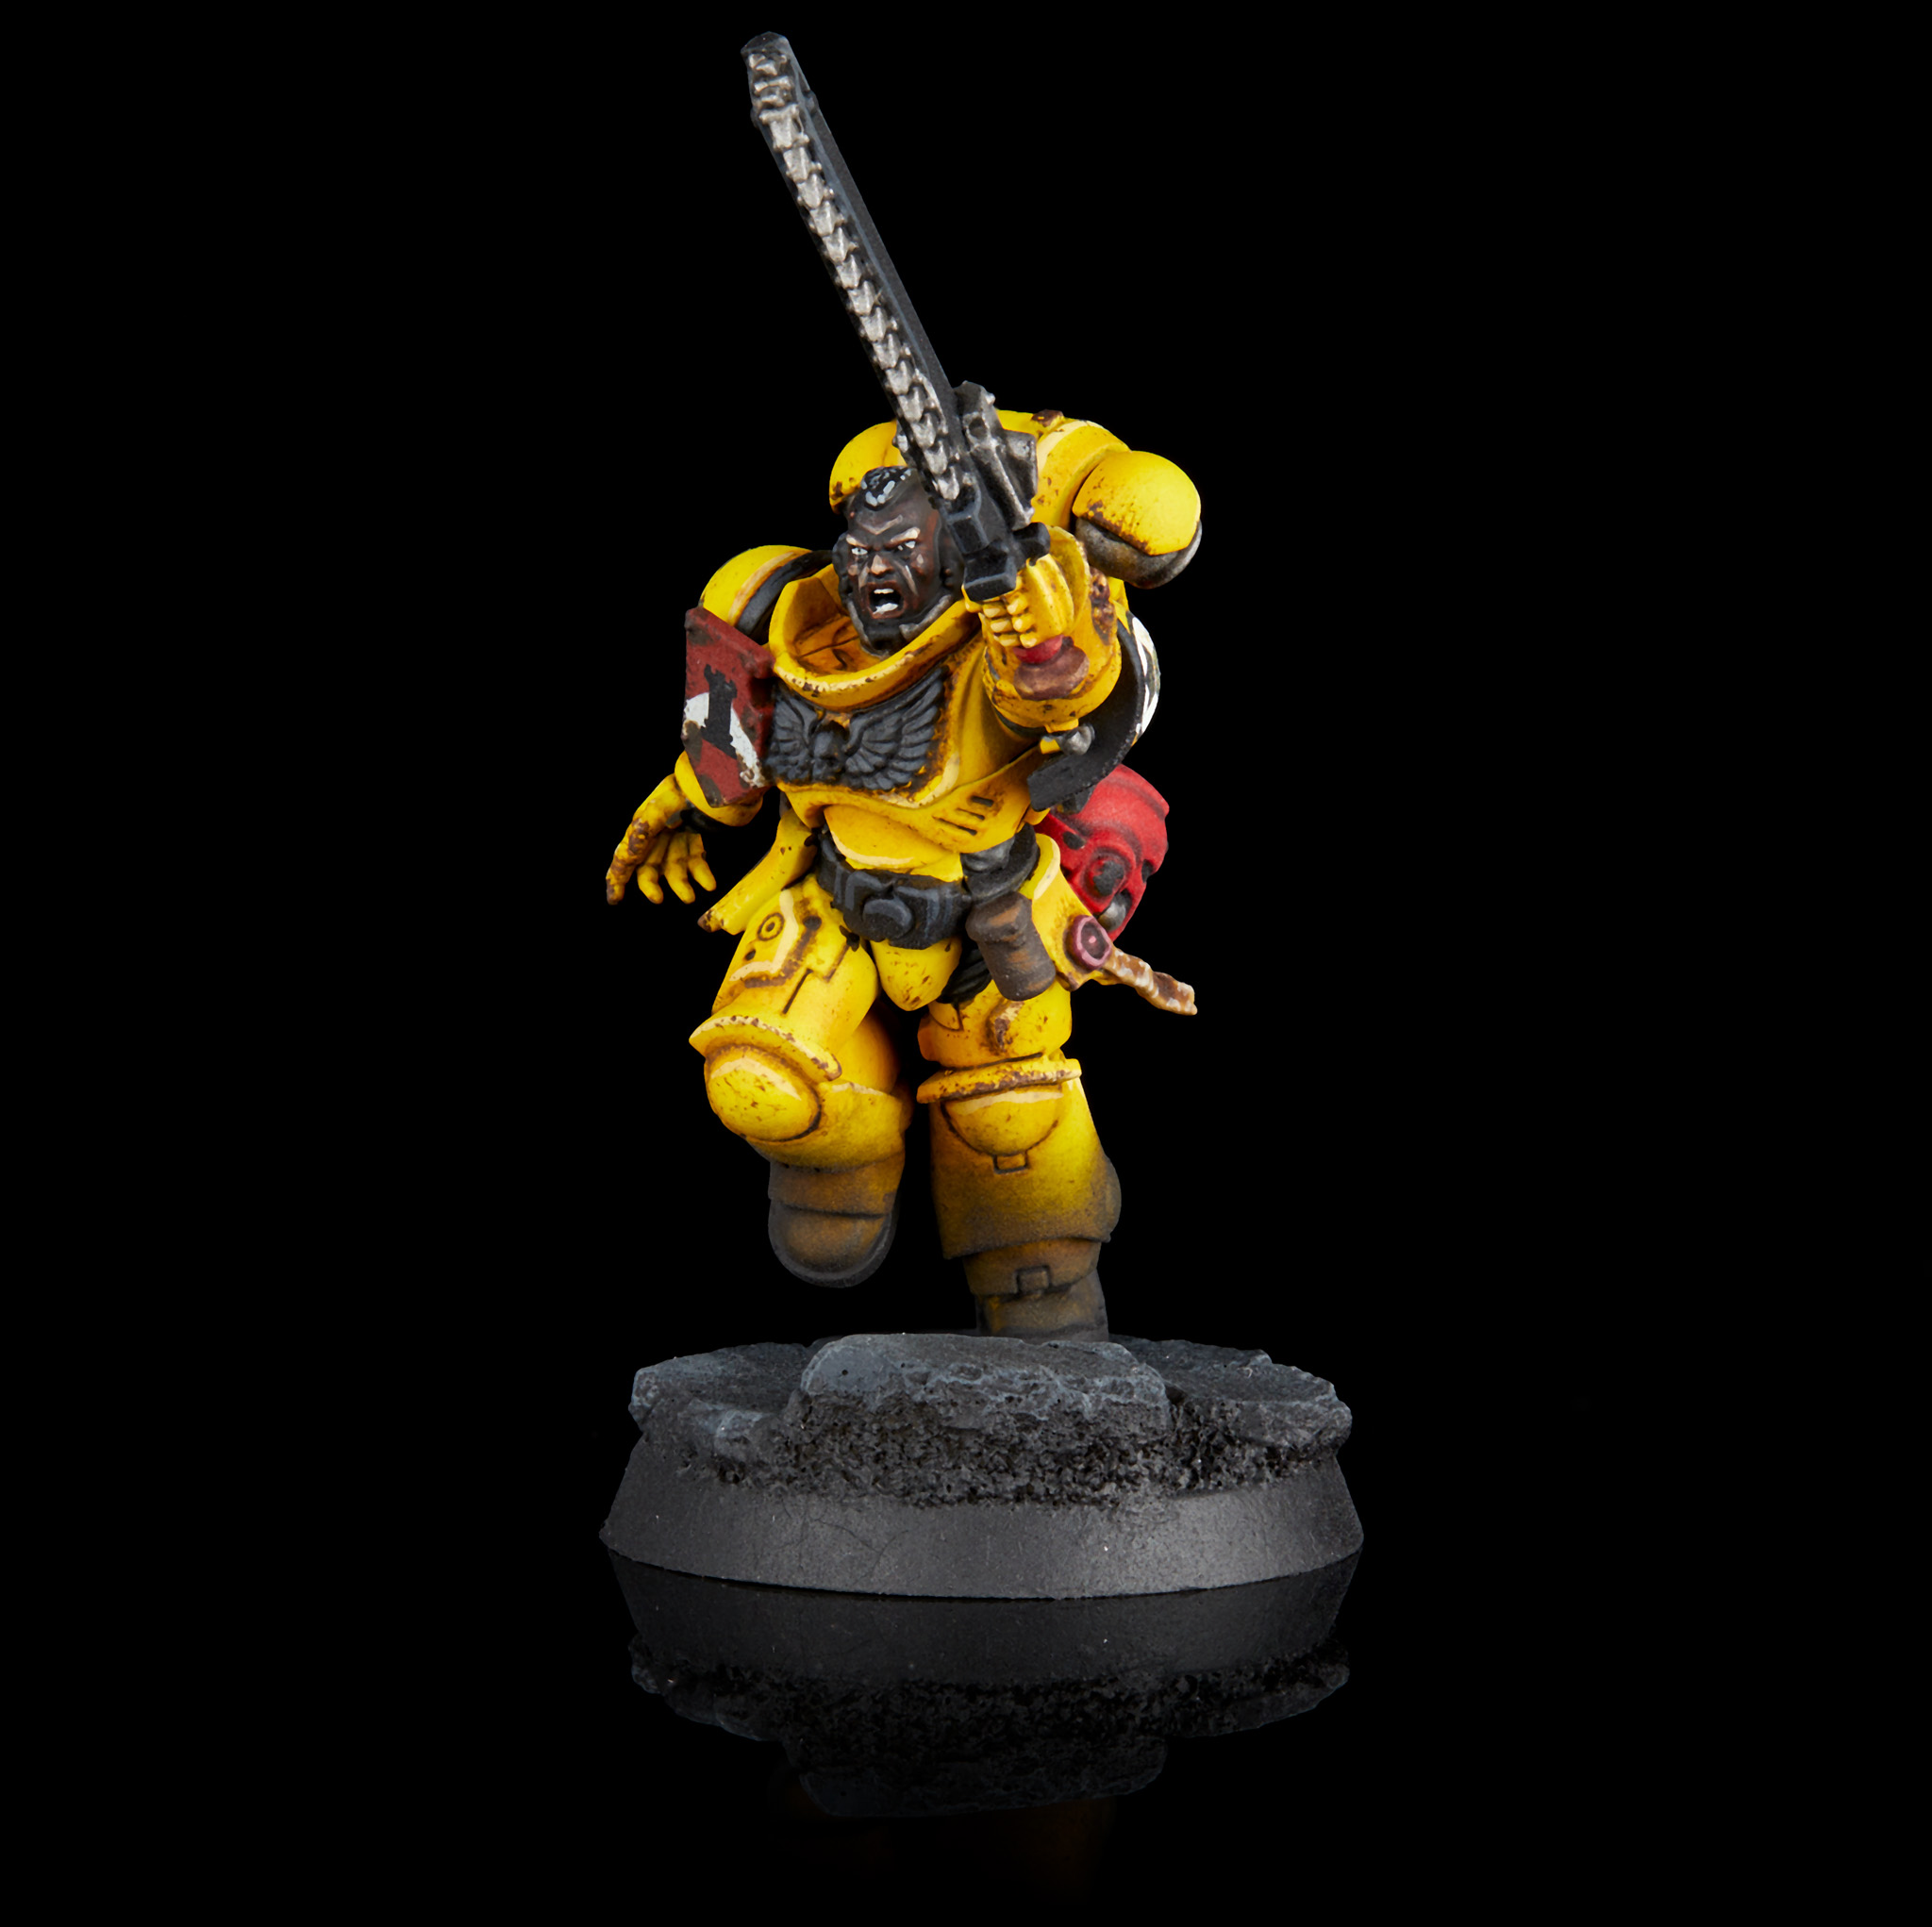 Imperial Fists Assault Intercessor. Credit: Jack Hunter

 Bladeguard Veterans. Credit; Raf Cordero

 Goonhammer App and Patron Updates: April, 2026
 Kill Team Tournament Report: Engage, Party, Repeat's March Madness 2026
 Goonhammer Reviews: Tribal Conquest