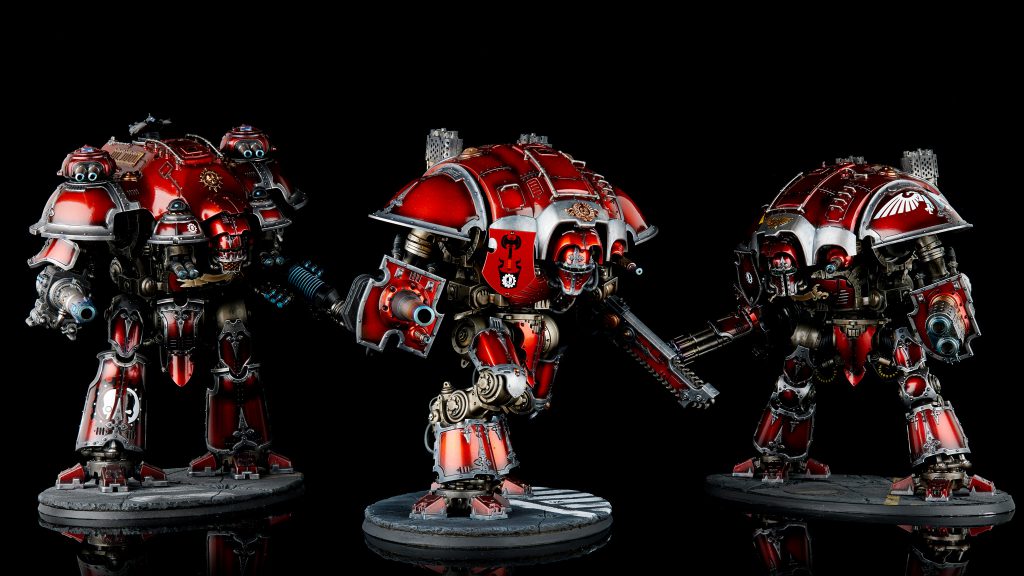
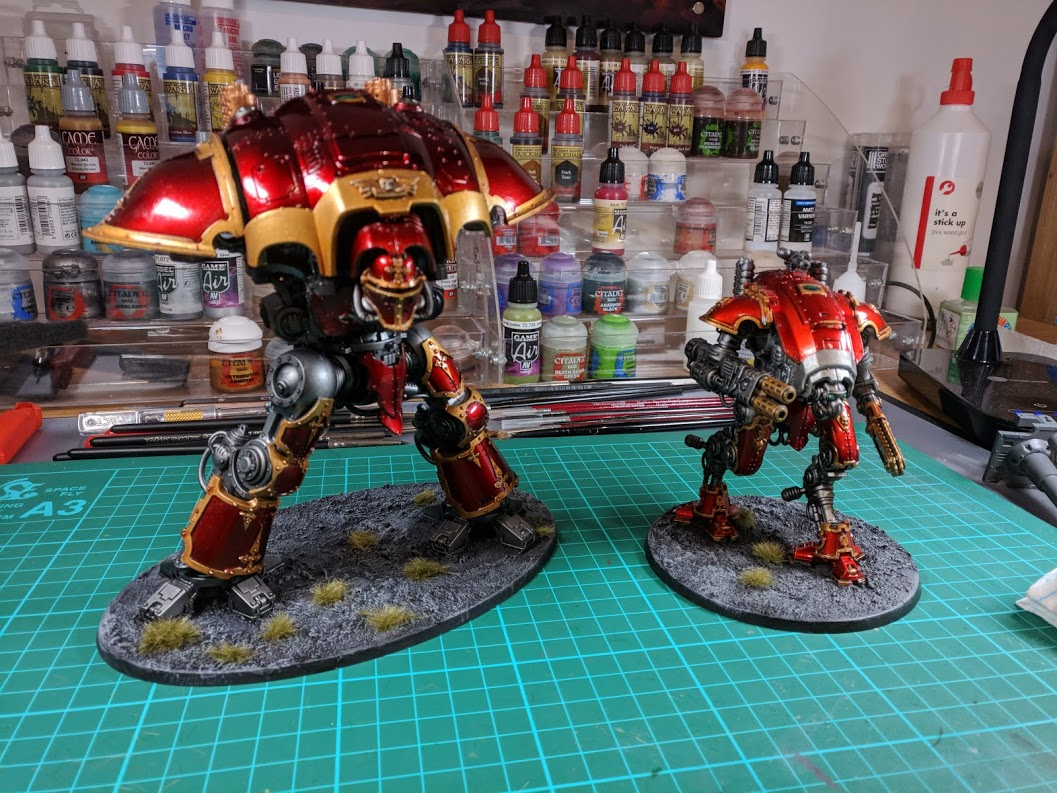
Imperial Knights are a joy to paint. Huge mechanized gearwork covered by large flat armor panels means you have a lot of surface area to experiment with different styles. Which is a blessing when an entire Imperial Knight army is no more than a handful of models (though strictly speaking, each Knight model is an entire handful by itself). To avoid an army that looks like four copy-paste operations, you can splash up the paint jobs to give each model their own individual flair.
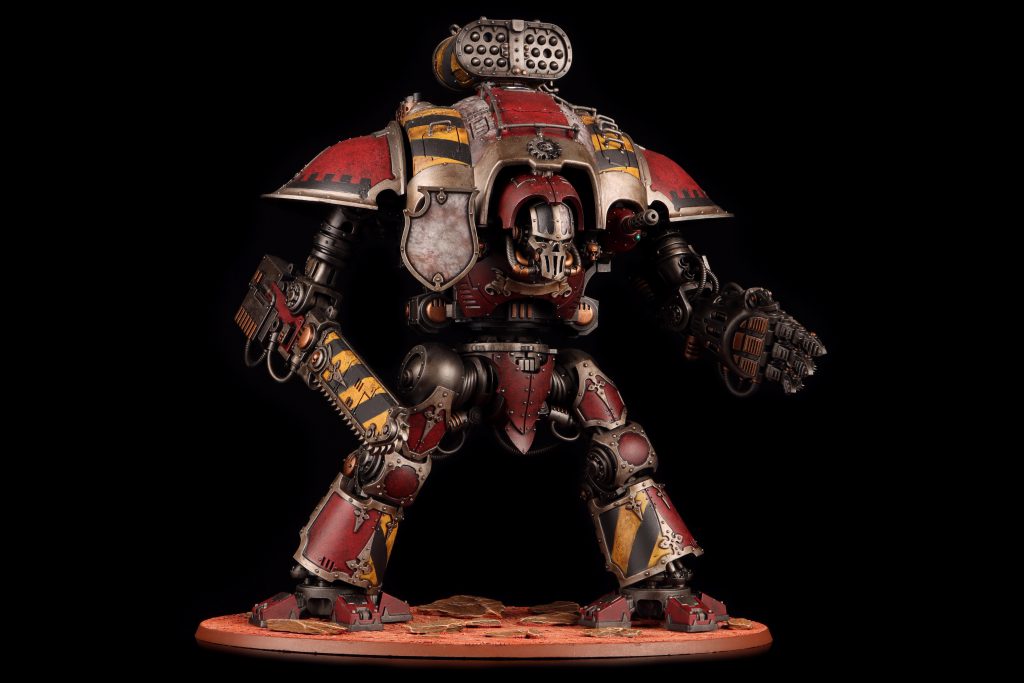
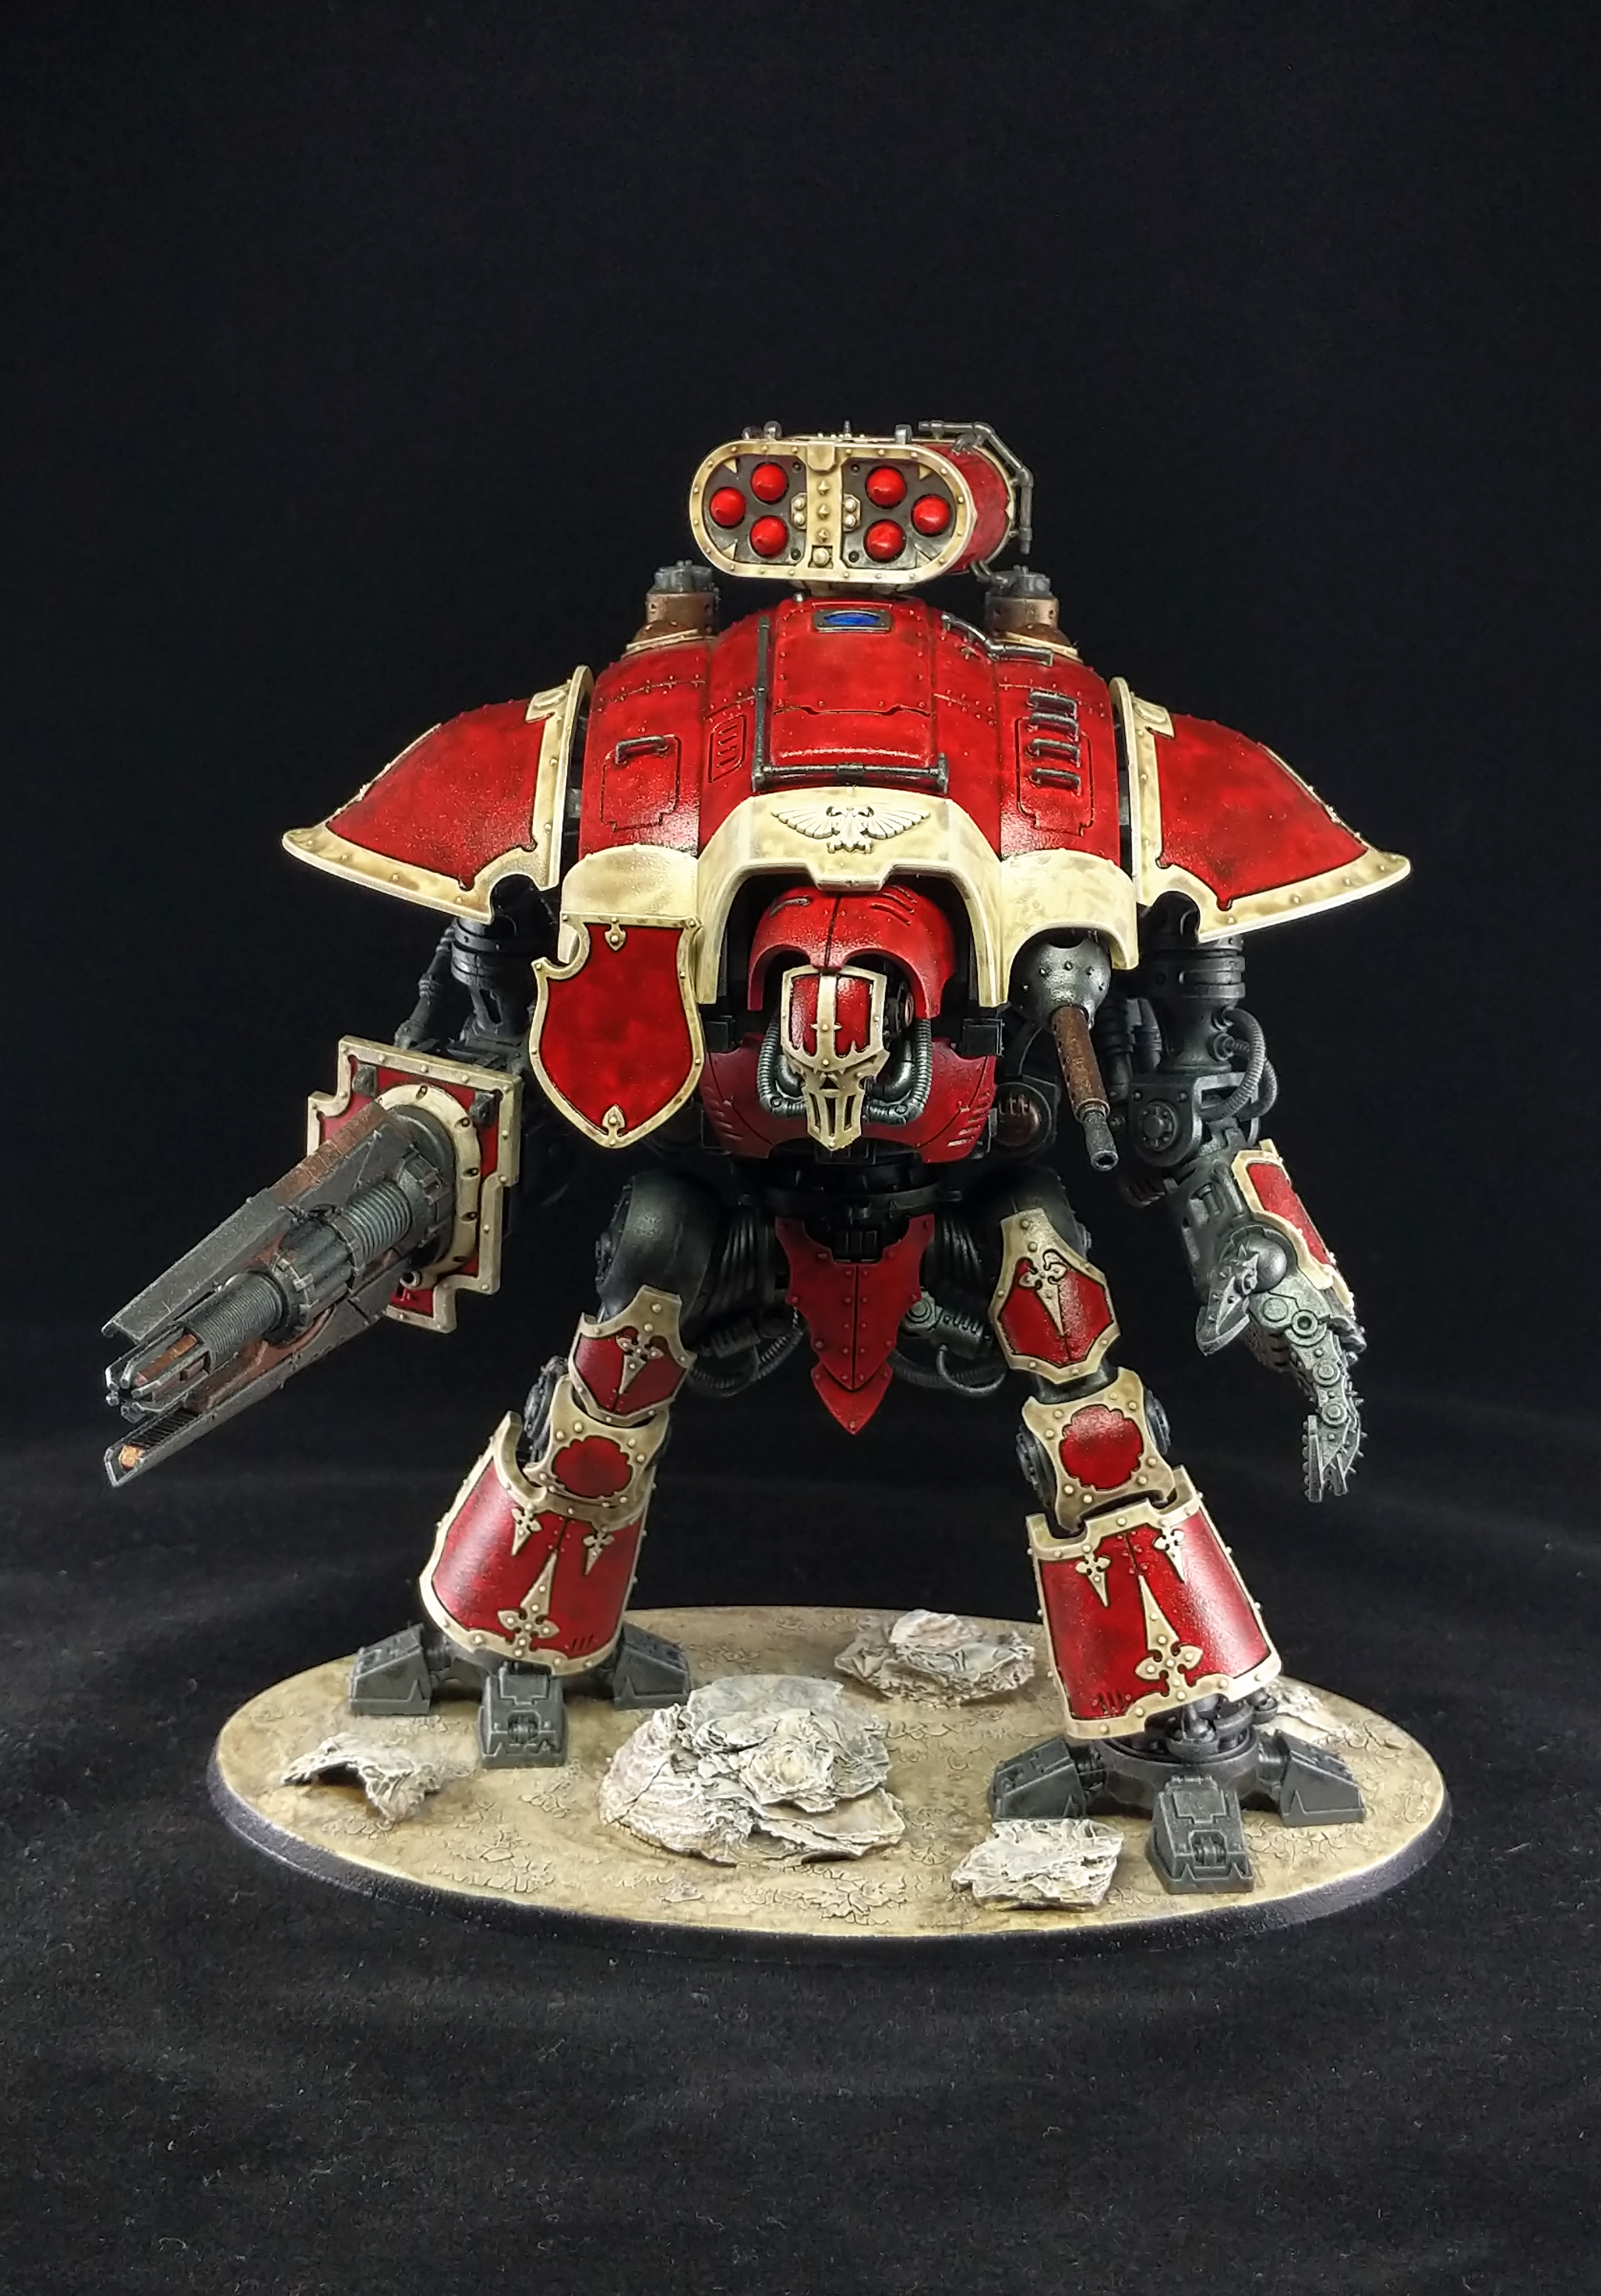
 Knight Gallant, he's got a magnet drilled into his forehead for mask swapping. Credit: Pendulin
I have no "one-size fits all" guide for Imperial Knights, but what I do have are a series of techniques I've used, frequently paired together, to create some interesting and memorable models. Let's go over them, shall we:
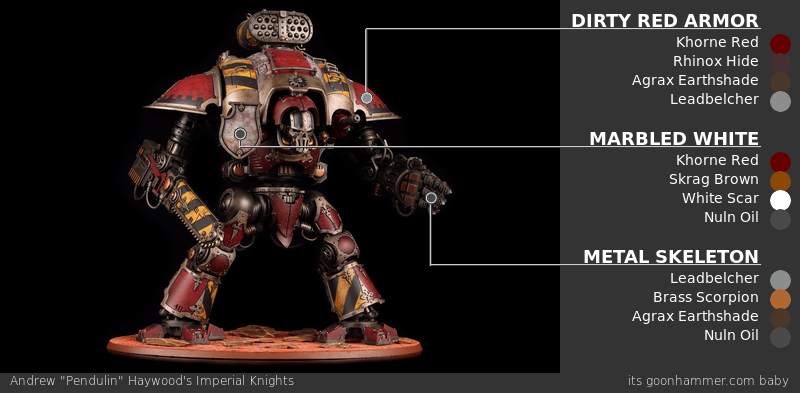
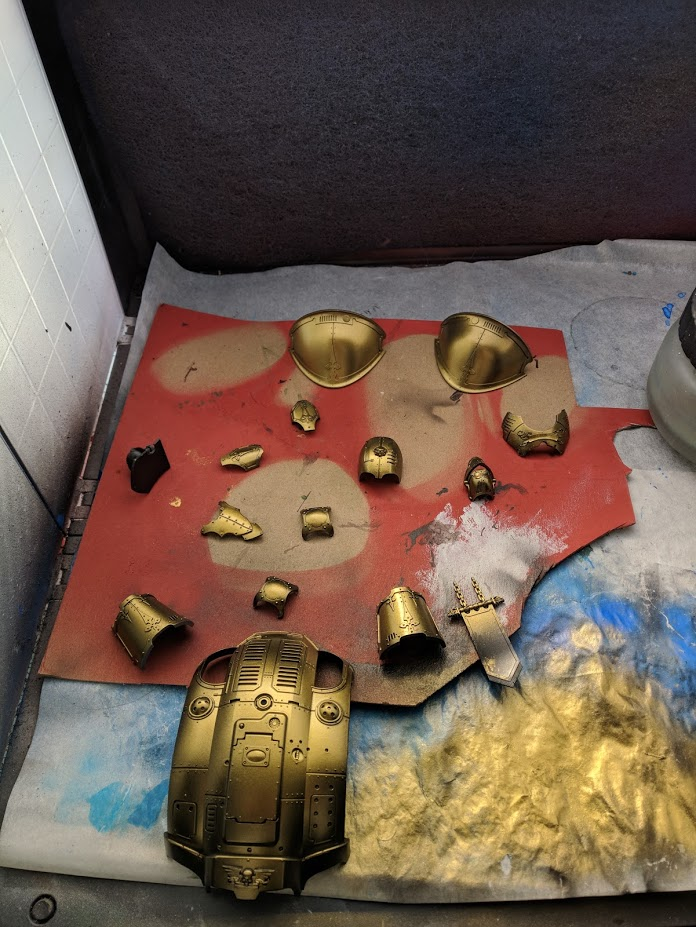
Metal Skeleton
The metal skeleton starts off either as
Leadbelcher spray, or as airbrushed
Stynylrez Black followed by
Vallejo Metal Color Steel. Those two approaches are fairly comparable, but I've found that
Vallejo Metal Color Steel to be a touch darker and richer. Either way, then follow up by highlighting wires or accent pieces with
Brass Scorpion. Then finish it off with a little bit of
Nuln Oil and
Agrax Earthshade.
Green Lenses
These lenses are just
Stormhost Silver with
Waystone Green on top of them. Maybe use just a touch of
Nuln Oil along the edges to create a clear line around the lens. You can get the same iridescent effect with other colors by using other paints in the Citadel Technical paint line, specifically the gemstone colors:
Spiritstone Red and
Soulstone Blue.
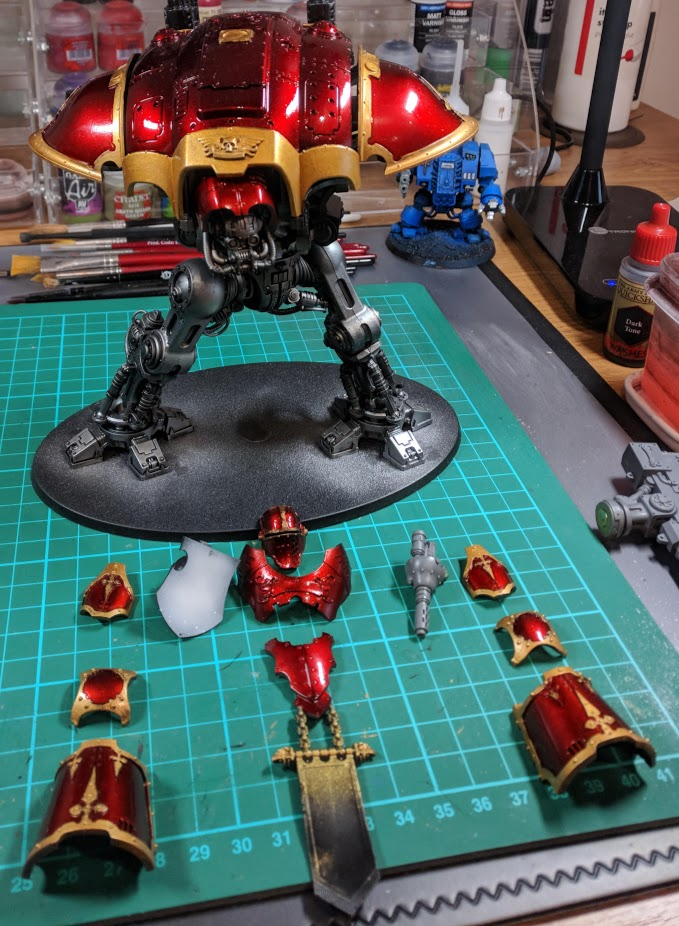
Dirty Red Armor
This is deceptively easy to paint. First paint
Khorne Red as smooth as possible (with an airbrush, if you have one). Then, take a torn up bit of sponge brush, and stipple on
Rhinox Hide, giving the whole armor panel an even, fairly dense speckling of it. Next, wash all the red/brown in
Agrax Earthshade. Once that's dry, grab the sponge again and this time stipple back on
Khorne Red. If you want to go the extra mile, then stipple on some
Leadbelcher on corners, edges, and anywhere the paint may have scratched off. The chipped paint look works better if the area surrounding the
Leadbelcher stipple is
primarily Rhinox Hide, rather than
Khorne Red. It gives that area a natural-looking transition from clean armor, to dirty armor, to chipped armor.
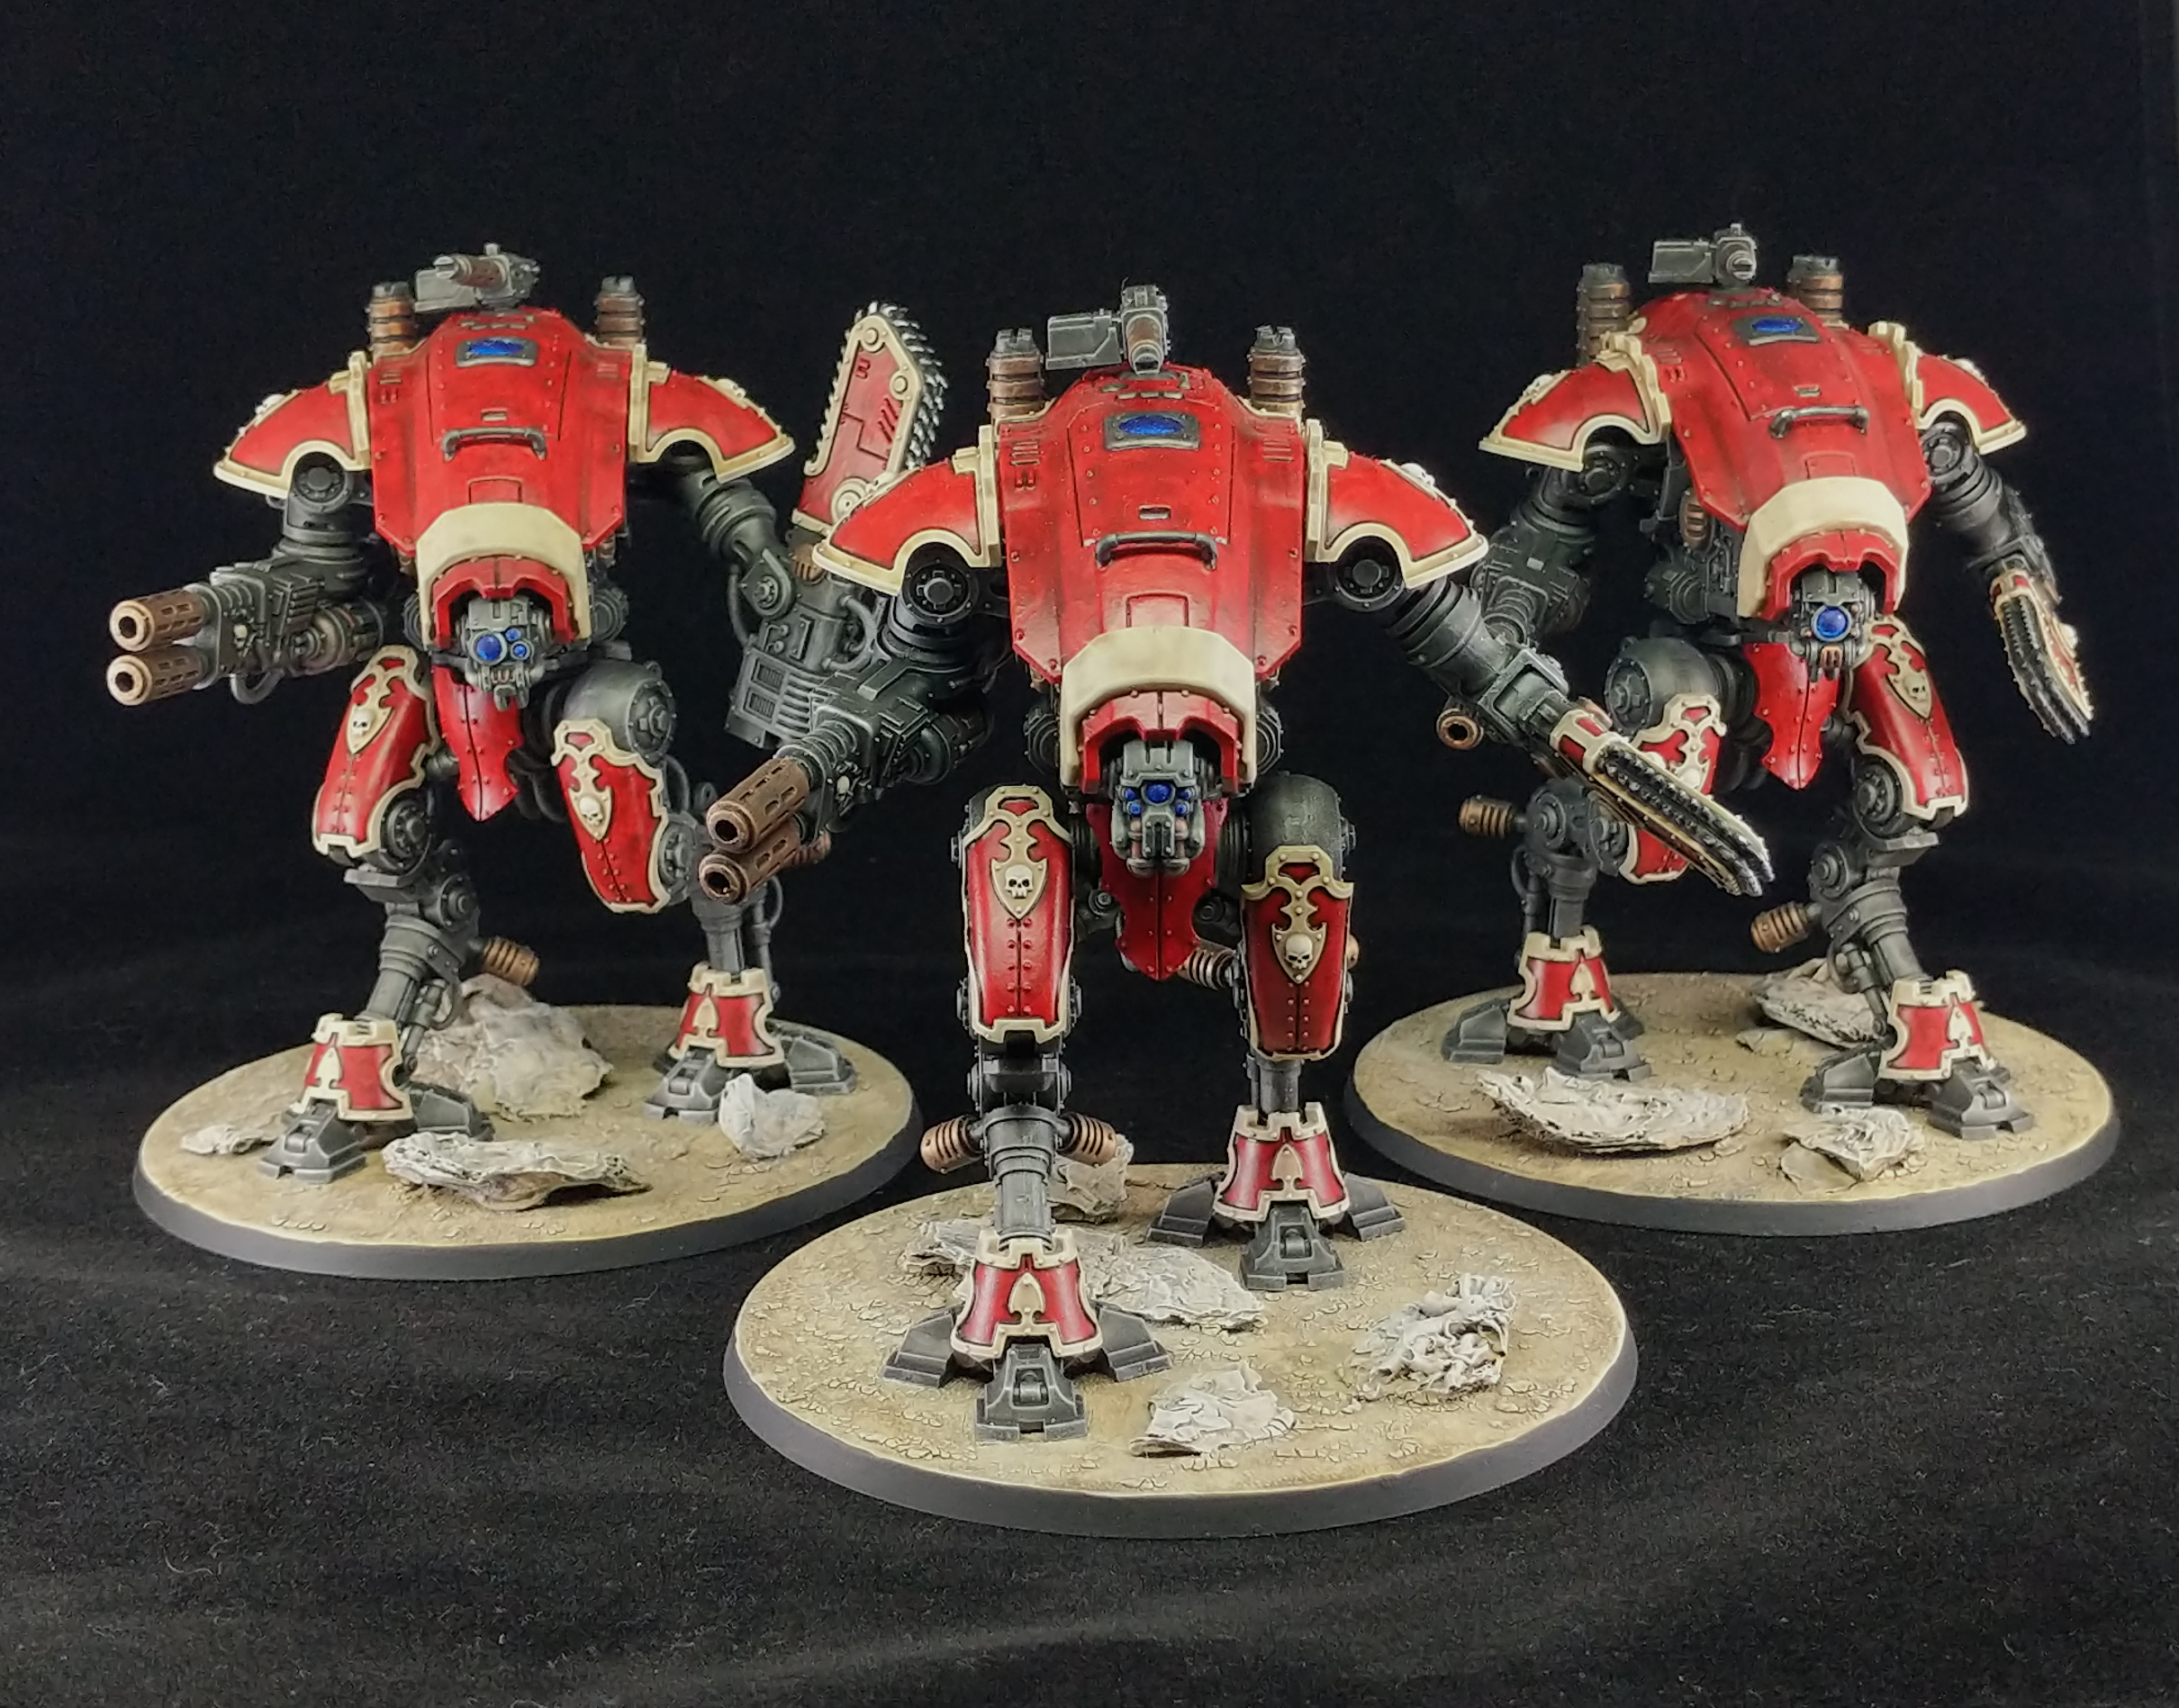
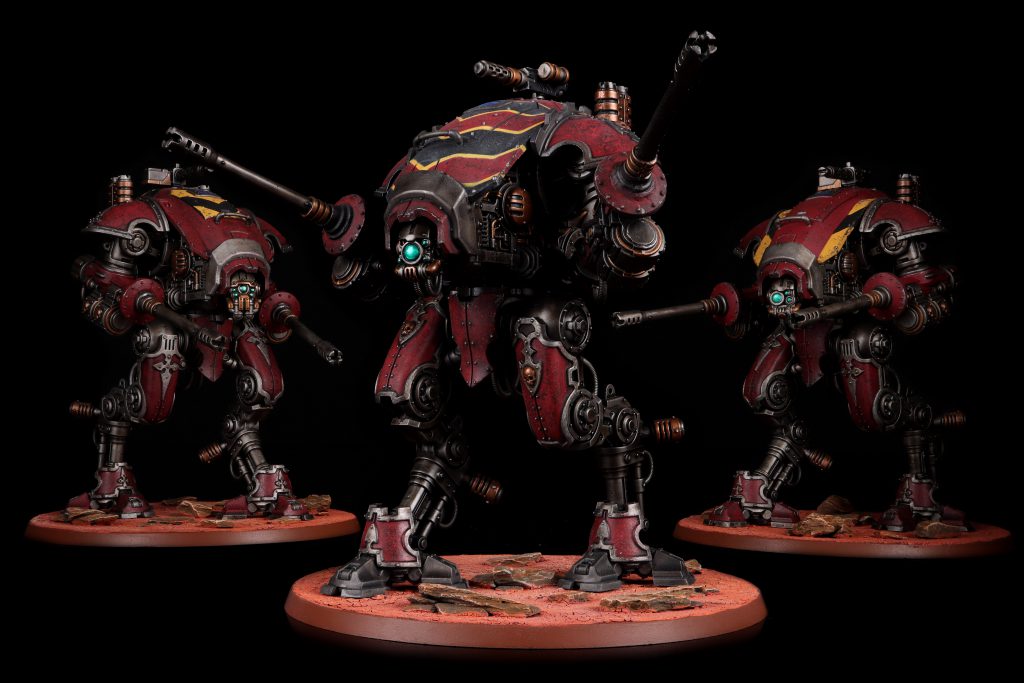 Armiger Helverins. Credit: Pendulin
Dirty Black Armor
I found that starting with a base of black, following by lightly stippling on
Eshin Grey worked quite well, no wash required. Somebody who knows more of color theory could explain why grey-over-black right next to brown-over-red works so well. But similar to the dirty red armor, you can stipple some
Leadbelcher on corners, edges, and places with chipped paint.
Hazard Stripes
Airbrush + thin masking tape. Easy-peasy. Specifically though, I found going from black to yellow easier. Start by airbrushing
Abaddon Black or
Stynylrez Black, then mask off all the areas you don't want to spray with yellow, and last airbrush
Averland Sunset right over the black to create the yellow lines.
Note that you might need to do a handful of thin layers to get the yellow to look good, but don't stress, it takes longer to mask the areas than it does to paint them. Pull the masking tape off, and then clean up the hazard lines with a traditional brush if necessary.
To go the extra mile, stipple on a little bit of
Rhinox Hide on the yellow, and then wash it with
Agrax Earthshade. Don't worry too much about getting it on the black areas, but do
NOT leave the masking tape on keep the wash out of the black areas. The wash will pool against the masking tape, and you'll wind up with a thick layer of wash that separates your colors and it will look terrible. Once the wash is done, carefully stipple
Averland Sunset back on top of the yellow areas, and optionally stipple
Leadbelcher on the corners and edges where chipping may have occurred.
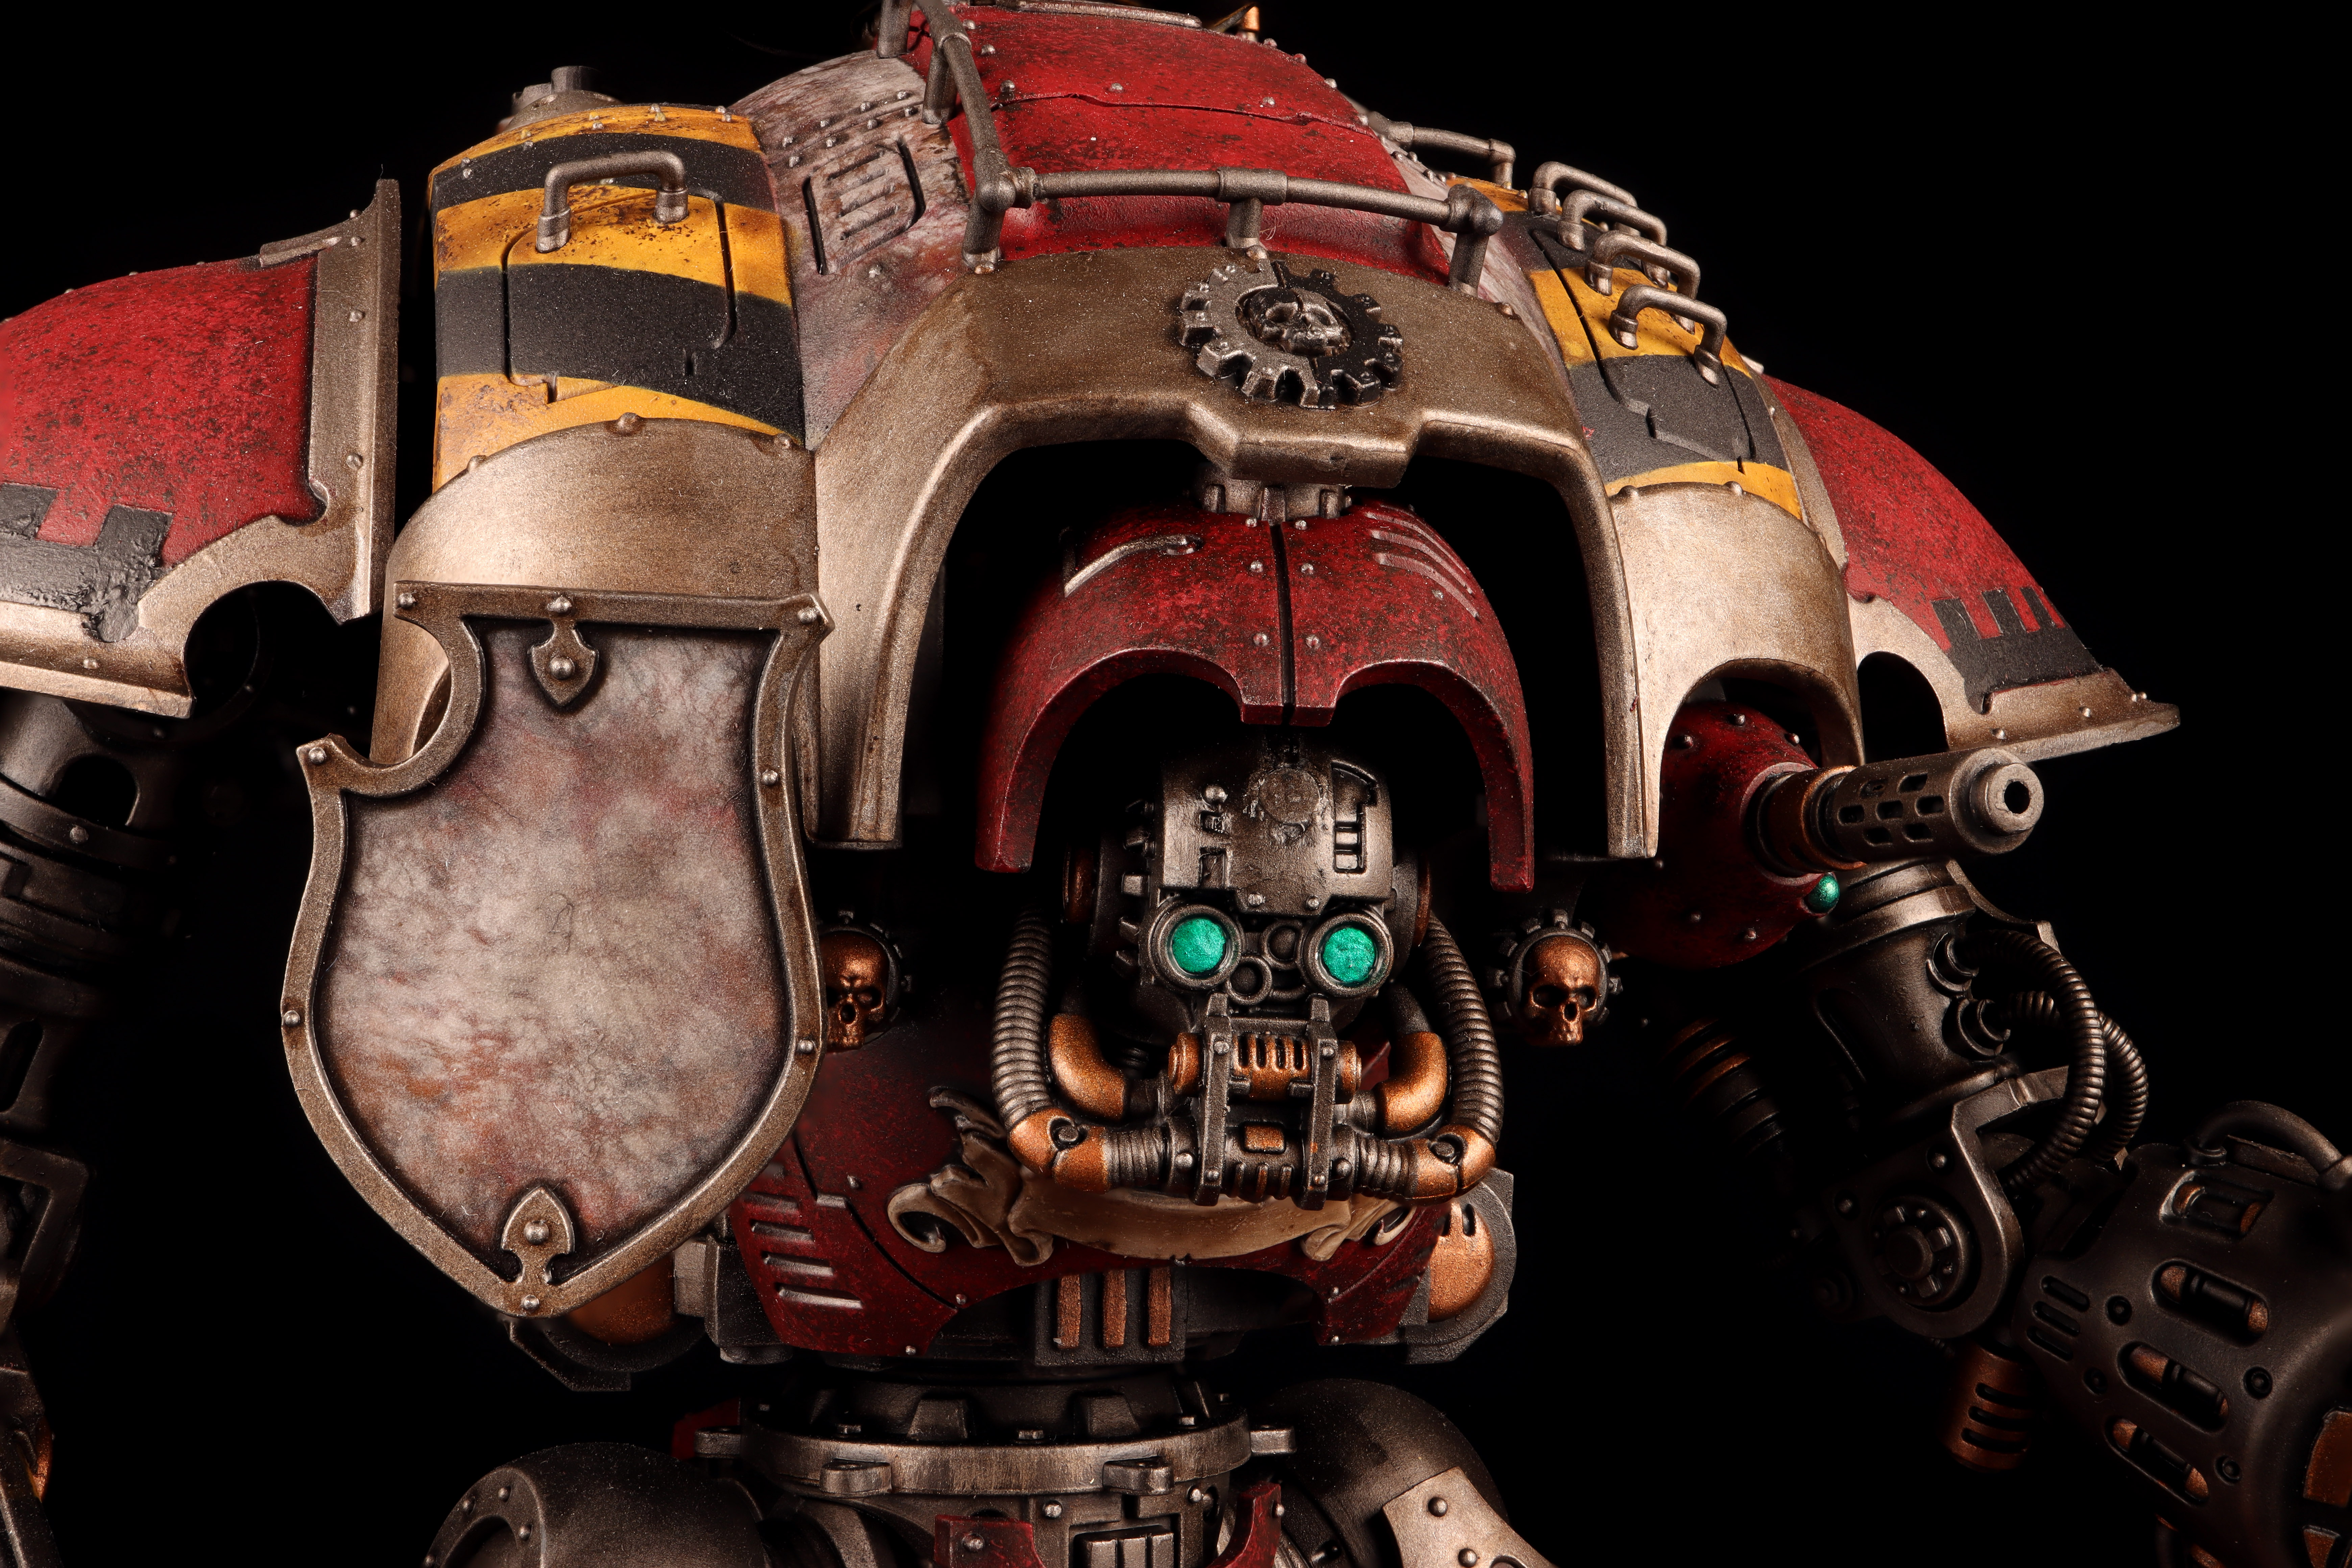
 Knight Gallant, now wearing a mask. Credit: Pendulin
Marbled White Armor
This is a technique that's going to require a lot of practice and fiddling to get to a desired result, but it's extremely versatile and cool. You need two tools for this: an airbrush and dryer sheets (the thin sheets of fabric you can place in with wet clothes in a dryer machine). There are a million brands of dryer sheets, and I have no frame of reference as to whether one works better than another, as I just use an unlabeled box of sheets I've probably owned for over a decade now.
First run those dryer sheets under some water and scrub them down with more dryer sheets. Many of these sheets contain fragrance, powders, and other stuff you want nowhere near your models. You'll want to work all of those out of the sheets, so the water runs through them clear and odor free. Let these fully dry before continuing.
Start with an even black layer (black primer is perfectly fine). Then stretch taught a dryer sheet over the area, almost as if you are trying to wrap the armor in saran wrap. Hold the dryer sheet there and airbrush
Khorne Red through it, creating a streaky, lined pattern. Repeat this with
Skrag Brown, and then with
White Scar. After all that, wash it in Nuln Oil and there you go!
What's great about this is you can switch up those paints to create different effects. Try
Skrag Brown first, then
Khorne Red. Or swap the red for a blue. Start with white and finish with a black. What do any of these look like? Who knows! Maybe they look perfect on
your Imperial Knight!

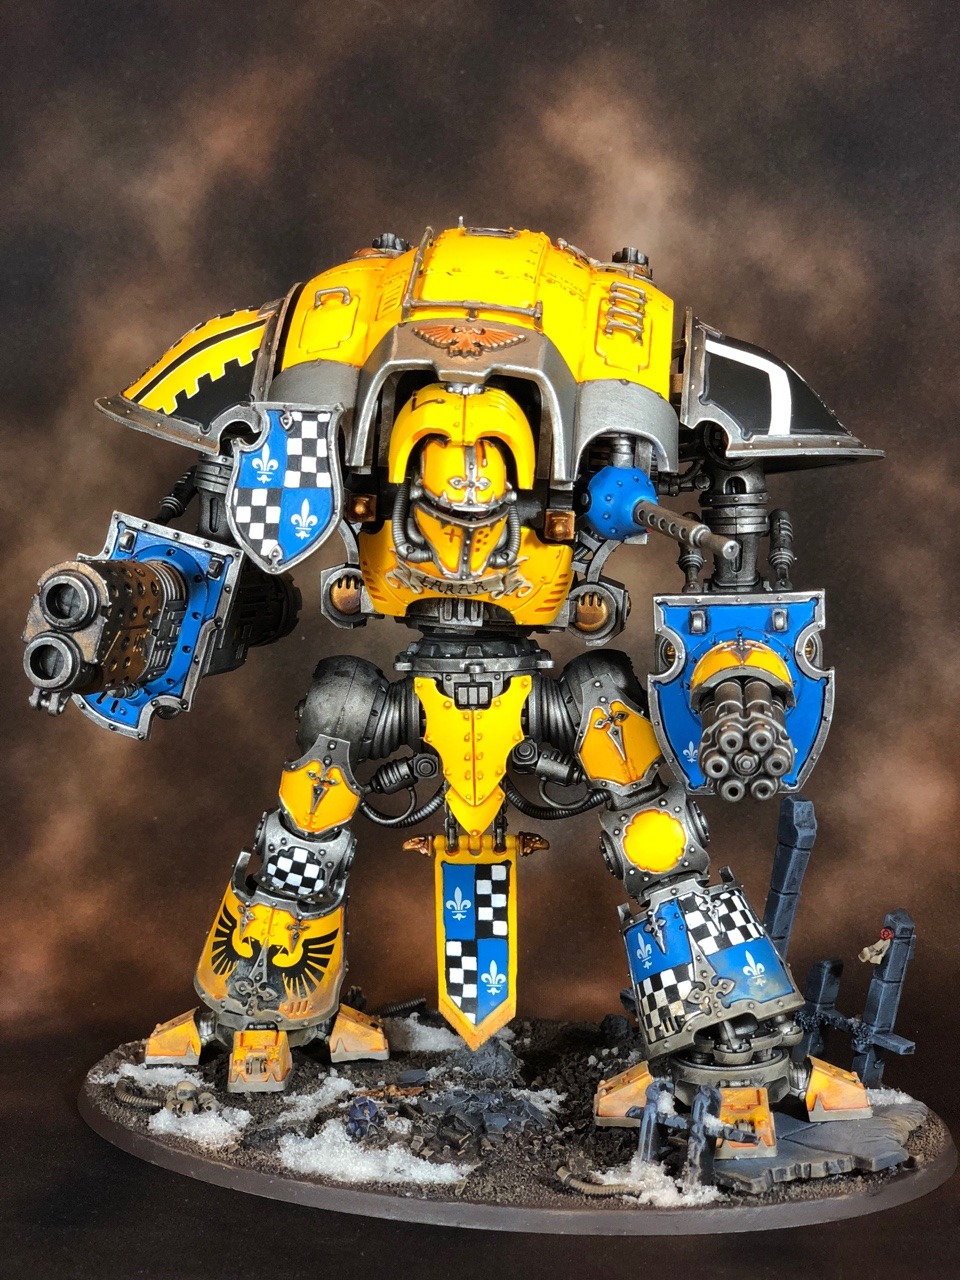
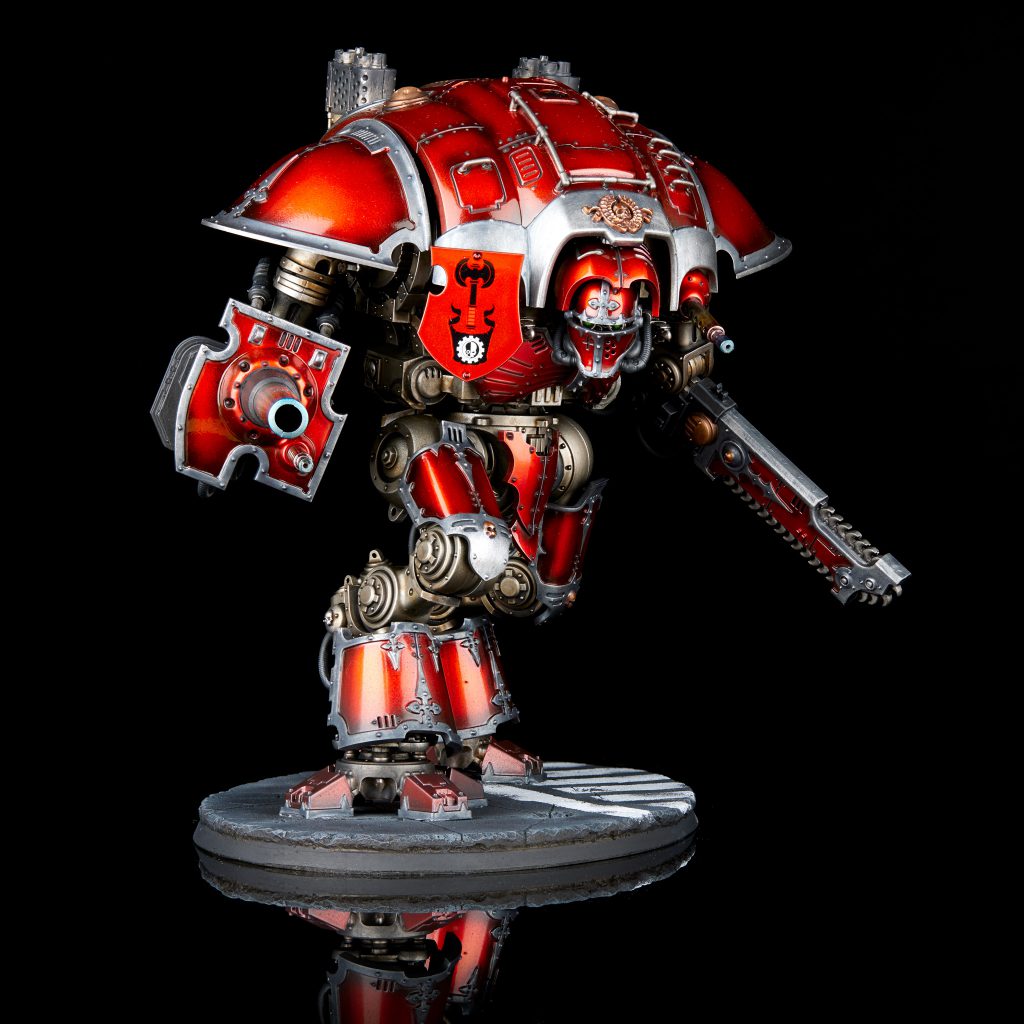
 Knight Gallant. Credit: SRM
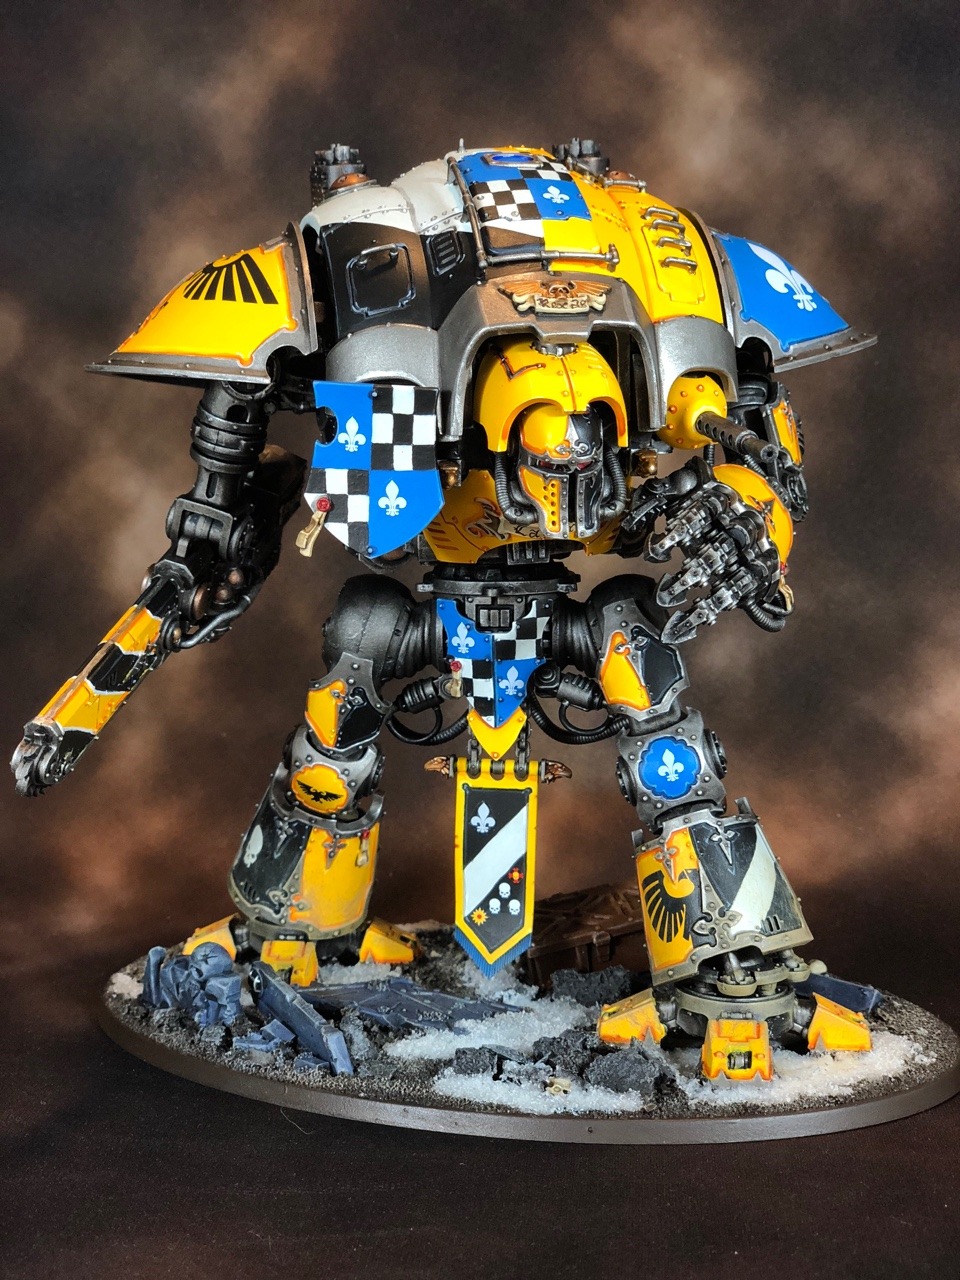
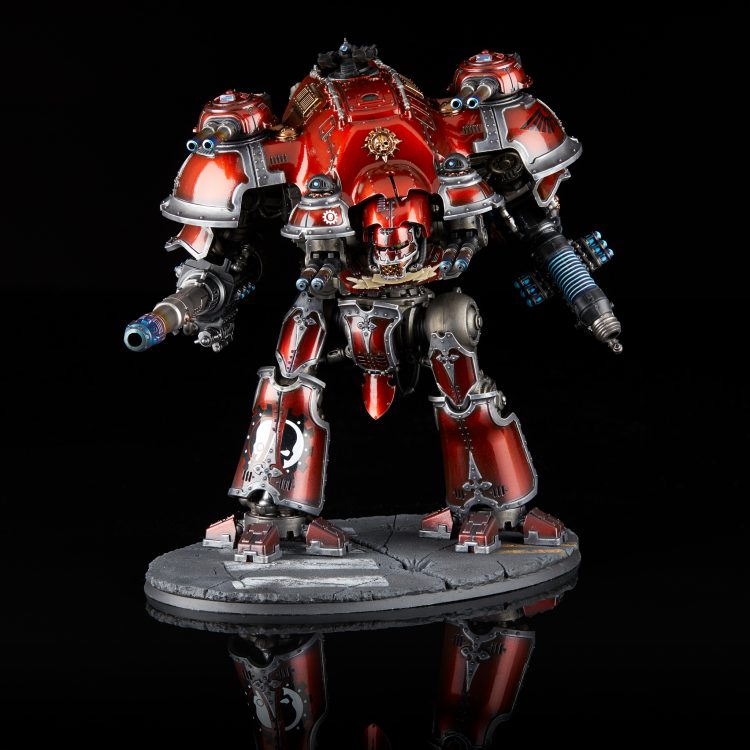
 Knight Crusader (Duchess Silas Magellan, Piloting the Auric Might) Credit: SRM
 Credit: SRM

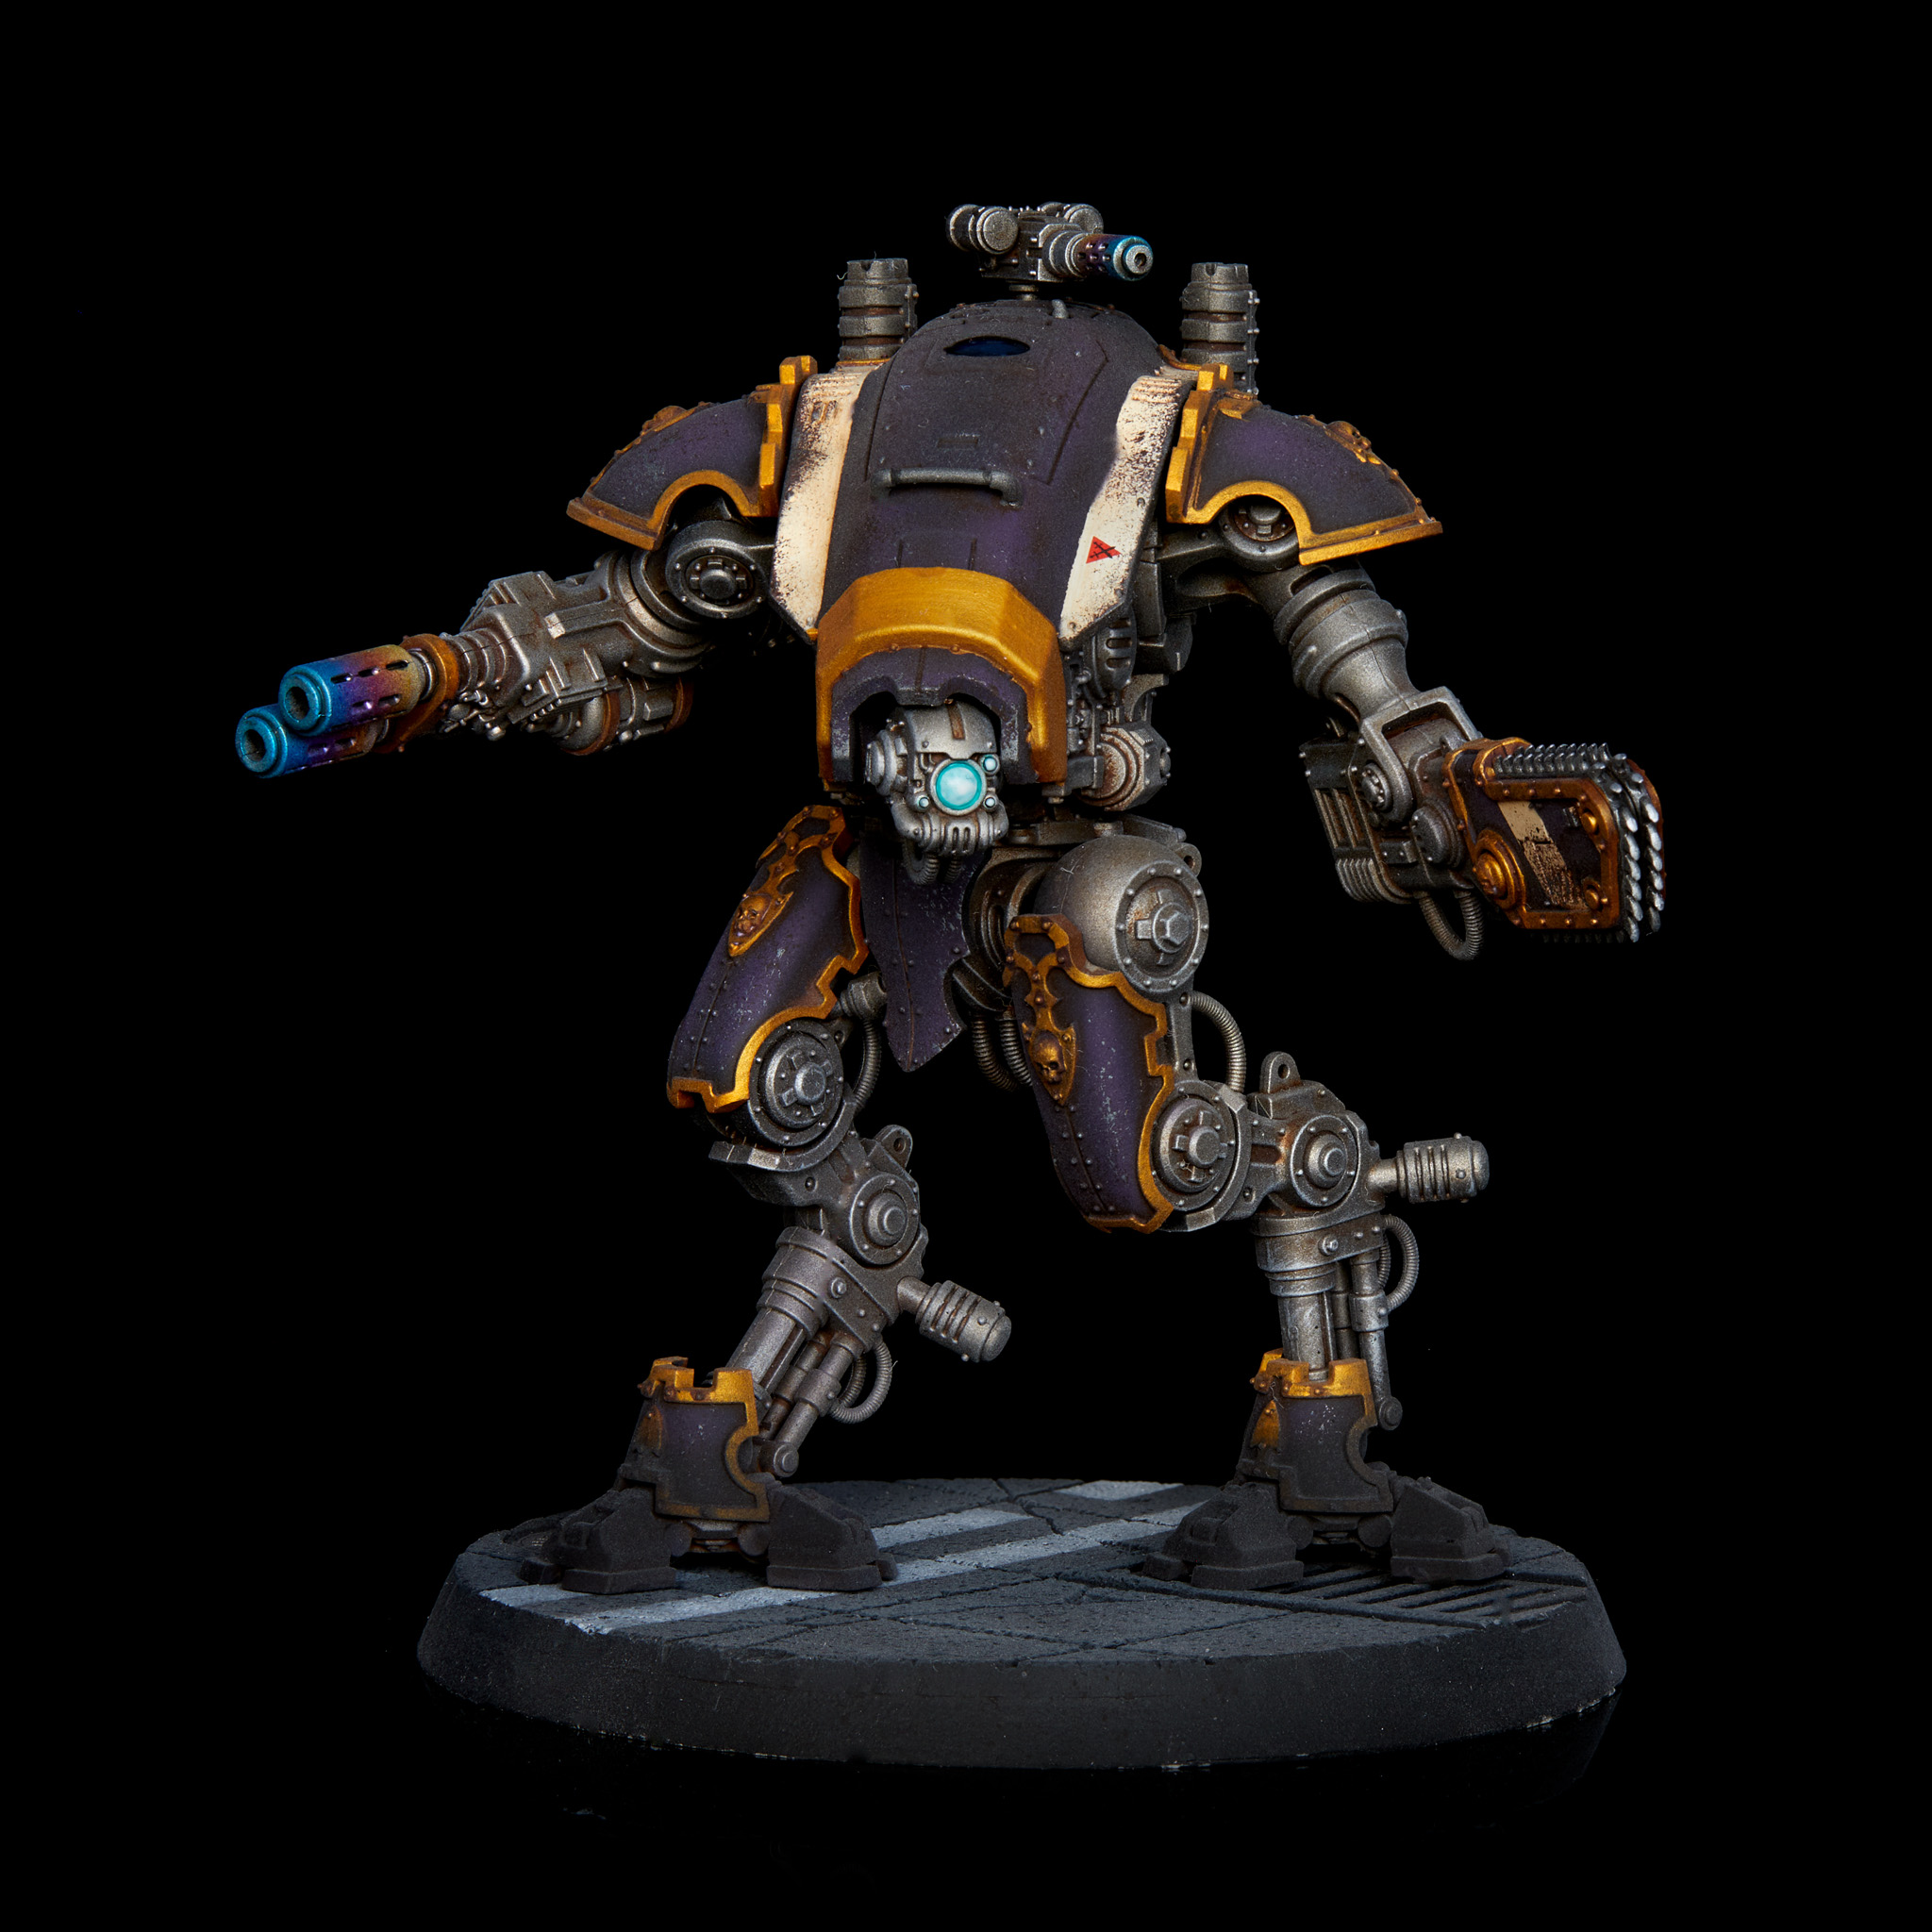
 Loyalist Knight Atrapos. Credit: Jack Hunter
 Armiger Warglaive. Credit: Jack Hunter
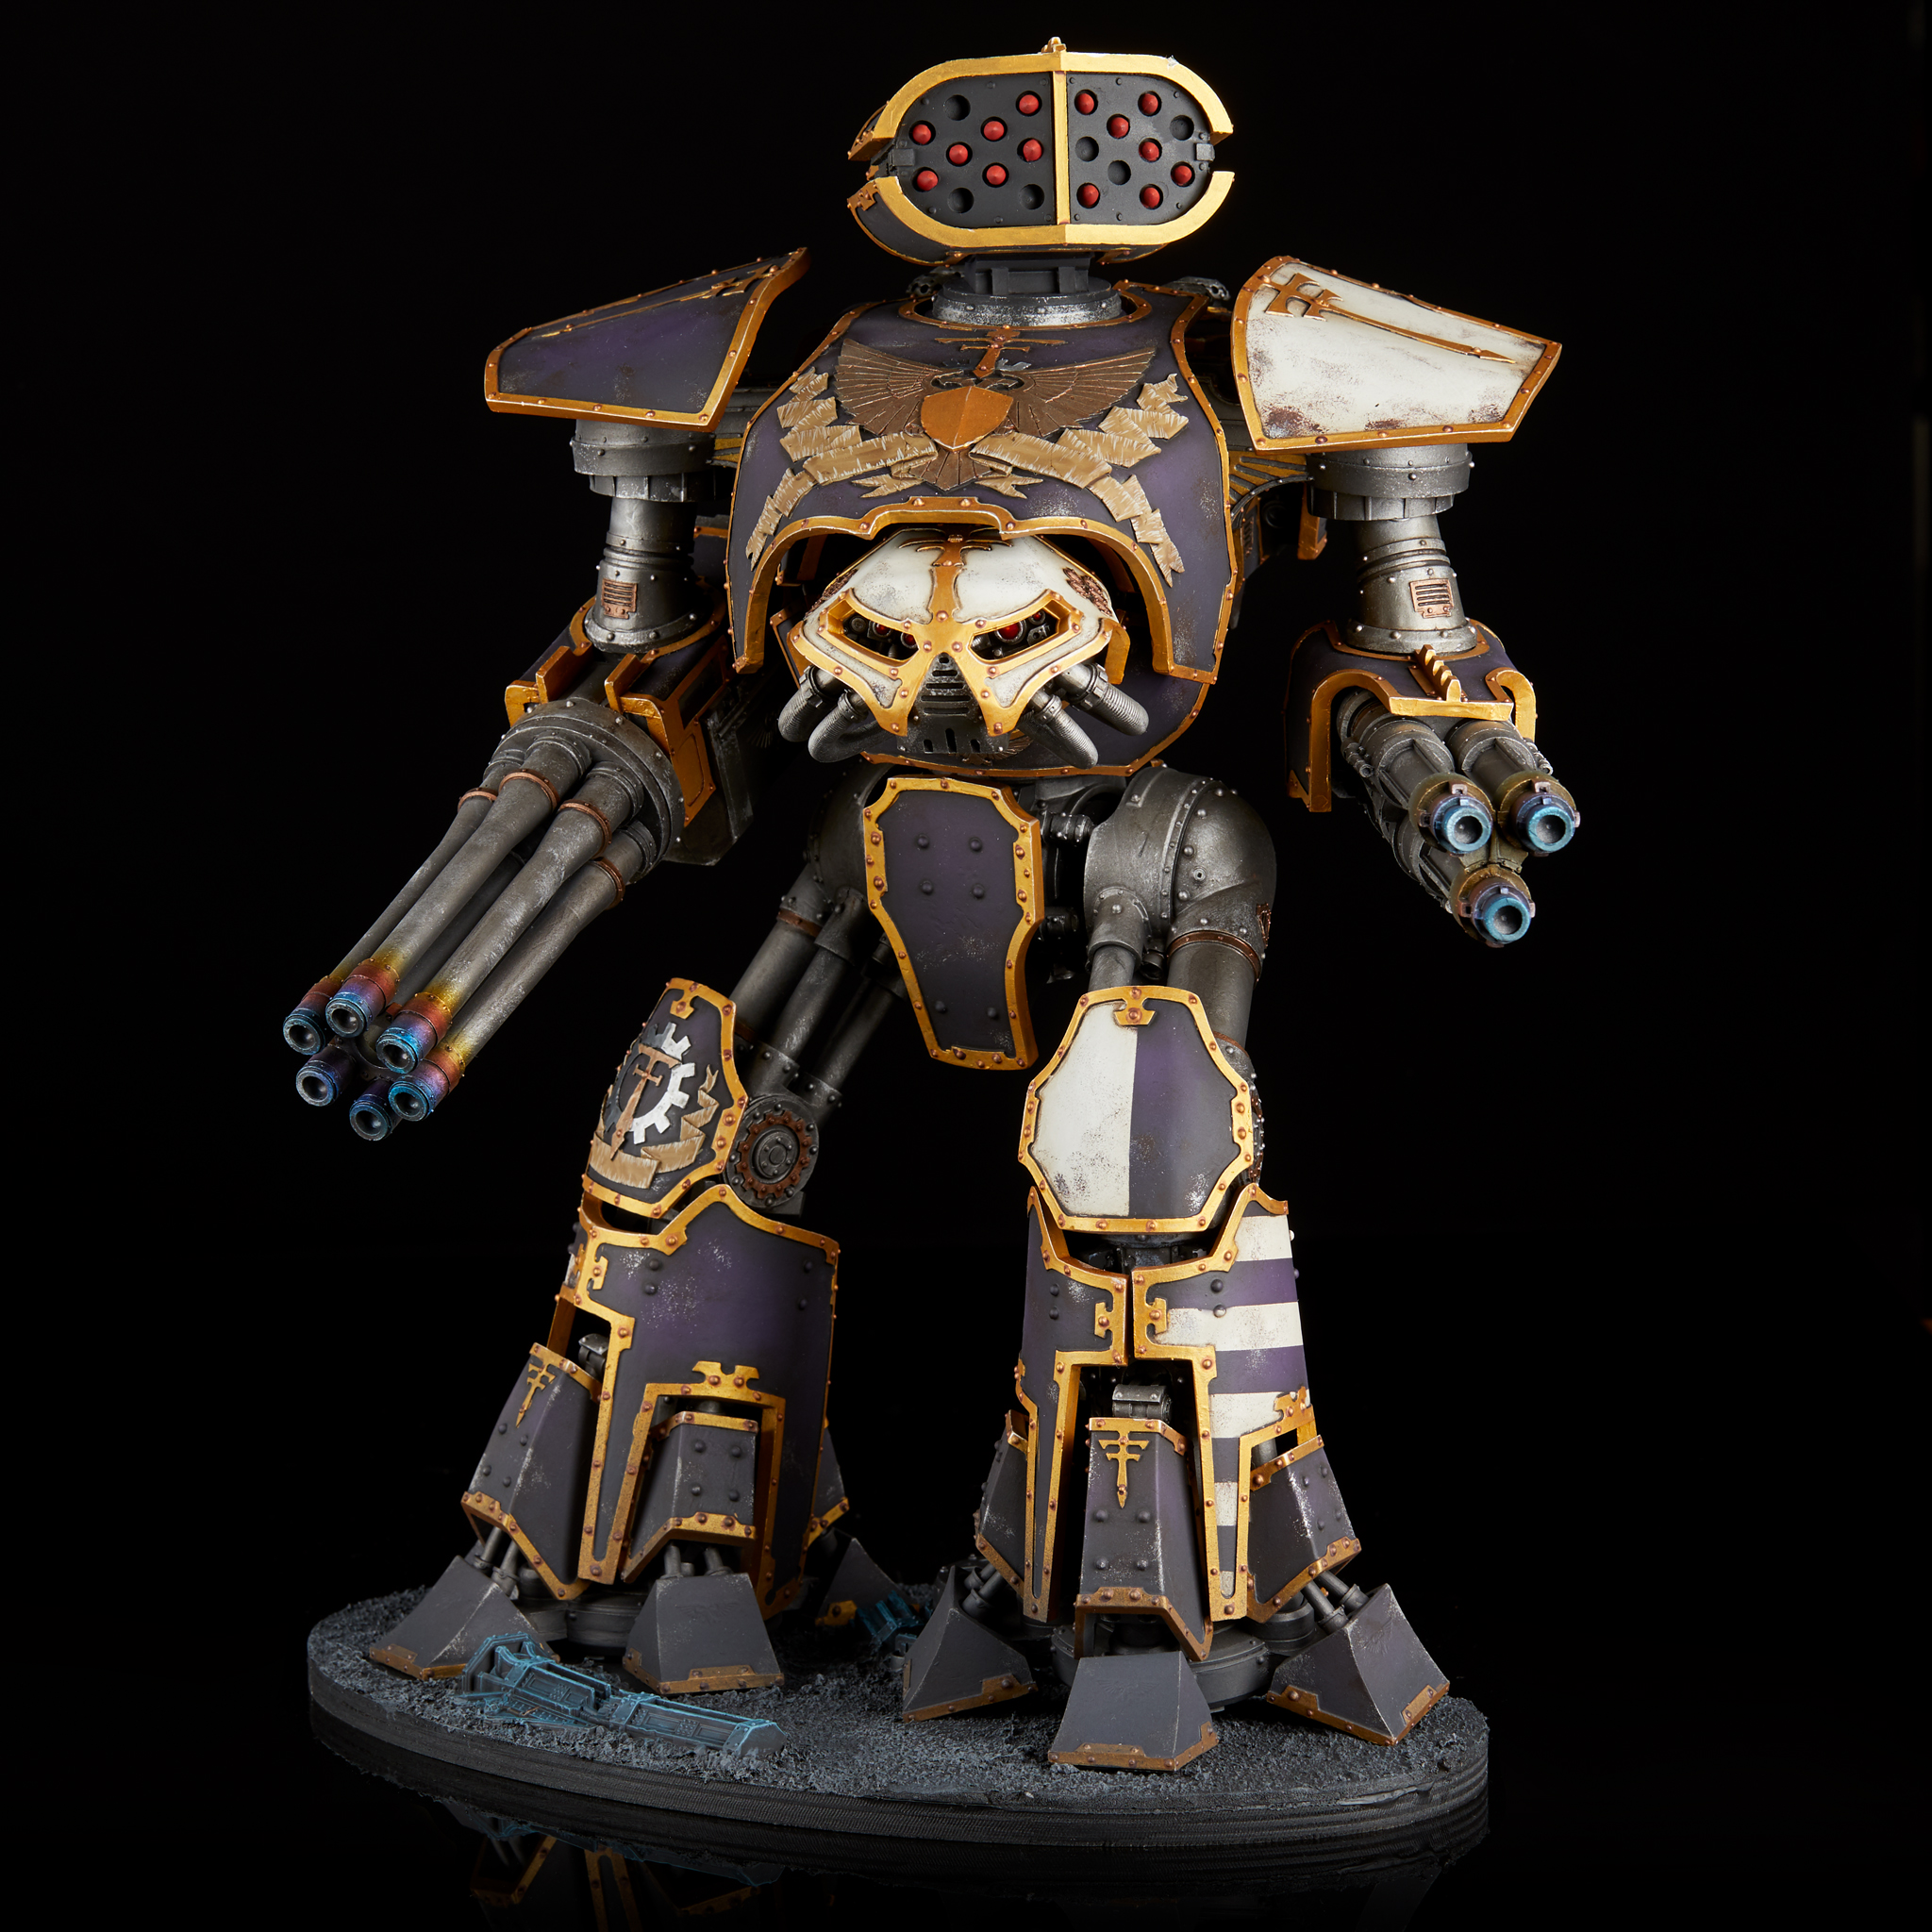 Legio Xestobiax Reaver Titan. Credit: Jack Hunter
 Armiger Warglaive. Credit: Jack Hunter

 Imperial Knight Paladin. Credit: Jack Hunter
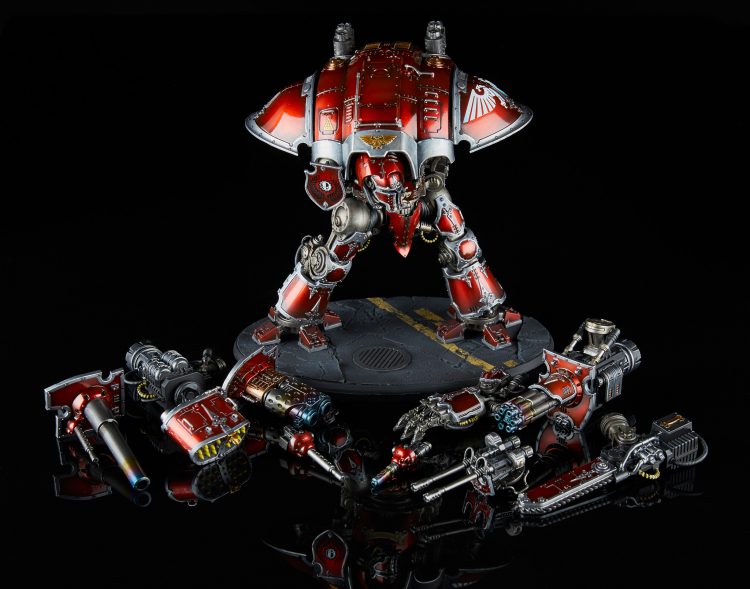 Magnetized Imperial Knight. Credit: Jack Hunter
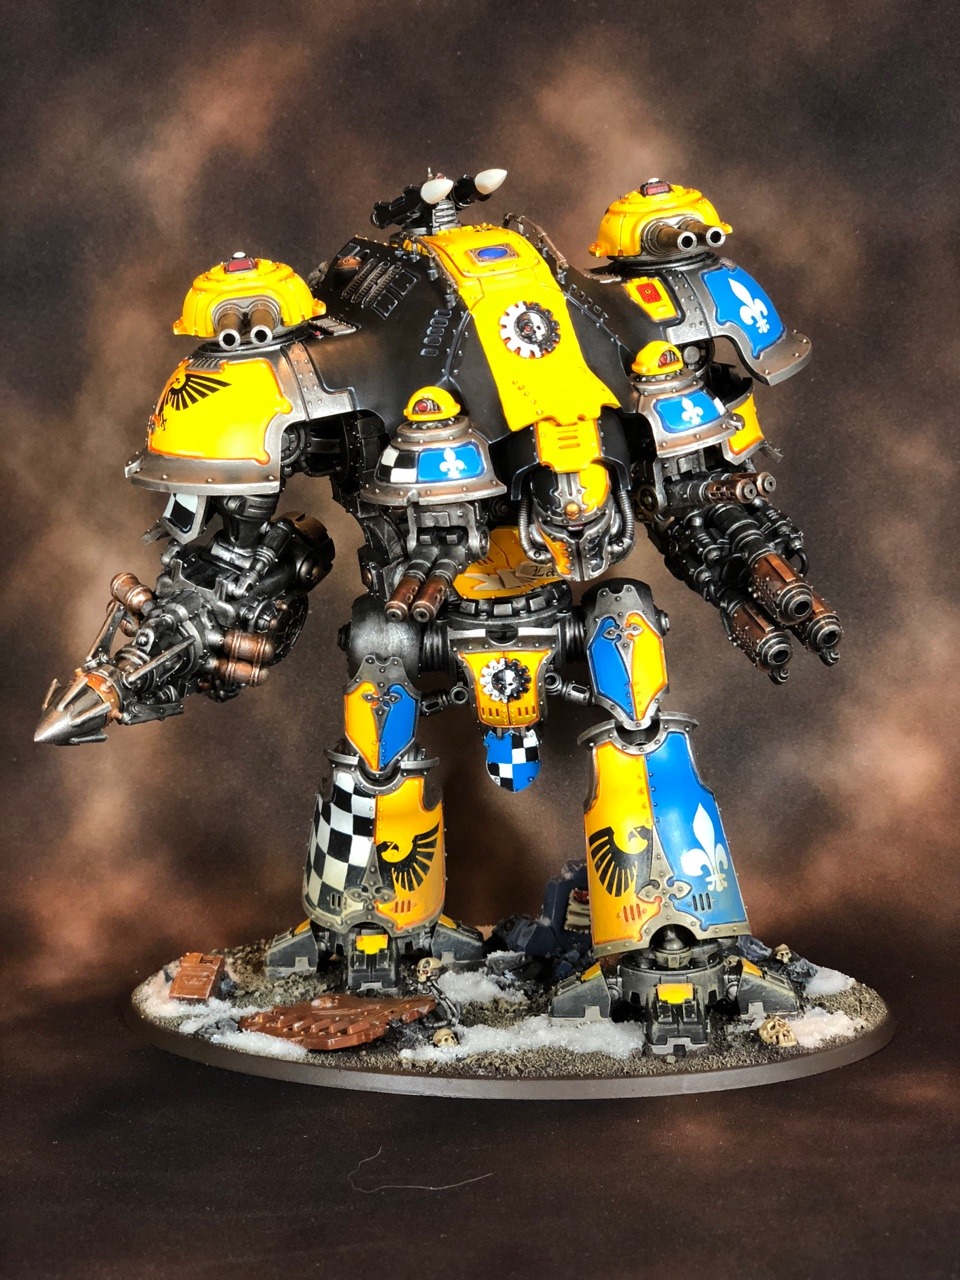
 Imperial Knight Castellan. Credit: Jack Hunter
 Imperial Knight Lance. Credit: Jack Hunter


 Imperial Preceptor. Credit: Kevin Genson
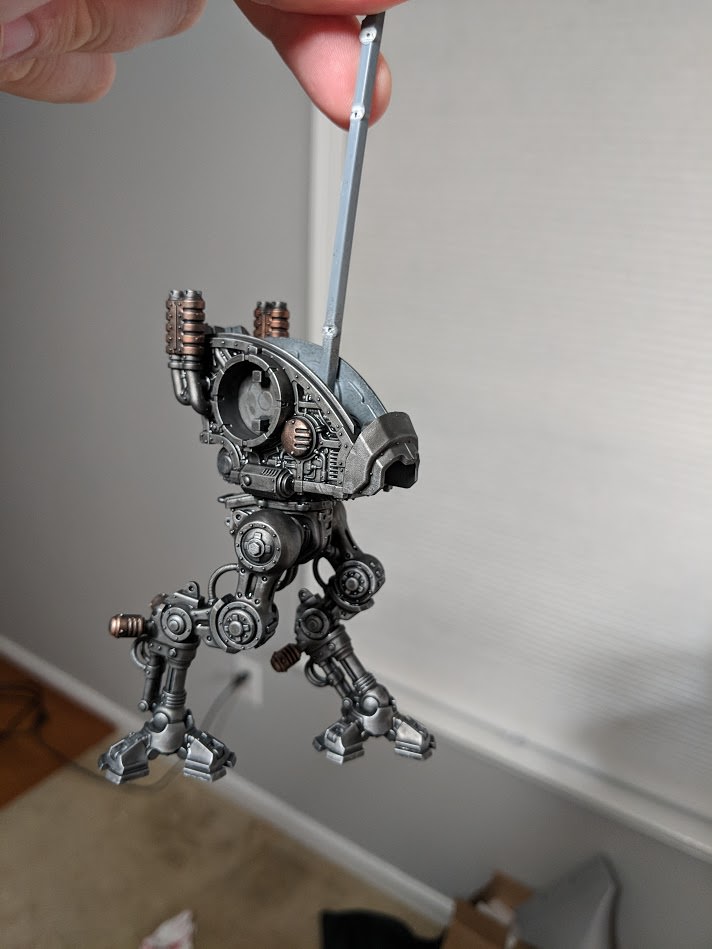 Armiger Warglaive "skeleton" showing metal technique. Credit: Kevin Genson
 Armiger Warglaives. Credit: Kevin Genson

 Knight Gallant, he's got a magnet drilled into his forehead for mask swapping. Credit: Pendulin
 Armiger Helverins. Credit: Pendulin
 Knight Gallant, now wearing a mask. Credit: Pendulin

 Goonhammer App and Patron Updates: April, 2026
 Kill Team Tournament Report: Engage, Party, Repeat's March Madness 2026
 Goonhammer Reviews: Tribal Conquest