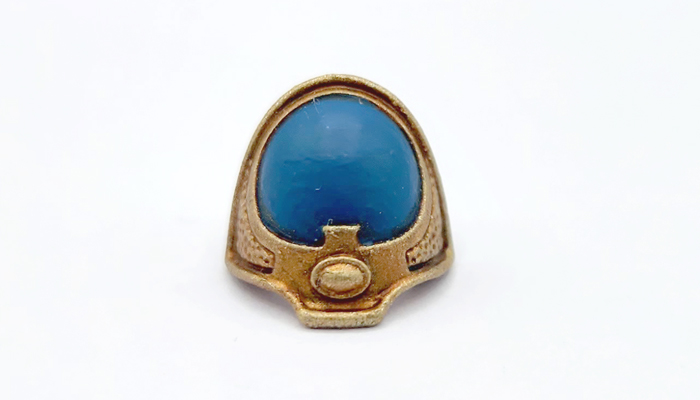
At least half of my time spent painting gold trim has been in the service of painting
my Thousand Sons, who have a ton of small details and gold trim ringing every part of their blue armor. There are two ways to go about painting gold trim on Thousand Sons, and I'm going to detail both here, though you can find more on the process (and how to paint the rest of the model) in our
guide to painting Thousand Sons.
Method 1: Priming the Model Gold (the GW Method)
There's a certain train of thought that it's easier to paint models like Thousand Sons and Chaos Space Marines with lots of trim if you prime them the color of the trim, then fill in the armor colors later. This idea has particular weight if you're going to be painting the armor a flat color, and aren't liable to hit the trim and require a lot of clean-up.
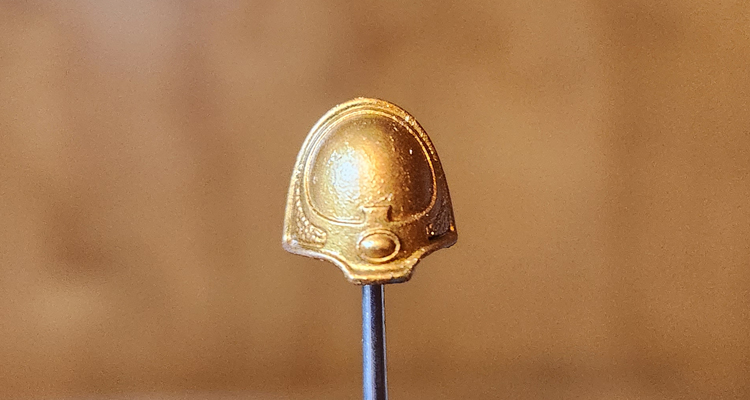
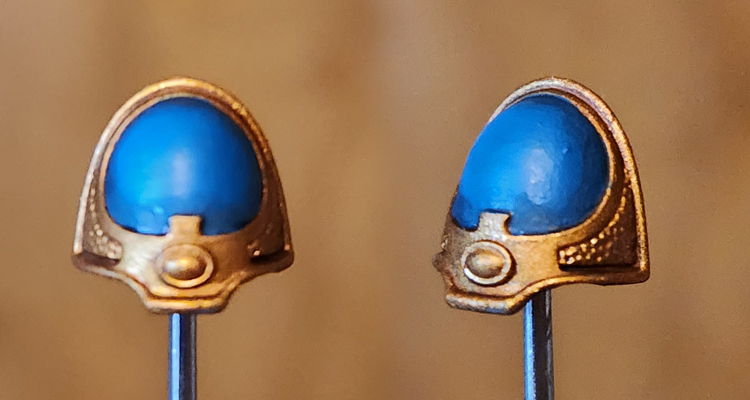
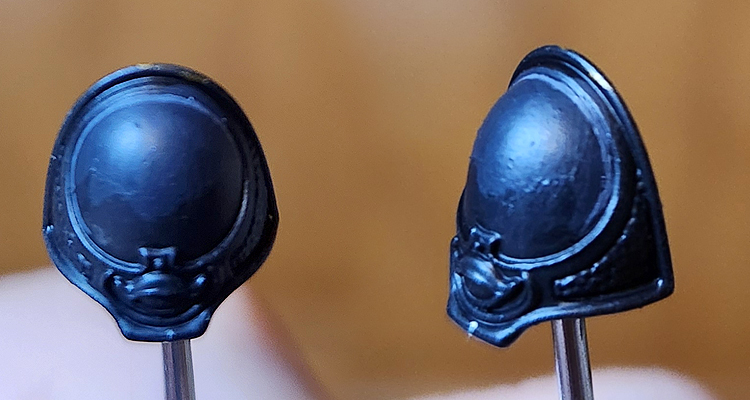
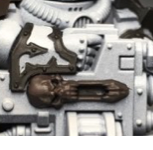
Step 1: Prime the model gold
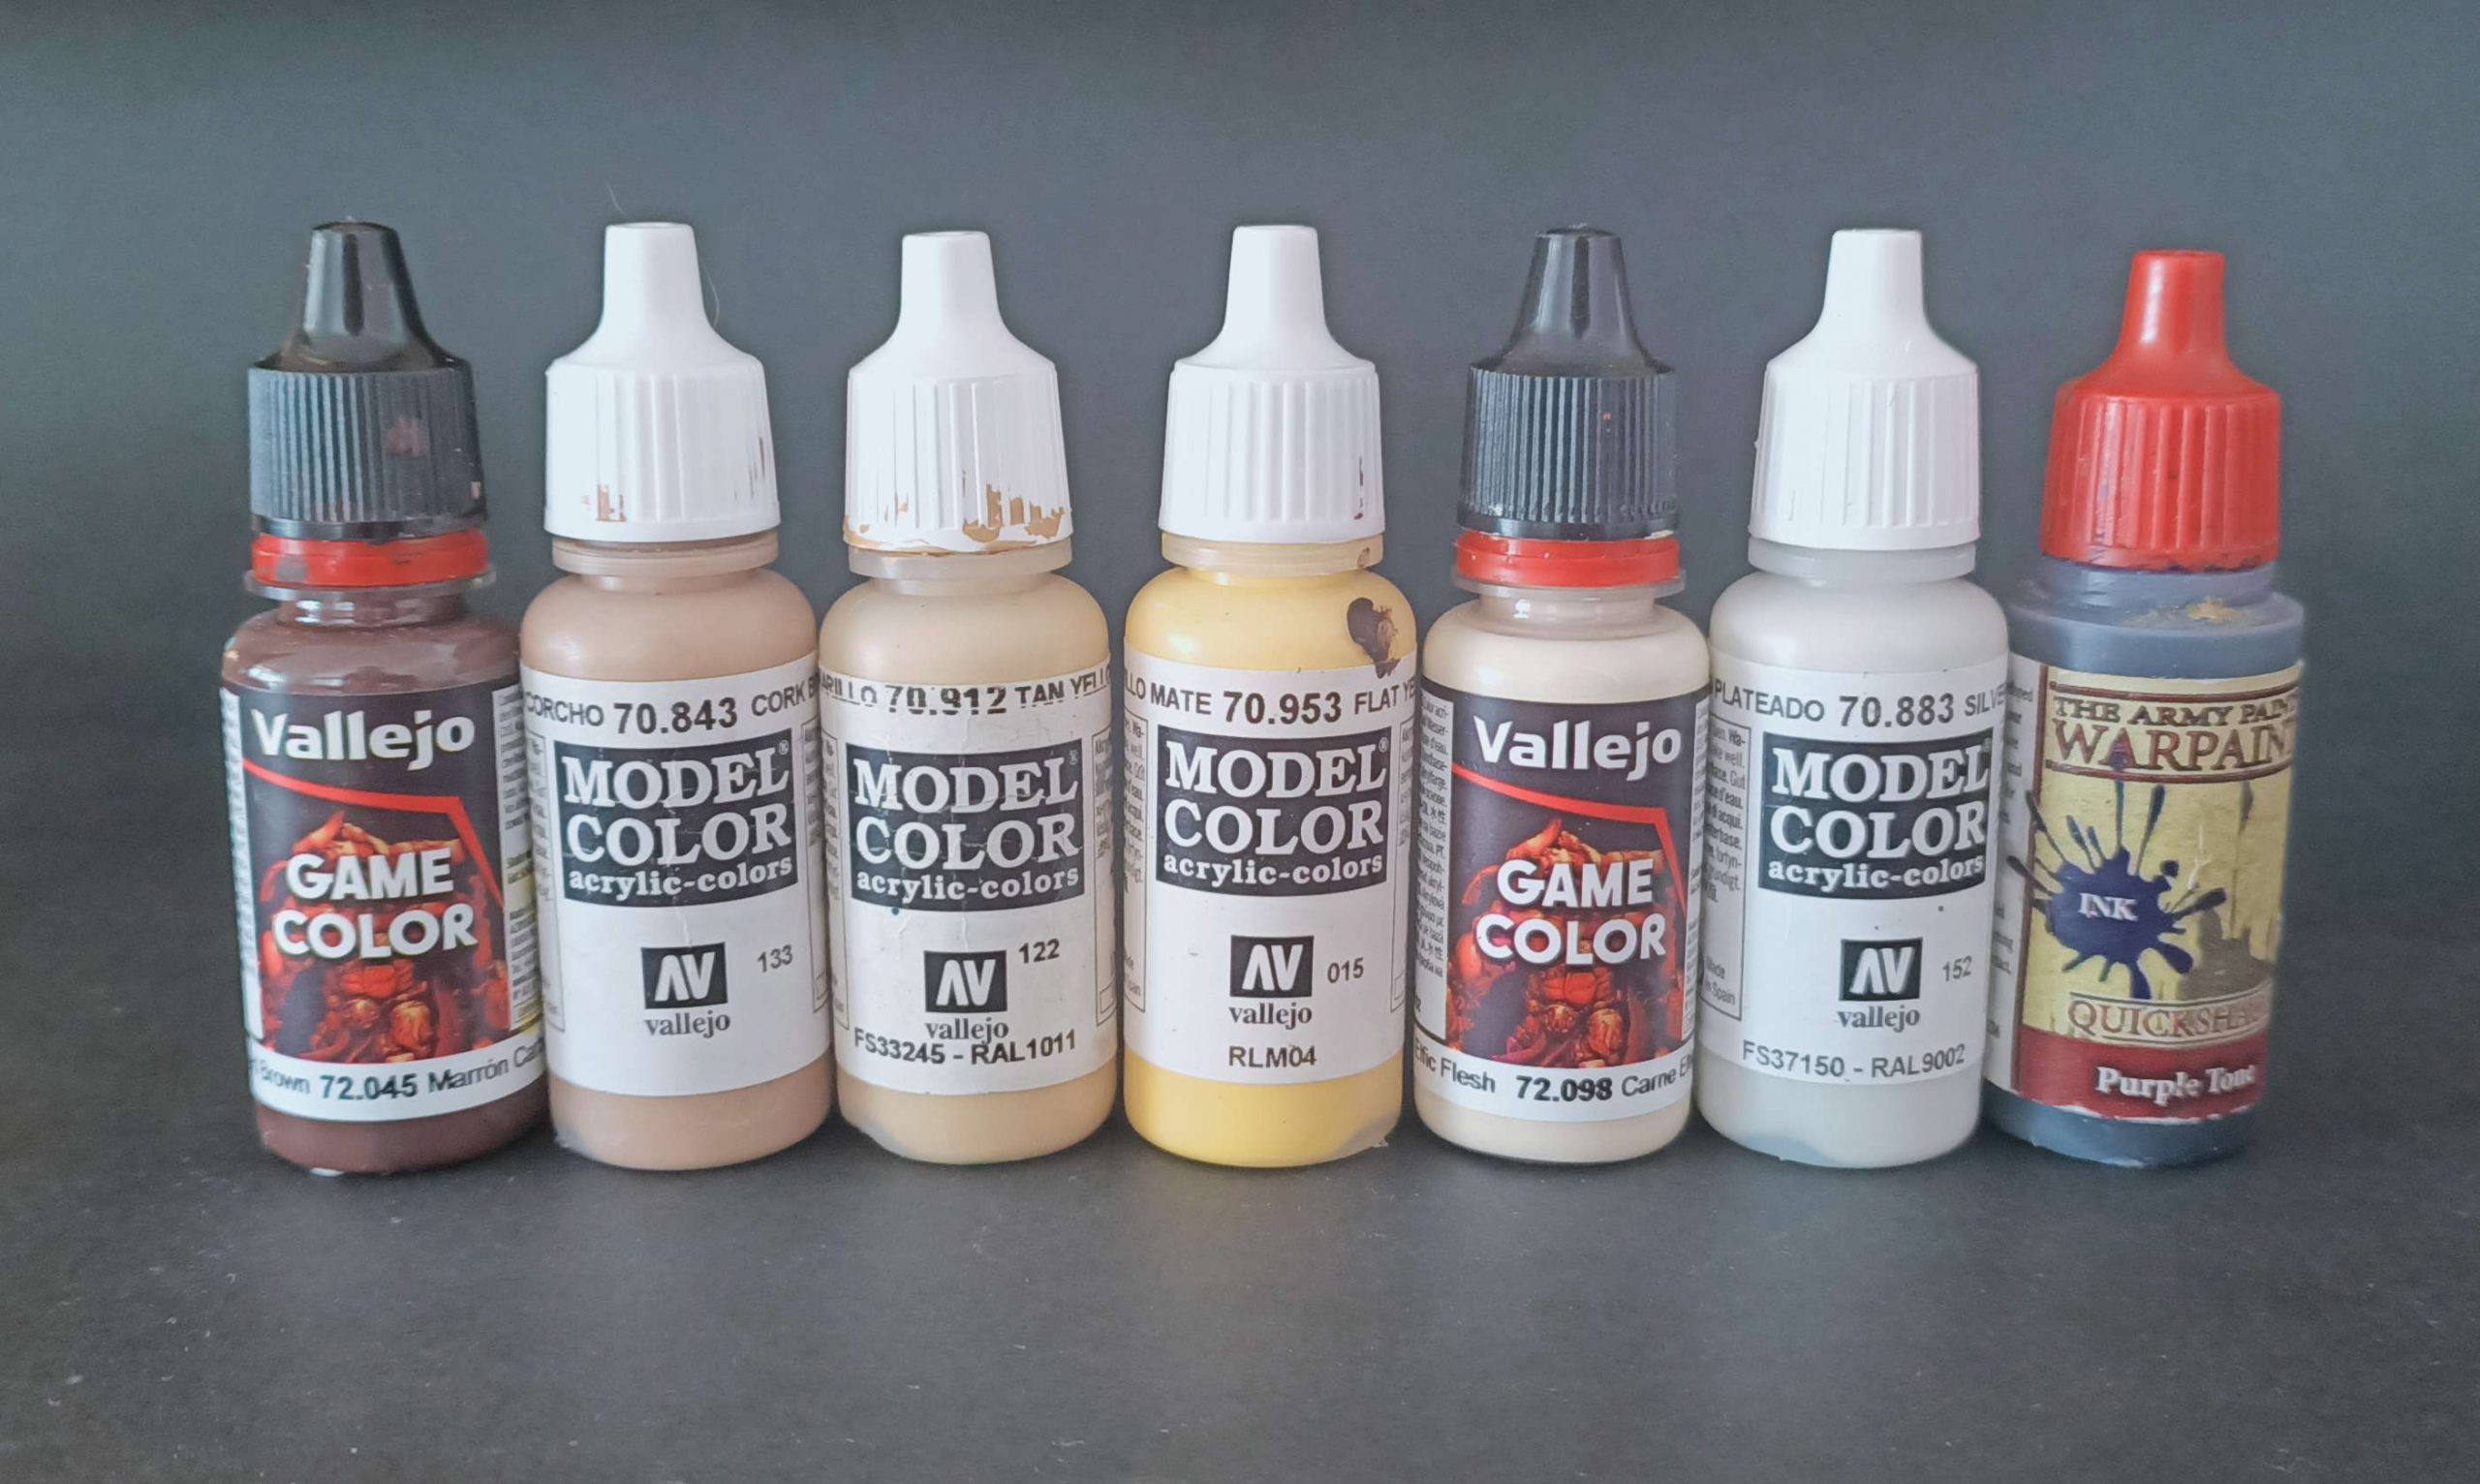
The easiest part of this. Prime the model whatever gold you're looking to use. In this case I used GW's
Retributor Armour. Clean up any spots that need a bit of extra gold.
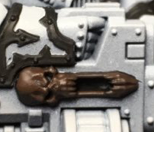
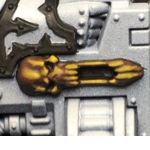
Step 2: Wash the gold
The next step is applying a wash to the gold. This will shade the gold, but also tone down some of the shininess, giving it a more burnished look. We can bring that back up later, but for now we want to create dark recesses in the gold parts of the model. For the GW's Thousand Sons studio scheme they use
Reikland Fleshshade here, though I tend to use Agrax Earthshade, as you'll see in the example below. Reikland gives the gold a redder, warmer appearance.
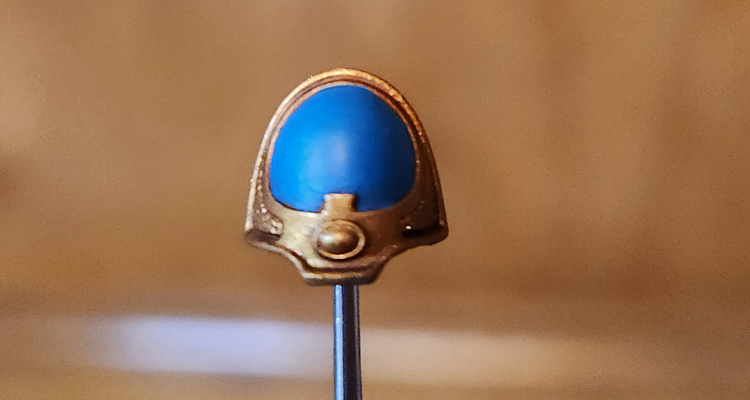
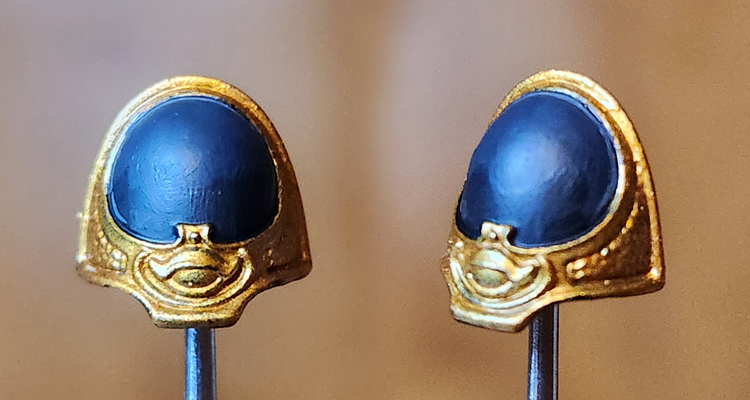
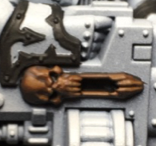
Step 3: Block in the Panel Color
Next comes blocking in the panel color. You don't have to be super-precise here but make sure you don't hit your trim - you can leave some small gaps between the panel and trim if you want, as we're going to color those in during the next step. For the GW scheme, the color to use here is
Thousand Sons Blue.
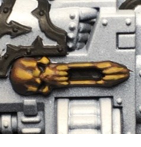
Step 4: Wash the Panels
Now it's time to wash the panels. We want to use a black shade for this - the GW method uses
Nuln Oil - to create dark, black recesses between the armor panels and the gold trim. You can go over a bit here, but the important thing is that your wash pools in the edge between trim and armor panel.

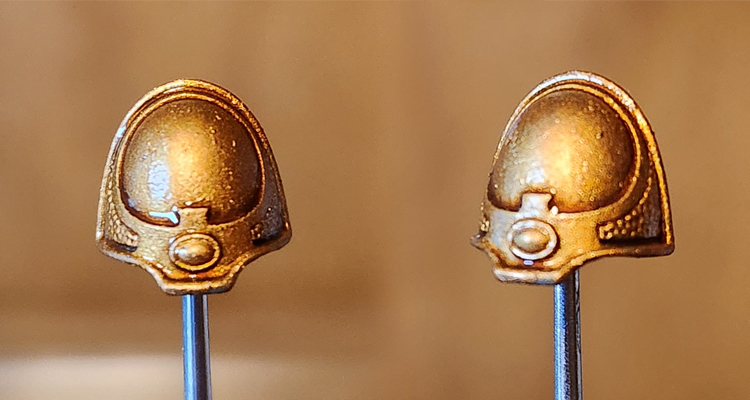
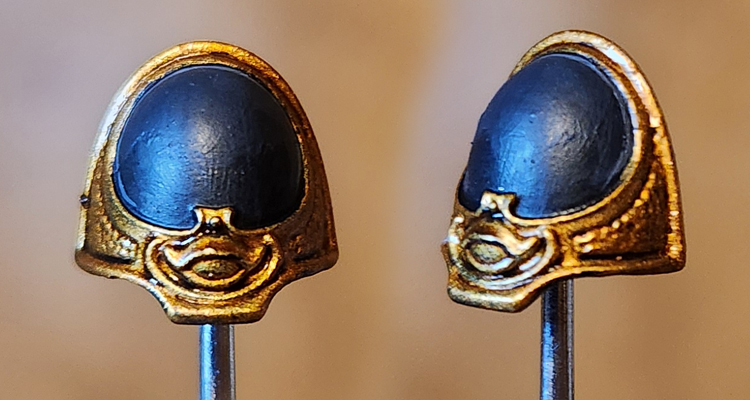
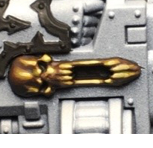
Step 5: Drybrush the Trim
In this next step we're going to drybrush the trim with a lighter gold. The GW method uses
Sigmarite but I used
Liberator Gold here, and those are basically the same color, just with different consistencies. The goal here is to catch the raised edges - you can go over the panel color as you do this, just make sure you're avoiding the dark recesses we just painted.
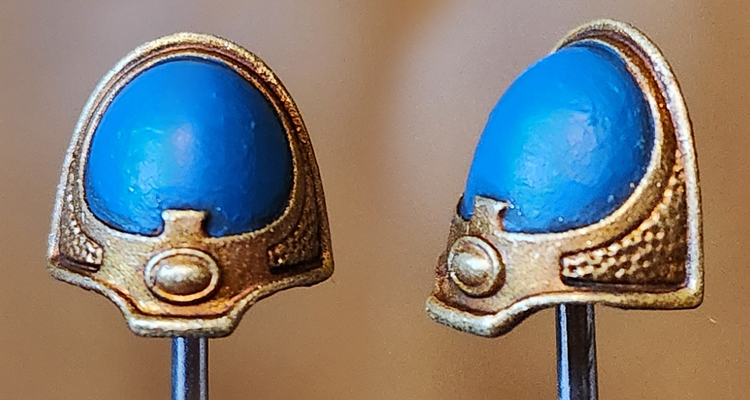
Step 6: Finish the panels
After that's done, go back and recolor the armor panels, making sure to leave your dark lines between the panels and the trim. After this you'll want to add details like transfers or painting the gemstone, and if you're careful, you can add some highlights to the armor panels. Though if you're planning to do more gradient work with the armor panels, I'd suggest painting the trim second.
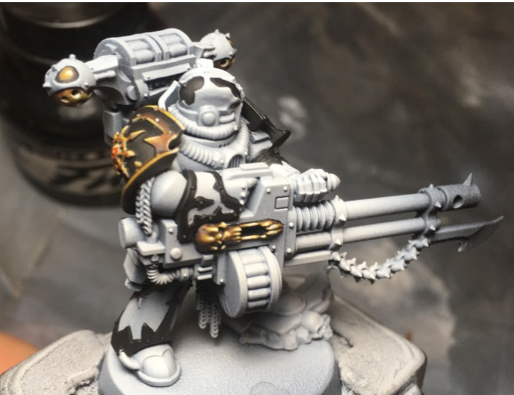
Method 2: Priming the Model Any Other Color
If you're looking to do more involved work with the armor panels, like giving them a gradient, then you'll want to paint the armor first and do the trim later. In that case, prime the model whatever color works best for your basecoat.
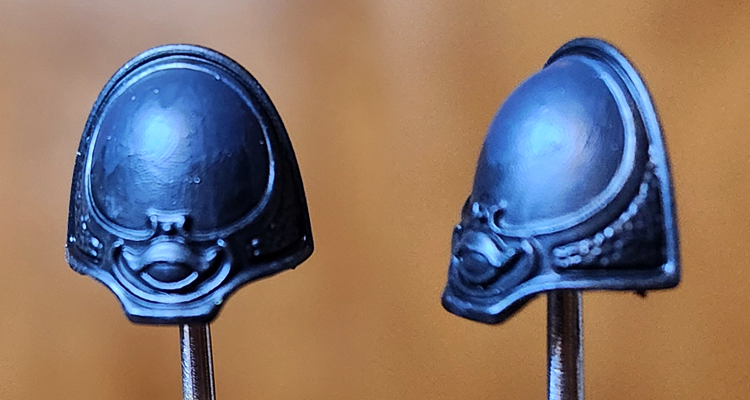
Step 1: Gradients
In this example I'm painting a Rubric Marine shoulder pad for the Black Legion. I tend to do some subtle gradients here, mixing up from
Abaddon Black to
Corvus Black, which is a more like a cool dark gray. If I do this for the whole model, it'll be done quickly with a larger brush, and I won't worry about the trim at that stage, making it ideal to come back and paint the trim later. In this case I usually do four mixes/shades: Pure Abaddon Black, 2:1 Abaddon:Corvus, 1:2 Abaddon:Corvus, and pure Corvus.
Step 2: Panel Lining
I tend to do panel lining highlights before I do my gold trim. This gives me room to clean things up before the trim goes down. For black armor I do a thin line of
Mechanicus Standard Grey. If you're going to wash your trim around the edges or paint the recesses, you'd do it here as well.
Step 3: Trim Basecoat
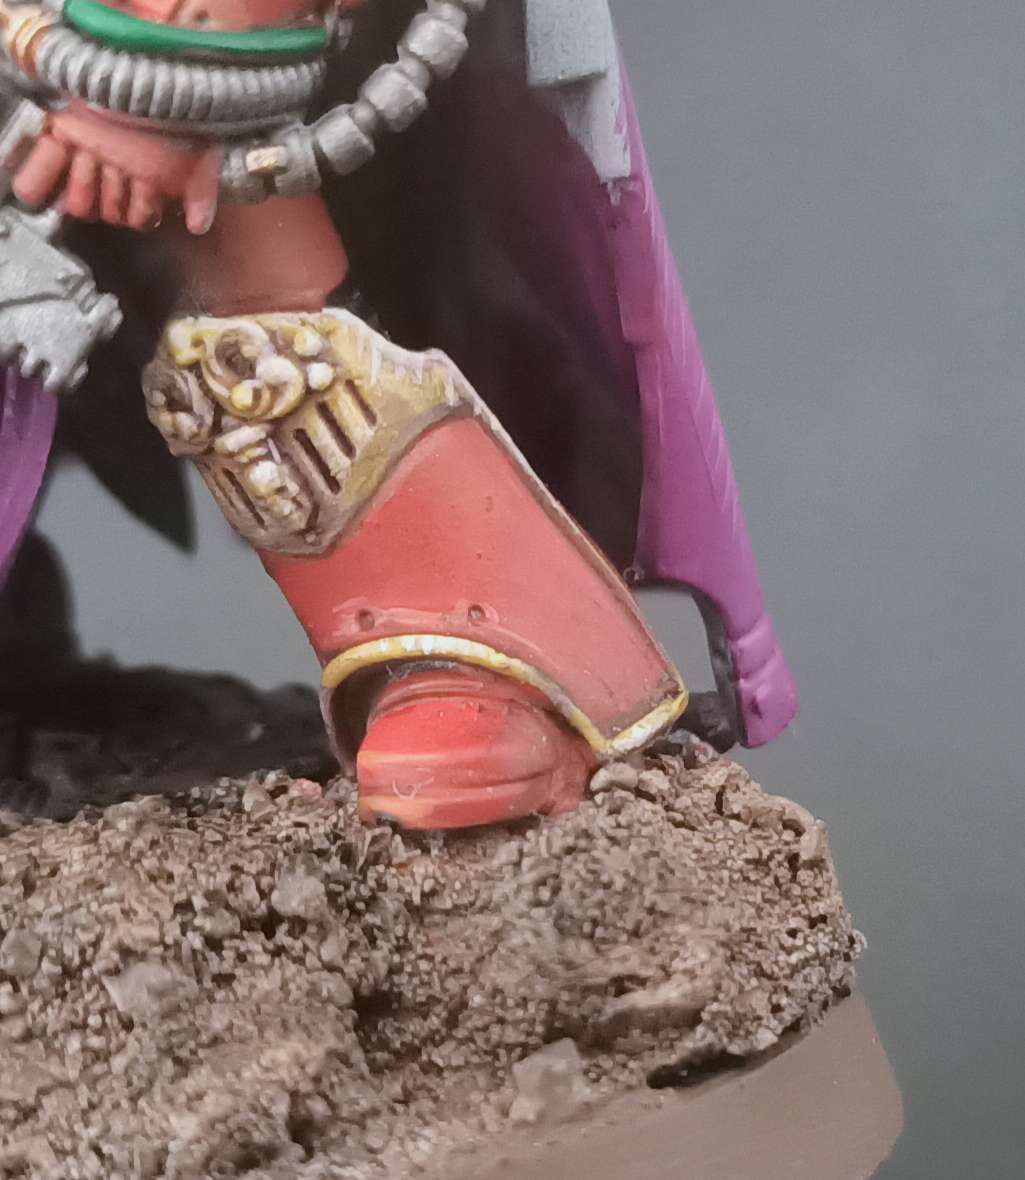
Time to paint the trim. For this trim I'm using GW's
Retributor Armour. If you want a darker gold there are ways to get there with shades and washes, or you can start with something more brassy, like Screaming Bell. This is also where you want a steady hand - you want to paint the trim without touching your armor panels. Take your time here and use multiple thin coats.
Step 4: Wash the Trim
Next we need to wash the trim. This will give it a deeper, burnished look and darken the recesses. This both gives the trim definition and also will make the highlights pop that much more. For this example I've used
Agrax Earthshade.
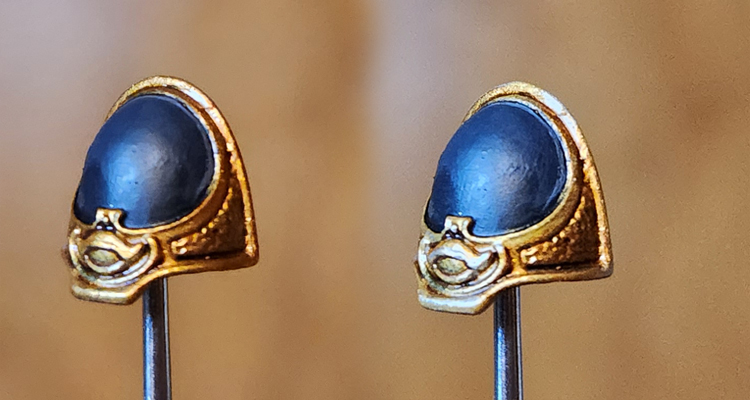
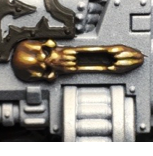
Step 5: Highlights
The final step is three stages of highlights: First I hit raised areas that are larger spots with the base trim color, in this case
Retributor Gold. You can most easily tell where I did this on the upper eyelid on the lefthand side shoulder pad - I don't want a blotch of Agrax wash sitting there so I came back and painted the whole lid.
Stage 2 is edge highlighting> First I hit the edges with
Liberator Gold and then I hit the very tops and corners with a silver, in this case
Runefang Steel. This gives the gold a very shiny look and really makes the edges pop.

 Credit: Bair
 Credit: Bair

 Credit: Colin Ward


 Goonhammer App and Patron Updates: April, 2026
 Kill Team Tournament Report: Engage, Party, Repeat's March Madness 2026
 Goonhammer Reviews: Tribal Conquest