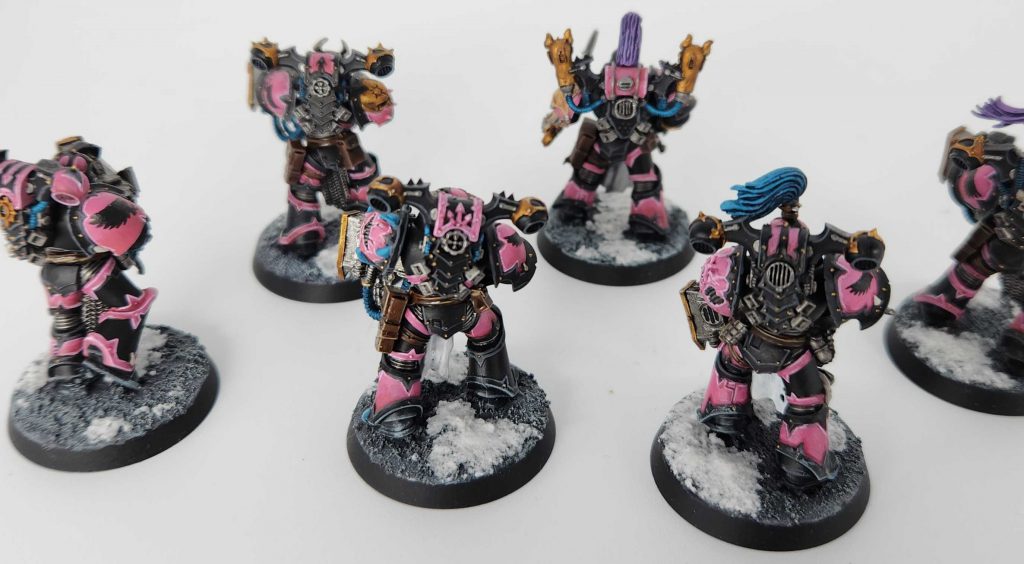
I started painting some Emperor's Children a while ago, for both my Black Legion and my Emperor's Children. While I ended up using the 3rd edition metal bits for my Black Legion Noise Marines, I decided to use the resin guns from the Horus Heresy Kakophoni models for my Emperor's Children Noise Marines. That said, I also used a fair amount of the older metal bits for the Emperor's Children models, combining them with the newer plastic Chaos Space Marine kits.
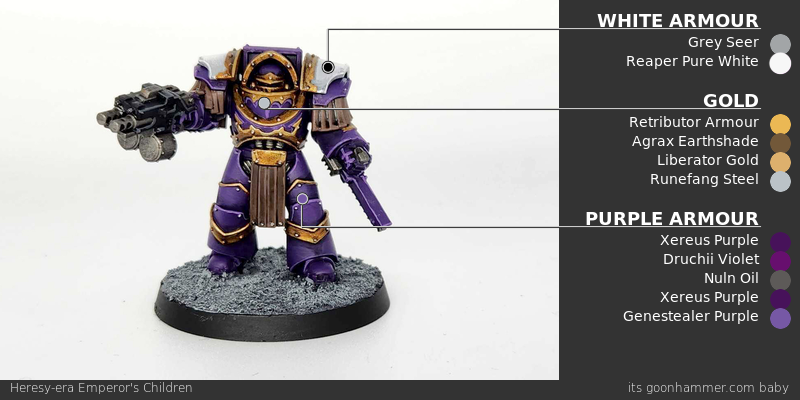
I still use the same method for the current modern Emperor's Chlidren kits, though I've started adding in some purple metal details at parts - see the tutorial above for more on how to paint purple metal.
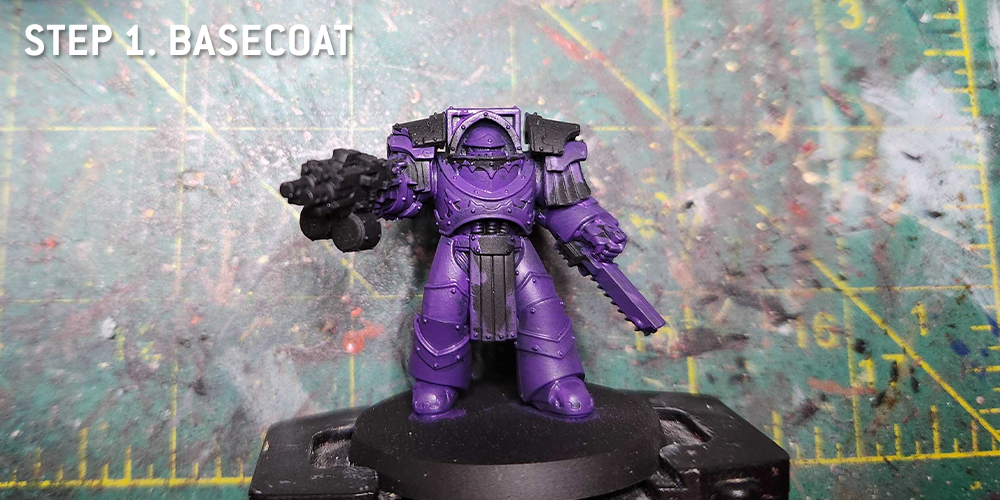
This particular model is a plastic Chaos Space Marine body with the metal Emperor's Children Chaos Lord arms and backpack, and the head from a resin Heresy Kakophoni marine. I primed him black.
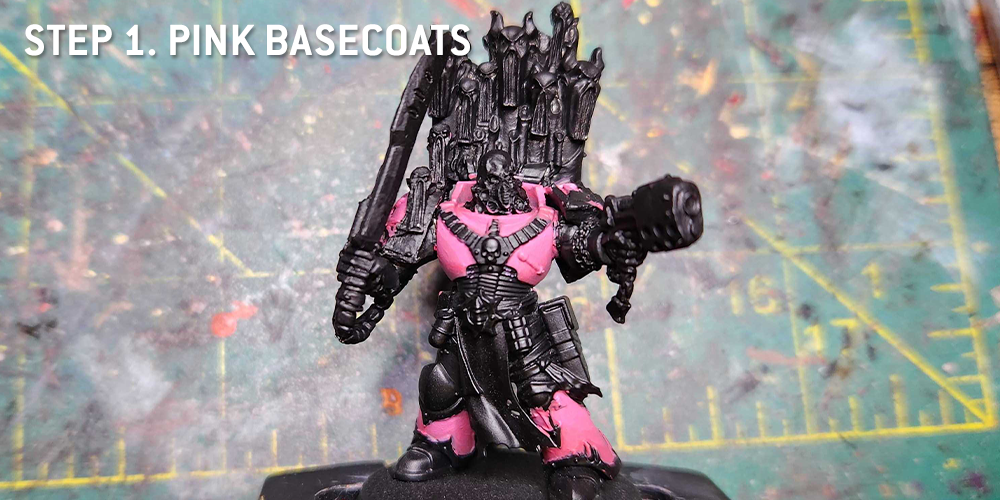
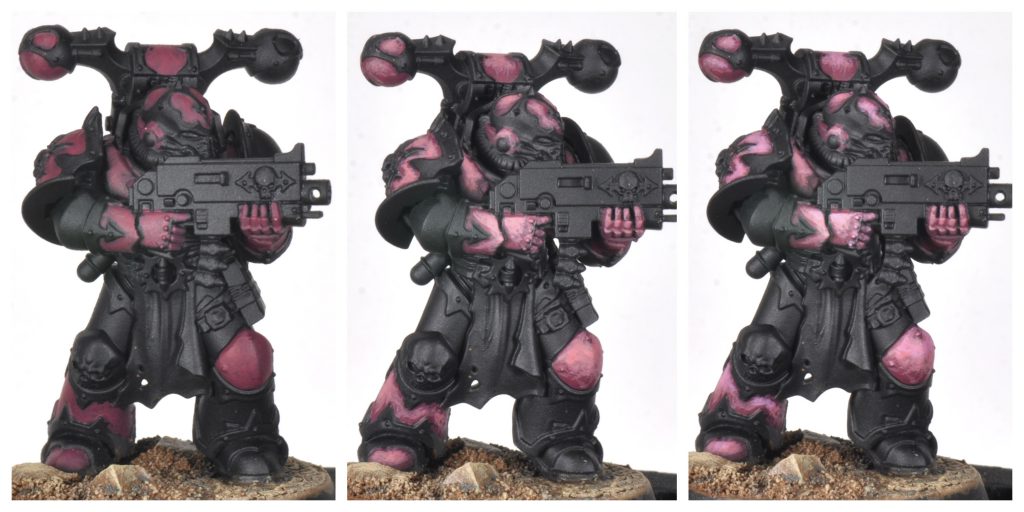
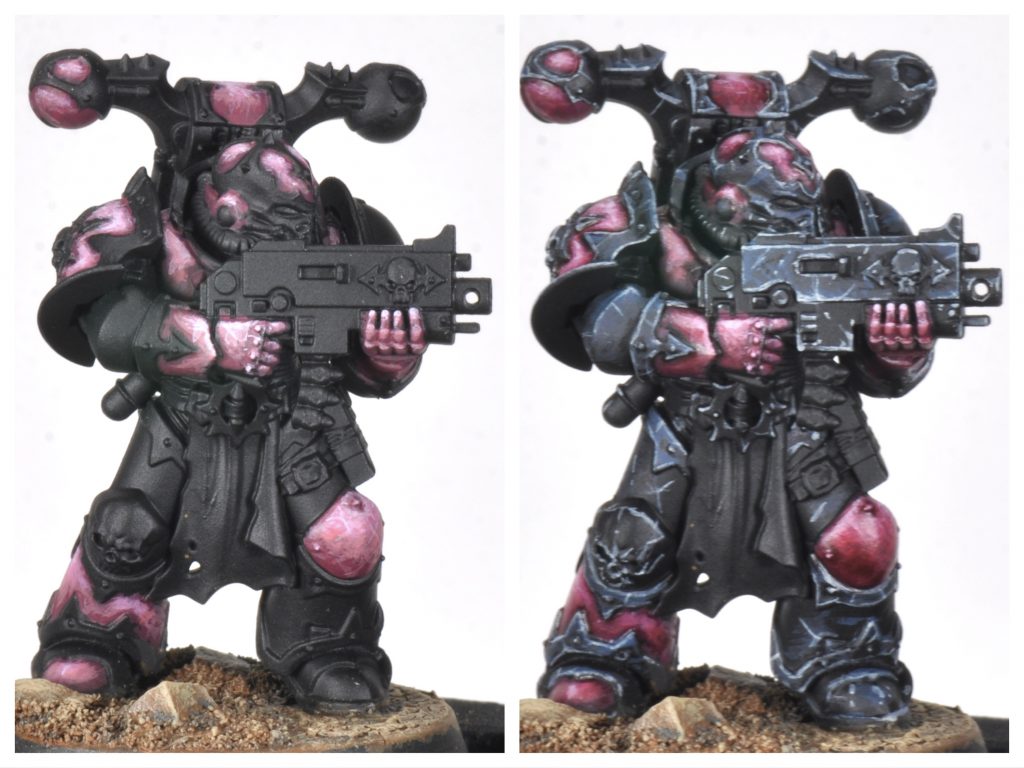
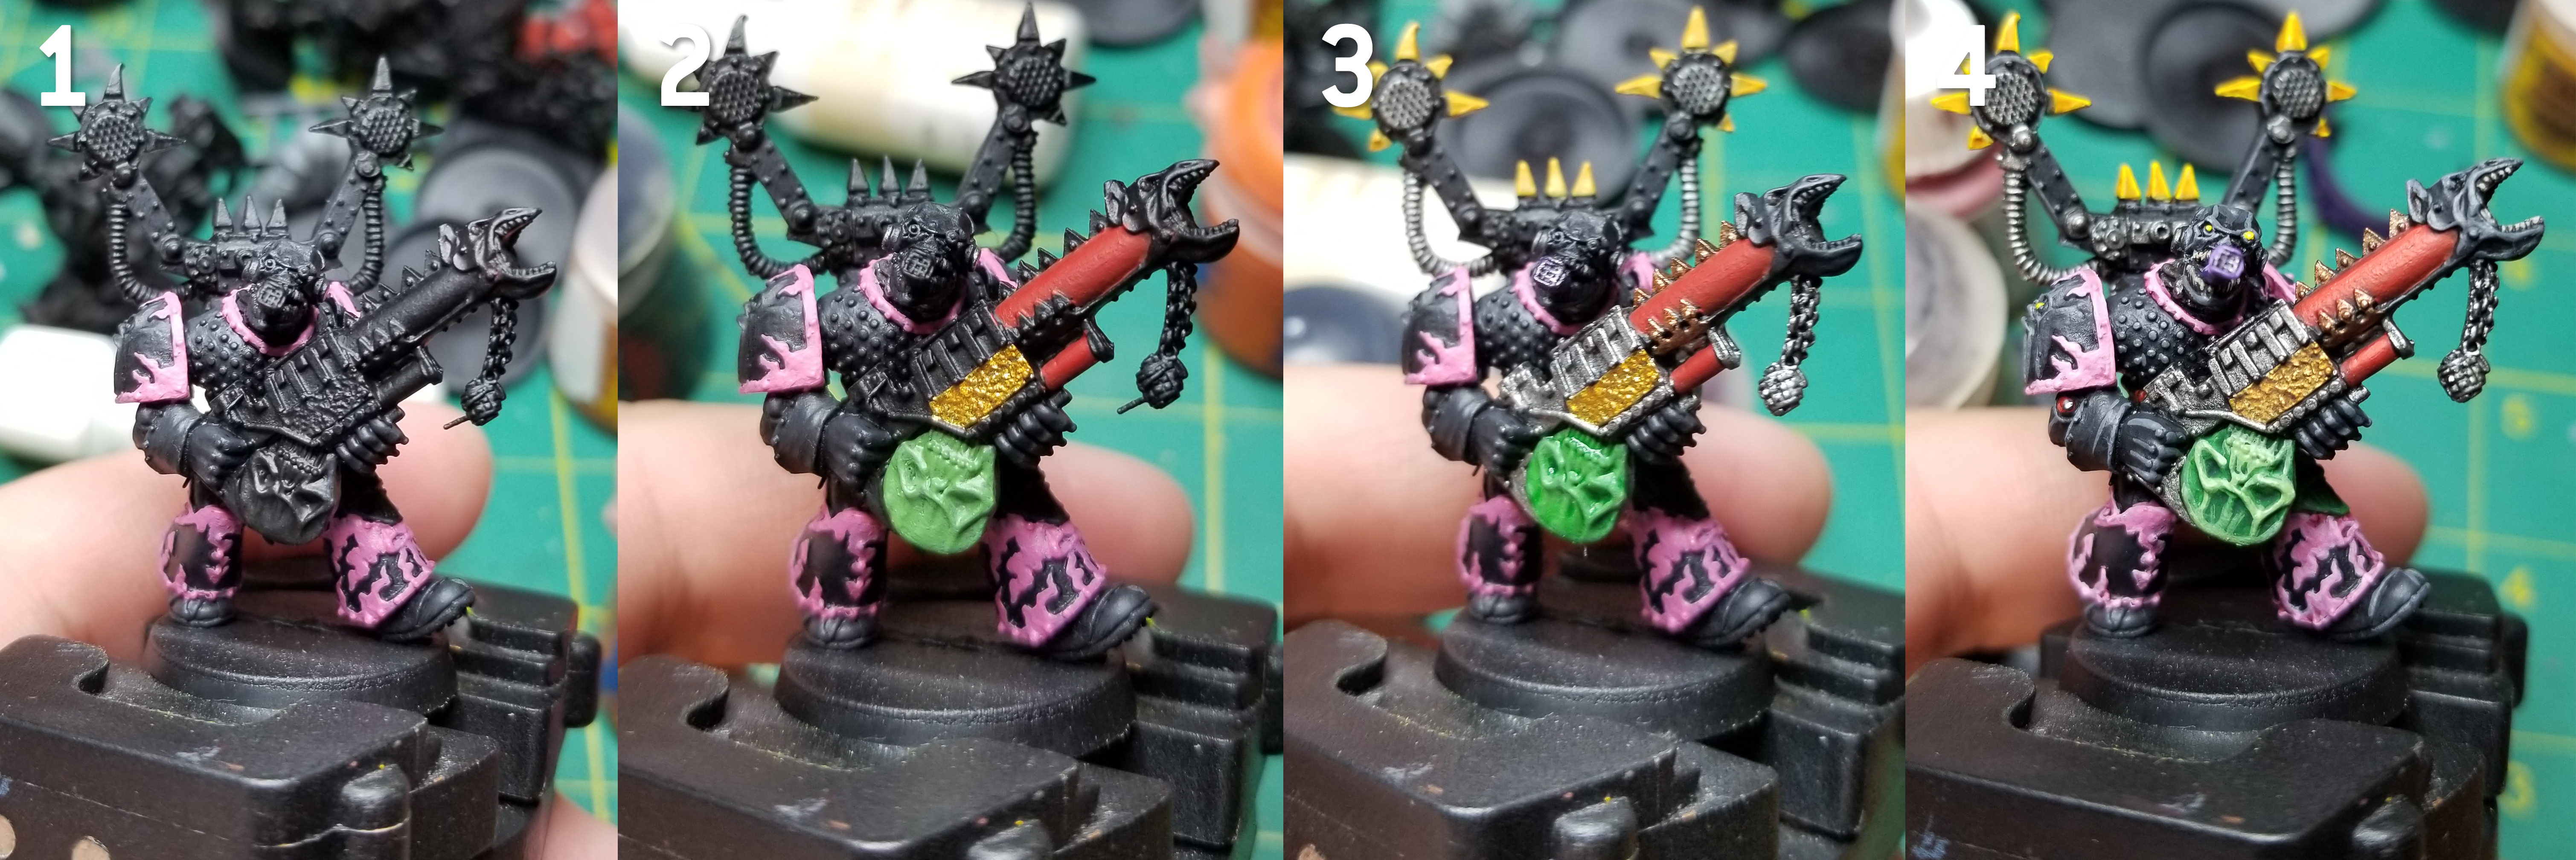
Step 1. Pink Basecoats
I started by laying down the basecoats for the pink parts of the model. This is
Pink Horror to start, then blend-highlighted up to
Emperor's Children.
This usually ends up being more of a three- or four-step process most of the time. It takes two to three thin coats of
Pink Horror to get the base pink I'm looking for on the model, then I'll do one pass of 2:1 Pink Horror mixed with Emperor's Children followed by a 1:2 mix and then finally I'll hit the top areas with pure Emperor's Children.
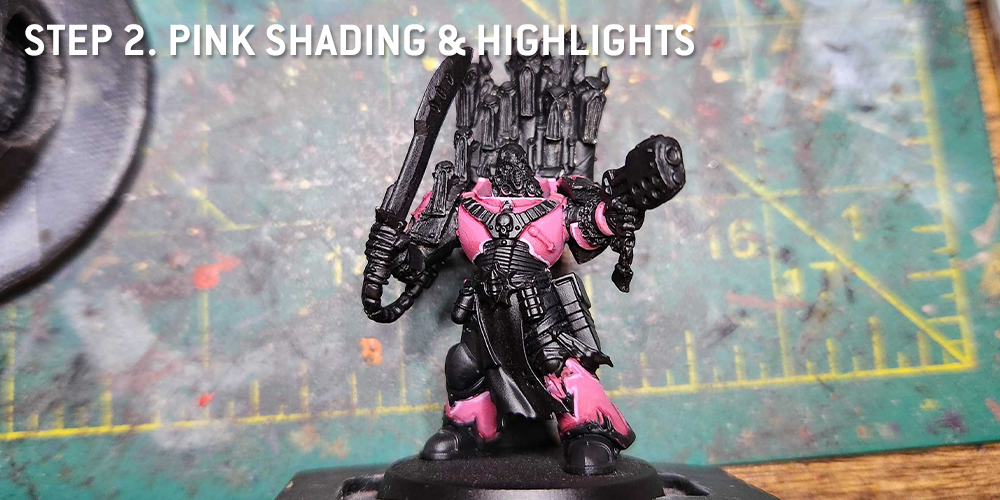
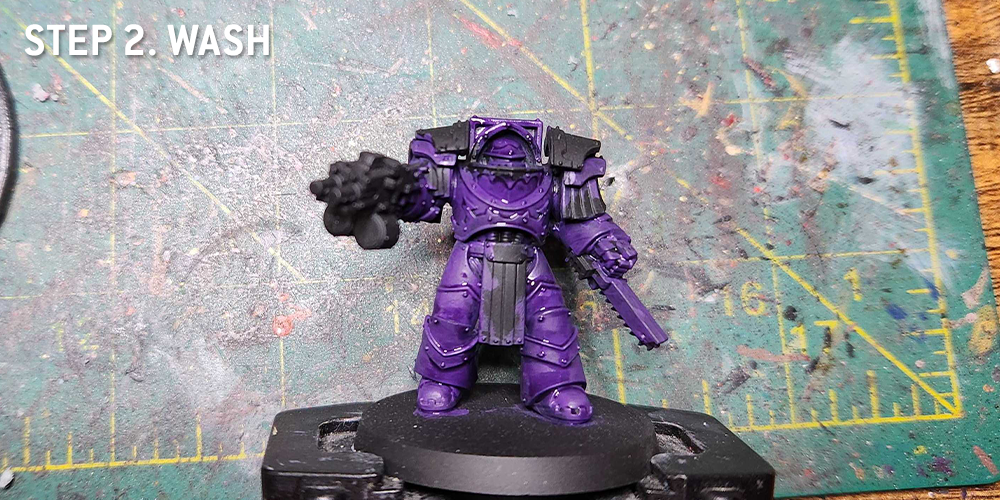
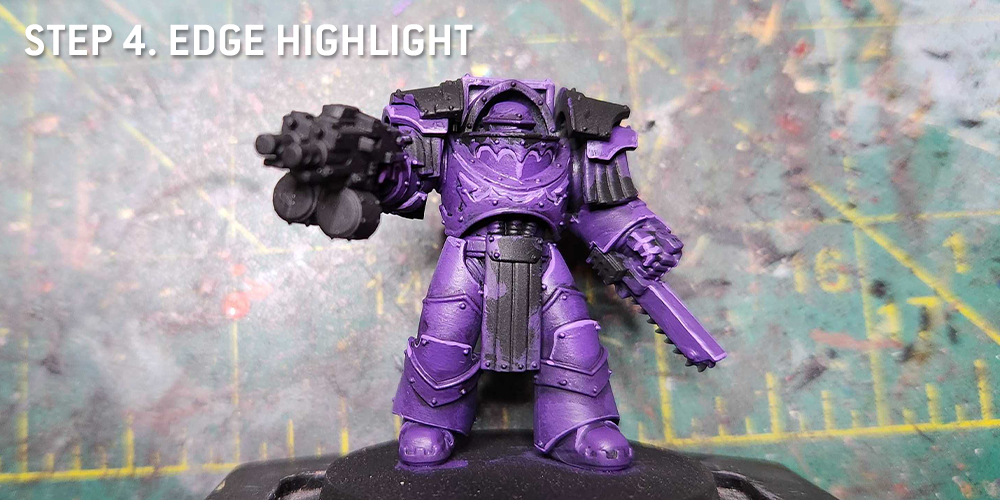
Step 2. Pink Shading & Highlights
Next up I do some panel lining with
Carroburg Crimson, using it to shade around the bottom edges of trim and the cabling on the armor. For the top edges I do a thin line of
Fulgrim Pink, and use that to edge highlight the pink armor as well.
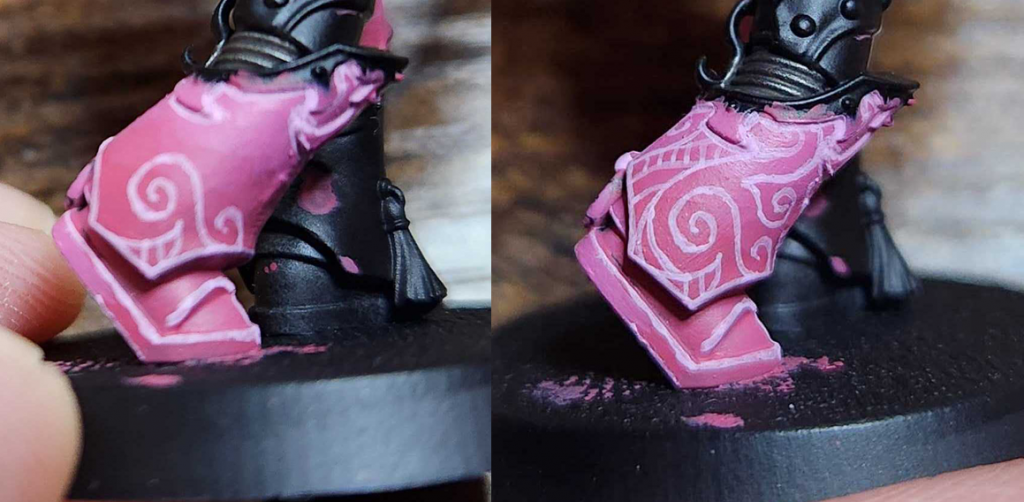
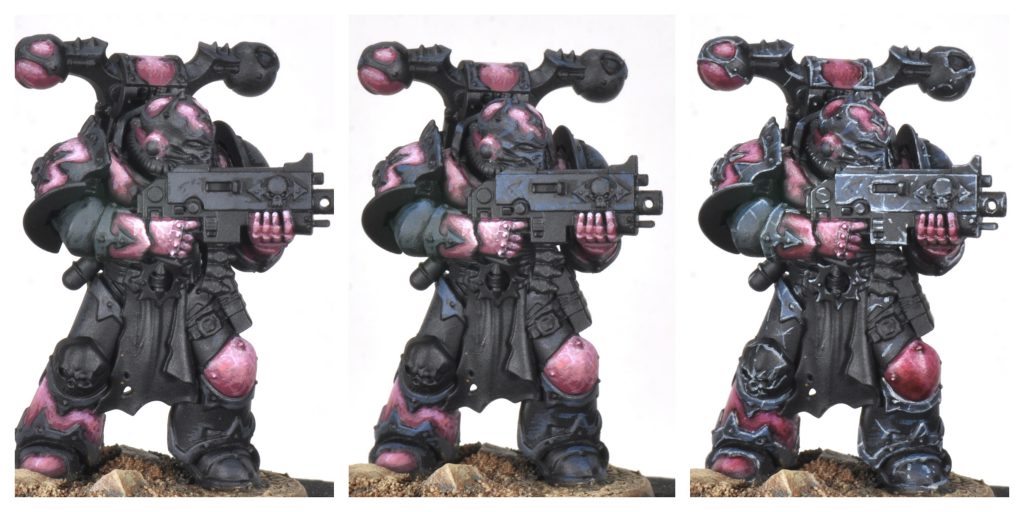
On my more recent models I've started doing lots of freehand filigree details. This both helps them stand out and also hides some of the rougher color transitions. There's unfortunately no secret to doing these; I just use a small (3/0) brush and
Fulgrim Pink. I usually start by doing a couple of swirl designs and then just building around that.
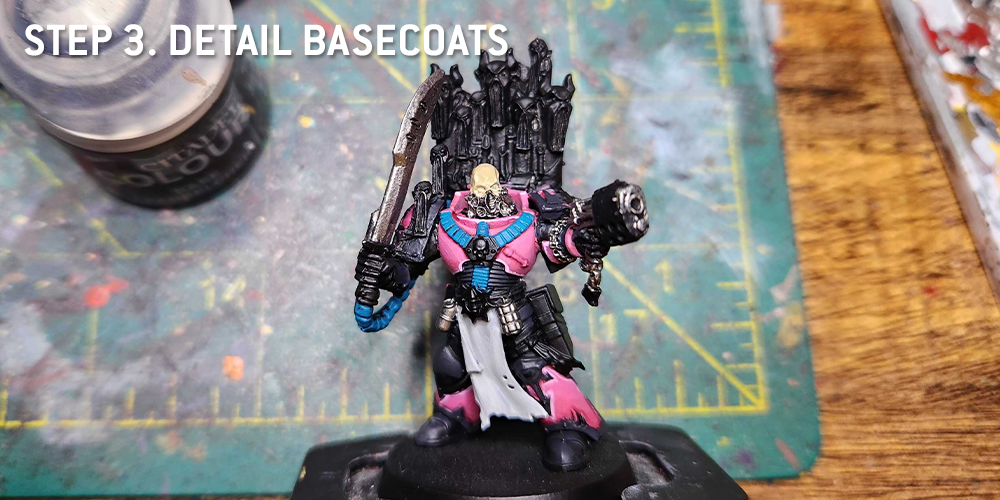
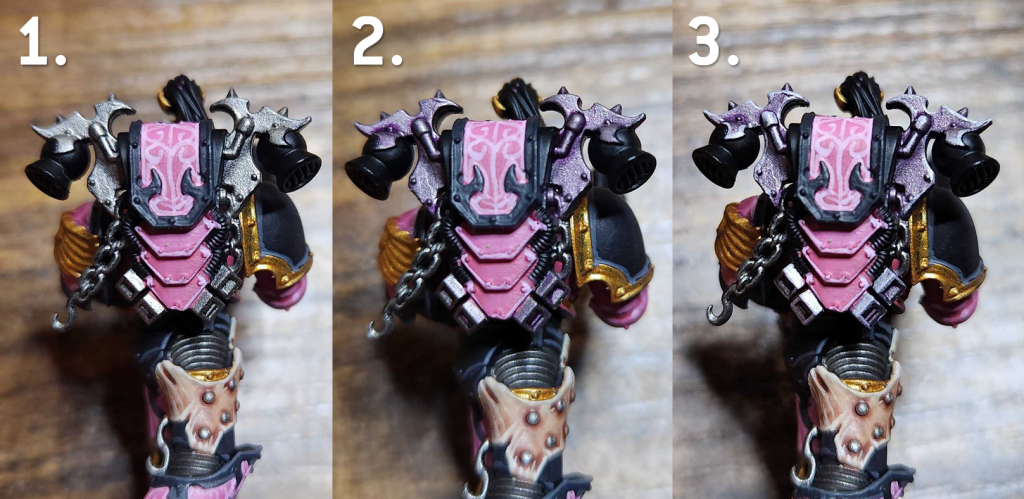
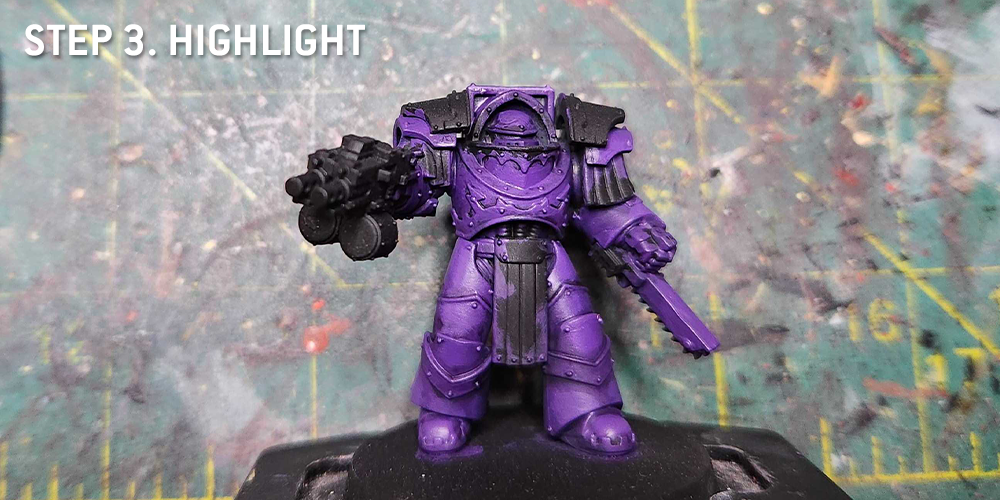
Step 3. Detail Basecoats
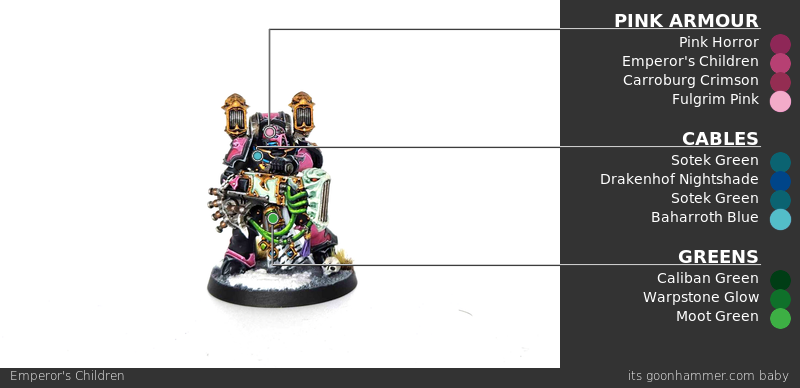
Time to start doing more of the basecoats. The cabling on my Emperor's Children is
Sotek Green, while the metal parts are all
Leadbelcher. This is also where I come back and repaint the trim with Abaddon Black before highlighting it with
Corvus Black and shading the two using a mix of Corvus Black and
Black Legion contrast paint.
The loincloth is
Grey Seer at this point.

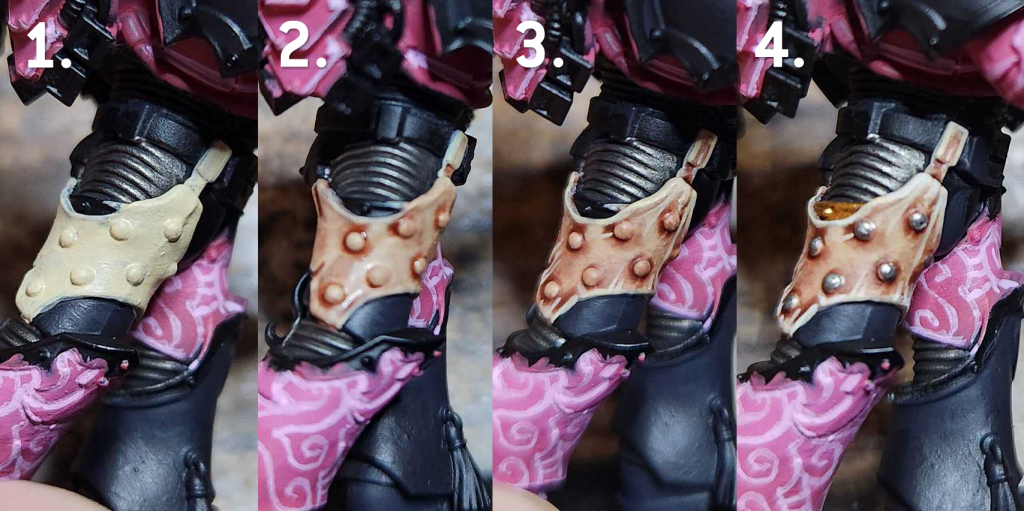
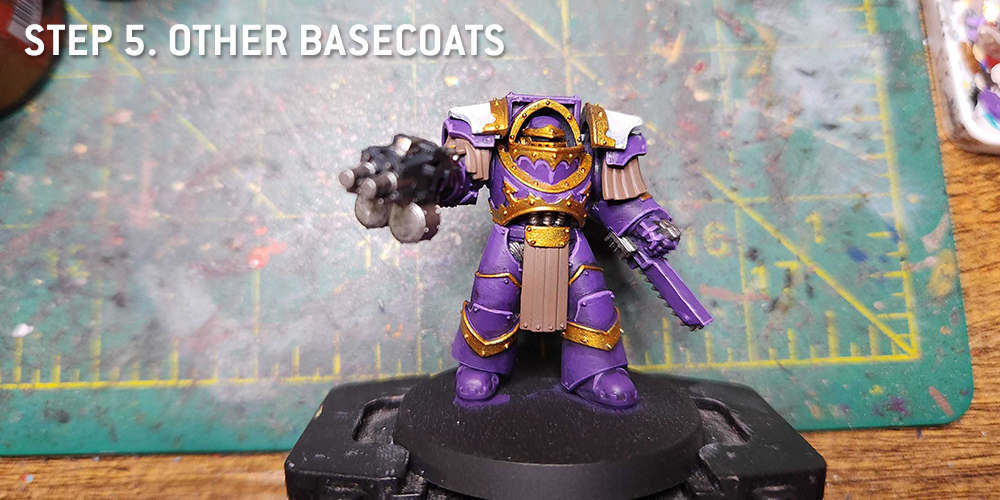
Step 4. Gold Bits
Time to hit the gold parts. They're painted with
Retributor Armour, though the plasma pistol was painted with
Balthasar Gold. The leather parts - belt, holster - were painted with
Cygor Brown. The skin on the head was painted with
Flayed One Flesh to give him a much paler tone.

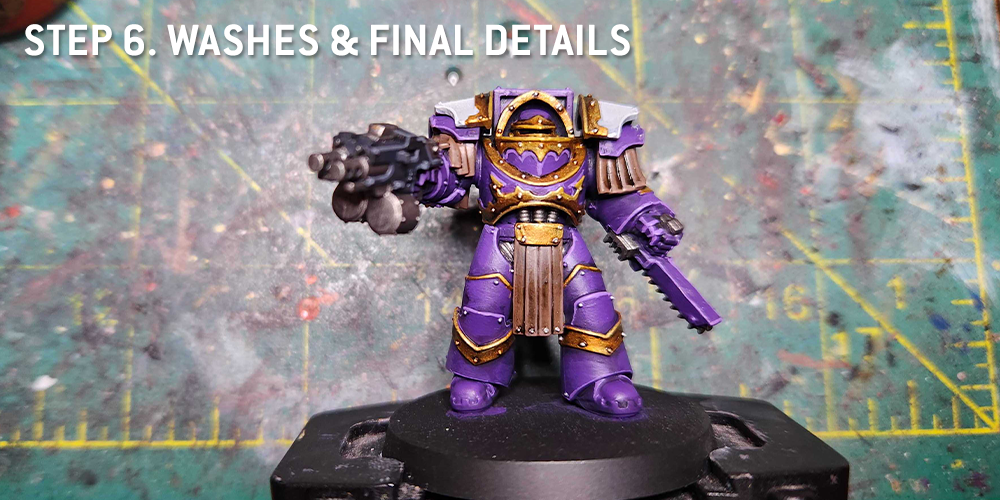
Step 5. Washes
Now It all gets washed. The gold parts are washed with
Agrax Earthshade, the silver bits with
Nuln Oil, the cabling with
Drakenhof Knightshade, the leather parts with
Agrax Earthshade, and the loincloth with
Apothecary White Contrast paint. The skin of the face is washed with
Reikland Fleshshade, though I do some
Druchii Violet around the eyes before dotting them with
Reaper Pure White.
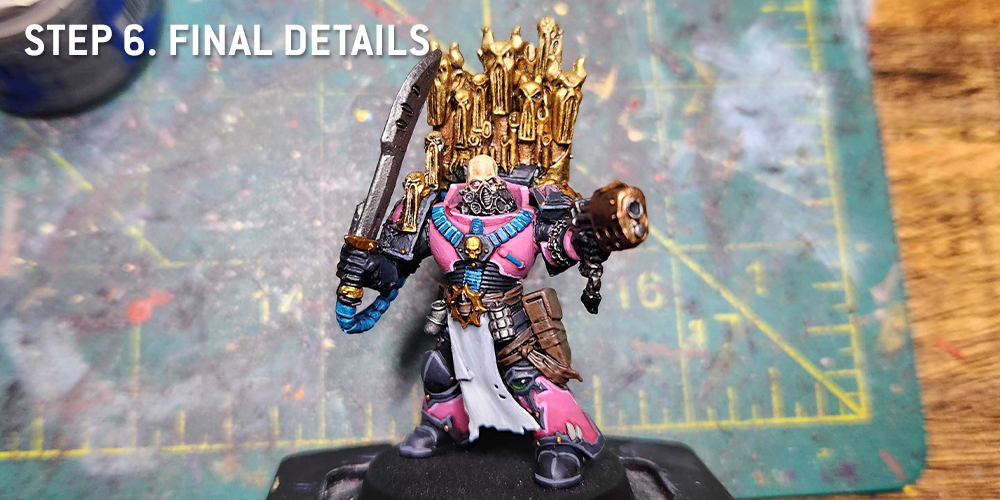
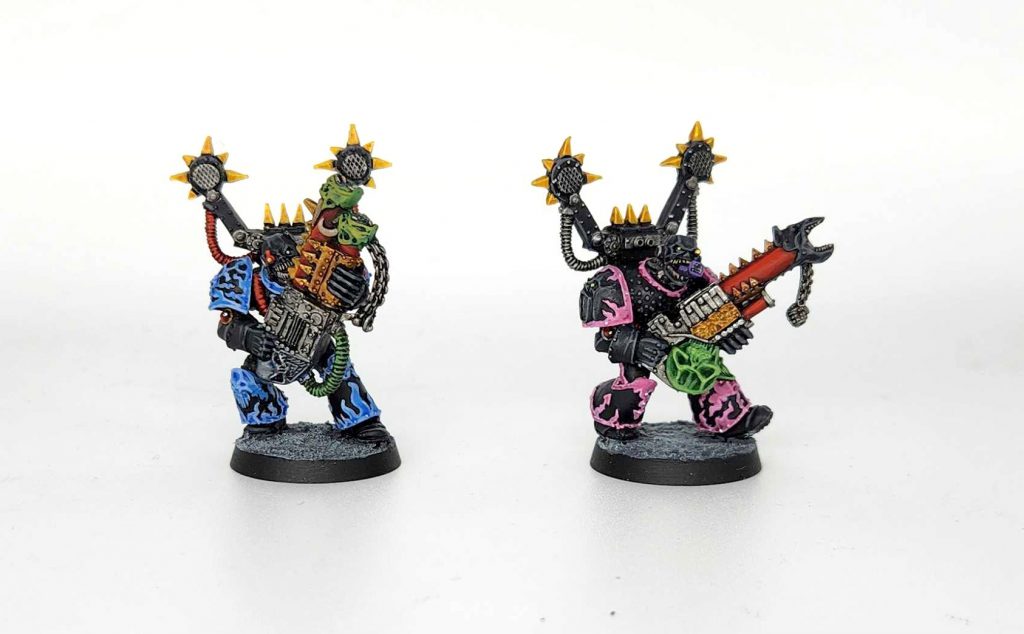
Step 6. Final Details
The final step is a bunch of little steps finishing off different color groups. The cabling gets a new highlight of Sotek Green and an edge highlight of
Baharroth Blue. The black armor panels and trim are edge highlighted with
Mechanicus Standard Grey. The leather parts are edge highlighted with
Cygor Brown. Any rivets on the black armor are painted with
Retributor Armour.
And that's pretty much it. I highlight the face skin again, using Flayed One Flesh and some Reaper Polished Bone. It's a relatively simple scheme, but the trick is how you apply it, figuring out when and how to mix up the pink and black.
 Credit: Robert "TheChirurgeon" Jones
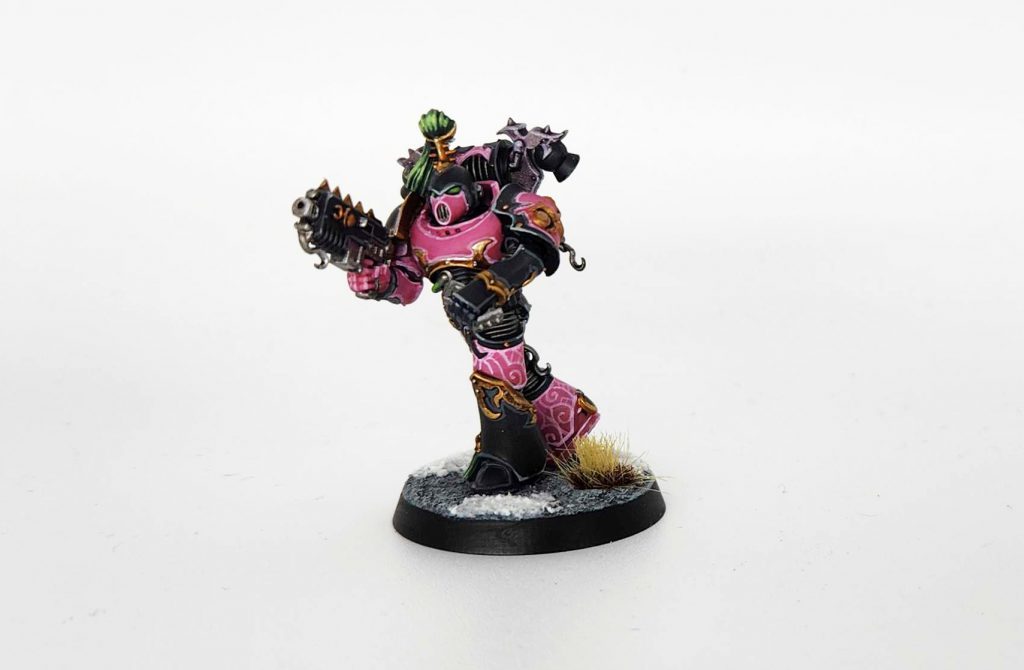
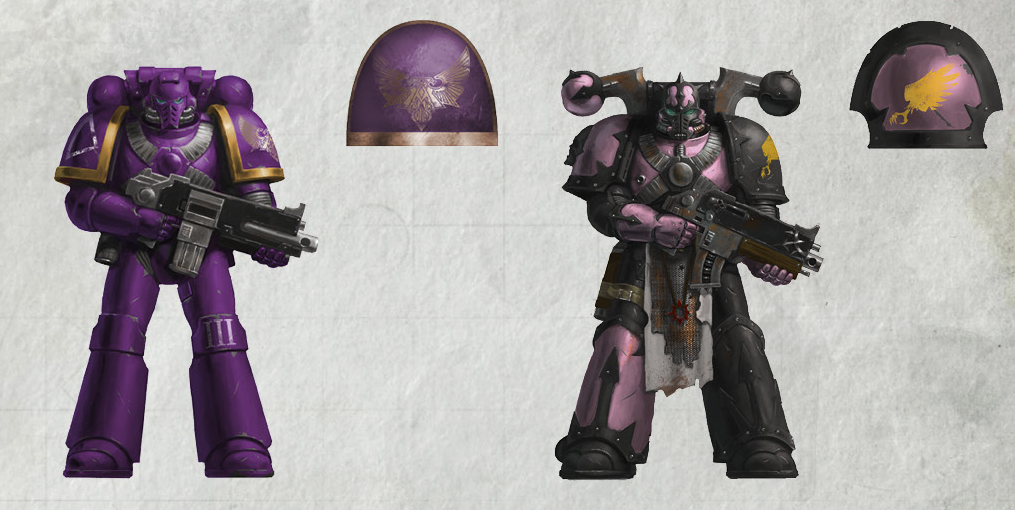
On the more modern models there are some different details to get, and I've started doing more with greens like I've seen on the GW paint scheme. These are usually Caliban Green with highlights of Warpstone Glow and Moot Green, though I use more muted colors for hte topknots and tassles.
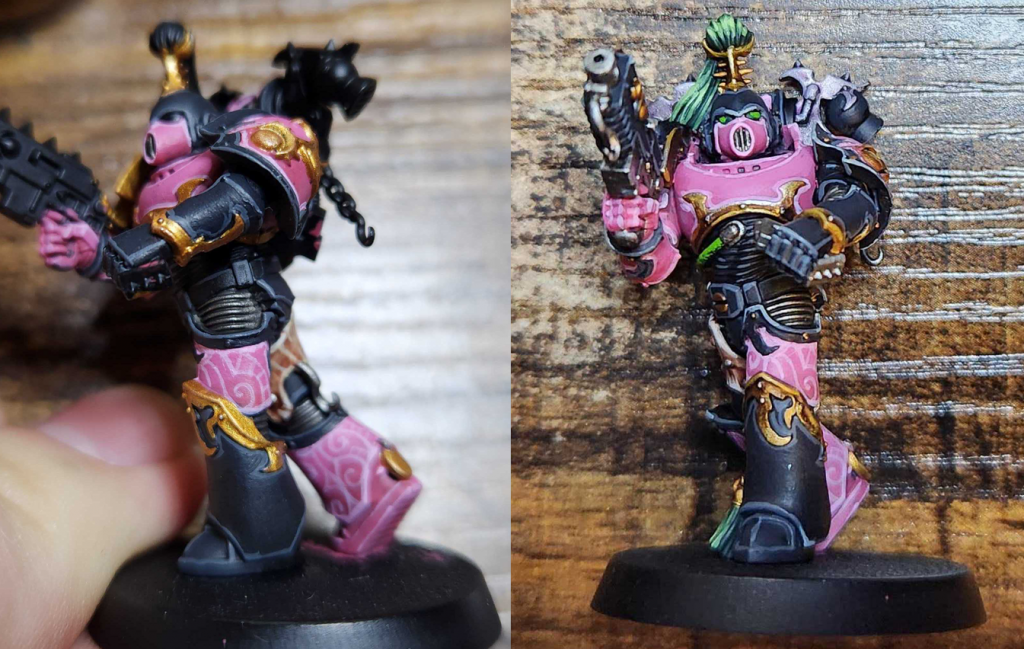
Overall my scheme hasn't changed much since going to the new models. I use more
Liberator Gold for highlights on the gold now, and I use
Deepkin Flesh shaded with
Poxwalker when I need to do the pale green elements on models like Noise Marines, but the core is still very much the same.
 Credit: Robert "TheChirurgeon" Jones
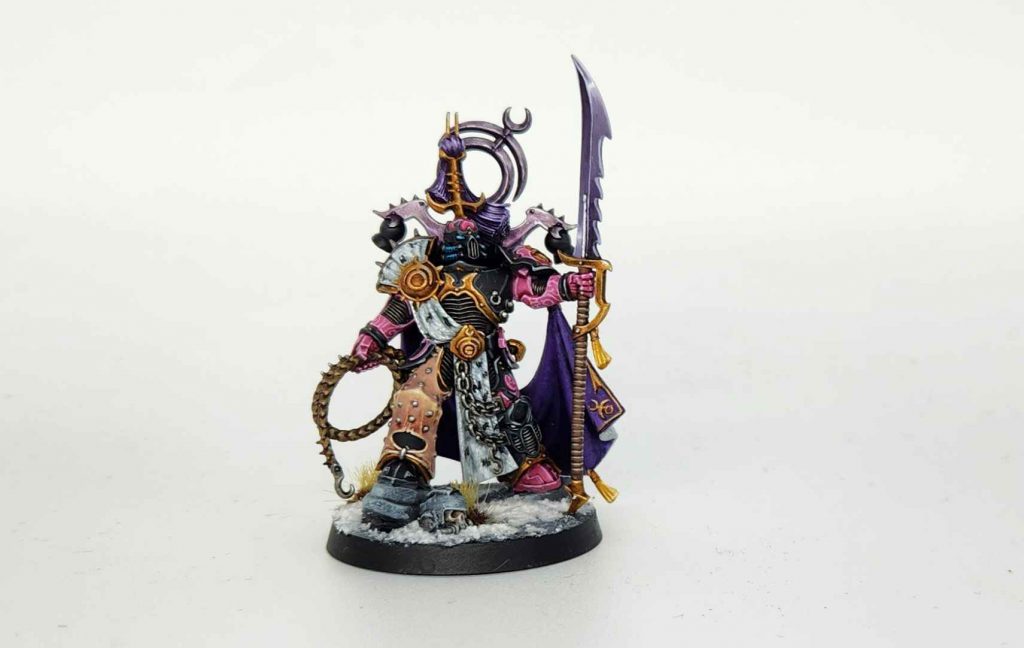
The Lord Exultant
I talked about this guy in the model review, but he needed a bit of TLC in order to be painted properly. While he's pretty straightforward to assemble, he’s got a number of bits that are a real pain in the ass to work around – specifically his combo cloak/tabard/toga doubles as his right shoulder pad, and glues together in two pieces at the top of his shoulder, with the draped cloak connecting on the left side at the bottom corner of his shoulder pad there. Because of this, when I painted him I decided to use a four-part sub-assembly:
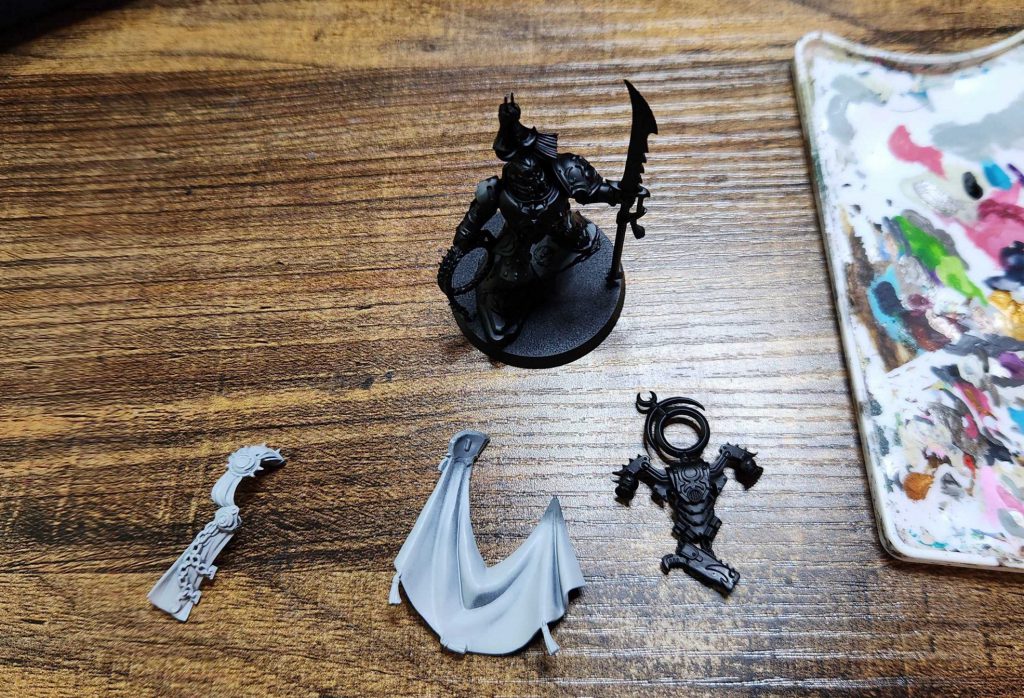
This let me get at the hidden parts of the model pretty easily and paint the underside of the cape and tabard as I went, while also letting me easily prime them a lighter color so I could do the white fur effect.
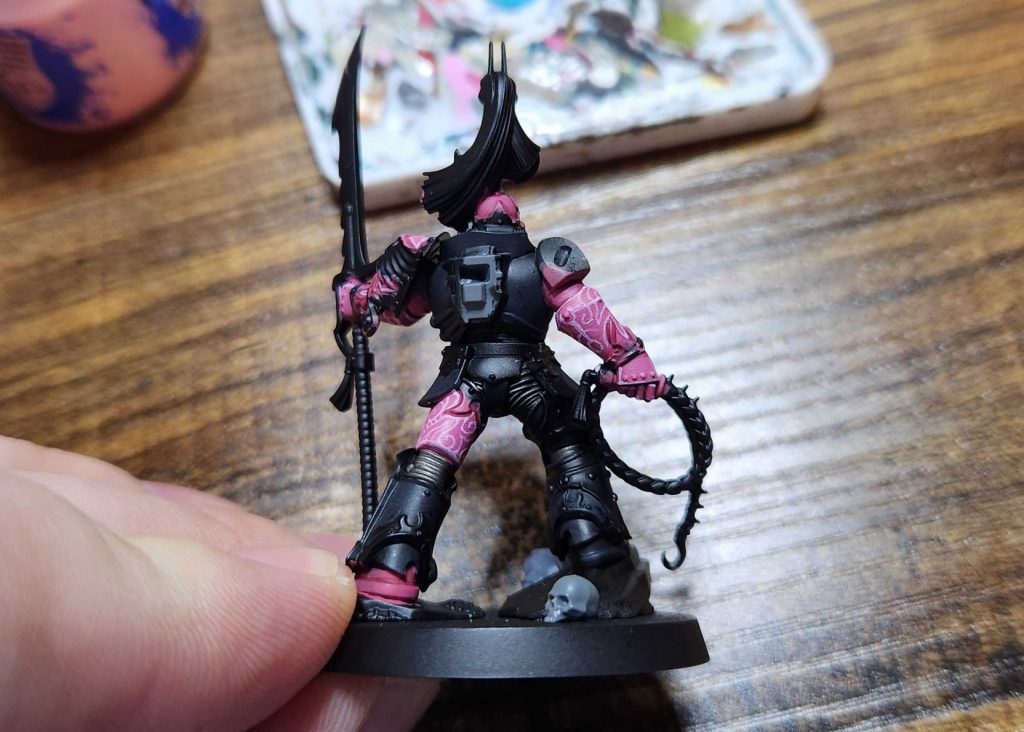
The base model is relatively unexciting, though I mean that in a good way – it’s a very solid model with good details that never feels like it’s trying to do too much. The Emperor’s Children models they've released generally have a little less trim than the Thousand Sons and even standard Chaos Space Marines, and that’s delightful.
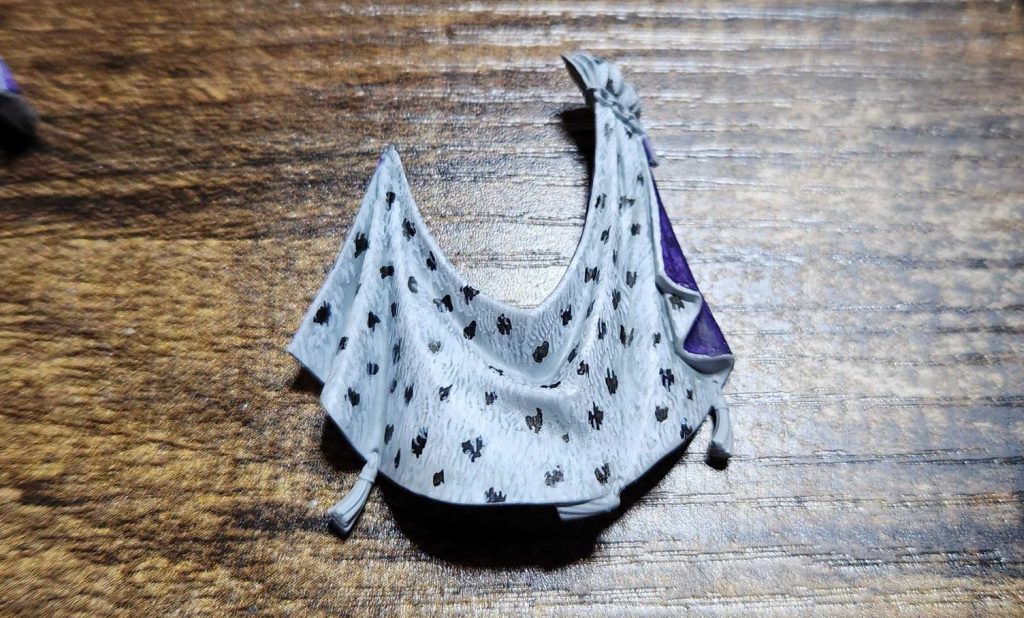
Speaking of that fur cloak, this was my first attempt at painting a fur cape. I’d see some painters do this online and wanted to try my hand at it, though having done it now I’ll say that it seems like it’s a lot easier to do this when you’re doing it with brown than with white. I started with the primer coat of
Grey Seer, and then shaded using a 3/0 brush in small, short strokes with Apothecary white. I then came back and did lighter layers of those strokes as highlights, mixing Grey Seer and Reaper Pure White. the spots are painted in similar fashion with Black Legion Contrast, then I did a final pass doing small, thin hairs with Reaper Pure White. I’m very happy with the final result, though it looks a lot more impressive from a foot away. It’s an ambitious choice for the model and while I’m happy with it, I also think I only got like 90% of the way there in terms of selling the effect.
 Credit: Robert "TheChirurgeon" Jones

 Credit: Games Workshop
 Credit: Robert "TheChirurgeon" Jones


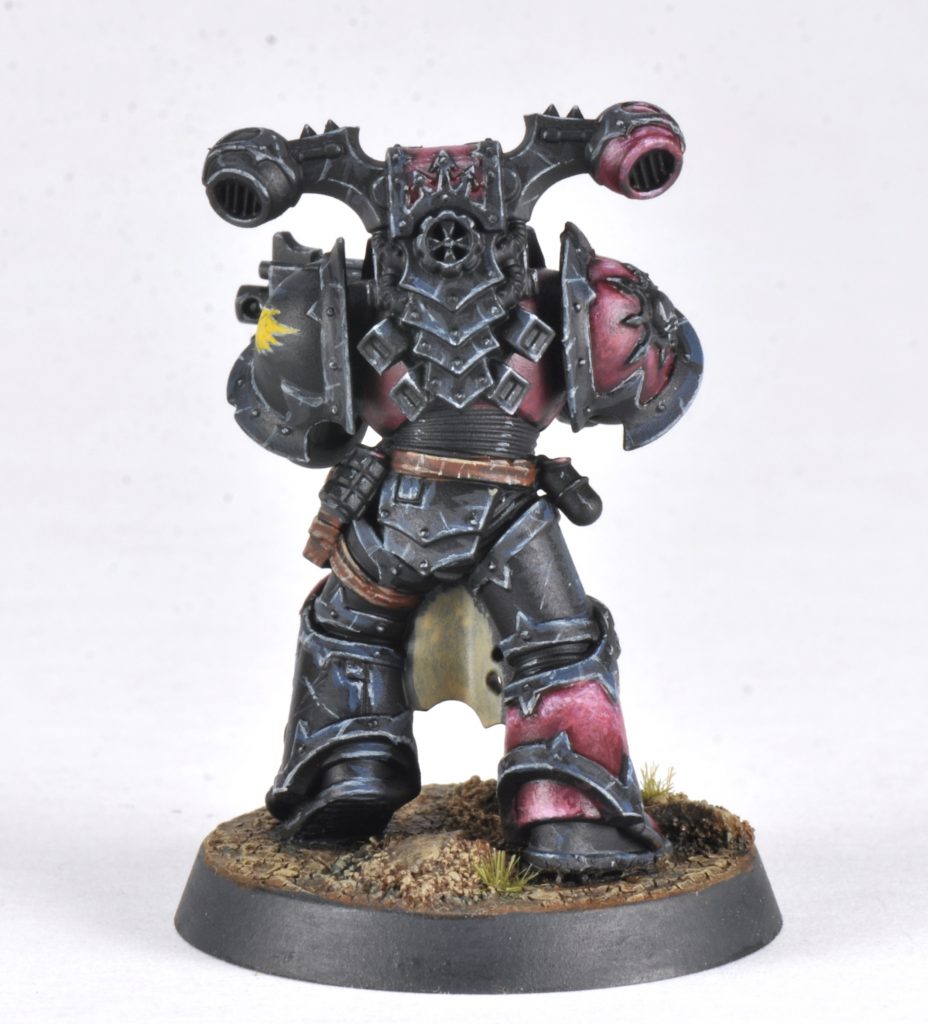
 4. Citadel Fulgrim Pink Highlight on upward facing surfaces.
5. Citadel Carroburg Crimson wash on all pink panels. (I did come back with Fulgrim Pink and retouch the highlights afterward.)
4. Citadel Fulgrim Pink Highlight on upward facing surfaces.
5. Citadel Carroburg Crimson wash on all pink panels. (I did come back with Fulgrim Pink and retouch the highlights afterward.)
 Cloth
Cloth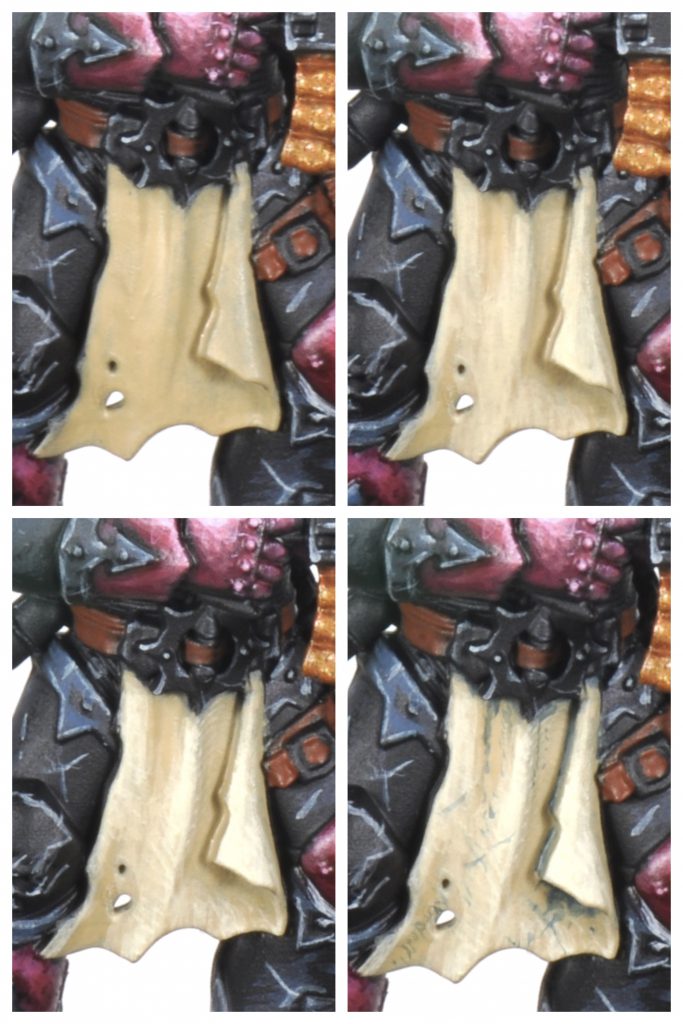 Emblem
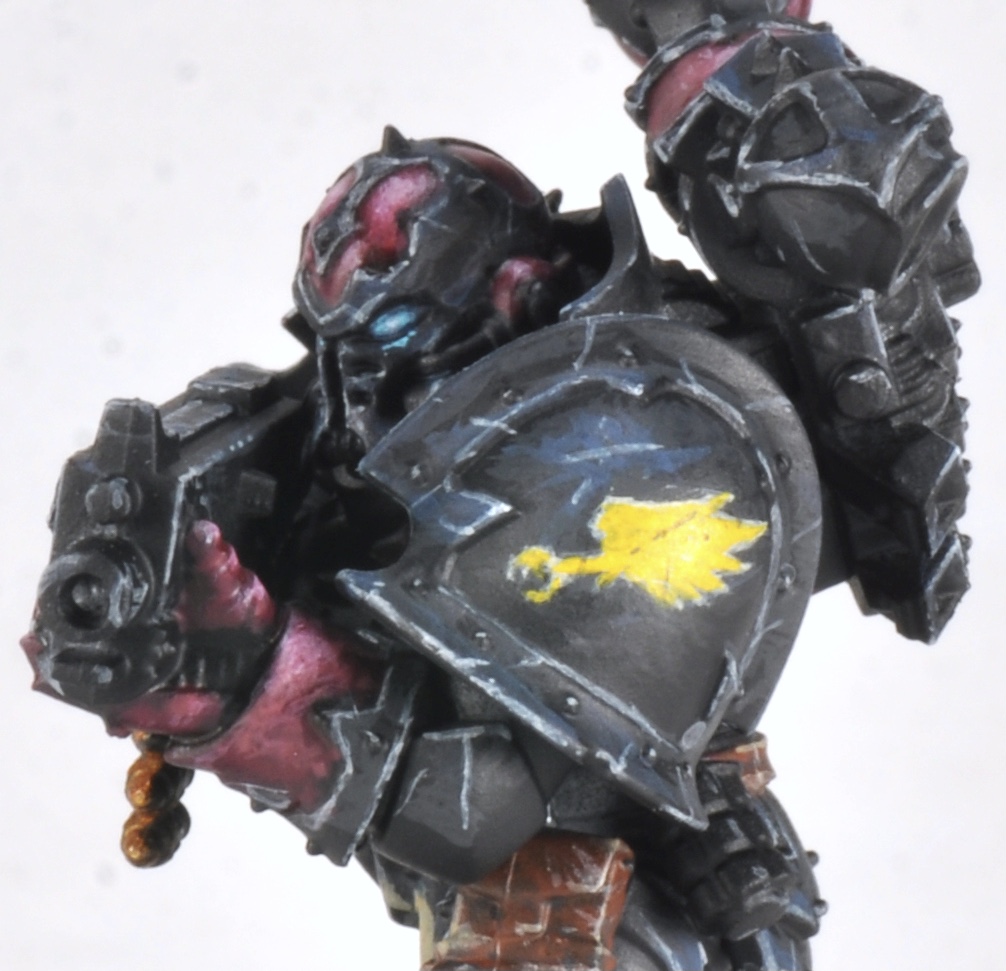
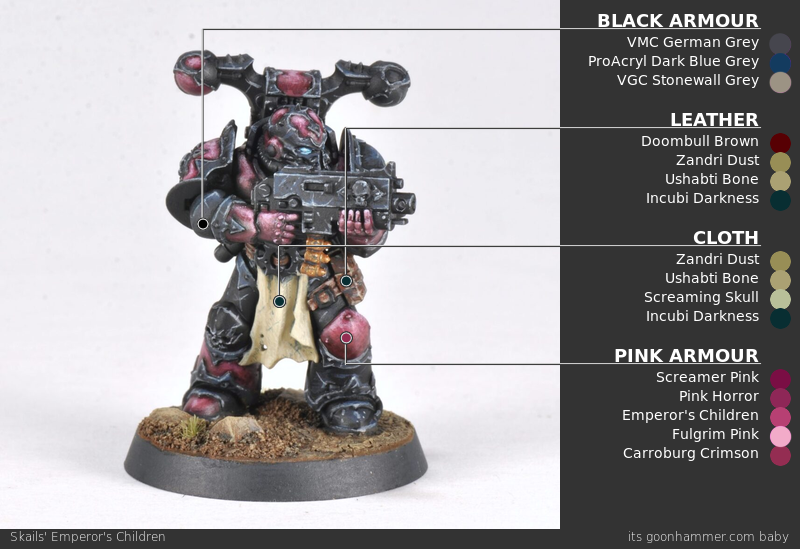
 Emperor’s Children Chaos Marine. Credit: Skails


 Credit: Robert "TheChirurgeon" Jones


 Goonhammer App and Patron Updates: April, 2026
 Kill Team Tournament Report: Engage, Party, Repeat's March Madness 2026
 Goonhammer Reviews: Tribal Conquest