In our How to Paint Everything series we look at how to paint well, everything, with different techniques and approaches. This wee we’re looking at how to take on an airbrush-based approach to OSL painting for a large number of models in Conquest.
In this tutorial we'll be covering all the steps necessary to speedpaint a Spires army using mostly simple airbrush techniques and drybrushing, with an
extremely limited amount of actual classical brushwork required. This method requires a little bit of practice with an airbrush, but is extremely quick once you understand it and has allowed me to churn out things like fourteen stands of Force-Grown Drones in under a week of occasional effort.
Step 1 - Basecoat
 Step 1 - Basecoats
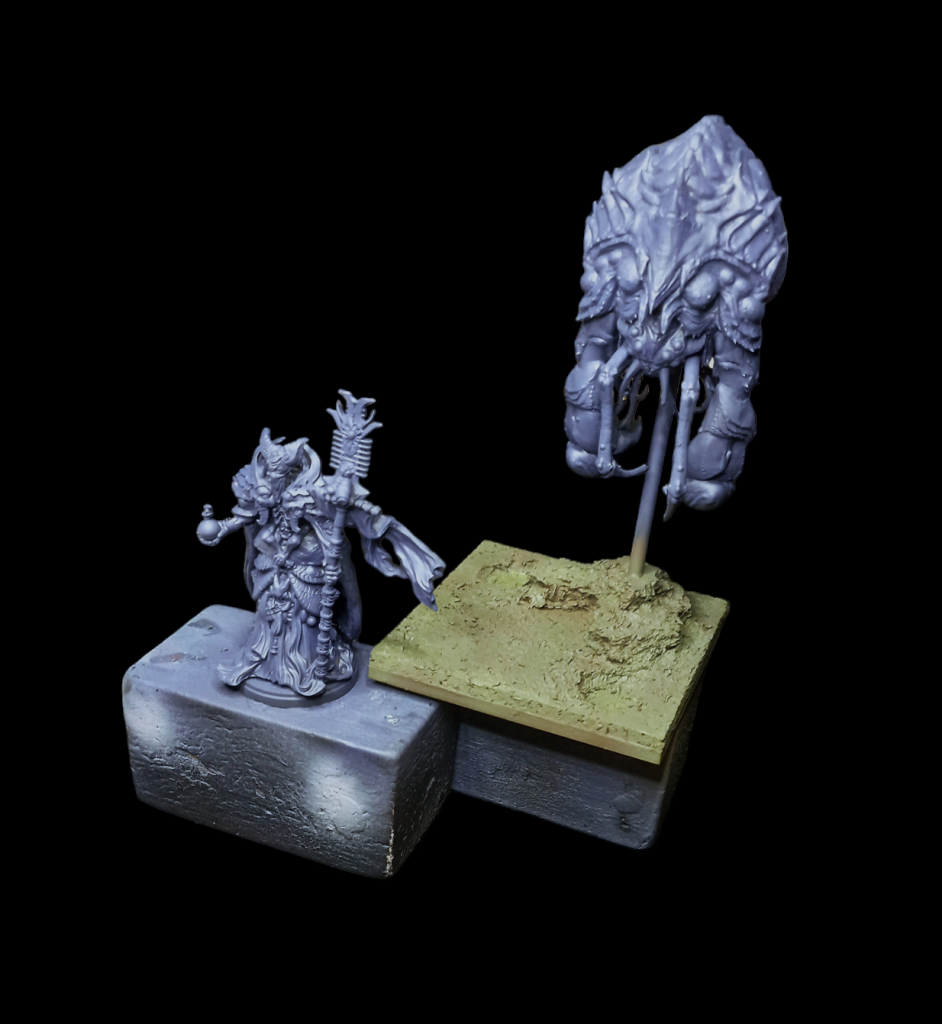
We start by undercoating our units black (or an undercoat colour of your choice, but I prefer black) and then applying our basecoats.
For the
bases, we're basecoating
vallejo chocolate brown followed immediately by a heavy coat of
flames of war german fieldgrey green. These will be completely covered by our basing material though, so don't sweat this too much.
For the
miniatures, basecoat a mix of
vallejo game air hexed lichen and
vallejo model air grey blue. We want a dark, shadowy blue-purple that we'll build up heavily over - this colour will only remain in the recesses, so pay attention to getting this into crevices (but your black undercoat will save you if you miss any really hard-to-reach places).
Step 2 - Chitin Colours (and slapchop basecoat)
 Step 2 - Grey Airbrush
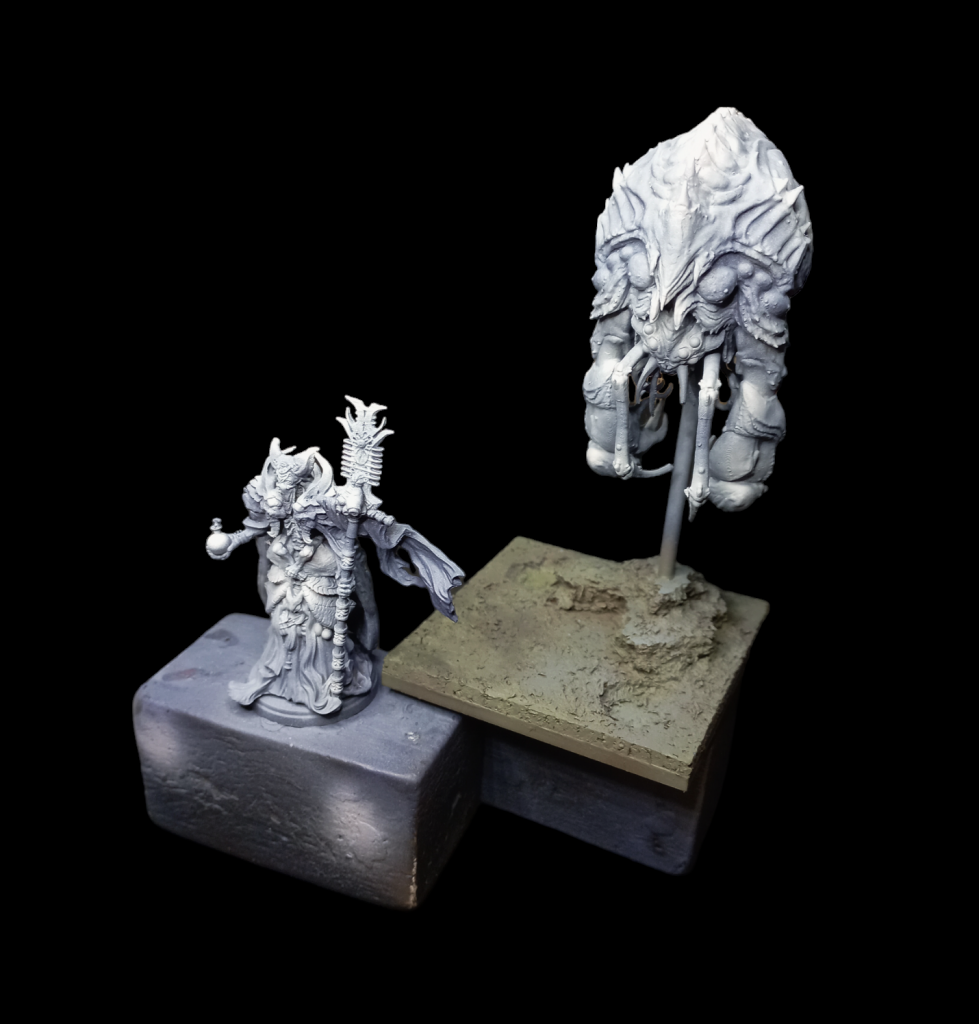
Our next step continues with the airbrush, applying two separate highlights heavily over the top of the blue basecoat. Apply these mostly as a zenithal (and if you're unpracticed with the airbrush, you can get away with literally just a top-down spray), but focus your extra highlights on the areas you want to be bright chitin in the end.
This will come down in two coats. Firstly, apply a mix of
vallejo game colour sombre grey and
vallejo game colour warm grey. Then, apply a highlight that takes your original mix and adds more
warm grey and some
white of your choice. The goal here is to move the colours on the model successively from
cool shadows to
warm highlights.
Step 3 - Drybrush and Wash
 Step 3 - Initial Brushwork
Now we pack up the airbrush and break out the brushes. There are two steps you'll do here and you want to do them in this order.
Firstly,
drybrush the entire model a mix of
warm grey and
white. Then do a second drybrush just of some of the model that you want to be brighter or catch the eye with a very gentle drybrush of just
white.
In addition to getting your chitin colours all basically done, this also sets up a perfect base for what is effectively a slap-chop method for our colours. For this scheme, we want to apply three heavy wash/contrast coats for our colour blocks. For this, we're using
hexed lichen let down with
water and vallejo glaze medium for our purple areas (most of the cloth and the buboes on the big friend alien),
citadel colour contrast kroxigor scales for our teal (the eyes, gems and potion), and a mix of
grey blue and
citadel contrast black templar for our dark blue areas (some of the staff, and the biomancer's cloak and cloth mask).
Step 3 - Airbrush Colour
 Step 4 - Second airbrush step
Now we go back to the airbrush and have a little work to do. For the blue, we want to add some selective object source lighting around anything we think we want to look a bit glowy (like the eyes). Do this with a
very gentle coat of
heavily thinned kroxigor scale. Because you've already drybrushed your highlights on, this will pop comfortably by itself without any need for highlighting.
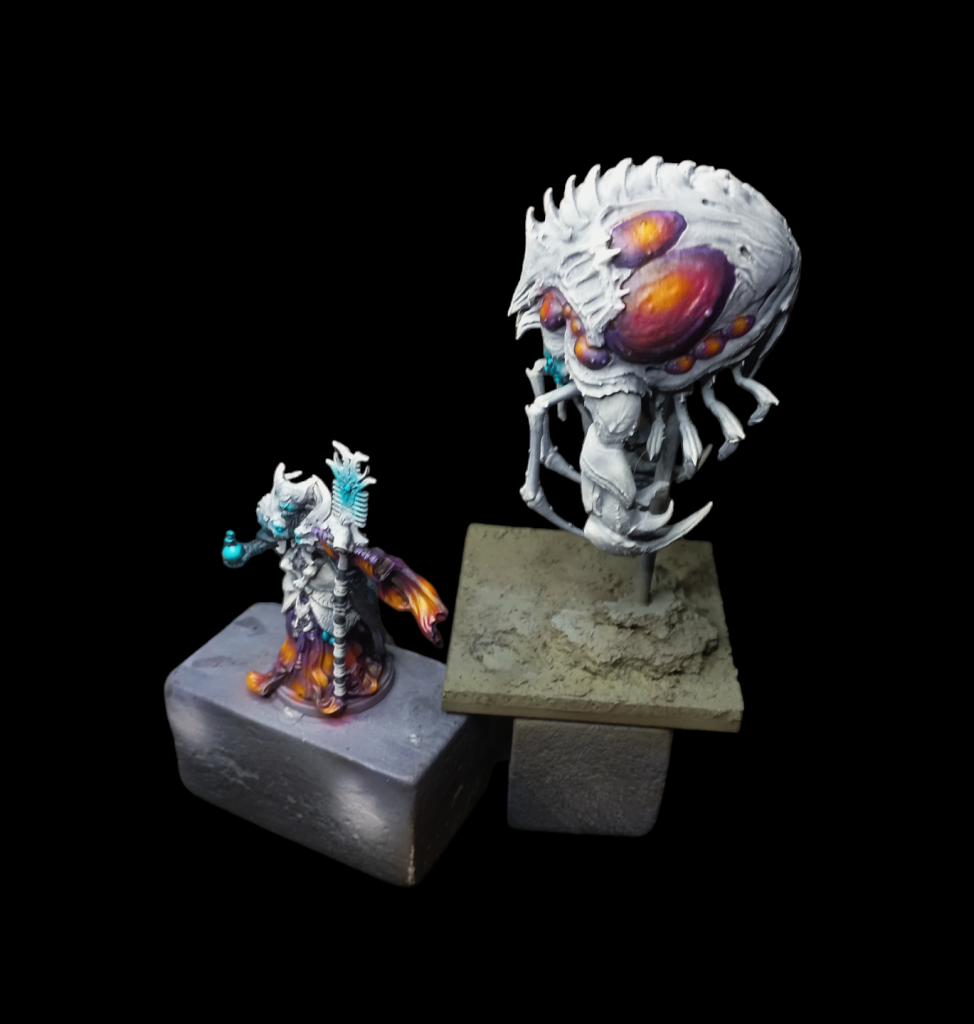
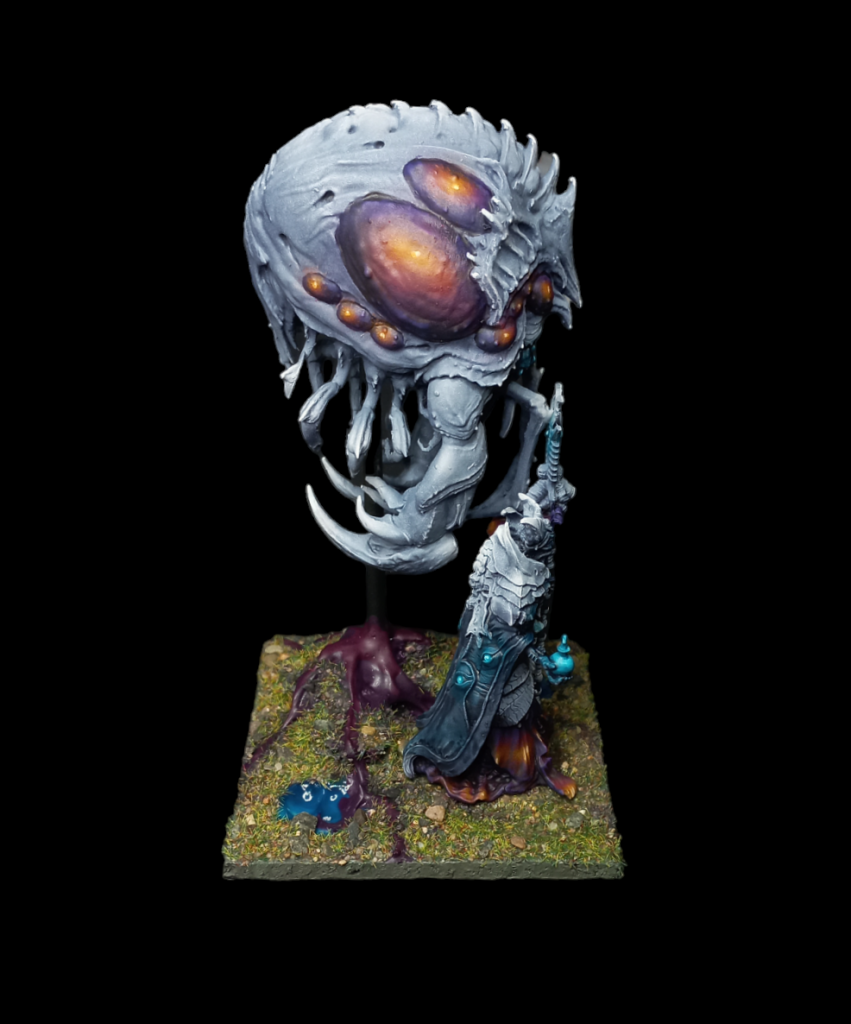
Next, we'll turn our purple washed areas into the colour transition you can see above. This is something very hard to do with traditional brushwork and very easy with an airbrush. Even so, it'll take three steps. When doing this, you want to paint within the areas you've made purple, but it's ok if you overspray a little. Because we're painting an organic army, it'll just look like reflected light or a weird living organism.
Firstly, fill in much (not all) of your purple with a mix of
vallejo model colour magenta fluo and
vallejo game colour deep magenta. Then, add
vallejo game colour sun yellow directly into the mix, which will turn it a golden brown and colour in an even smaller area. Finally, apply pure
sun yellow directly as the smallest area. You can see this in particular on the big pustules on the alien's flank as shown in the picture above.
Step 4 - Brush Highlights and Basing
 Final step - spot highlights and basing
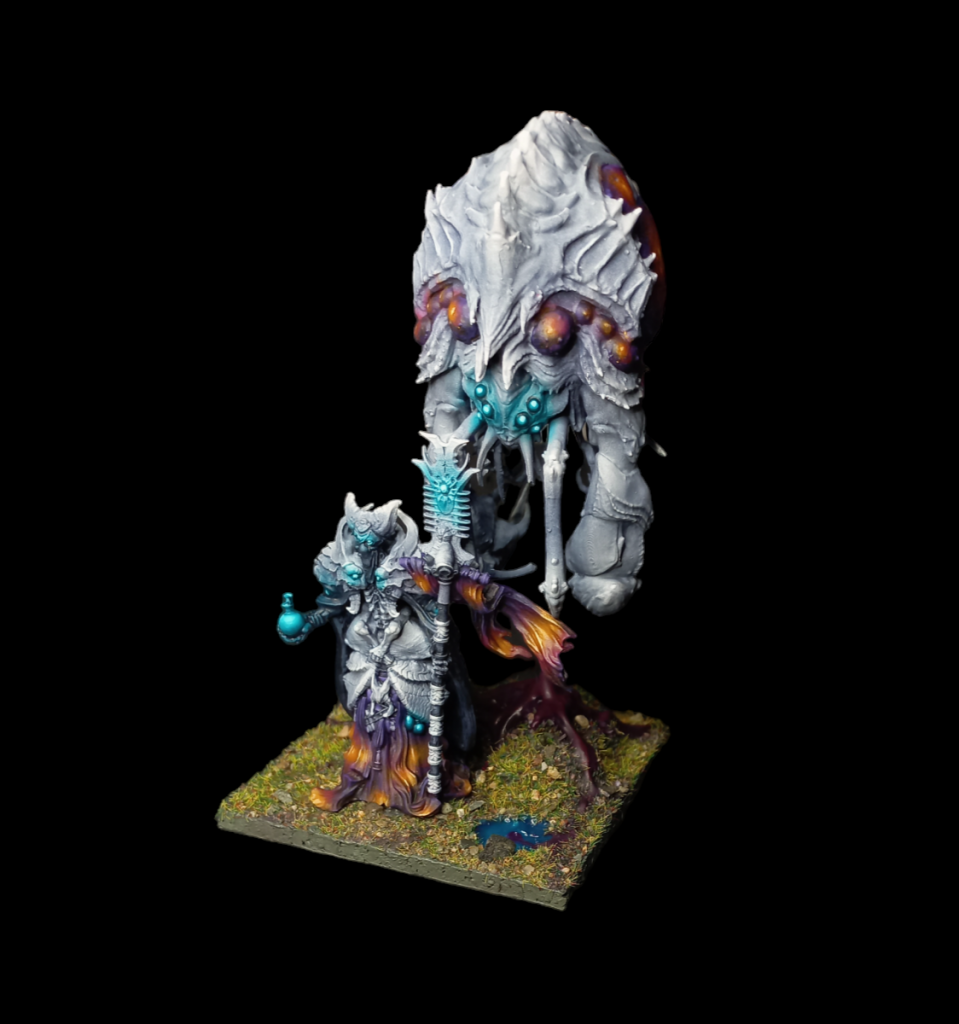
Although it's not essential, the model will still benefit a lot from some final, limited brush highlights. For the yellow in the purple->yellow colour mix, use
vallejo model colour light orange and
vallejo model colour glacier yellow for a few select and tiny line highlights (you can see on the biomancer's banner) and literal dot highlights on things like the center of the pustules on the alien.
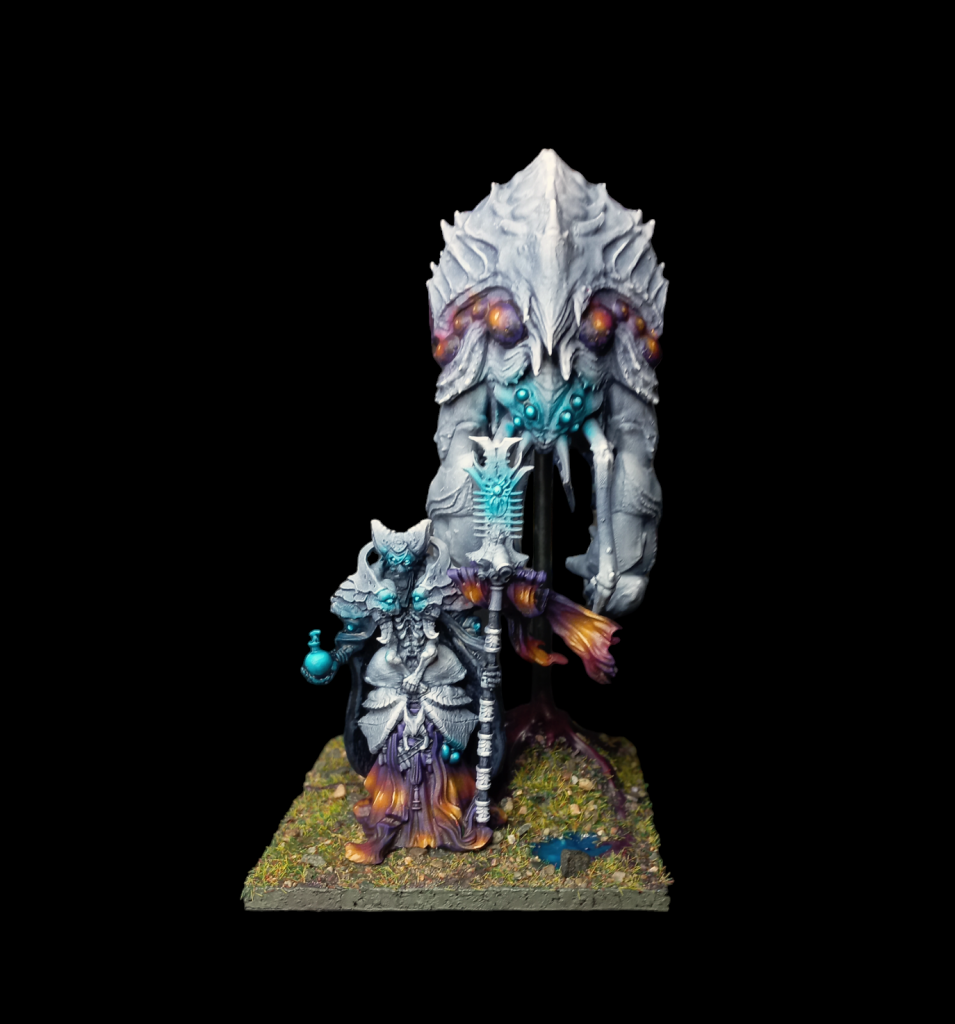
You'll also want to add highlights to the glowing areas, using a mix of
vallejo game colour glacier blue and
kroxigor scale to really sell the glowing effect. You won't need to highlight anything else, just the actual light source.
You can optionally also get out some pure
white and do tiny dot highlights on any sharp pointy bits of chitin, but that's strictly optional.
Finally, go ahead and base the model however you'd like. For this miniature we're using a
zorpazorp base ready patchy plains for the grass, sand and rock mixture (which unfortunately is no longer for sale, but is just a mix of static flock, sand and small pebbles, all applied using PVA or mod podge) and
vallejo water texture acrylic Mediterranean blue for the water (this stuff is mouldable and incredible, strong recommend). For the purple creep, take the same water texture Mediterranean blue and mix heavily with your choice of
red paint until it turns purple, and then apply onto the base. I actually find it easiest to apply all the water texture first, let it set up overnight and then apply the flock mix the next day. For a bit of added visual flair, apply a mix of heavily watered-down
hexed lichen around the veins of creep to make it look like it's seeping through the grass, and you're done - varnish with a varnish of your choice
(
testors dullcote is my preferred)
and you're ready to play.
As always if you want to get 10% off and support Goonhammer you can make your Conquest purchase by clicking here for US/Canada or here for EU/rest of world. You’ll also need to enter code “goonhammer” at checkout. Look, we don’t make the rules, that’s just how it works!
Have any questions or feedback? Drop us a note in the comments below or email us at contact@goonhammer.com. Want articles like this linked in your inbox every Monday morning? Sign up for our newsletter. And don’t forget that you can support us on Patreon for backer rewards like early video content, Administratum access, an ad-free experience on our website and more.
Thank you for being a friend.

 Goonhammer App and Patron Updates: April, 2026
 Kill Team Tournament Report: Engage, Party, Repeat's March Madness 2026
 Goonhammer Reviews: Tribal Conquest