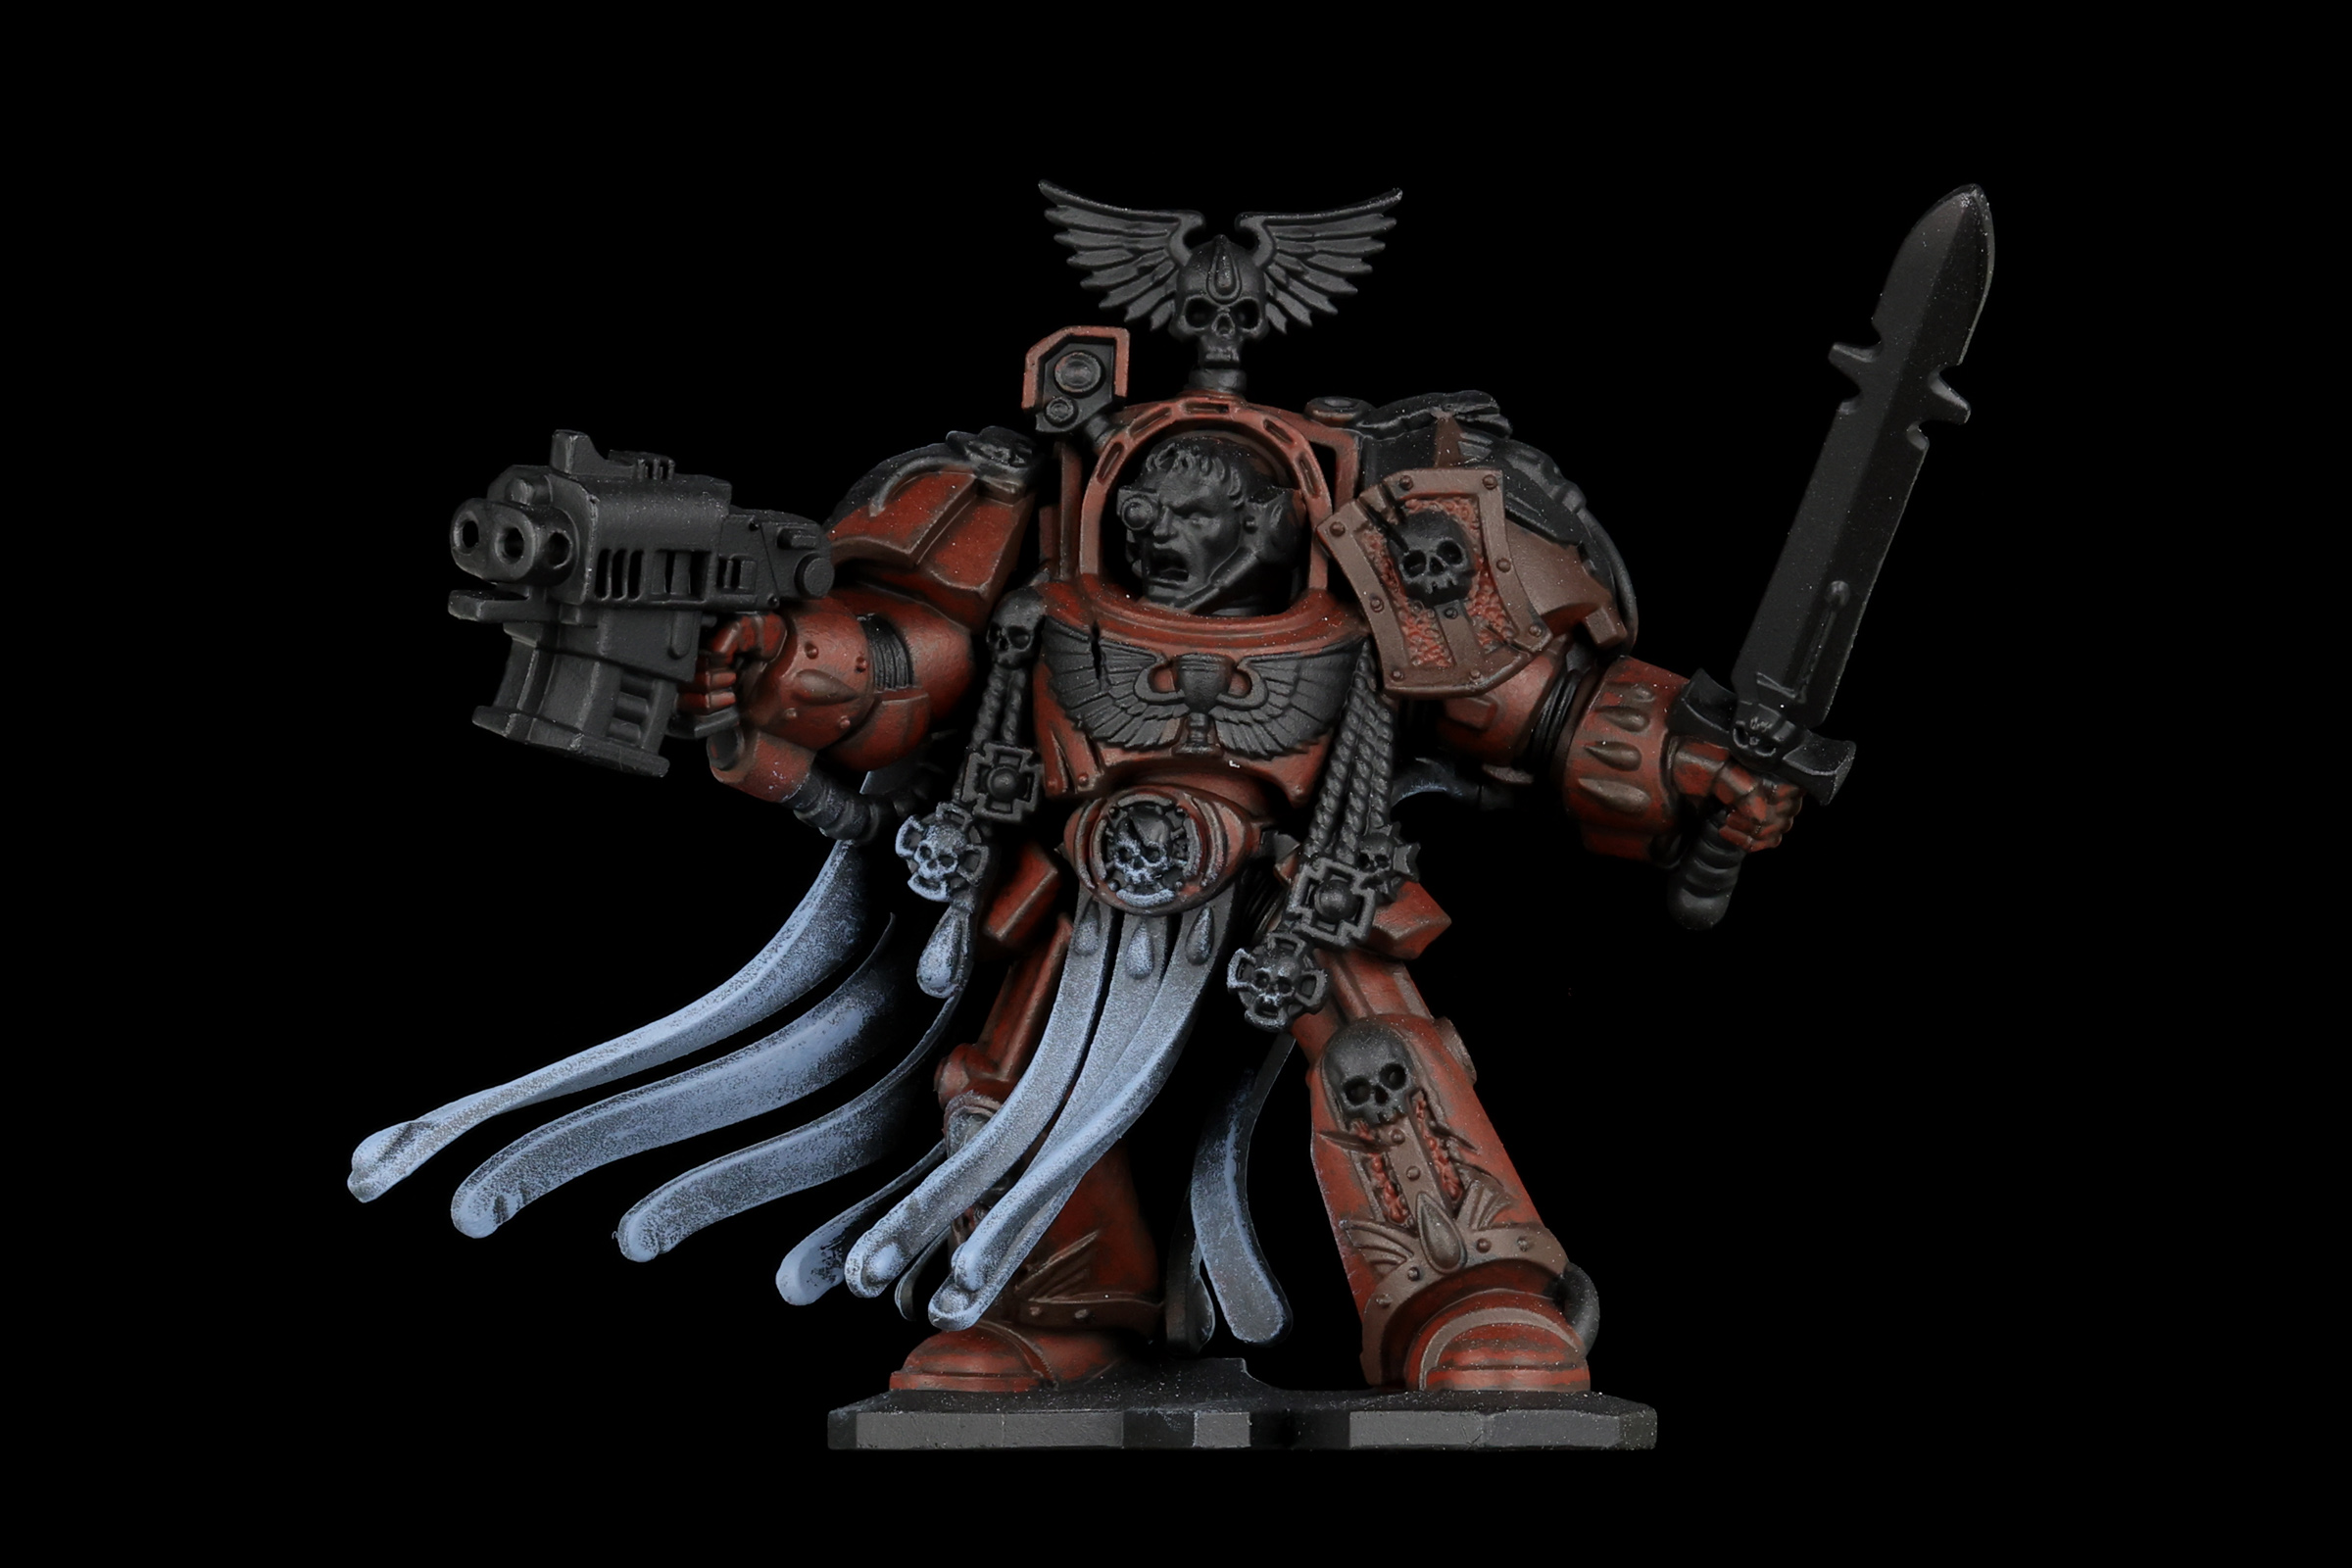
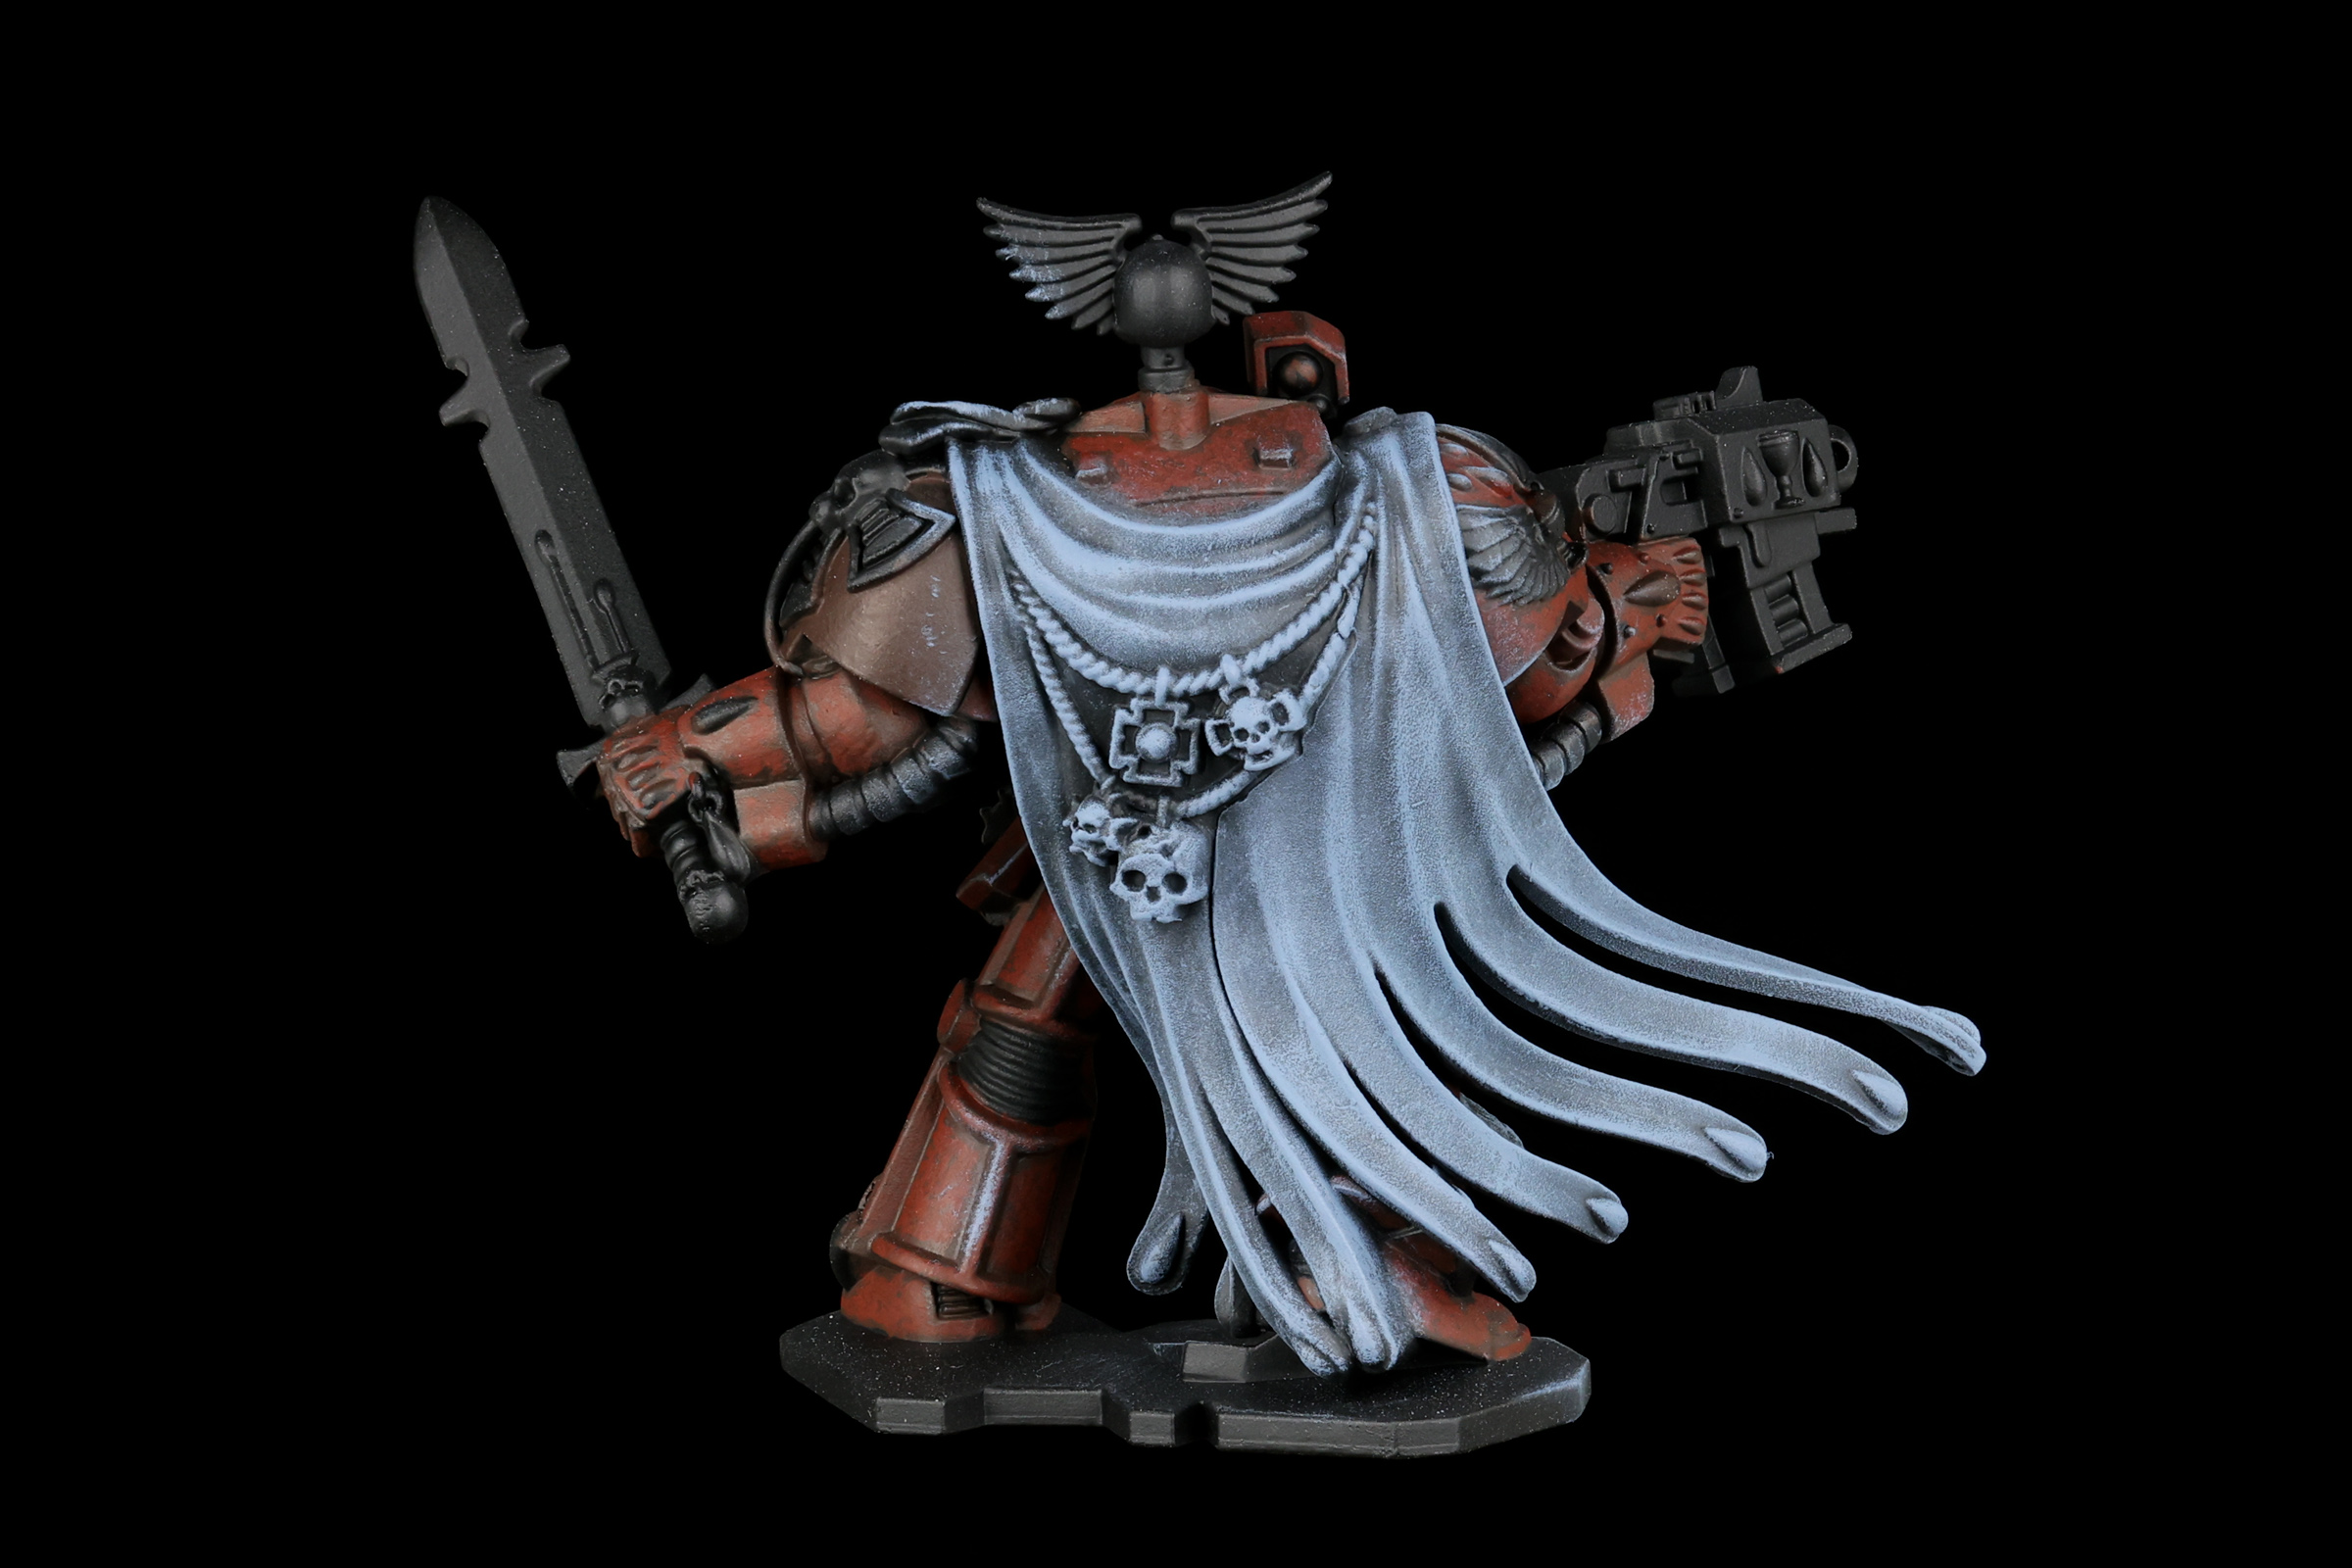
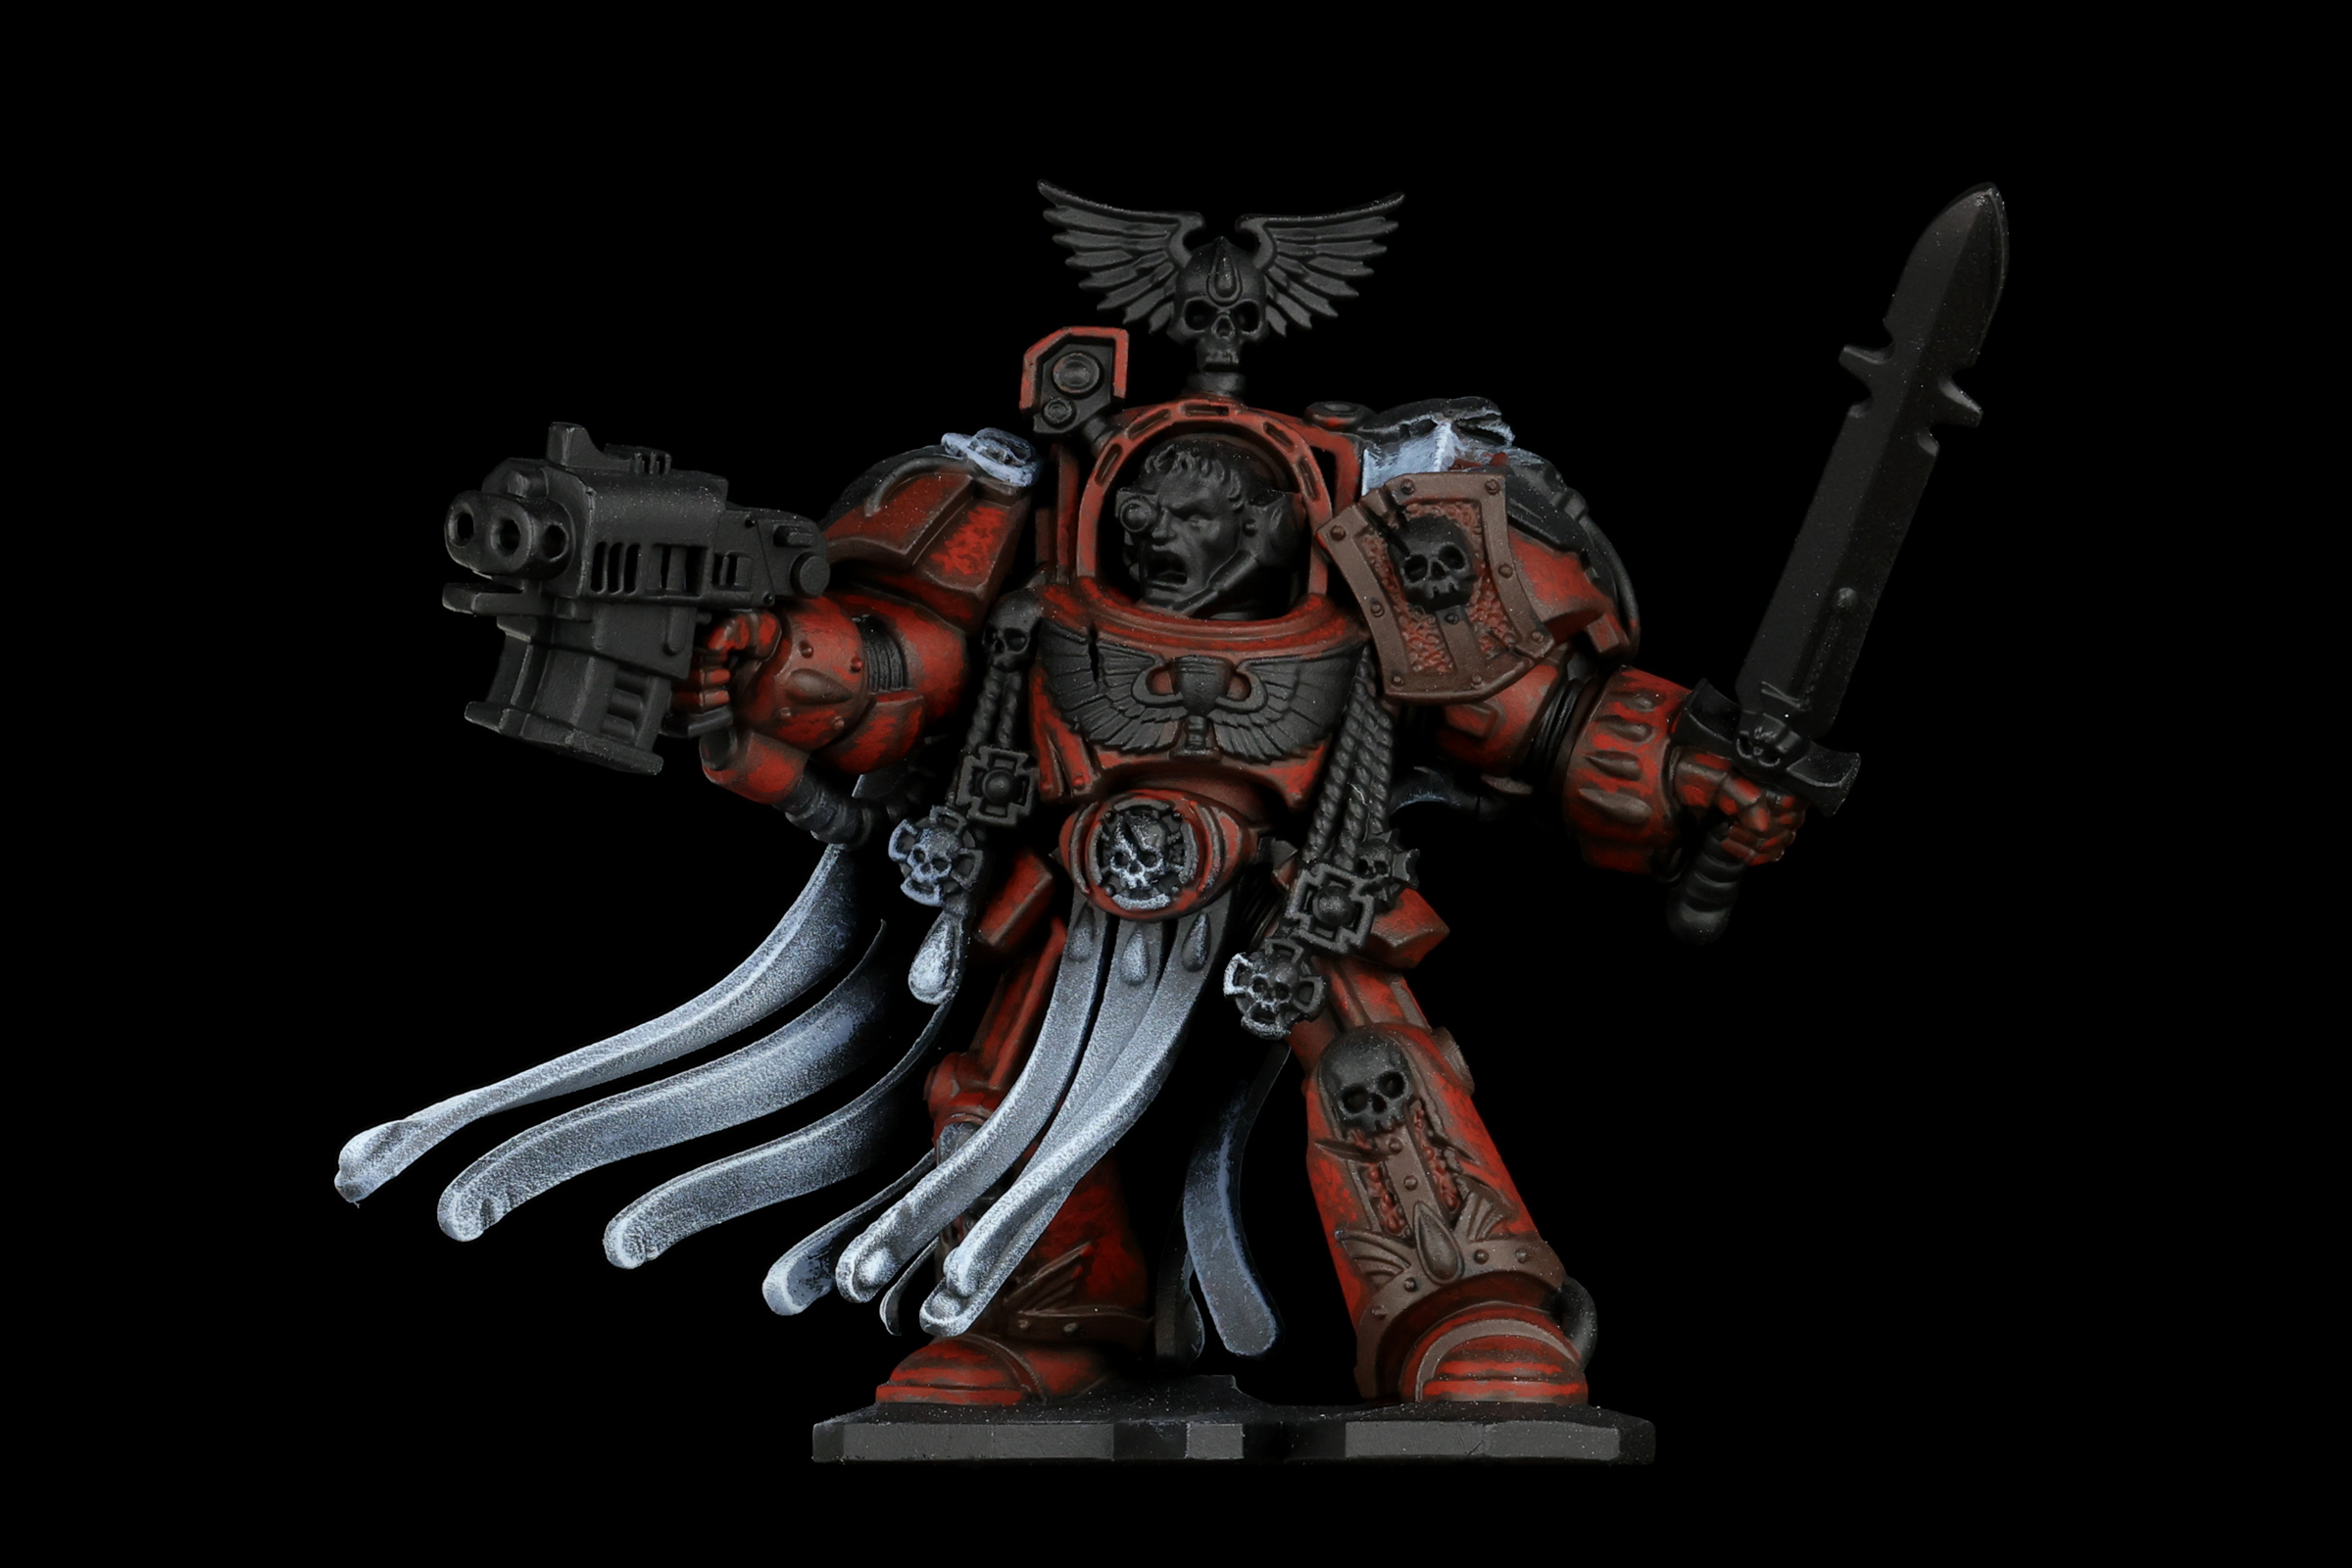
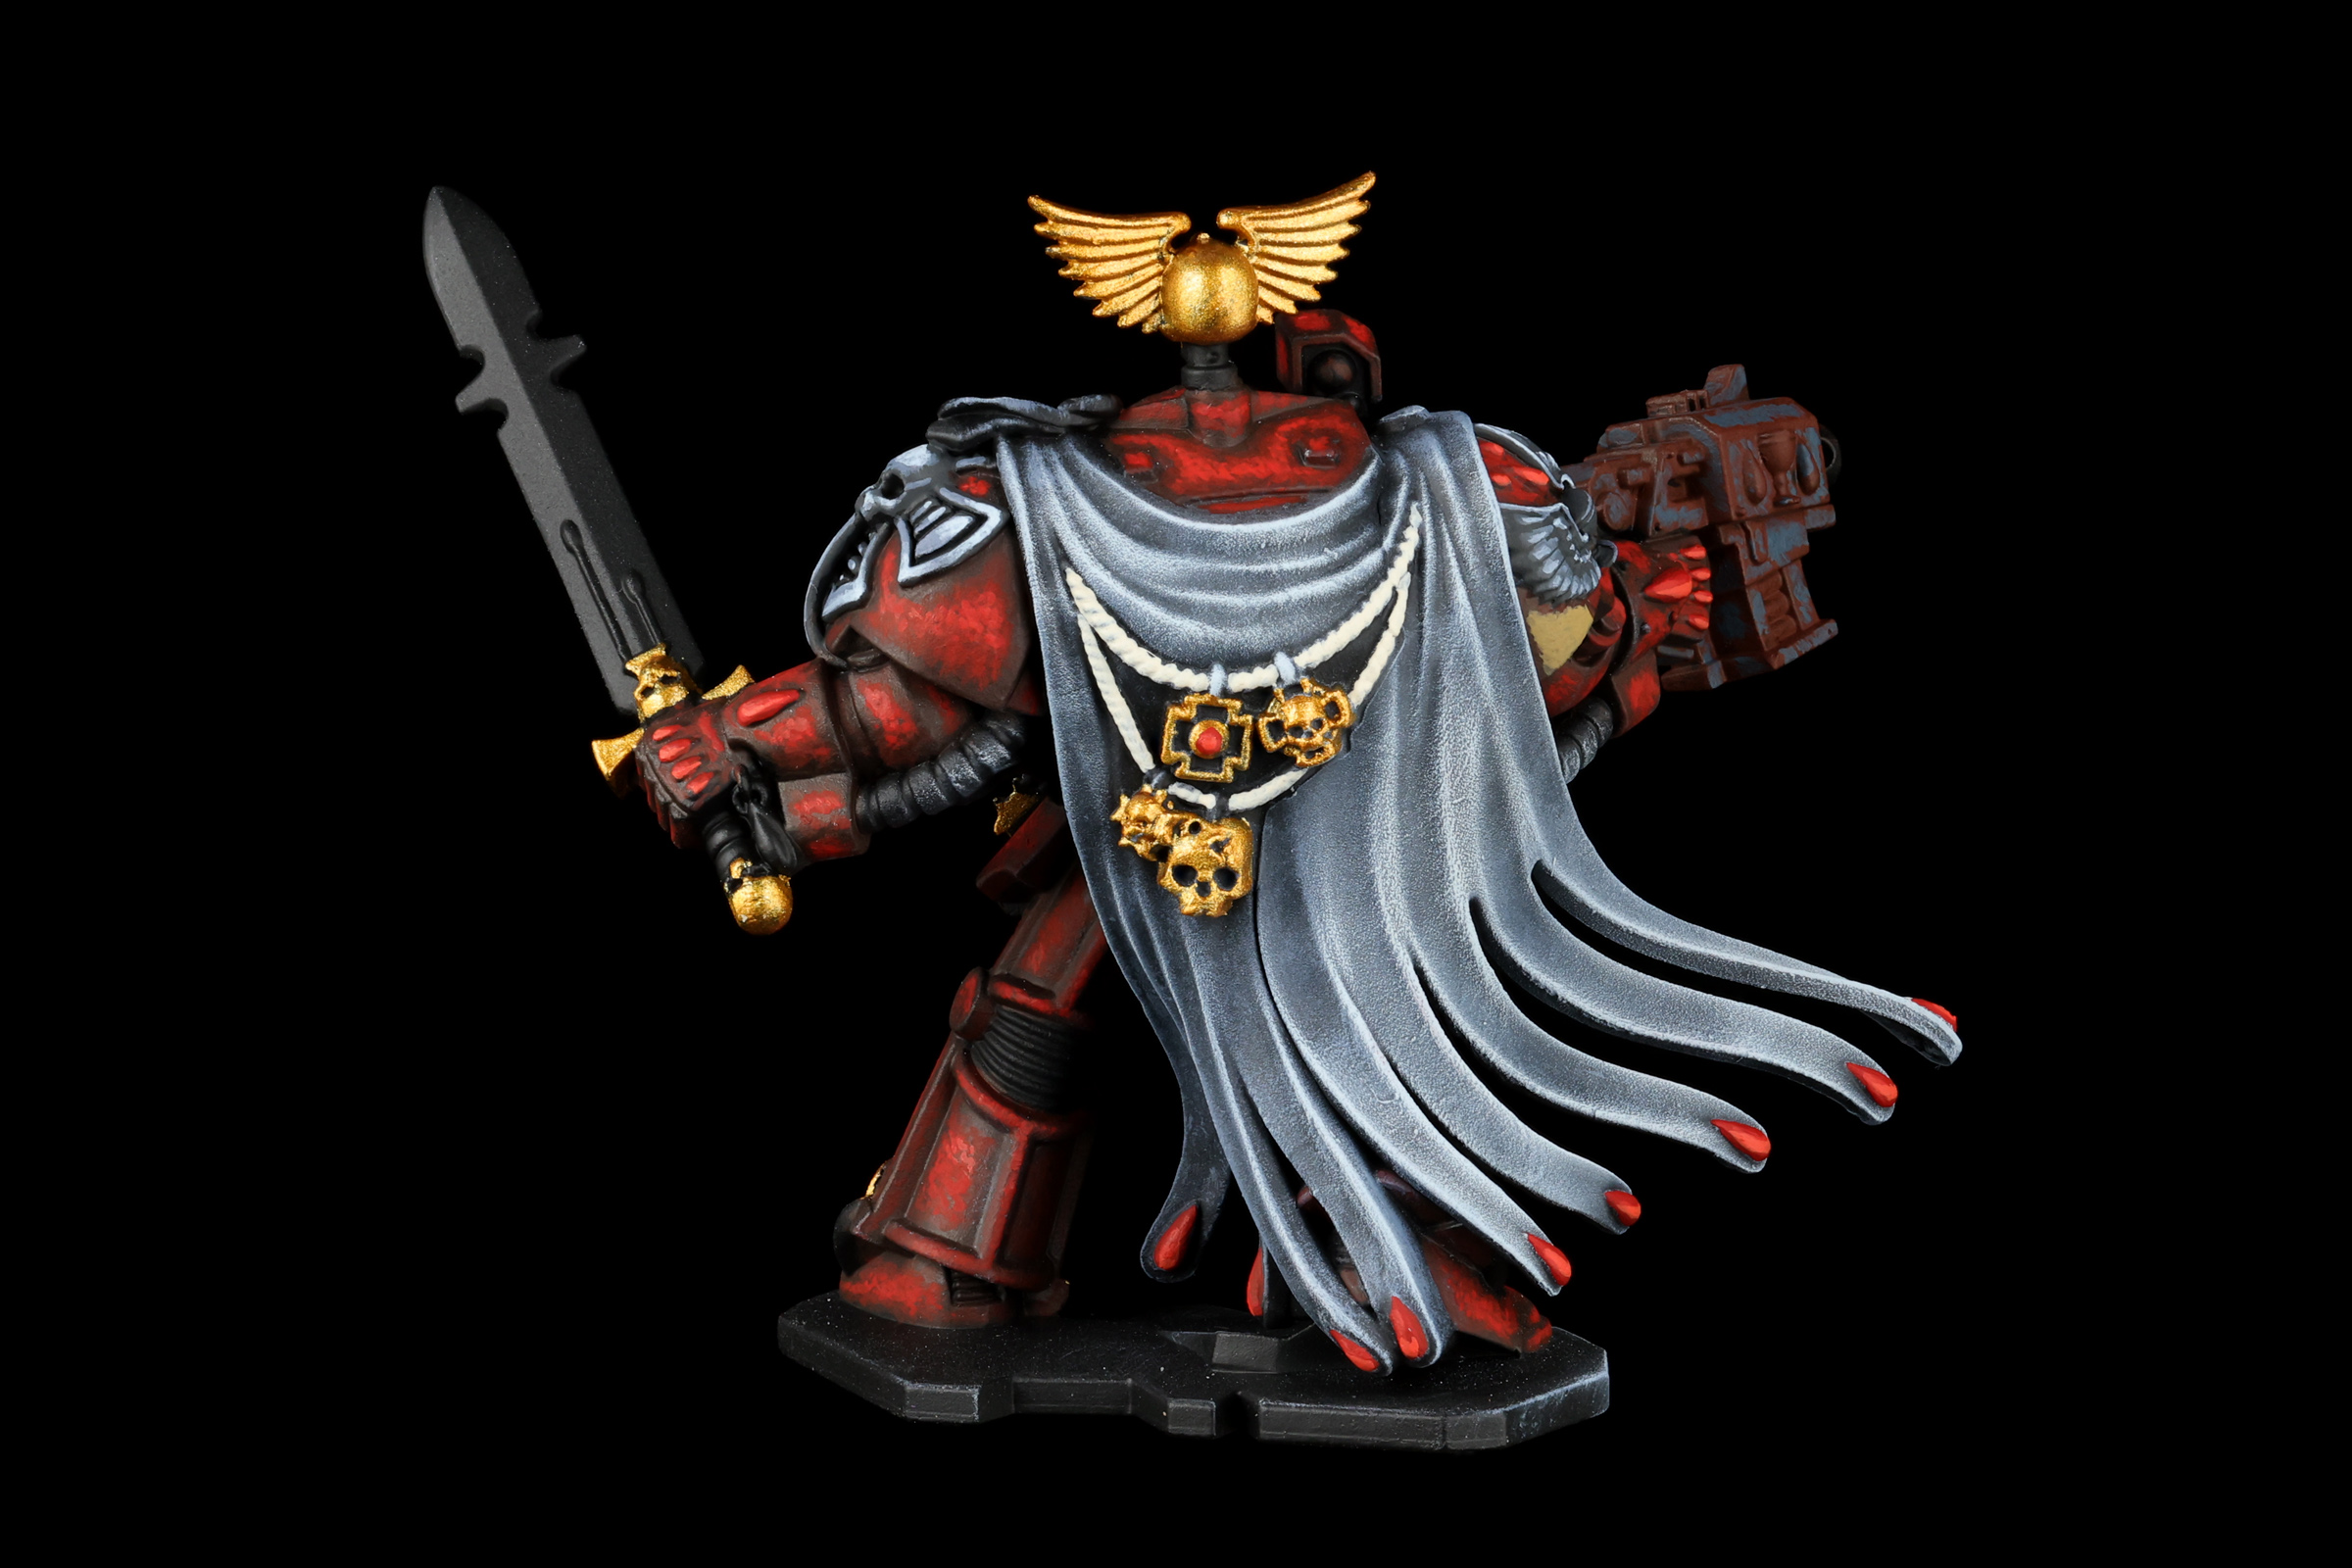
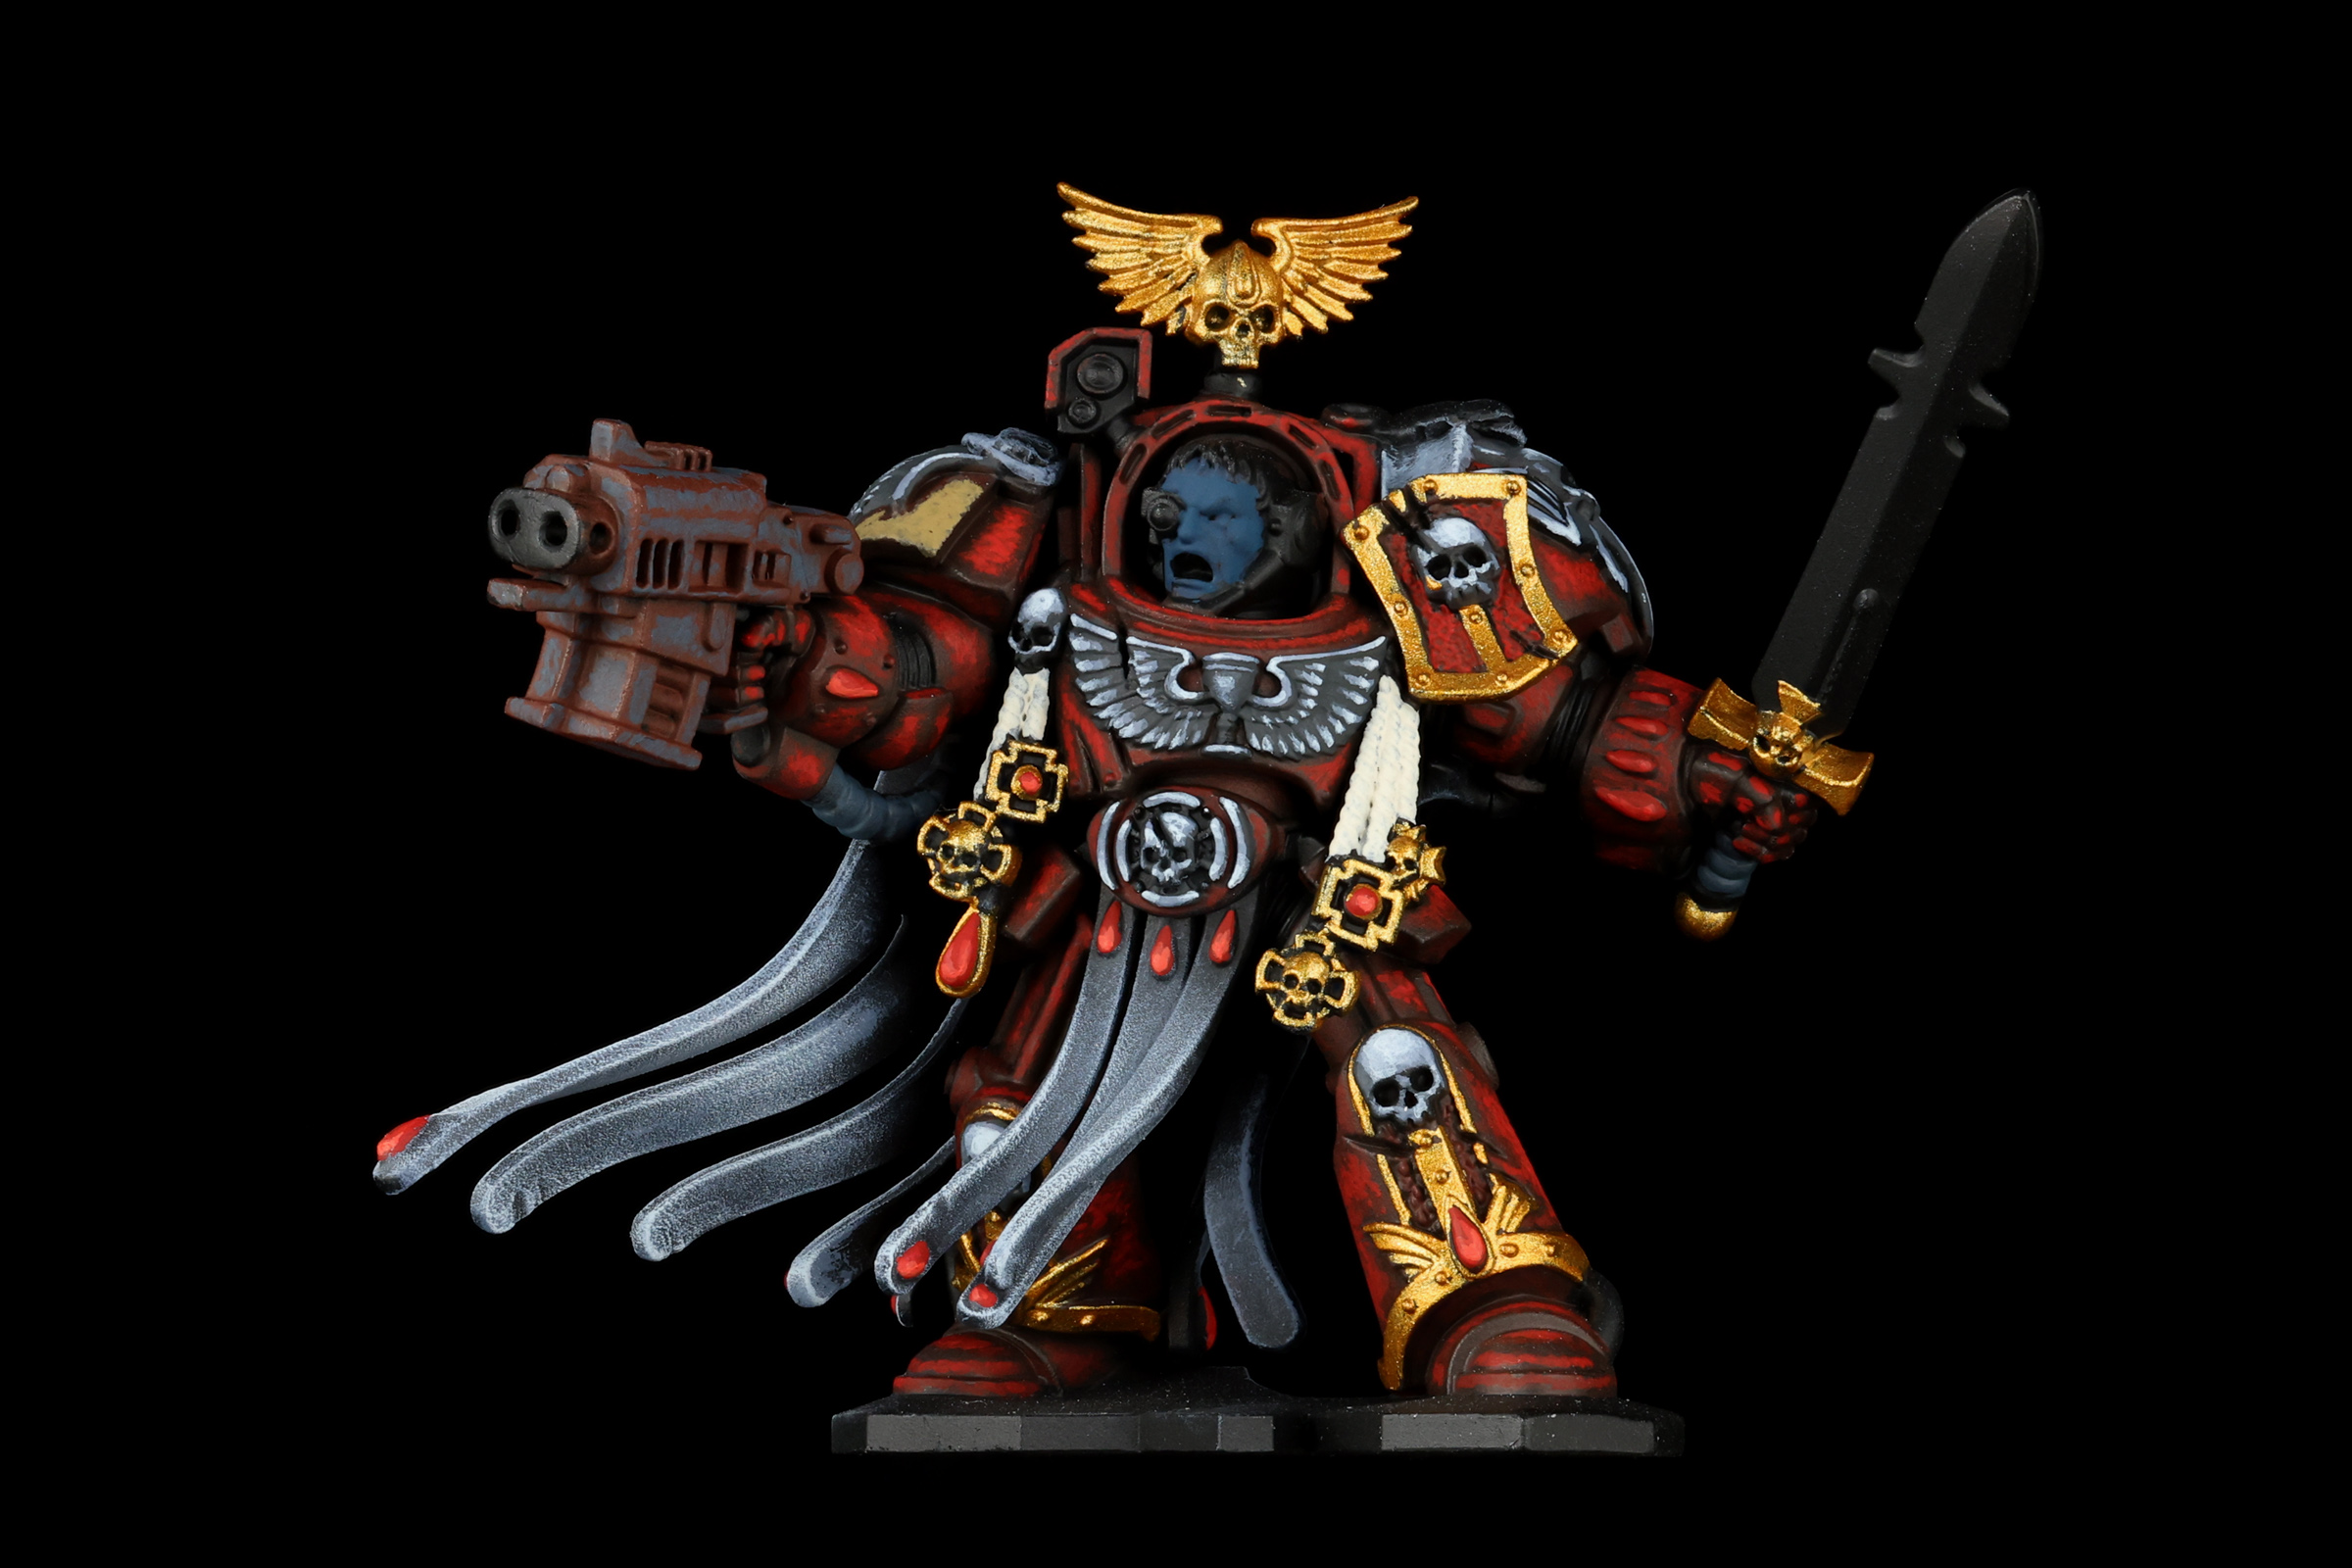
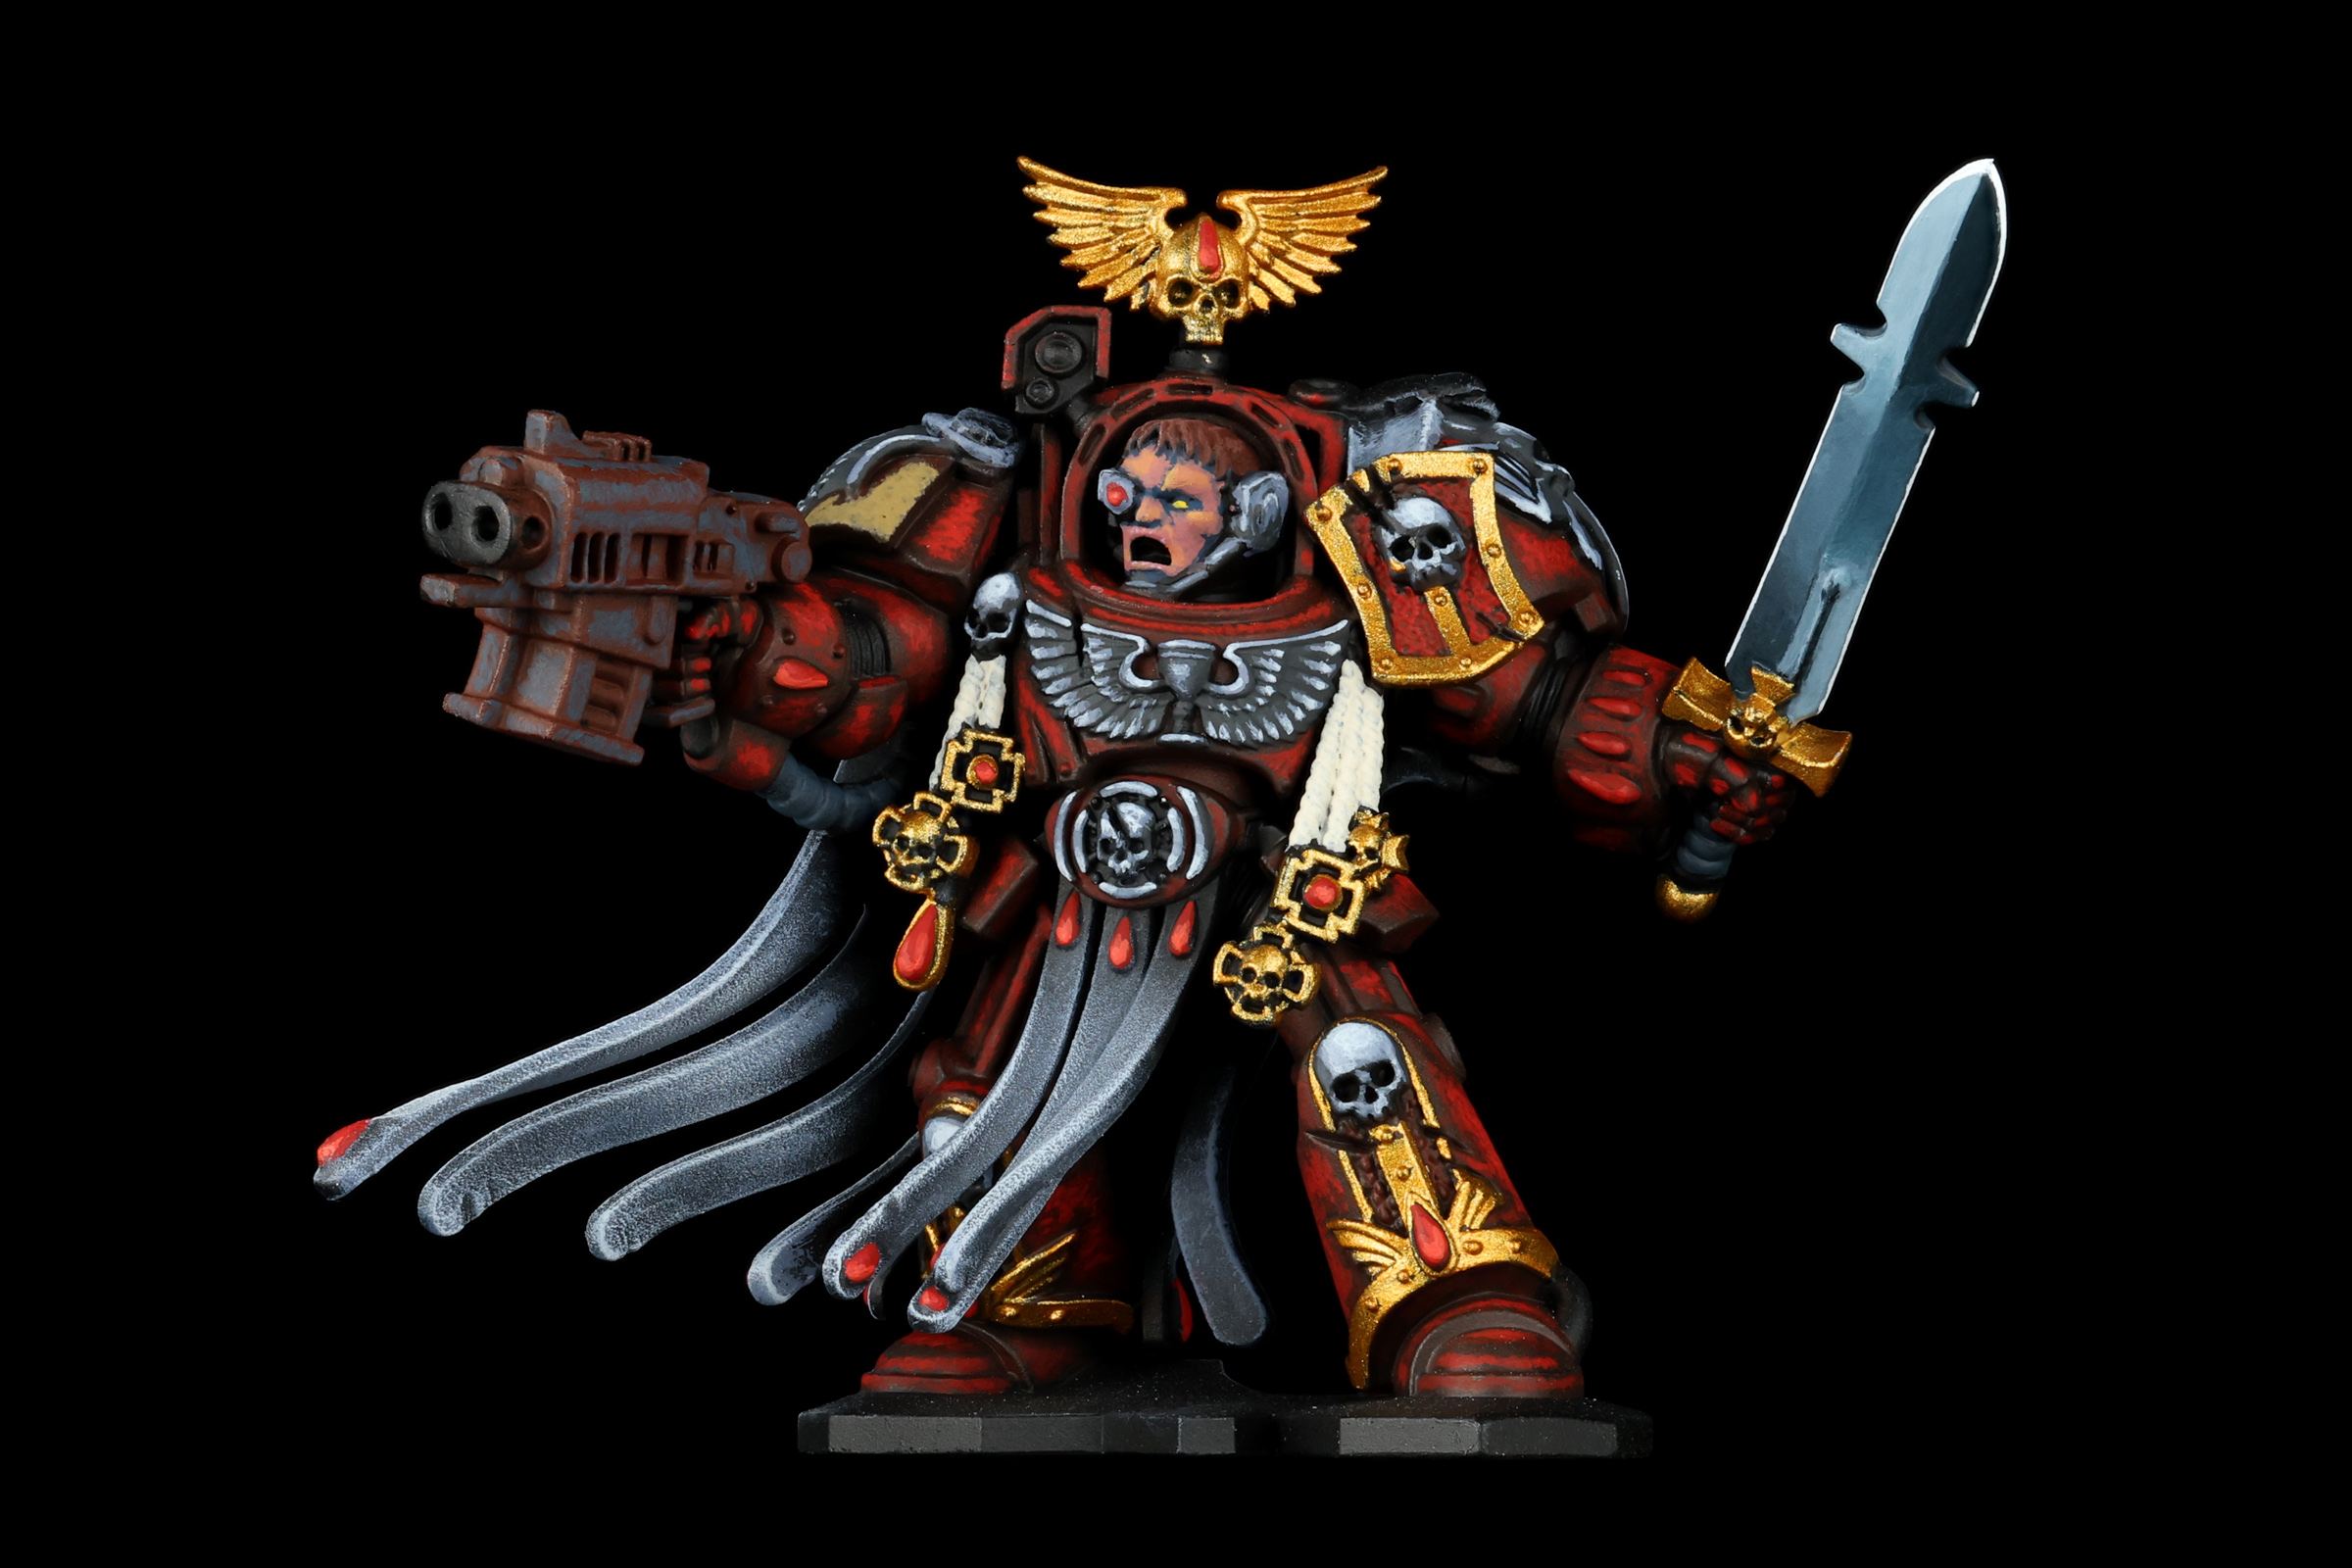
Let's go old school. Let's go back to a distant Space Hulk, riddled with Tyranids and treasure, with Sergeant Lorenzo of the Blood Angels.
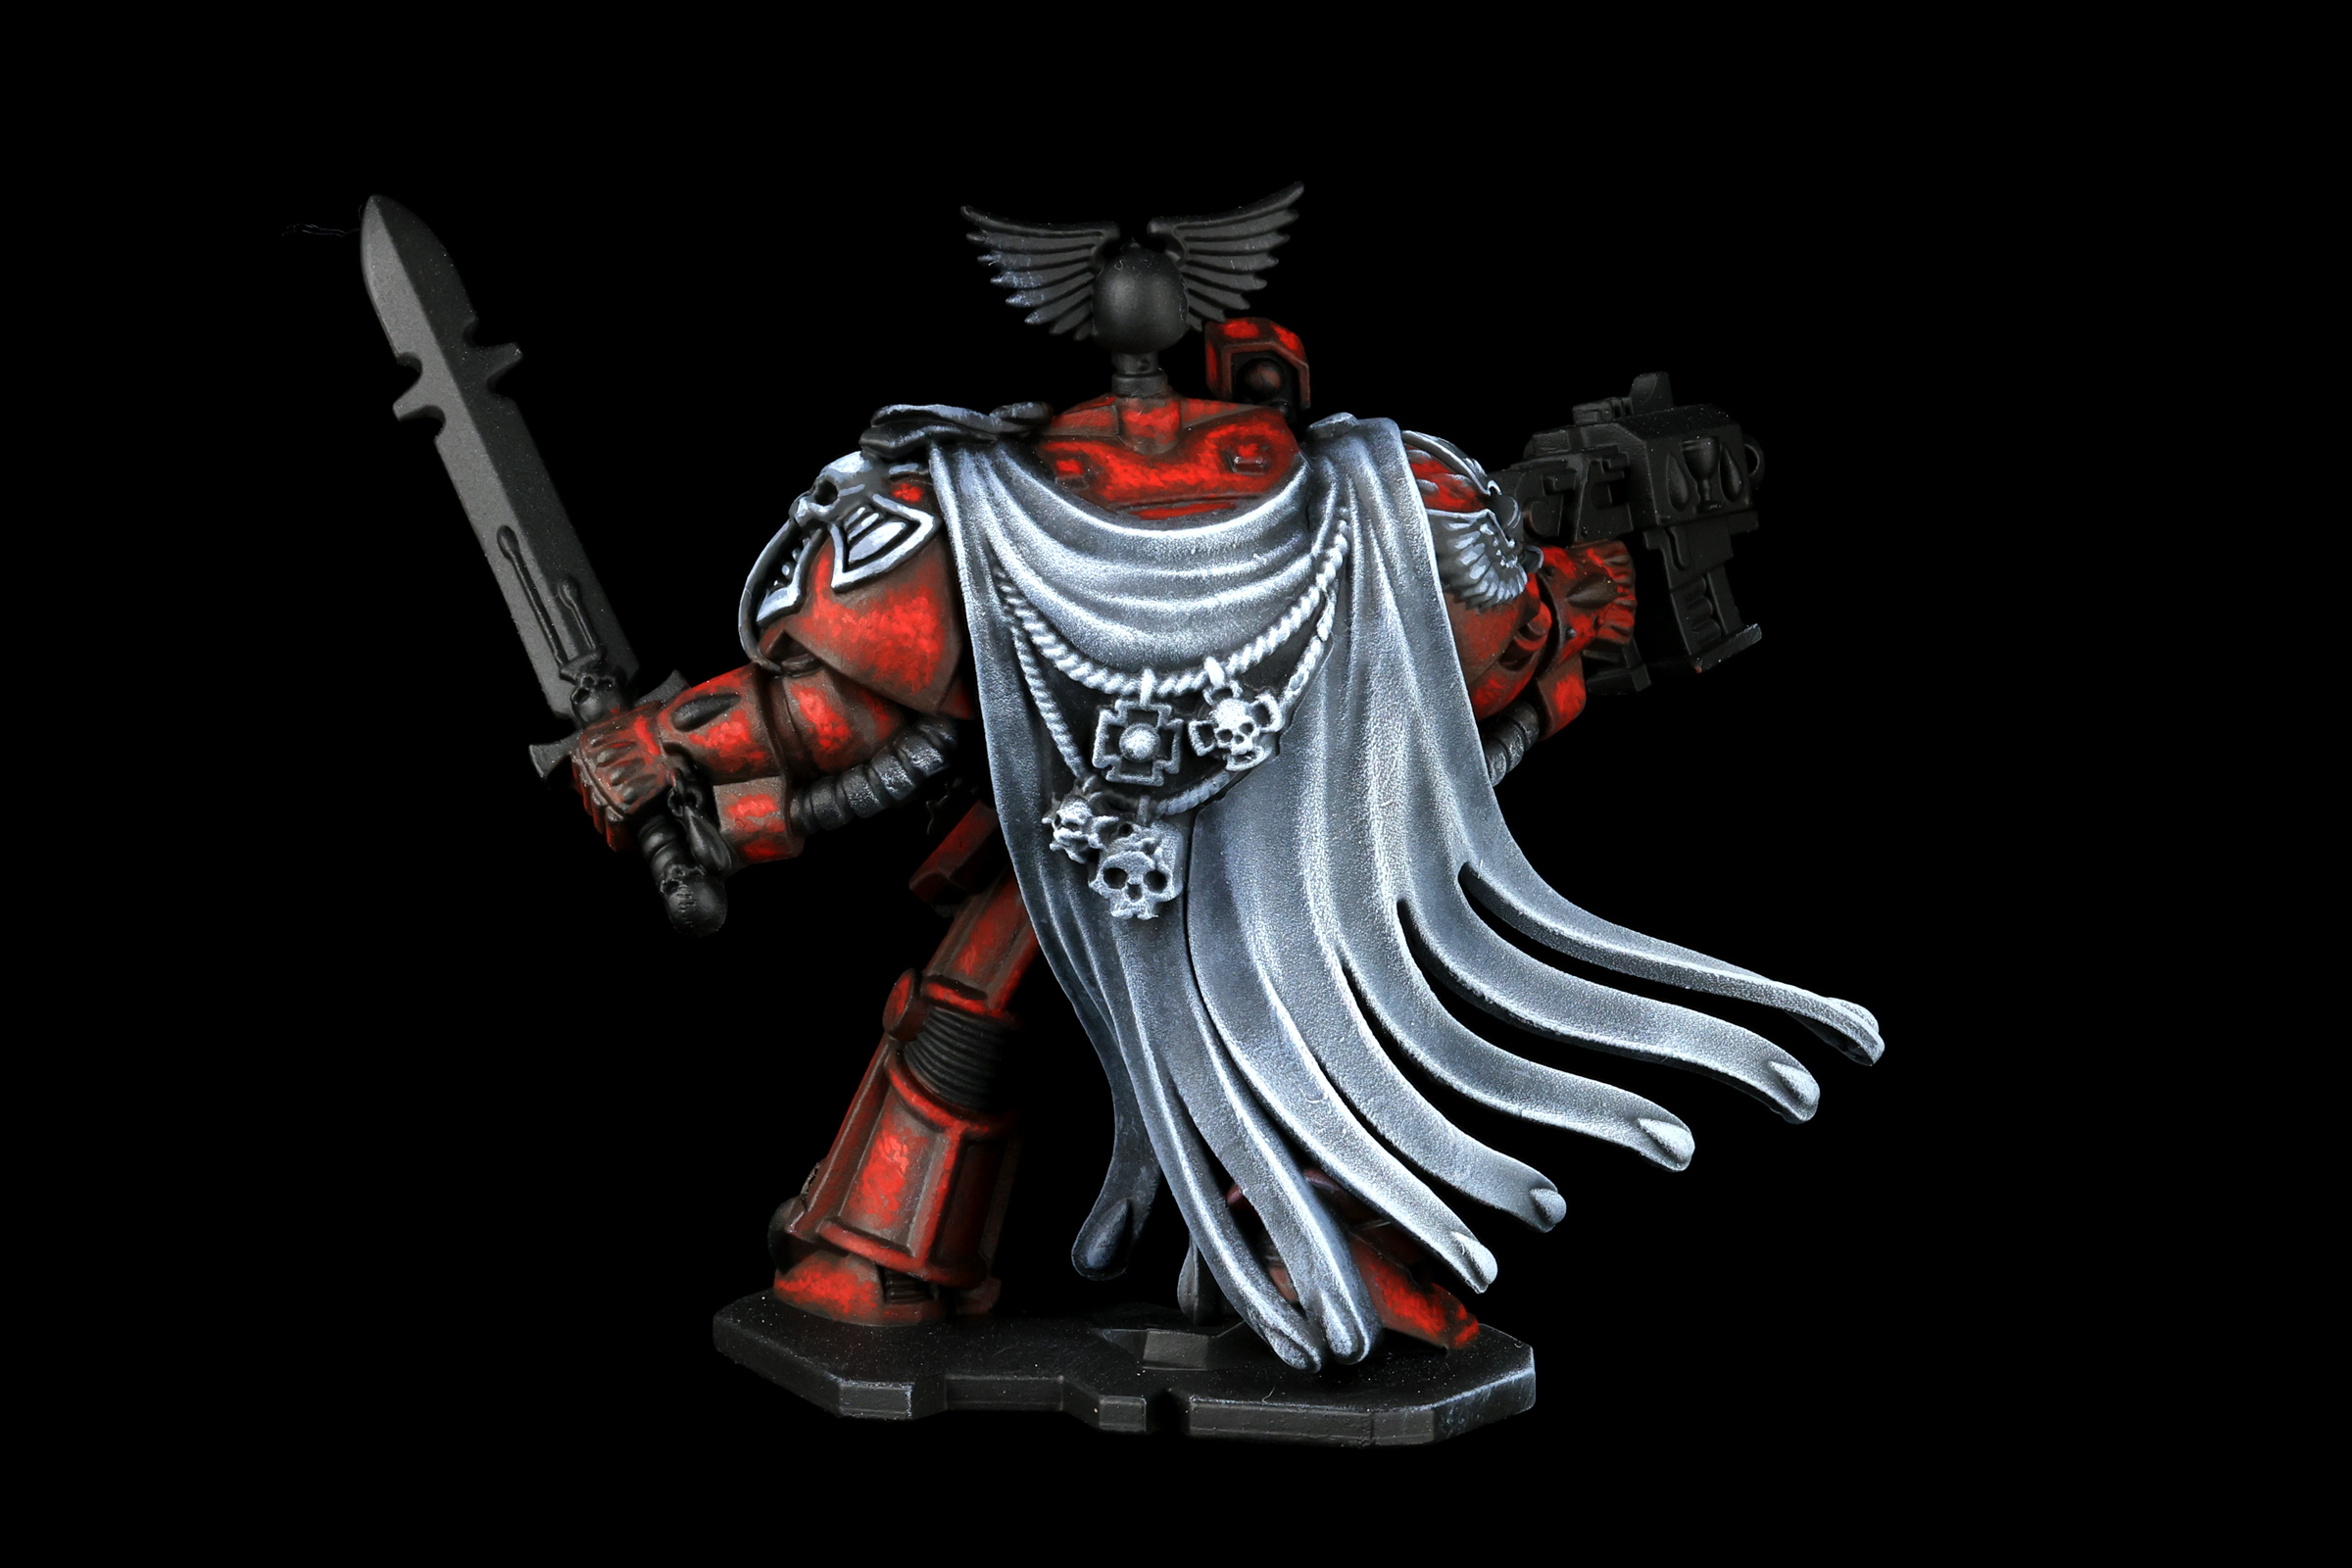
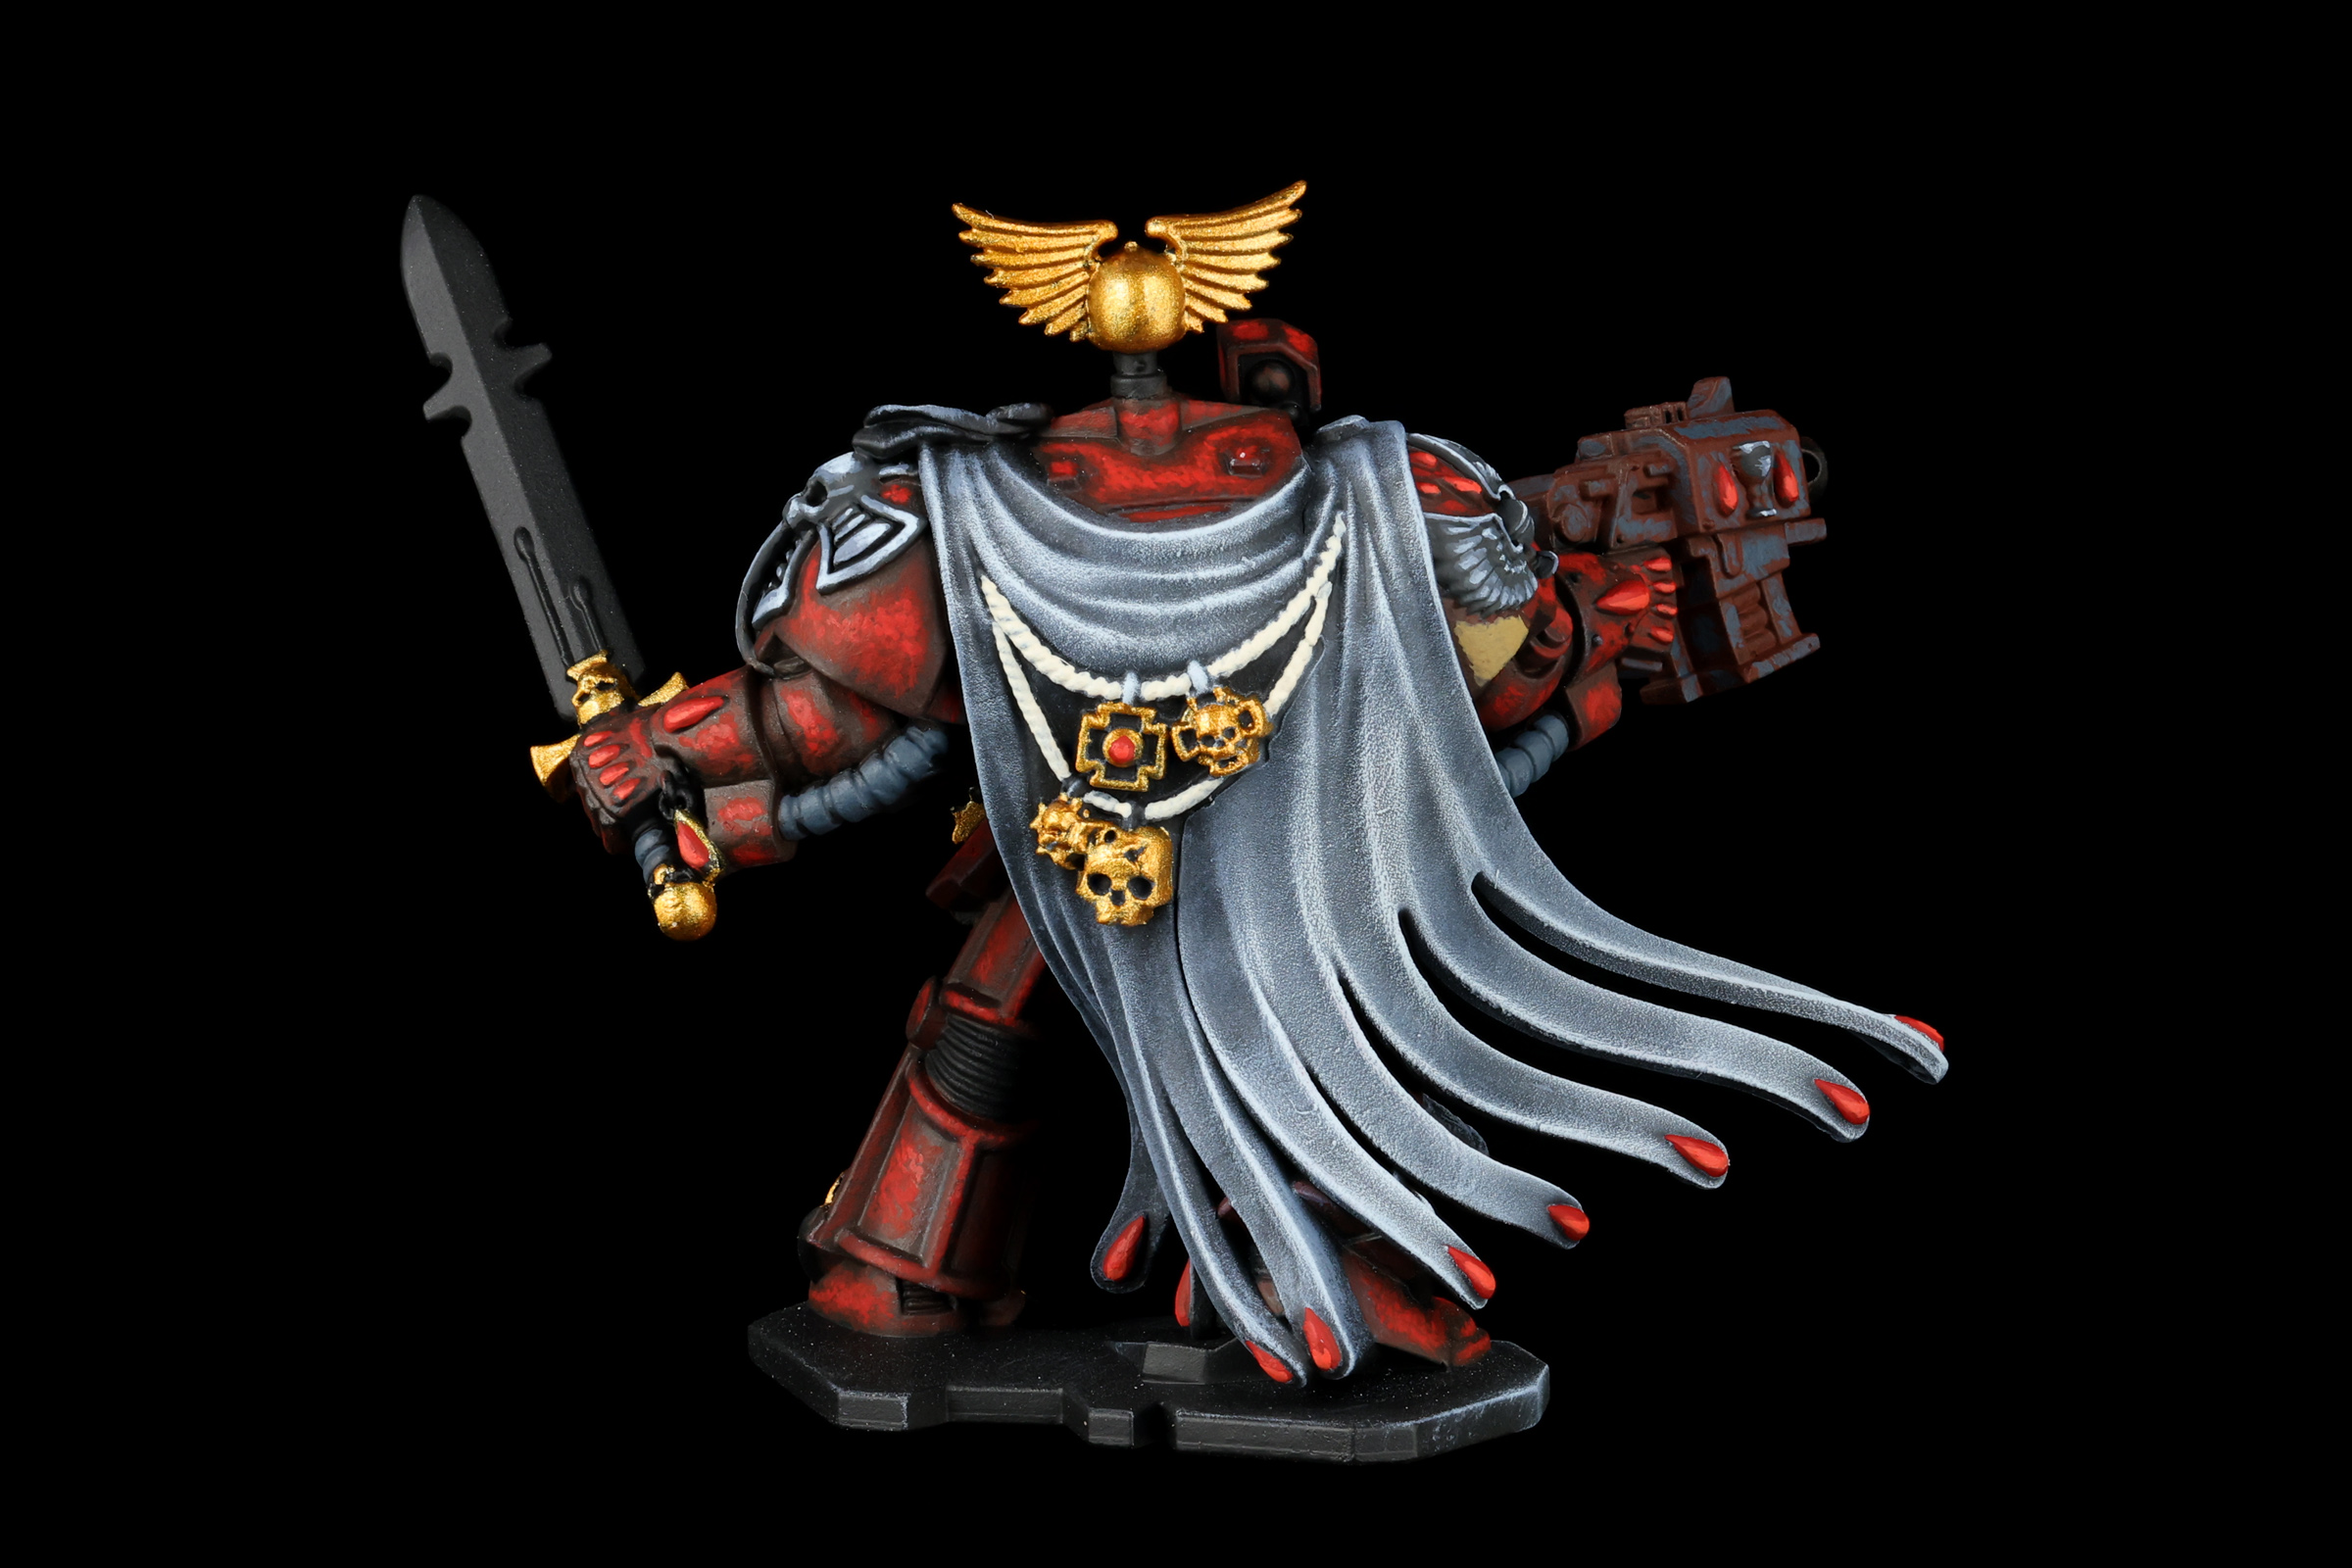
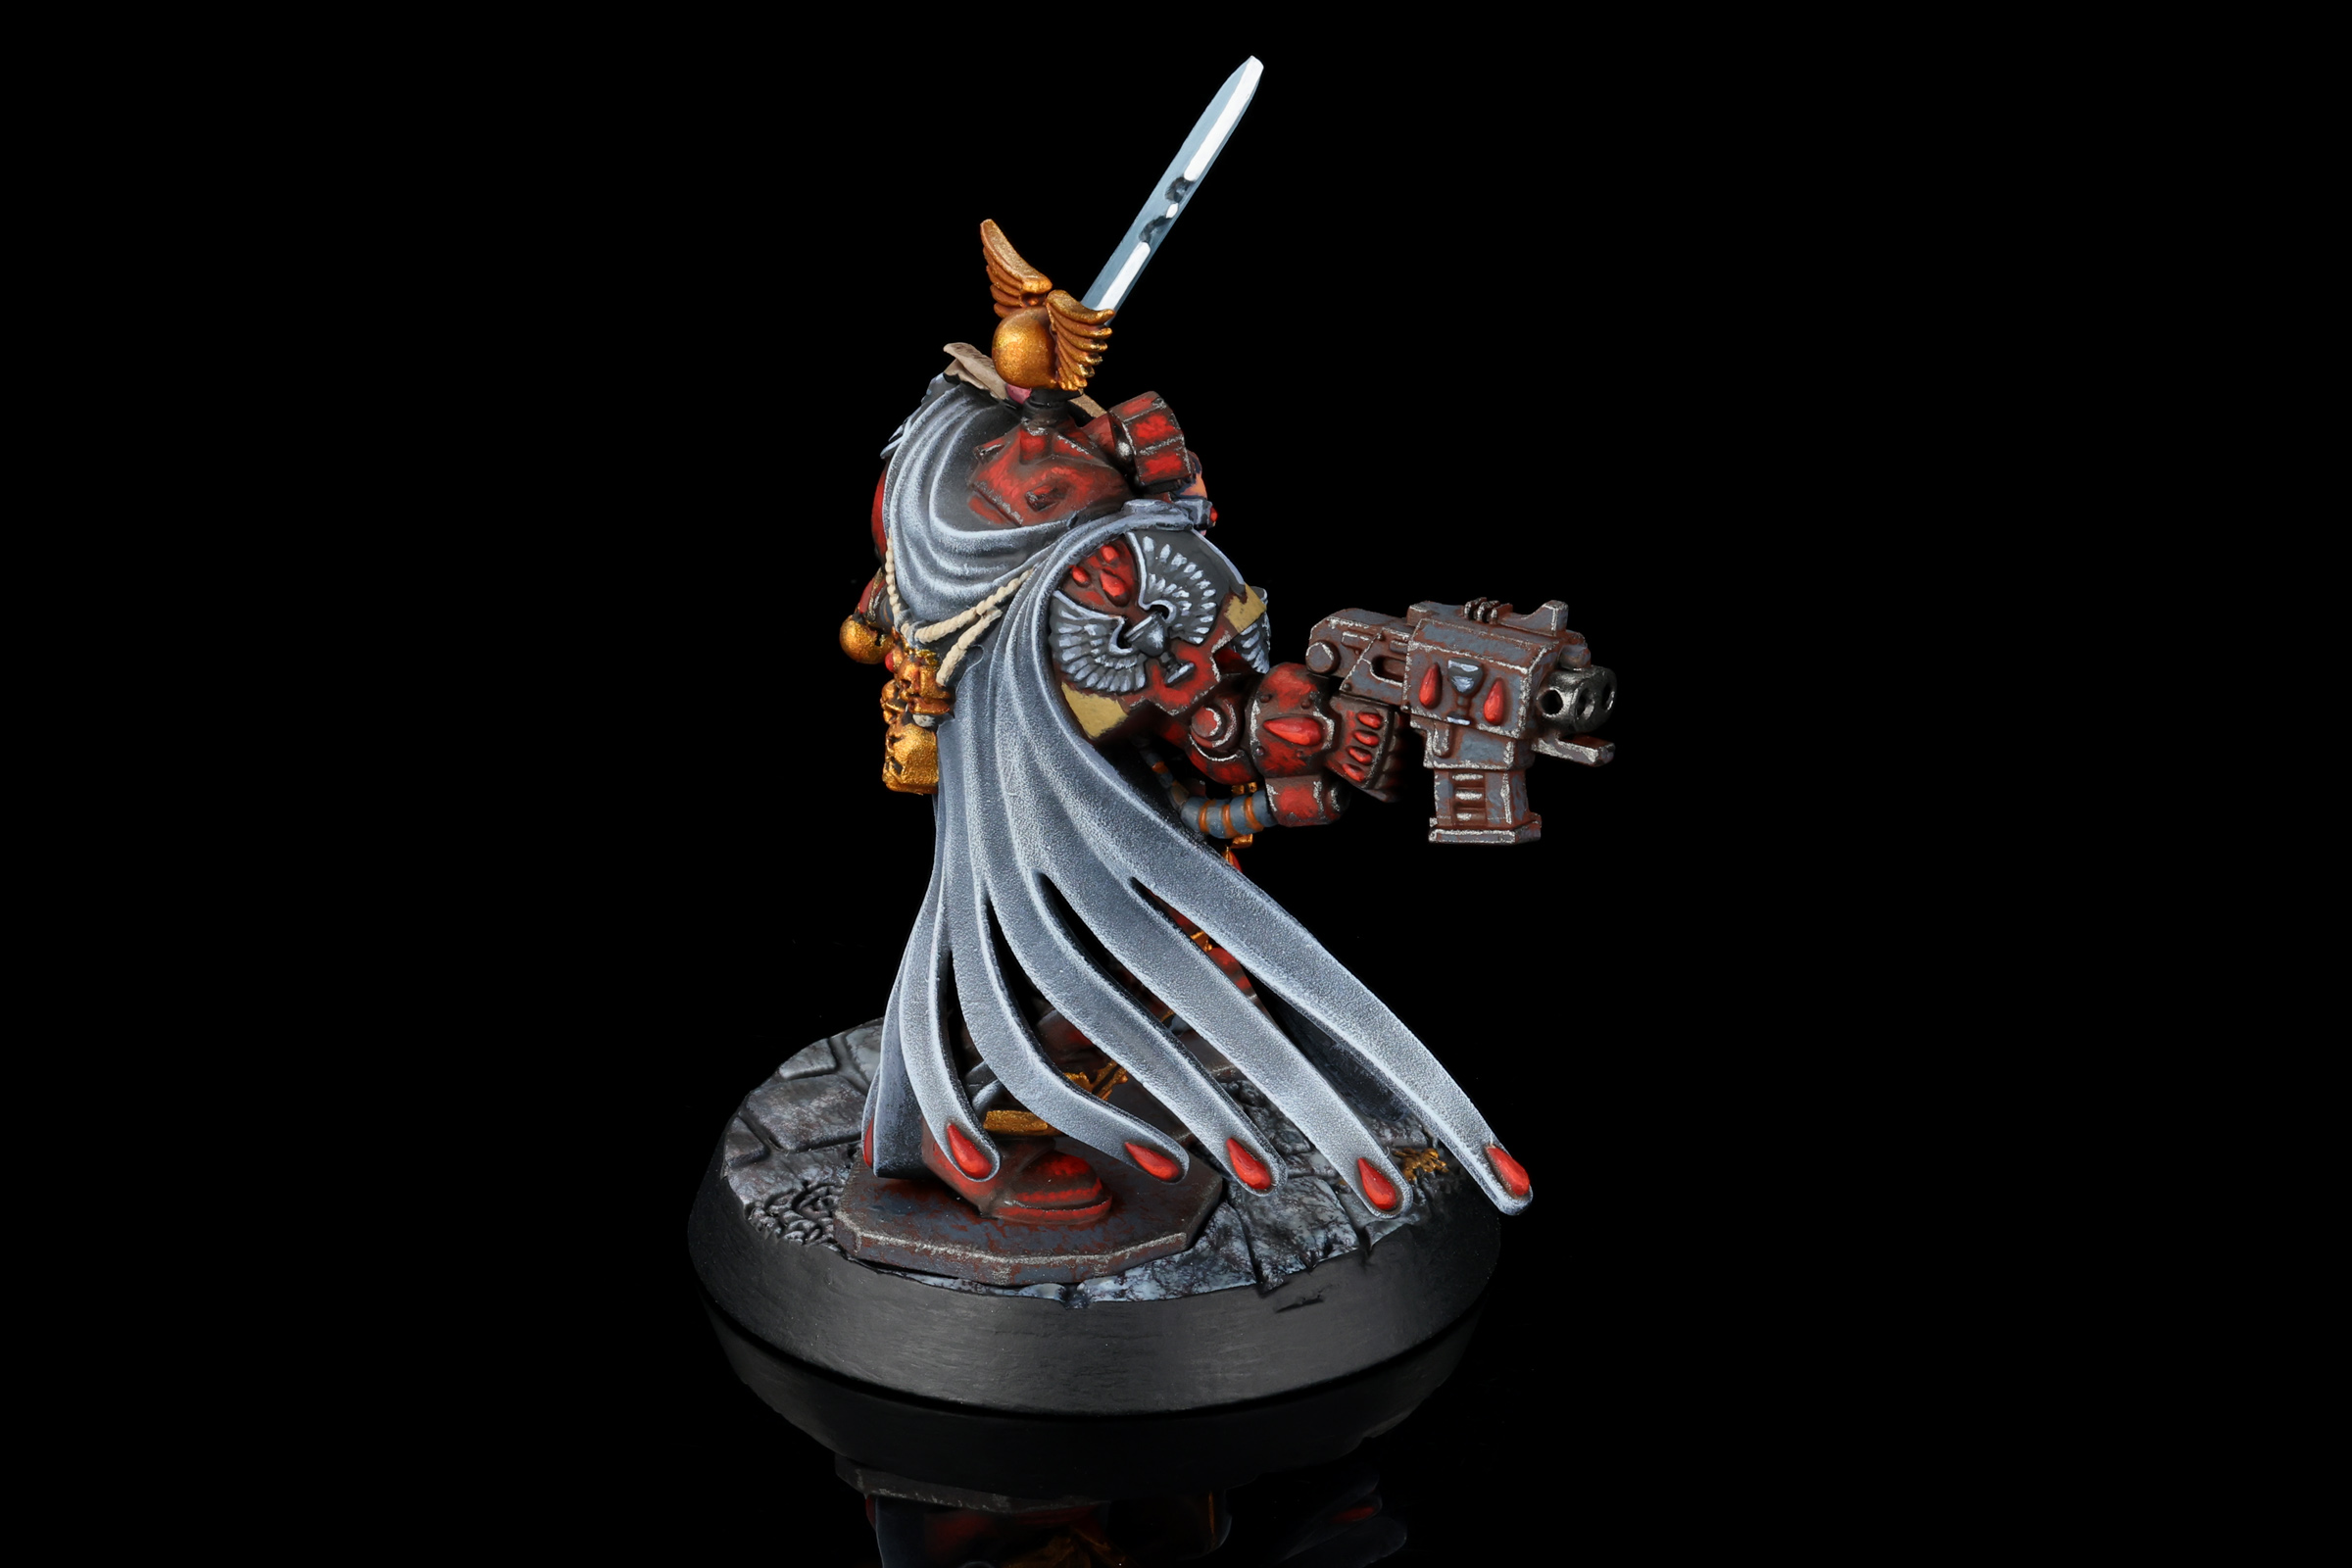
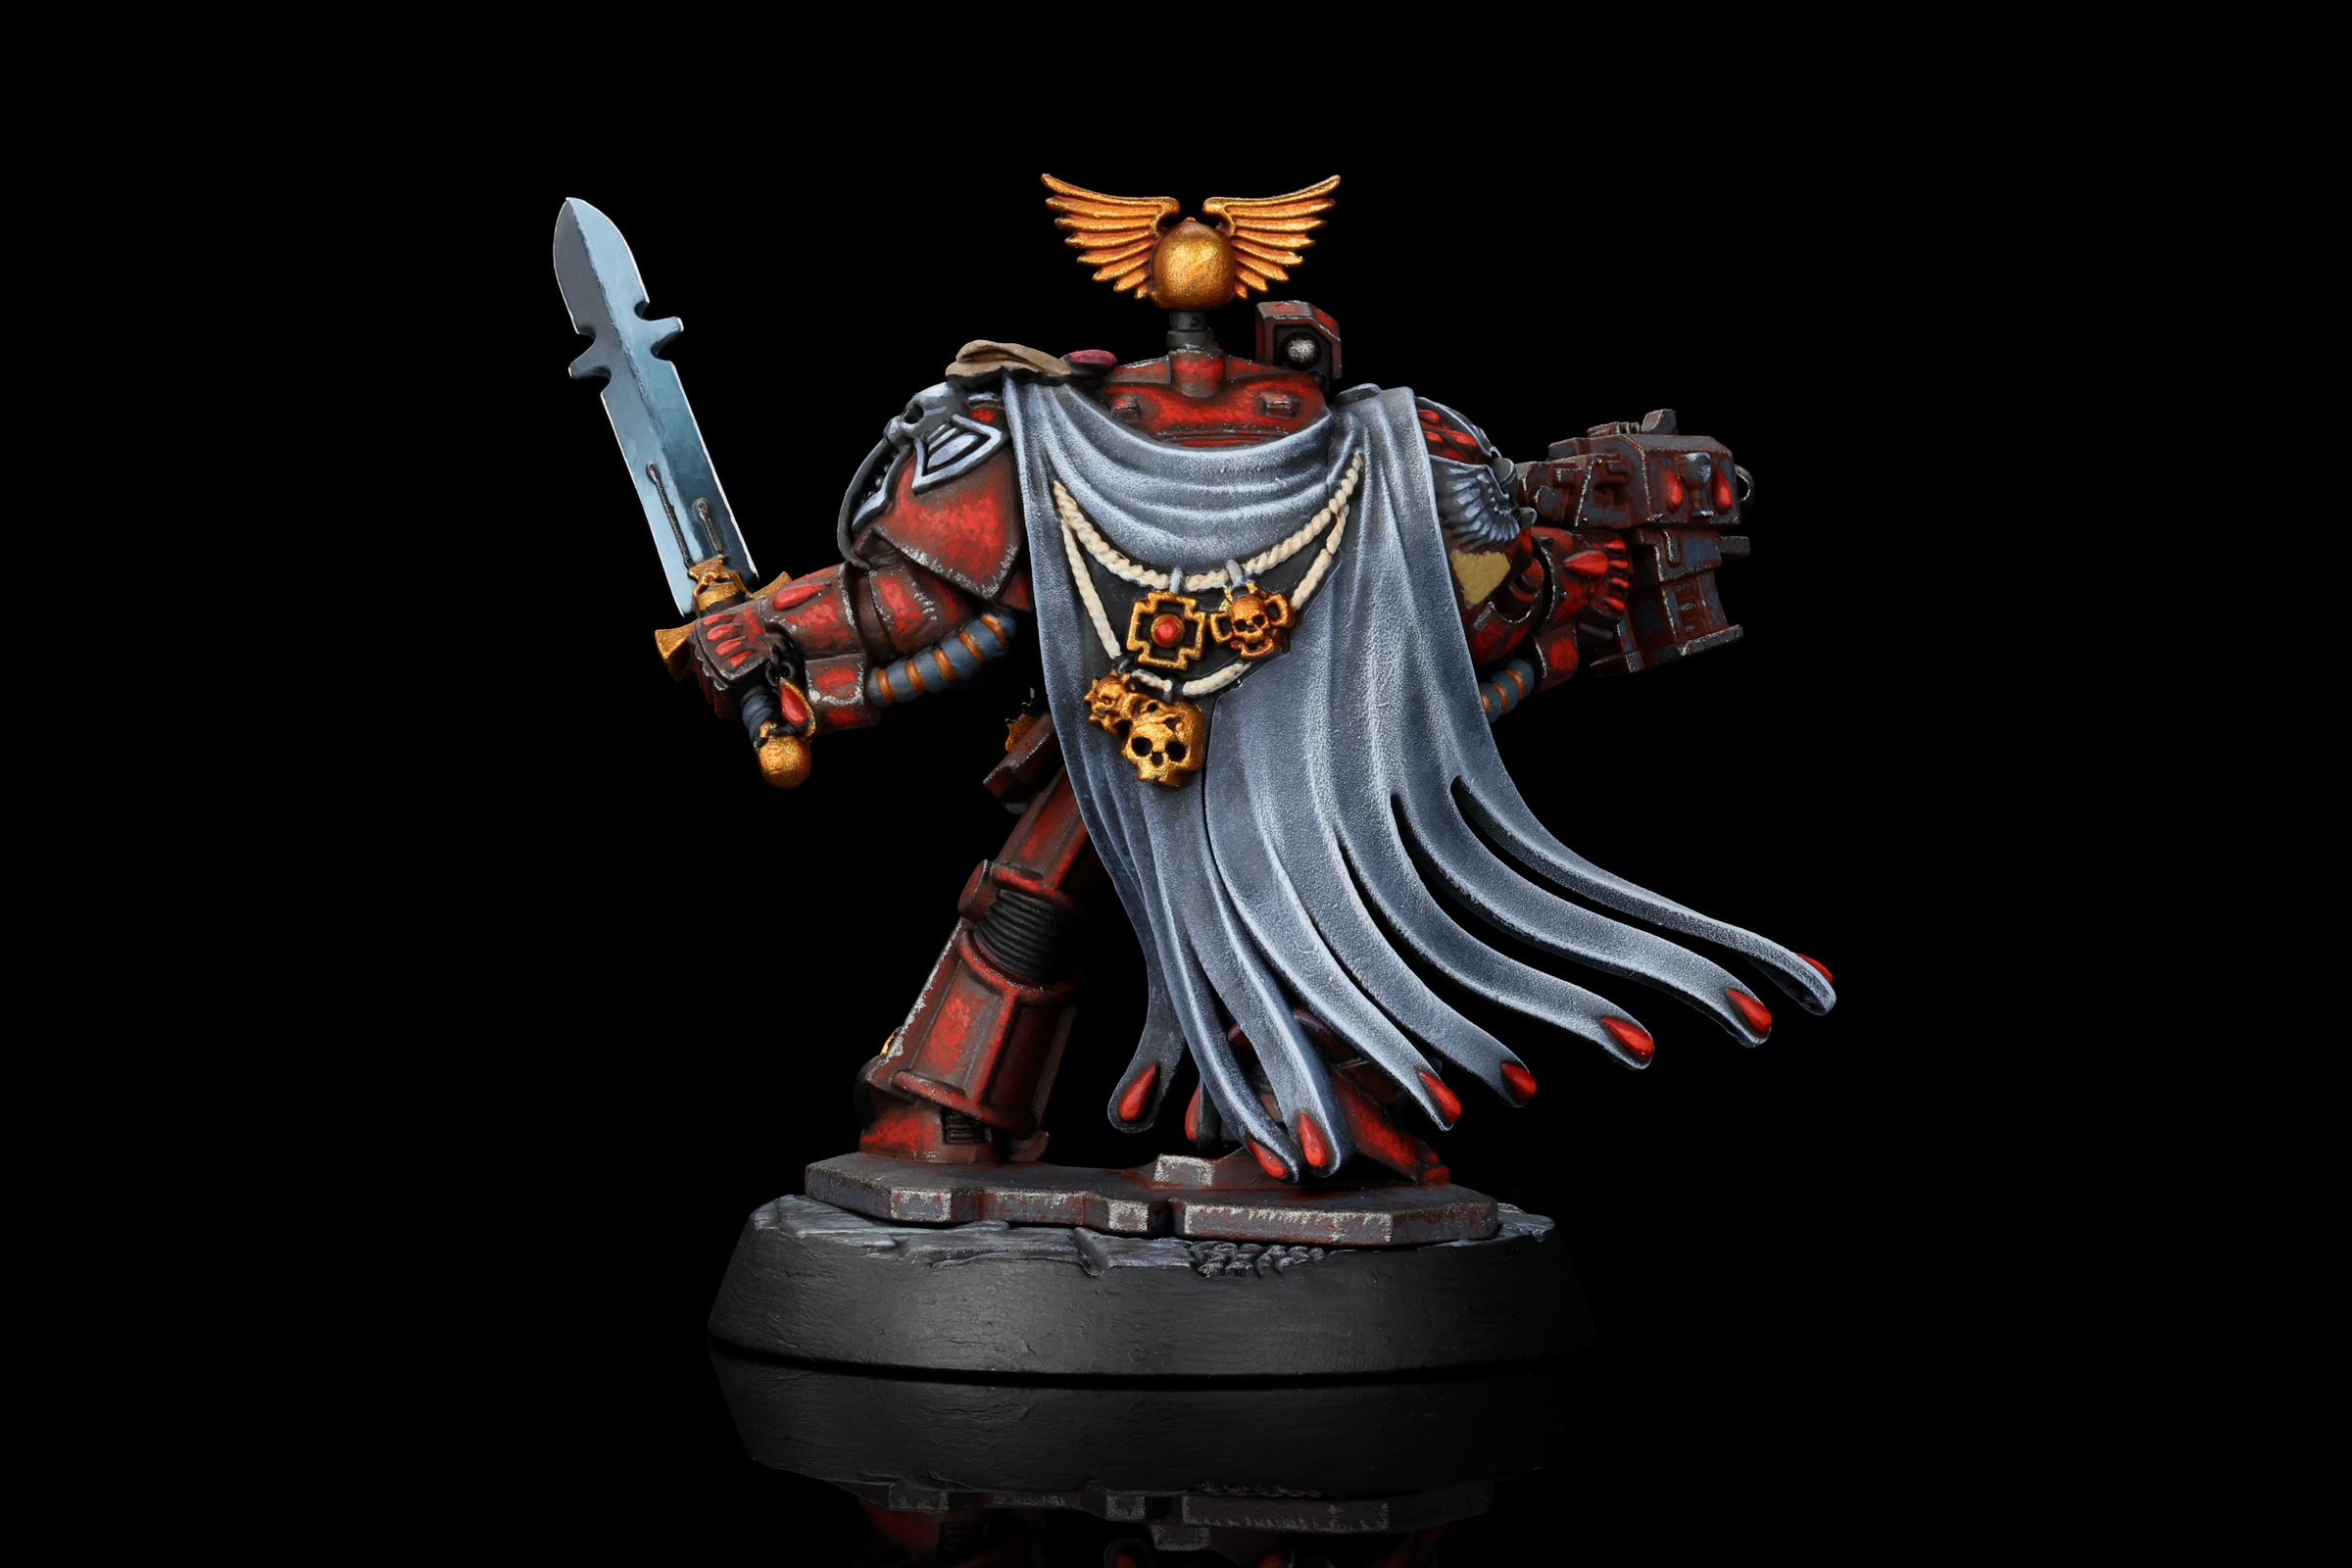
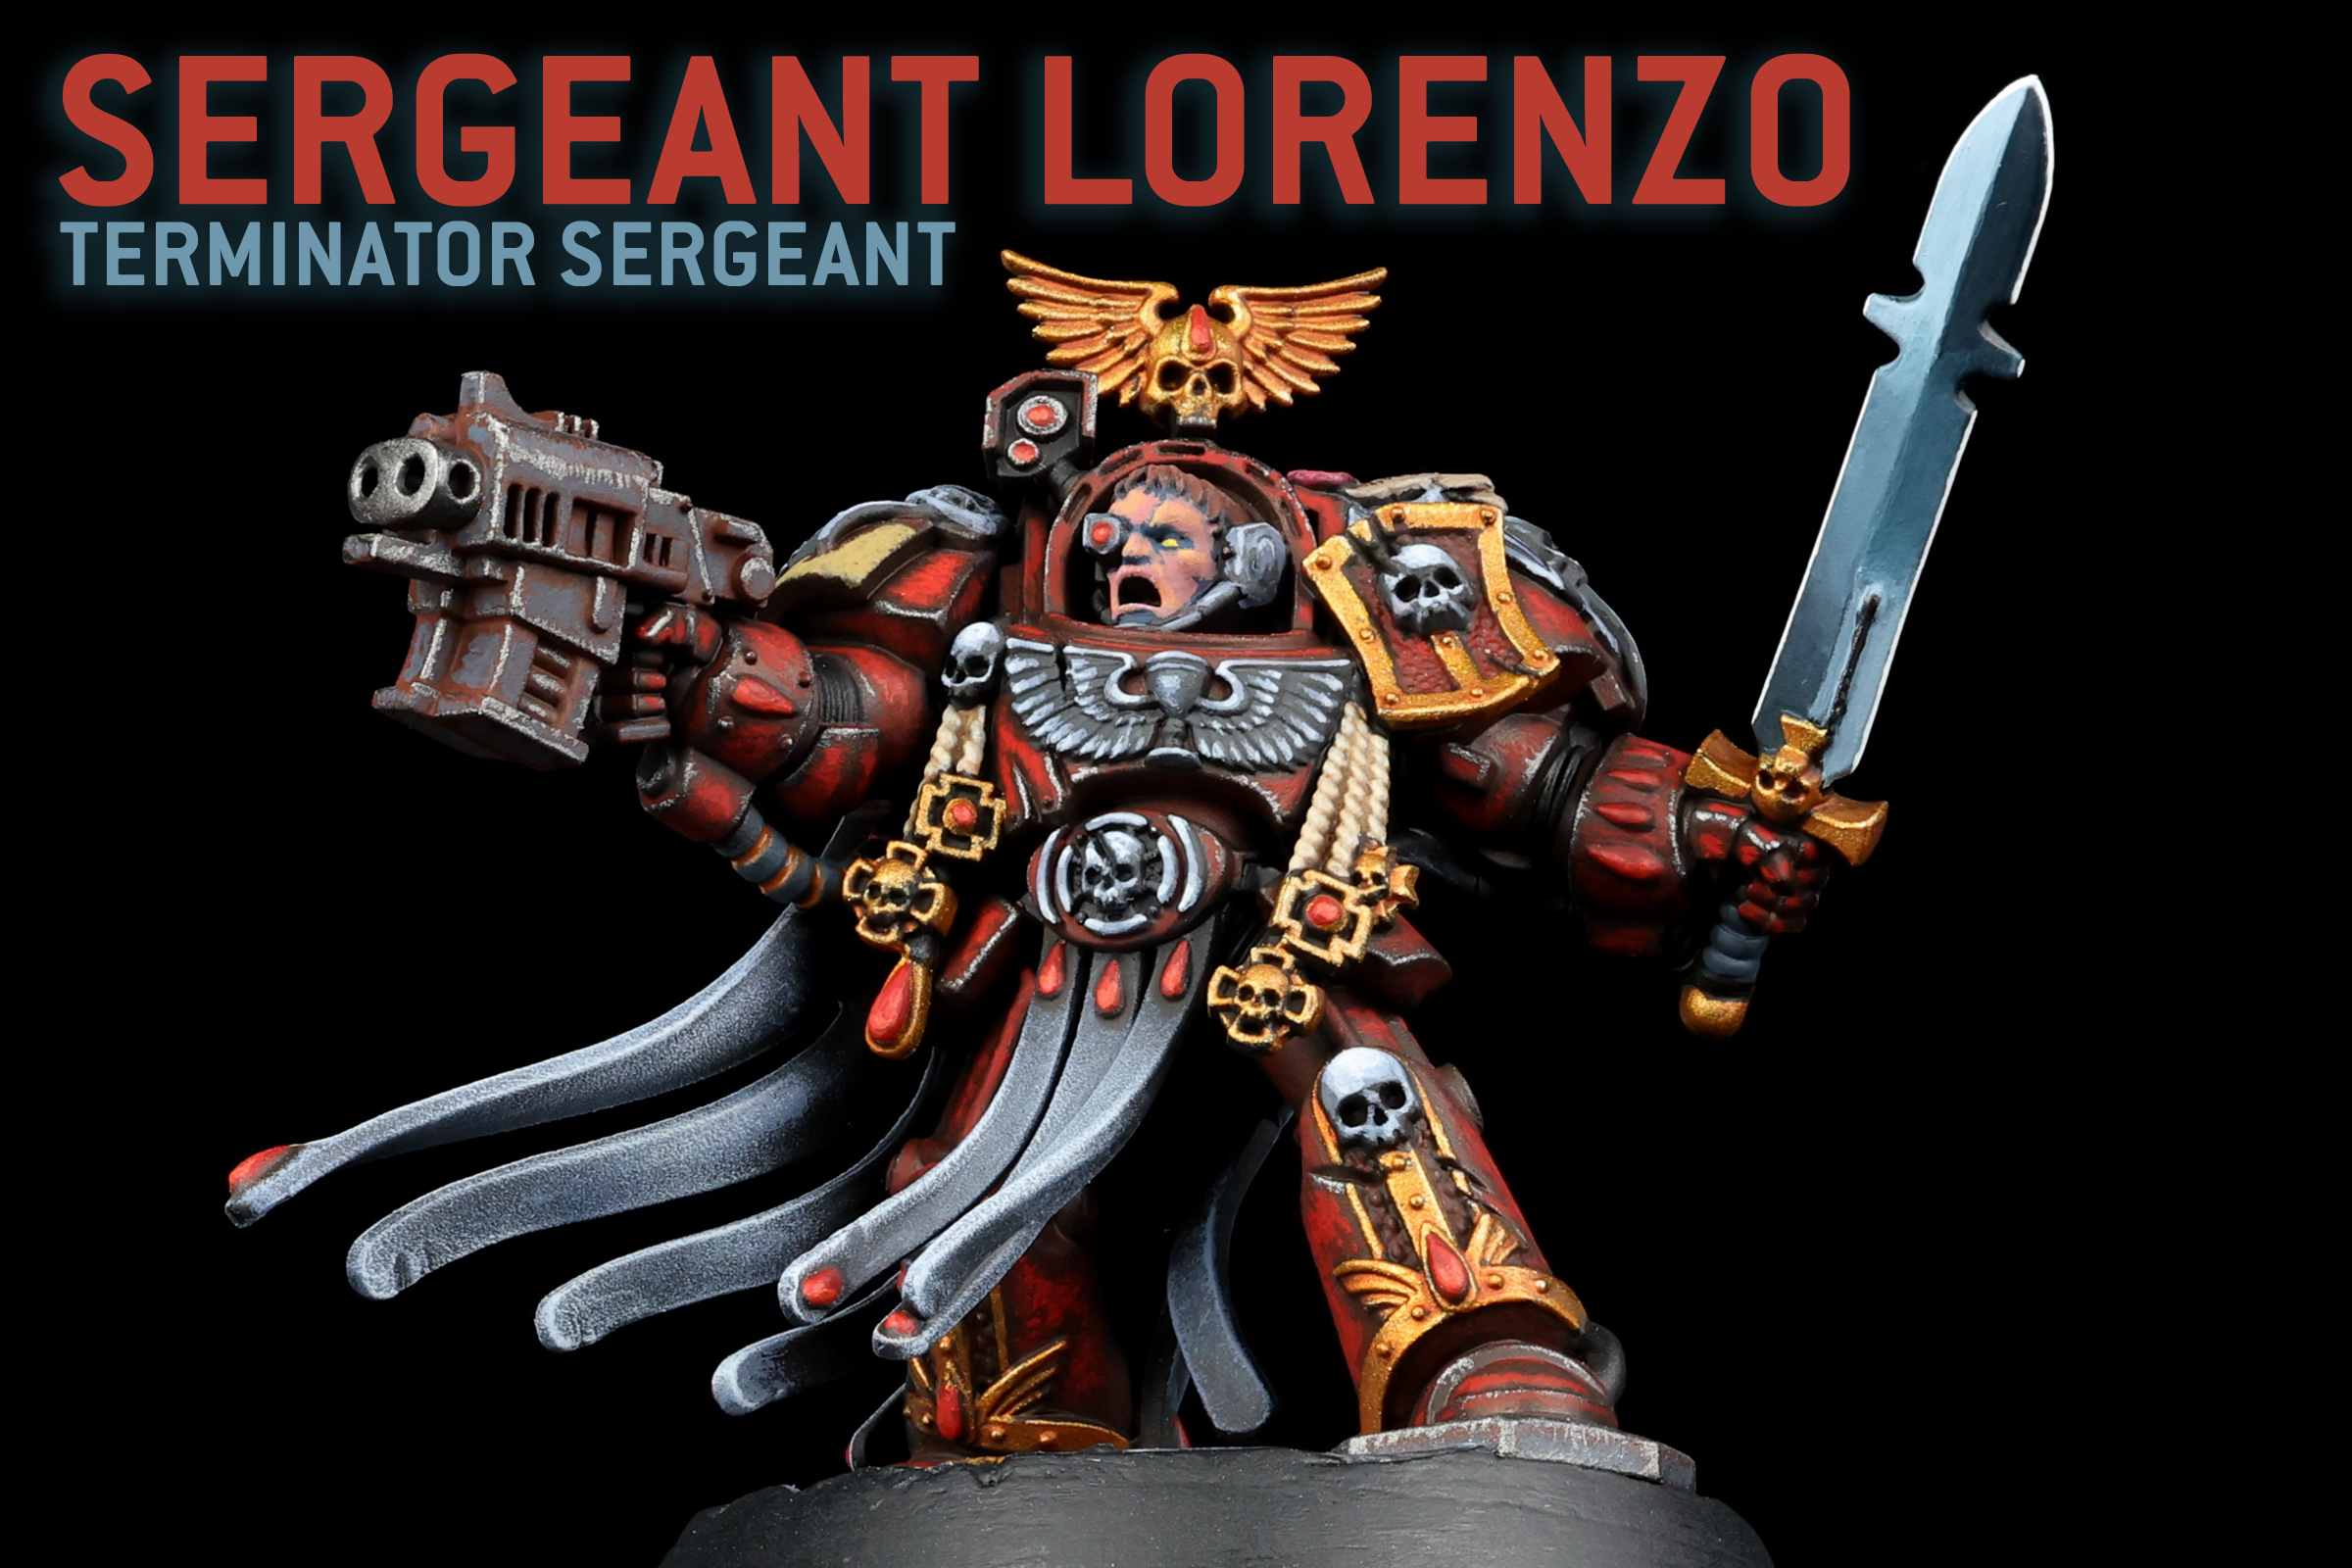 Sergeant Lorenzo, Terminator Sergeant. Credit: Pendulin
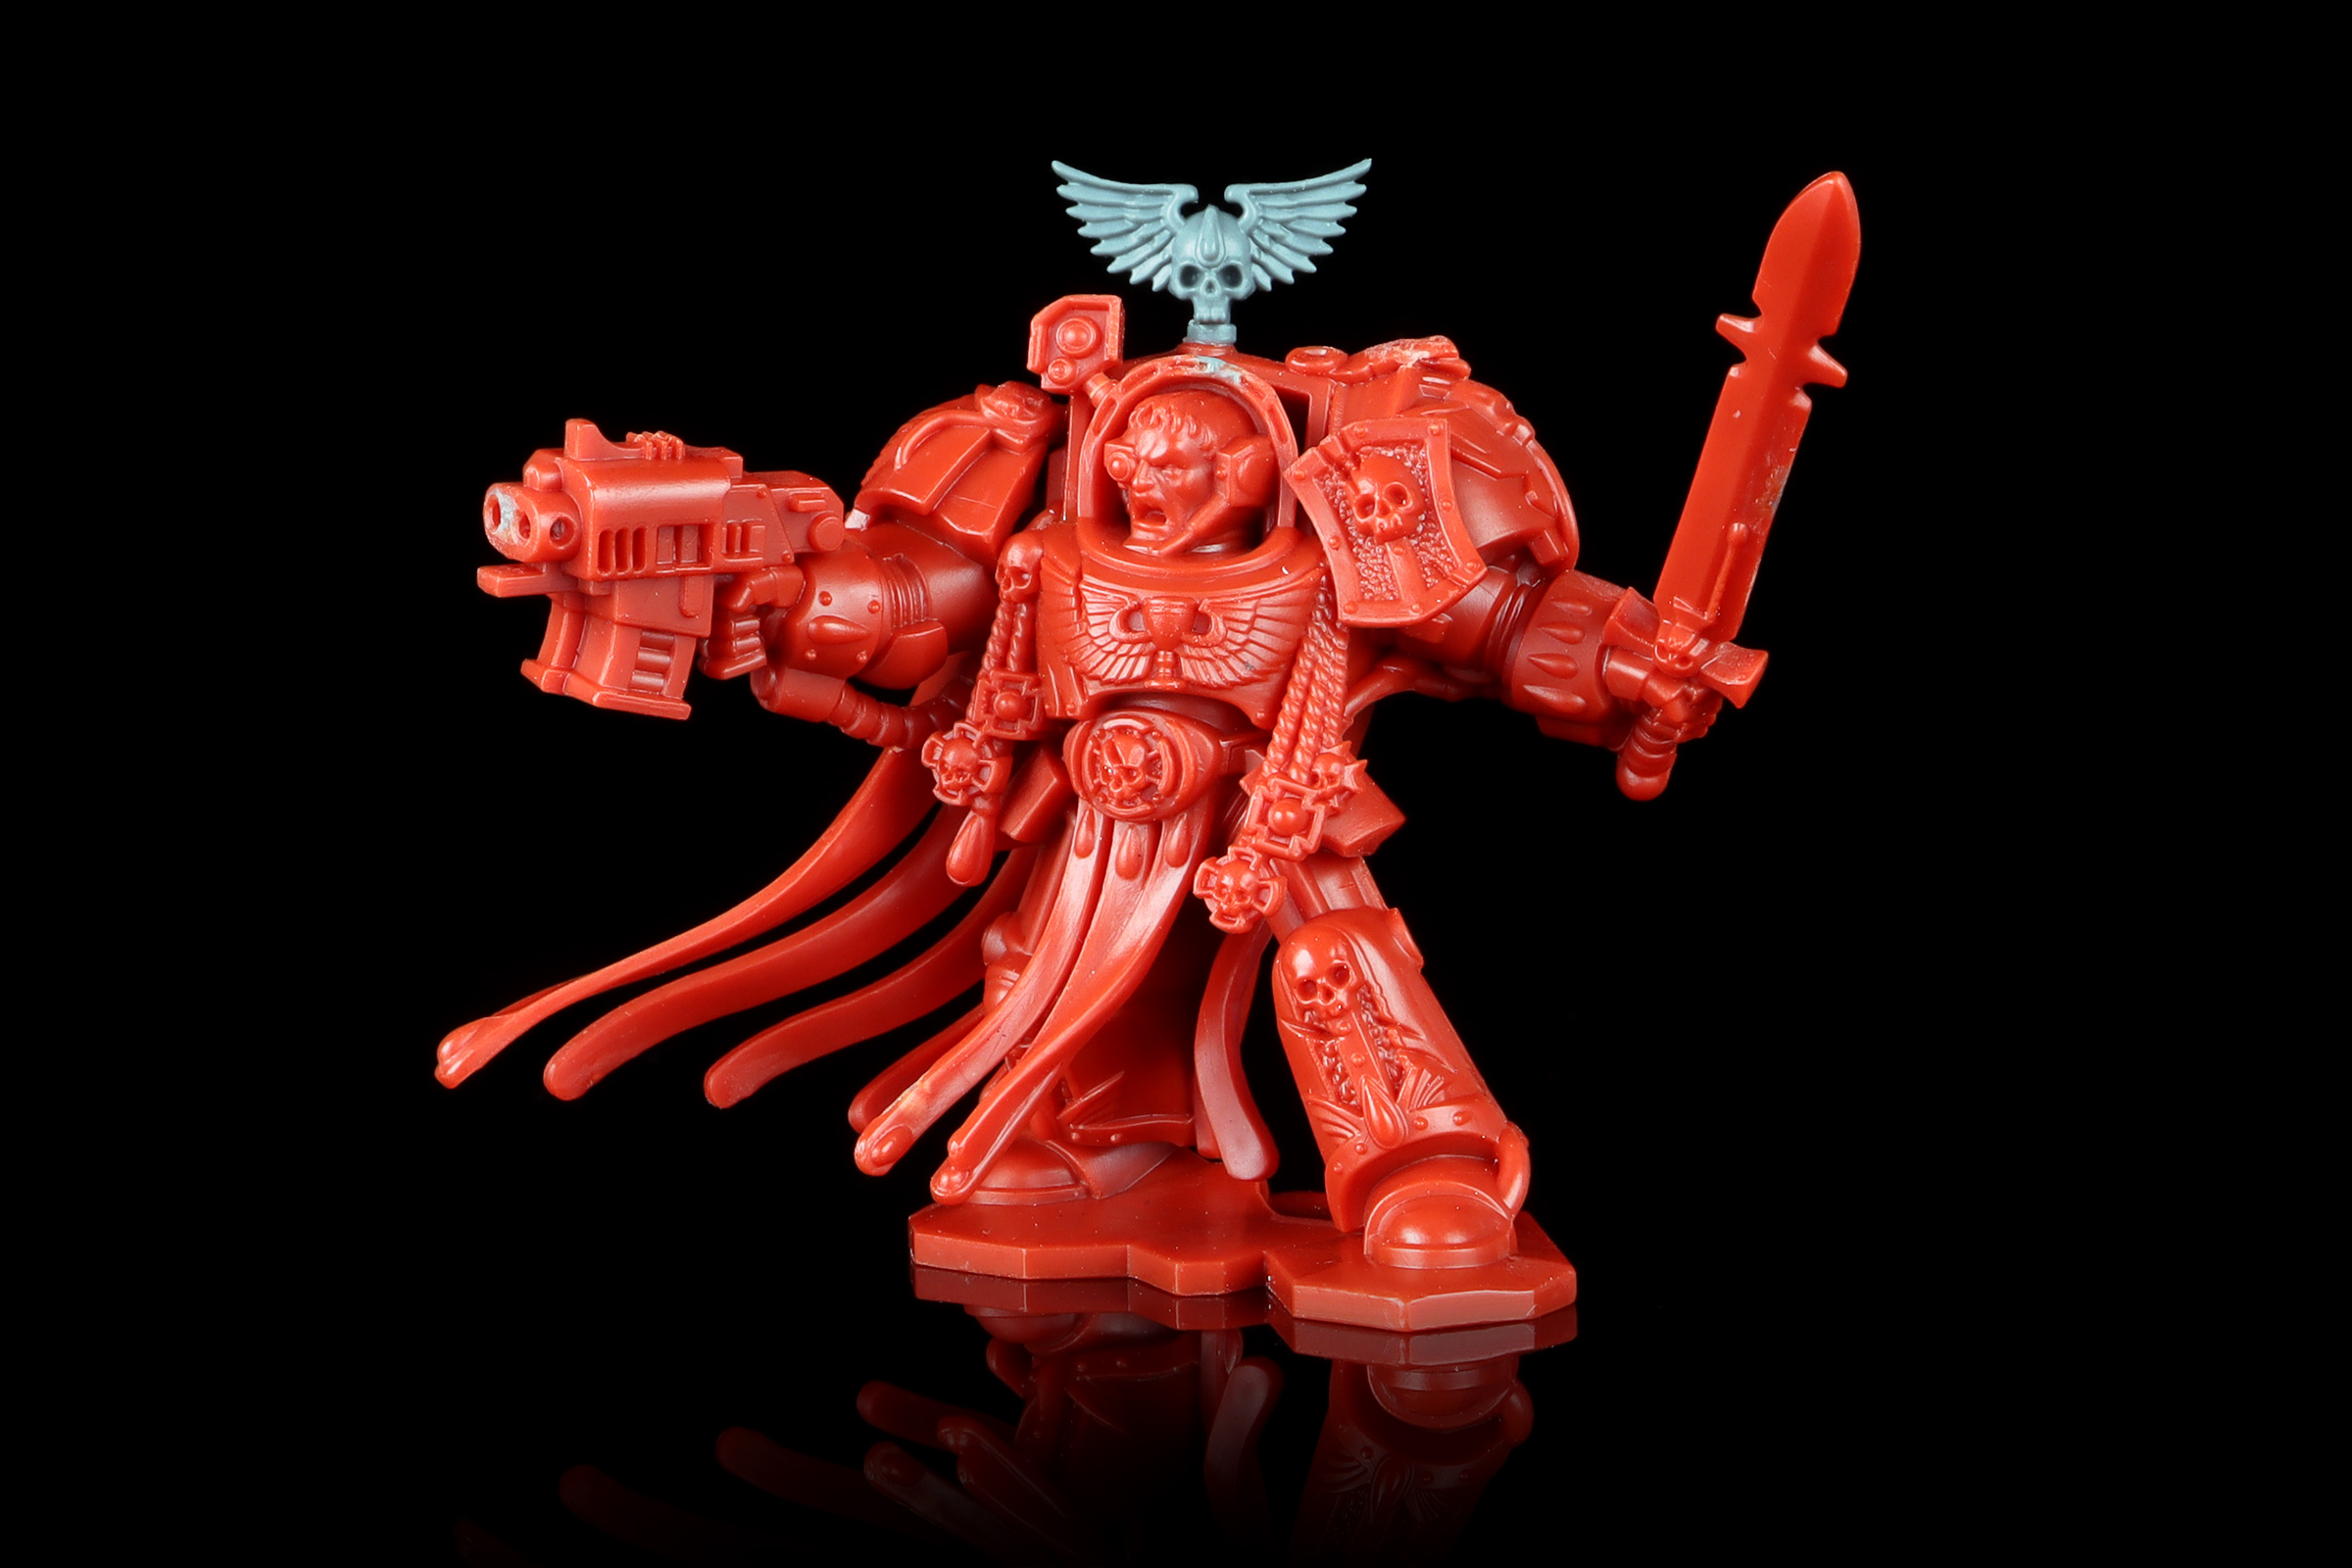
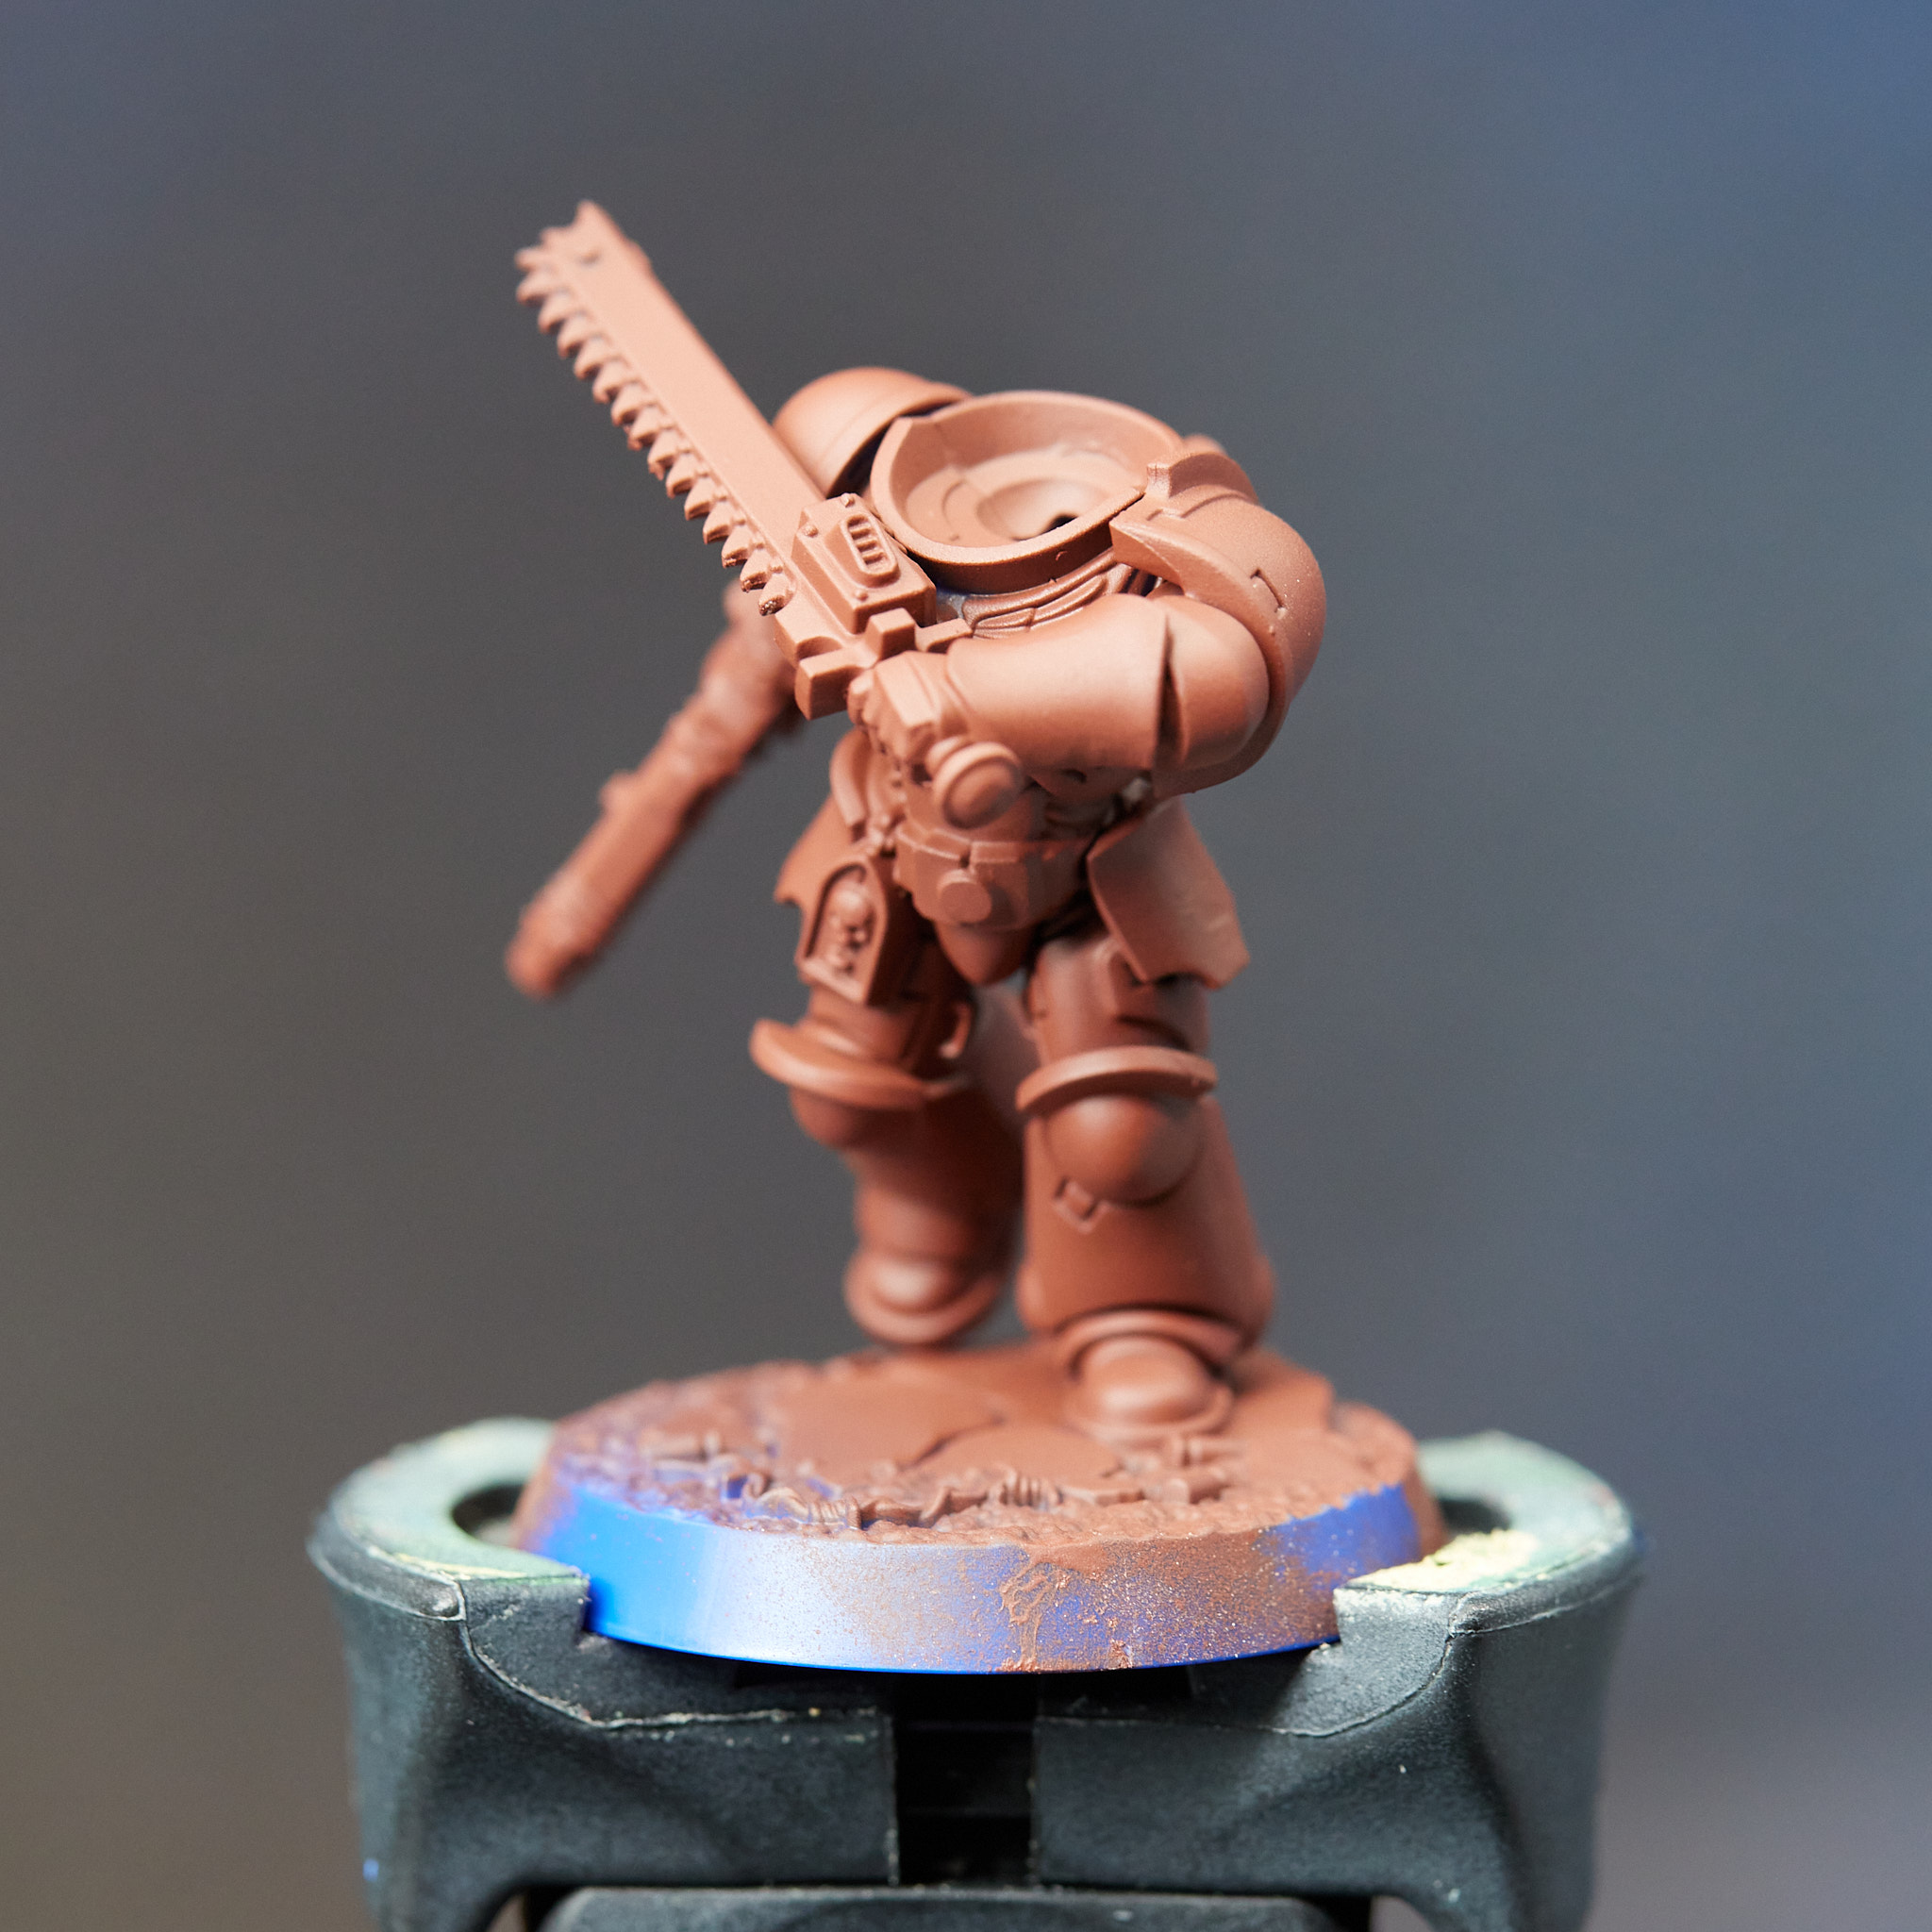
But how did Sergeant Lorenzo get such great looking armor? Well, before we go the the grim darkness of the 41st millennium, let's go back to unprimed plastic and work our way up.
My copy of Lorenzo had some battle damage - the chalice at the top was missing, the holes on his bolter were cracked, and the armor above his head was chipped. Fixing those up gives us a clean place to start however.
 Blood Angel Terminator. Credit: Pendulin
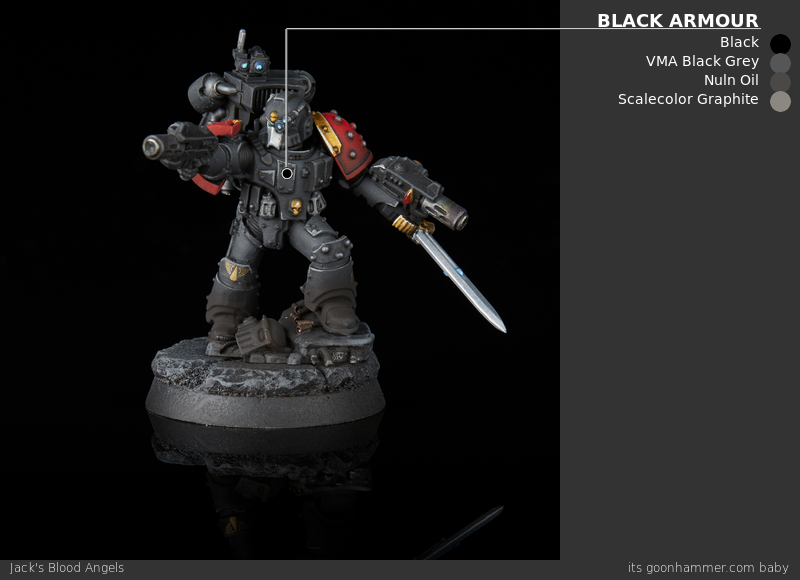
Start by
priming black. I didn't take a photo of just this because it honestly wasn't that interesting. Just think of the above picture, with a layer of black primer on it. Very exciting.
 Blood Angel Terminator. Credit: Pendulin
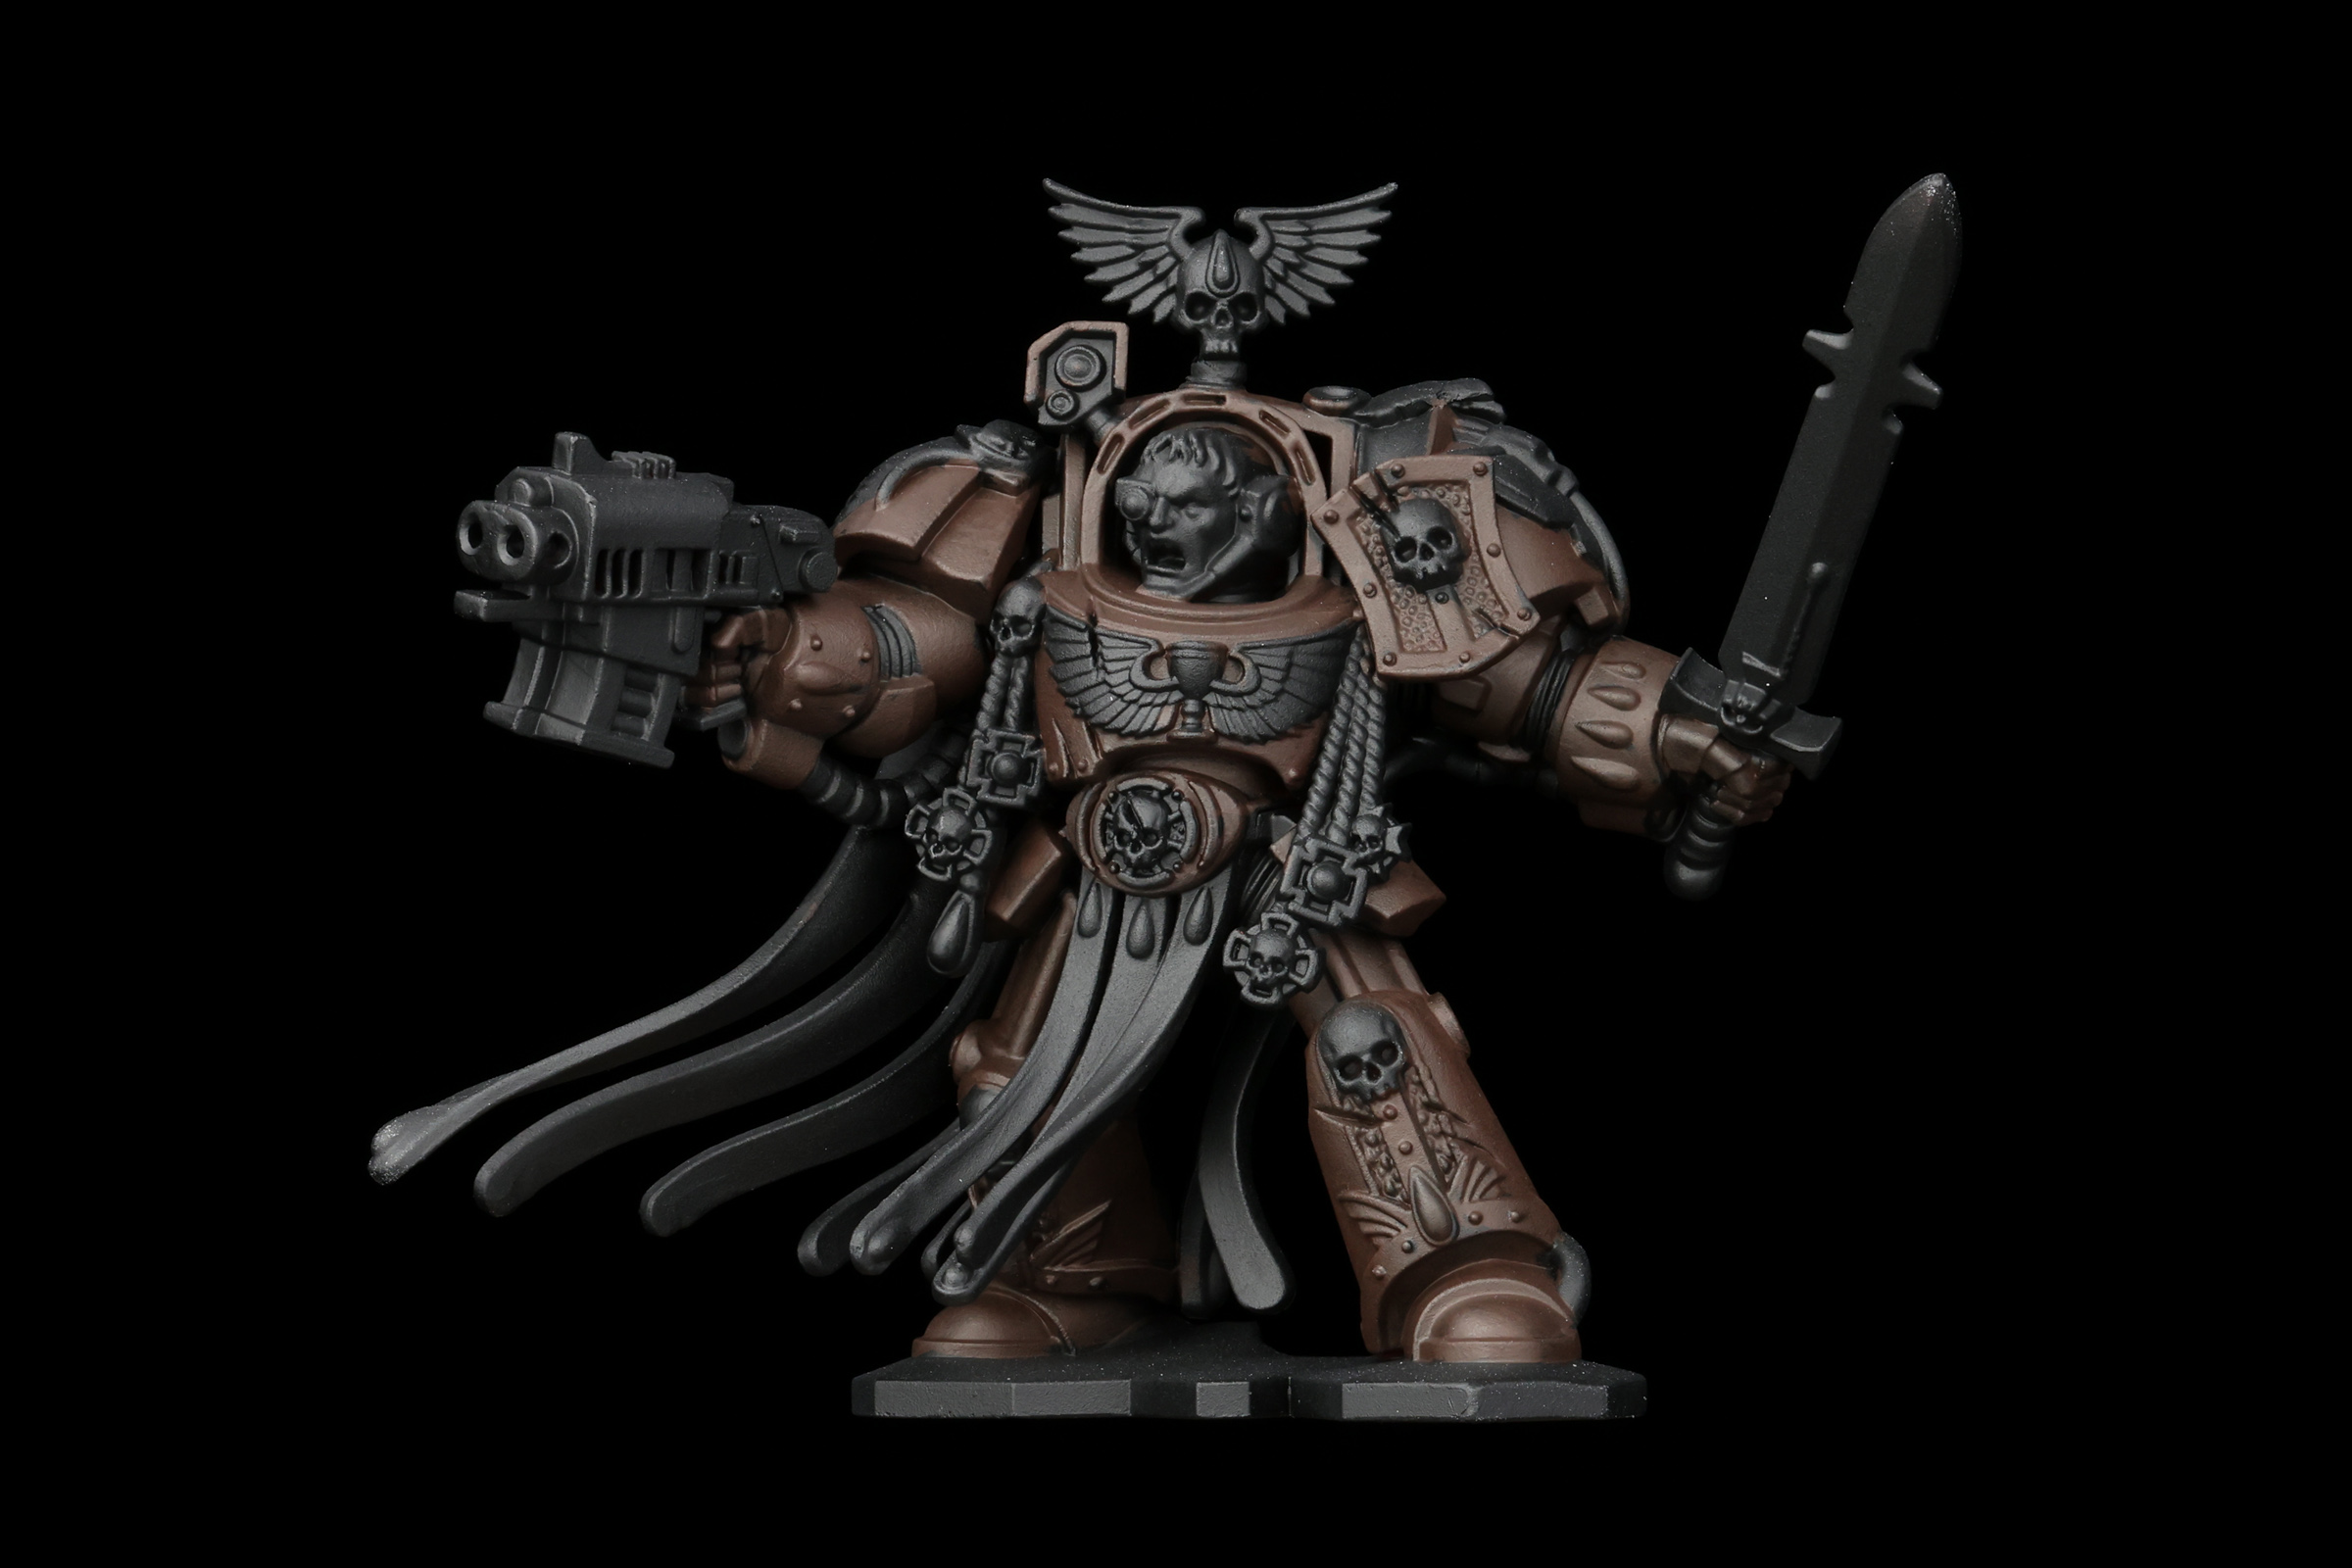
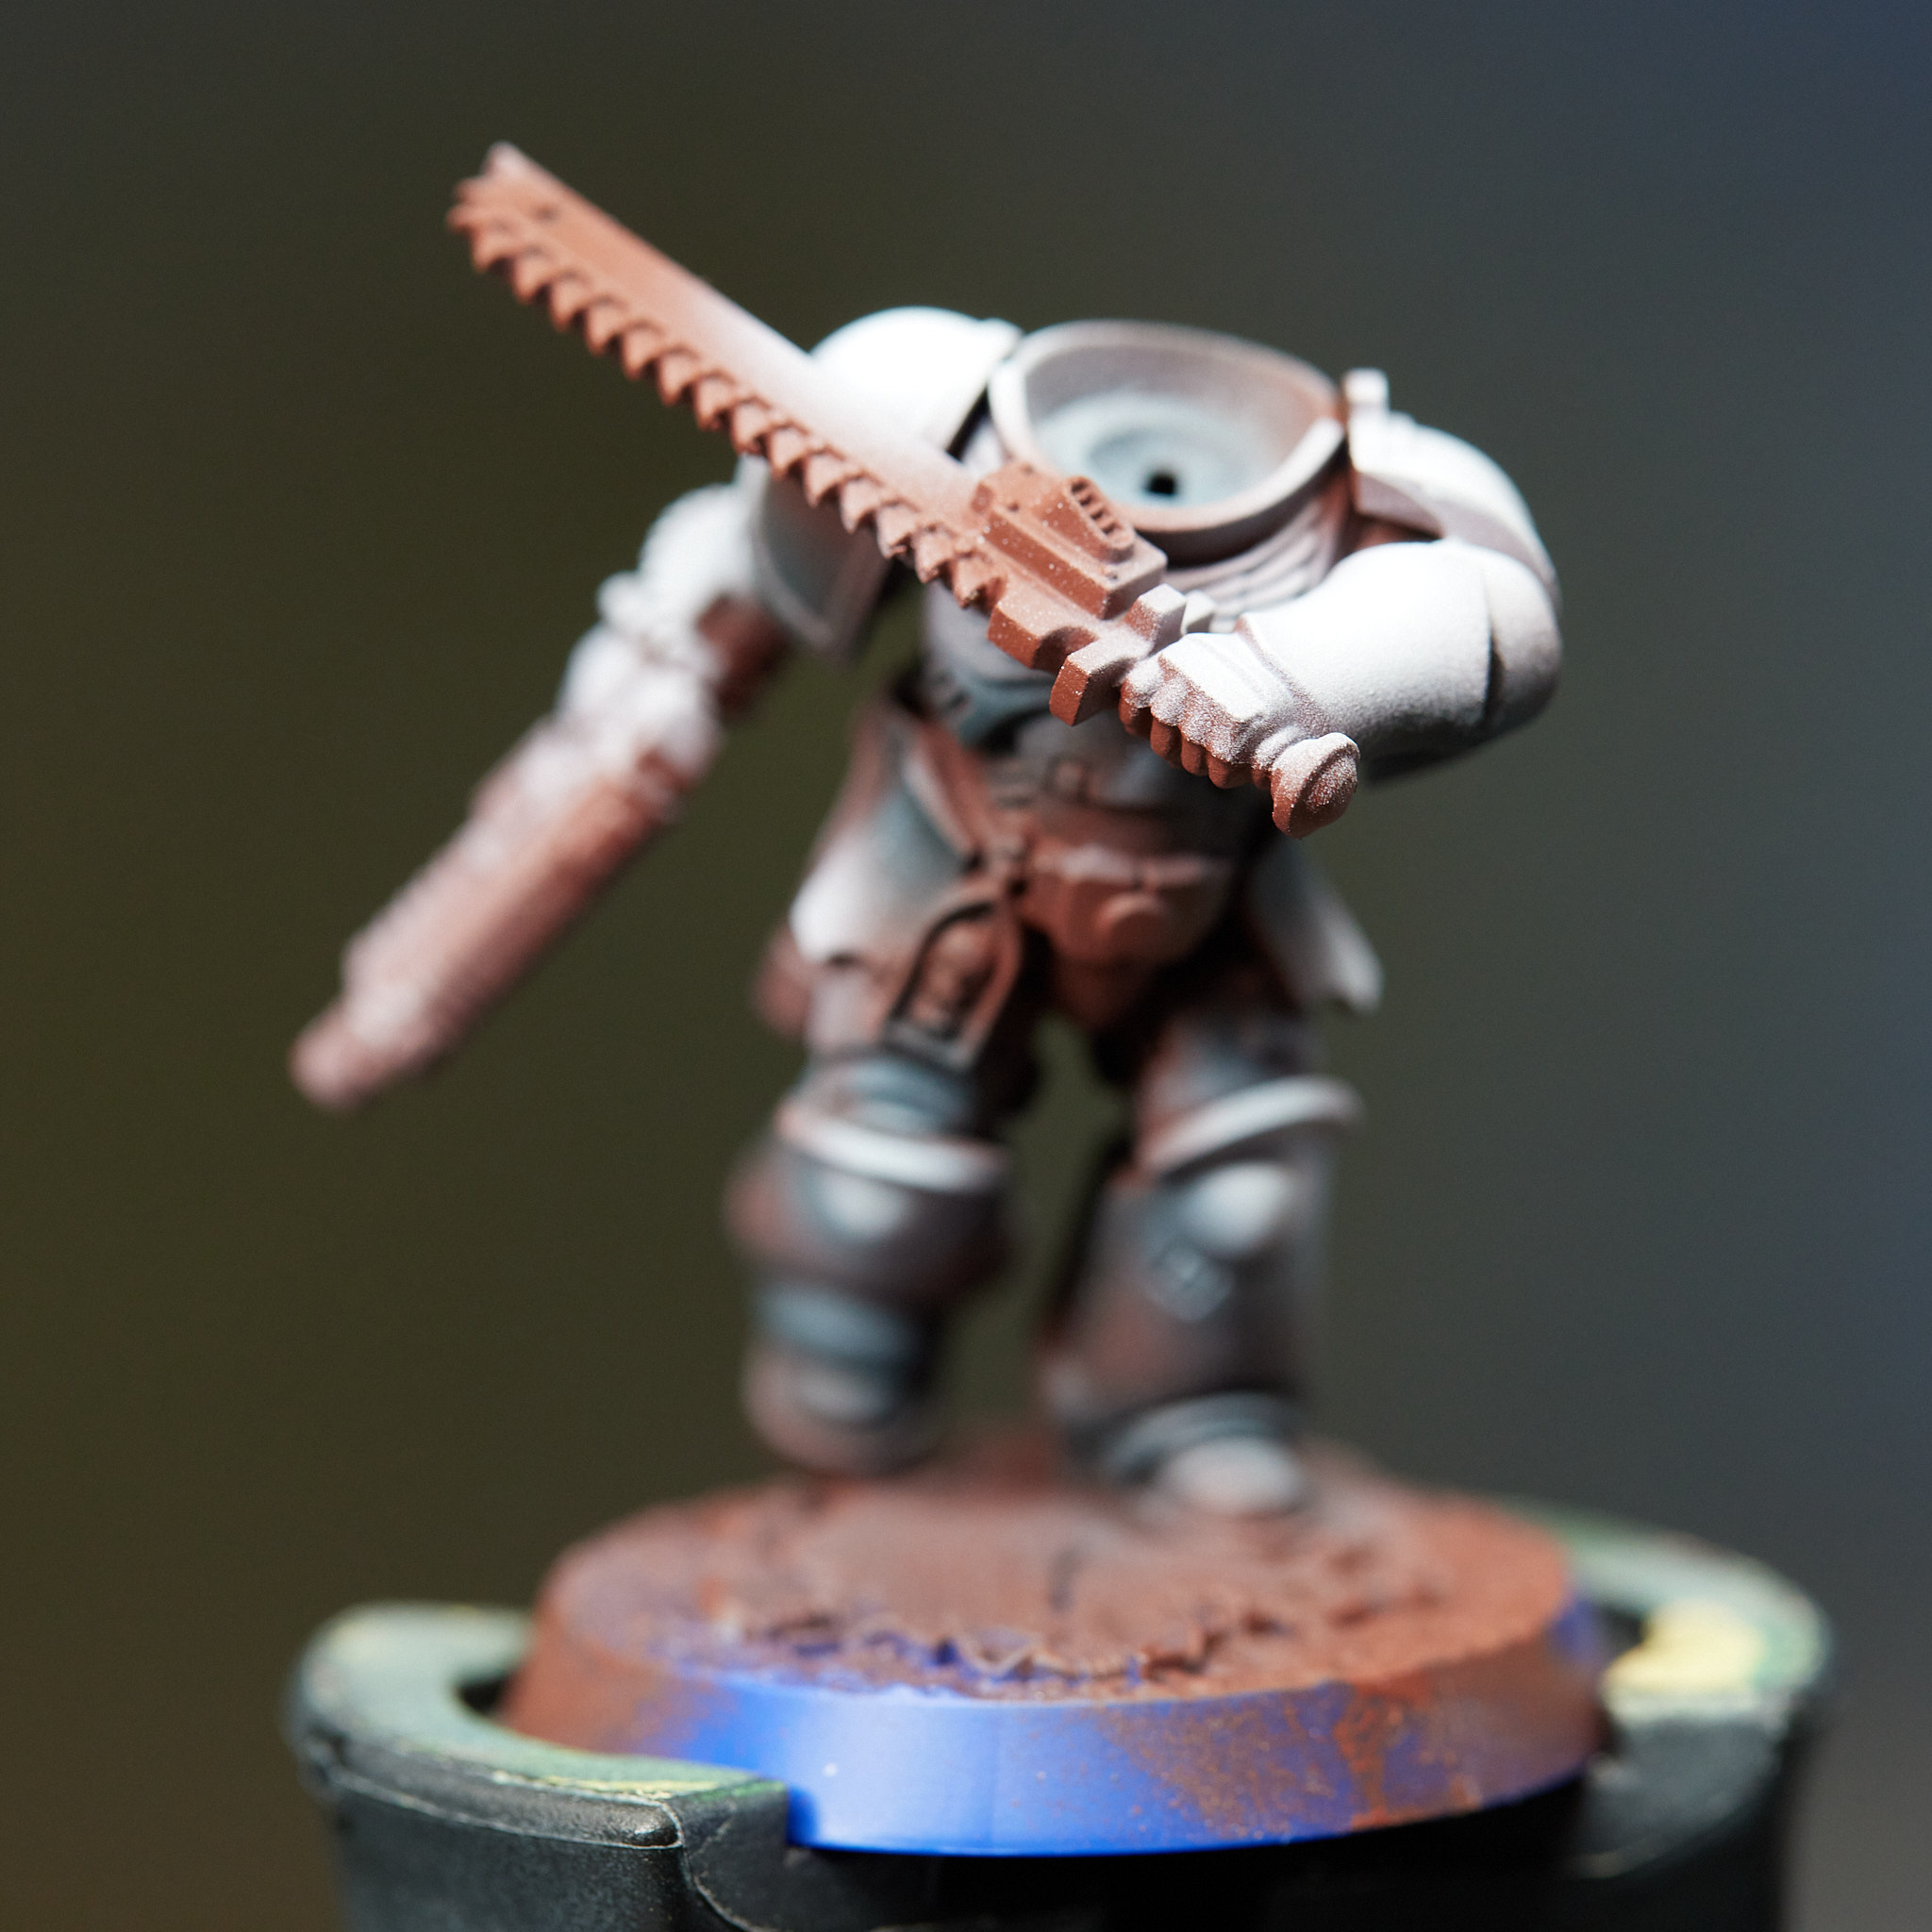
After priming, find all the areas that will eventually be red, and
base with Rhinox Hide. Rhinox is a fantastic paint to work with, so this step is a breeze.
After that, start
mixing Rhinox Hide and Mephiston Red and stippling it on. You want to slowly add red to the brown, if you're unfamiliar with stippling, just think of little tiny dots covering the entire model. This creates subtle differences in color that look more natural than flat brush strokes. It also takes a
lot longer, so strike your own balance.
Note: paint any cloaks before doing this, as explained below.
 Blood Angel Terminator. Credit: Pendulin
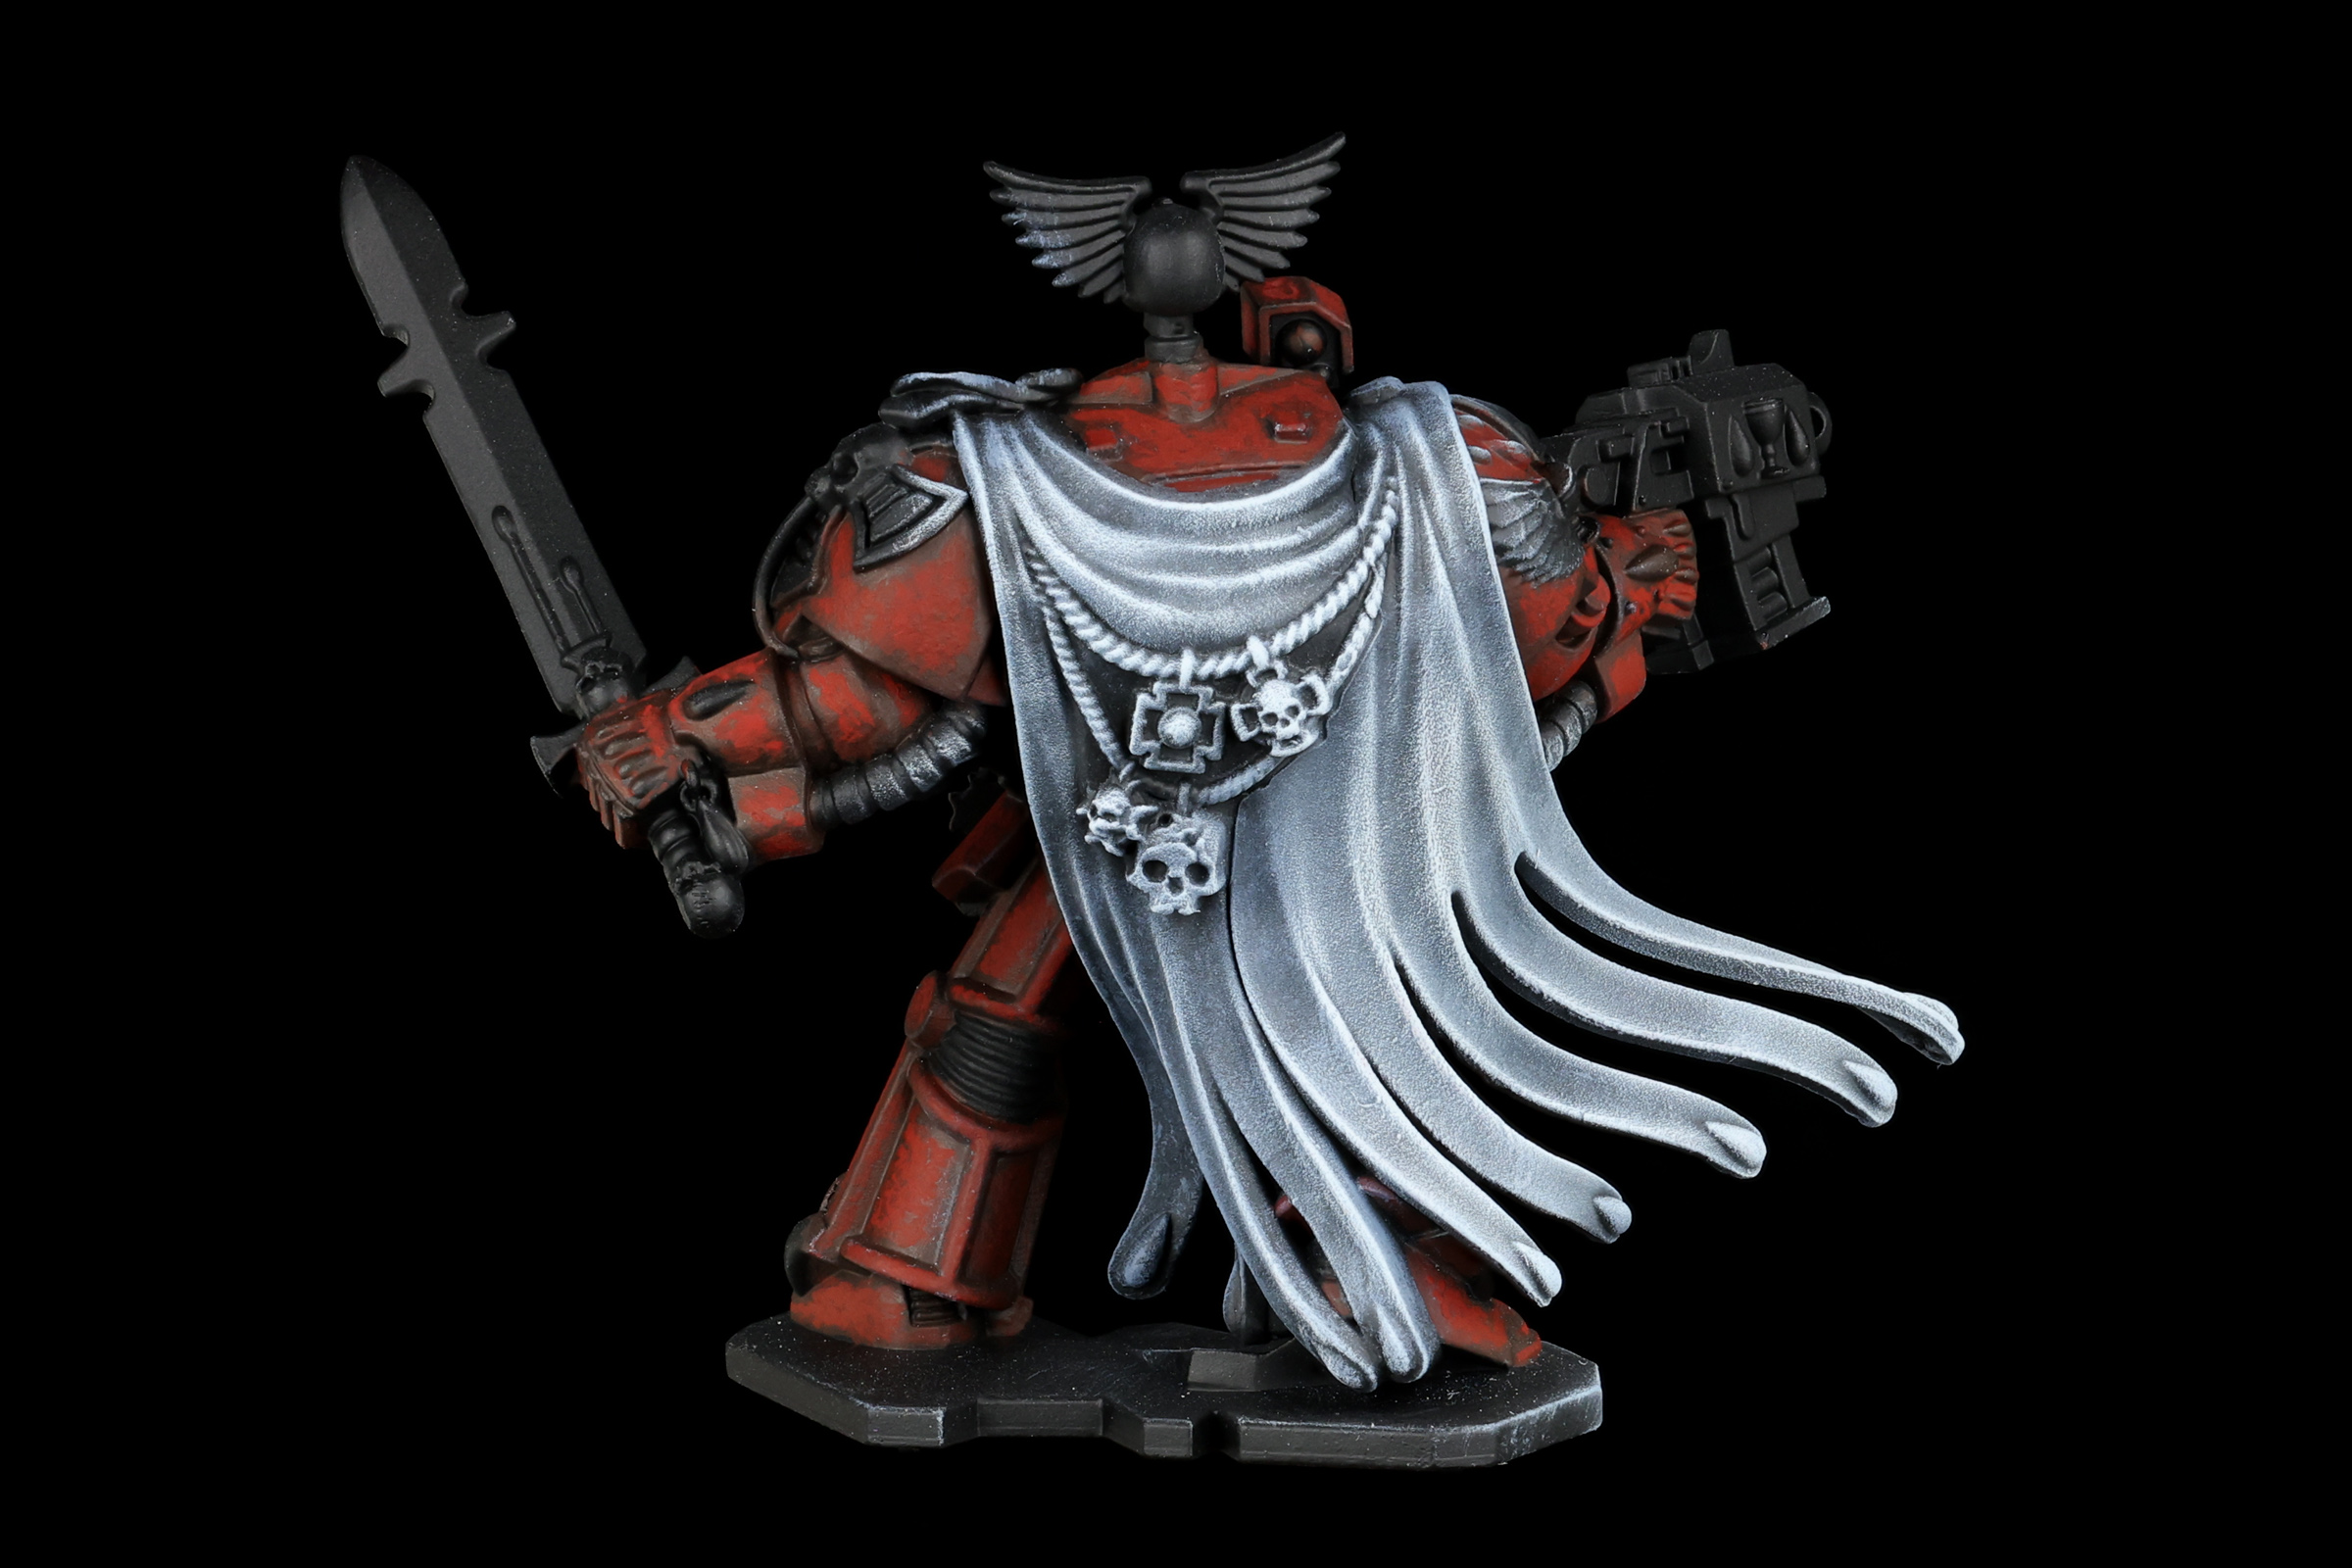
Welcome to below. The reason for painting cloaks first is that I paint the cloaks with drybrushing, and that tends to be messy. If you paint them in the order I did, you'll have to go back and clean up all the red paint you accidentally drybrush over. Not a huge deal, but it's an optimization I'd recommend.
If the model has a cloak, start by
drybrushing Vallejo Sombre Grey. If you want it a little warmer, or have some interesting undertones, then before the Sombre Grey you can Drybrush it with Rhinox Hide, Dark Reaper, or Incubi Darkness. That's not a critical step though, as the Sombre Grey will be an extremely dominant color.
 Blood Angel Terminator. Credit: Pendulin
 Blood Angel Terminator. Credit: Pendulin
After that,
drybrush Vallejo Wolf Grey. This is a similar hue to Sombre Grey, just a bit brighter, which is exactly what we want.
 Blood Angel Terminator. Credit: Pendulin
 Blood Angel Terminator. Credit: Pendulin
Tangent on painting the cloak is finished, back to armor.
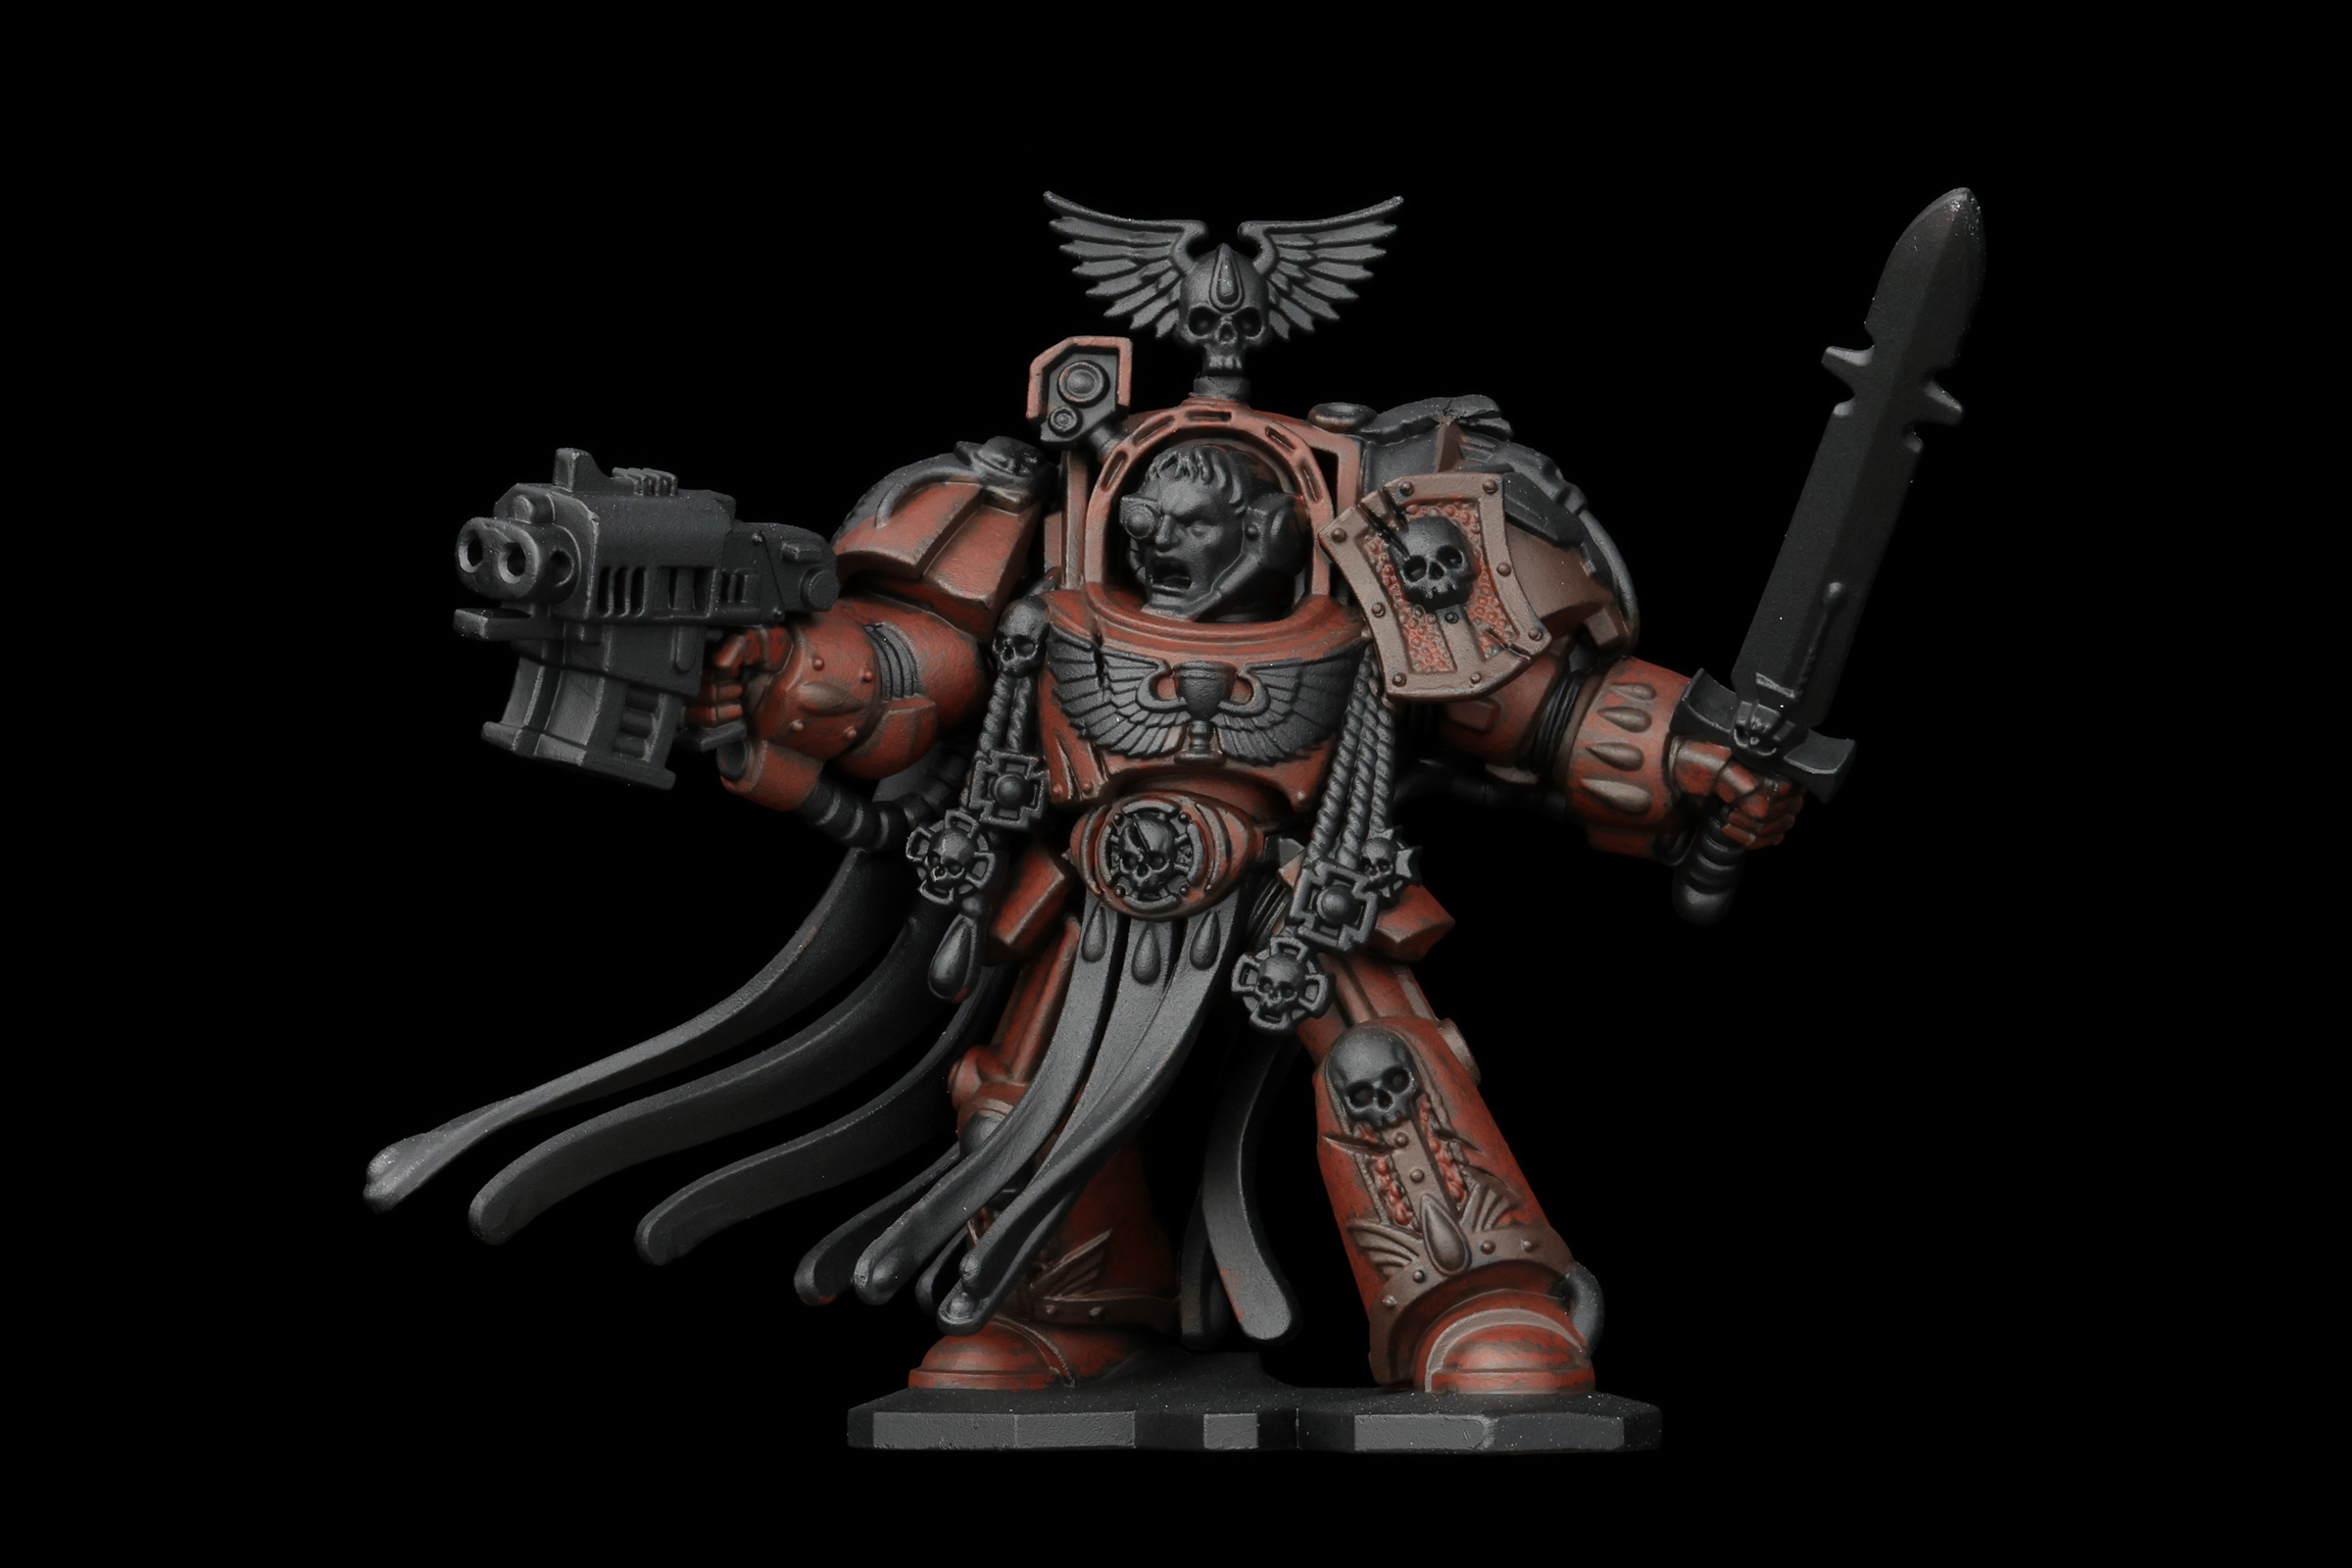
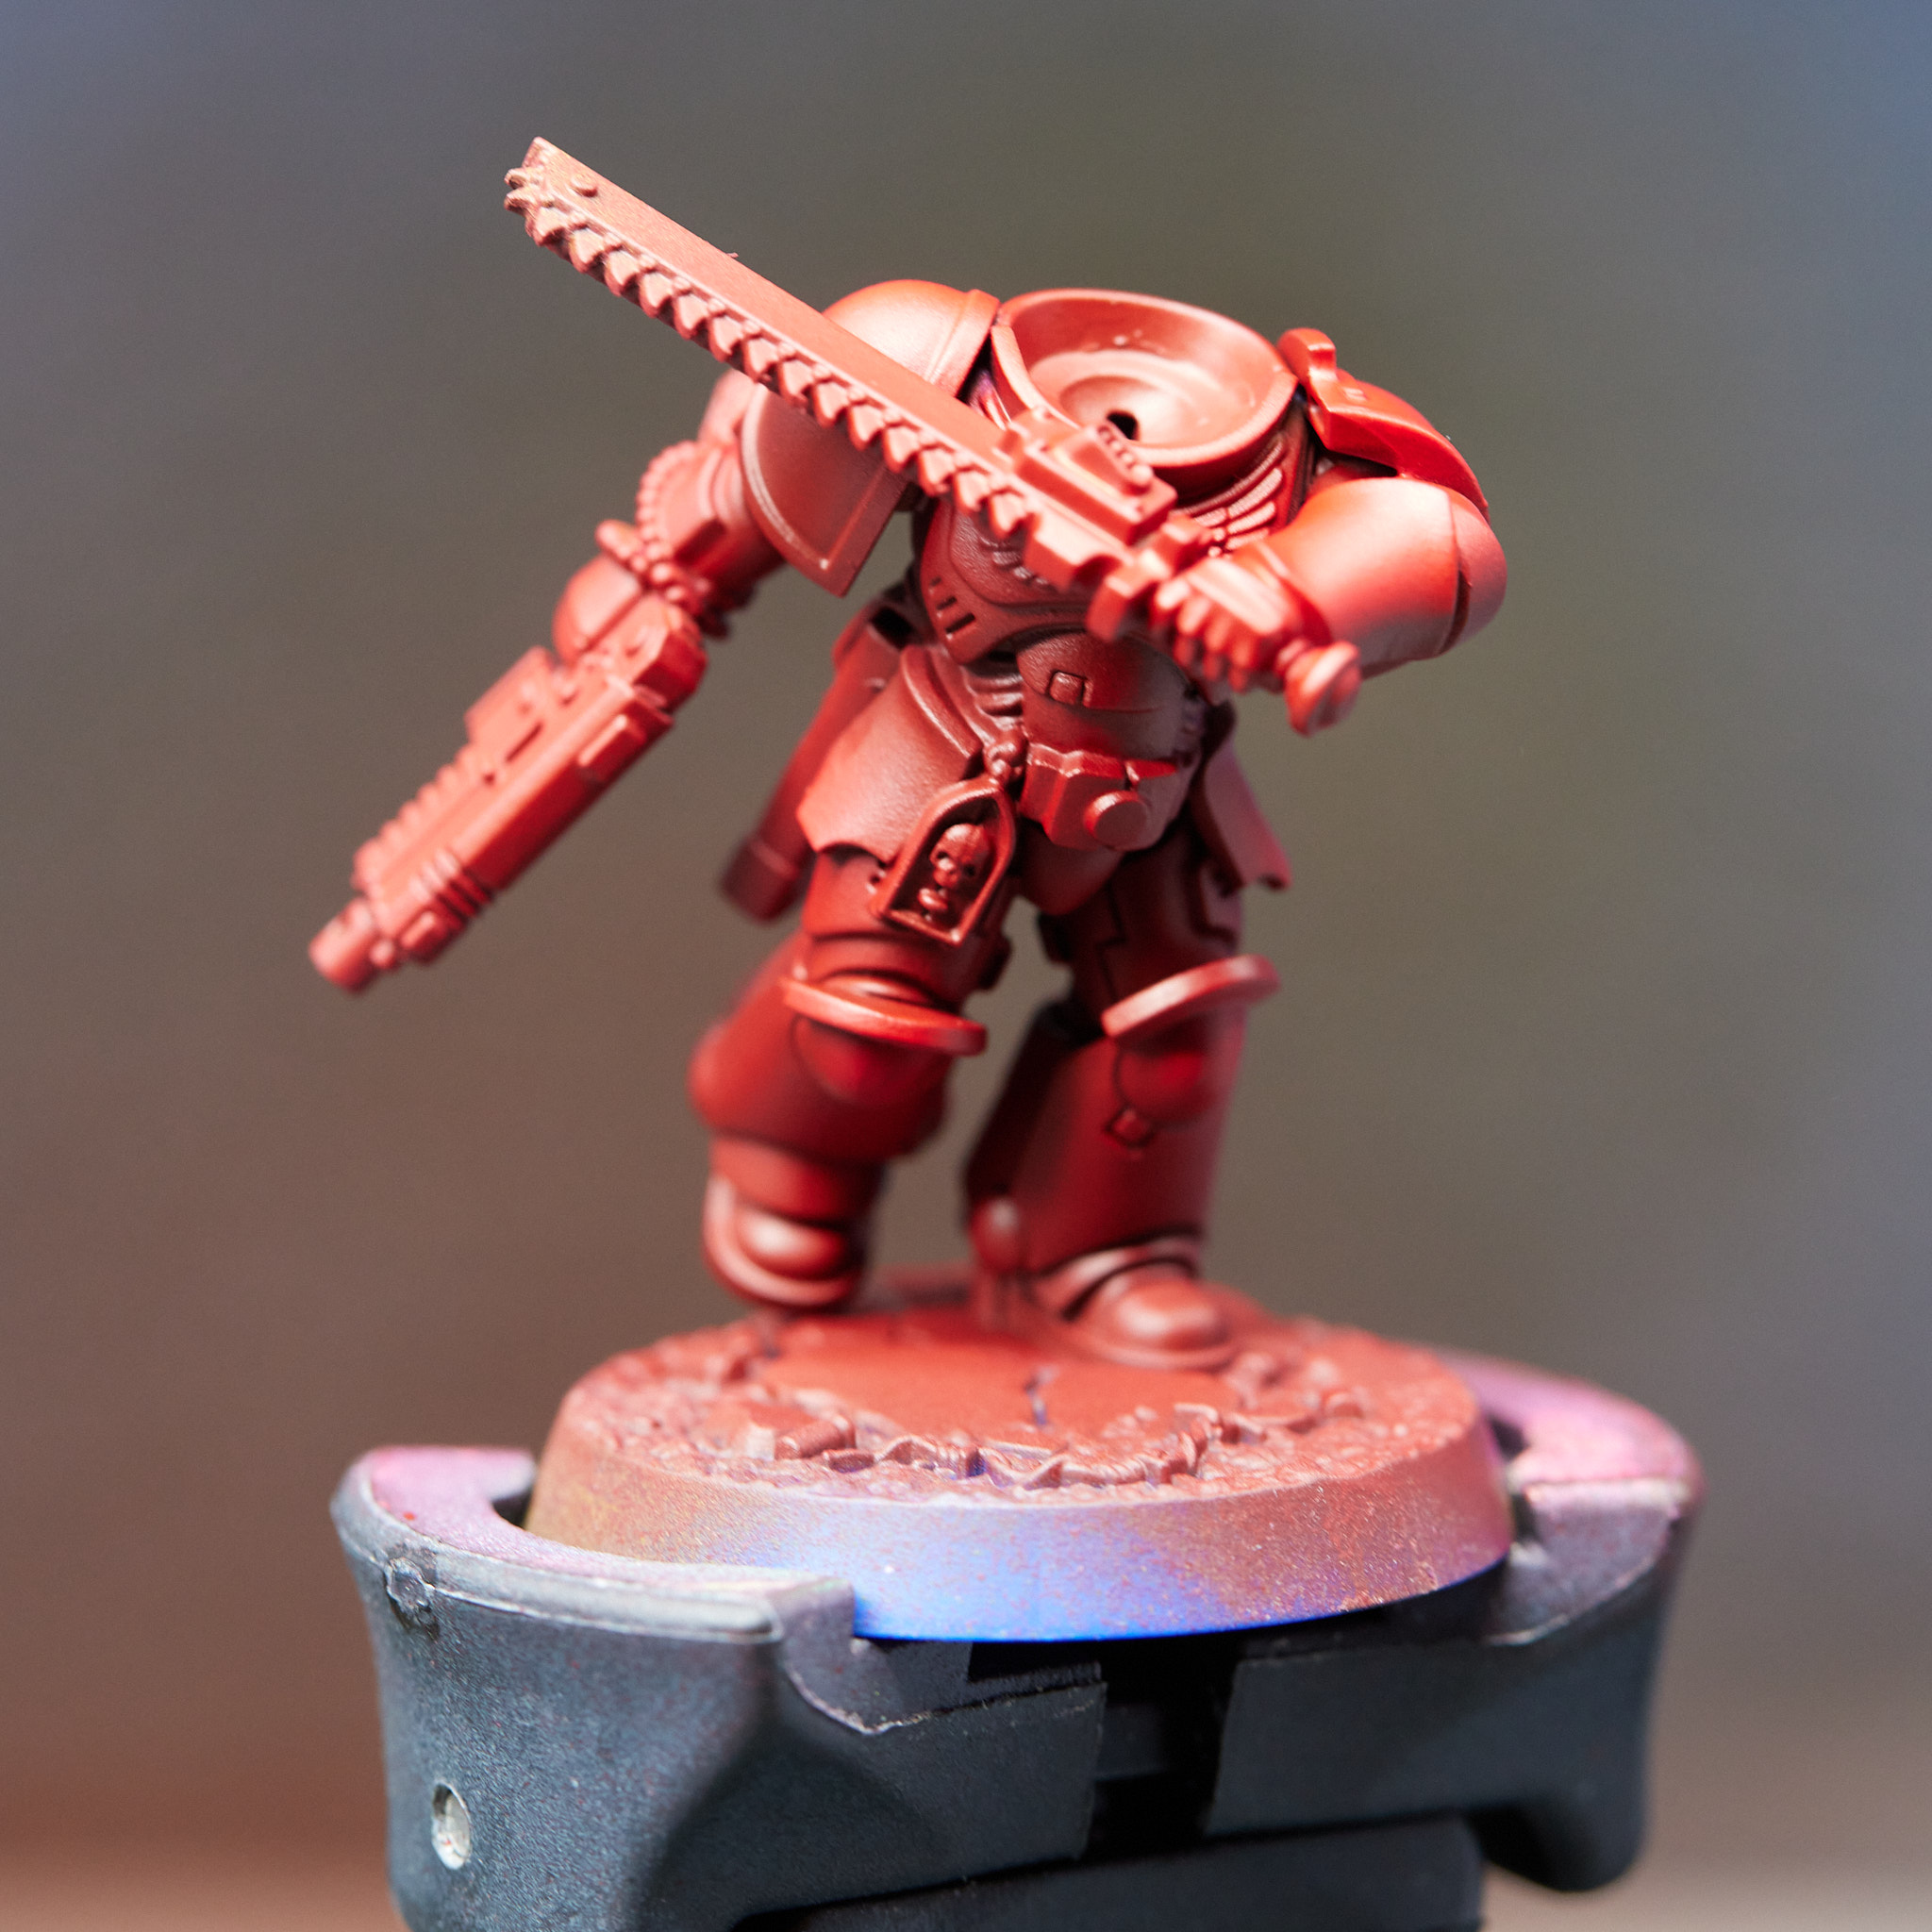
Continue mixing more Mephiston Red with Rhinox Hide and stippling it on. You want the edges and corners of the armor to remain dull and brown, and all the flat panels to get brighter and more red.
Eventually you want to go to 100% Mephiston Red to get that iconic Blood Angels color.
 Blood Angel Terminator. Credit: Pendulin
 Blood Angel Terminator. Credit: Pendulin
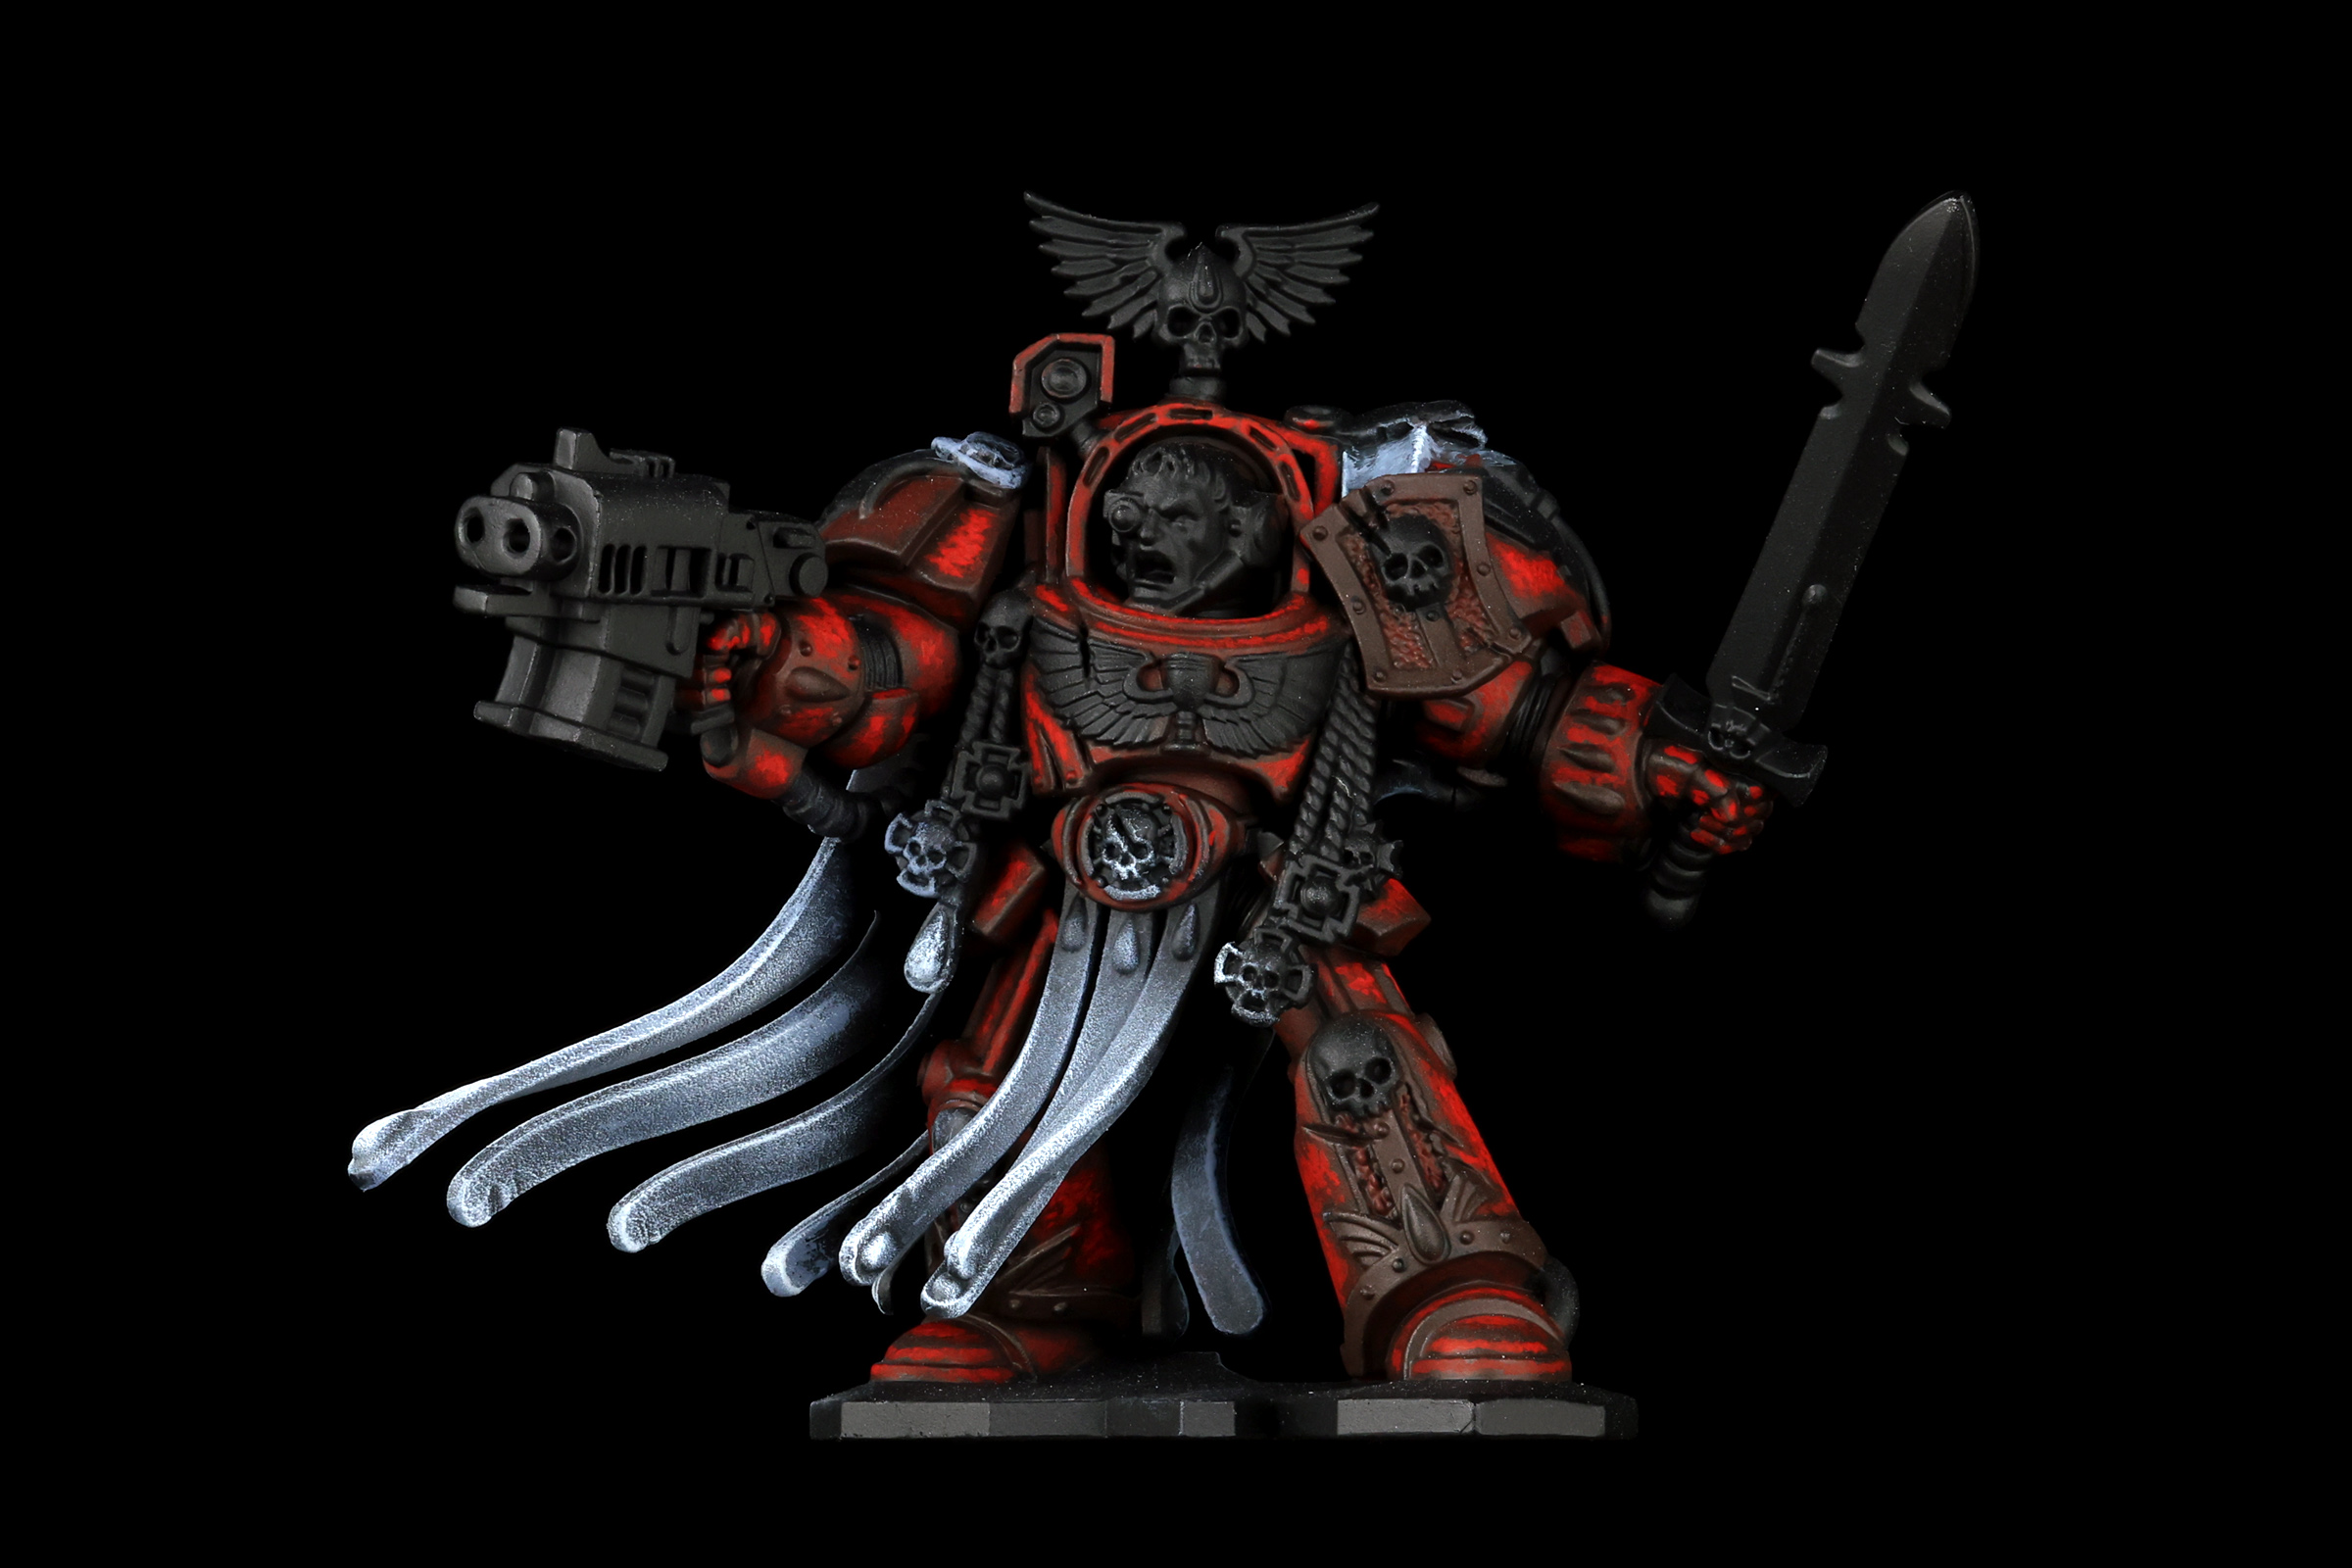
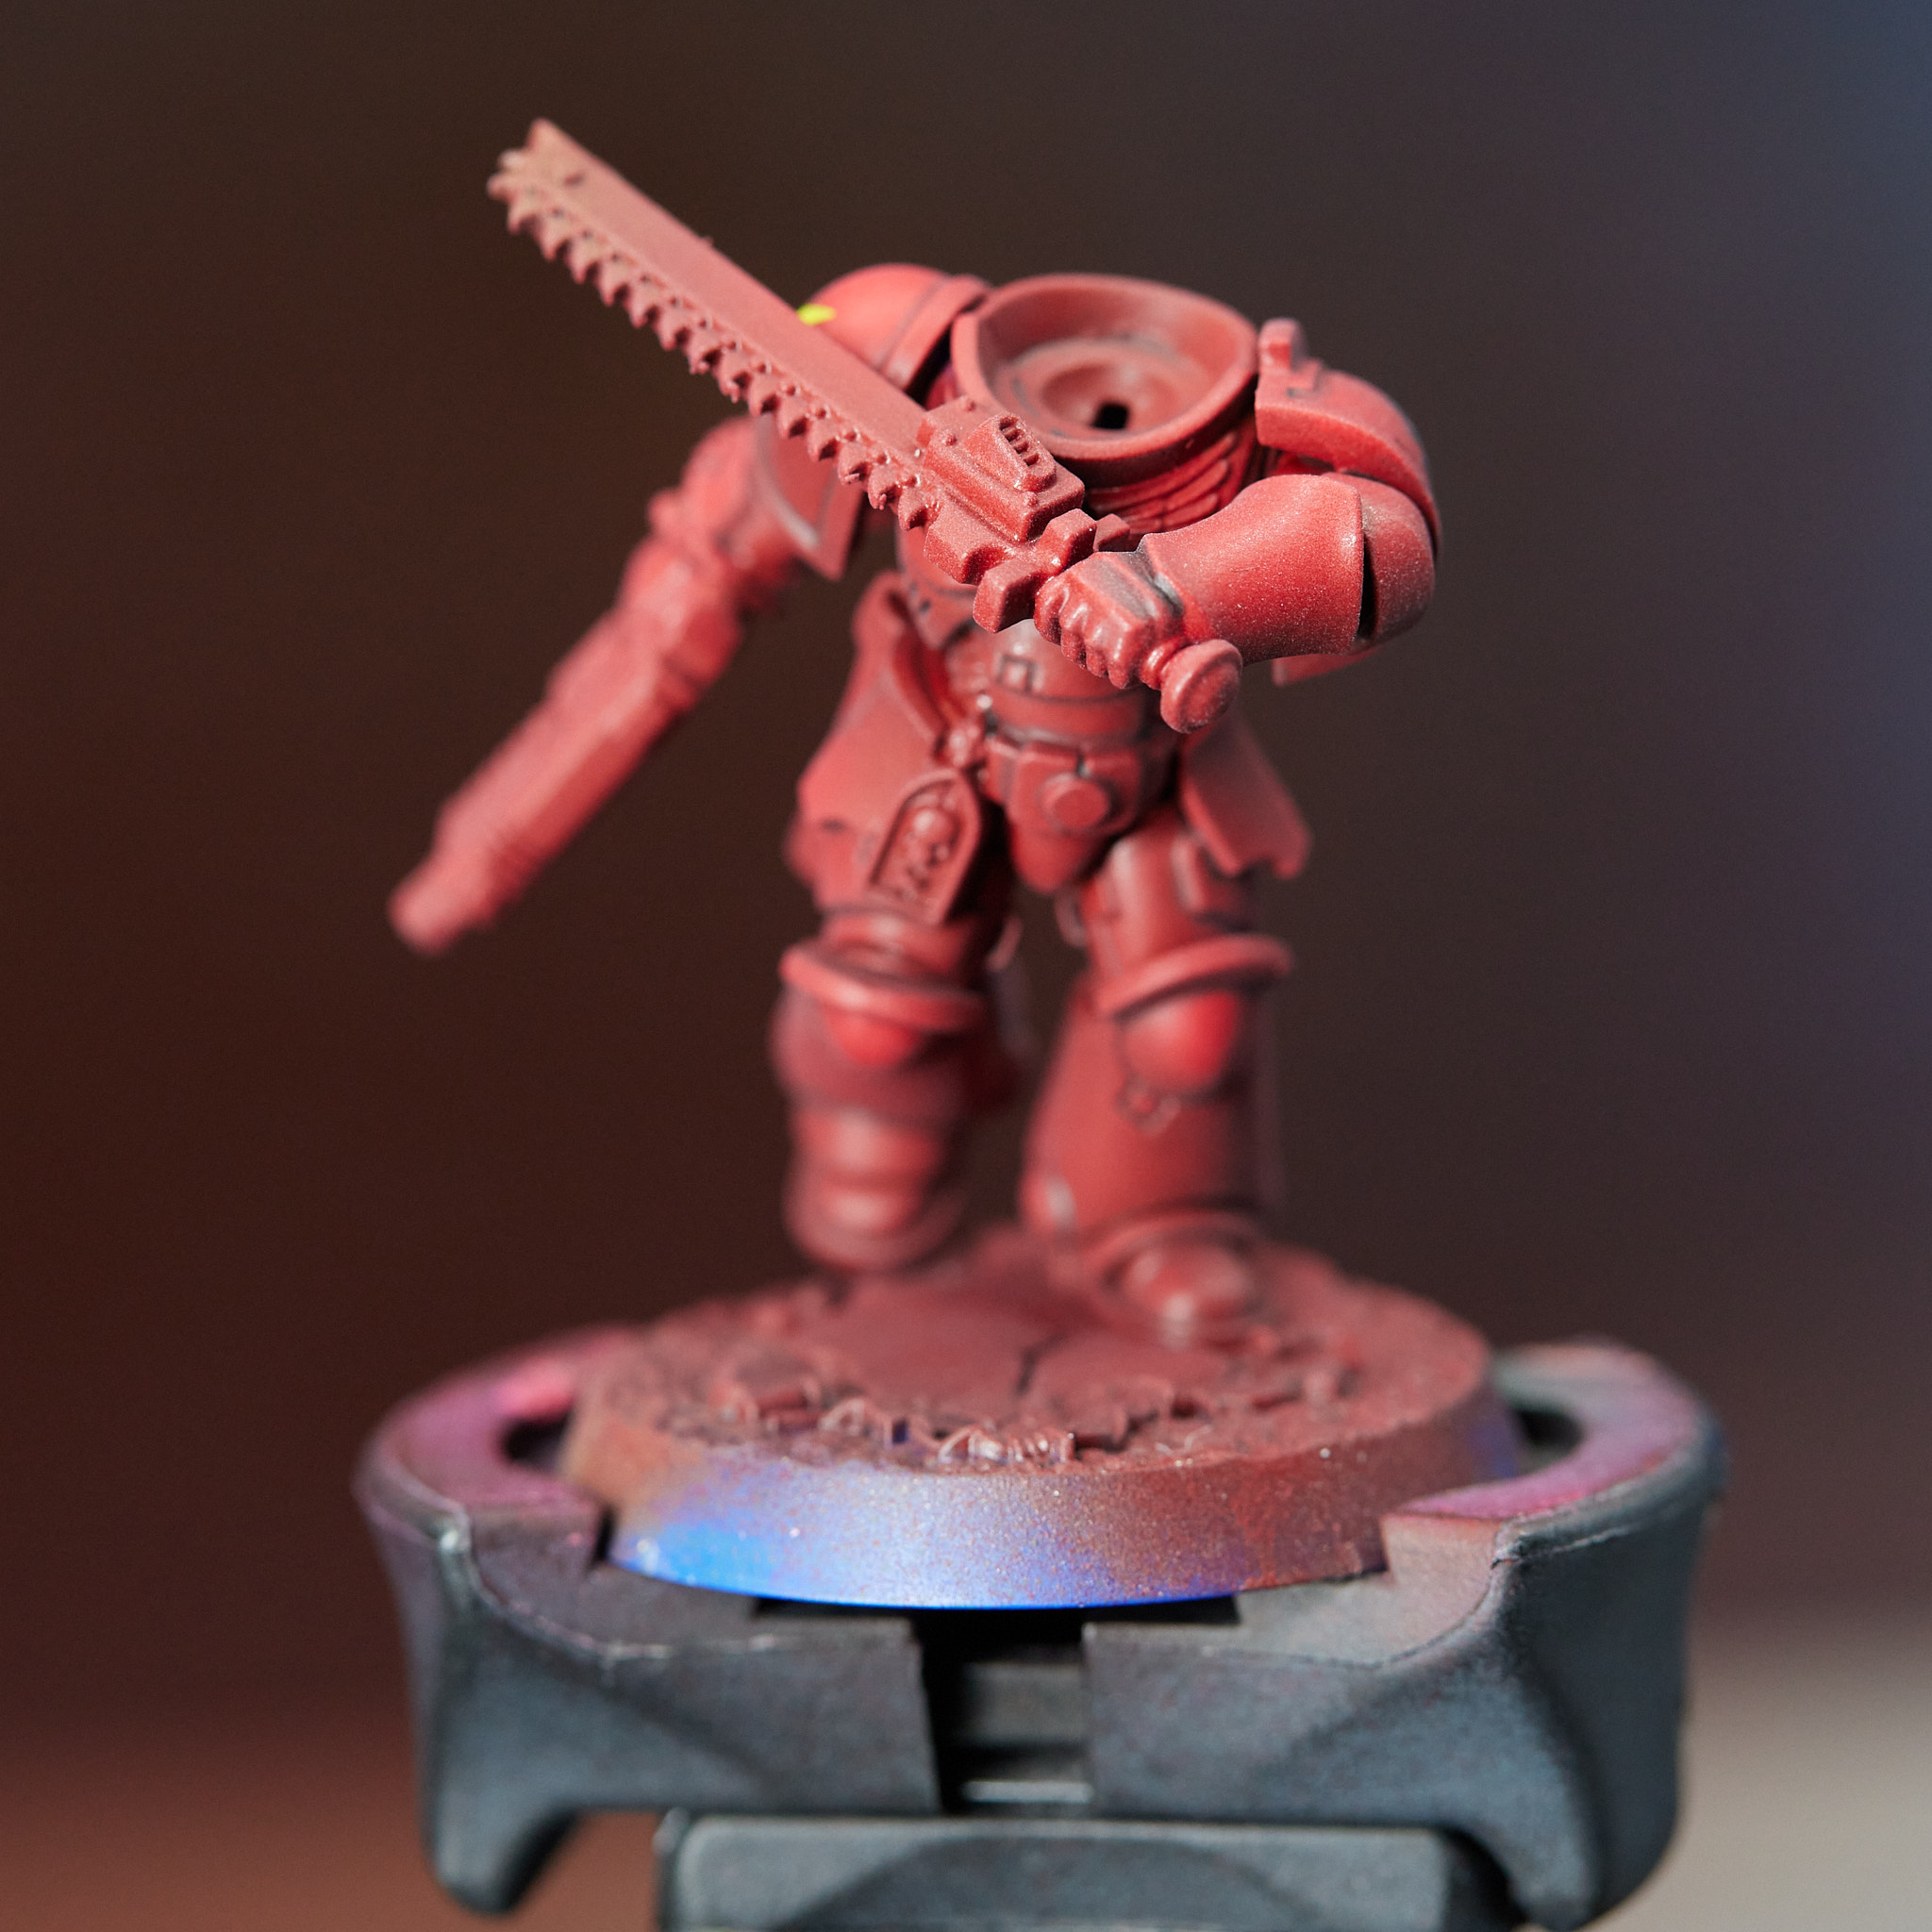
After stippling on Mephiston Red, we actually want to go even brighter. This is because areas that would get direct sunlight should look even brighter. Fortunately, Evil Sunz Scarlet is perfect for this. So mix of
Mephiston Red and Evil Sunz Scarlet and stipple it on. Eventually adding more and more Evil Sunz until you are stippling pure Evil Sunz onto the brightest areas of the model (the spots that would get direct sunlight).
 Blood Angel Terminator. Credit: Pendulin
Blood Angel Terminator. Credit: Pendulin
Blood Angel Terminator. Credit: Pendulin
Alright, that's mighty bright. Let's now work on some other areas of the model. For the Terminator seals, markings, and skulls, use the same colors as the cloak:
Vallejo Sombre Grey and Vallejo Wolf Grey.
 Blood Angel Terminator. Credit: Pendulin
 Blood Angel Terminator. Credit: Pendulin
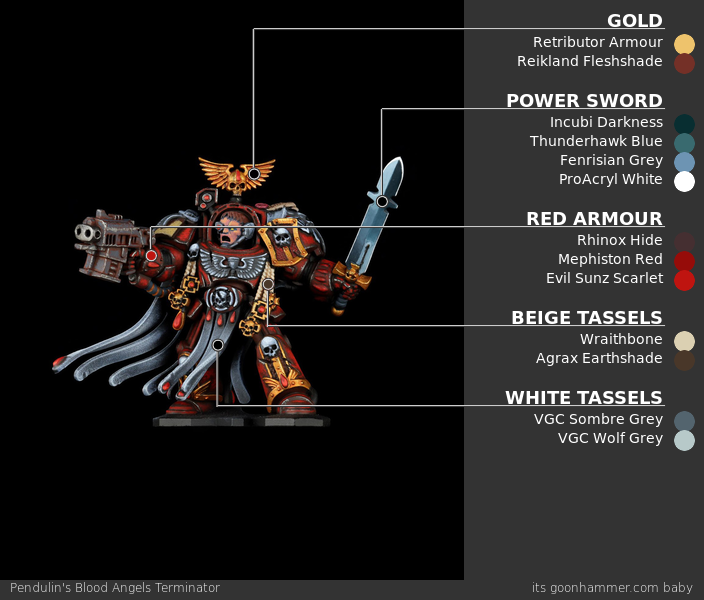
Couple more steps completed here. For the gold, I stuck with the classic
Retributor Armour, on gems I used
Mephiston Red, and for tassels I painted those with
Wraithbone.
 Blood Angel Terminator. Credit: Pendulin
 Blood Angel Terminator. Credit: Pendulin
Couple more steps here. For the gems, I painted on some
Evil Sunz Scarlet in the lower half, and then a crescent of
Wild Rider Red on the bottom.
For the bolter, I based the whole thing with
Reaper MSP Mahogany Brown. Then I stippled on
Dark Reaper into the flat areas, leaving brown showing on all the corners.
Additionally, if your Blood Angel scheme calls for any yellow (like the helmets on close-quarters units), use
Tallarn Sand and maybe mix just a touch of
Balor Brown for highlighting sharp corners.
 Blood Angel Terminator. Credit: Pendulin
 Blood Angel Terminator. Credit: Pendulin
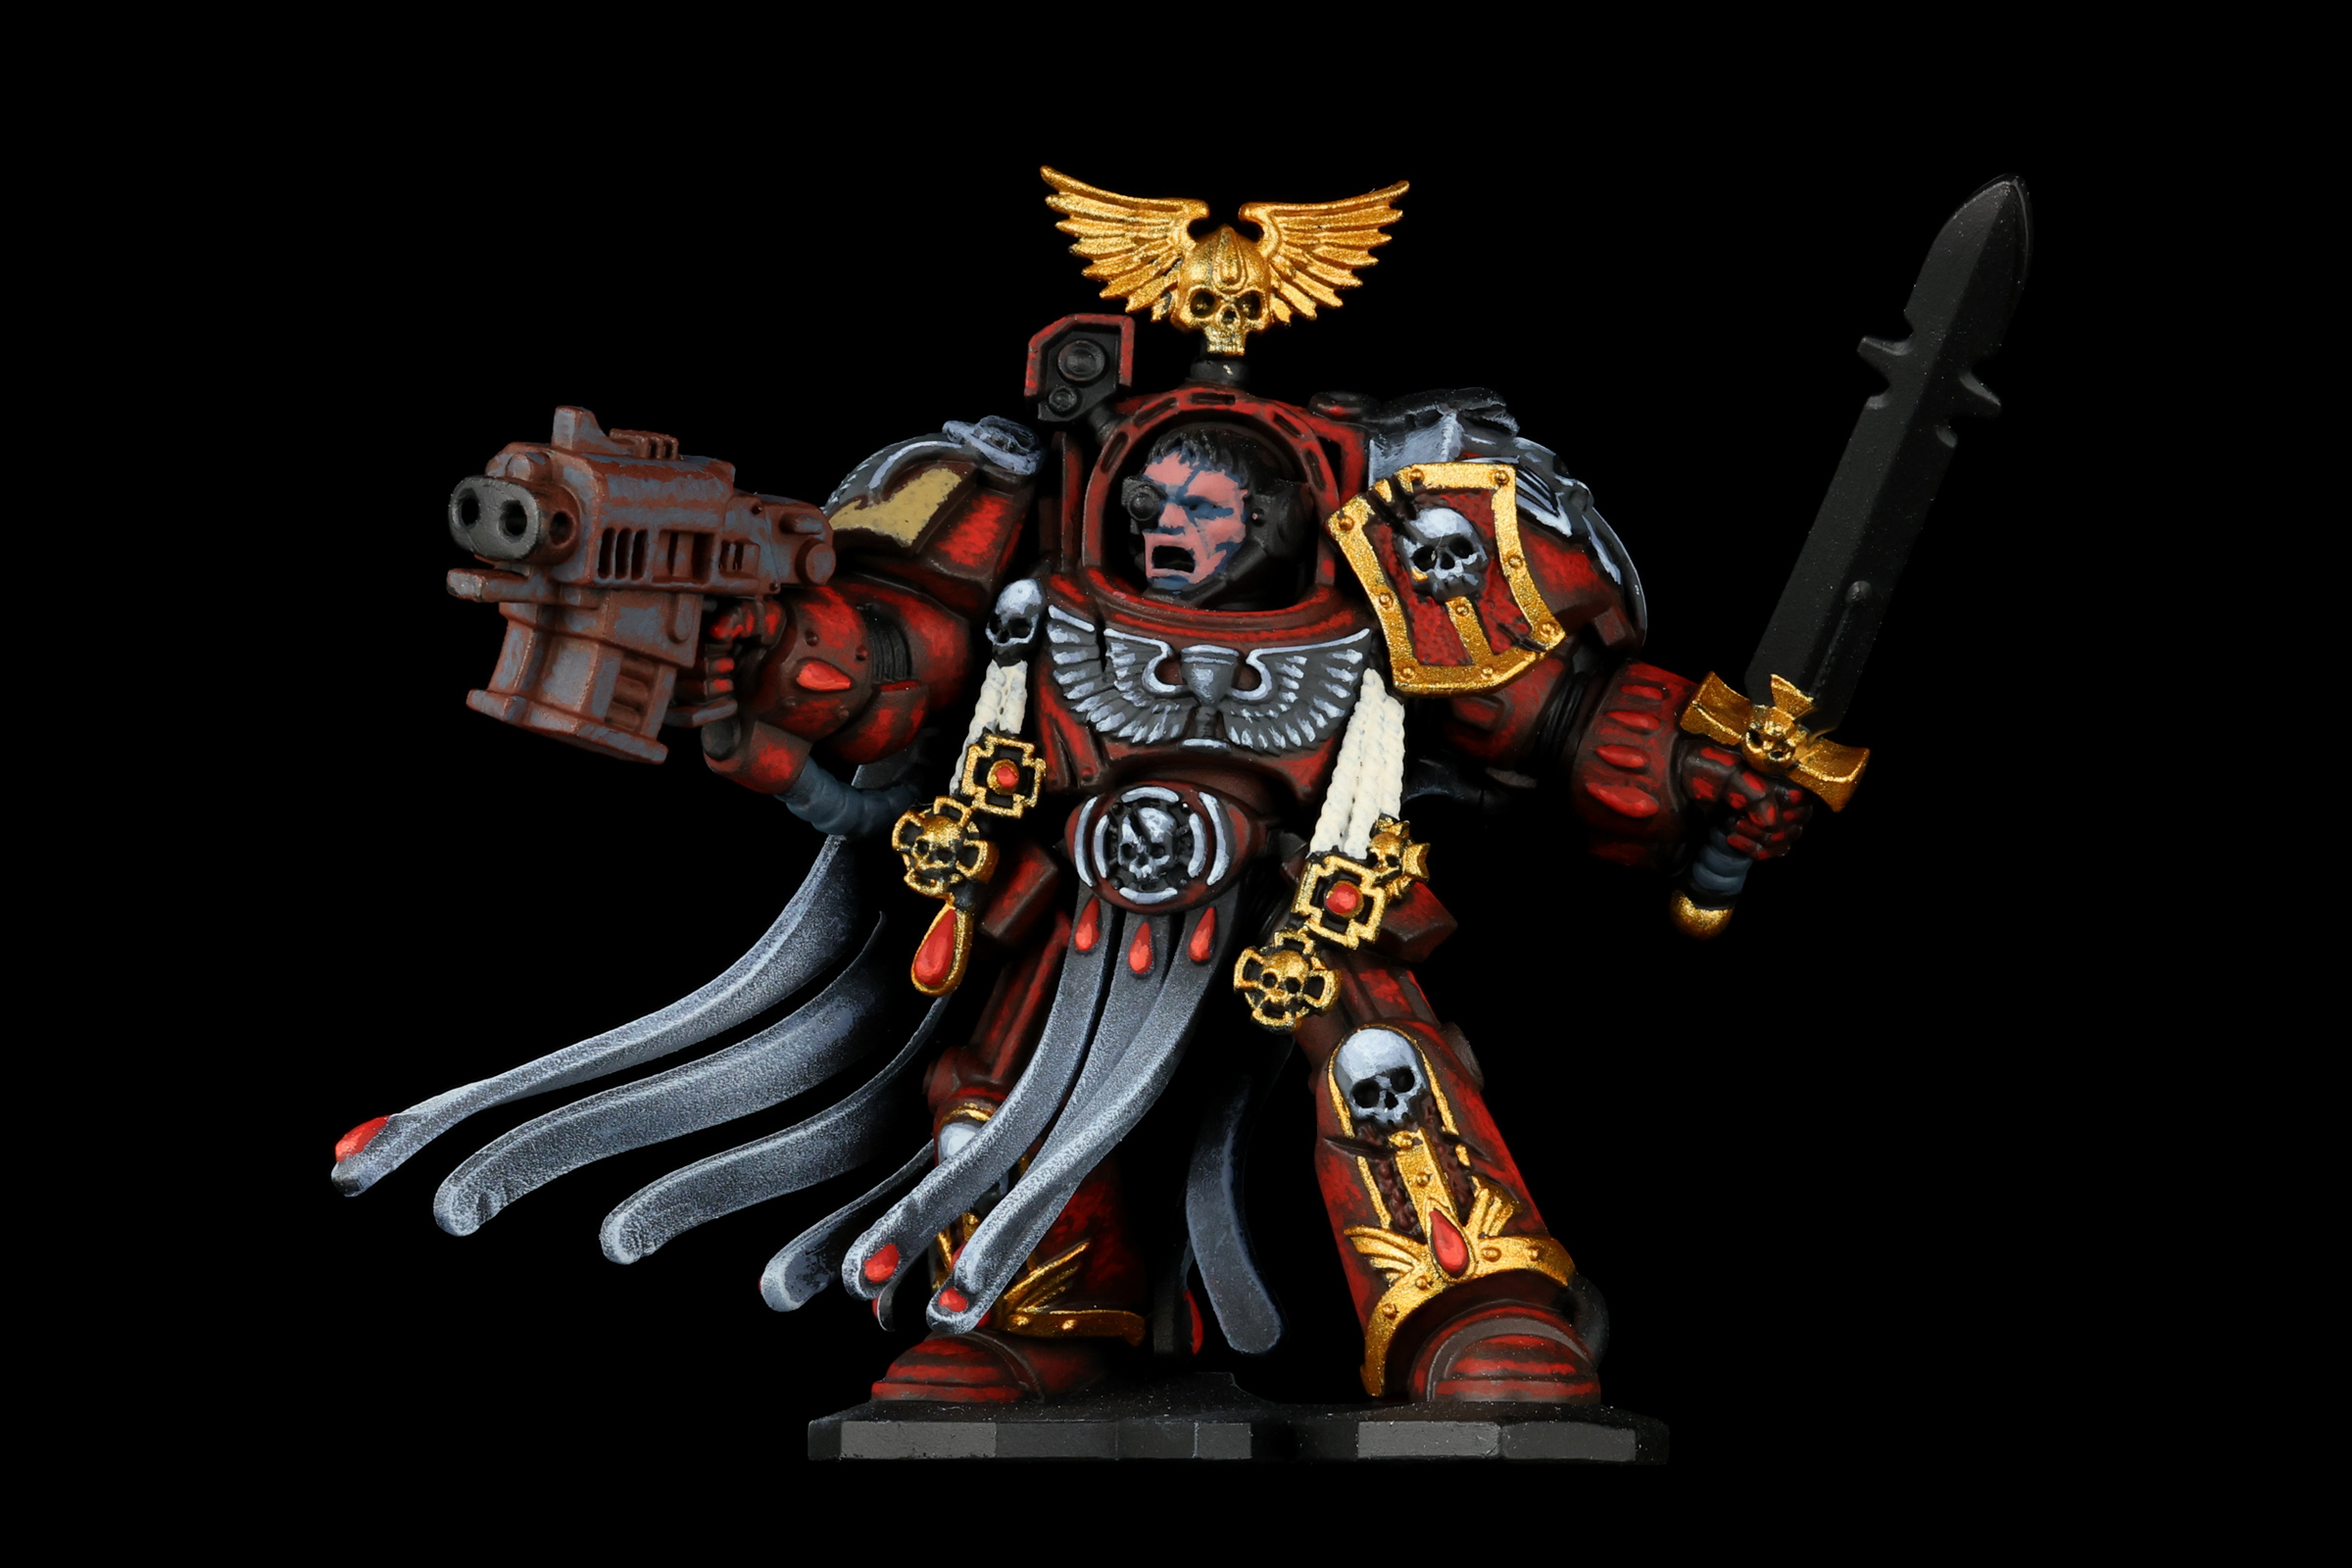
And we finally come to the arbitrary point in the model where I decide to paint the skin. An awkward start, but
base the skin with Vallejo Abyssal Turquoise. Yeah, you red that right. Trust me, it turns out well.
If your model has random cables, like the ones under Lorenzo's arms, hit those with
Incubi Darkness.
 Blood Angel Terminator. Credit: Pendulin
 Blood Angel Terminator. Credit: Pendulin
Follow up the skin with
Vallejo Succubus Skin. I honestly did a poor job blending them here, but I clean it up a bit in later pictures.
 Blood Angel Terminator. Credit: Pendulin
Then mix a little bit of
Vallejo Succubus Skin and Vallejo Plague Brown for your skin highlights. On his eyes, I did a little dash of
Yriel Yellow for some Space Marine glowing eye coolness.
I also painted the power sword in this step, because I got carried away. For that, start by painting the whole blade in
Incubi Darkness. Then feather the Incubi Darkness to
Thunderhawk Blue as the blade gets brighter. From there, feather it to
Fenrisian Grey for the blade at it's brightest. Hit the edge of the blade with white, either
ProAcryl White or
Vallejo Dead White or whatever you have handy.
 Blood Angel Terminator. Credit: Pendulin
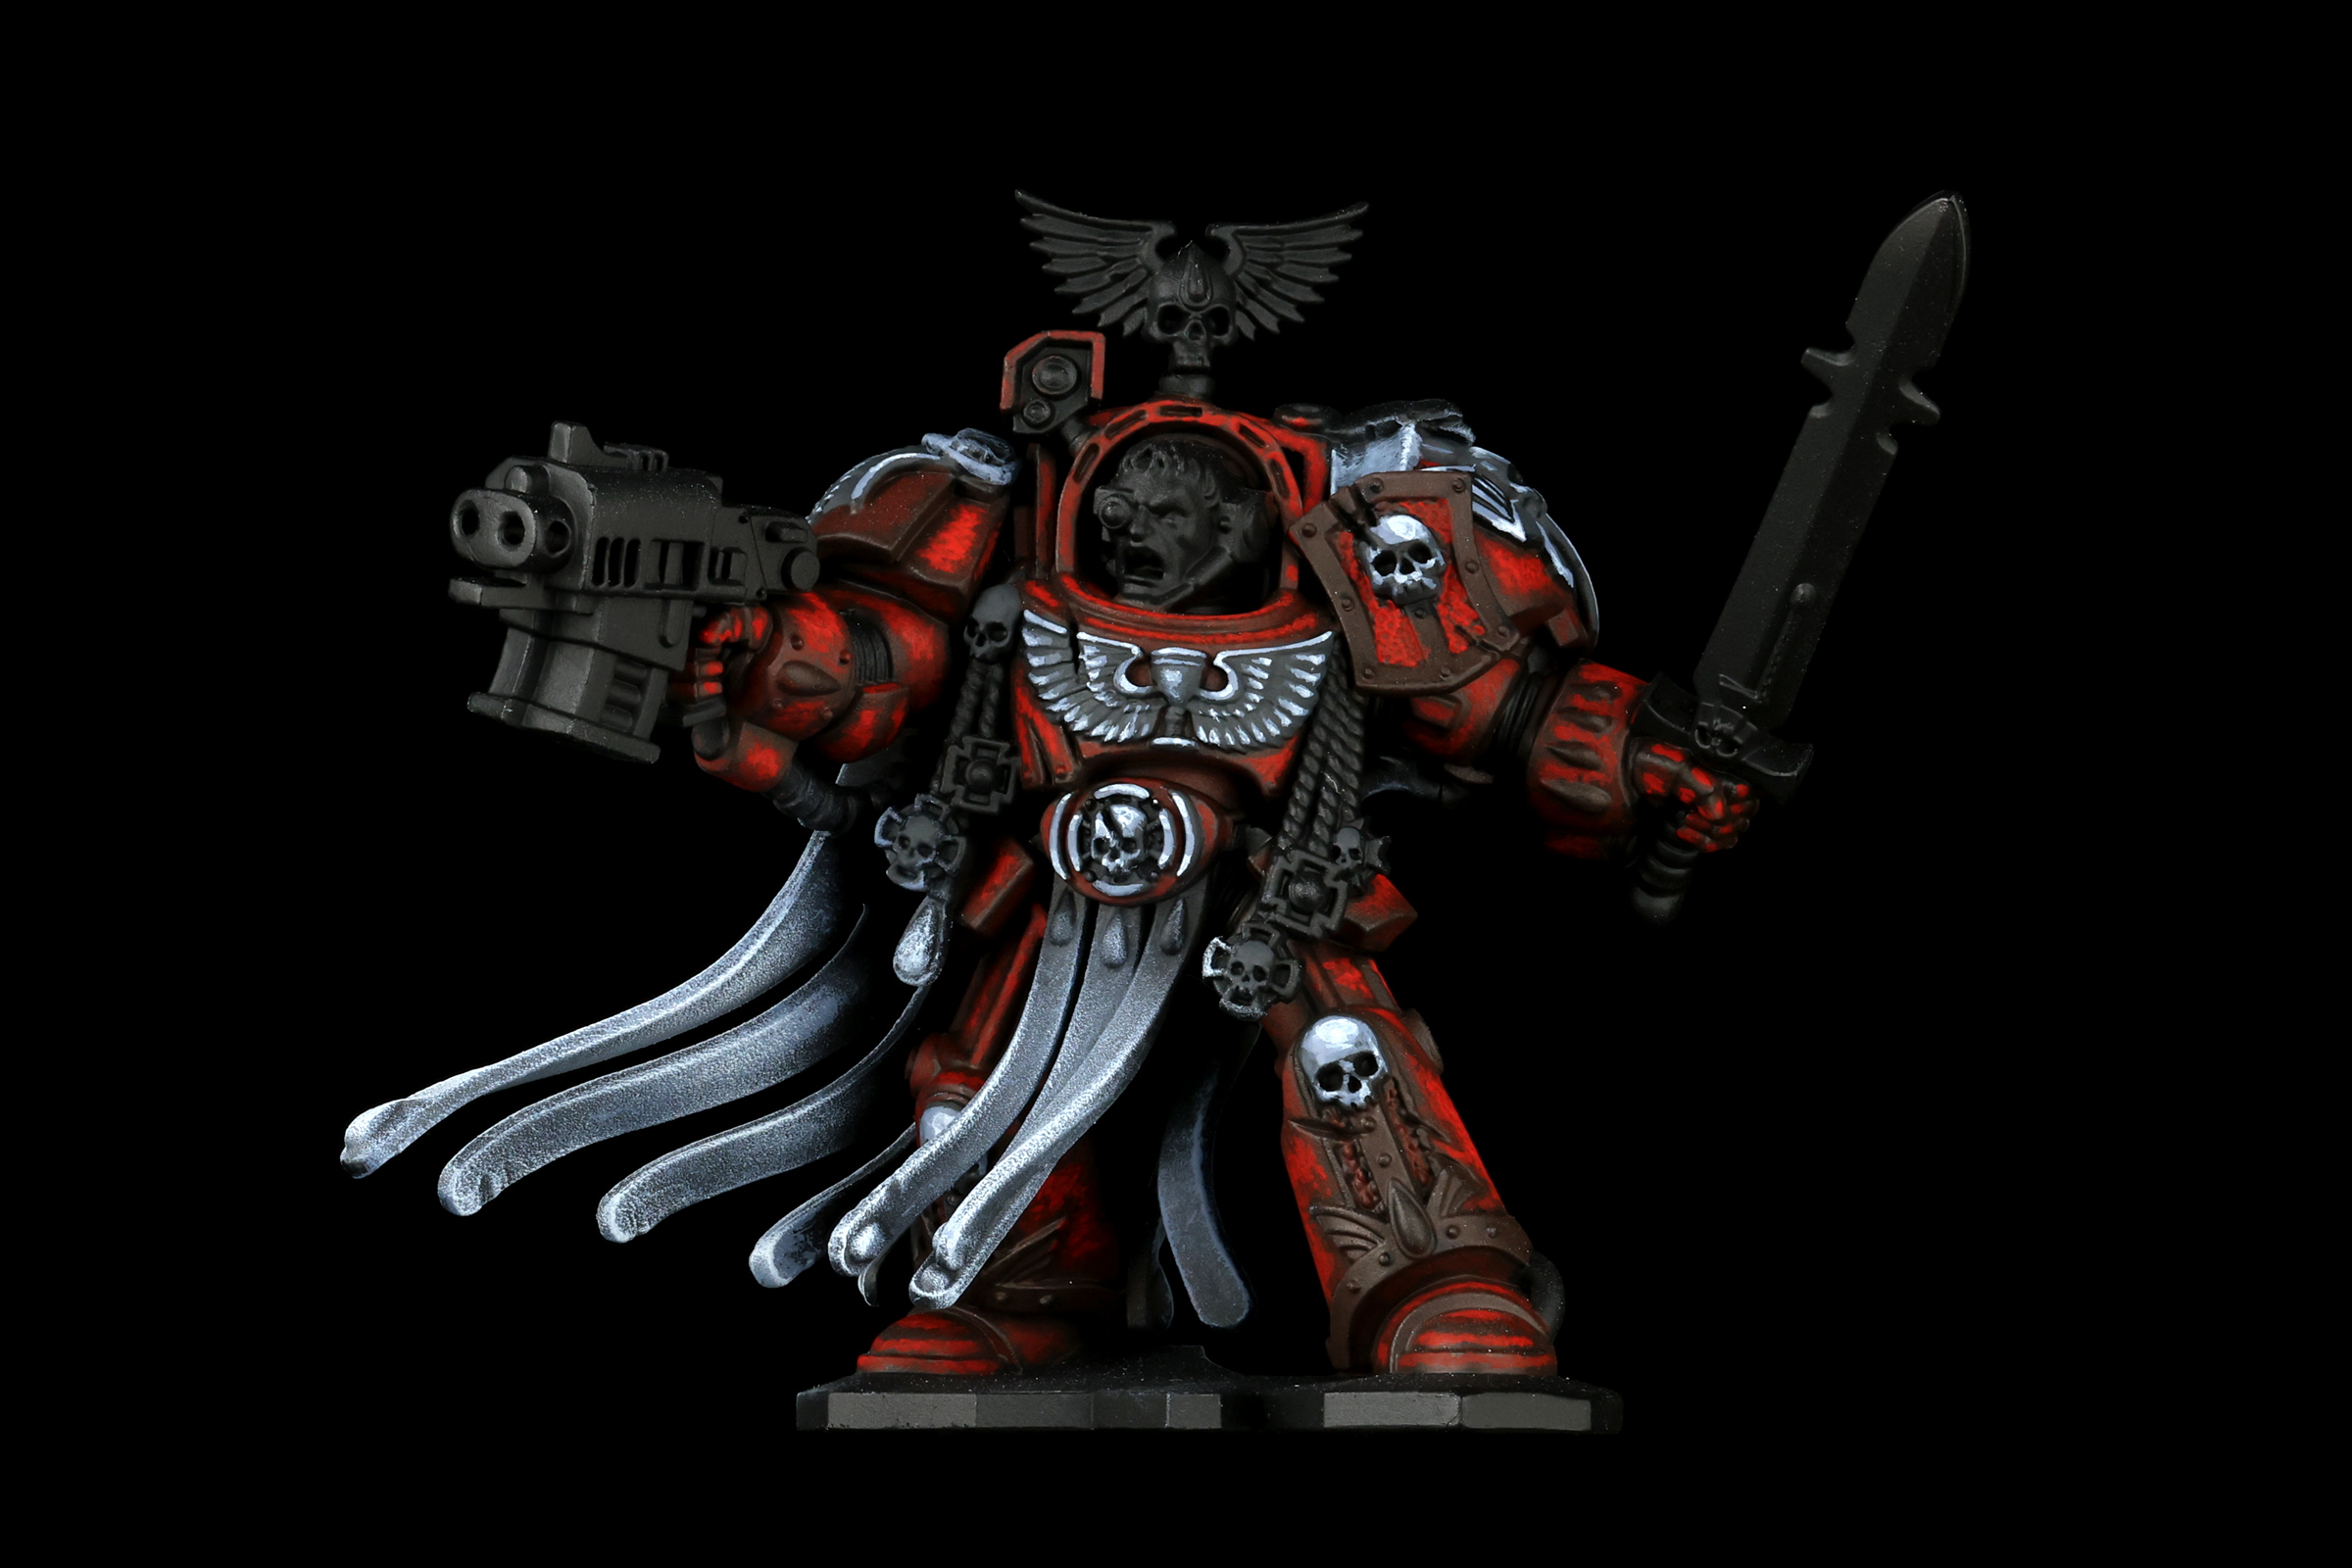
Blood Angel Terminator. Credit: PendulinLet's get some shading in. Shade all the gold with
Reikland Fleshshade to give it a reddish hue, and shade any white tassels with
Agrax Earthshade. If you have gems whose edges don't seem defined enough, especially when next to red armor, then trace a thin amount of
Nuln Oil around their edges. This will create a nice dividing line between that separates the gem from its surroundings.
In the photo below I also did some edge-stippling with
Vallejo Metal Color Steel. You can most easily see this on the bolter, and the scratches to Lorenzo's armor on his lower chest. But I applied this anywhere that light would be catching an edge to the armor.
Also in the picture below I finished painting the cables below his arm. Not sure why it took me so long to get back to it, but whatever. Thin down some
Skrag Brown and work it into the ridges of the cables.
One last thing, below I also painted the purity seal on his left shoulder. This follows my standard recipe for purity seals:
Rakarth Flesh paper, Screamer Pink wax, Pink Horror wax highlights, fine scribbles with Rhinox Hide for lettering, and finally wash with Agrax Earthshade.
 Blood Angel Terminator. Credit: Pendulin
 Blood Angel Terminator. Credit: Pendulin
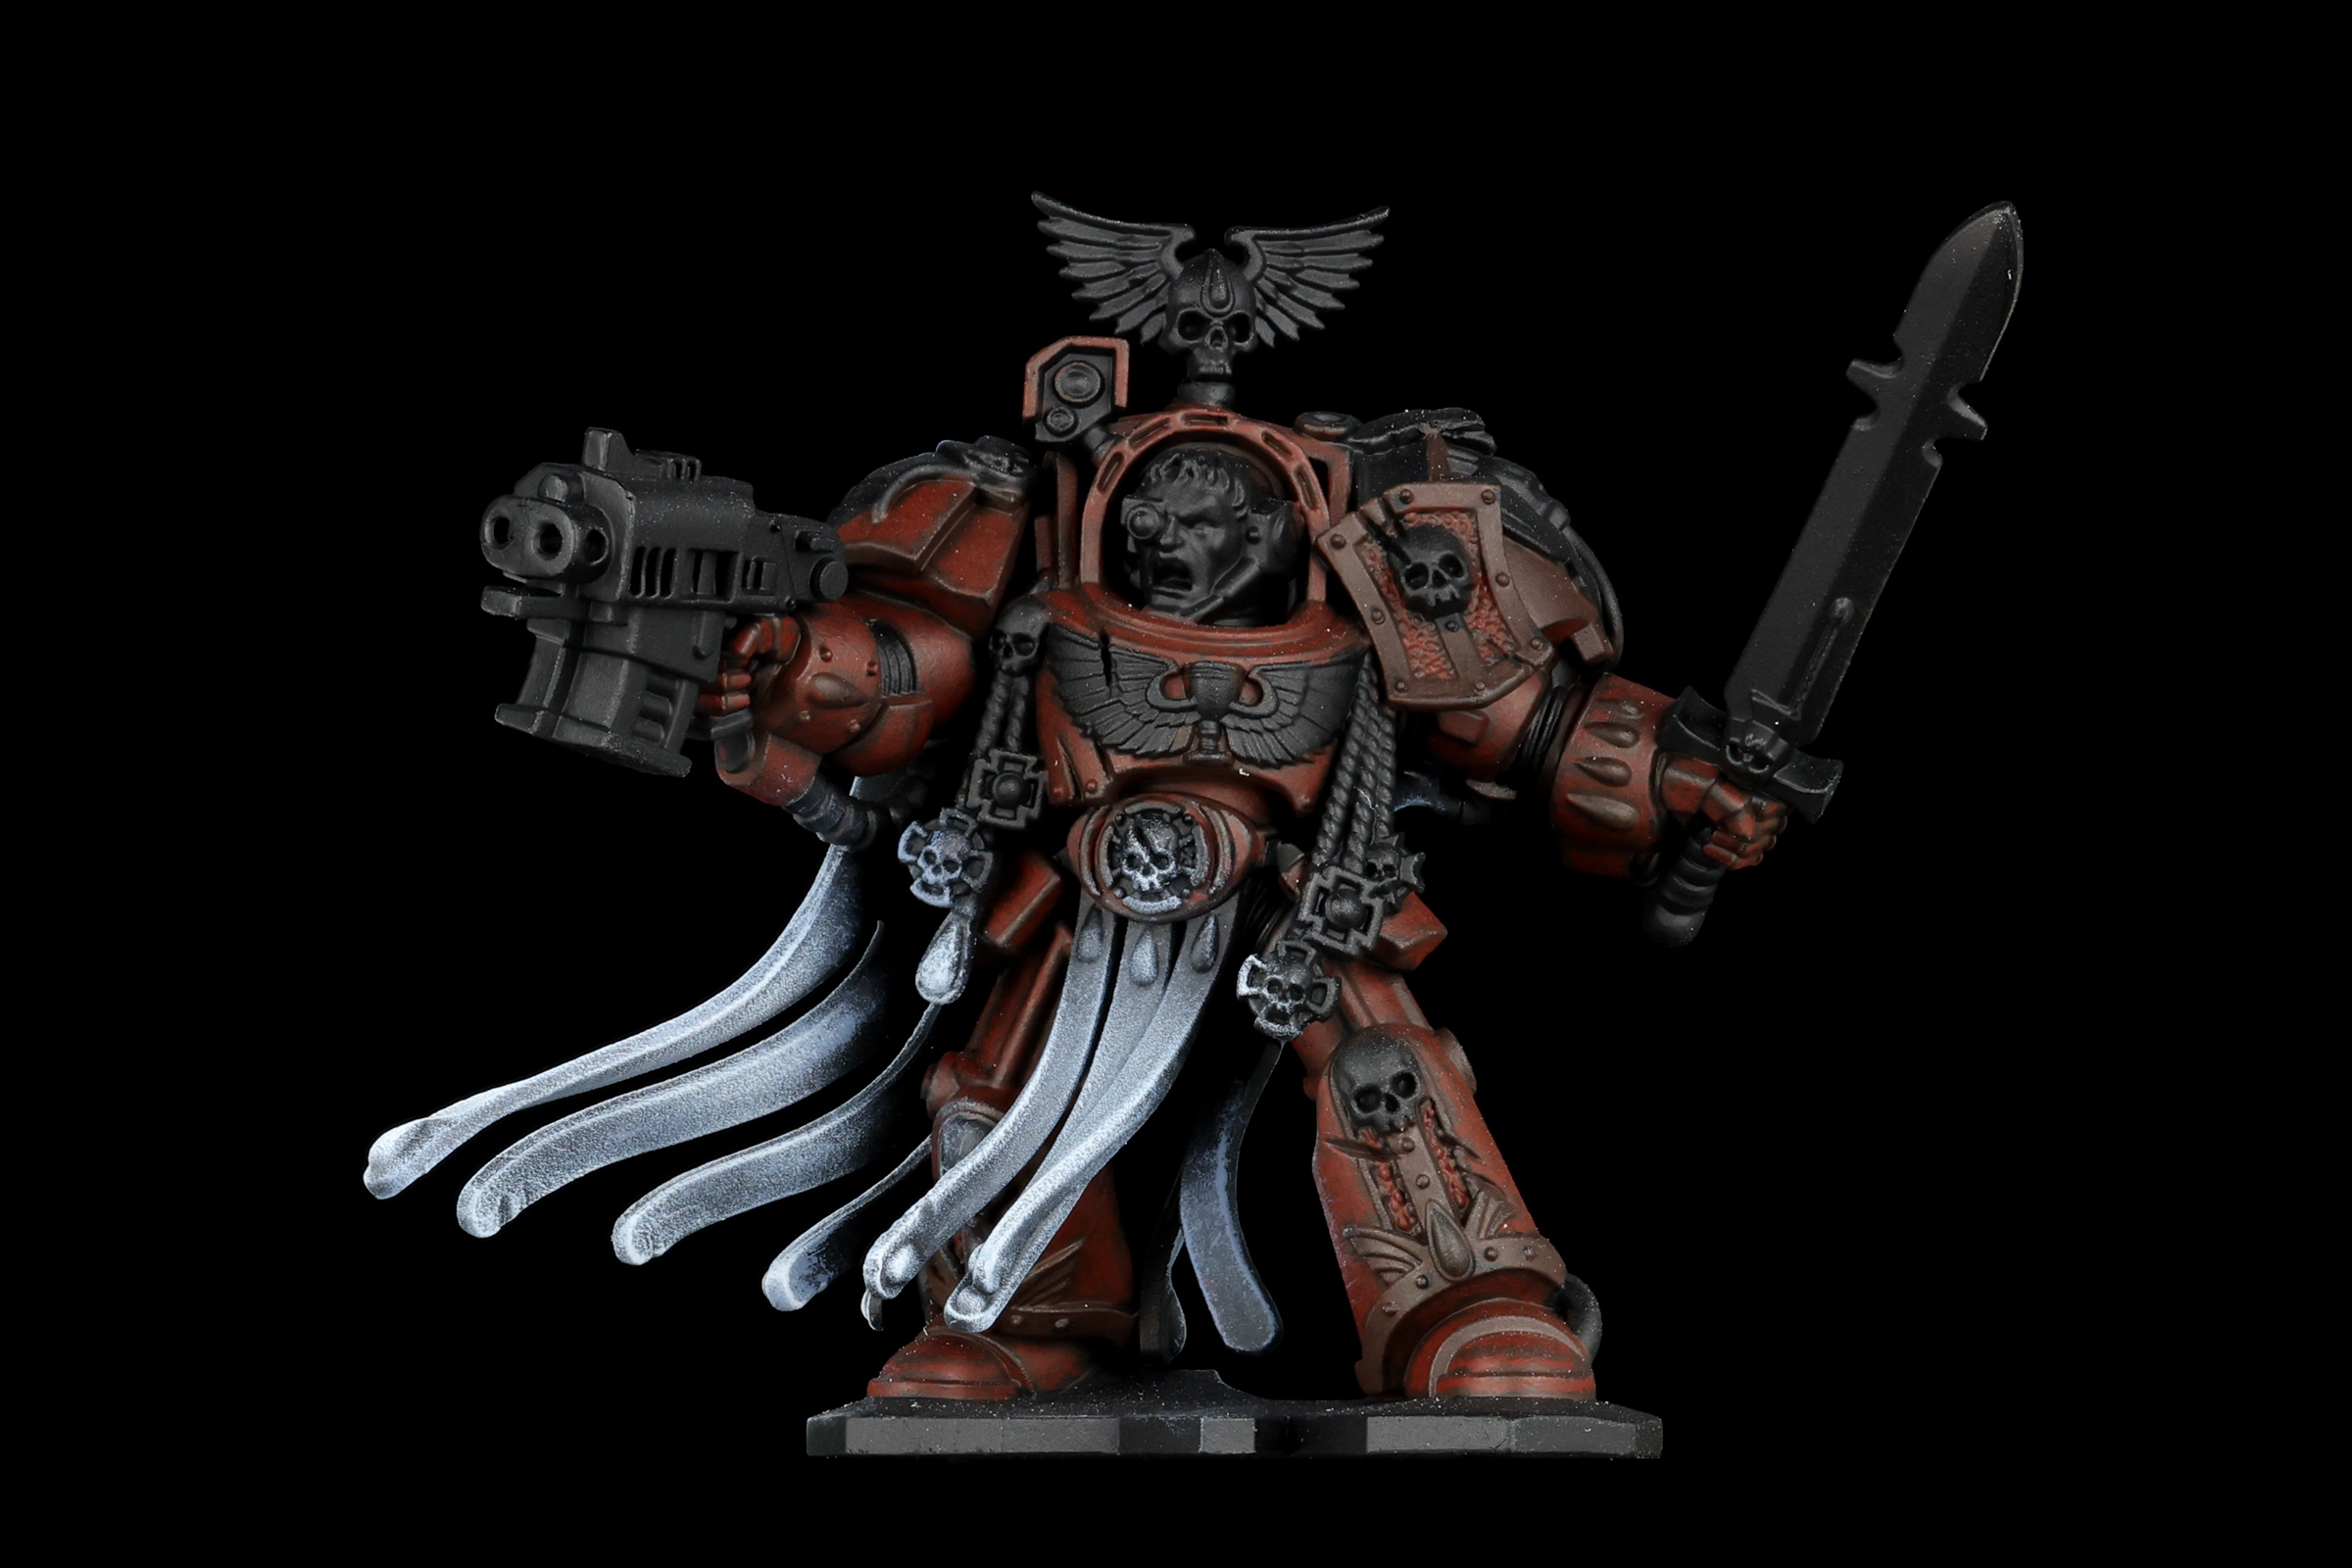
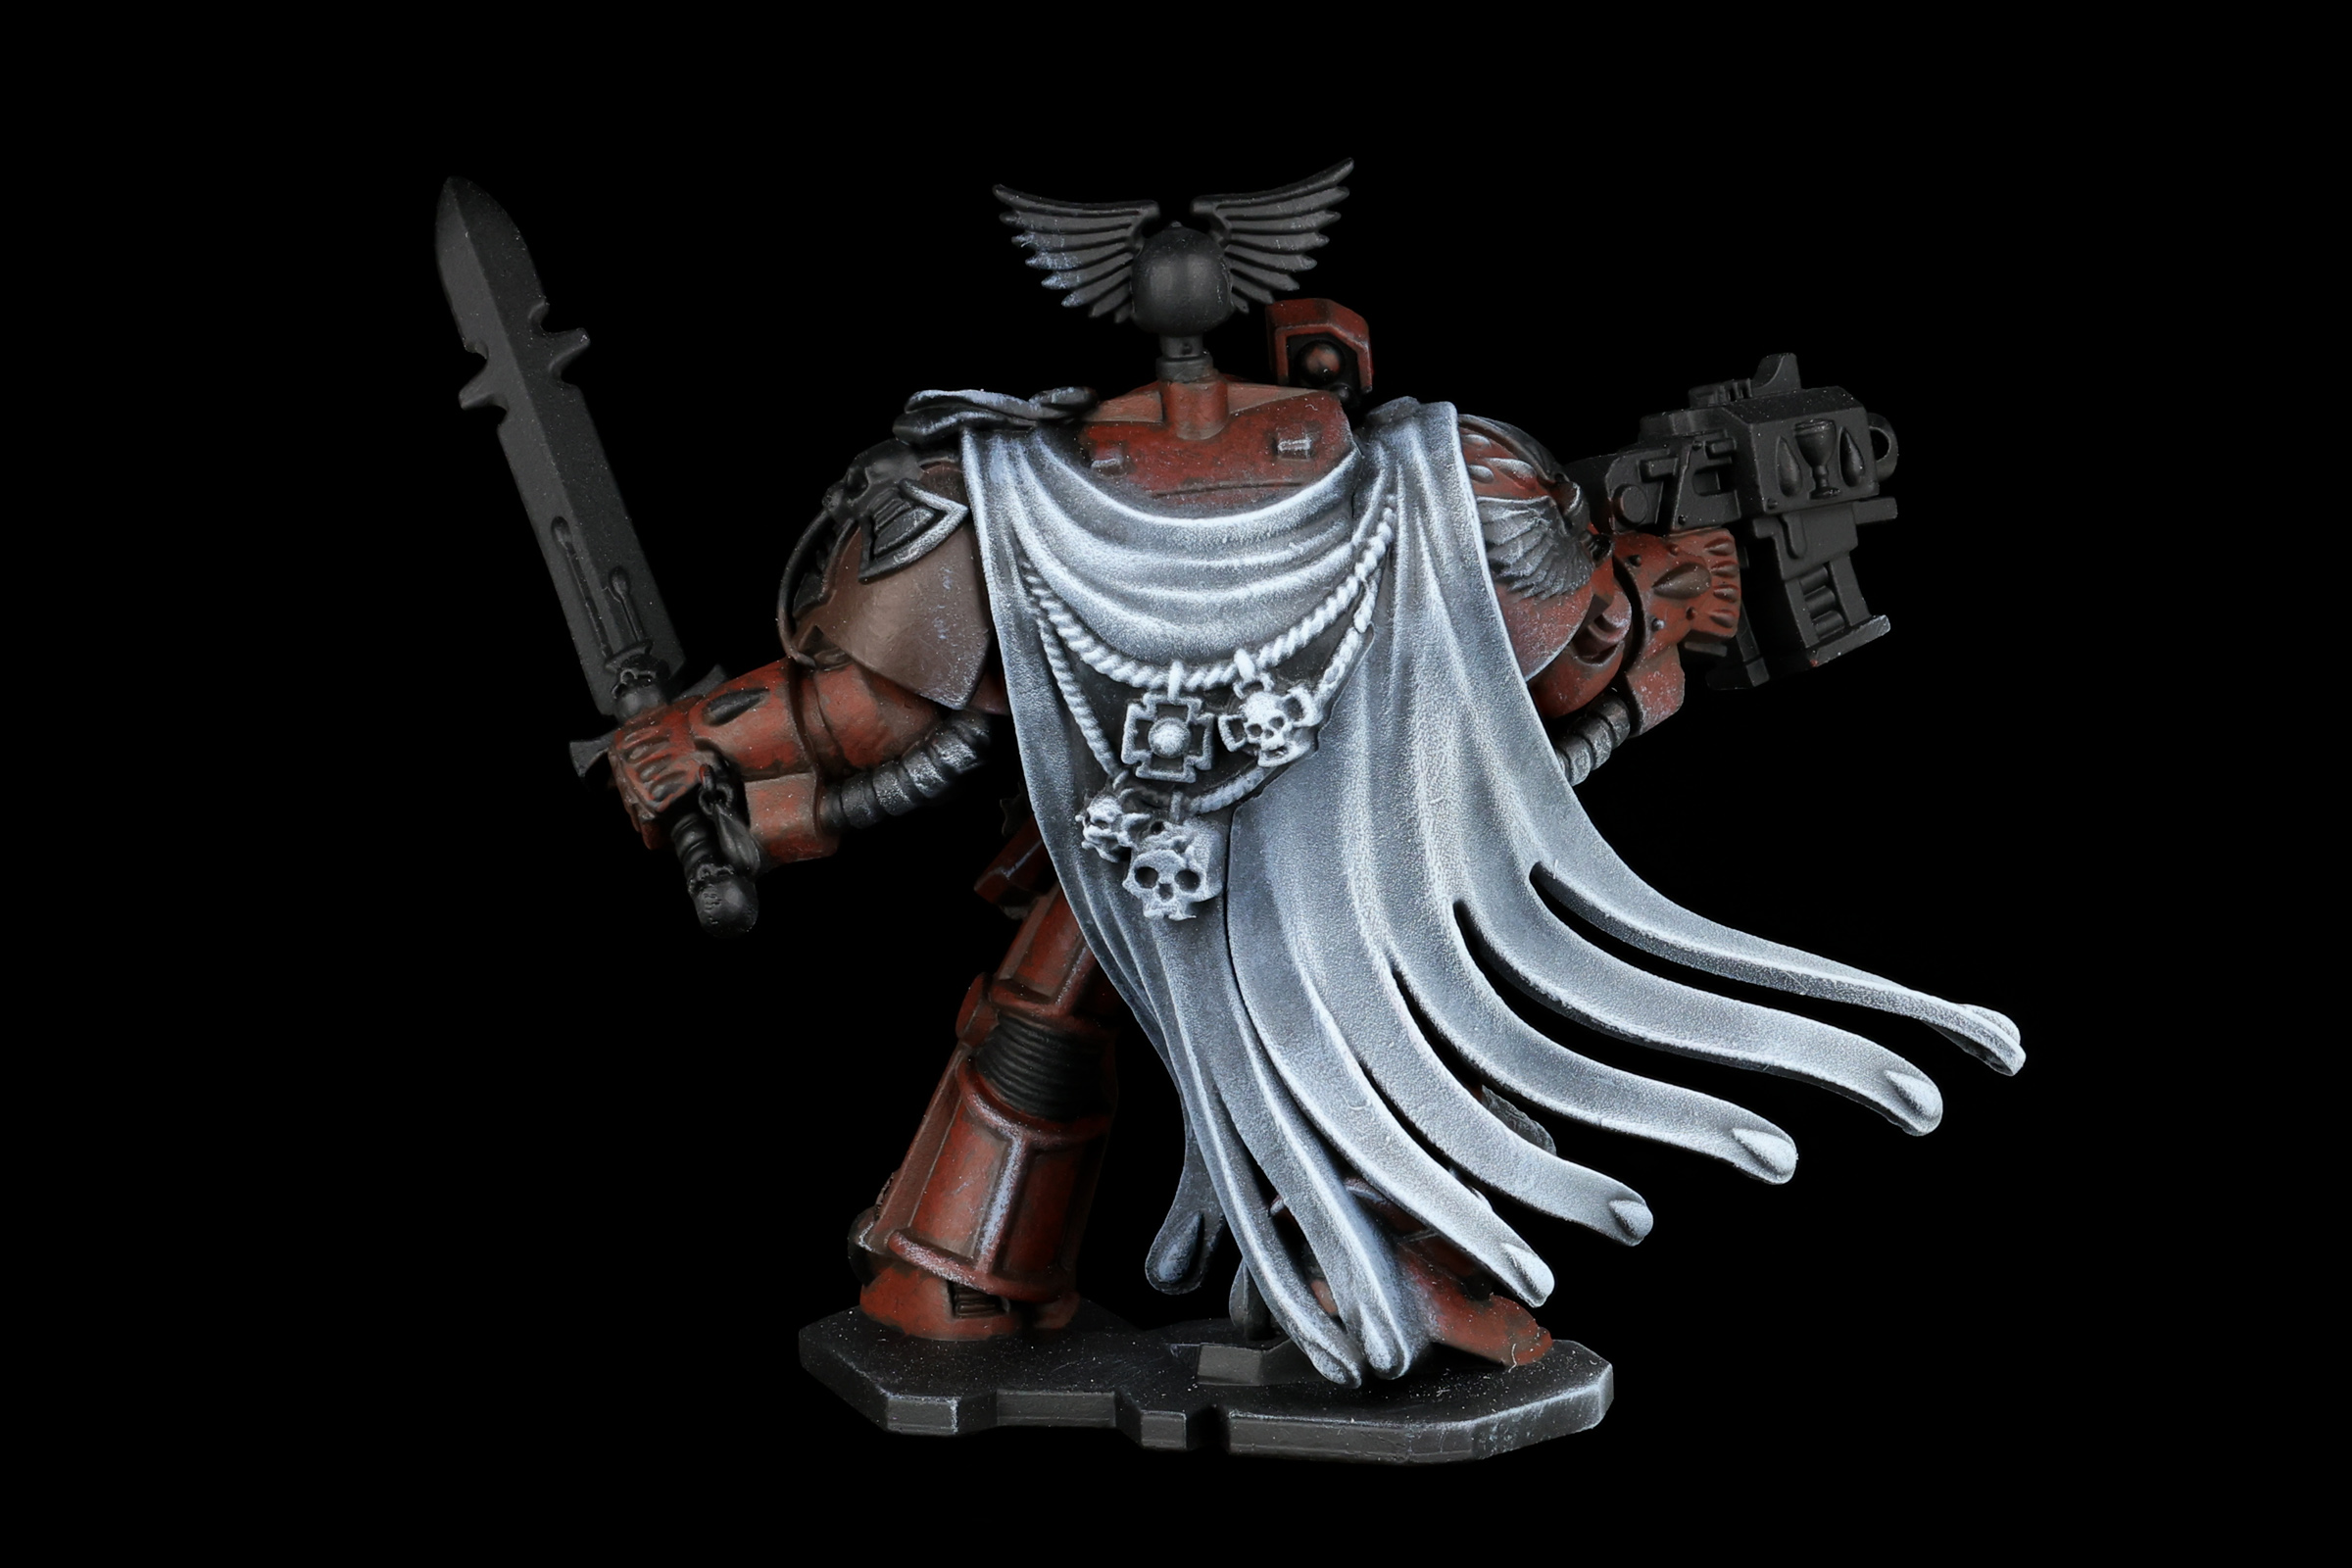
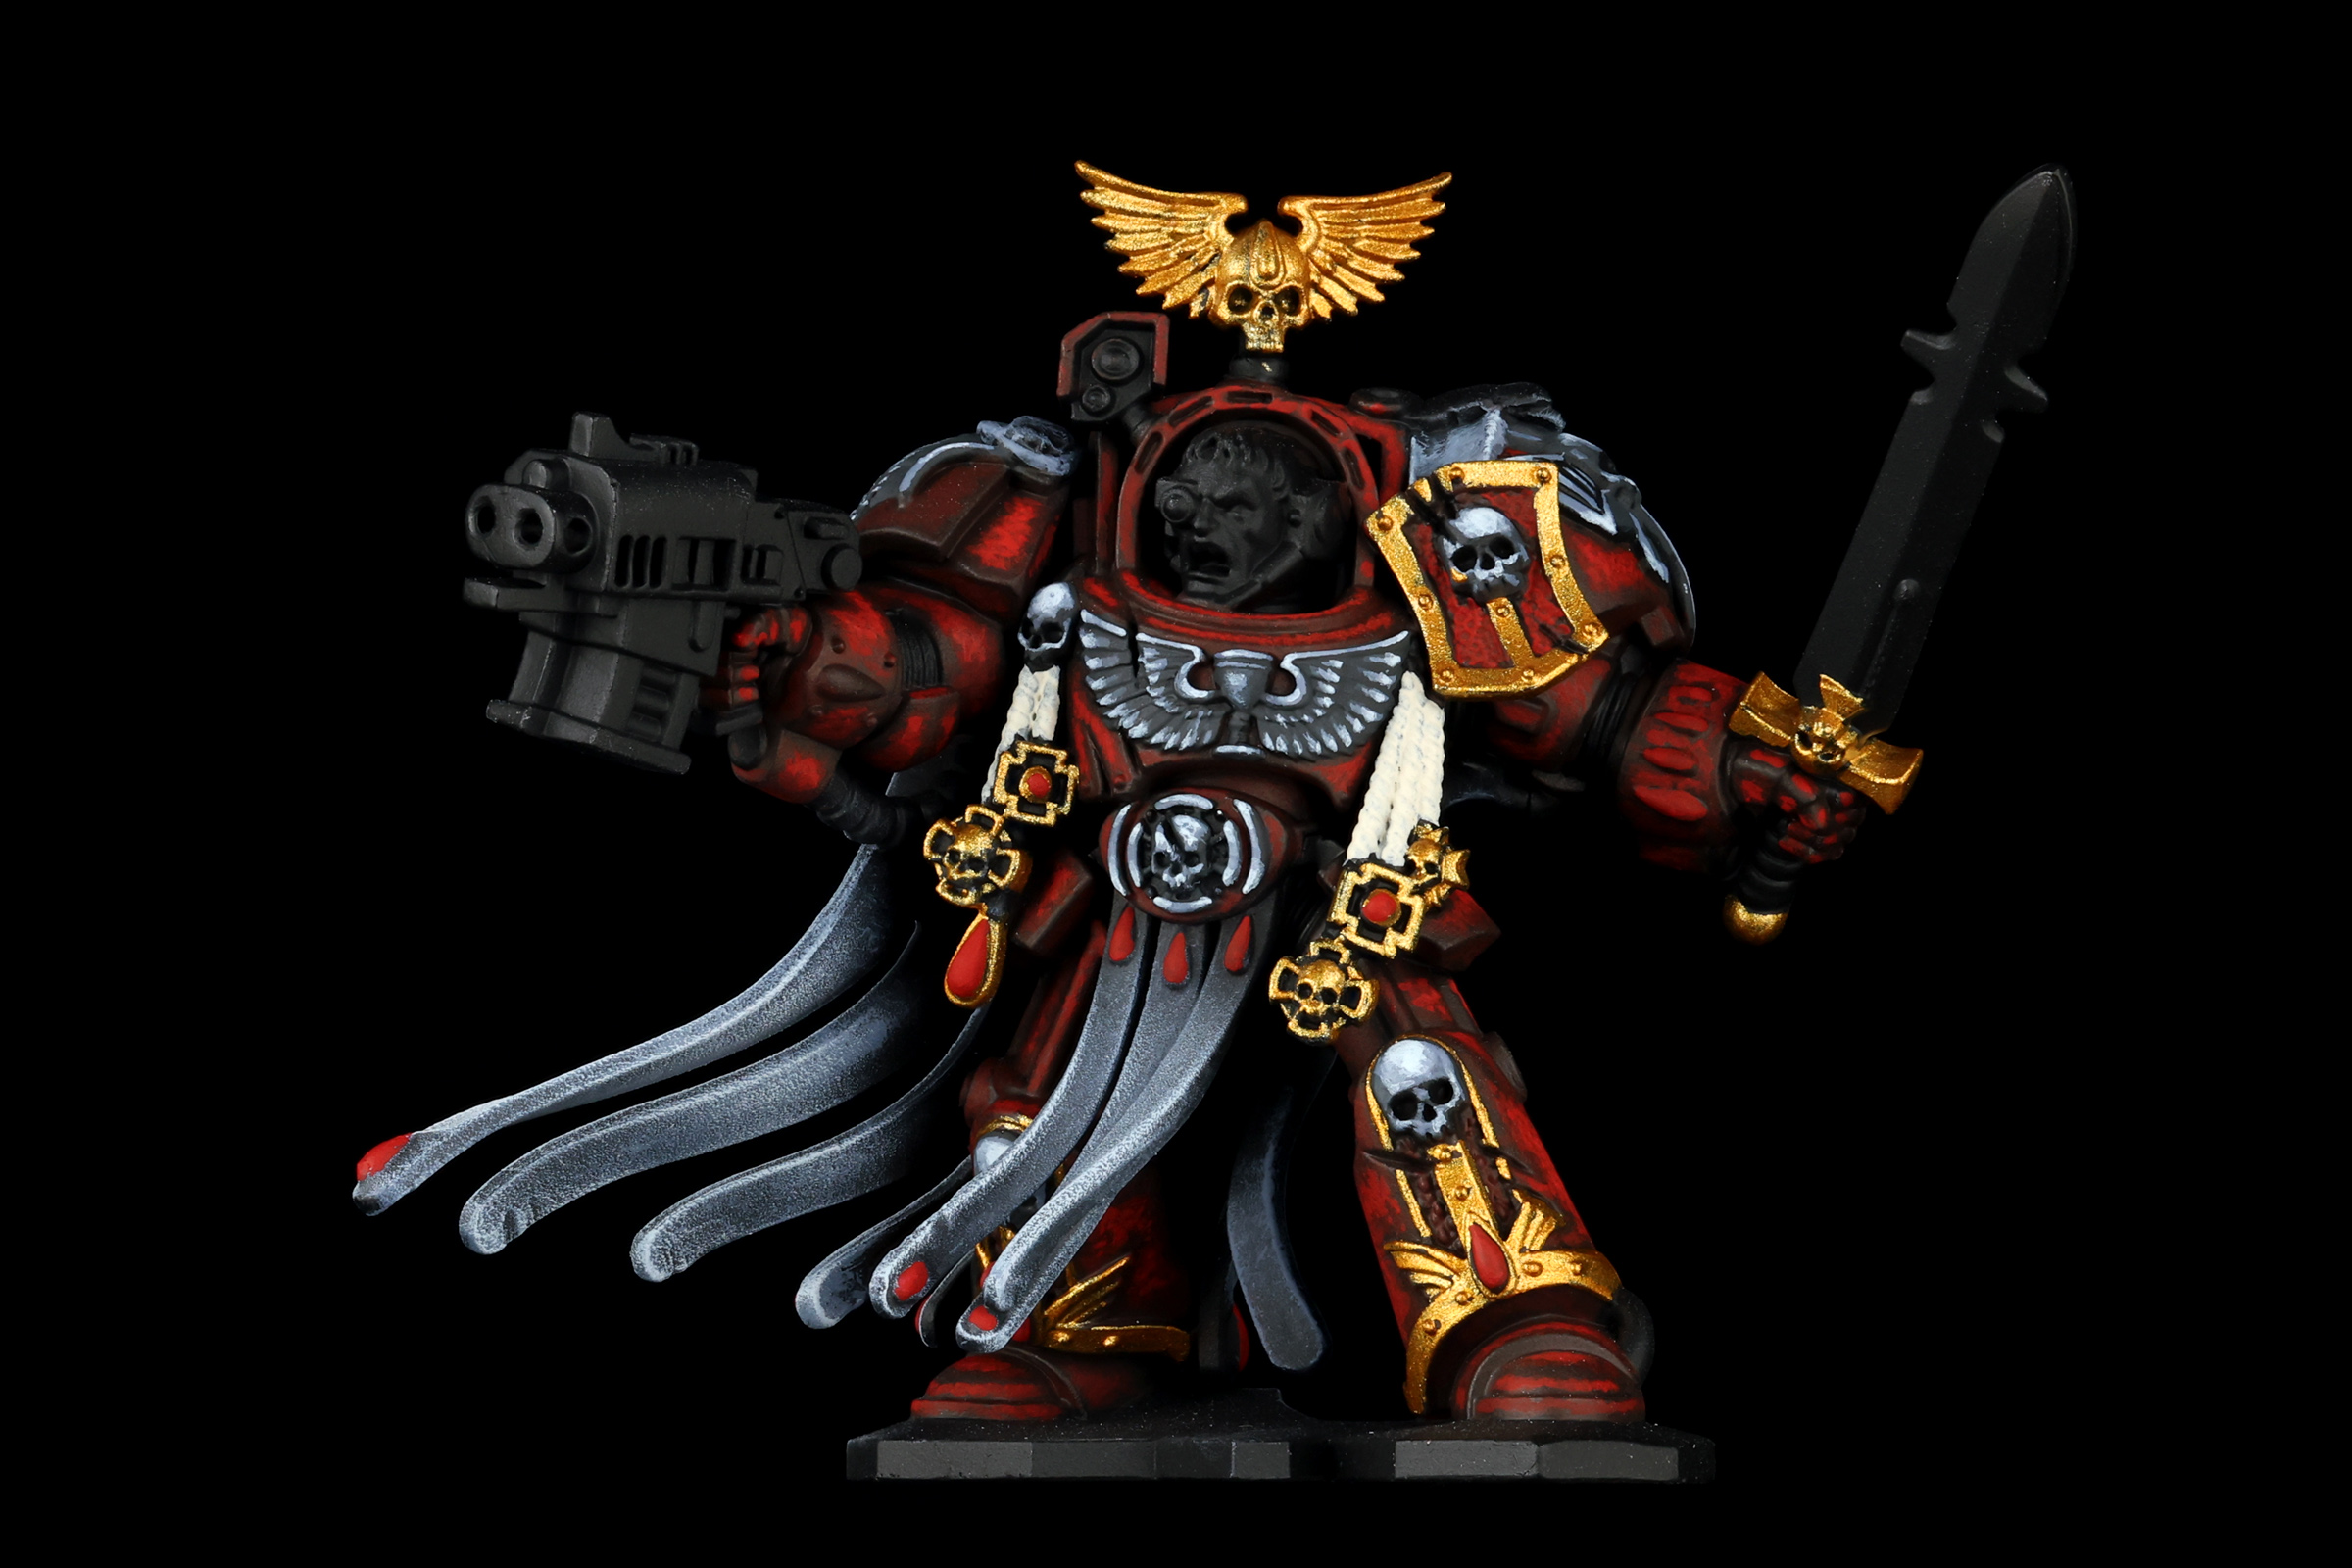
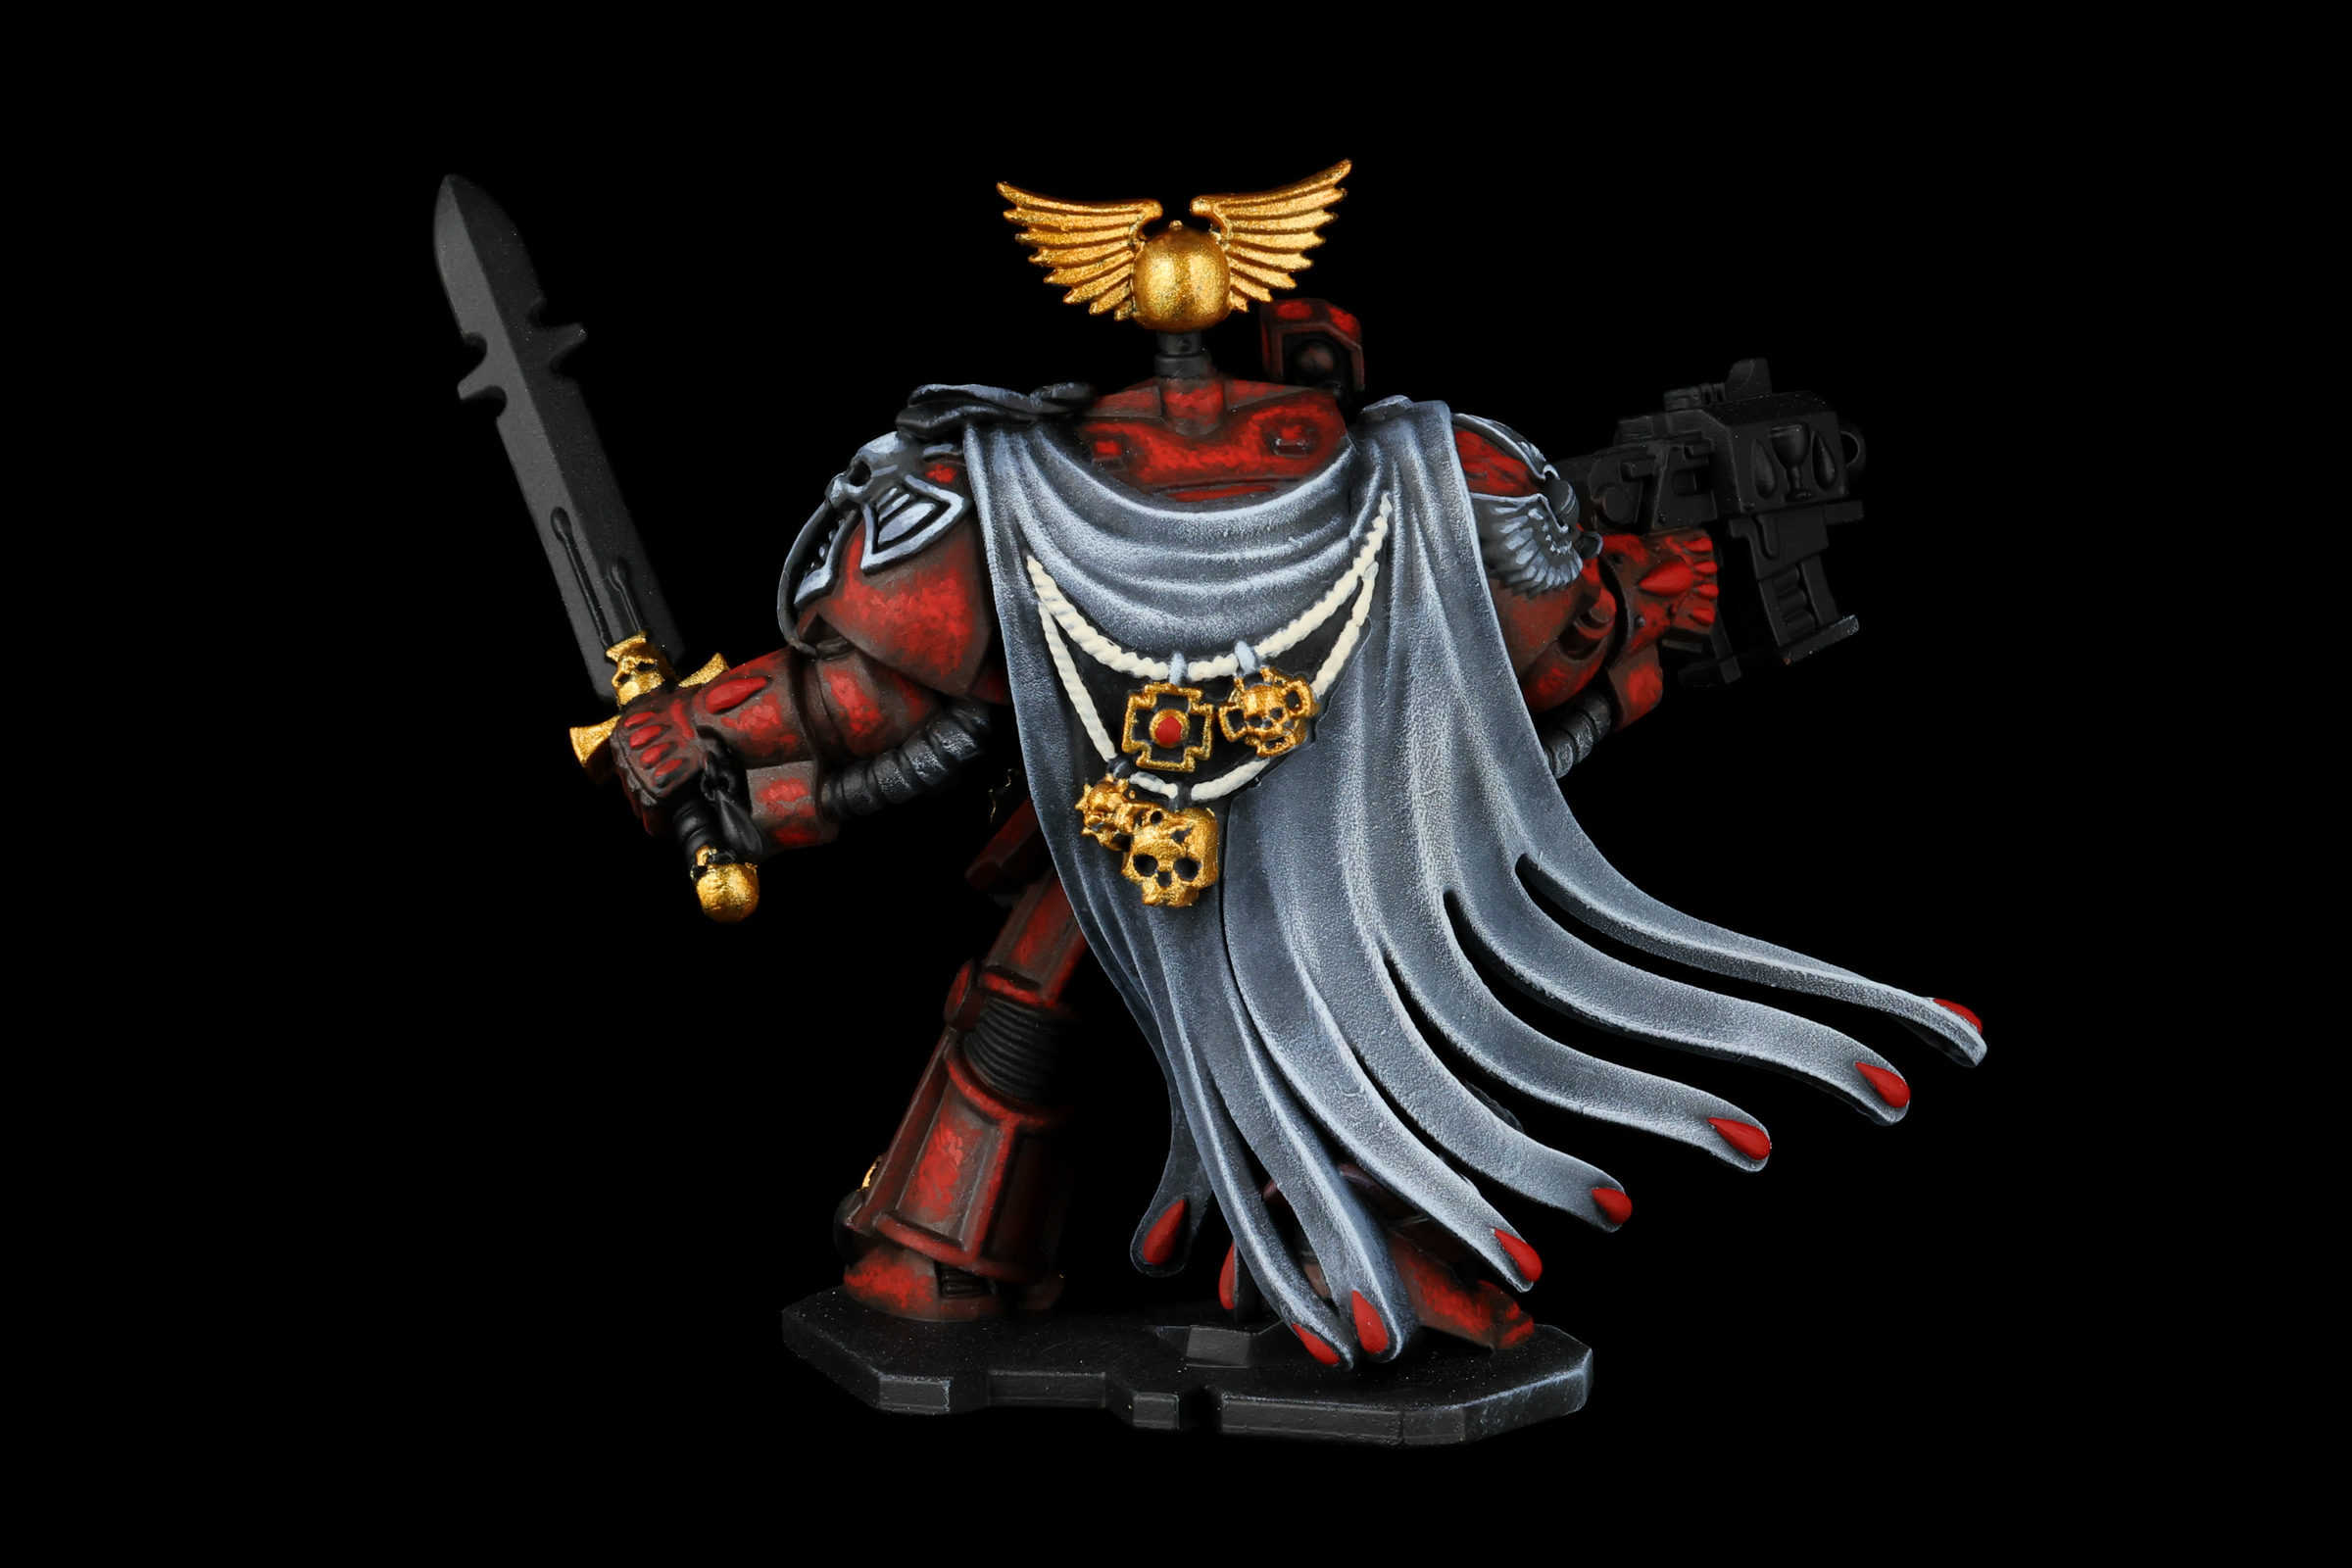
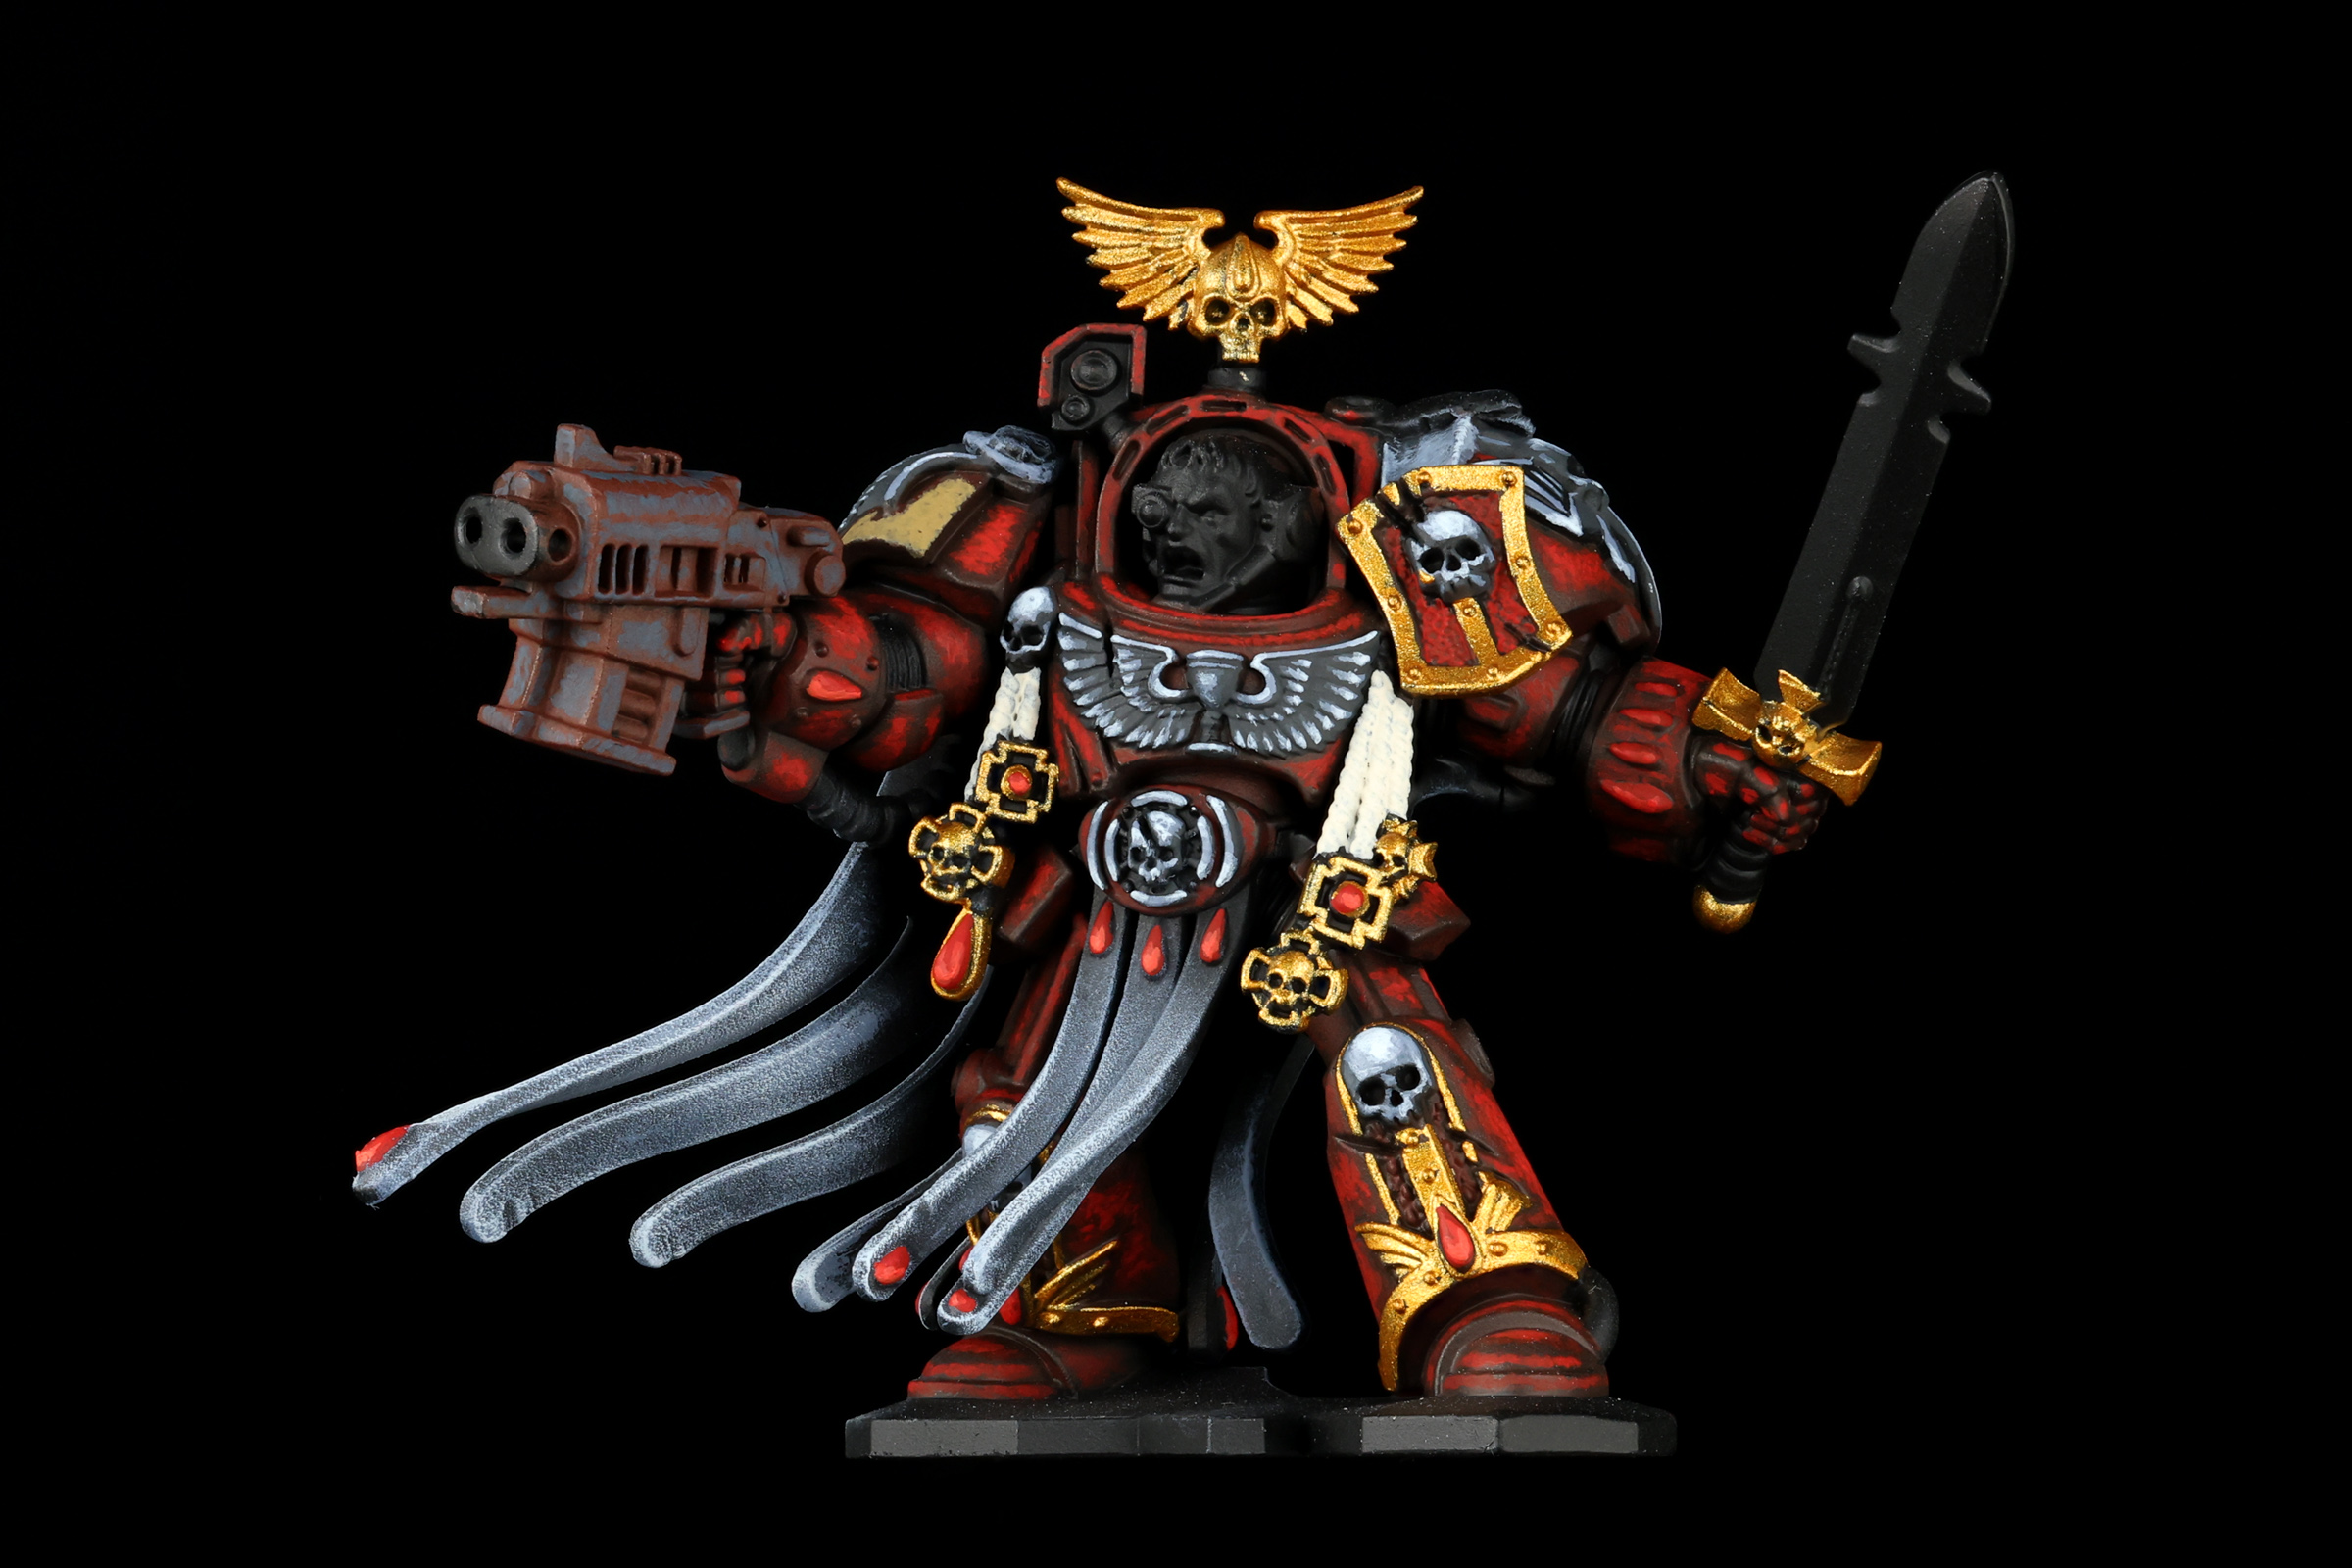
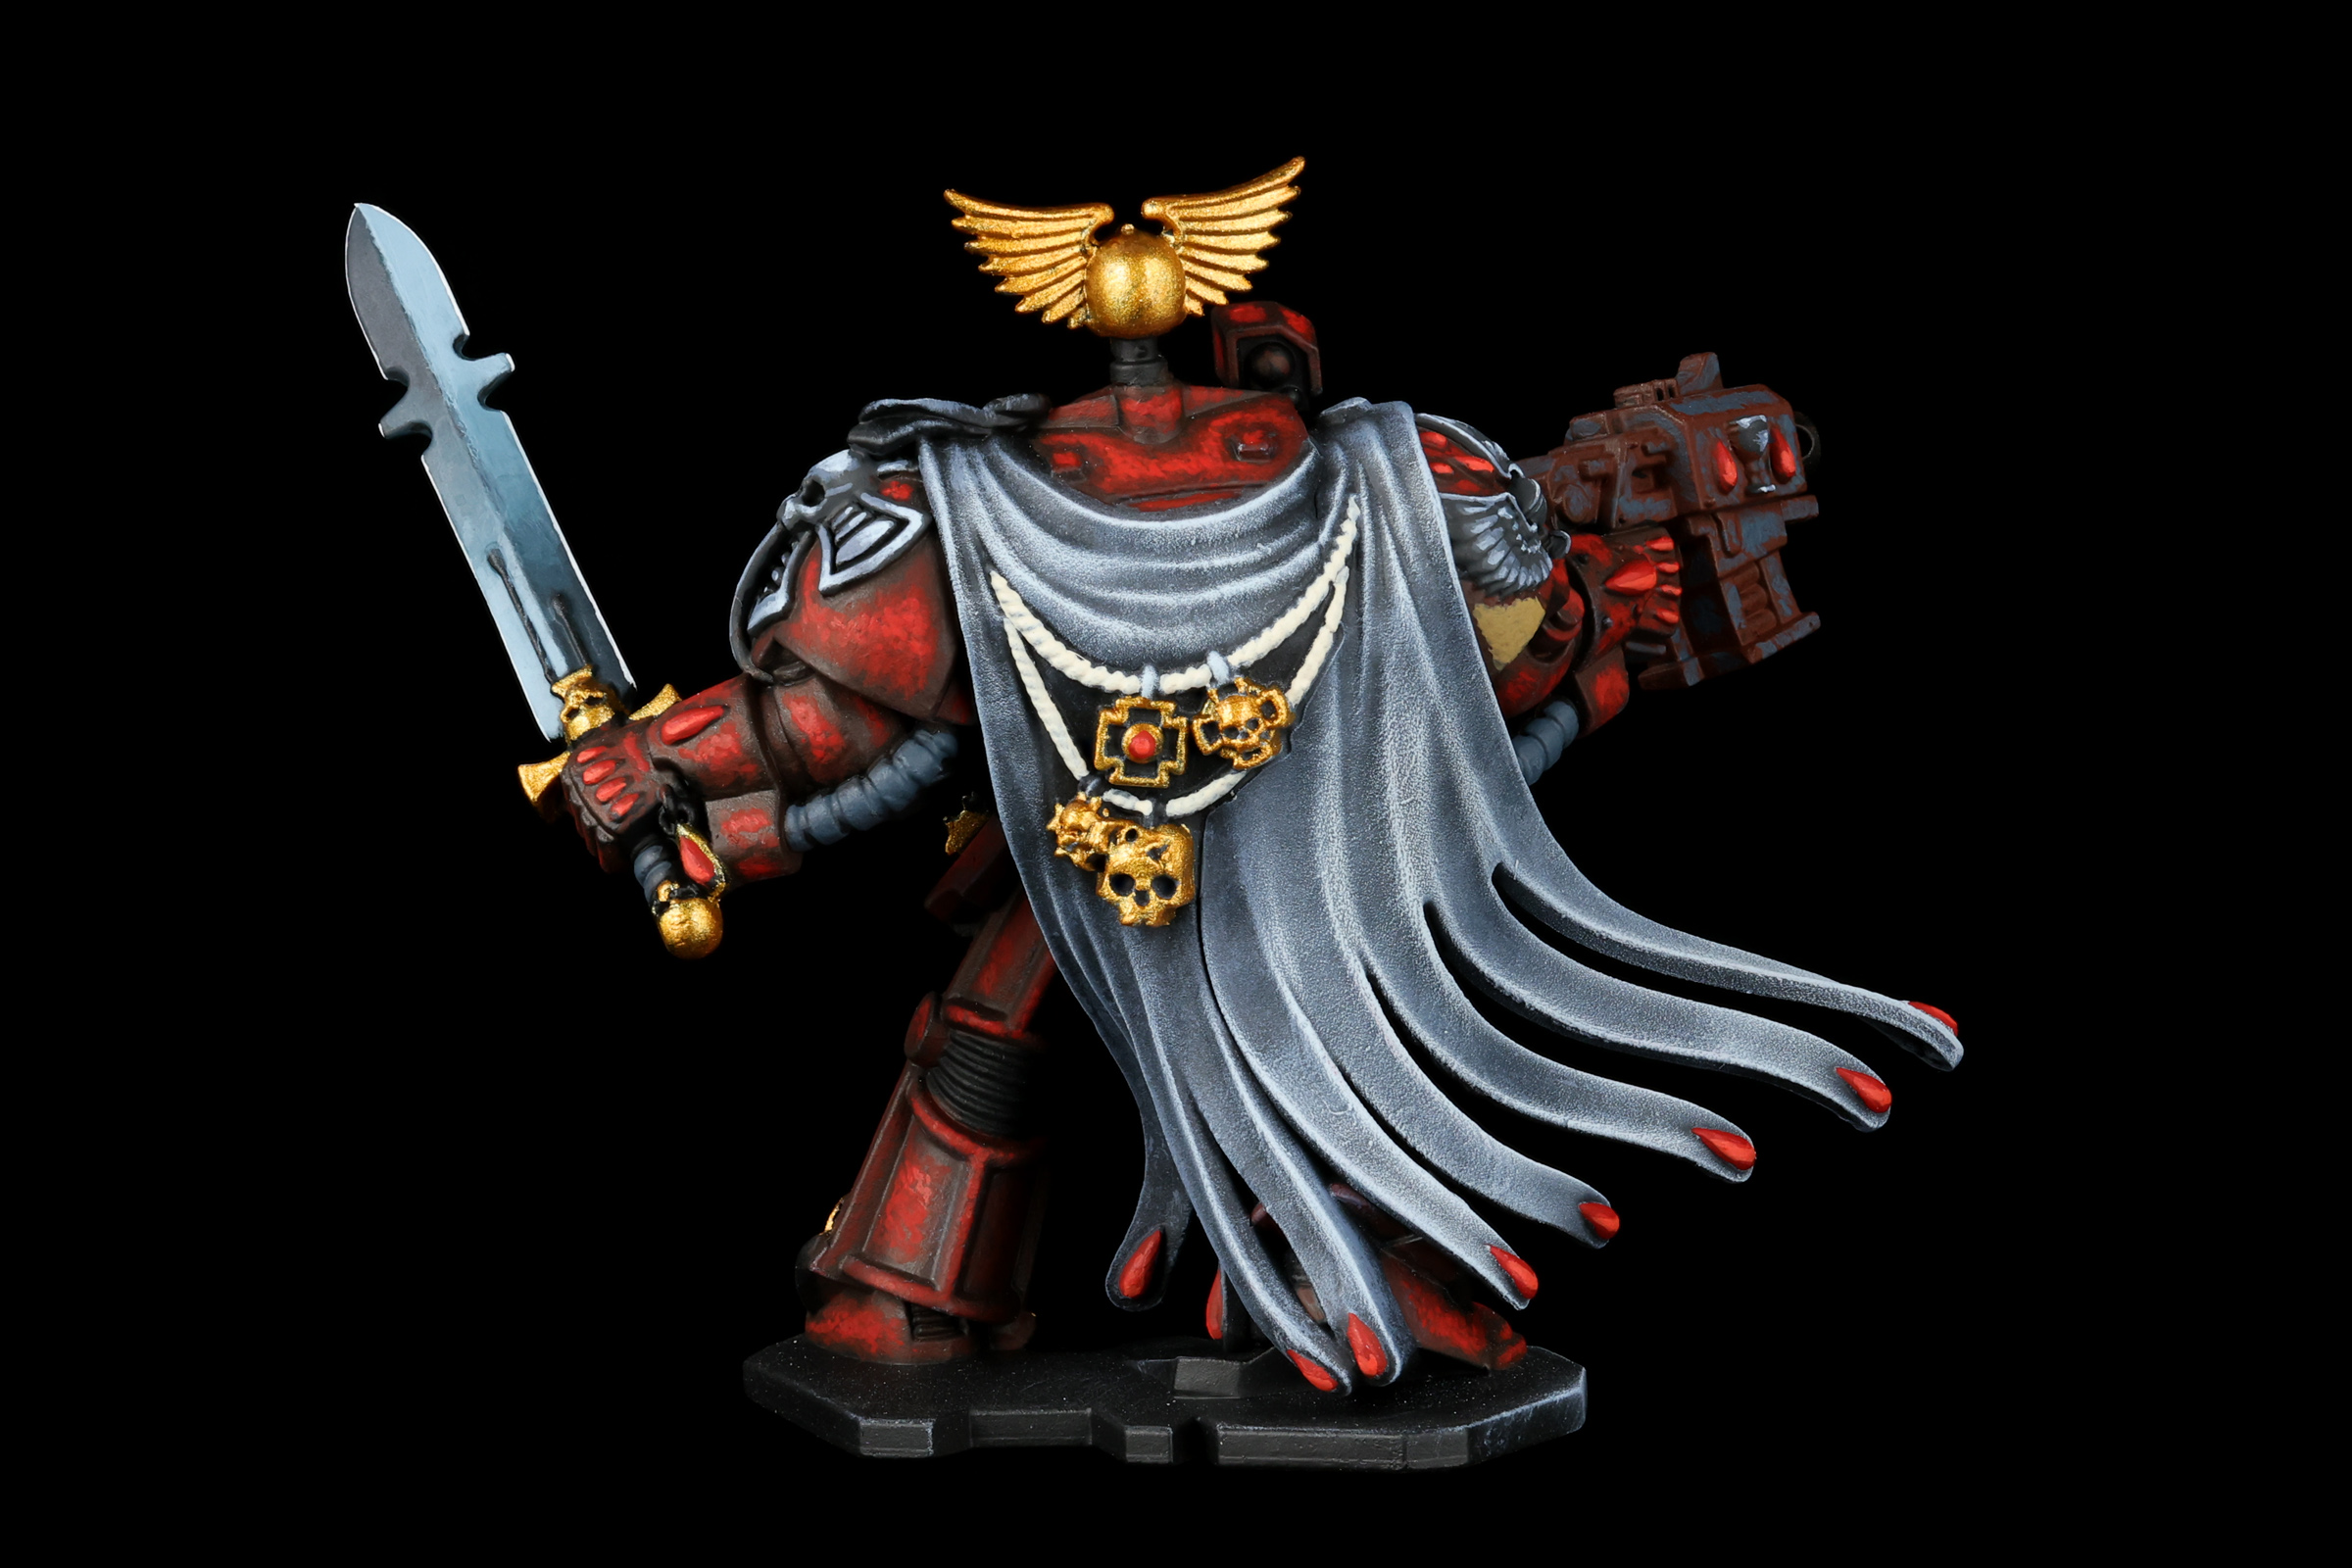
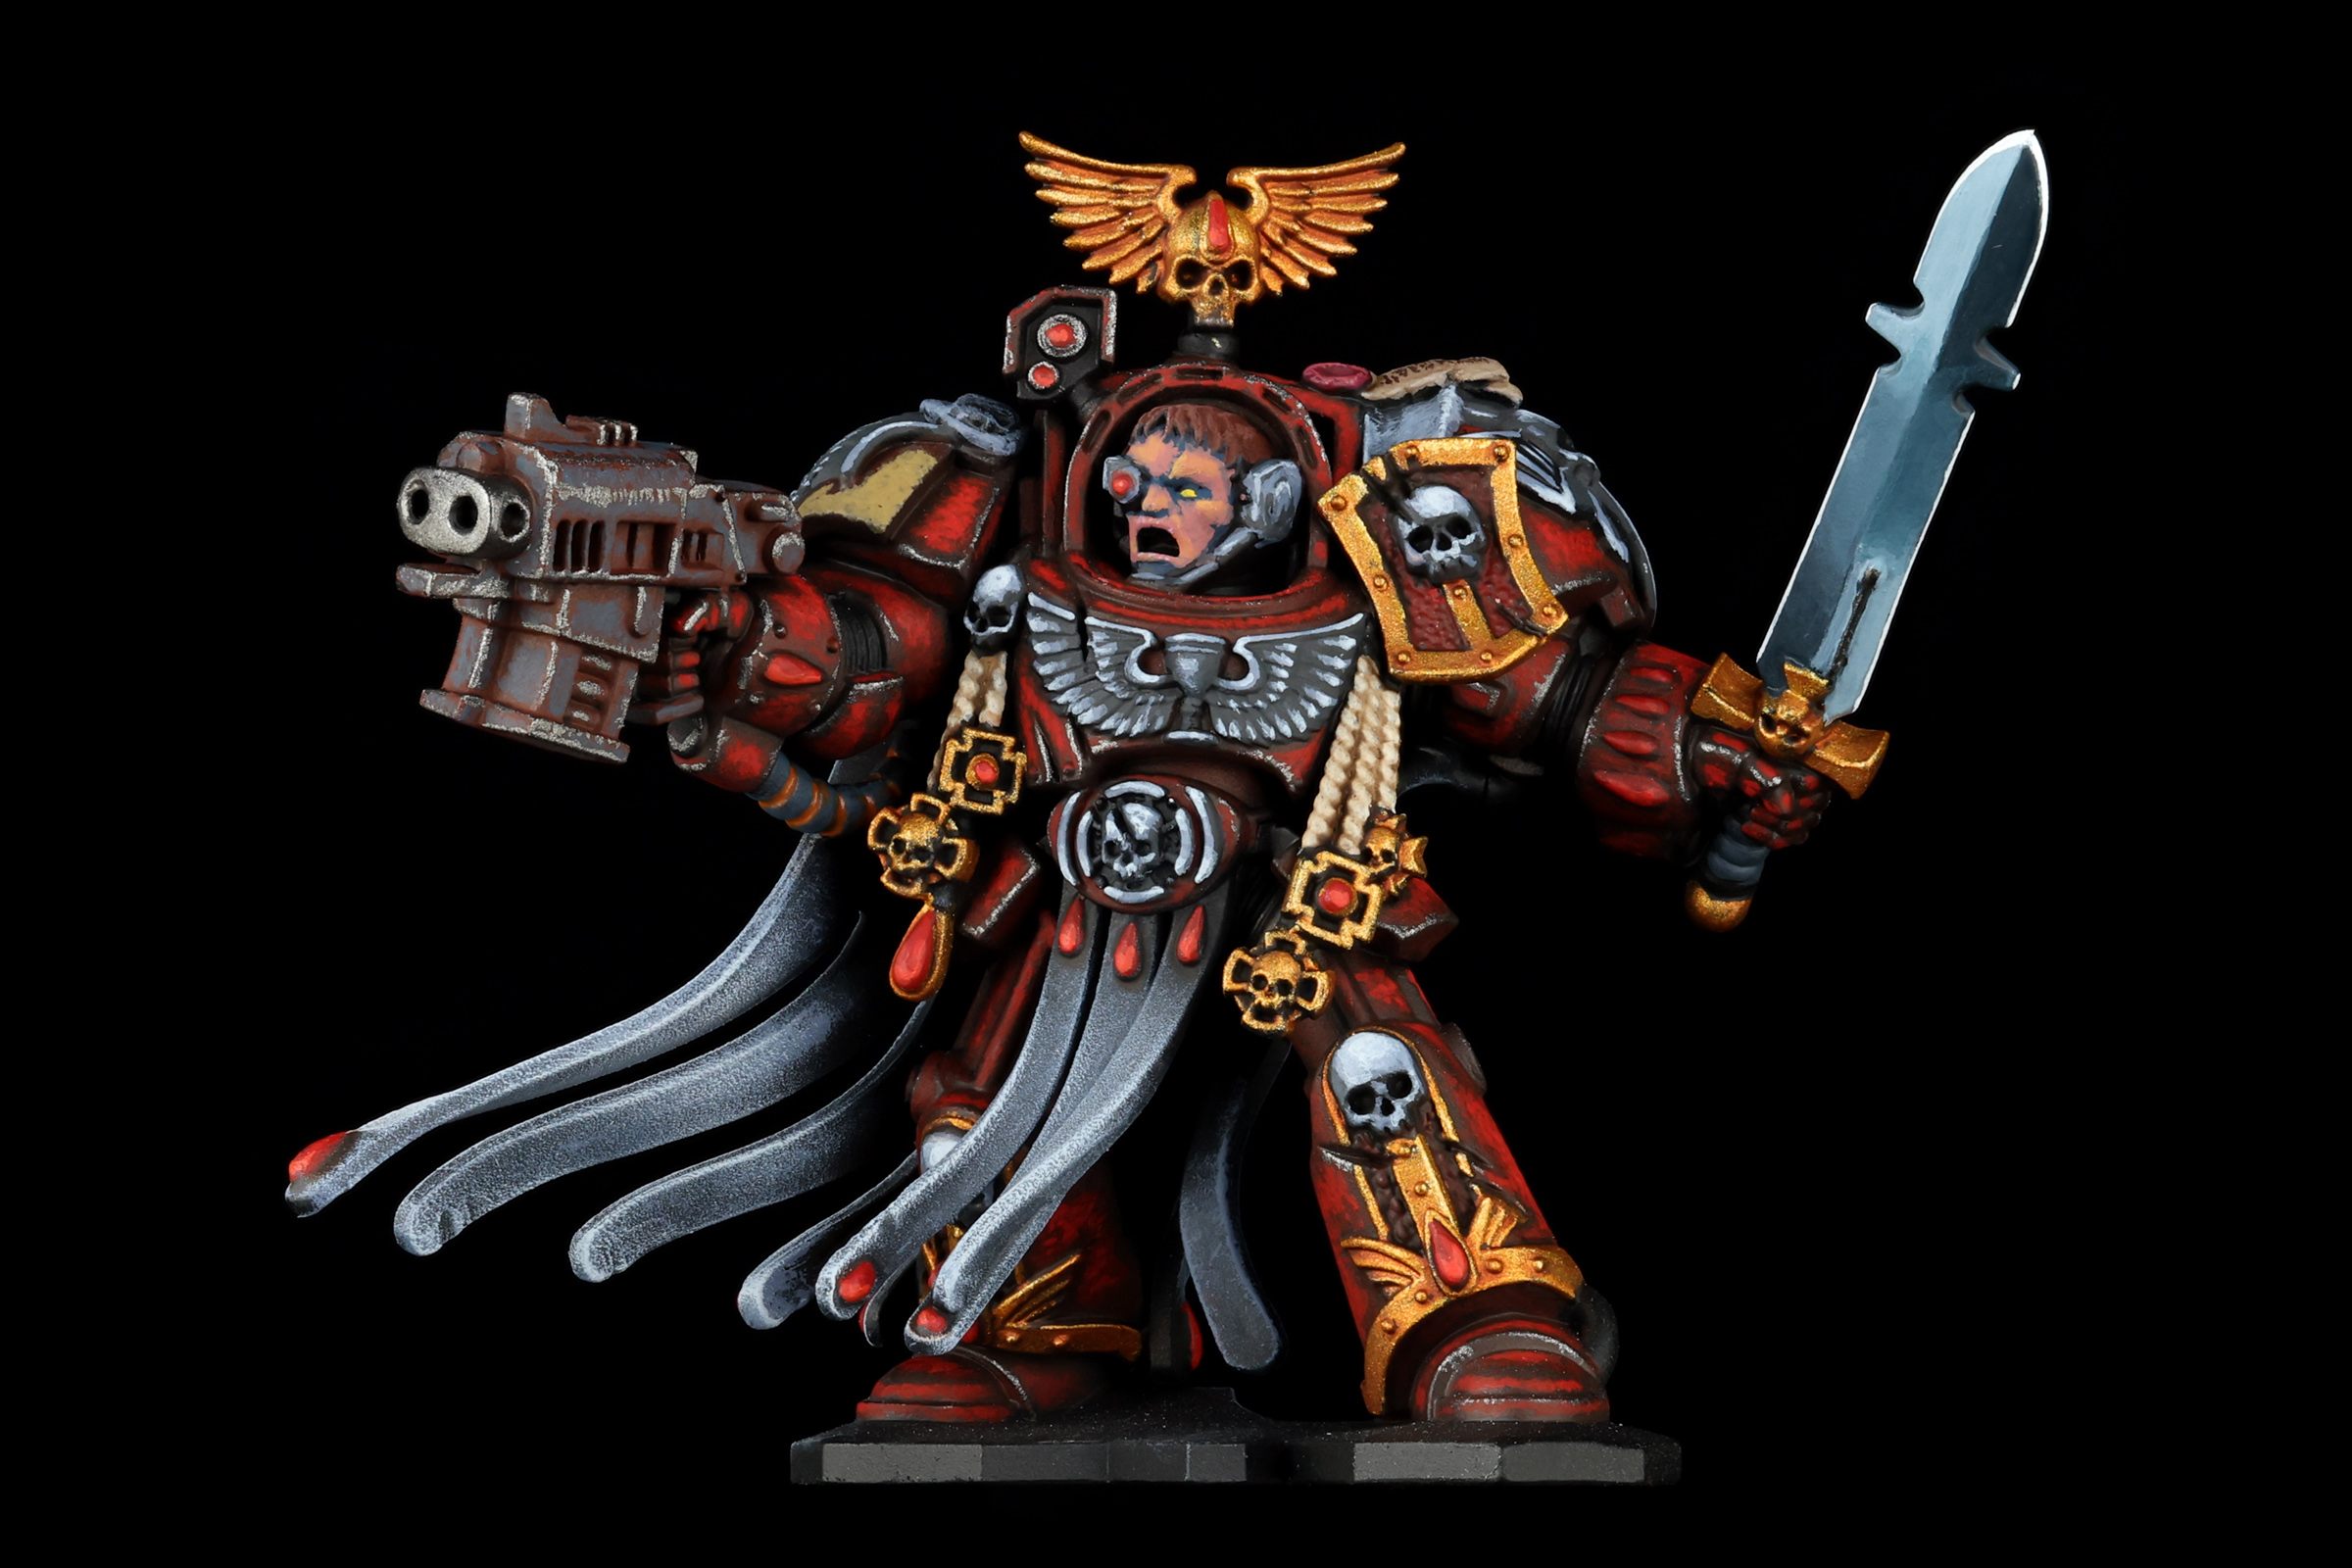
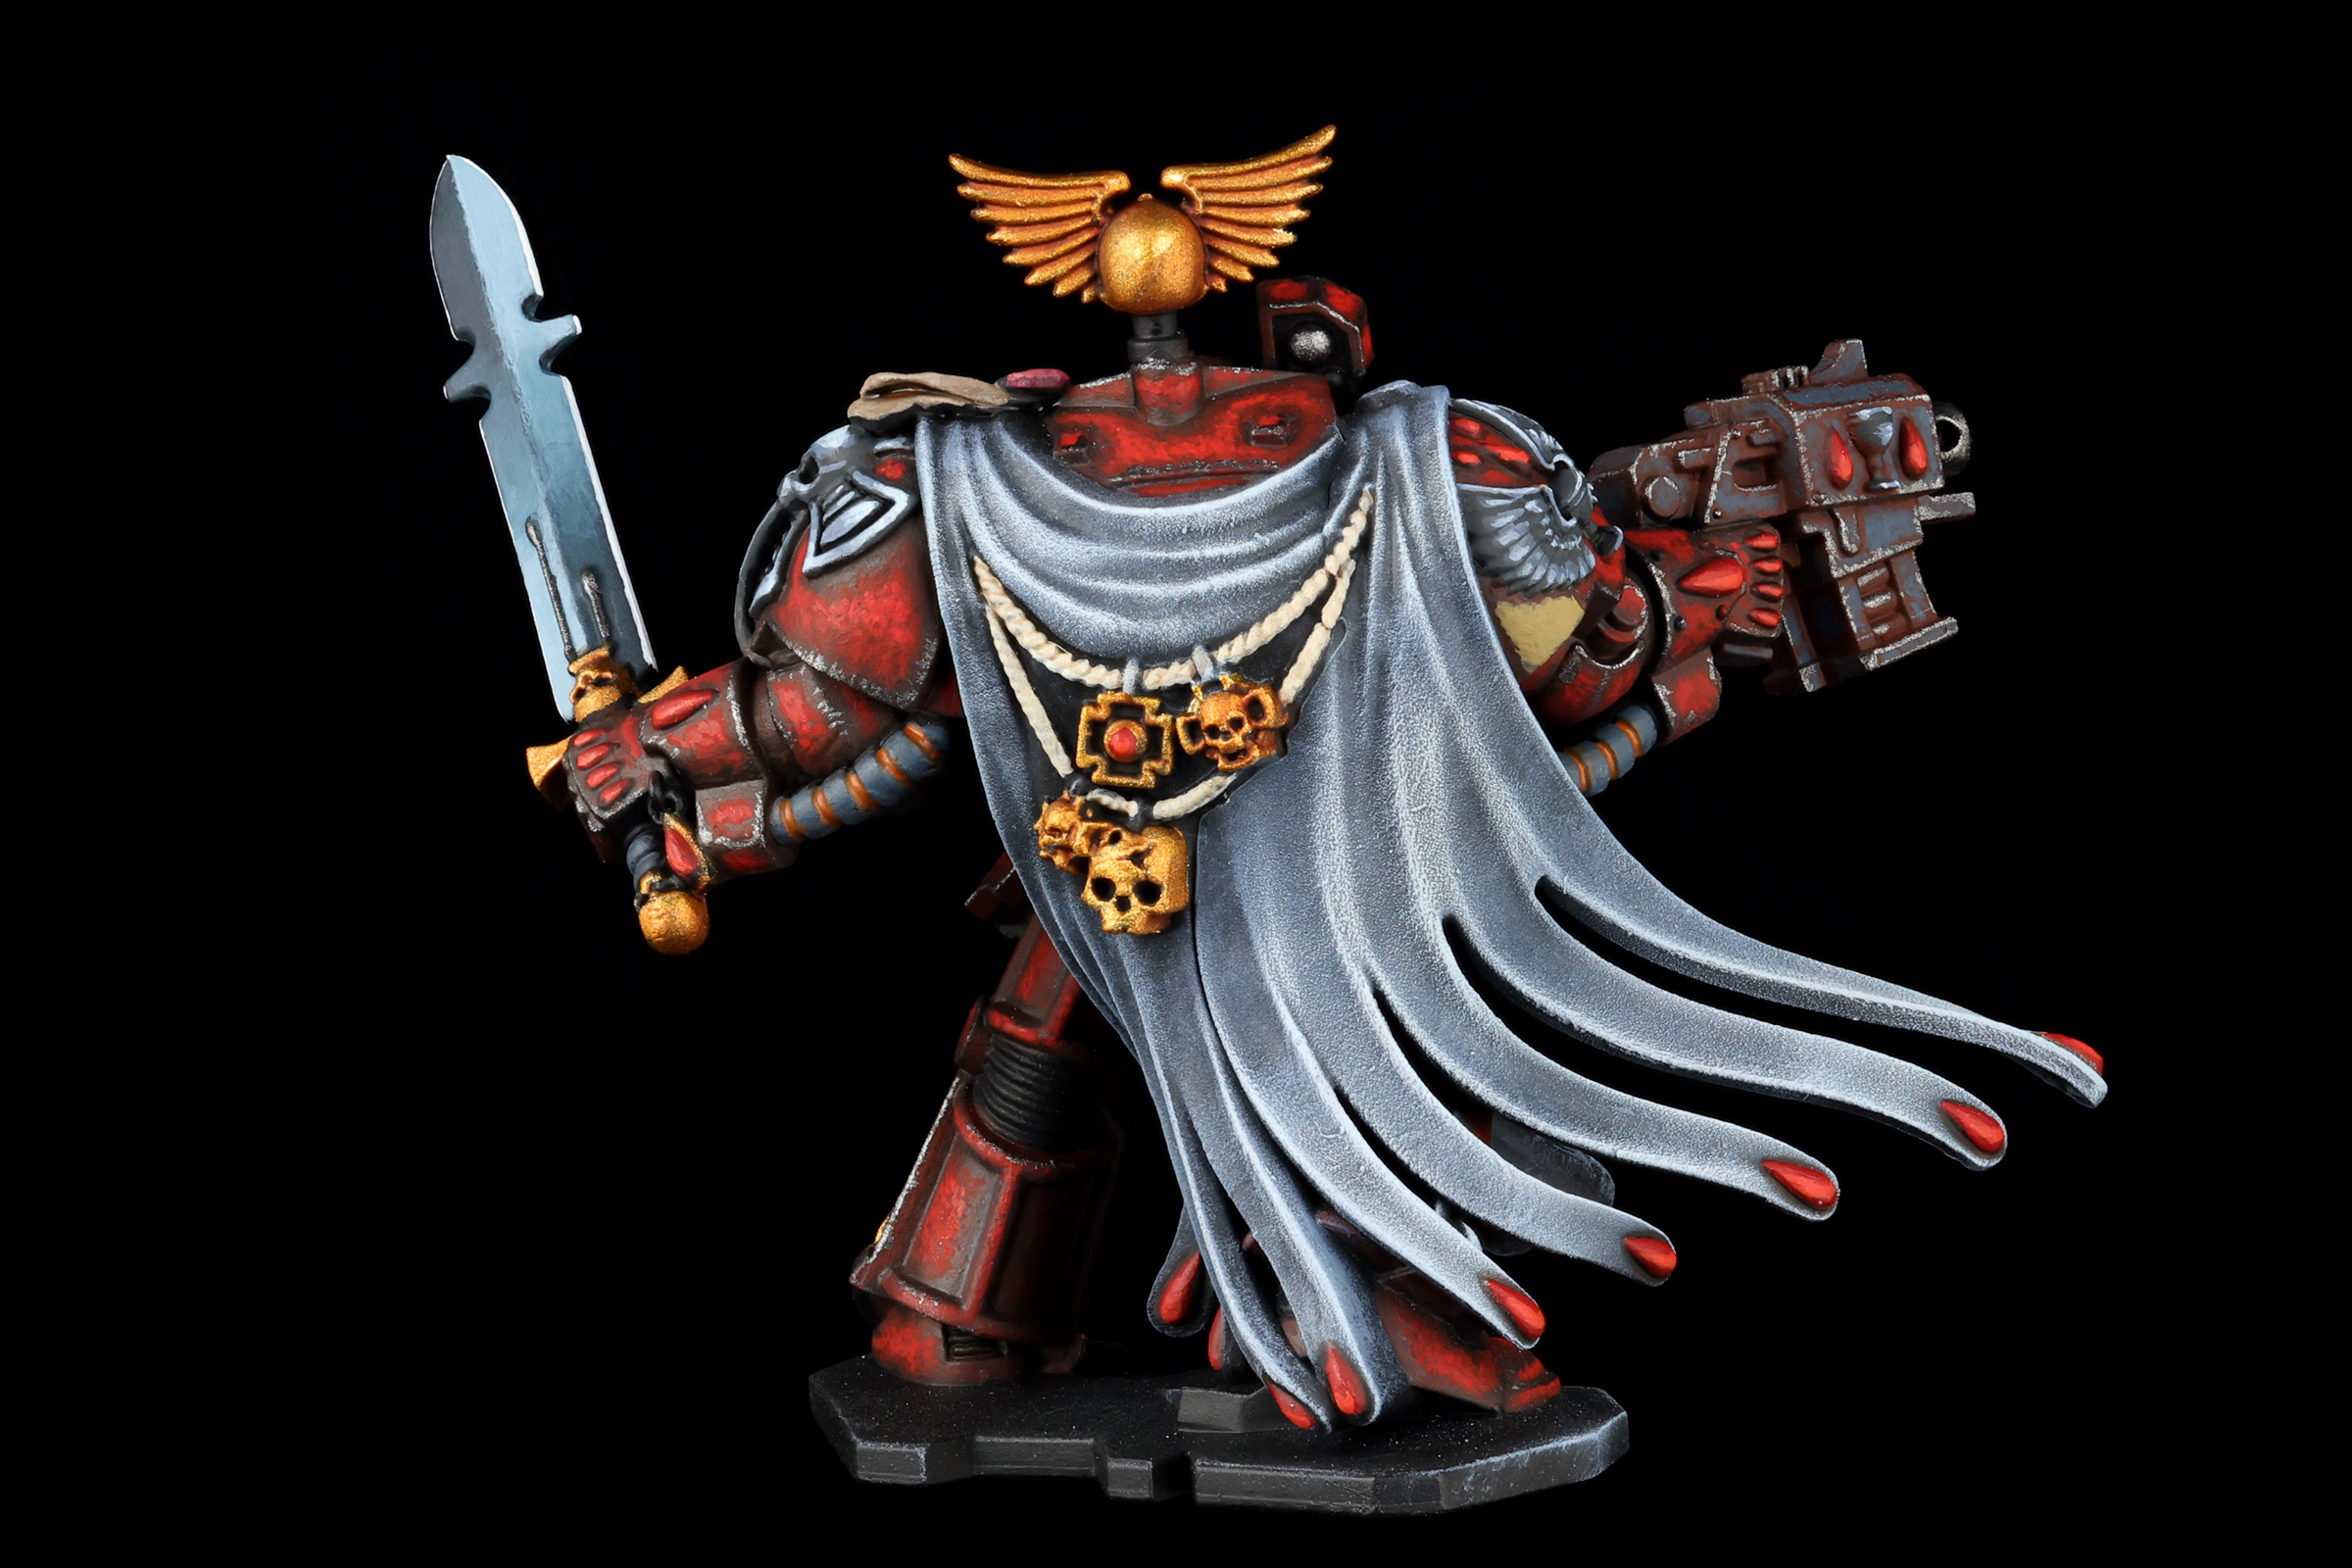
And that wraps up the model. Base it how you'd like, and you've got an awesome Blood Angel ready for the battlefield!
 Blood Angel Terminator. Credit: Pendulin
 Blood Angel Terminator. Credit: Pendulin


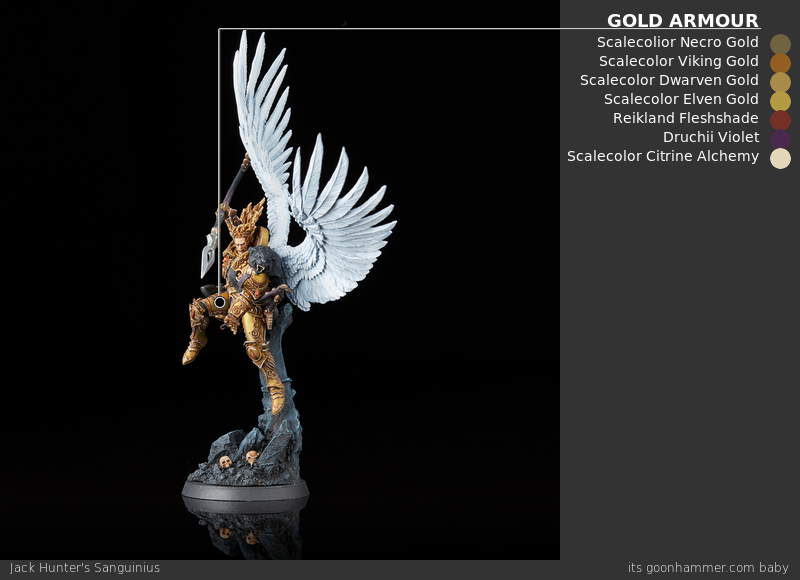
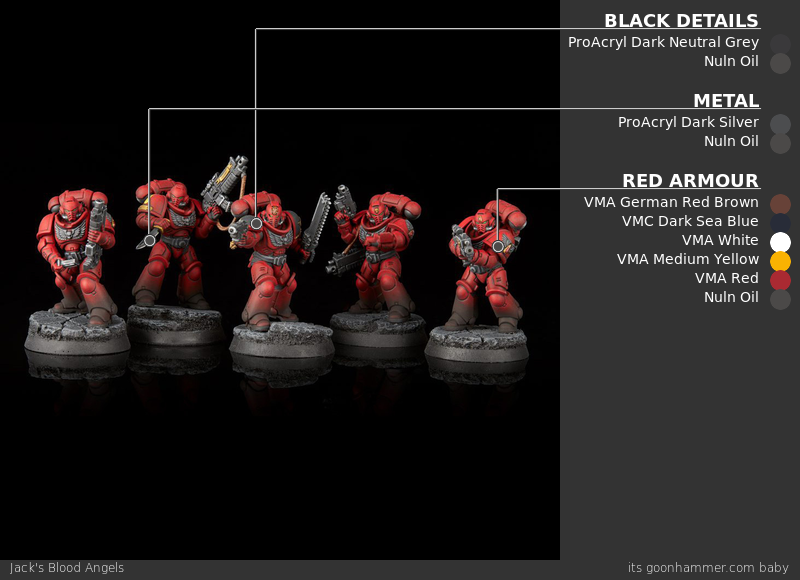
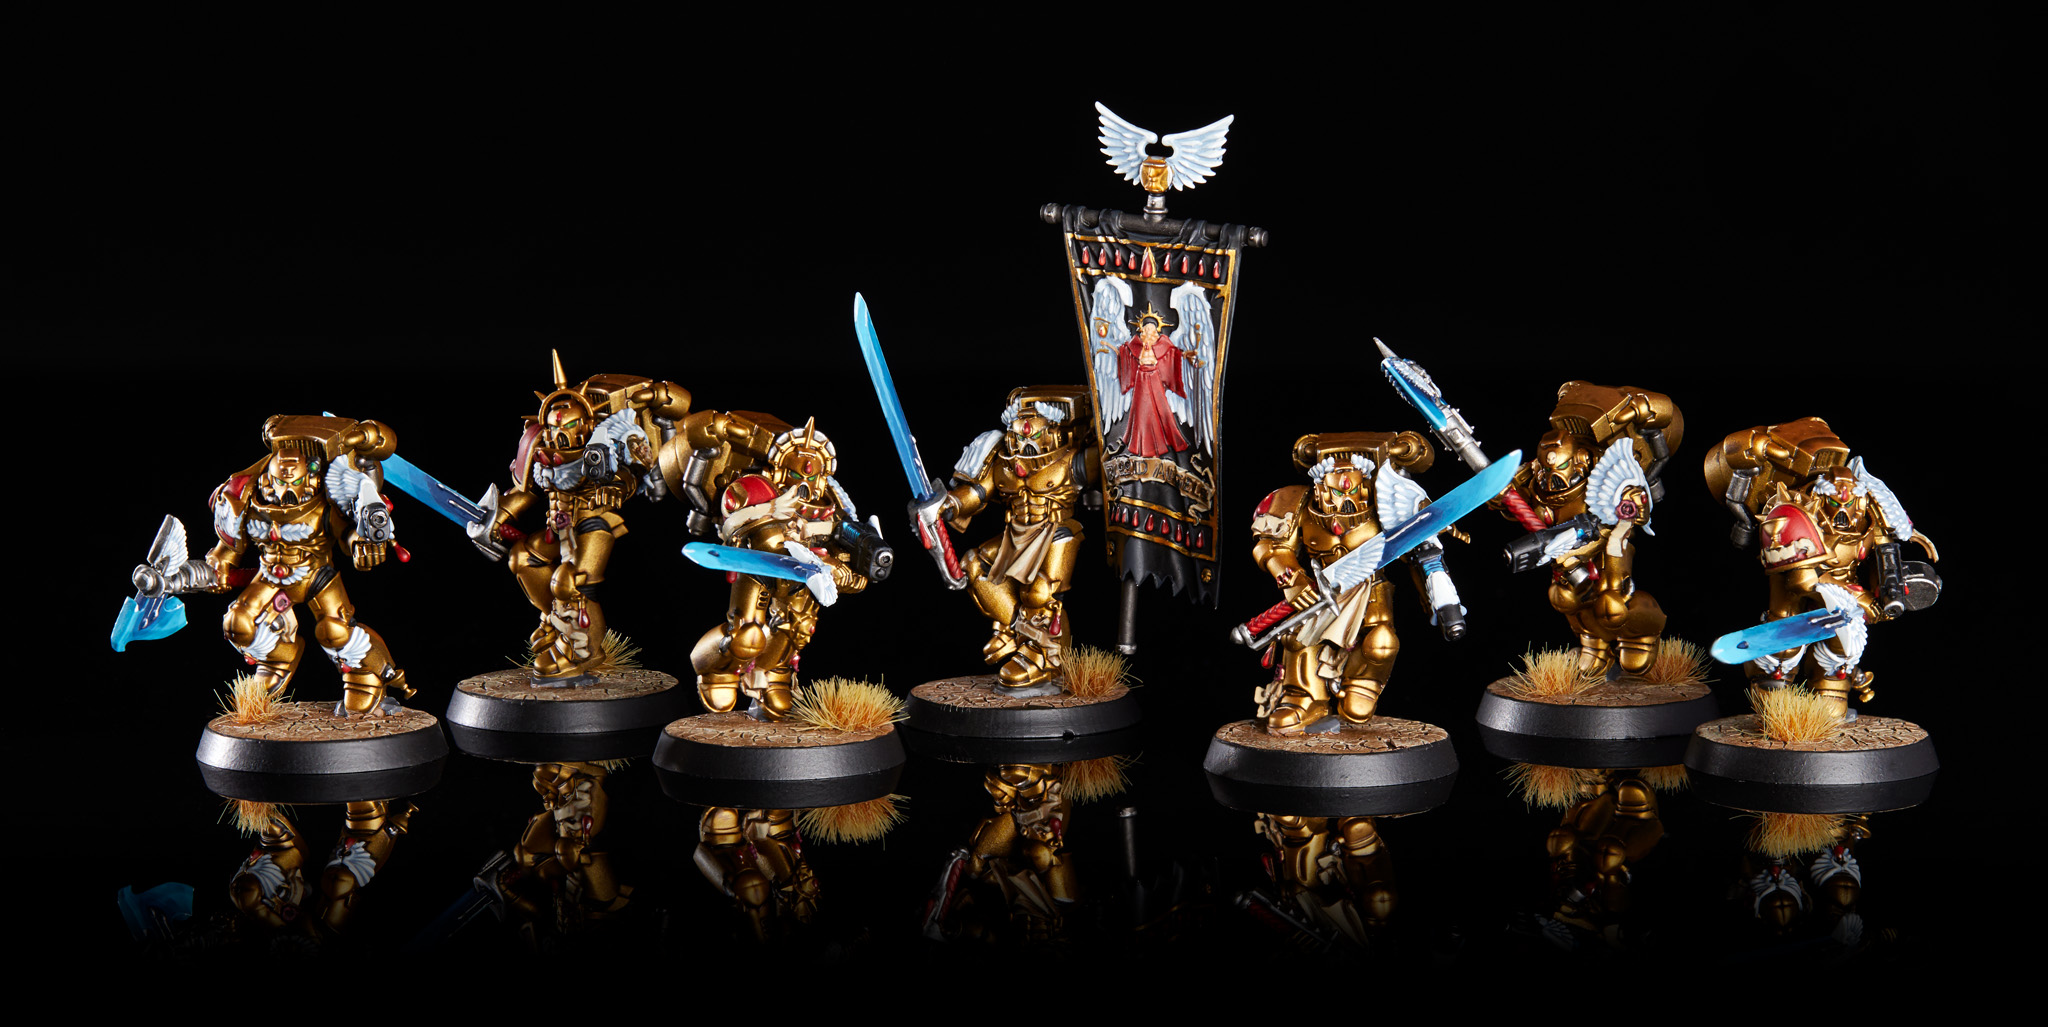 Blood Angels Sanguinary Guard. Credit: Jack Hunter

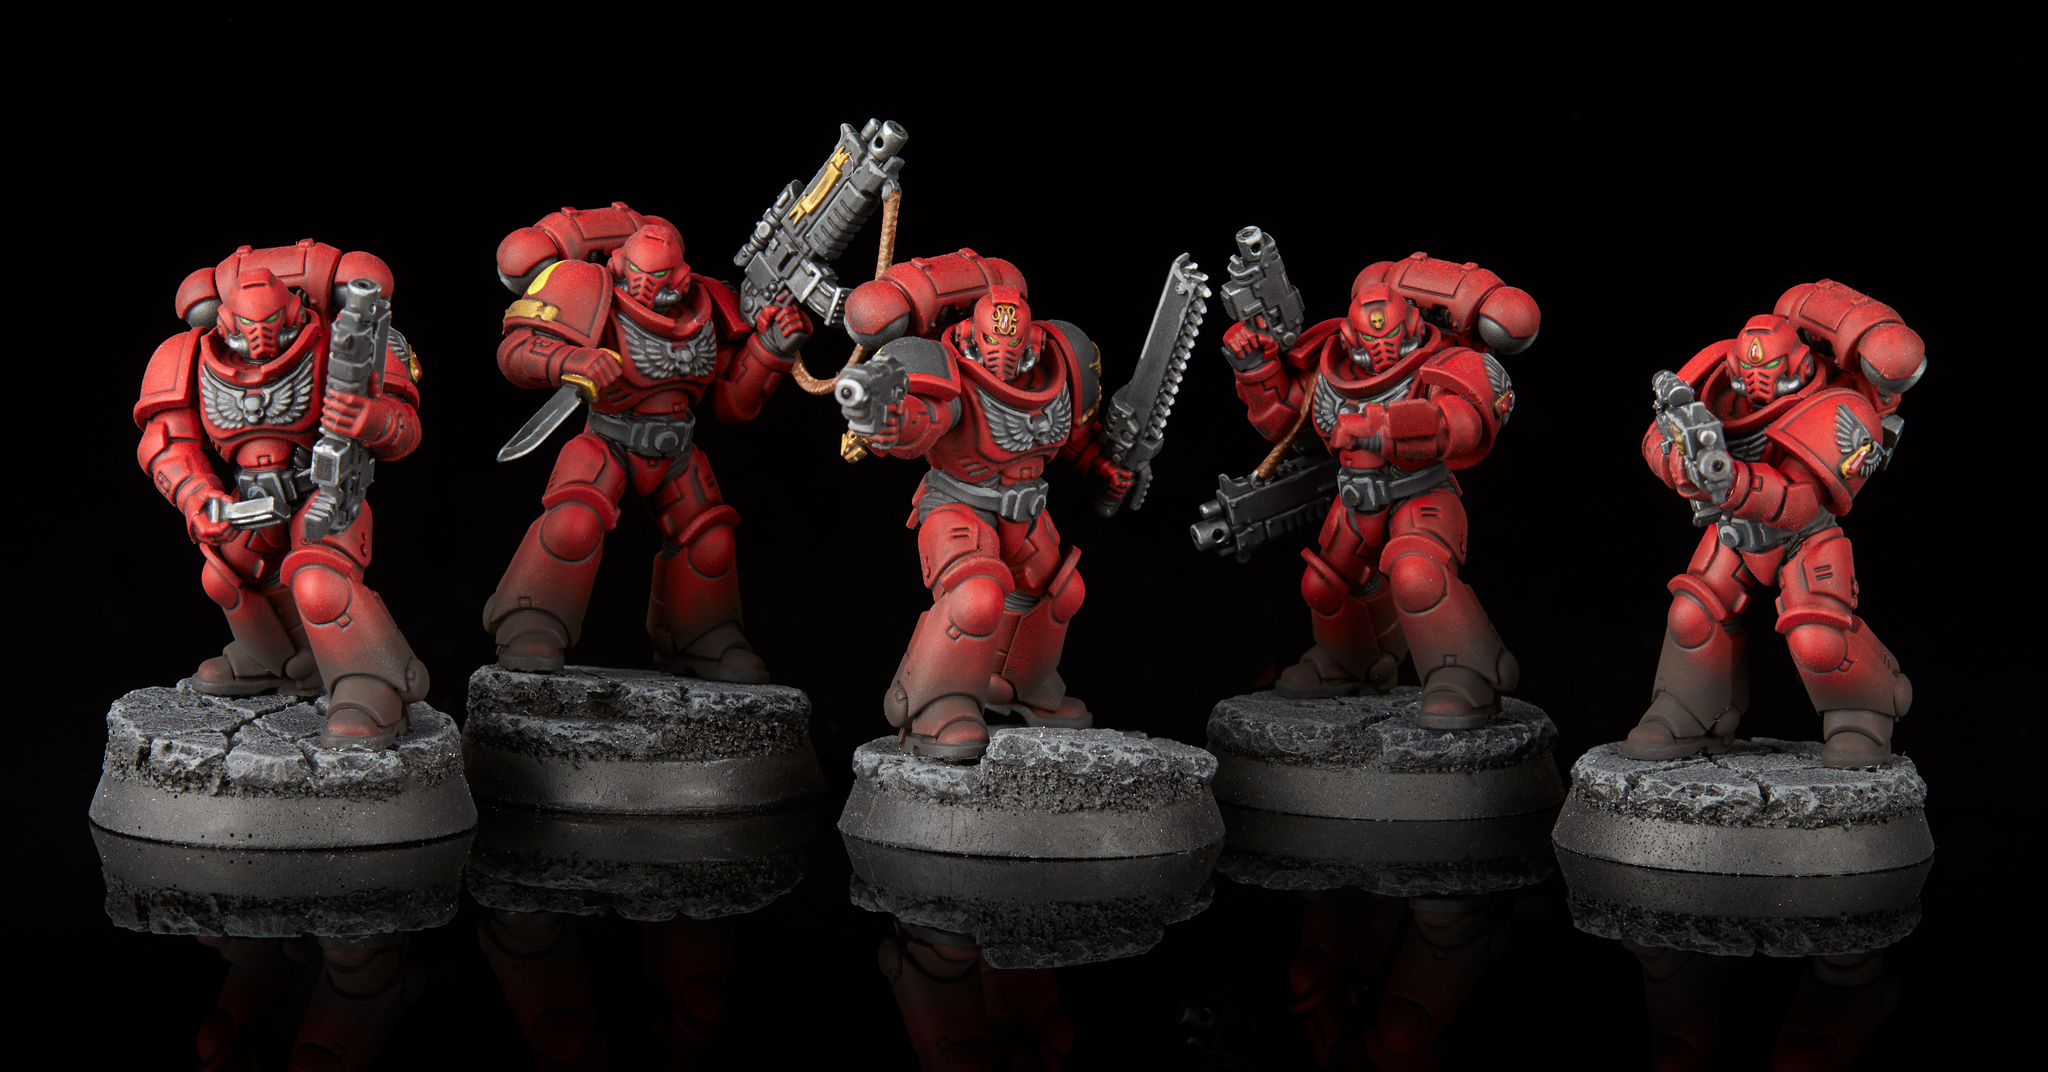 Blood Angels Intercessors. Credit: Jack Hunter
 Blood Angels First Captain Raldoron. Credit: Jack Hunter
 Step 1: Primer
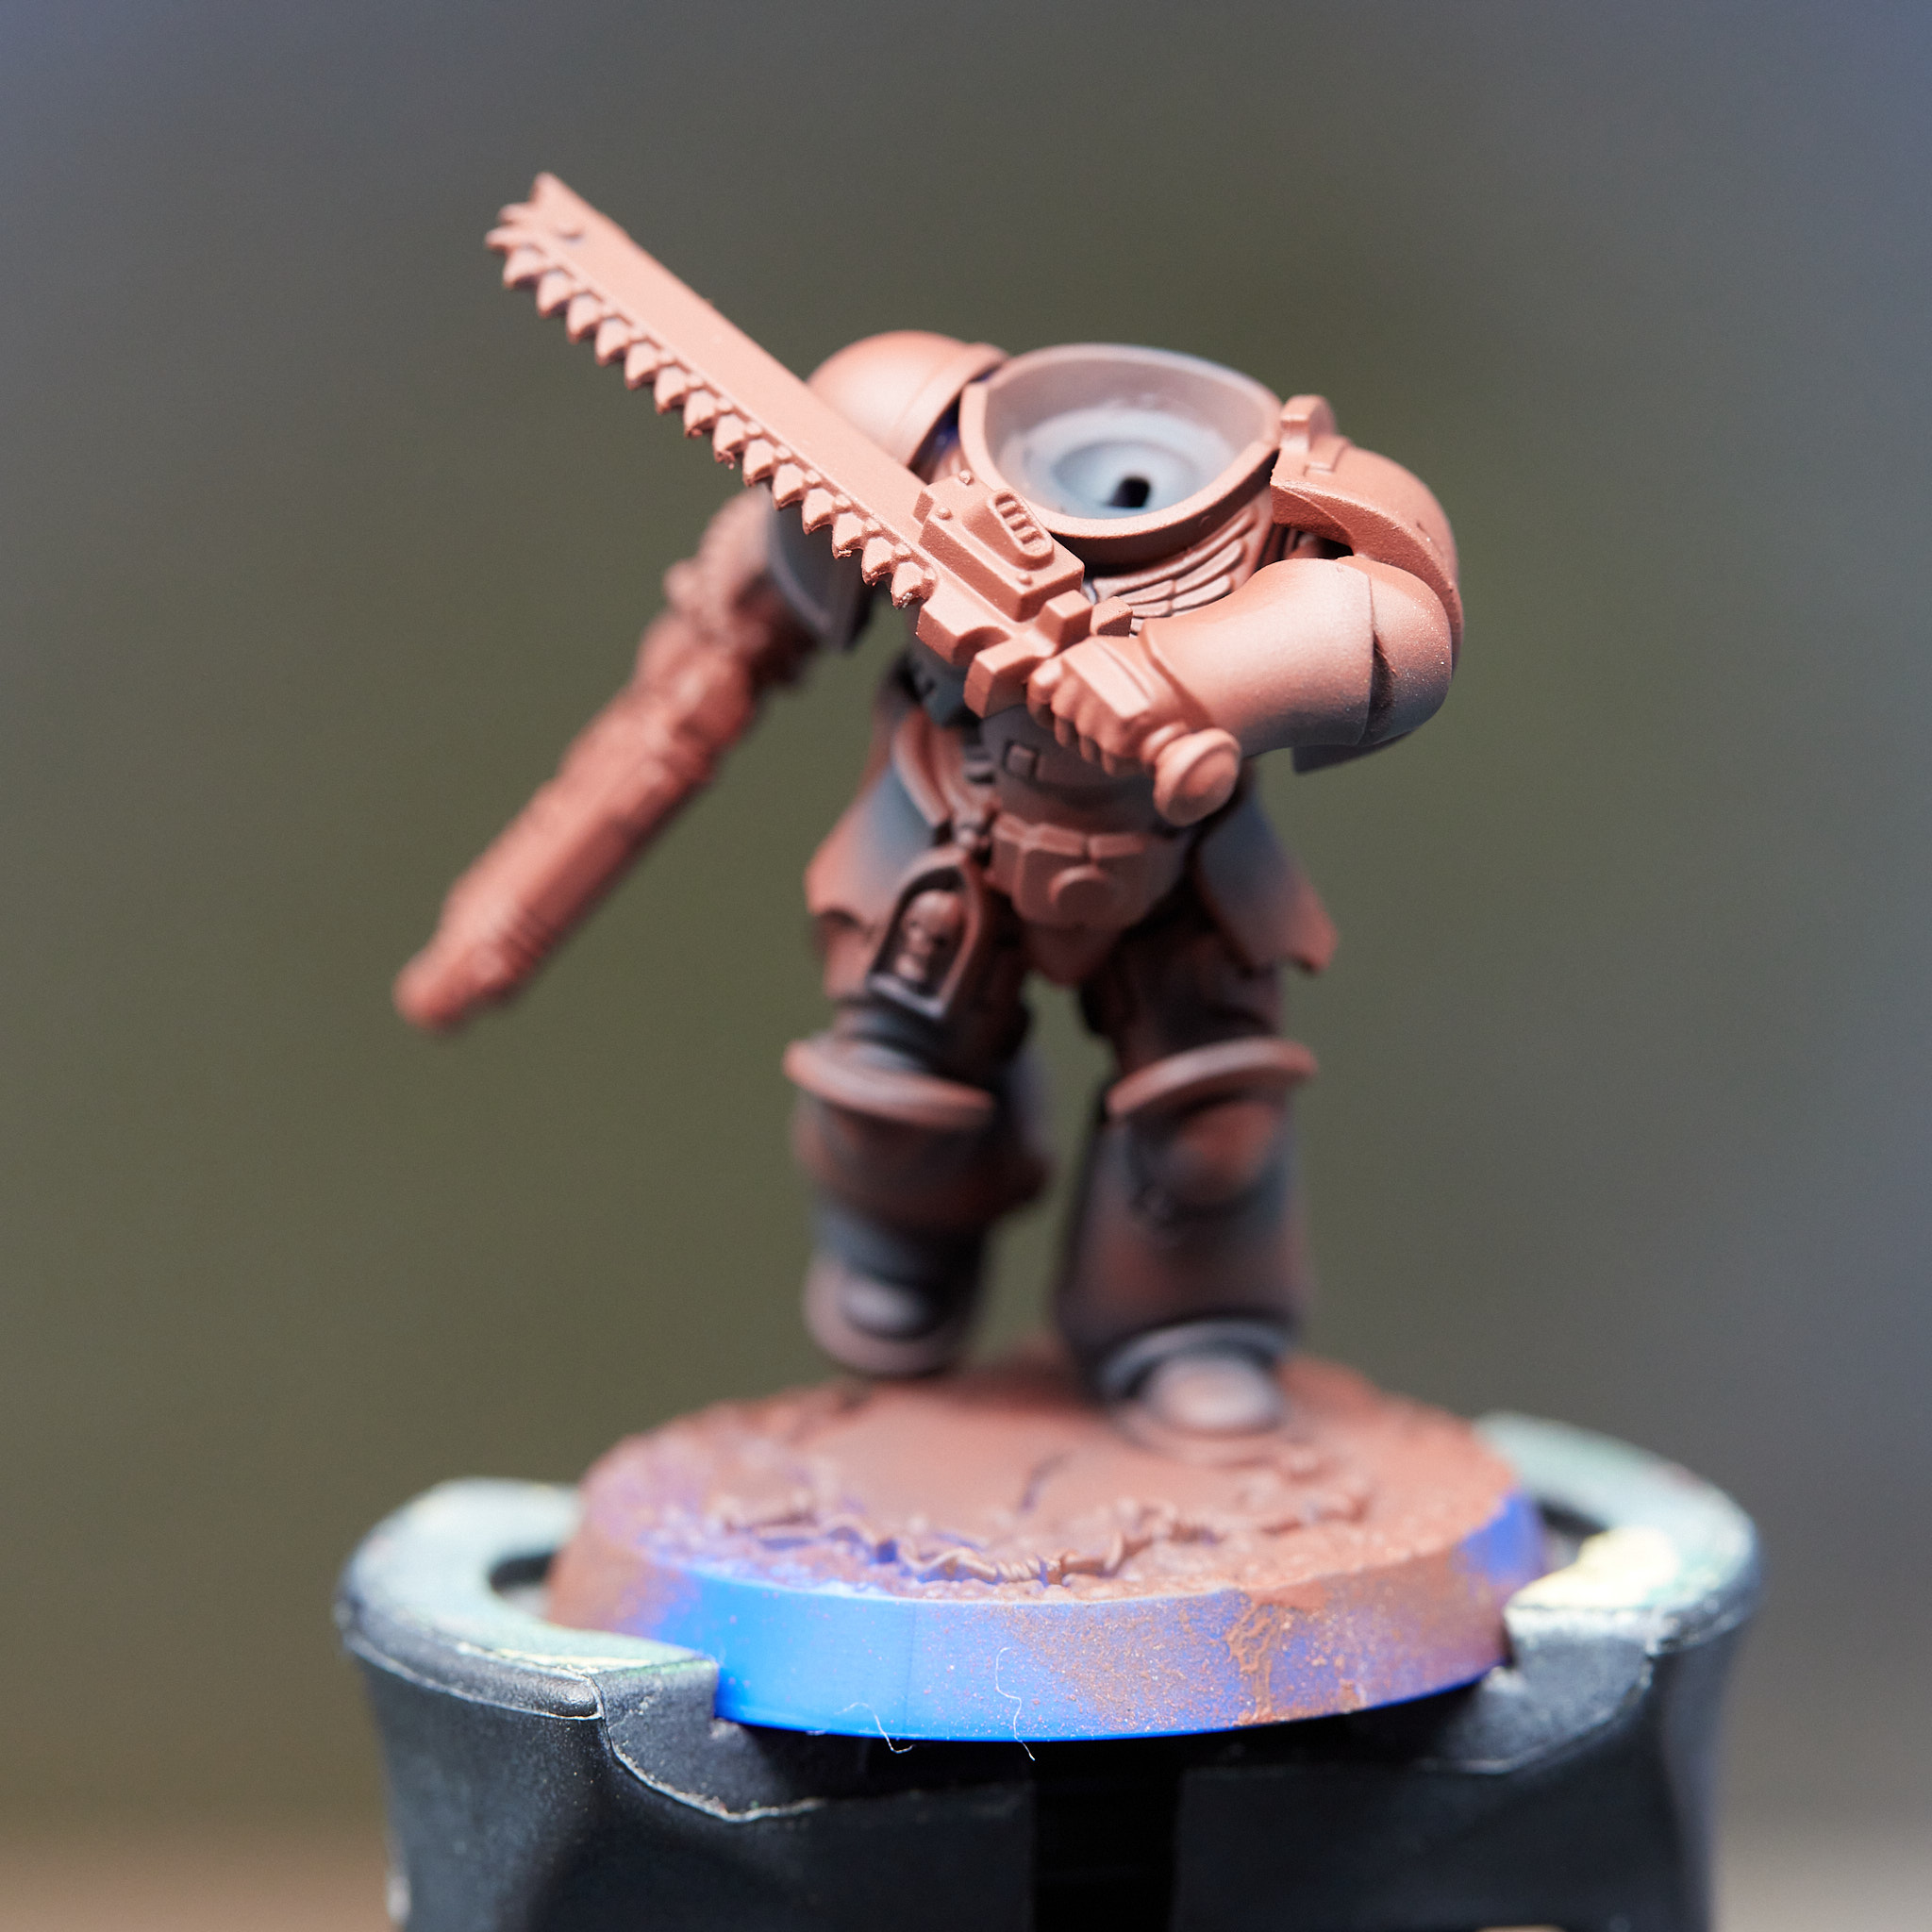


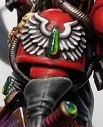
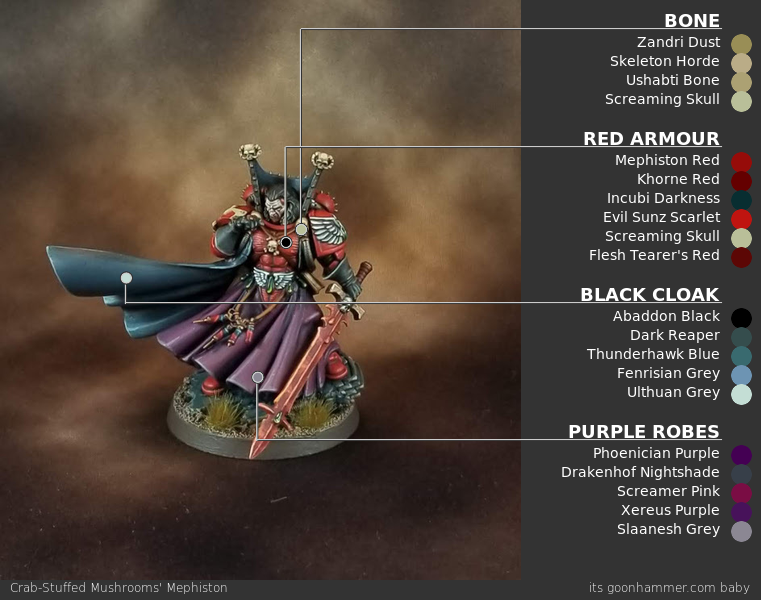
 Mephiston Guide for placing highlights by Crab-stuffed Mushrooms
 Mephiston with Basecoats by Crab-stuffed Mushrooms
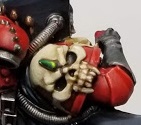
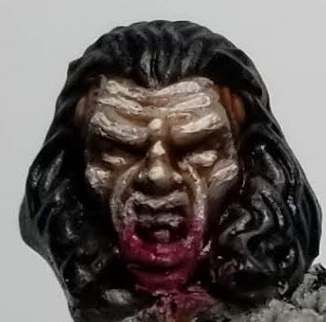 Mephiston's Face by Crab-Stuffed Mushrooms
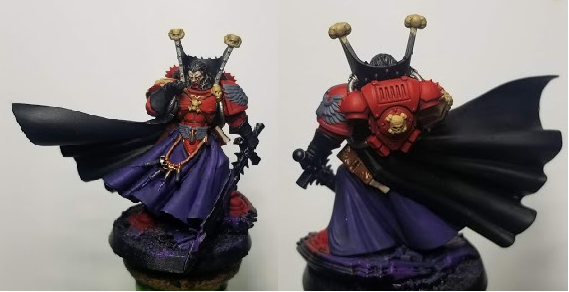
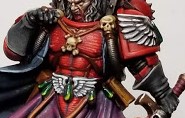
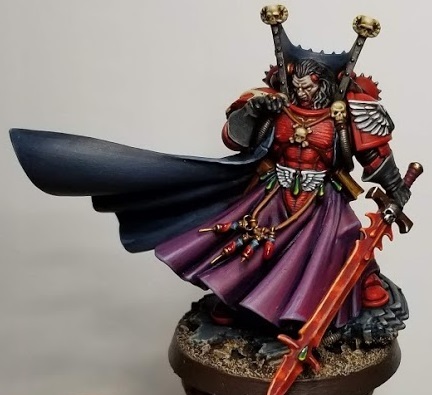 Mephiston by Crab-stuffed Mushrooms
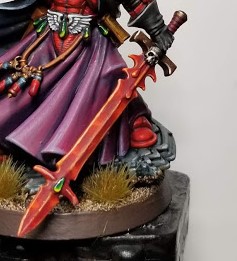
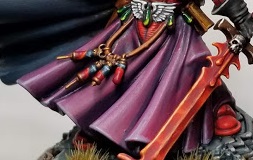 Mephiston's Robes
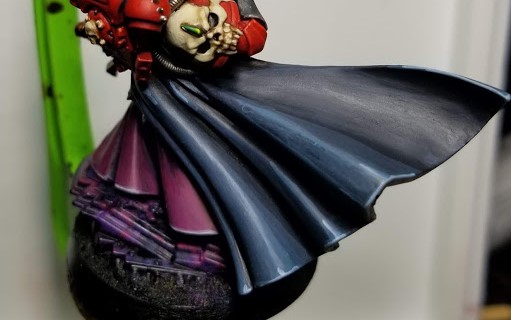 Mephiston's Cape
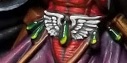
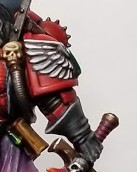
 Mephiston's Right Shoulder Pauldron


 Goonhammer App and Patron Updates: April, 2026
 Kill Team Tournament Report: Engage, Party, Repeat's March Madness 2026
 Goonhammer Reviews: Tribal Conquest