Swiftblade: The Black Legion isn’t my first Chaos Space Marine sweetheart. That honor goes to the Word Bearers when I first began collecting CSM in 2012. Being ultra-devoted to the dark gods was certainly neat and all, but once I read
The Talon of Horus by Aaron Dembski-Bowden I was converted. So, from shame and sorrow I was cast, and when Chaos Space Marines got their range refresh in 2019 I was reborn in black and gold.
The Black Legion paint scheme can be deceptively difficult. It combines two of the biggest headaches in painting miniatures: highlighting black and lots of trim. After a few years practice I’ve managed to get my paint scheme locked in for my Black Legion. I can’t avoid painting trim or highlighting black, but I can try and make it as easy as possible.
I’ll share my scheme and methodology for painting the Black Legion scheme with one of my favorite models in all of Warhammer: the Chaos Space Marine Terminator.
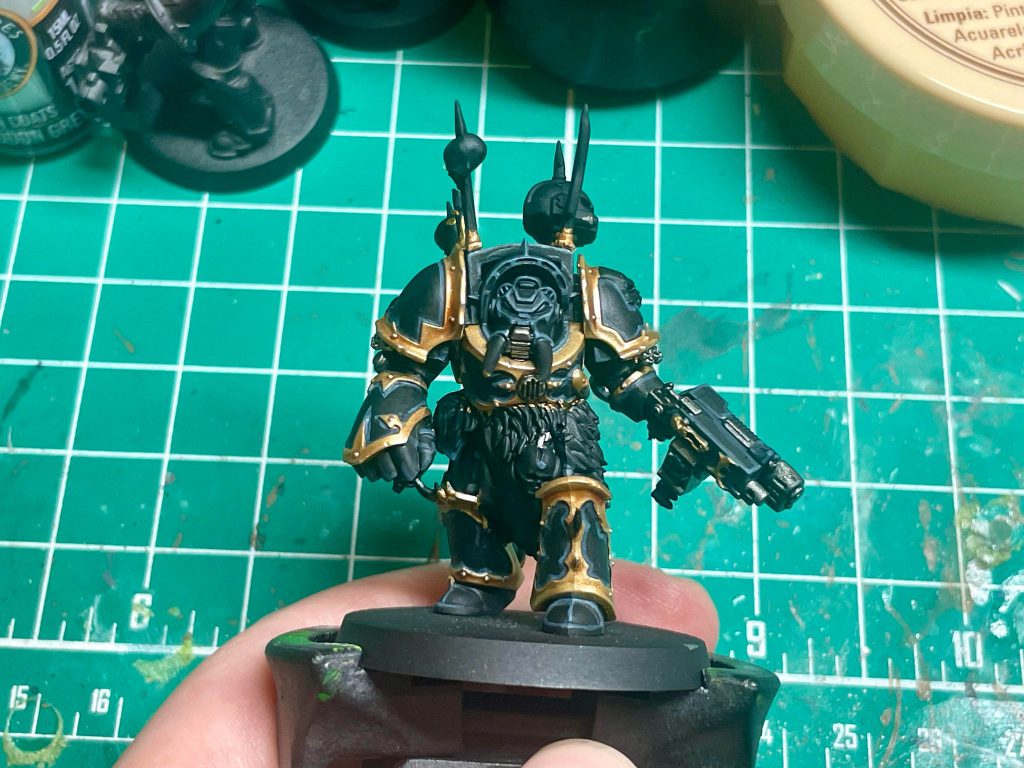
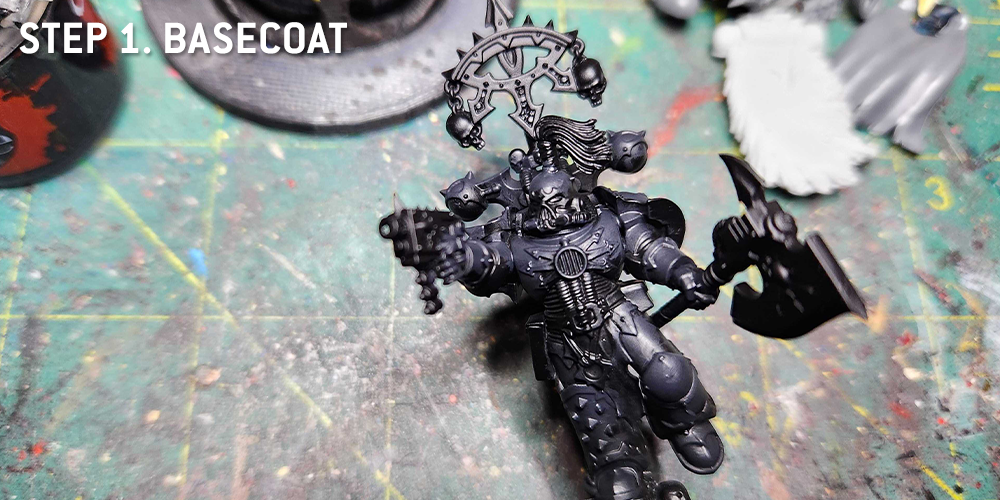
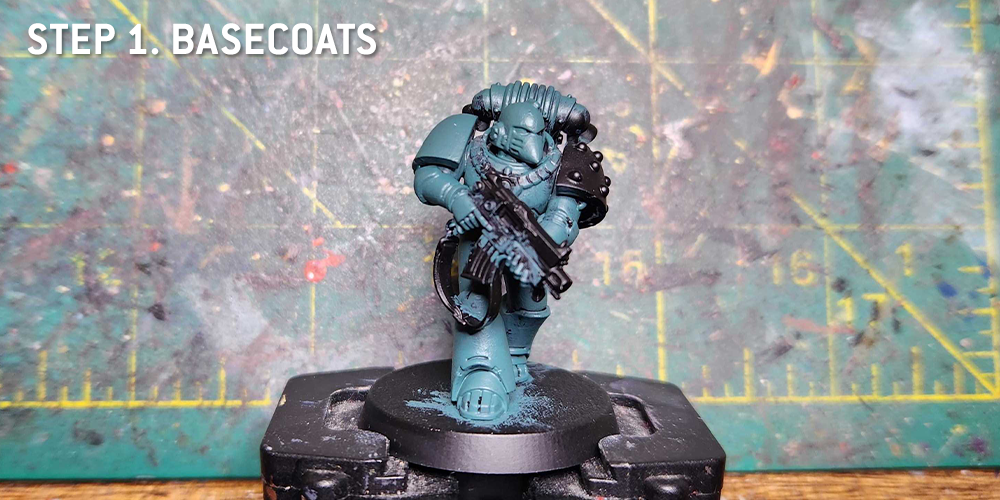
Step 0: Prime Black
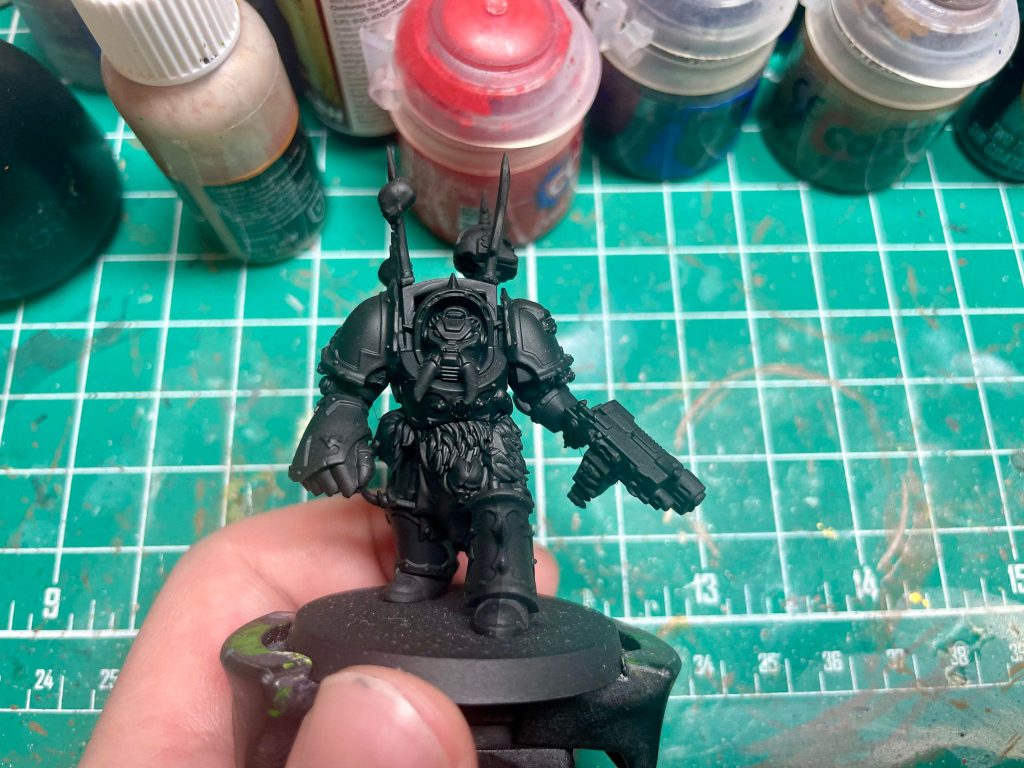
It’s a no-brainer. No reason to prime any other color here.
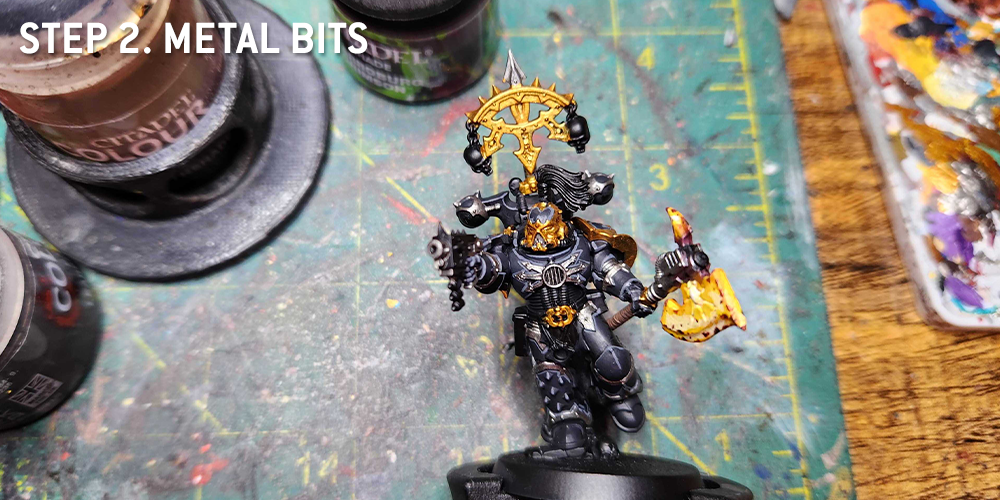
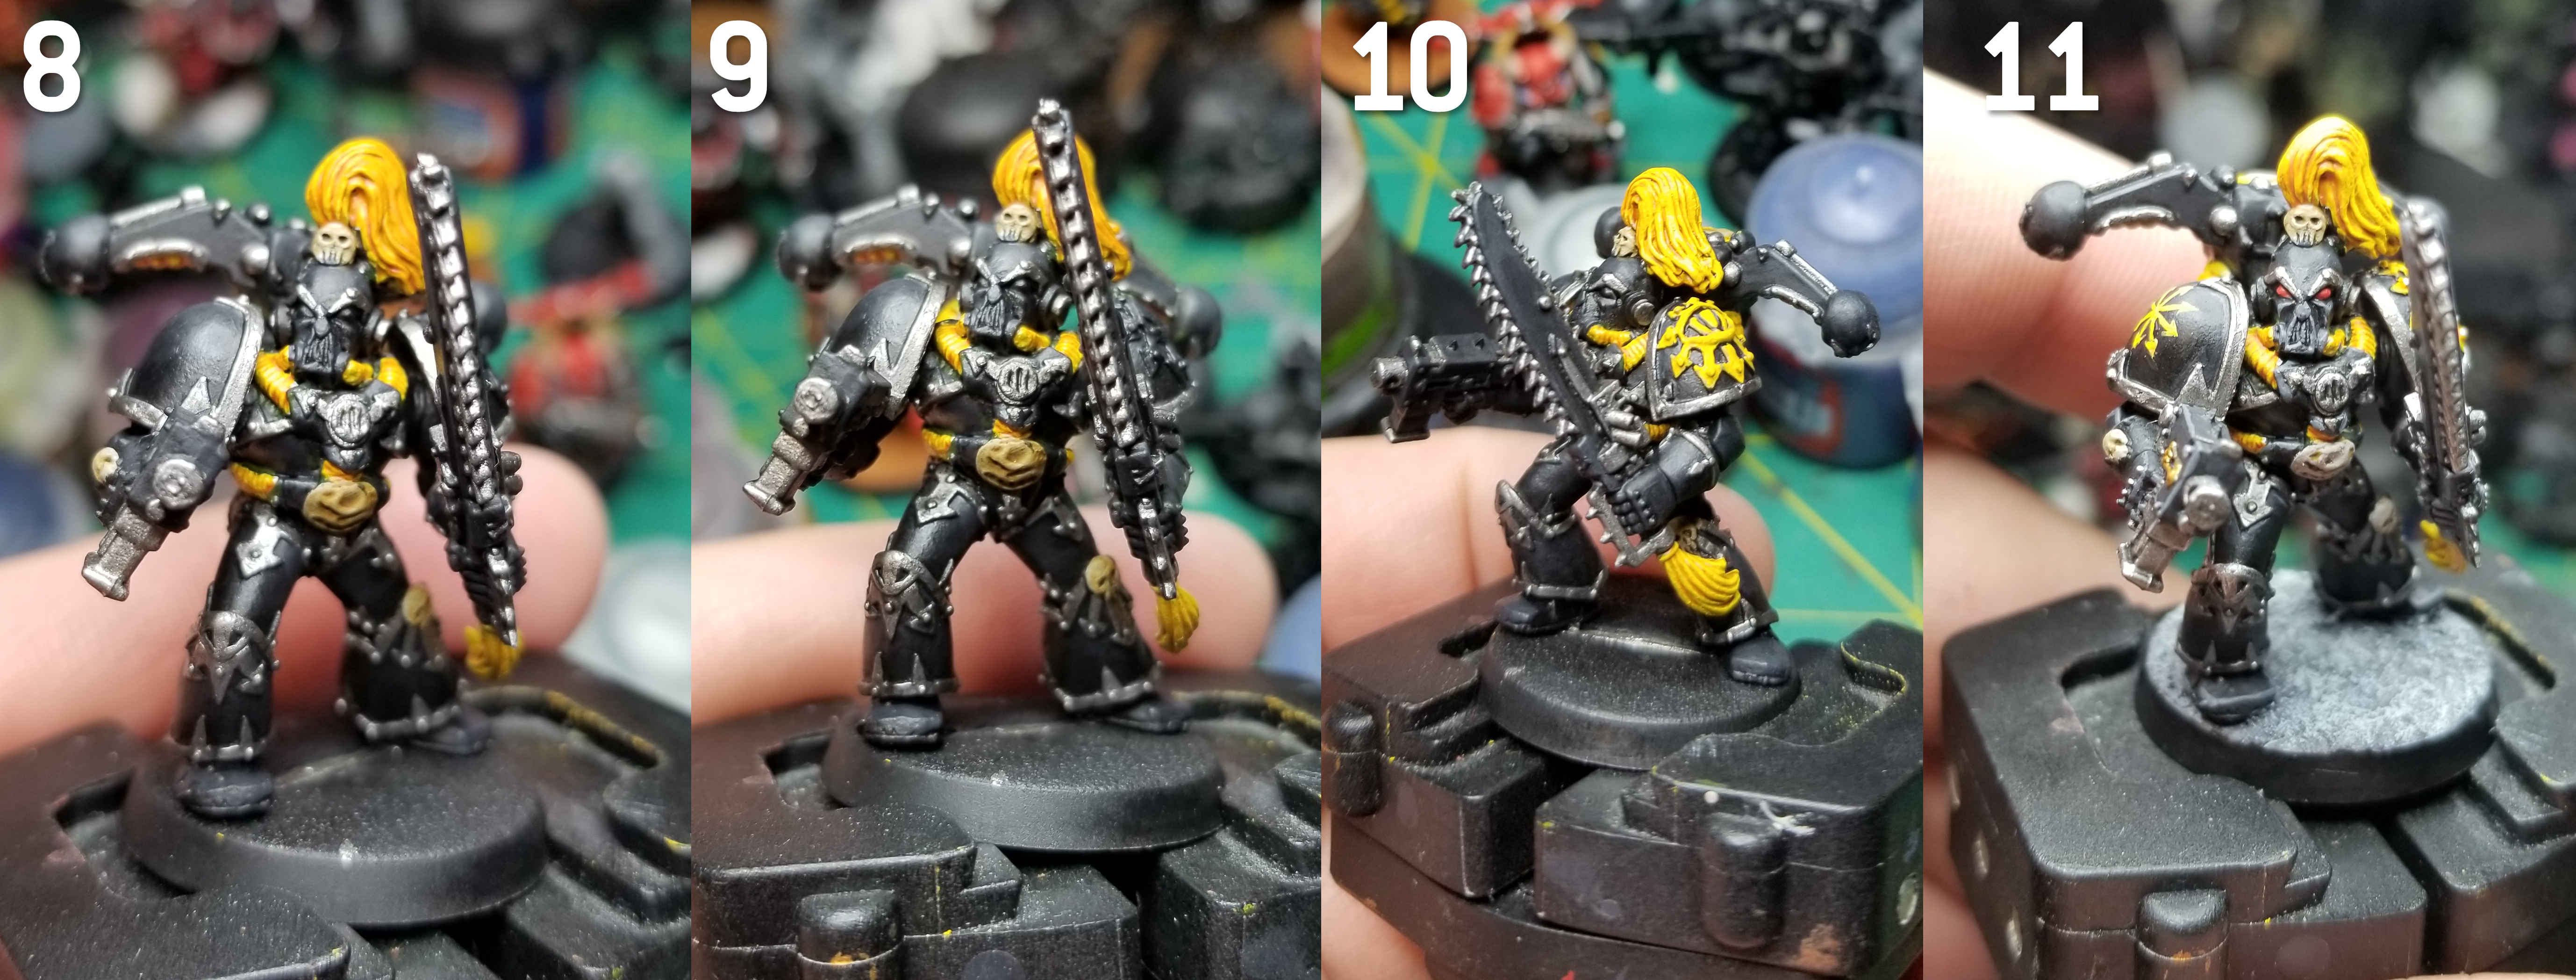
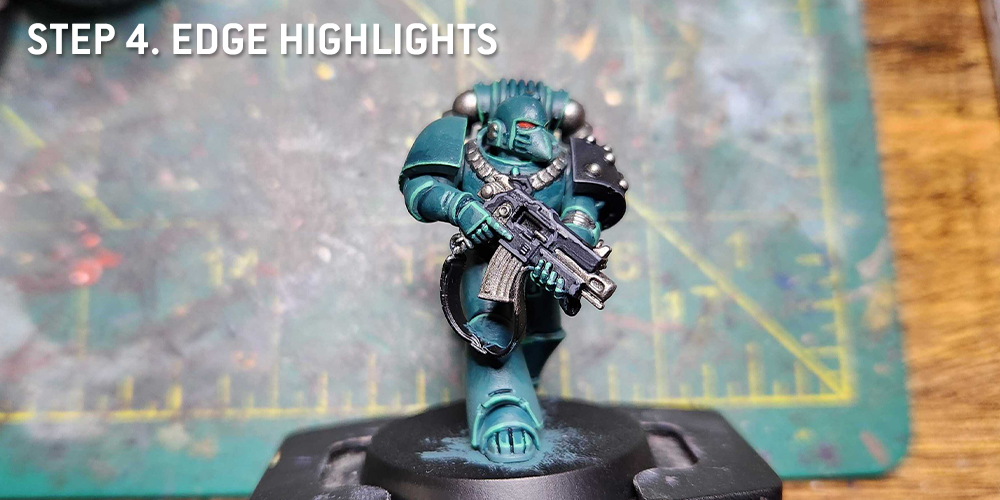
Step 1: The Gold Trim
In most cases, I think it’s smarter to base the armor before starting on the trim, but with the Black Legion the black primer acts as basically a base color for the armor. So, rather than painting the armor and then cleaning up the trim when we paint it, we will paint the trim and clean up the armor panels when we get to painting them.
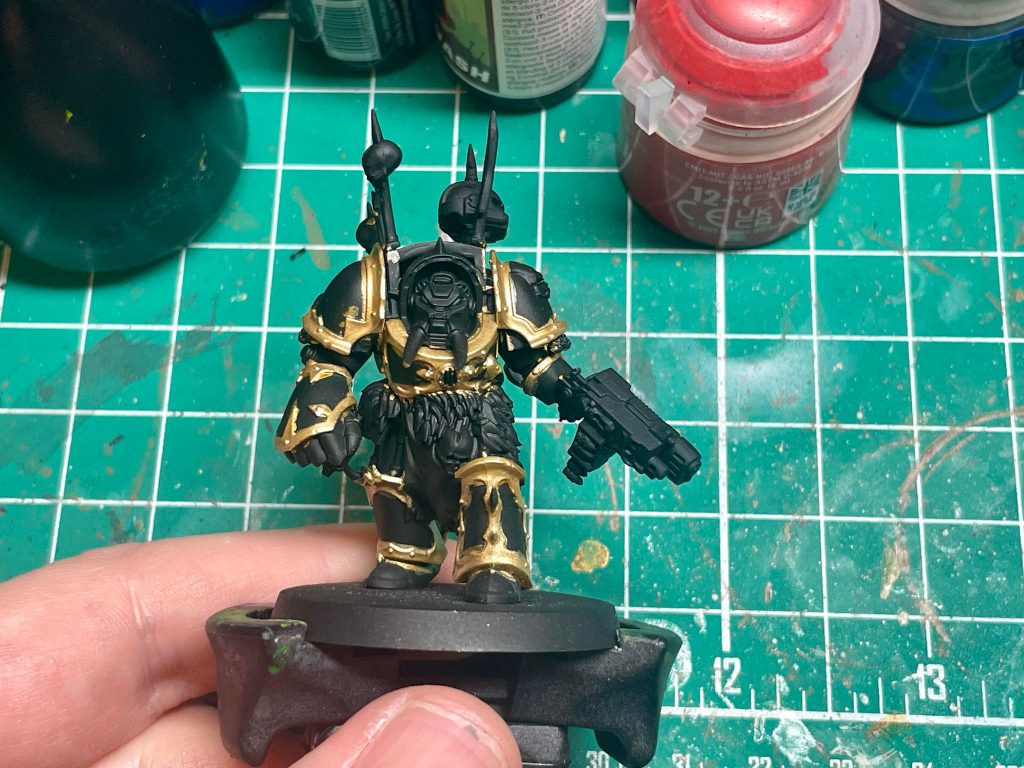
For the trim, I prefer a brighter gold for my Black Legion. I do this by basing with
Retributor Gold, and then layering on Duncan Rhodes
Glistening Gold/Liberator Gold. If you don’t have access to the Duncan Rhodes paint,
Liberator Gold works just fine, but
Glistening Gold is an easier paint to work with in my experience.
Following this, I’ll shade with lightly-thinned down
Guilliman Flesh Contrast, and then edge highlight with more
Glistening Gold. Lastly, I hit the most raised edges of the armor and the studs with a spot highlight of
Duncan Rhodes Plate Armour.
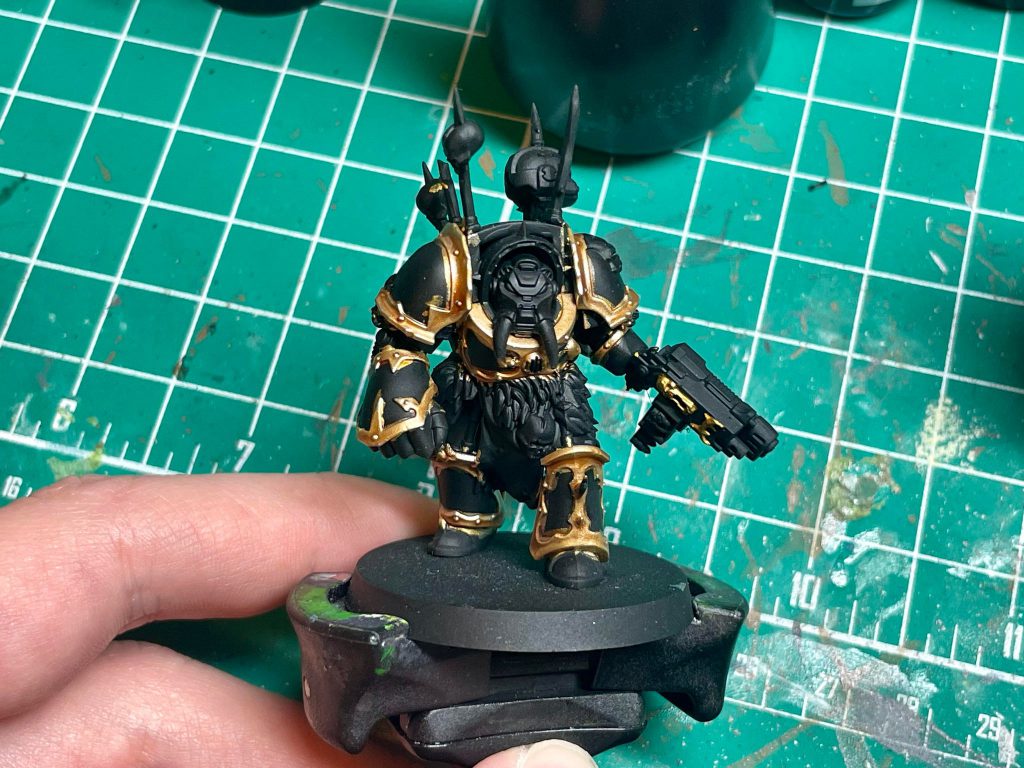
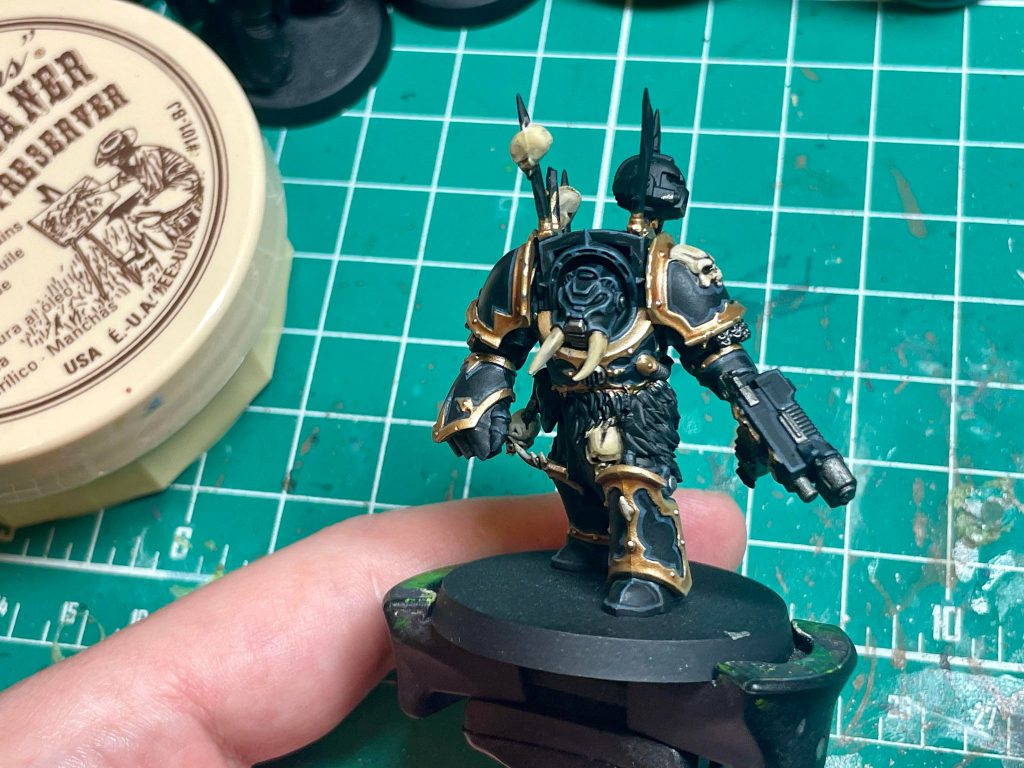
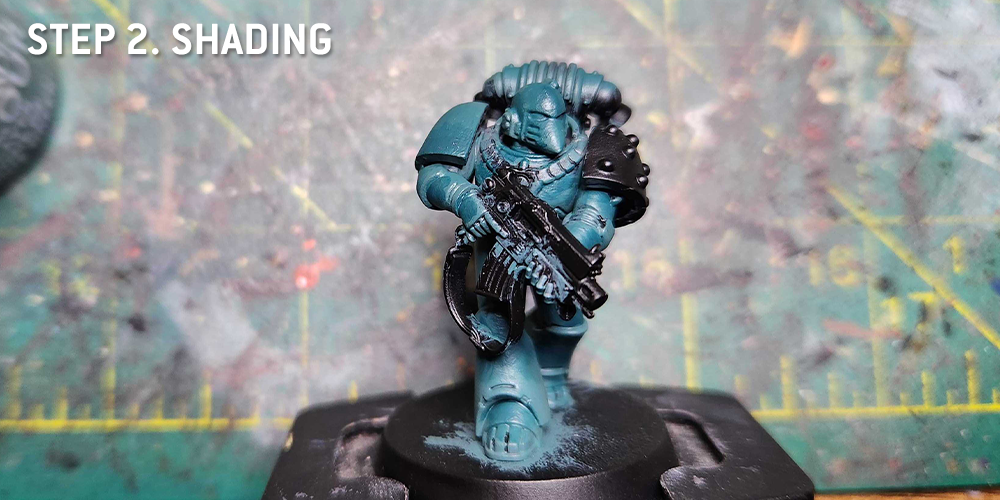
Step 2: Painting the Armor
First thing here is to clean the armor up from painting the trim, as well as make sure the armor is a nice and uniform shade of black. I hit the black areas of the armor with a coat of my special stuff:
Black Legion Contrast. If you paint black frequently, I highly recommend this stuff. It’s very highly pigmented, so even though it’s thin like contrast paint its coverage is excellent. You’ll rarely ever need more than 2 coats to cover up a mistake and make it super black. Just be patient and let the paint dry before
reapplying more paint if a mistake is still visible after the first pass.
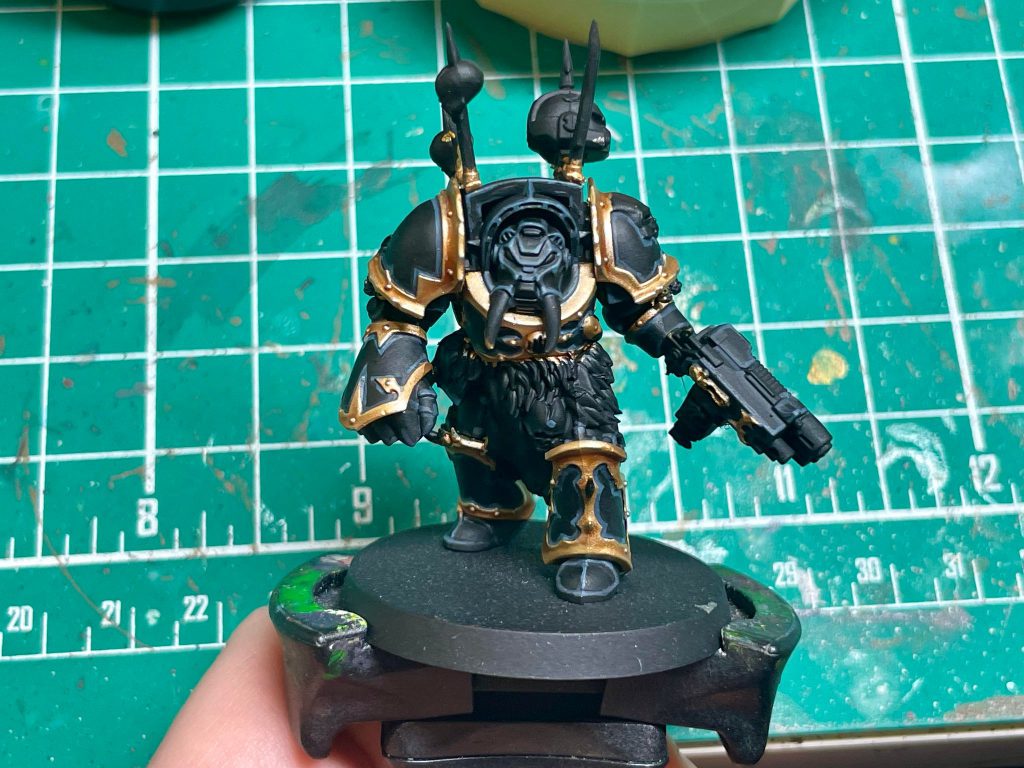
Next, I apply an edge highlight of
Dark Reaper, followed by hitting the most prominent edges with a highlight of
Thunderhawk Blue. Try to keep these edge highlights thin so that the model still reads as black after highlighting, but don’t panic if you make a mistake. You can always clean up a messy edge highlight with more
Black Legion Contrast.
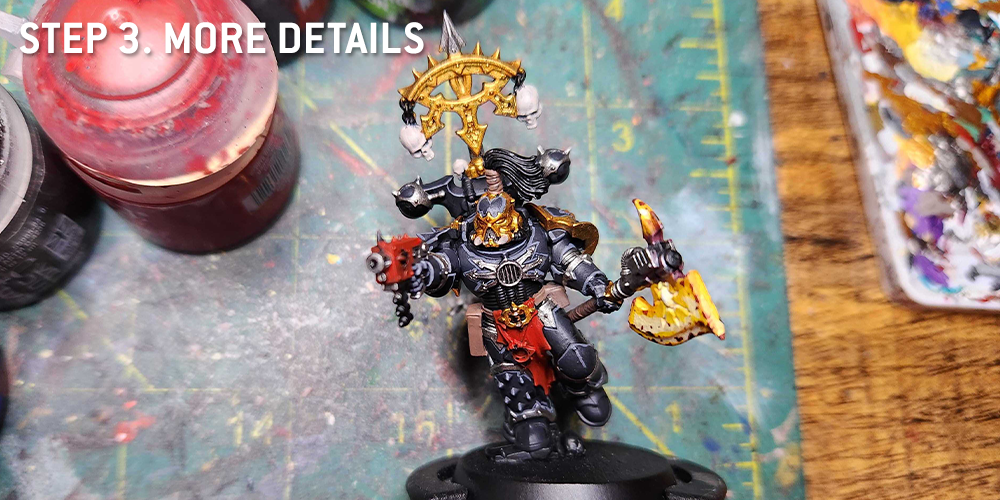
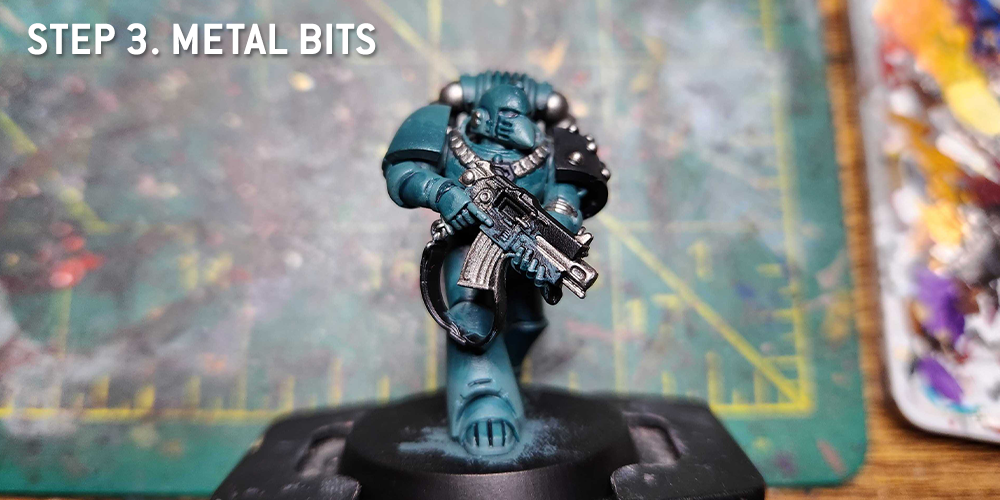
Step 3: Painting Silver Details
All of the silver details for this model get the same basecoat of
Leadbelcher. This includes the gun, chainmail details, armor joints and chains. For the armor joints, I use
Basilicanum Grey as a wash to make the joints almost black with silver peeking through. The other silver details get a wash of
Army Painter Dark Shade, followed by a touch up with
Leadbelcher again and
Duncan Rhodes Plate Armour.
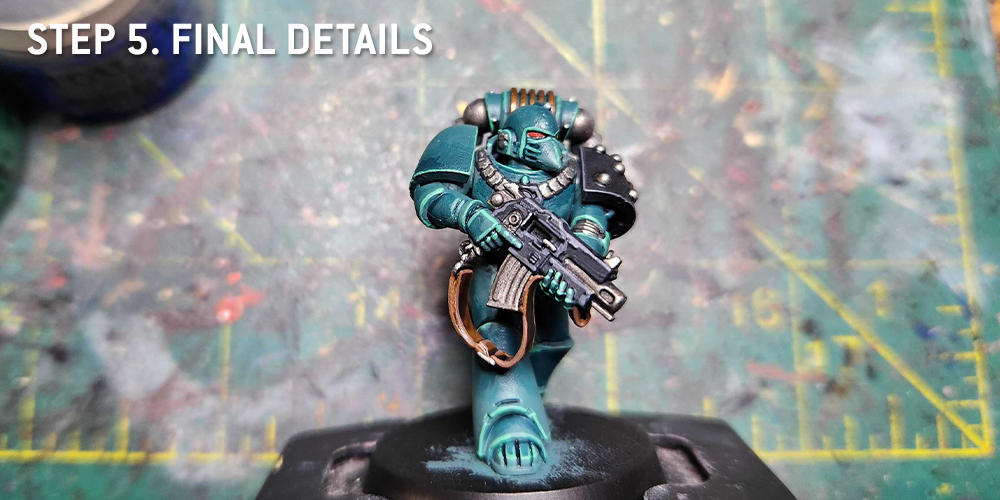
Step 4: Skulls and Bone details
I base with
Thondia Brown so that the recessed areas of the bones, like the eye sockets and nasal cavity, will stay nice and dark. Then I add a layer of
Duncan Rhodes Skeleton Legion all over, avoiding the recessed areas. I shade the bones with
Skeleton Horde Contrast before reapplying
Skeleton Legion. I carefully highlight the bone areas with
Duncan Rhodes Vampire Fang so that the bone details don’t look flat.
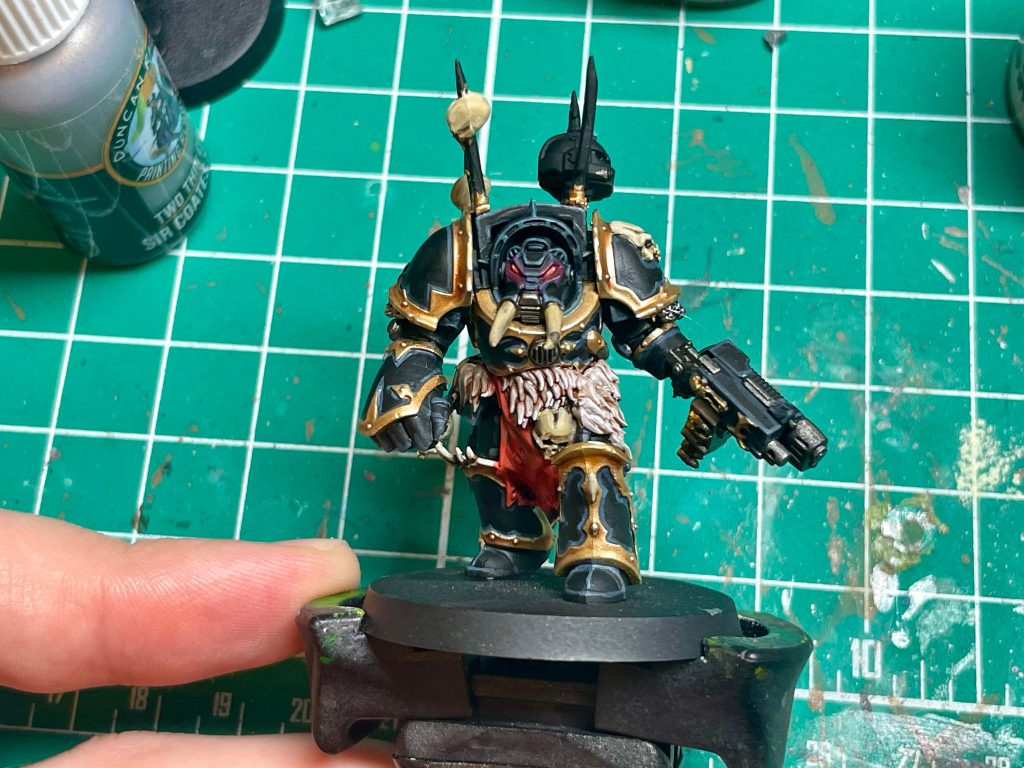
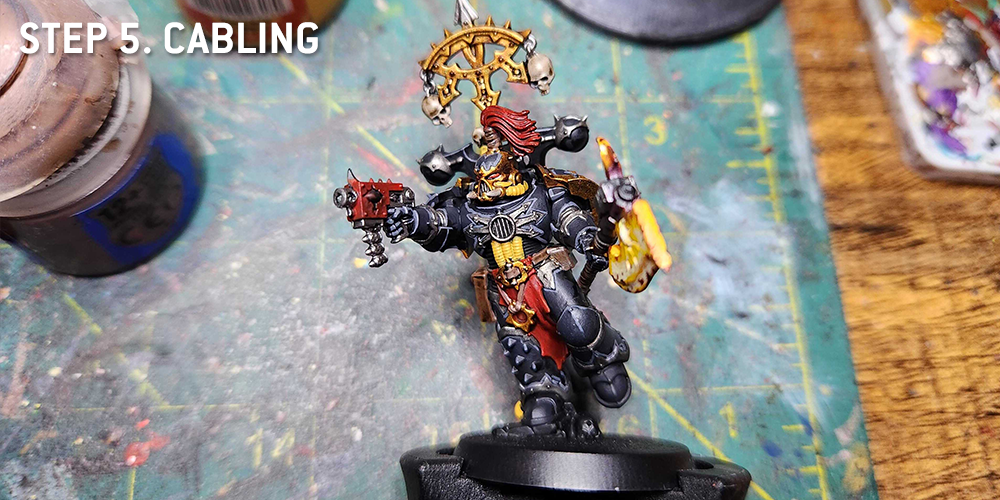
Step 5: Fur, Lenses, and Tabard
For the fur, around the Terminator’s waist, I base with
Rakarth Flesh, wash with
Reikland Fleshshade, touch up with
Rakarth Flesh again and highlight with
Pallid Wych Flesh. You can make the highlighting process a little easier by using the side of the brush to catch raised details.
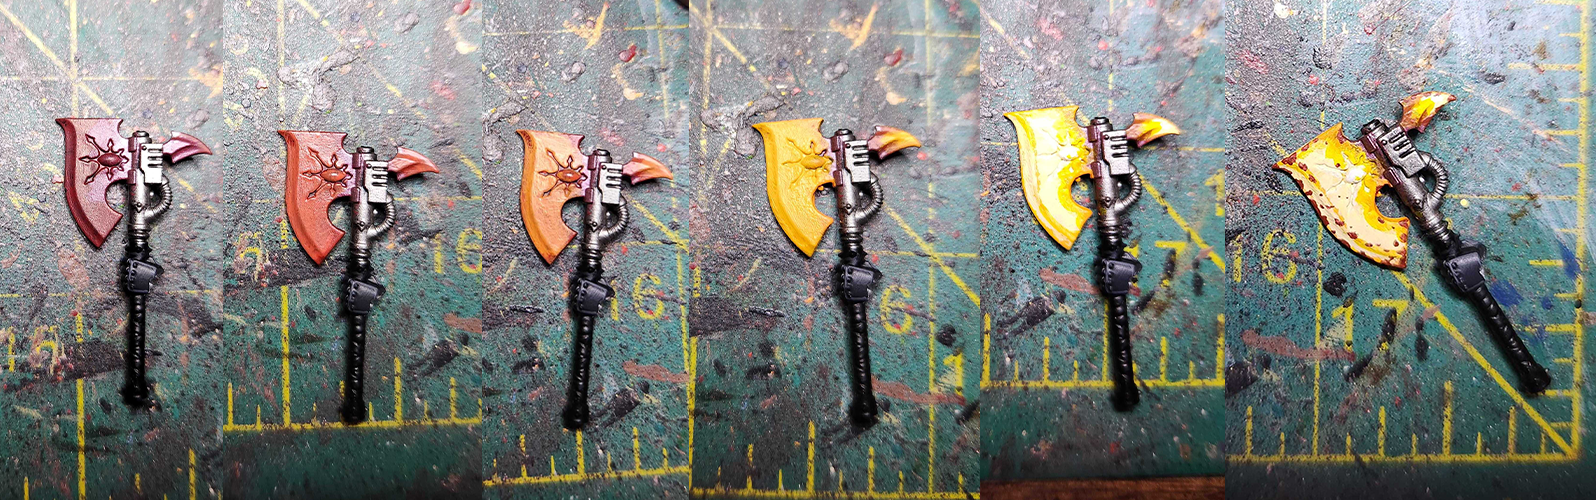
The lenses are a pretty simple progression of red:
Mephiston Red base, then a small highlight of
Evil Suns Scarlet towards the center of the lens, and a touch of
Wild Rider Red followed by a little white dot of
Pallid Wych Flesh. I also add some thinned-down Doomfire Magenta Contrast to add a glow effect to the lenses.
Finally, the tabard. I base with
Mephiston Red, followed with a wash of
Agrax Earthshade. I highlight the tabard back up with
Evil Suns Scarlet, focusing on the raised parts of the tabard, and then highlight with
Wild Rider Red.
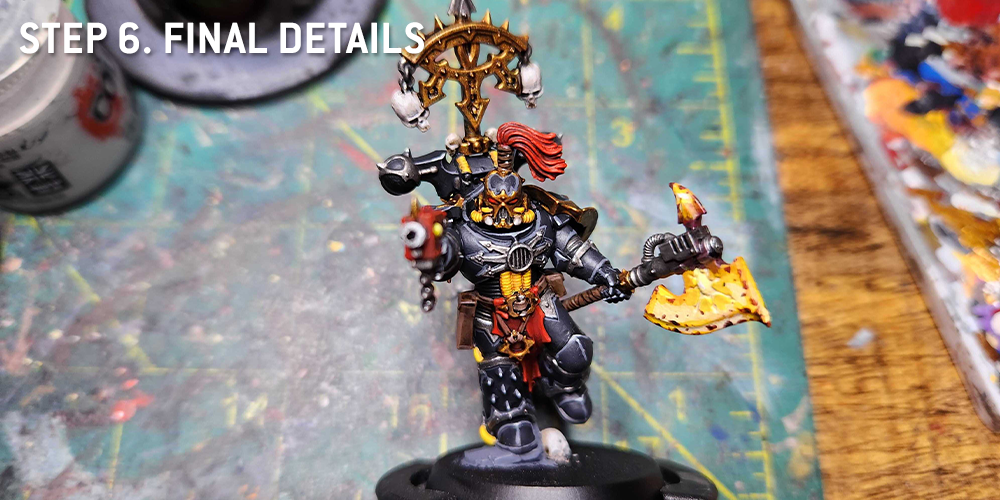
Step 6: Plasma Glow and Other Details
Adding plasma glow is one of the most fun parts of a paintjob for me, and my method for green glow is dead easy. I start with a layer of
Moot Green before applying
Duncan Rhodes Yellow Flame to the corner of the plasma coils and where the coils meet the gun casing. Then, I apply
Tesseract Glow on the plasma and in the areas around the plasma for a quick-and-easy OSL effect. You can go deeper into applying OSL here (
and we have a great guide how on Goonhammer!), but I think this simple effect will look great on the table.
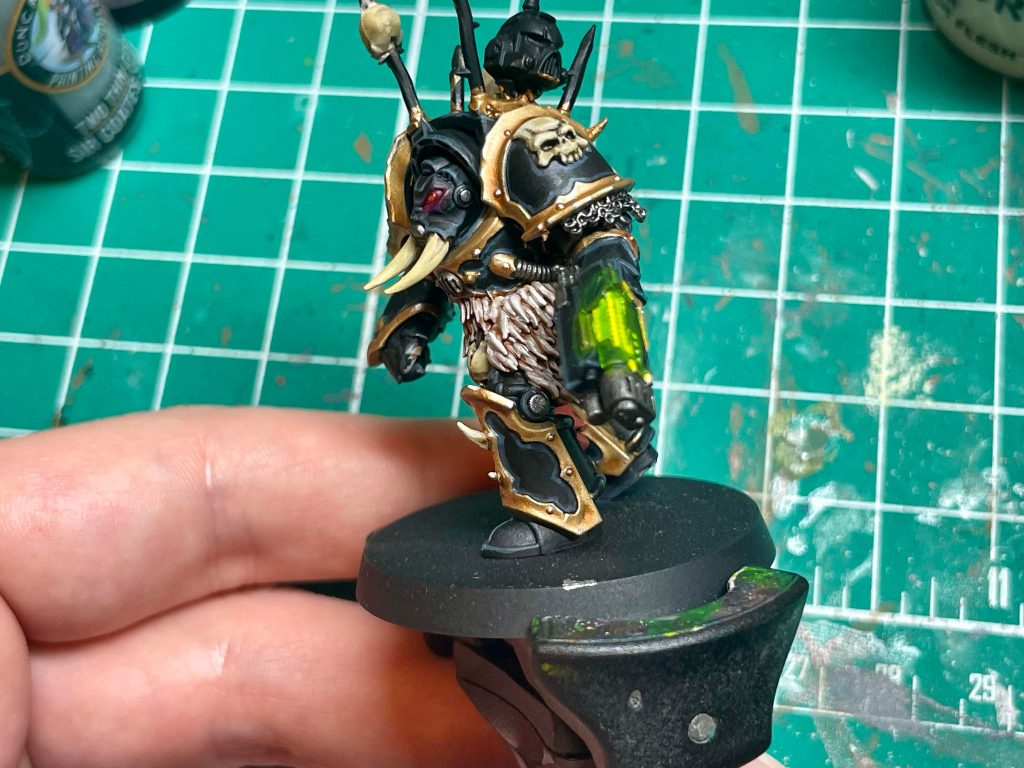
For the spikes on top, I apply
Dryad Bark, wash with
Army Painter Dark Shade, and highlight with
Gorthor Brown. I decide to make the trophy helmet an Ultramarine, and start with
Macragge Blue. I shade using
Dark Shade as well, and highlight with
Alaitoc Blue. For the red and silver details, I follow the steps I’ve already mentioned.
After basing the Terminator, making sure we give the ground a sinister red glow with a drybrush of
Wazdakka Red and lightly touching it up with a drybrush of
Screaming Skull, we are finished!
 Credit: Dan "Swiftblade" Richardson
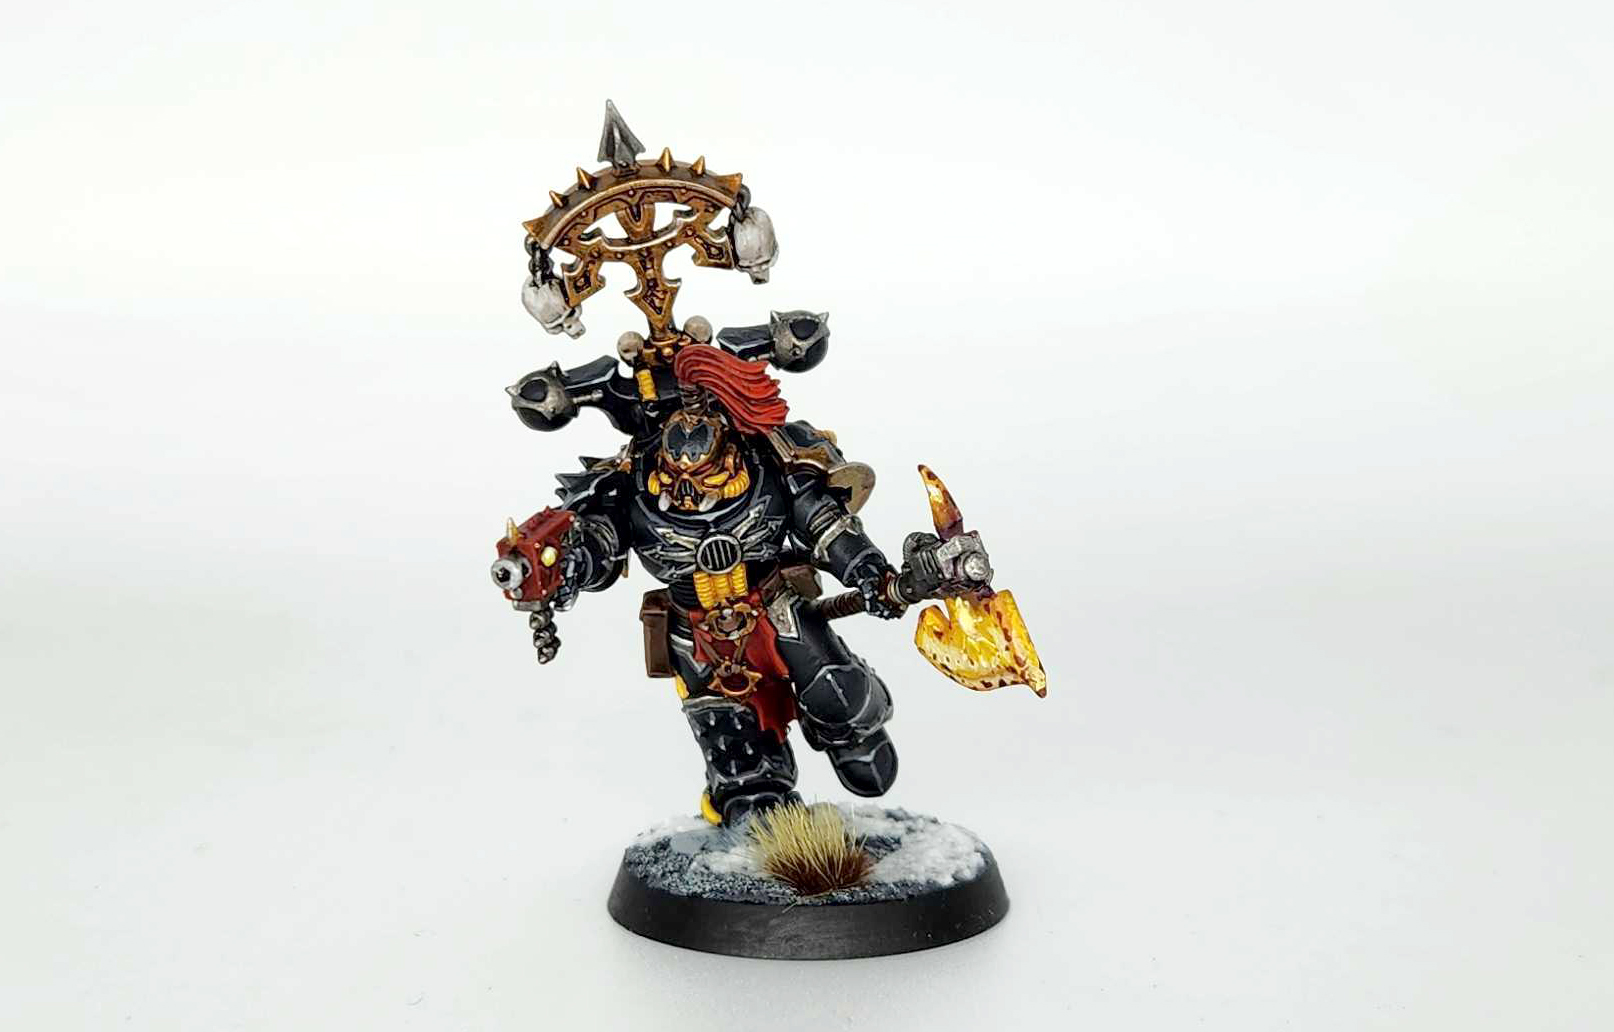
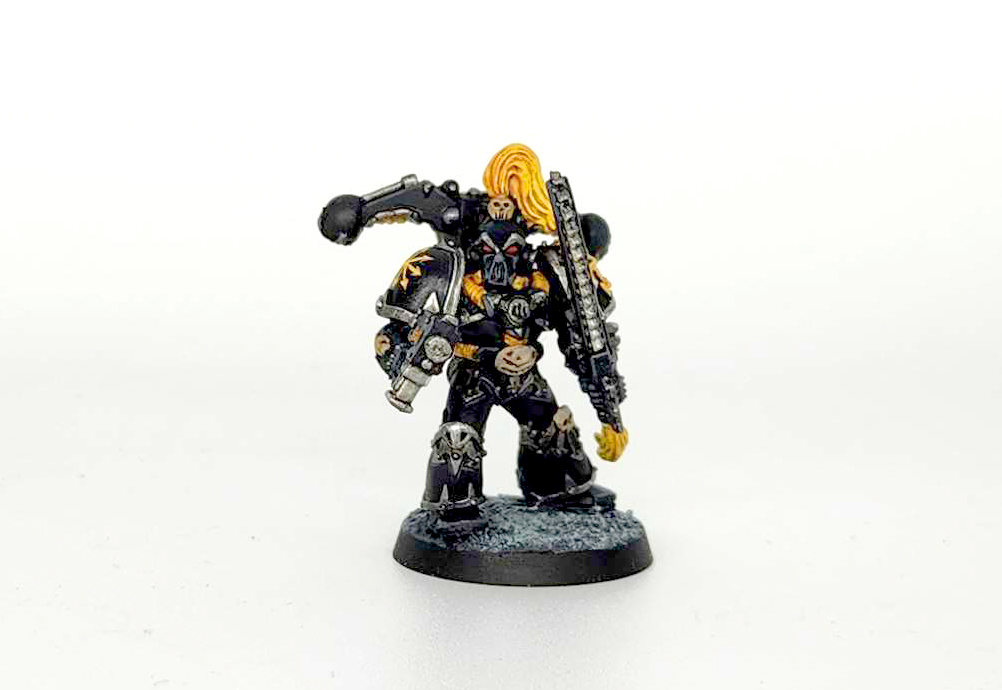
That’s all I’ve got for how I paint my Black Legion stuff, folks! Painting Black Legion Chaos Marines may seem daunting, especially if edge highlighting isn’t your strong suit, but a good looking Black Legion model looks menacing as hell on the tabletop and can be a lot of fun to do.


 Credit: Robert "TheChirurgeon" Jones
 Credit: Robert "TheChirurgeon" jones


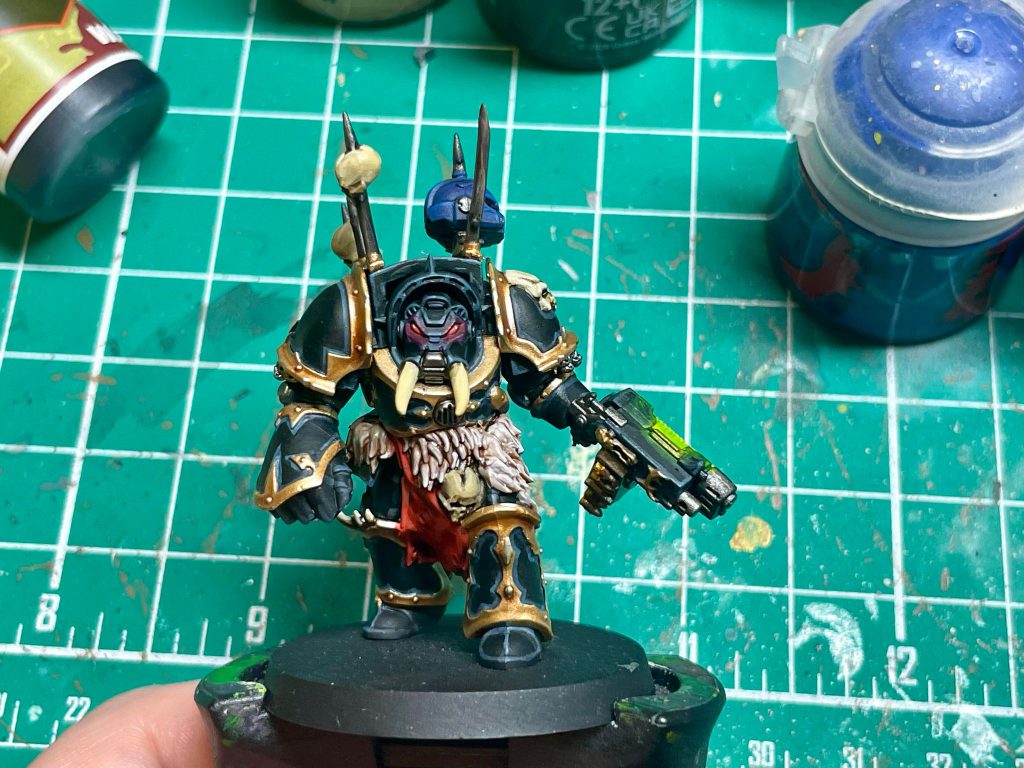
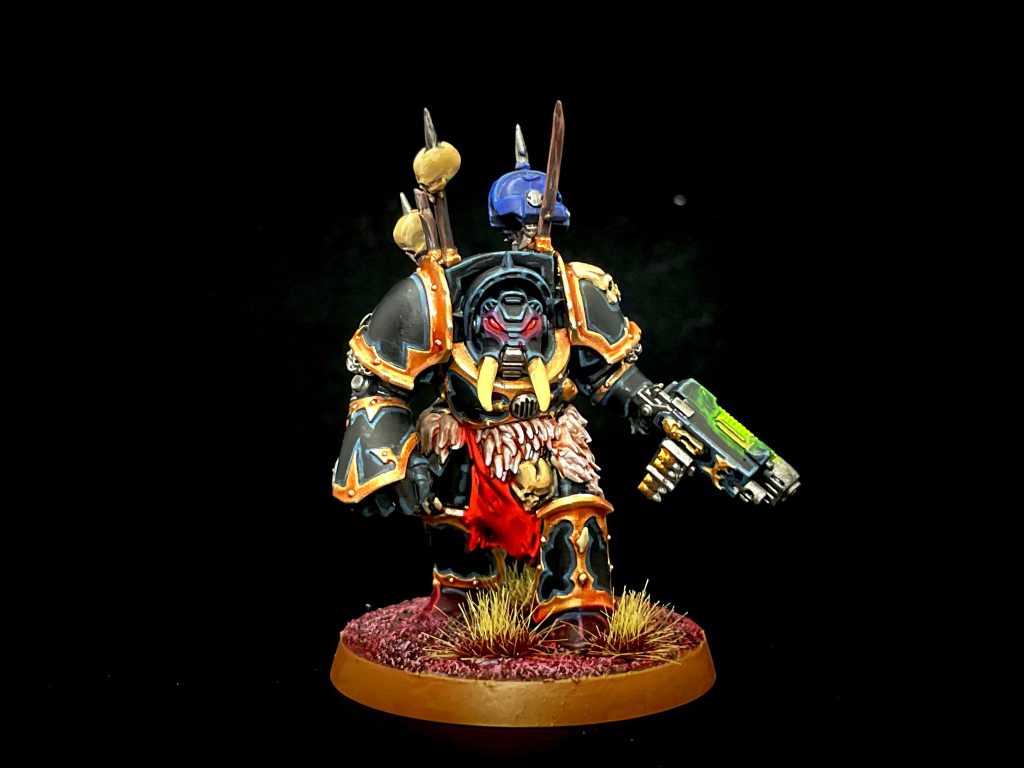
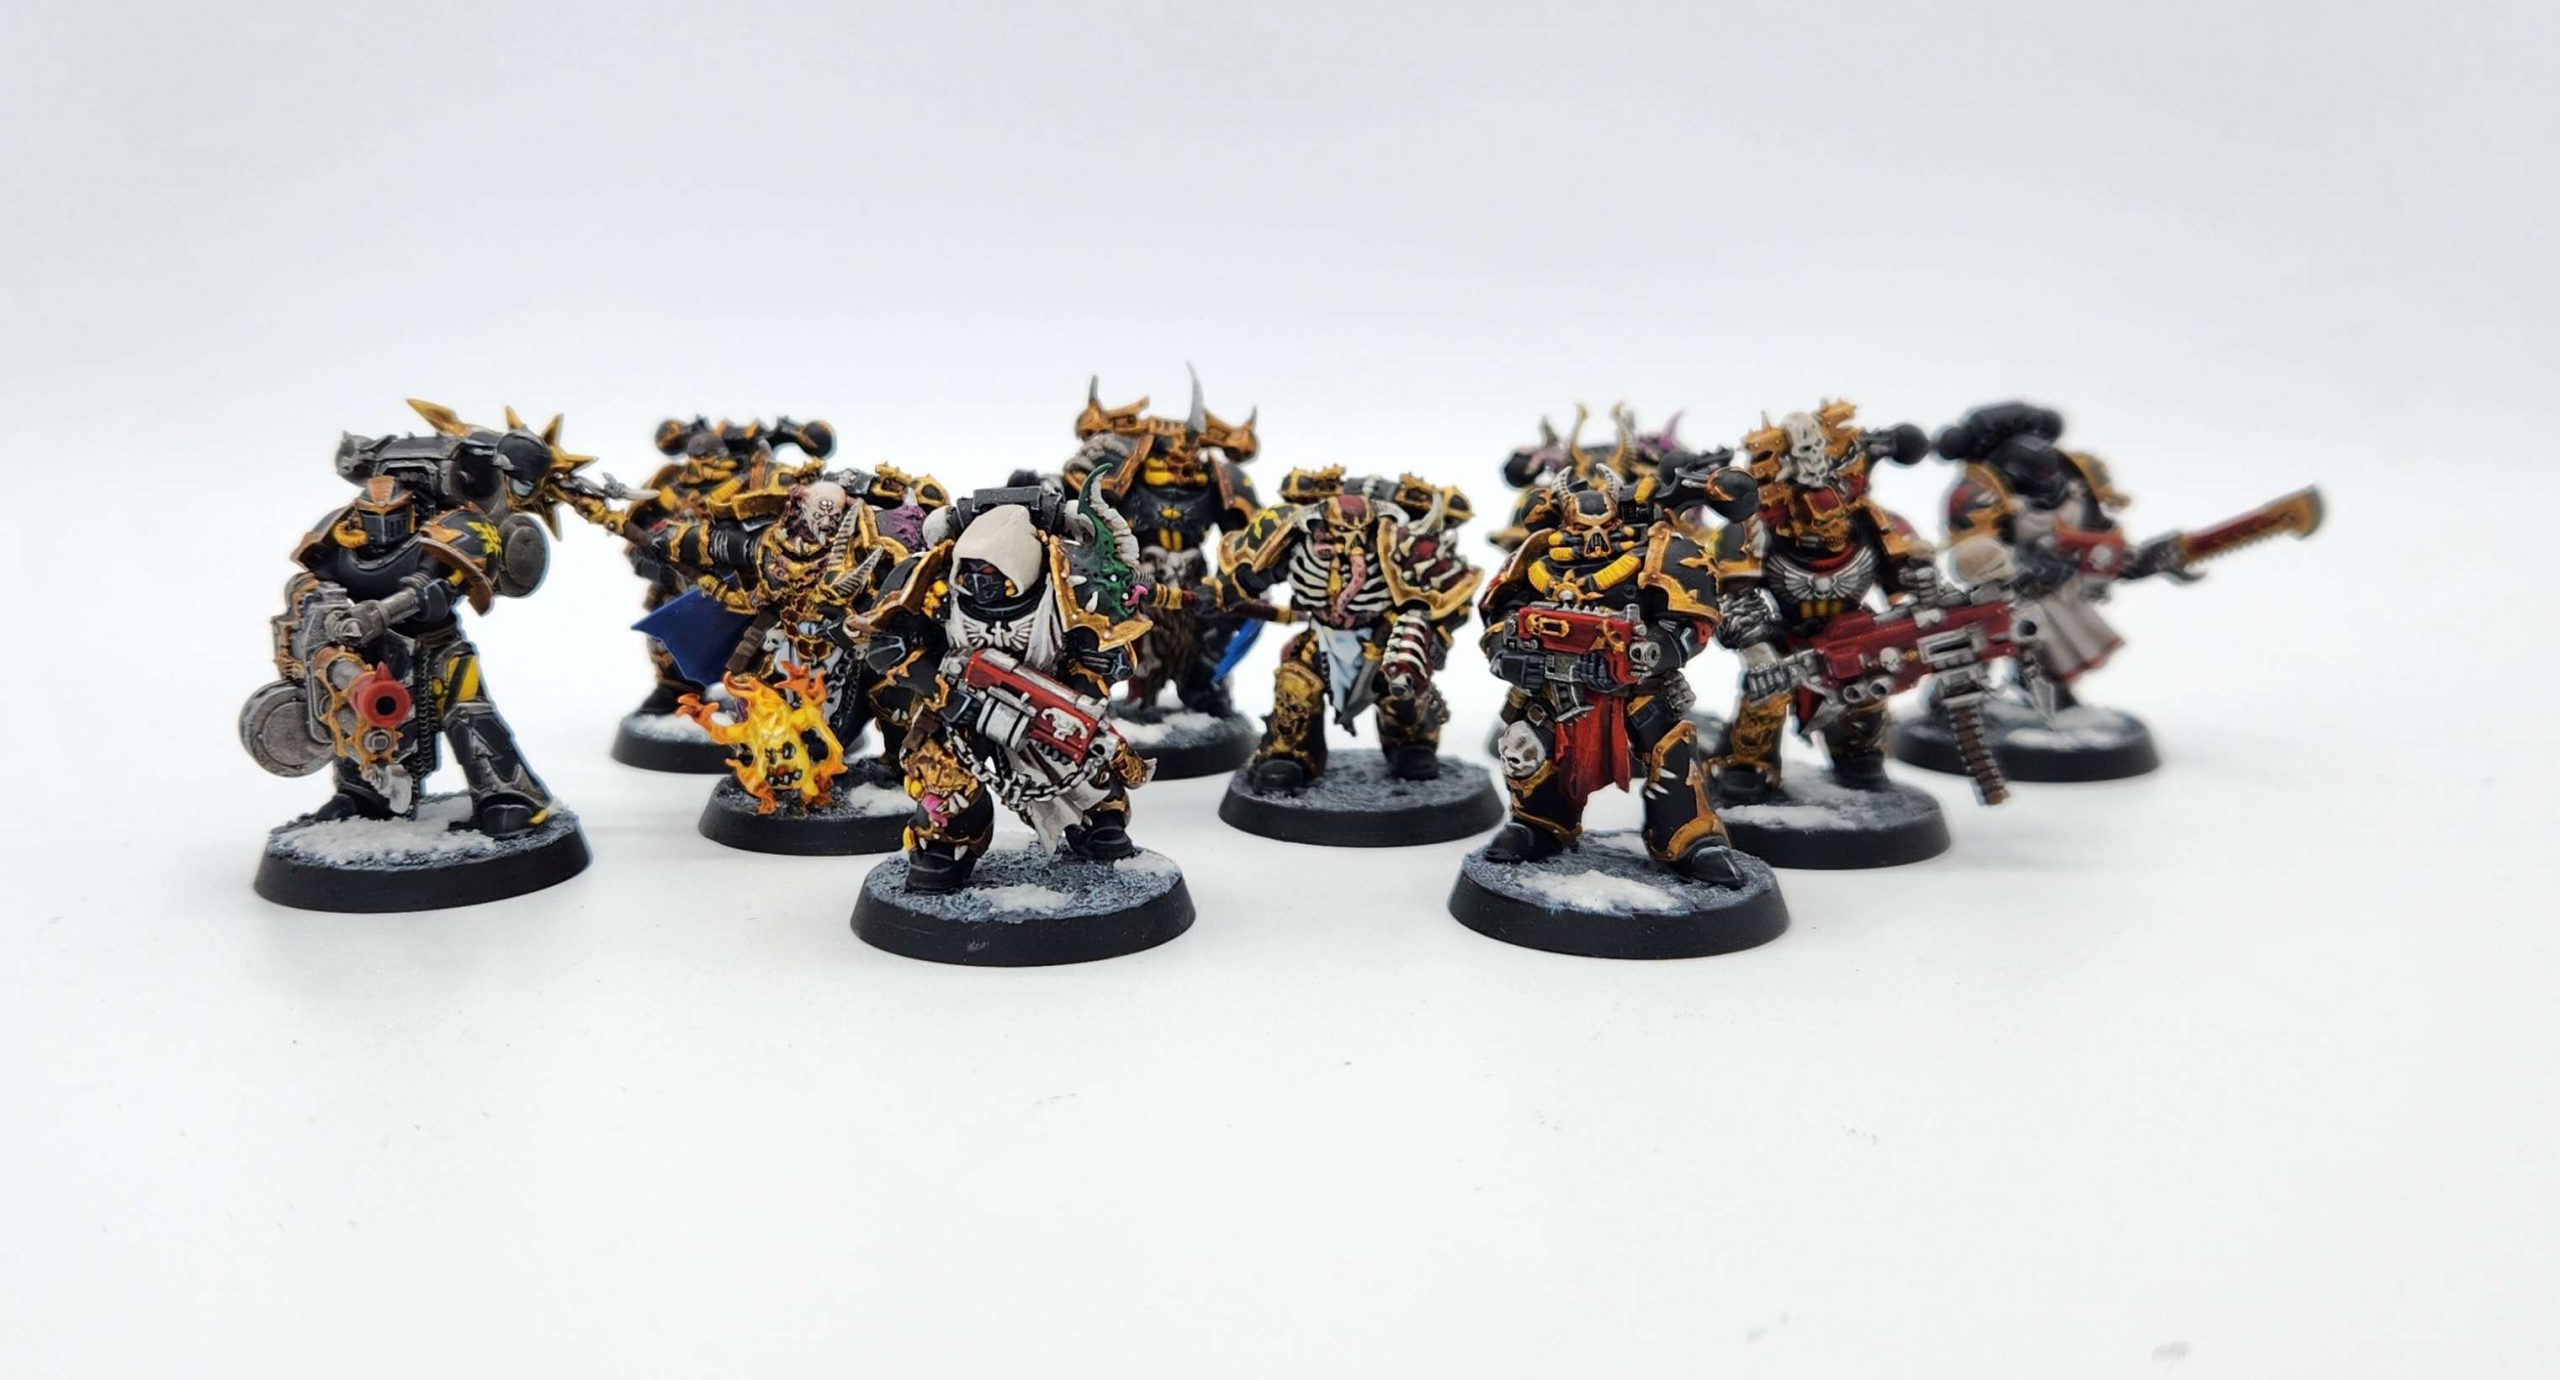
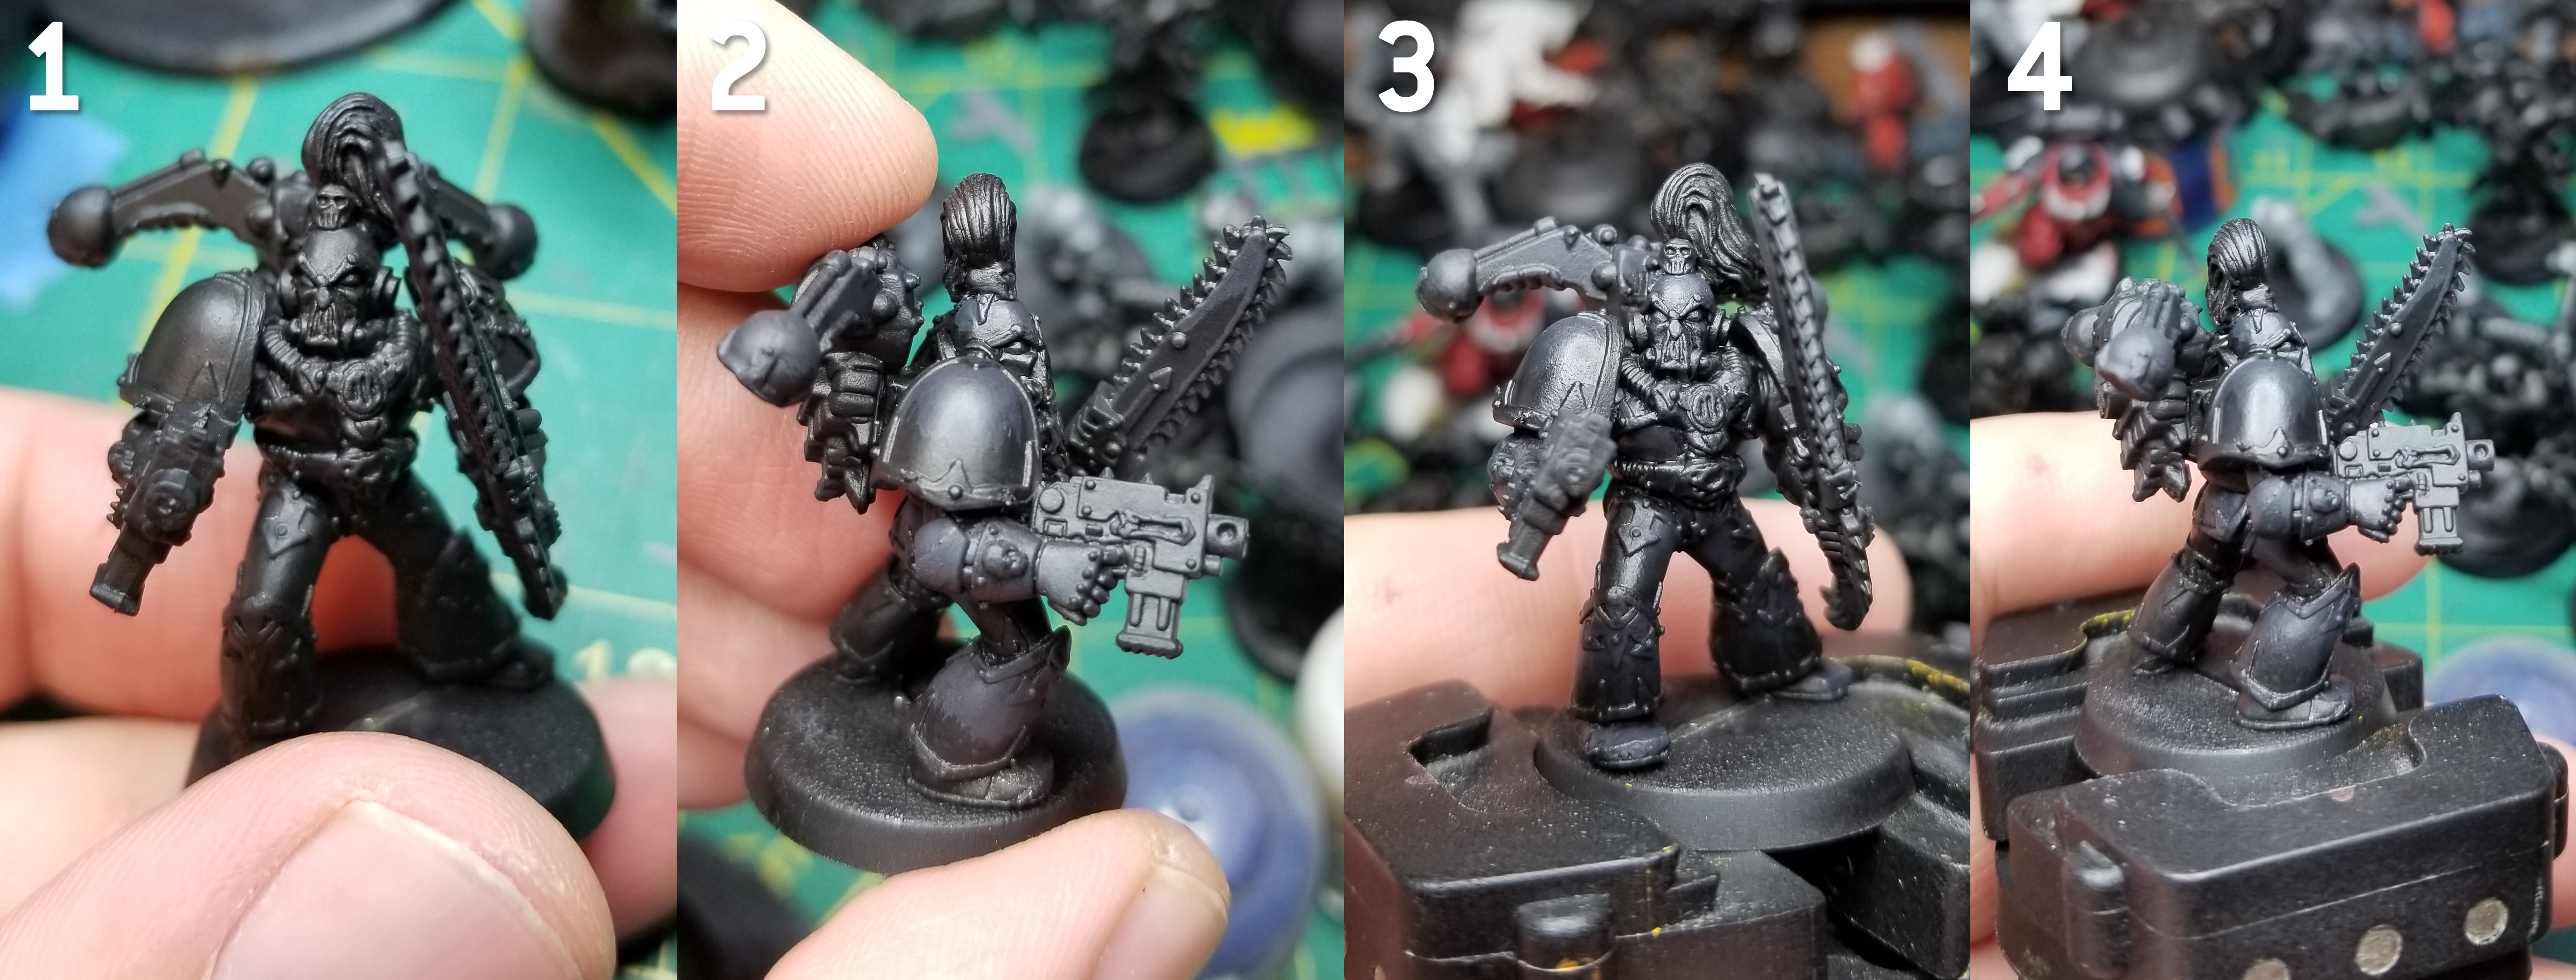
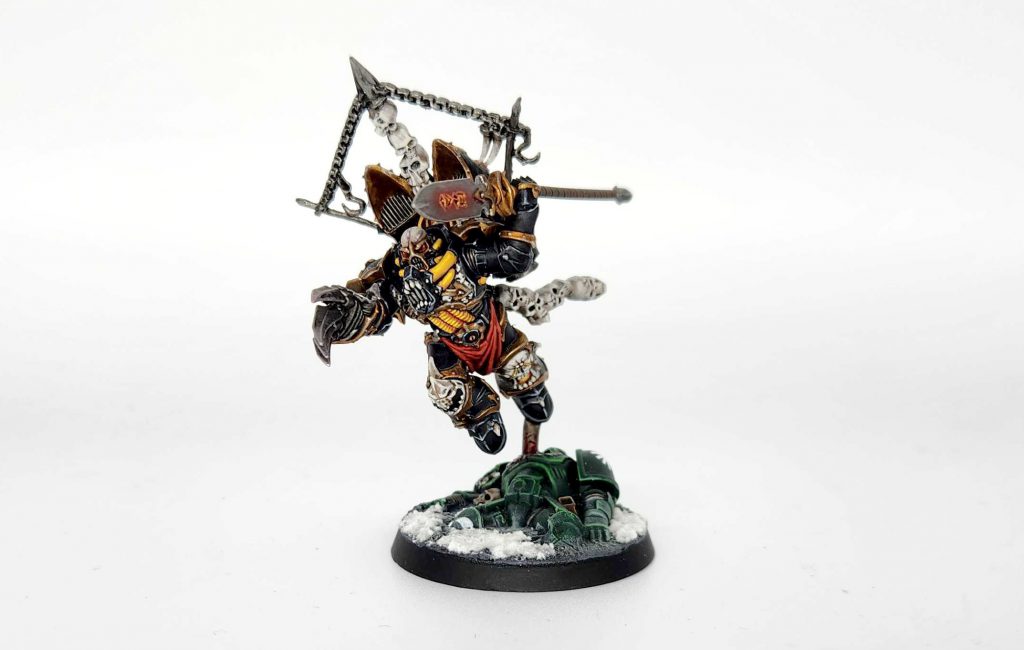
 As an added note, I picked the bits for this model carefully - the spiked greave and shoulderpad were reminiscent of the old Justaerin models, and the topknot is also a common visual element for the Sons of Horus. One thing I like to do when making new Black Legion models is convert them to be visibly related to other legions, to show that the Black Legion aren't just former Sons of Horus but rather traitors drawn from across the eye to a common cause. I like to use bits and armor choices to mix in Fallen, Iron Warriors, Alpha Legion, etc. It's a great way to put that bits box to work!
 Credit: Robert "TheChirurgeon" Jones


 Credit: Robert "TheChirurgeon" Jones

 Credit: Robert "TheChirurgeon" Jones
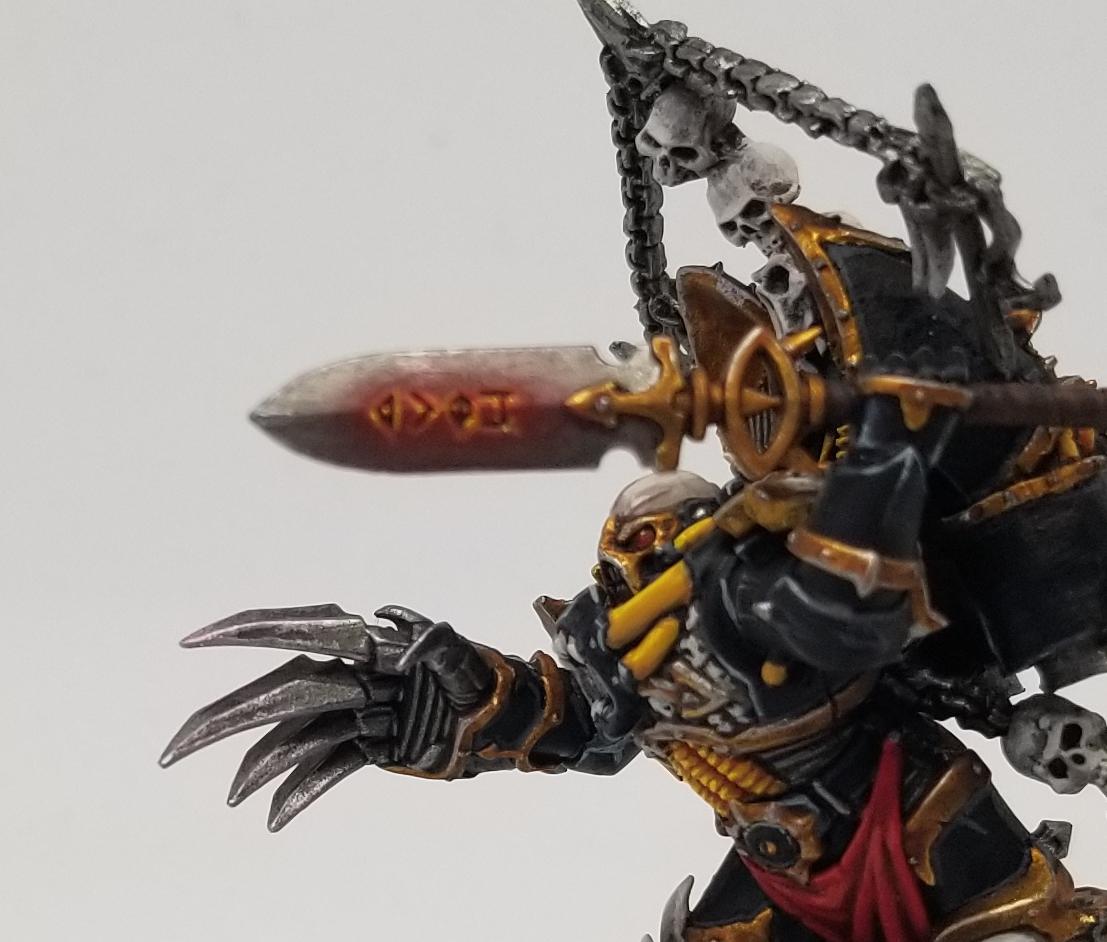
 The Black Legion have two special/named characters to work with, the Warmaster of Chaos and his Herald of the Apocalypse. Below you'll find notes on painting Haarken and a link to an article on painting Abaddon the Despoiler.

 Credit: Robert "TheChirurgeon" Jones

 Goonhammer App and Patron Updates: April, 2026
 Kill Team Tournament Report: Engage, Party, Repeat's March Madness 2026
 Goonhammer Reviews: Tribal Conquest