Taking your modelling outside of resin, metal, and plastic can produce some startling and striking results, and it's not at all difficult to do. In the absence of anyone actually asking "Lenoon, how do you do that?", here's a two part guide to using natural materials for wargaming modelling, with simple tips and tricks for incorporating the varied textures and aesthetics you can find in the real, outside, world into your hobby time.
This article covers Wood, Seeds, Lichen and anything else I can think of to use from plants and fungus. Part two will cover animal materials and stone.
It's simple enough to incorporate plant (and plant/fungal hybrid) matter into your modelling practices, and you may well do so already though basing scatter, hero rocks or plasticised reindeer lichen. If you're looking for a guide to how to whittle, turn, and sand wood into shapely forms though, this isn't it. Let's go through some basic principles and approaches, and then look at specific examples of different materials I've used and how I've used them.
Basic Natural Materials Work
What You Need
The hobby tools you already have are more than good enough. Add a small pair of nail scissors and a jewelry saw or other tiny hacksaw to the standard kit. Both are very useful.
Plastic glue isn't going to cut it here. To work with a wide range of materials you'll want superglue and PVA/white glue for fast and slow bonds. Modge Podge is a thinned out PVA and sometimes you'll want the thicker stuff. A tub for builders is cheap and will last you a lifetime. You can use both glues to seal in and protect the materials you use as well, though if you want a really strong and hard wearing finish, you could add a 2 part epoxy resin
Collecting Your Supplies
There's an obvious answer here and it's "pick stuff up and use it," but depending on where you are, what you're picking up, and if you're taking it across borders, there are legal restrictions on collecting things you find. You should know more about how these work in your area than I do, so put the work in to find out what's allowed where you live.
I exclusively collect material that has already fallen and would otherwise end up in the street or gutters, and never take anything from a living plant. Don't strip bark, pull birch paper off or make incisions to collect sap. The plants you're collecting from are doing their own thing, so leave them to it. I collect on the street, in local parks and wasteland in my area - don't go wandering around botanic gardens to pick up rare seeds and plants, that's a shitty thing to do and there's more than enough interesting stuff to find on pavements and gutters. Collect a little, it all mounts up anyway.

Collecting is seasonal and cyclical, so be prepared to store materials over the course of the year - seeds from one tree may drop in the spring, from another in winter, etc etc. Keeping a collection in a dry, dark, box will let you use everything all year round.
Maintenance
If you're looking to make a model, put it on the shelf and have it still look identical in ten or twenty years time, you probably don't want to be incorporating frangible materials that will actively decompose into your models. However, you can still make something that looks good after a long time, even when you accept it will look different. The look, size and shape of fresh plant based materials will be significantly different to their look in a year or two. Bark will shrink (a little), lichen will fade and shrivel, leaves and roots will brown and crumble. This is a natural part of the process, so plan around it. Don’t use fresh, wet materials for structural purposes as, when they dry, your model will pull itself apart.
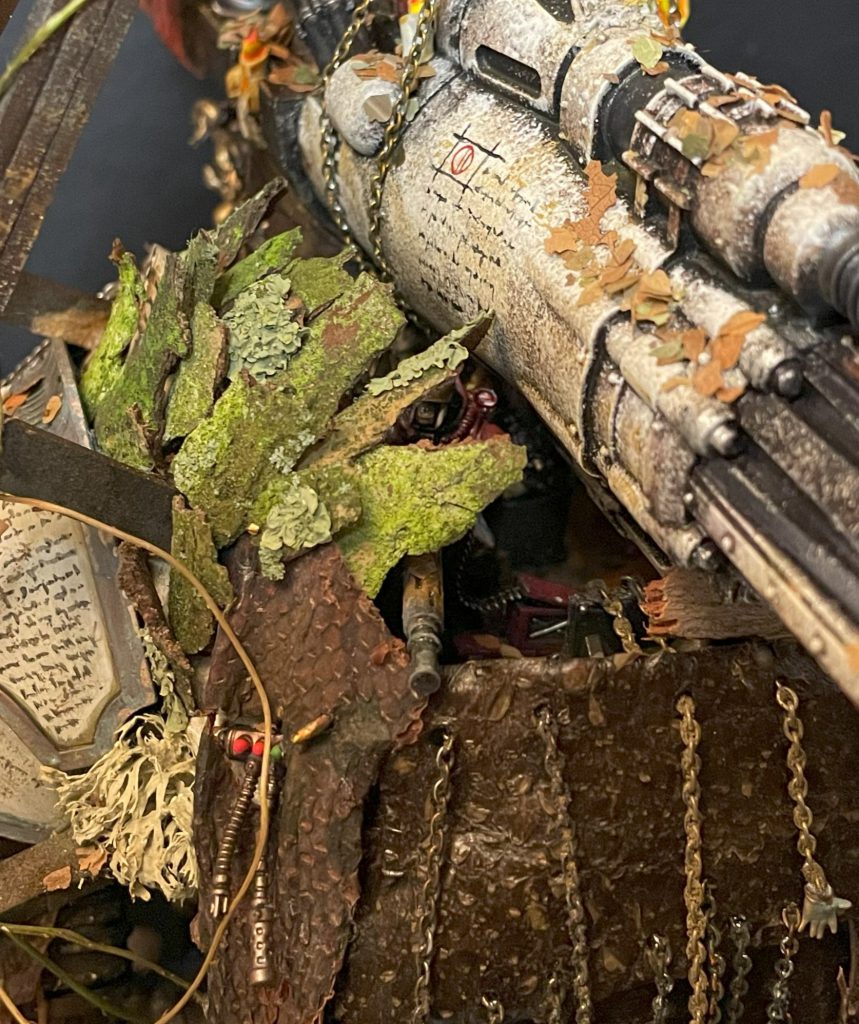 Freshly applied bark and Lichen
It's not all doom and gloom – the look of a model that incorporates natural materials will change over time, which is a beautiful and strangely touching thing. The bark covers of my Porphyrion have faded and weathered into the same colour scheme as the plastic – almost (but not actually) as if this process was planned to compliment the colour scheme. Time acting on plant based materials is a good thing, and will create unexpected moments of beauty, even poignancy, as your models change and decay.
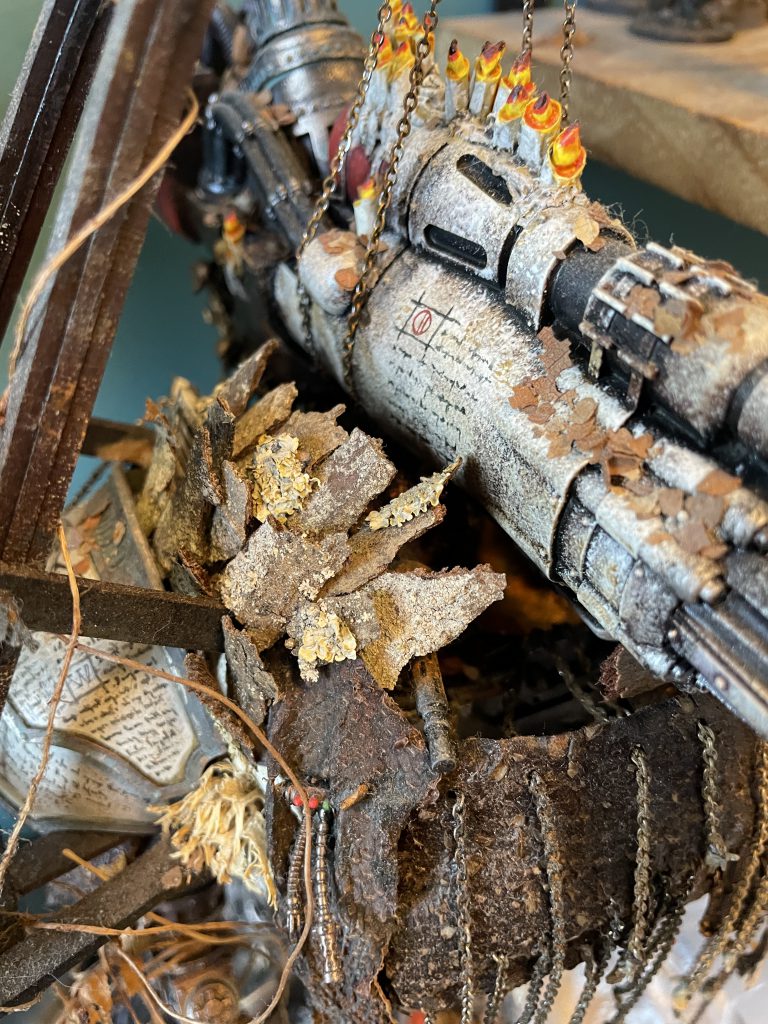 The same bark and Lichen 14 months later
Maintaining natural materials of all types on your models is as simple as keeping them dry. Luckily, you already do this! Keeping moisture off your models will eventually lead to desiccation, which will arrest most decomposition. If you’d like to boost the longevity of your materials, you can use the same techniques as preserving paint jobs – varnish, sealant and keeping them clean and dry. If you really want to preserve a particular look forever, and you have a lot of patience, you can water down some PVA and place one end of the wood/bark/lichen into it. The PVA will be drawn into the capillaries and – to some extent – the entire fabric, giving you an extremely budget and not particularly effective version of plasticization. Two Part Epoxy resin also works with tougher materials in the same way.
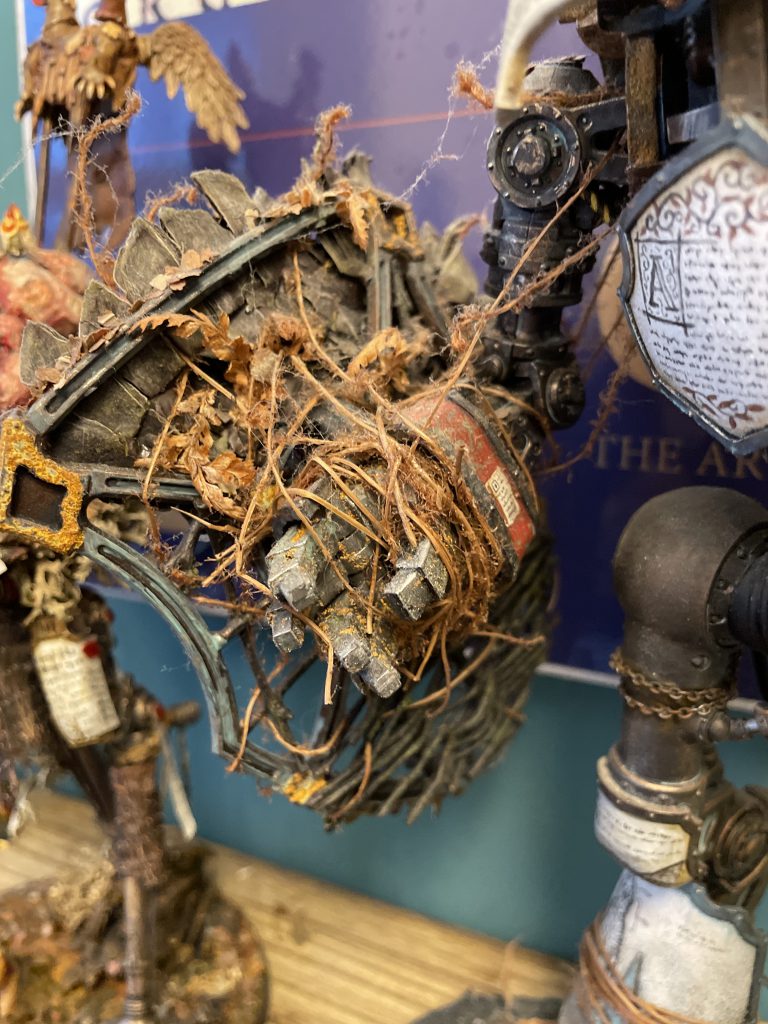 Faded and dried materials have a beauty all of their own
Cleaning Natural Materials
Lots of guides will tell you to bake materials, but I don’t think this is entirely necessary, or even desirable, in all cases. Baking is a good way to kill off anything left living in the wood/leaves you’re using, and this, substantially aided by cooking out moisture, will aid the longevity of the materials you’re using. Unless you’re working with bone or feathers (see next time, folks!), I don’t find it a particularly useful thing to do. If you are highly concerned about picking up some kind of disease from pine cones then yes by all means bake them.
If you do want to bake materials before you use them, I recommend something in the range of 150 degrees C. Higher will crisp and cook whatever you’re using – particularly finer pieces like leaves – and lower won’t remove all the water. Be aware that it isn’t suitable for everything - baking particularly thin and fragile materials like lichen or birch bark will render them unusable.
Painting
You can paint most plant based materials in the same way as anything else. Acrylics and Oils both work perfectly well, and all the usual techniques will have the usual results. I’ve found that enamels don’t work as well and when I’ve tried them I’ve had lots of beading or pooling.
It's worth noting that plant materials will absolutely drink up water based paint, so go thick for a base layer and don’t use the good stuff until the first layer is dried! This can be used to your advantage - soaking materials in watered down paint (particularly lichen) can tint them with the paint pigment, doing a lot of the painting for you.
Safety
Don't eat any of this stuff, wear gloves and eye protection when working with it, work with it outside, and wash your hands afterwards. Even when baking to kill bugs, you don't want to breathe in things like fine cellulose dust or mold, and you don't want to riddle your hands with splinters. Be sensible and take any of these recommends on your own account!
Materials Guide
With the basic how to done, let’s have a look at some useful materials, what they could be used for and how to work with them. This is by no means exhaustive – how could it be! – but is an example of how you can think about different plant based materials in your modelling.
Wood
Sticks, twigs, palm fronds/stems, large roots, etc.
You know them, you love them. Every modelling kit should have a selection of twigs. Flexible twigs do flexible things, rigid twigs do rigid things.
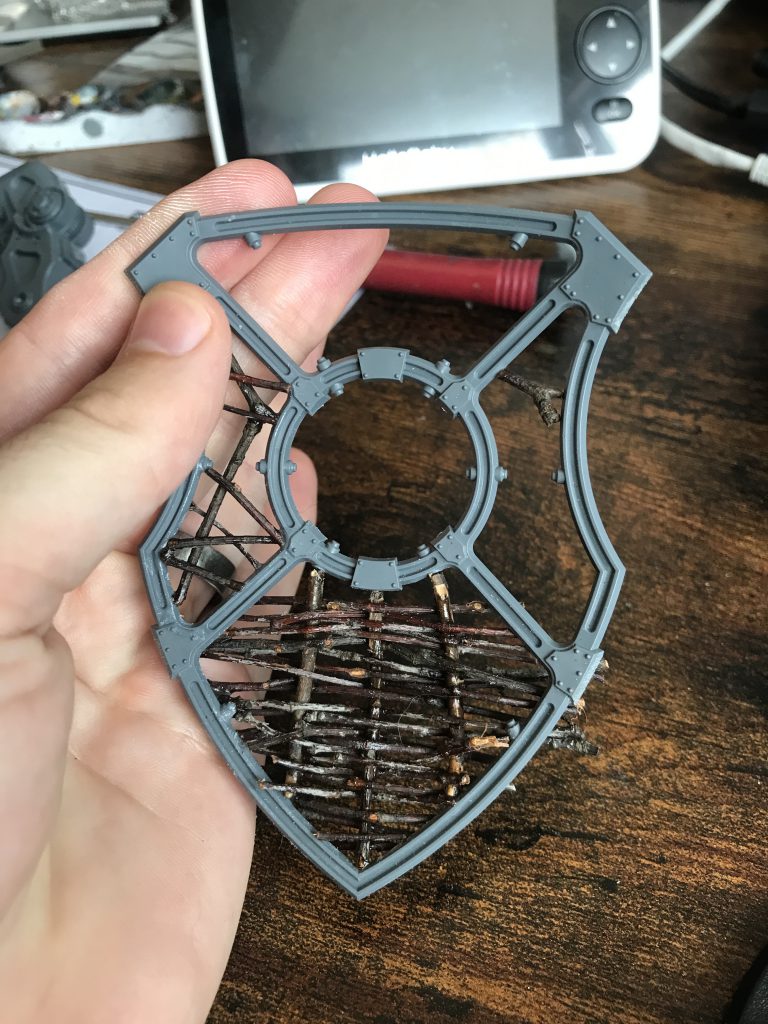 Flexible twigs can be woven into wicker if you are an idiot.
Good for:
Flexible twigs can be woven into wicker if you are an idiot.
Good for: Basing, weapon hafts, structures, making Ents.
How to work: Fine saw to trim, knife to strip and whittle into shape. Use superglue to secure.
 Large roots work very well for fallen trees for basing
Preparation:
Large roots work very well for fallen trees for basing
Preparation:
- Bake to remove moisture if you want to guarantee a final shape.
- Strip bark off any sections you’re gluing – you want the glue to adhere to the wood, rather than the bark which may fall off under pressure.
- Measure twice, cut once!
Balsa Wood
Balsa wood is classified as a hardwood, and many other hardwoods share a similar structure and can be worked with in the same way. Balsa is much lighter and easier, but the same principles apply to other hardwoods too! It can be easily split to give long straight sections with obvious wood grain, which makes it a fantastic resource for modelers.
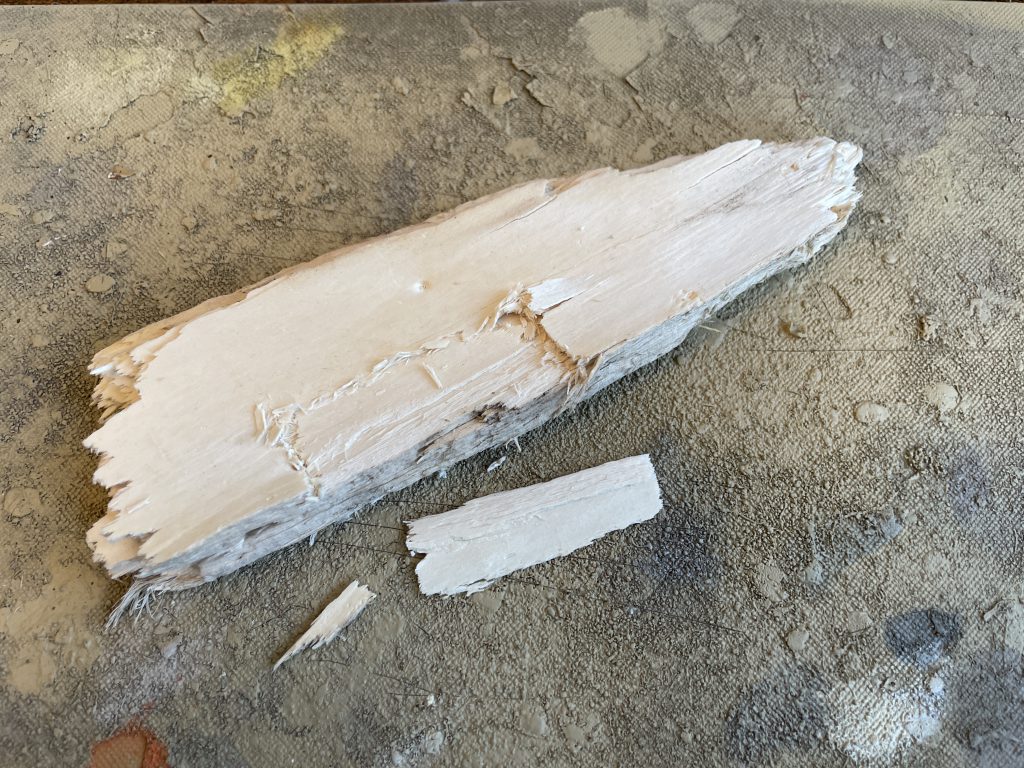 Balsa wood can be easily split and trimmed to shape
Good for:
Balsa wood can be easily split and trimmed to shape
Good for: Basing, shields, armour plating.
How to work: Split with sculpting tools, trim and shave to fit with knife, use PVA and expect a long drying time.
Preparation:
- Split lamellar sections of wood off along the grain, giving you large flat planes to work with.
- You can split it along the grain for a fantastic splintered cross section that isn’t painful to touch too.
- Balsa absolutely drinks up superglue, so PVA might be best to secure it – you want this nice and thick to avoid saturating the entire piece with water.
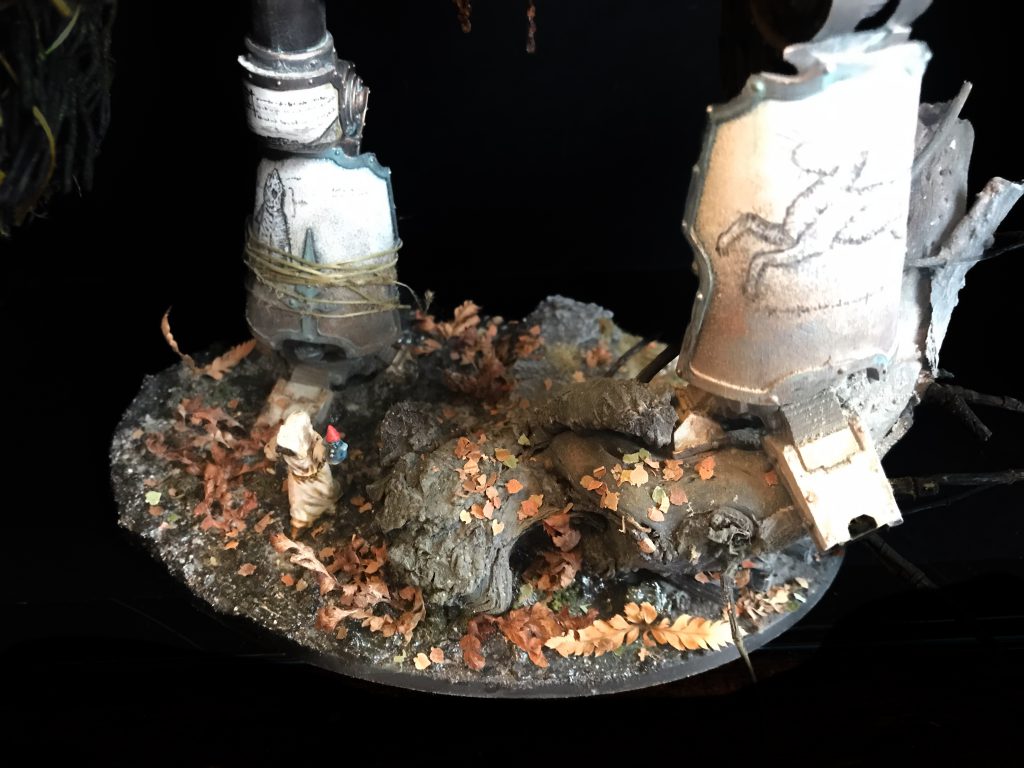
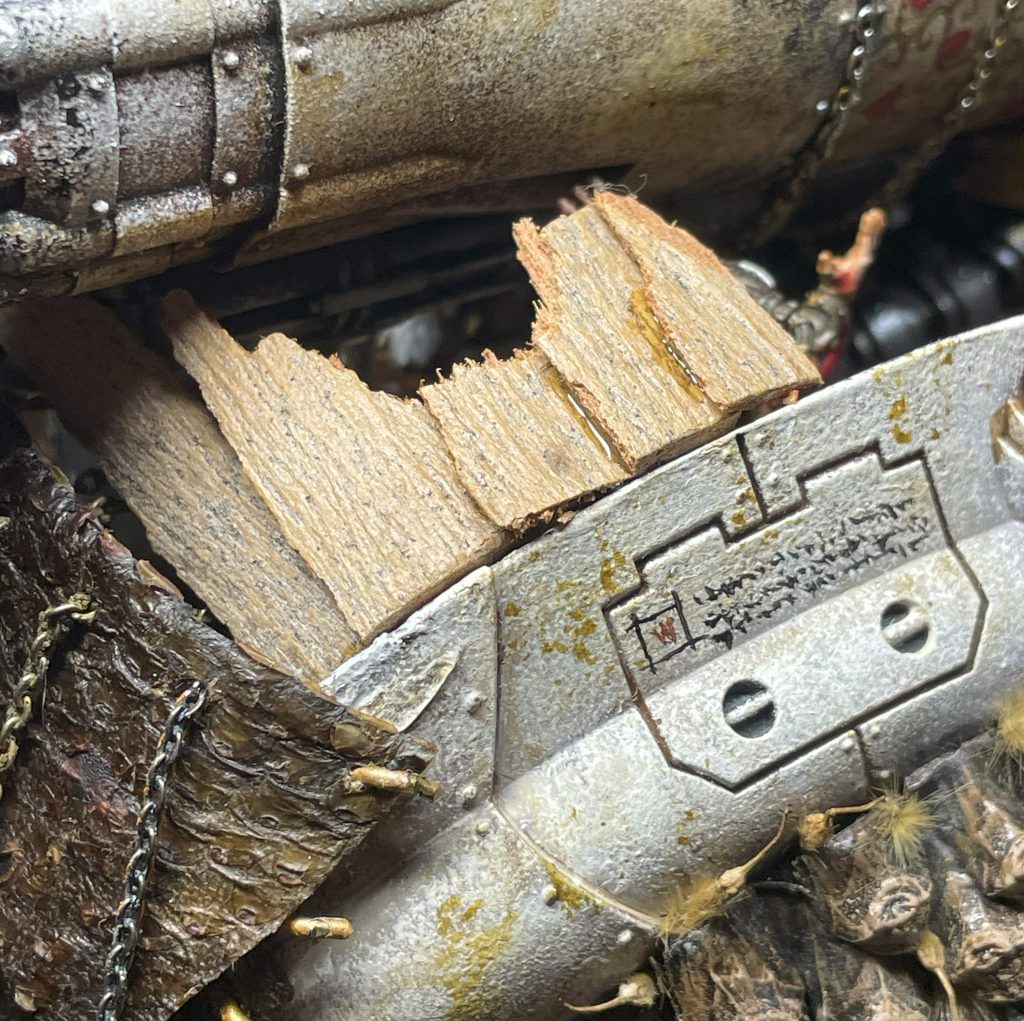
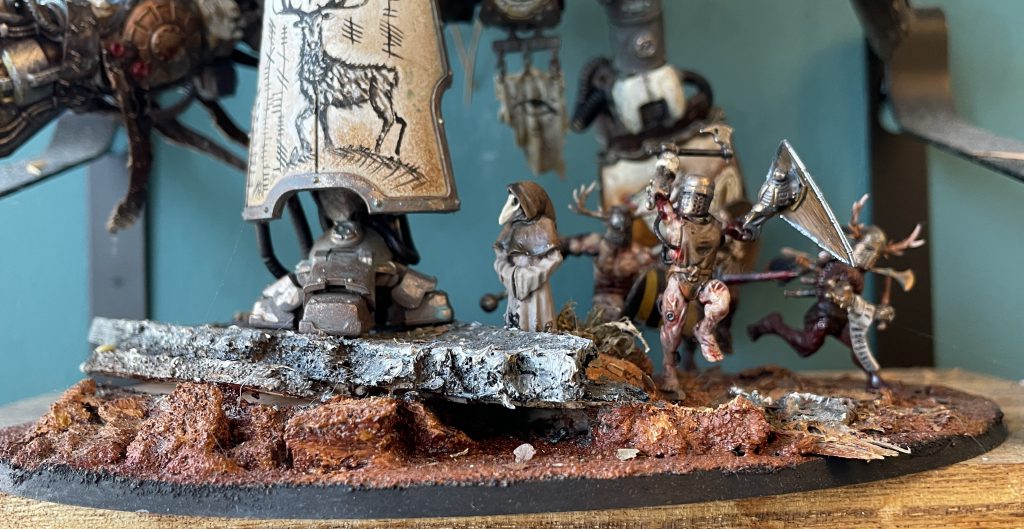 Once split, Balsa makes for excellent basing rocks
Bark (Thick)
Bark provides a huge range of interesting textures, and often comes with the added bonus of really cool lichens. Don’t ever strip the bark off a living tree to get at it though. Thick bark is usually not dropped, so you’re looking for woodchips or taking a very very very small amount from fallen trees. Don’t get greedy – Beetles need that bark.
Good for: Adding texture, bases, grimdarking it up, scales, furs.
How to work: Use a sharp modelling knife to skim the very top layer off, preserving all the texture without the bulk, or smash a big chunk with a hammer to produce natural broken rock shapes. Use superglue.
Preparation:
- Remove any pulpy or rotten wood.
- If you’ve taken it from a fallen tree, baking is a very good idea, though having small beetle grubs hatch out of a model is a very cool concept.
Bark (Thin)
The best thin bark for modelling is Eucalyptus or London Plane. Both drop their bark in prodigious quantities so it’s very easy to collect, and do so in large strips giving you a huge amount of flexibility in how you work it. They’re not particularly textured and can be used for all sorts of purposes.
 Eucalyptus Bark Lenoon's Knight Porphyrion Detail
Good for:
Eucalyptus Bark Lenoon's Knight Porphyrion Detail
Good for: Armour, banners, shields, curved surfaces.
How to work: Sharp knife.
Preparation:
- Use superglue.
- Eucalyptus – soak and leave to dry under pressure if you’d like to flatten a section, otherwise cut, trim and stick.
- London plane (and other) – cut, stick, enjoy.
Birch Bark
Birch bark peels off in thin layers, and has been used extensively as paper around the world. You can channel your best
Onfim impression and use it too!
Good for: Banners, pteruges, fabric, purity seals and scrolls.
How to work: Cut to shape with scissors or knife.
Preparation:
- Soak and press under heavy weight to flatten curly pieces.
- Cut the shape you'd like, then paint as you'd like.
- If you want to inscribe instead of painting, use thicker sections and use a blunted point (sculpting tool will work well) to press a design into the bark.
Seeds and Seed Pods
Tree seed pods come in a phenomenally wide range of shapes and sizes both whole and in pieces. I use London Plane, Sweet Gum and Indian Bean Tree pods for preference, as you can take them apart to provide lots of different components. London Plane pods can give you a nasty looking spike, a brain-like centre and a lot of fine hairs that work well as static grass. I recommend picking up a few pods and breaking them up to see what's inside and how the structure is formed, you'd be surprised at how complex and variable they are.
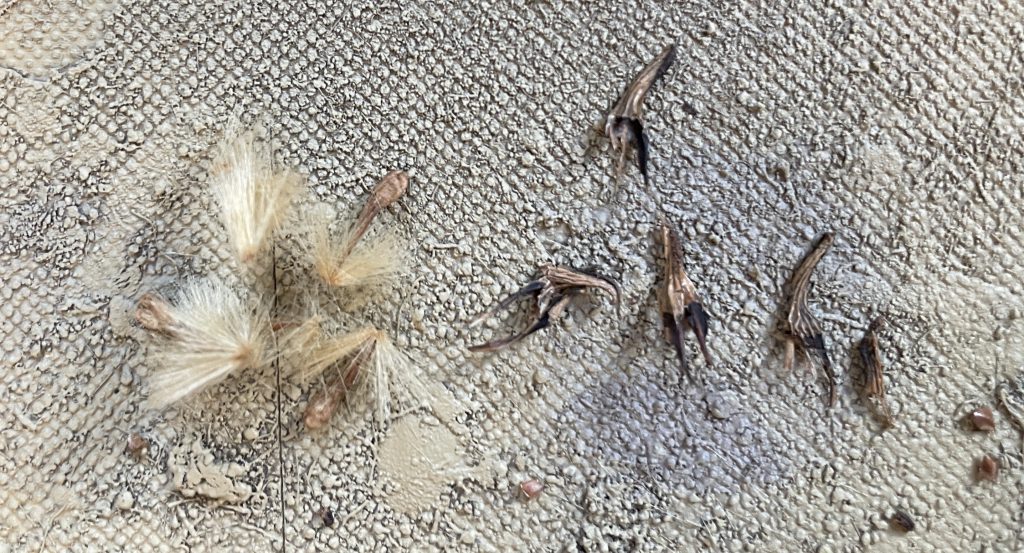 Shapes from seed pods in my garden
Seeds themselves are hugely variable, so have a look at what's available in your area. I'm a big fan of using maple seeds for wings and weirdnesses, for example.
Good for: Spikes, shapes and textures, leather, wings, weapons, all sorts!
Preparation: Leave to dry rather than bake - pods will naturally breakup and distribute seed which saves you some work!
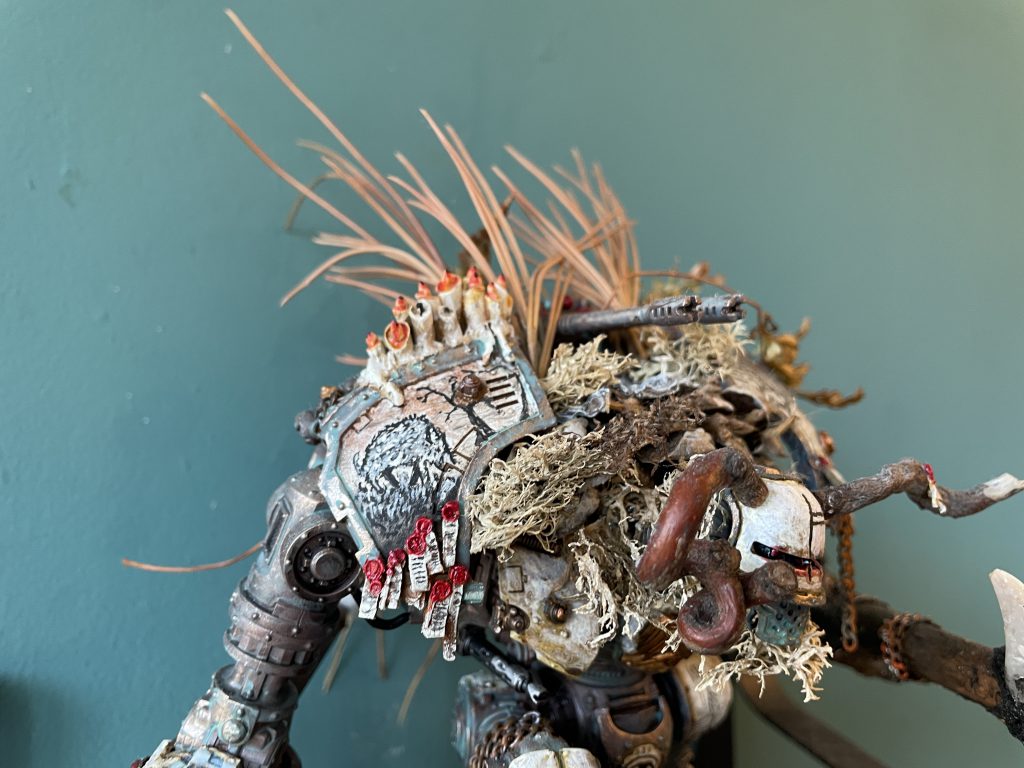
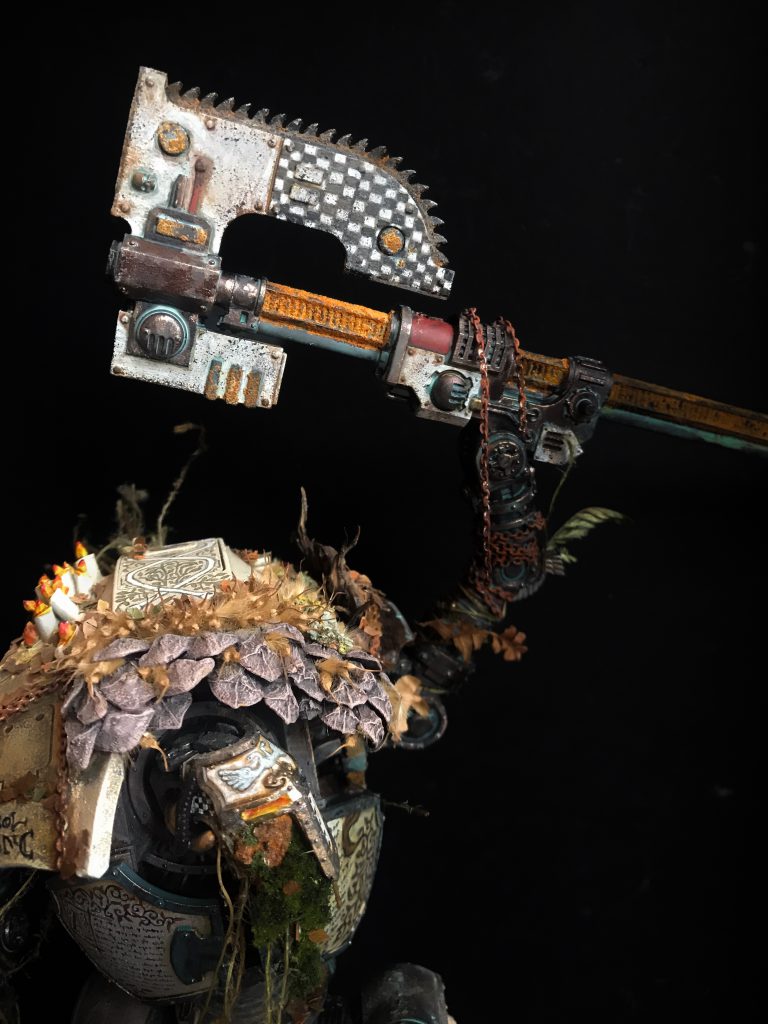 I've made extensive use of London Plane seeds here to give a furry/spikey effect
Pine Scales
The mighty pine cone is the best and easiest material to work with. The seeds I've yet to find a good use for, but the scales are good for everything - robust but easily shaped, with a variety of textures, easily stackable for structures, armour or terrain, and in a massive range of sizes even on a single cone. Collect cones once they've fallen but before they get chewed up and sodden, and avoid picking up ones that are obviously caked in mould - get out after wind has knocked them down but before the rain gets to them.
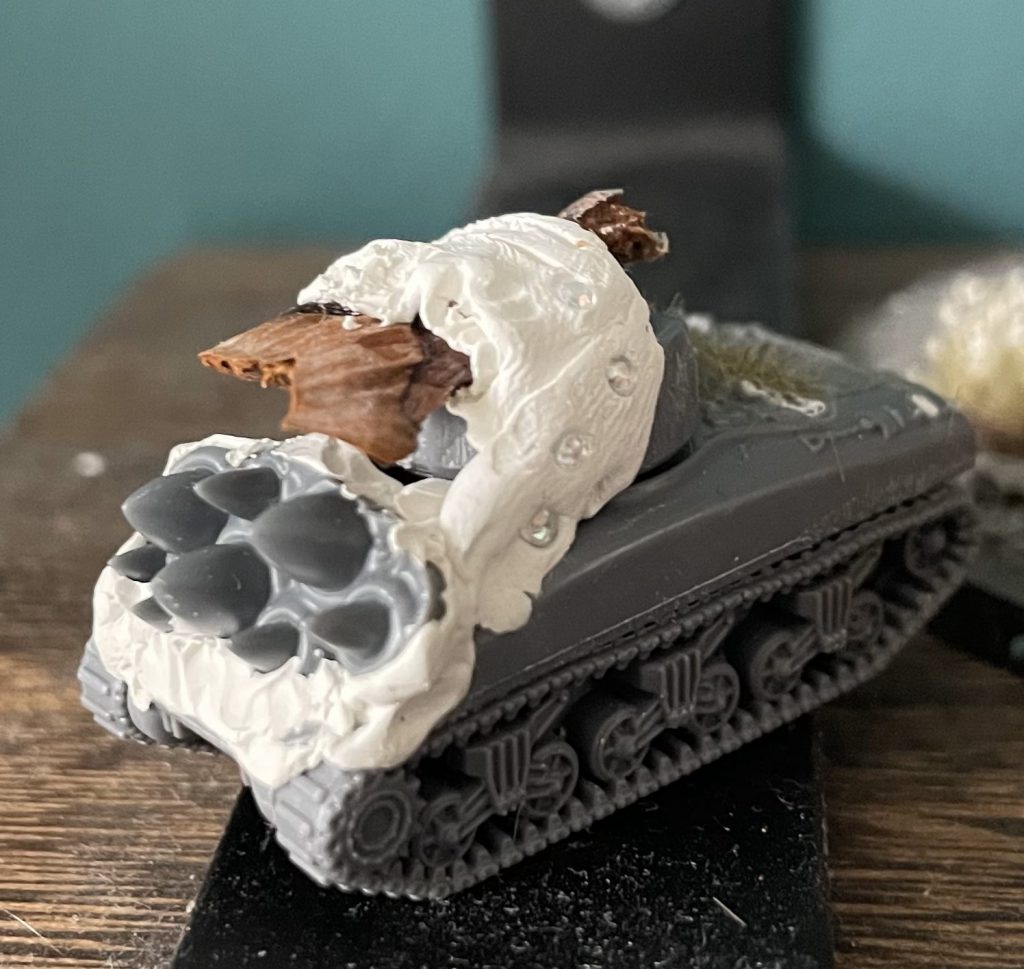 Pinecone in, weapons on, milliput applied
Good for:
Pinecone in, weapons on, milliput applied
Good for: Everything.
How to work: Superglue, though be aware it runs everywhere!
Preparation:
- Use clippers to remove scales from the cone, or use a small jewellery saw to remove them while keeping the shape and structure.
- Definitely wash out cones that have opened widely, as they'll be infested with spiders.
- Closed cones you can leave on top of a radiator for a while and they'll open up.
- If you really want them cleaned of sap (and spiders), soak them in water and vinegar for a couple of hours, then bake.
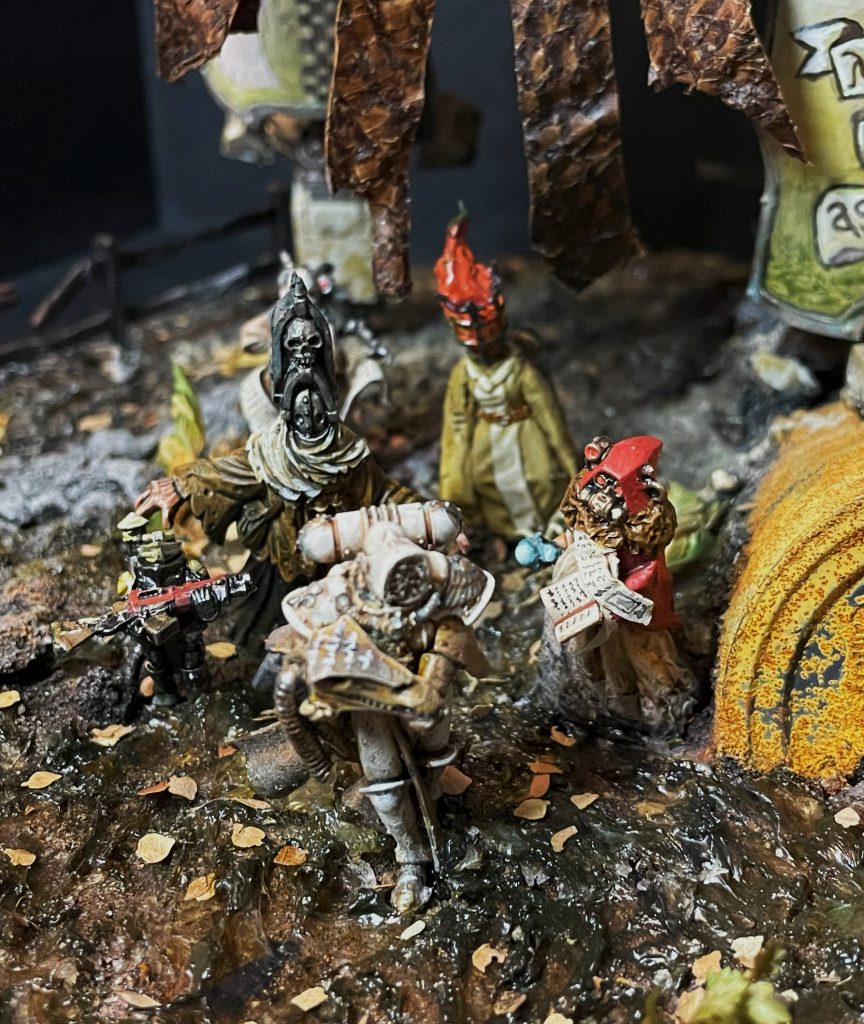
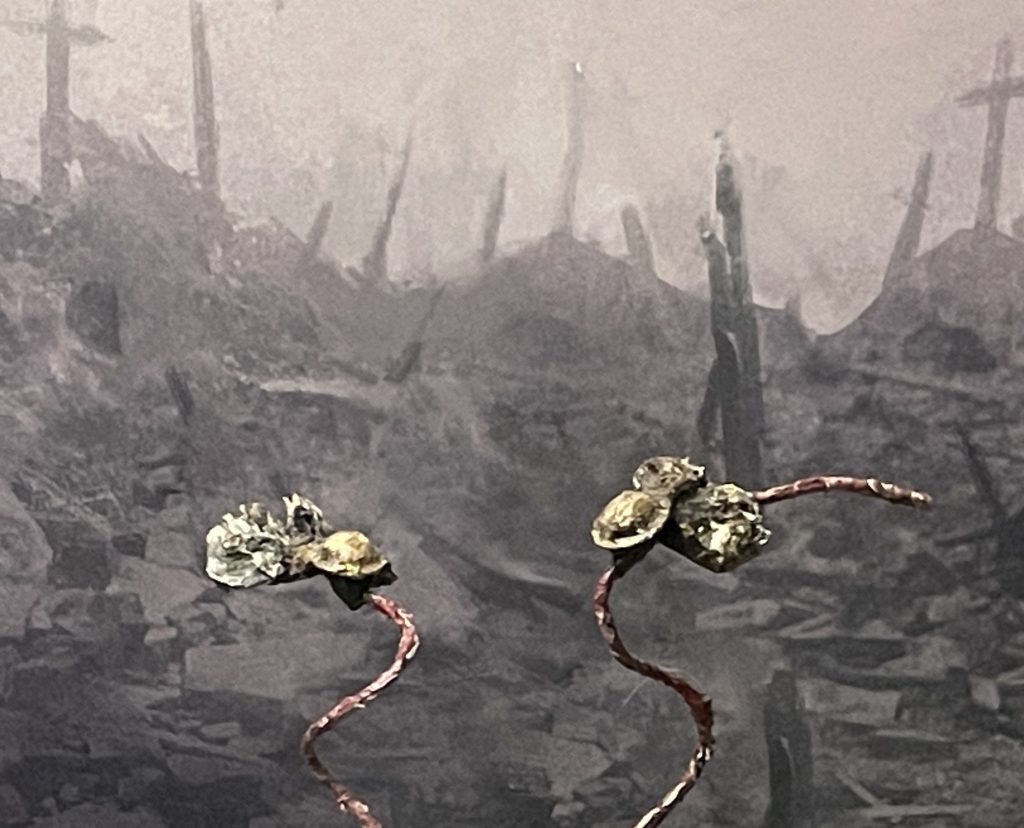 These trench ghoses are made from two pine scales and a hat. Models: Lenoon Backdrop: John Hodgson
Deciduous Leaves
Of all the materials in this article, leaves are probably the most often used in the wider modelling world. Dry fallen leaves, kept dry, will last a surprisingly long time, though will become extremely brittle and weak quickly, making them best for using in small pieces rather than as banners or leather.
 Leaf punch scatter works nicely to add some realistic texture to bases
Good for:
Leaf punch scatter works nicely to add some realistic texture to bases
Good for: Basing.
How to work: PVA, leaf cutter presses (strongly recommended).
Preparation: Wash and bake the leaves, even if you've picked up very dry finds. You can then easily cut to shape, or use a leaf cutter press to produce masses of leaf litter for basing scatter.
Pine Needles
With pine needles littering my house at the moment no matter how hard I clean up, I should mention these very annoying little buggers in a modelling context. Pine needles look great applied en masse (think Hedgehog or Porcupine style), and once dry will keep their shape and size for a long time. Long leaf pines are best, with long straight needles you can cut to size if you need something smaller. Depending on where you are these might be more or less common than pines with smaller needles, but I find the Christmas tree style ones irritatingly short to work with, and very brittle. It's good to have some flexibility or your pine needles will very quickly break off.
 Good for:
 Textures, cloaks, organic shapes, horrible teeth, piercings.
How to work: Scissors, clippers and super glue.
Preparation:
- Cut off close to the base and set aside for a day or so - can be quite sticky.
- Bake and clean as with pine cones, then cut to size.
- Add in densely - dense clusters look better than loose ones.
Saps and Sap Glues
Sap - particularly but not exclusively pine sap - has been used as a strong and resilient glue for tens of thousands of years, and it works well on miniatures too! Pine sap is the best that I've tried, but cherry sap works fairly well. Don't collect the sap by tapping into a living tree, look for it on fallen pieces.
 I used sap for glue on this arm - upper joint internally, lower joints externally. It took about a week to set. credit: Lenoon
Good for:
I used sap for glue on this arm - upper joint internally, lower joints externally. It took about a week to set. credit: Lenoon
Good for: Glue, slime, weird textures.
How to work: Prepare, then glob on and leave to set.
Preparation: Big disclaimer here is that making this is
dangerous. You need high heat and it is VERY easy to scald yourself in the process. Don't do it without gloves and eye protection at absolute minimum, and don't do it without an responsible adult present even if you're one yourself.
Well worth looking up some detailed guides, but the essential method is heat the sap in a metal container until it melts, and add a little charcoal to add some strength and reduce the stickiness to a workable texture. Let it cool until it's workable but not scalding hot.
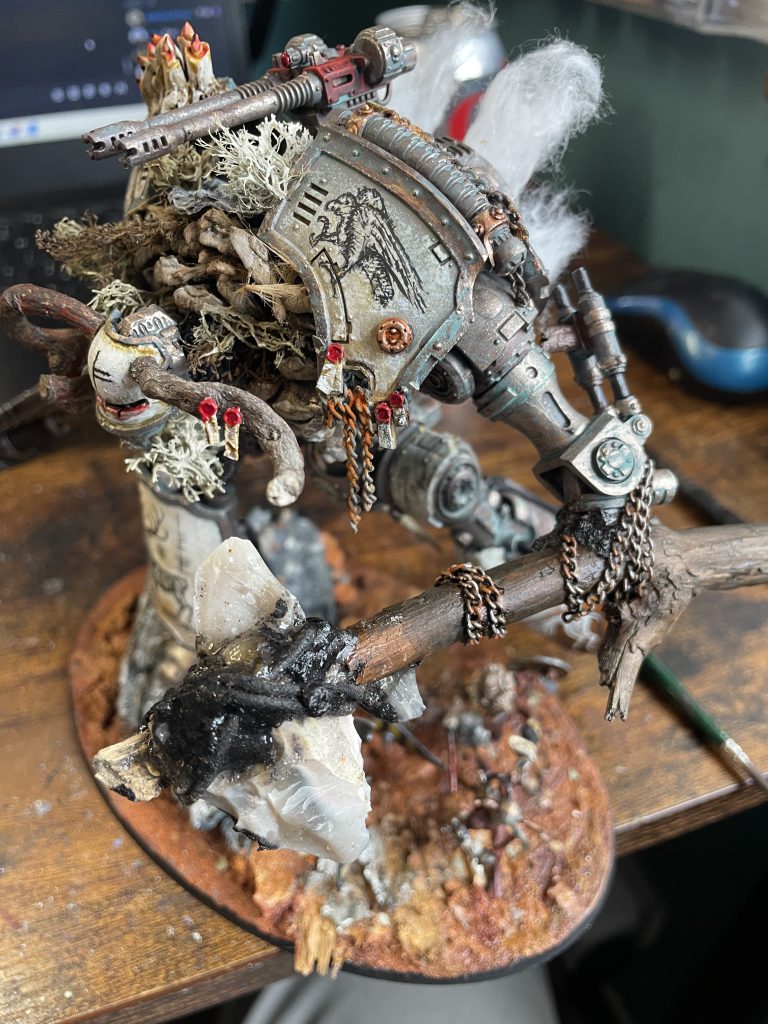
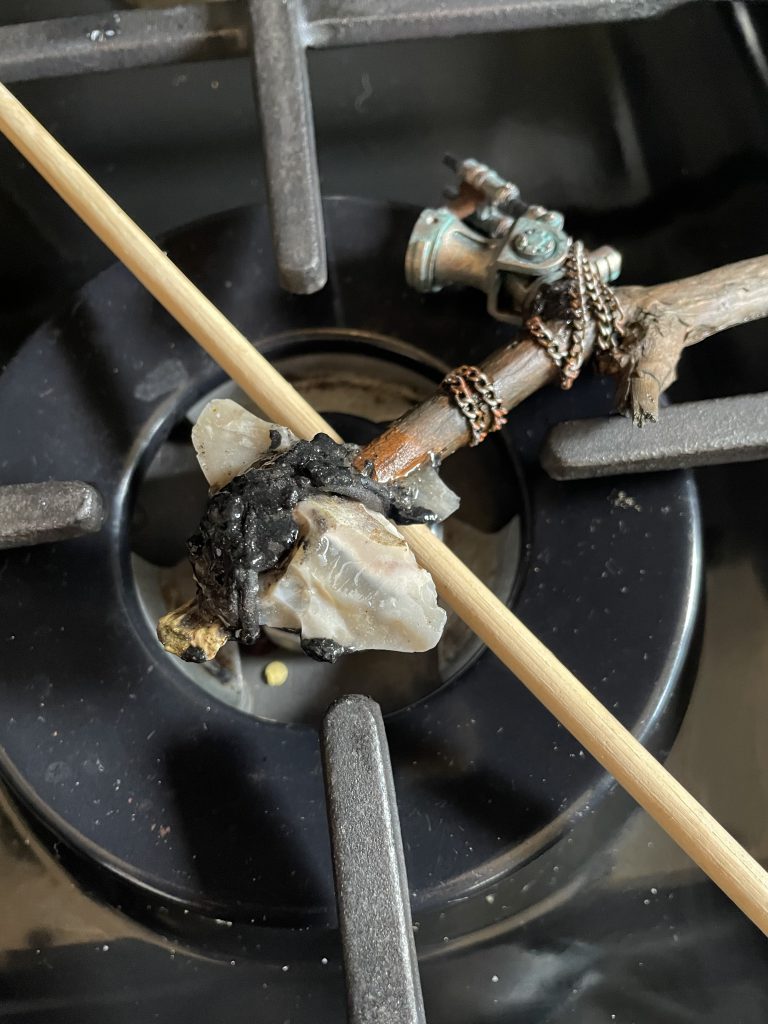 Sap glue holds this stone in place credit: Lenoon
This will work to hold plastic to plastic and even metal-plastic joints, but it isn't pretty, neat or as strong as a superglue bond. It will also take quite a while to set, eventually setting to something that feels a little like gritty glass (if that makes sense!). The bits you don't get out of the container will cool and dry in strange patterns which look excellent on bases or terrain, especially as forge slag.
Lichens
Ah, lovely lichen. An algae or bacterial/fungus hybrid that is god's own gift to modelling. Lichen is widely used in prepared and plasticised/rubberised form, usually coloured and ready to work with out of the box. Lichen collected from out and about is easy to work with, looks awesome and generally lasts well. Lichen can be protected in various contexts, and should be left alone on trees - again, I pick mine up from pieces of bark that I find on pavements and the street. There are two main forms you can use, foliose and fruticose lichens. Both can be dyed by placing the lichen in modelling ink or paint - the thinner the better.
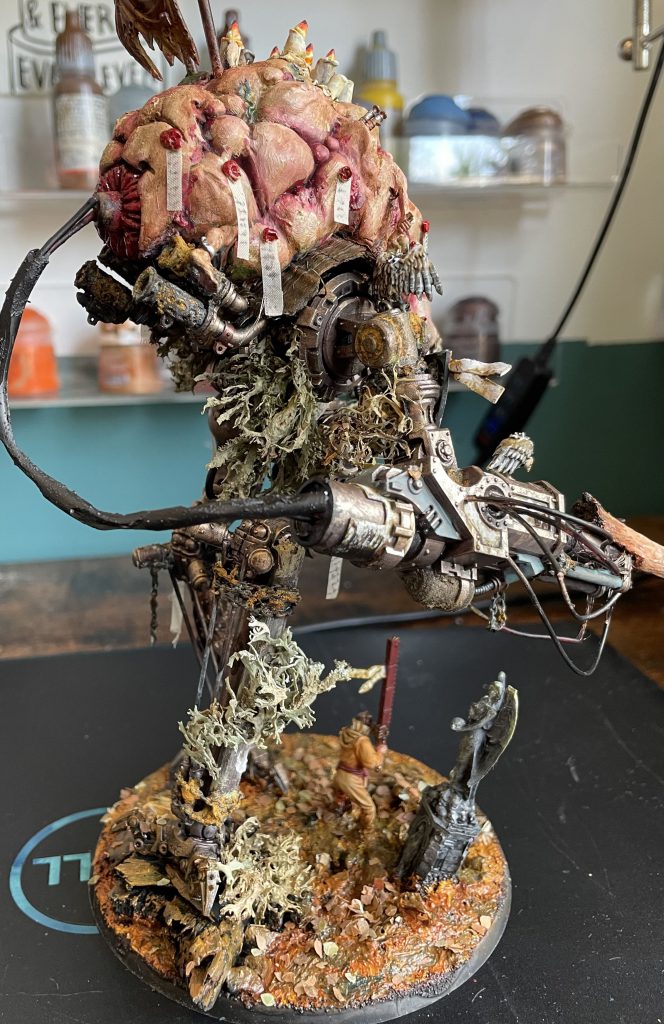 Fruticose lichens. Armiger. Credit: Lenoon
Foliose lichens have flat/wrinkled "leaves" that spread along the substrate they're growing on.
Good for: Organic textures, unsettling textures, grimdark nonsense
Preparation: Run a sharp knife between the surface of the wood/rock/whatever and the lichen, skimming it off, ready to stick on to your model. You can keep some wood/bark and glue that on if you'd like the lichen to stay alive, or copious superglue if you're going to kill it. Keep these looking colourful with an occasional misting of water.
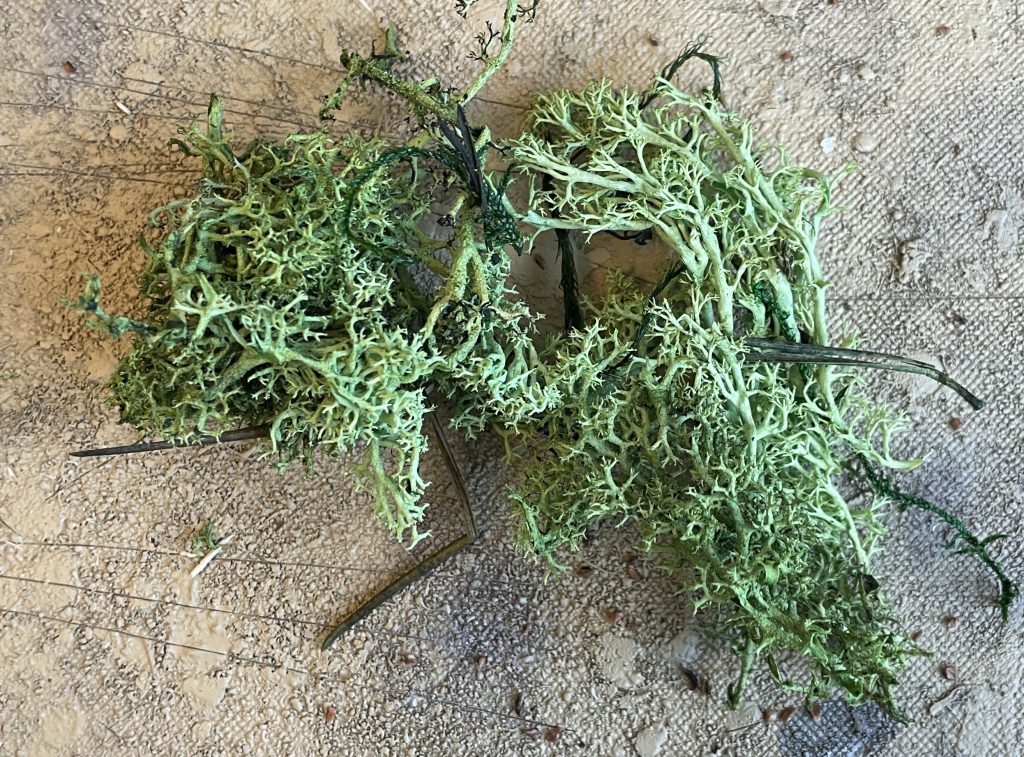
Fruticose lichens are the branching shrub-like lichens that are often sold - in rubberised form - as modelling material. You'll often find small clumps of these fallen from trees, and can be stuck straight on to your models.
Good for: Truly unsettling textures, organics, gills, horrifying your opponents
Preparation: Usually just stick on. Mist with water to keep them looking fresh and restore volume. They'll quickly dry and shrivel but they're equally quick to recover.
 Rubberised lichen just isnt quite as cool
Give It a Go
There are hundreds of other examples I could include here (do you know Palm stalks are a fantastic plastic rod substitute!) but the best thing I can say is go outside and touch some grass! Keep a keen eye out for interesting textures and natural objects and hold on for part two where we talk the more adventurous bone, teeth and skin!
Have any questions or feedback? Drop us a note in the comments below or email us at contact@goonhammer.com. Want articles like this linked in your inbox every Monday morning? Sign up for our newsletter. And don’t forget that you can support us on Patreon for backer rewards like early video content, Administratum access, an ad-free experience on our website and more.Thank you for being a friend.


 Goonhammer App and Patron Updates: April, 2026
 Kill Team Tournament Report: Engage, Party, Repeat's March Madness 2026
 Goonhammer Reviews: Tribal Conquest