Welcome to Hobby 102: Rust, Verdigris and Corrosion. Whatever the game or miniatures range, most of us think about adding a touch of decay to our metal painting at one time or another. Painting rust and corrosion can range from extremely simple to an involved, multi-step process, but here at Goonhammer we want to demystify these things to help you up your game.
Greg's old tutorial on Spaceship bases touches on rust but I've no idea how - imgur isn't available in the UK anymore! Luckily, there are tons of ways to paint and texture corrosion on your models, and given that I can't pass up the opportunity of slapping orange, brown, and silver everywhere, I stepped up to take you through at least a few.
How Corrosion Works
Ok, that's a slightly misleading title to this section, because I'll not dive into the details of how corrosion really works (oxygen or whatever else reacts with the metal, it turns into metal oxide, you have to spend a lot of money to fix your car, etc etc), but it's worth having a quick think about where and how corrosion builds up.
Oxidation of Iron - rusting - is an inevitable process of refined iron slowly converting itself into stable iron oxide. Given water, oxygen and time, all worked iron will eventually turn entirely into rust, as - unlike copper, as we'll discuss below - rust penetrates into the Iron. Rust is usually red-brown and orange, starts with a discolouration and eventually turns into layers of flaking, crumbling iron oxide. There are simple basic rules - bare metal exposed to water and oxygen will rust more quickly than painted metal, more water tends to mean more rust, and exposure to only atmospheric water (water vapour in the air) can restrict rust to a very thin layer.
Oxidation of Copper is a little different. Copper oxidises in the same process, but copper oxide forms a protective layer on the metal that can stop any further oxidation. Copper (and copper-derived metals) corrodes from the bright orange of elemental copper to dark brown, then a light, matte, green.
There's lots of variation in colour across both forms of corrosion, so it's vital to build up a reference library for rust and corrosion effects. Luckily, it's incredibly easy to snap a couple of pictures of rusted metal when you're out and about, and a collection of pictures gives you a solid set of examples to work from. Corrosion occurs in different ways depending on the weather conditions, content of the metal, any preservative layer, paint or coverage, so a wide reference library might have specific examples that match onto exactly what you're trying to paint.
Loading...
Rust
There are probably as many ways of painting rust as there are painters - usually involving orange, brown, black and metal tones. For these examples I've used the following Army Painter paints:
Effects Paints:
Dark Rust
Fresh Rust
Oil Stains
Fanatic Paints:
Lava Orange
Gunmetal
Mithril
I divide painting rust into textured and untextured techniques.
Untextured - Drybrushing
Drybrushing is absolutely the simplest way to paint rust on bare metal, and does a good job for very little effort. Start from a Black primer, then add an overbrush of Dark Rust - don't worry about taking paint off your brush for this, and keep it messy!
 Rust Effects Step
After that, drybrush on your Fresh Rust with a much lighter coat, followed by a further, lighter, coat of Lava Orange and a final very very light coat of Mithril.
 Rust Effects Step
If you want this rust to be on painted metal, simply paint in the colours you're using after the final drybrush. This is quite a good technique for aged rust in environments where there's little water to accelerate the process.
If you want to paint rust in a more watery environment, or more progressed rust generally, use washes instead of drybrushing. Flipping the Cruiser Mark 1 the other way, use a diluted Fresh Rust over the black primer to add pooled rust. Instead of watering this down, I used Army Painter Stabiliser and Retarder to make a thinned, but still very pigmented oil-style wash with plenty of working time. You want this looking thin but opaque, as below:
 Rust Effects Step
 Rust Effects Step
As this dries, stipple on neat Fresh Rust with an old brush around various areas you want to look particularly rusty. Semi-randomly layering on different tones gives you a more realistic look here, and it will dry with patches of very bright rust and duller rust pooled around the bottom of panels, rivets and deeper details, exactly as you want!
 Rust Effects Step
Once this dries, the difference between the rust tones will be slightly less pronounced:
 Rust Effects Step
If this ends up too bright for you (it may!) you can knock it back with a thinned brown wash, ending up with the below:
 Rust Effects Step
Streaks
The mix of rust effects paint, stabiliser and retarder (1:1:1, probably too much of the latter two!) can work as a good acrylic replacement for enamel and oil based streaking effects. It has the opacity and colour that you want, with a nicely long working time that allows you to manipulate the streaks for quite a while.
To add rust streaks, load up your brush and dot it onto the area you want the streak to begin from - in the photo below the streaks come out of the turret rivets:
 Rust Effects Step
You can then begin to manipulate the streak paint with either a brush or makeup sponge, lightly encouraging it to flow down the painted surface. You can keep fiddling with this for ten to fifteen minutes before it's fully dry, and I'd recommend playing with it until you're happy with vertical flicks of a brush from top to bottom, and then bottom to top.
 Rust Effects Step
Texturing Rust
As rust progresses, it picks up texture as the surface flakes and falls away. The more advanced the corrosion, the more texture there is until the rusted surface disintegrates. You can add texture by repeatedly stippling layers of paint until they build up to a noticeably uneven surface but, like subtext, this is cowardly. Use thicker texture like a true hero.
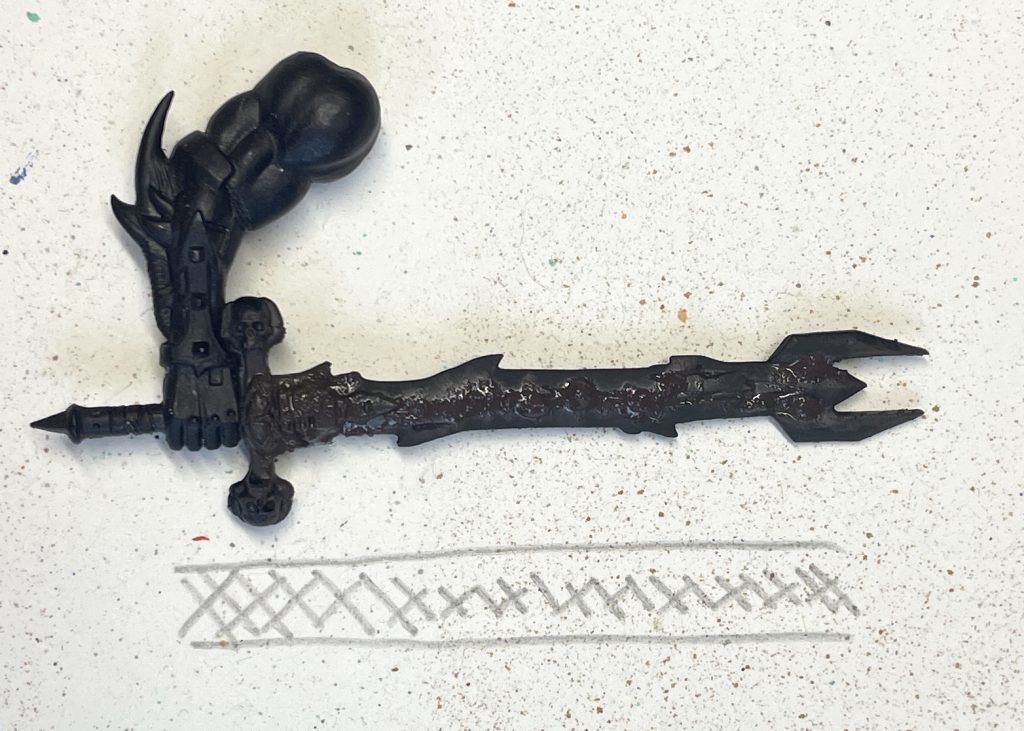
Texture paints made for bases work well for textured rust effects. I've used a spare Demon Prince sword as an example here - add texture paint up the centre of the sword, focusing on areas that aren't going to be burnished by, say, using the sword to hit people. It's helpful to sketch out where you put this - as below:
 Rust Effects Step
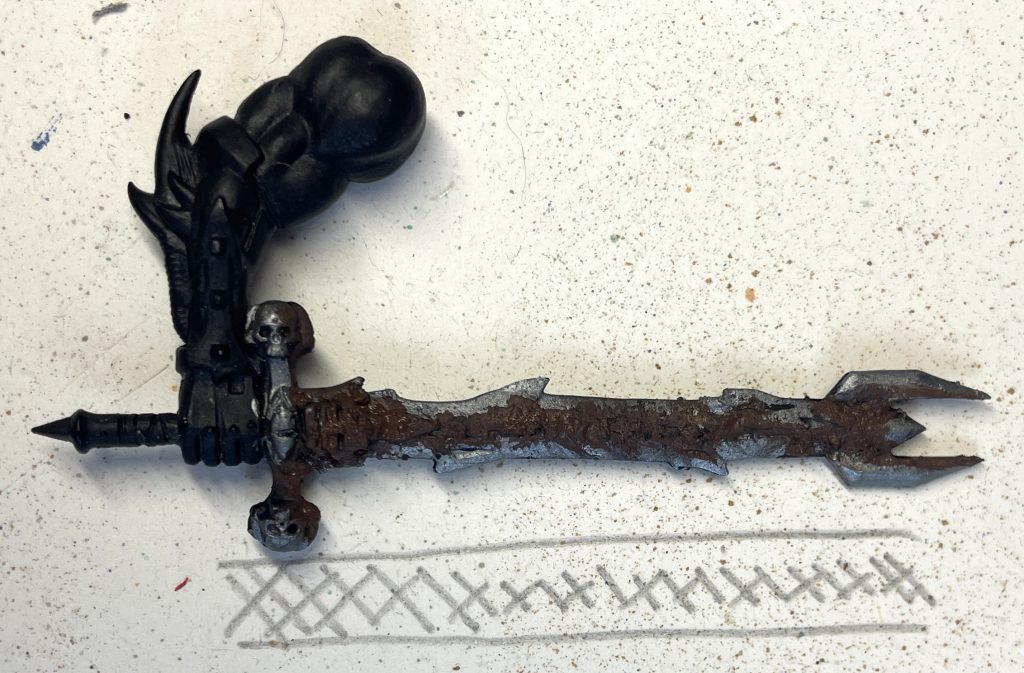
Once it's dry, paint Gunmetal around the texture paint, then add layers of rust paint over the texture paint from darkest to lightest - Dark Rust, Fresh Rust and then Lava Orange, with Oil Stains dotted on in any recesses that the texture paint has left.
 Rust Effects Step
 Rust Effects Step
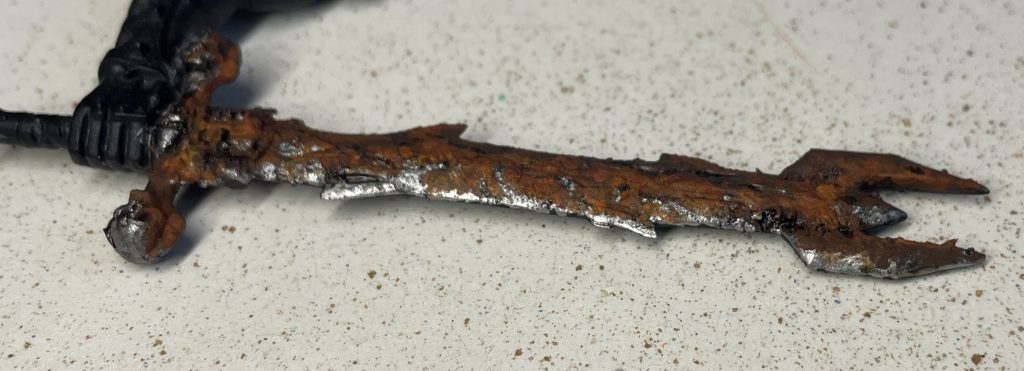
The more you go back and forth adding tones (dark, then fresh, then dark again, etc etc), the better this effect will look. Once you're satisfied with the level and colours of the textured area, dab Mithril on the very edge of the sword blade. I've taken an angled photo of the finished sword to give you a look at how the texture works out:
 Rust Effects Step
You can use this technique to add realistic looking rust texture in a controlled manner to any surface, taking rust painting a lot further than stippling, drybrushing or washing will allow for. It works well for tanks, terrain, walkers, etc etc - anything that looks very very rusty rather than a little bit orange.
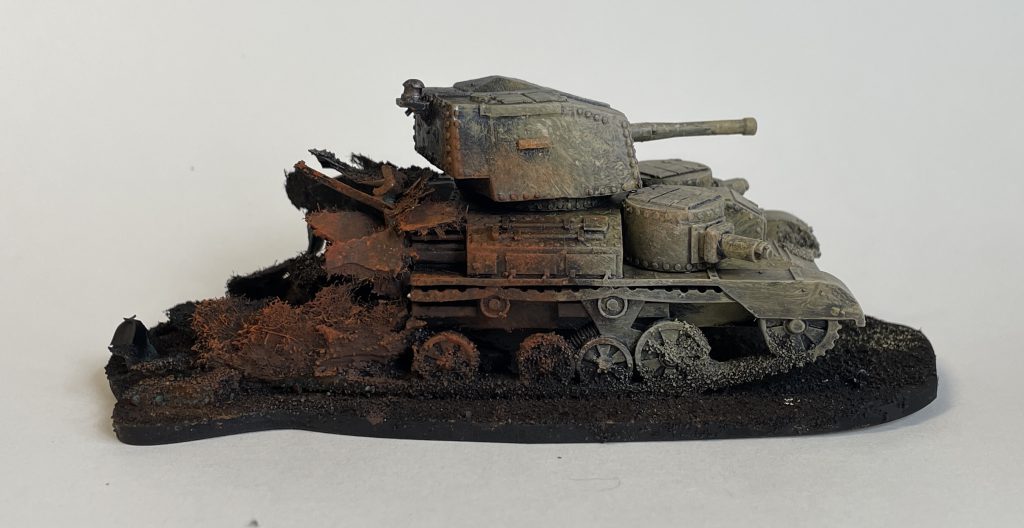
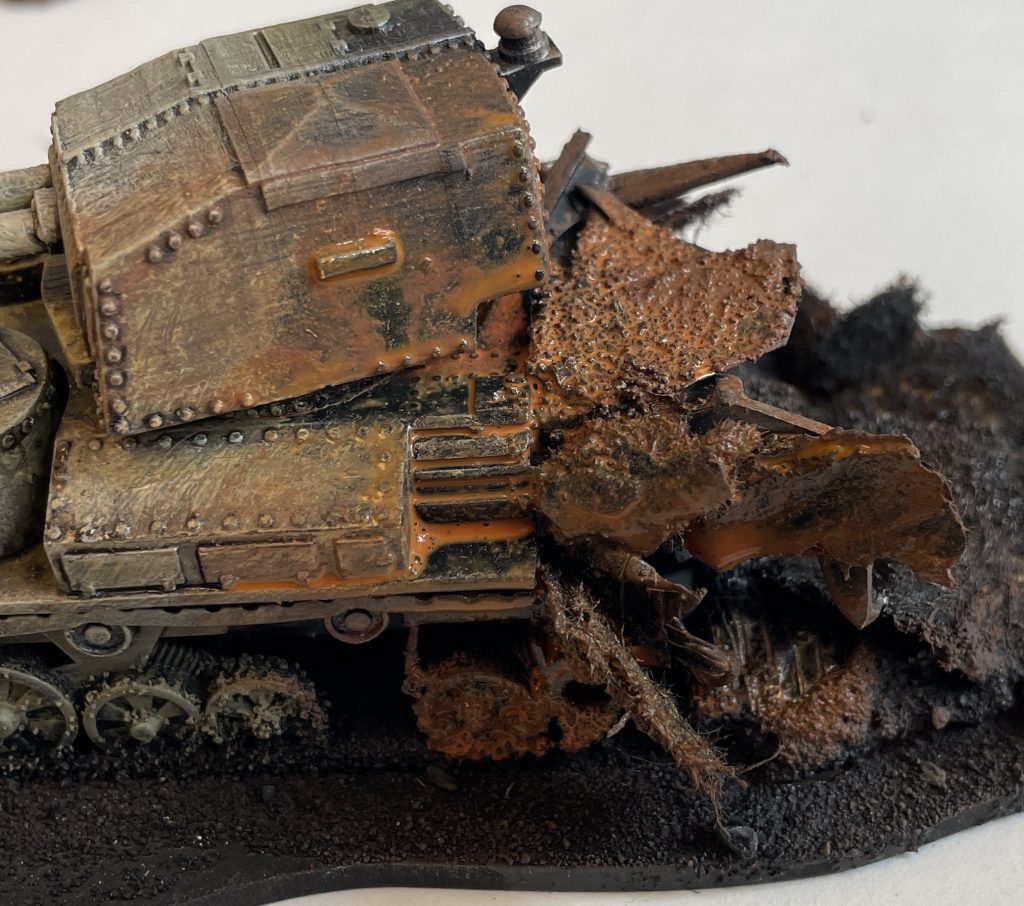
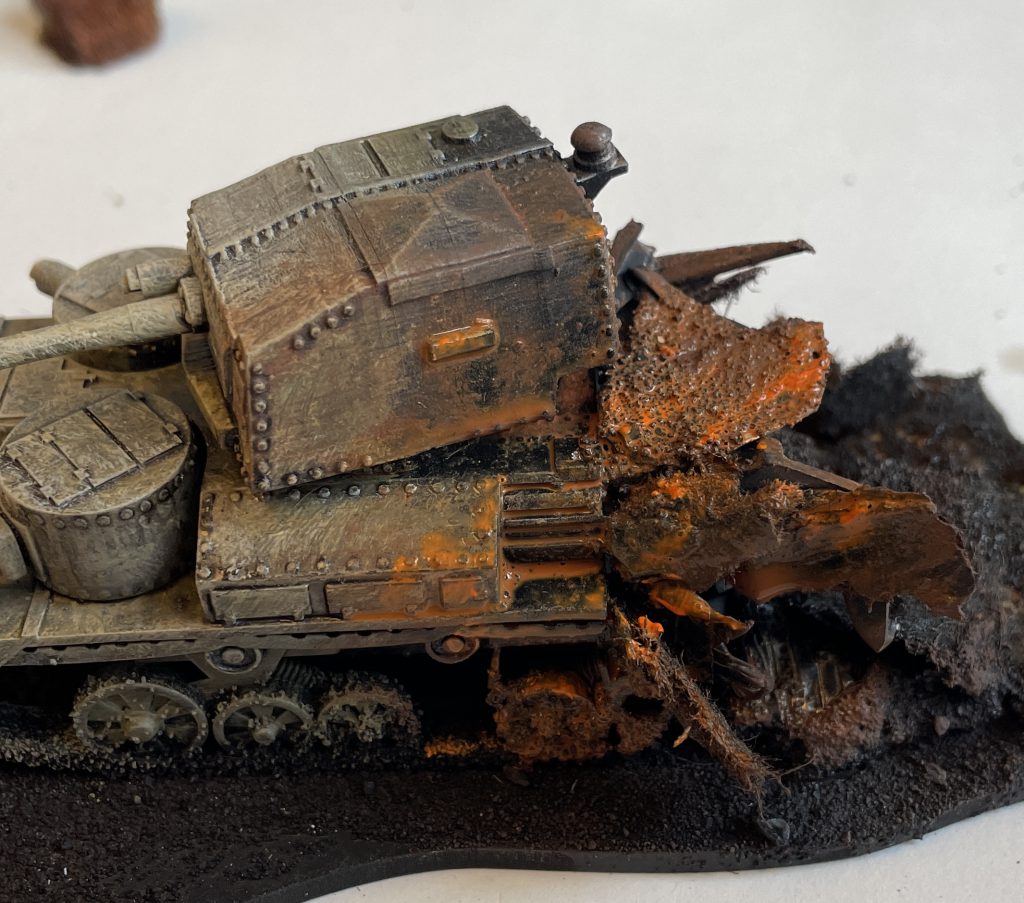
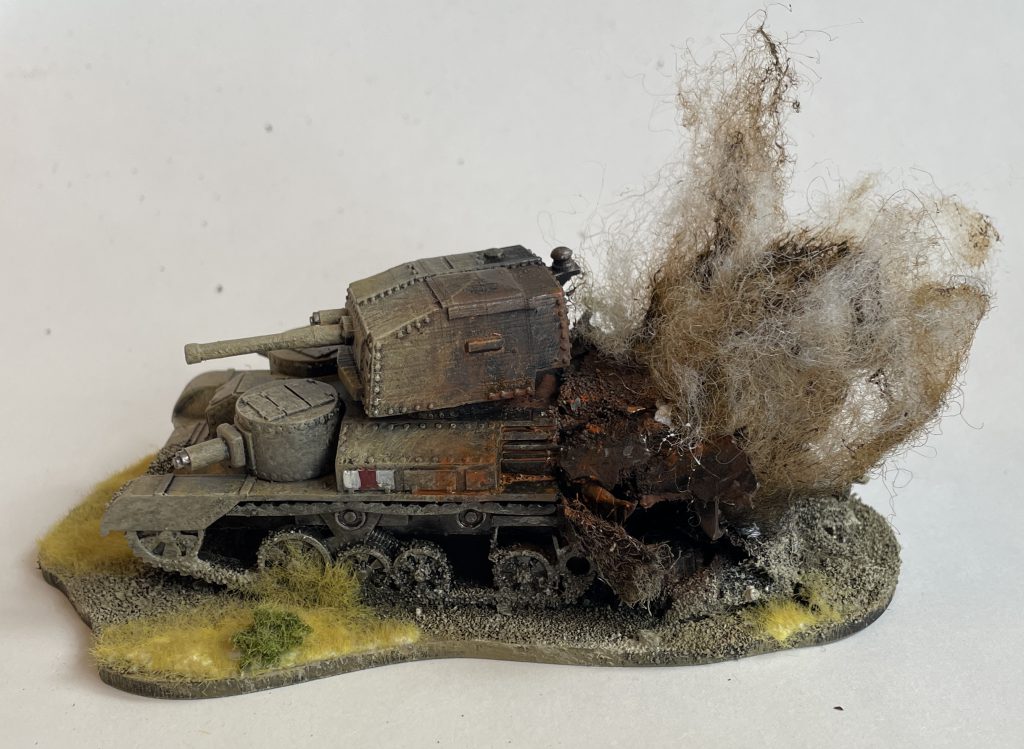
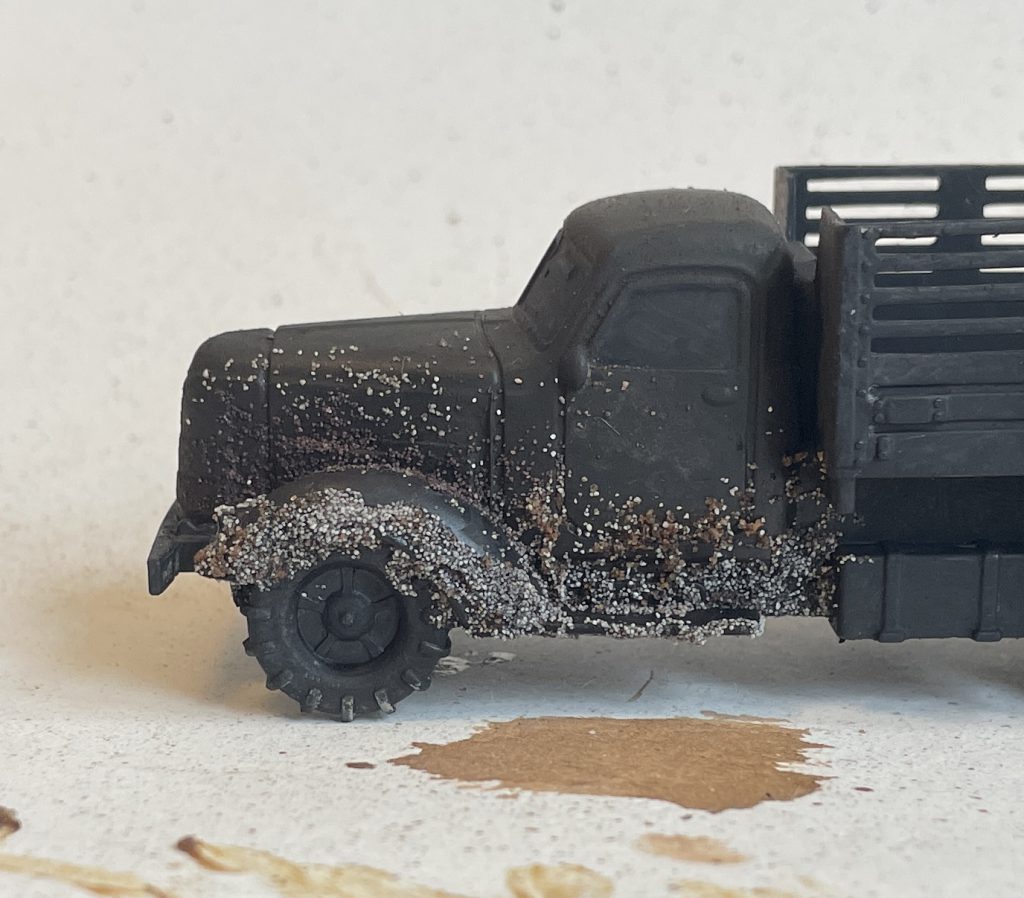
If you want to make something look terminally rusty, seconds away from complete disintegration, use the ever handy Army Painter Battlefield Basing Snow and fine sand to add a massive amount of texture before painting.
 Rust Effects Step
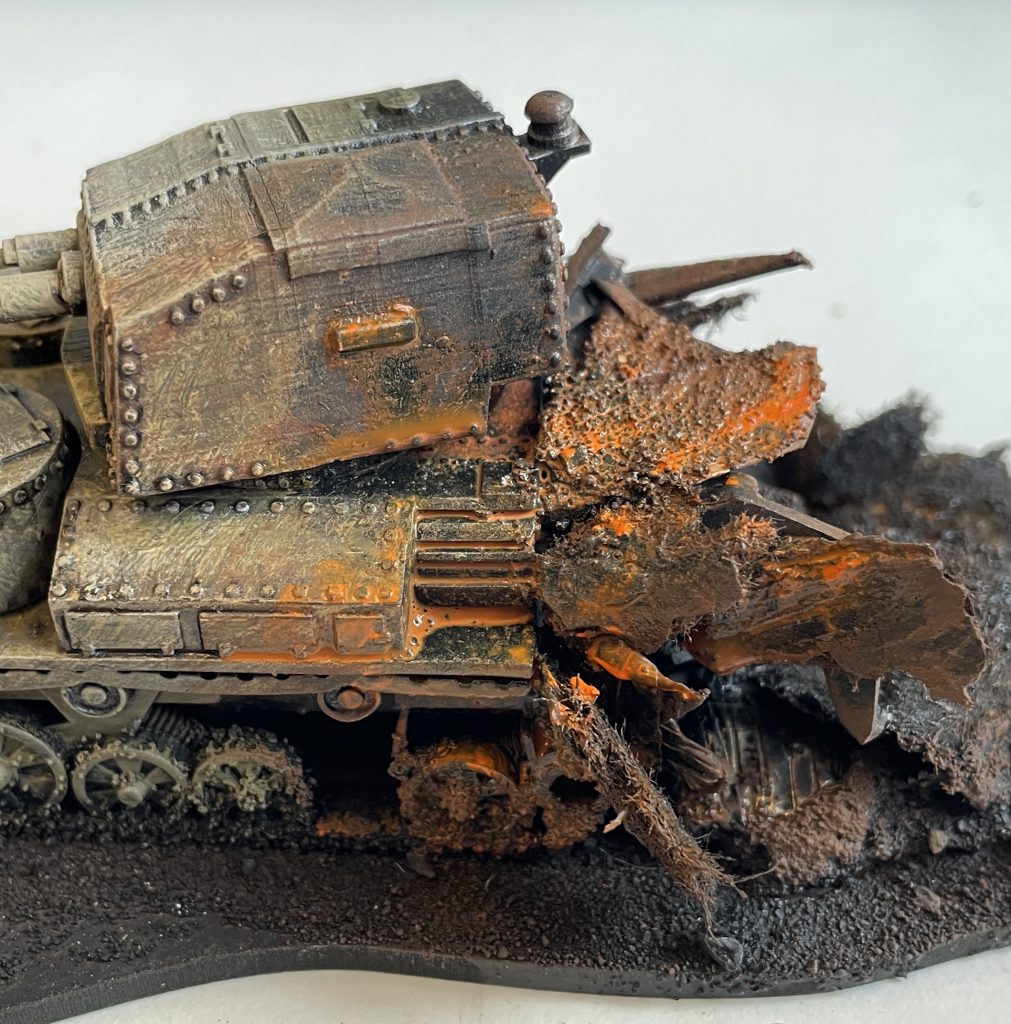
Here I've used a textured primer, sand and snow effects to give a graded texture - perhaps this truck has been parked in water! As the snow effects soak up paint, the first step is to give it a very heavy wash of Lava Orange:
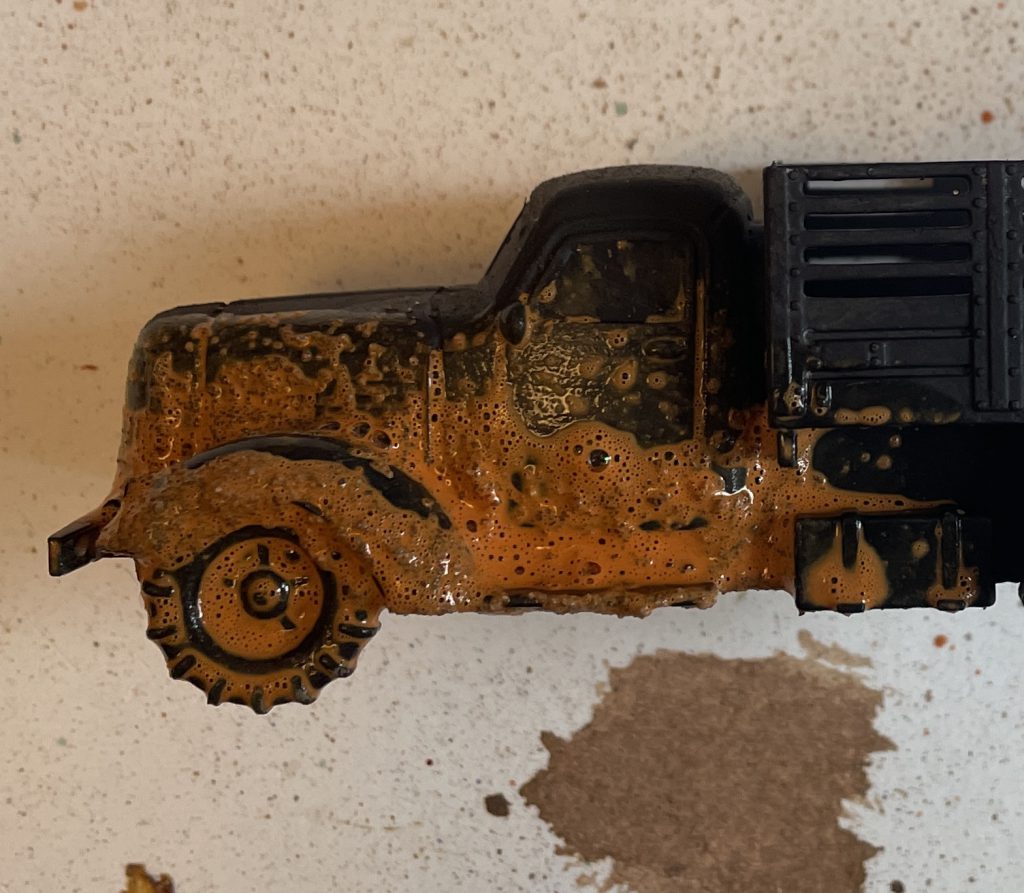 Rust Effects Step
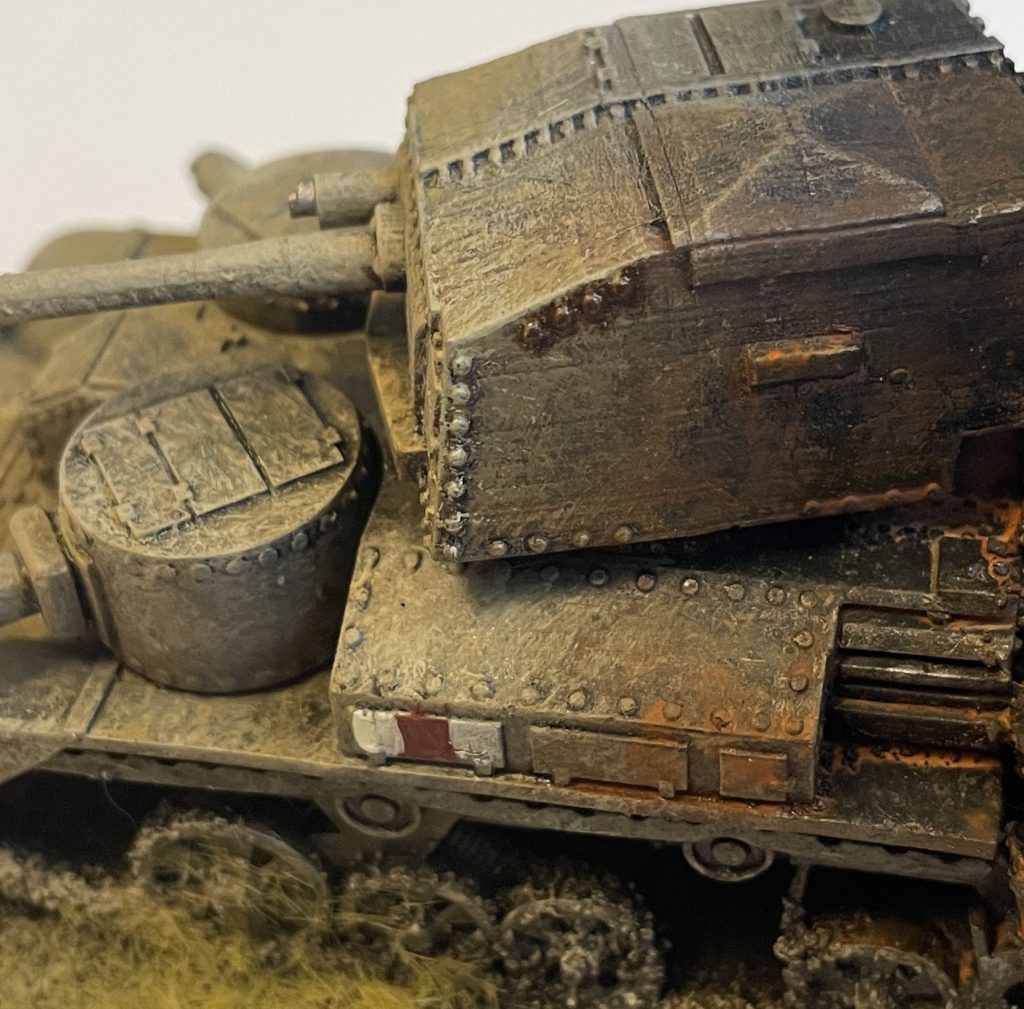
I said heavy! This will soak into the sand and snow effects, leaving both bright orange. Once it's dry, overbrush Dark Rust:
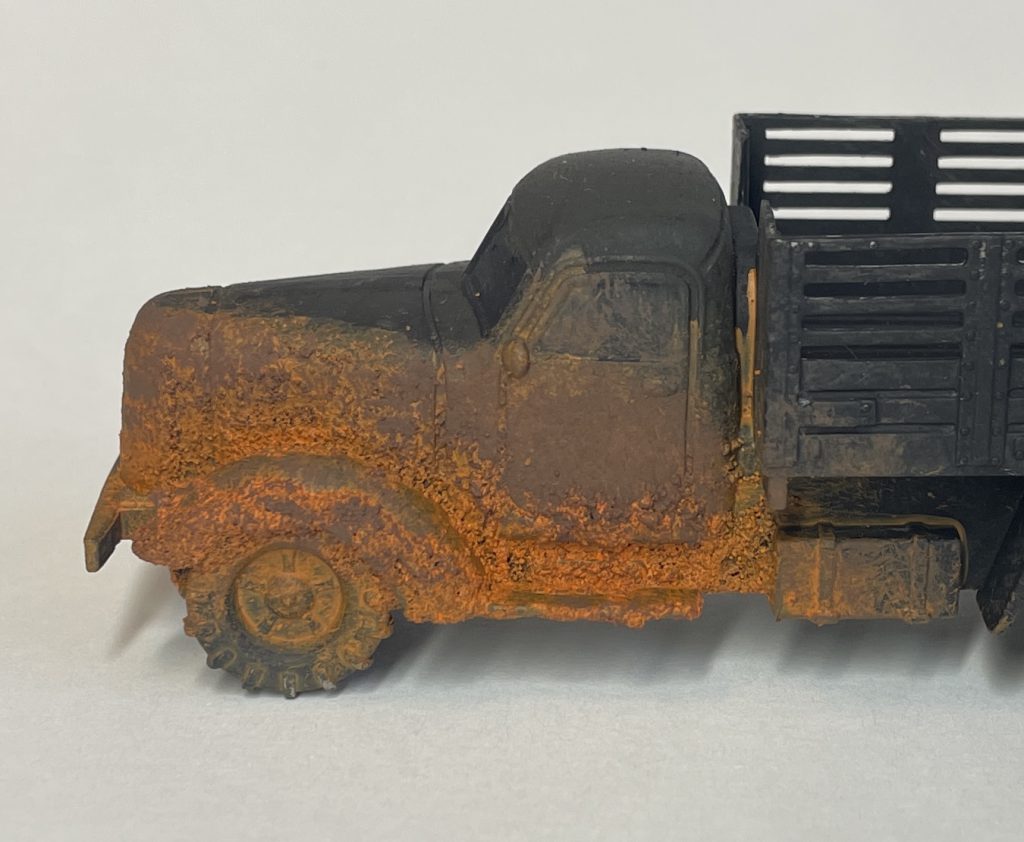 Rust Effects Step
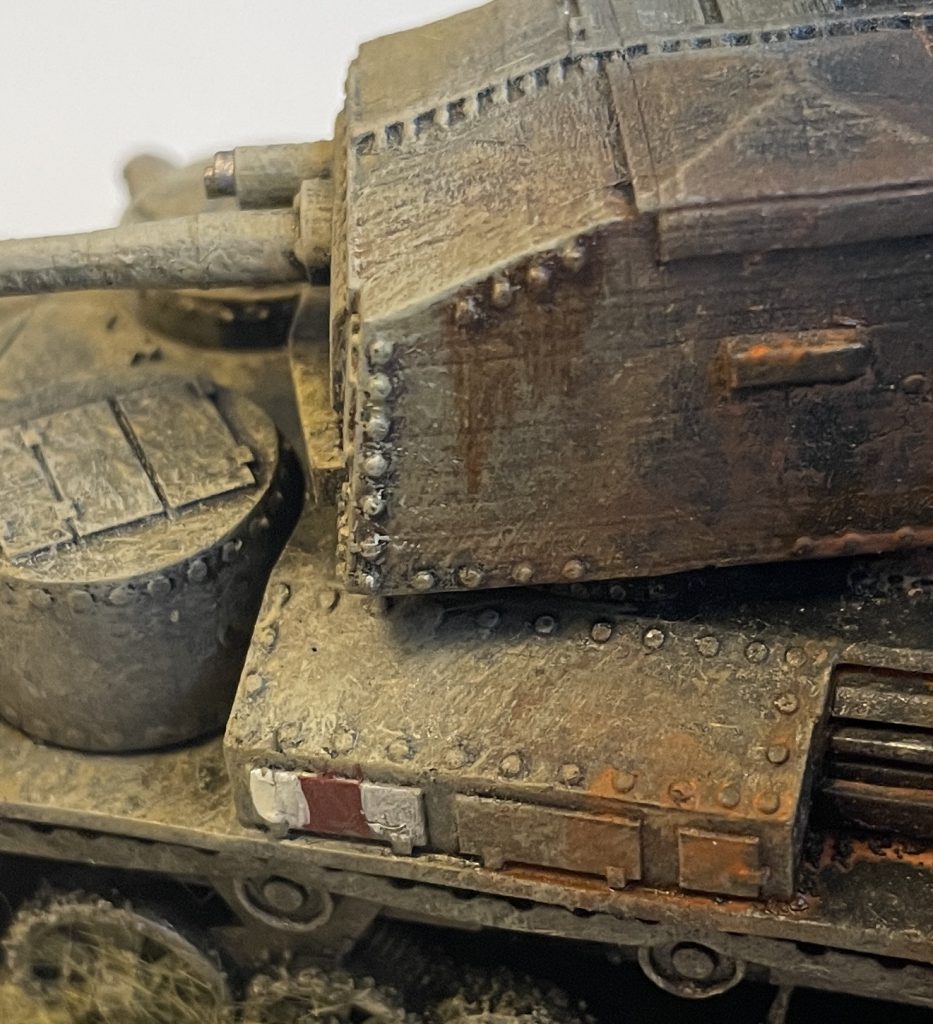
Once again, if you'd like this rust to be on painted metal, paint the metal now:
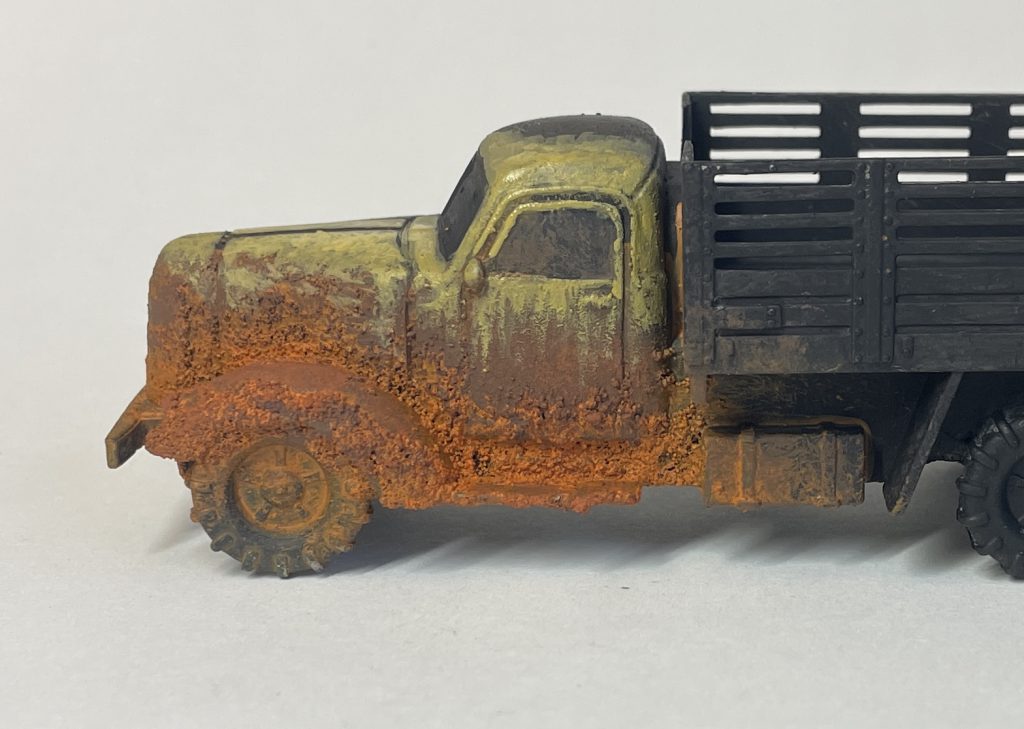 Rust Effects Step
This is a very simple process that apes the look of real rust very quickly. You can drybrush more colours on - dark flesh tones work well to darken the rust, leaving the brightest orange in the nooks and crannies of the rust texture.
Verdigris
At the scale we're working with, Verdigris except on the most incredibly corroded bits of piping will usually look best untextured, or with the texture from dedicated verdigris effect paints. The colour and coverage you should be aiming for is dependent on how long you want the copper to have been exposed to the elements without treatment. Verdigris progresses from bright copper to a dull brown, then through greens and eventually back to a darker brown if conditions are right.
The best example of this is one of the largest - the Statue of Liberty.
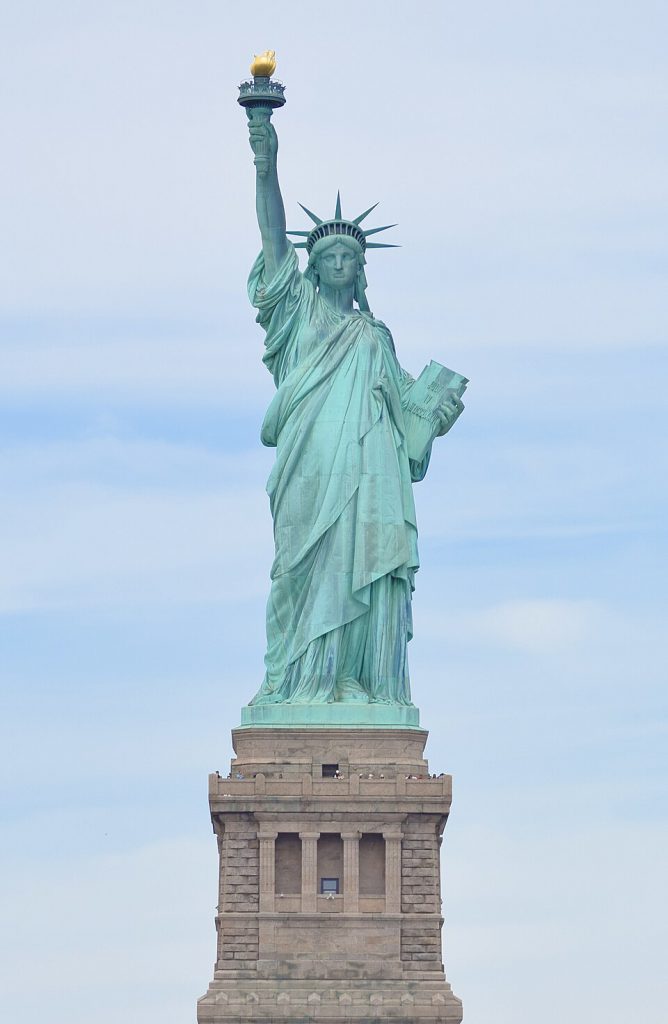 By AskALotl - Own work, CC0, https://commons.wikimedia.org/w/index.php?curid=175770064
140ish years after construction, it's a dense, matte green and starting to fade into duller brown in various places. Originally, it was bright copper, though would very very quickly turn brown exposed to sea air:
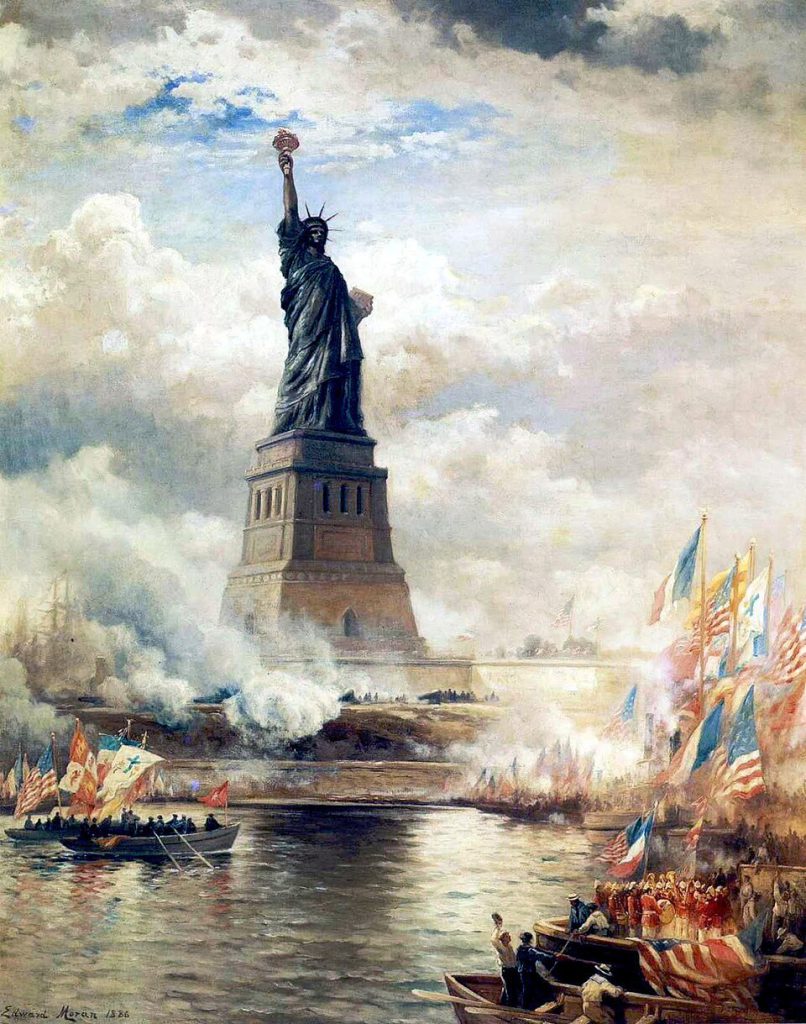 By Edward Moran - Museum of the City of New York, Public Domain, https://commons.wikimedia.org/w/index.php?curid=229787
Generally, the longer your copper has been outside, the greener it should be, with some areas becoming green faster:
- Anywhere water pools - rivets, flat surfaces, concave surfaces.
- Anywhere water runs - down from rivets, in streams along vertical surfaces.
There are some great examples of the process being reversed by treatment - usually by repeated polishing, movement or burnishing. The best and clearest example is the Tomb of poet and fatal duelist Victor Noir.
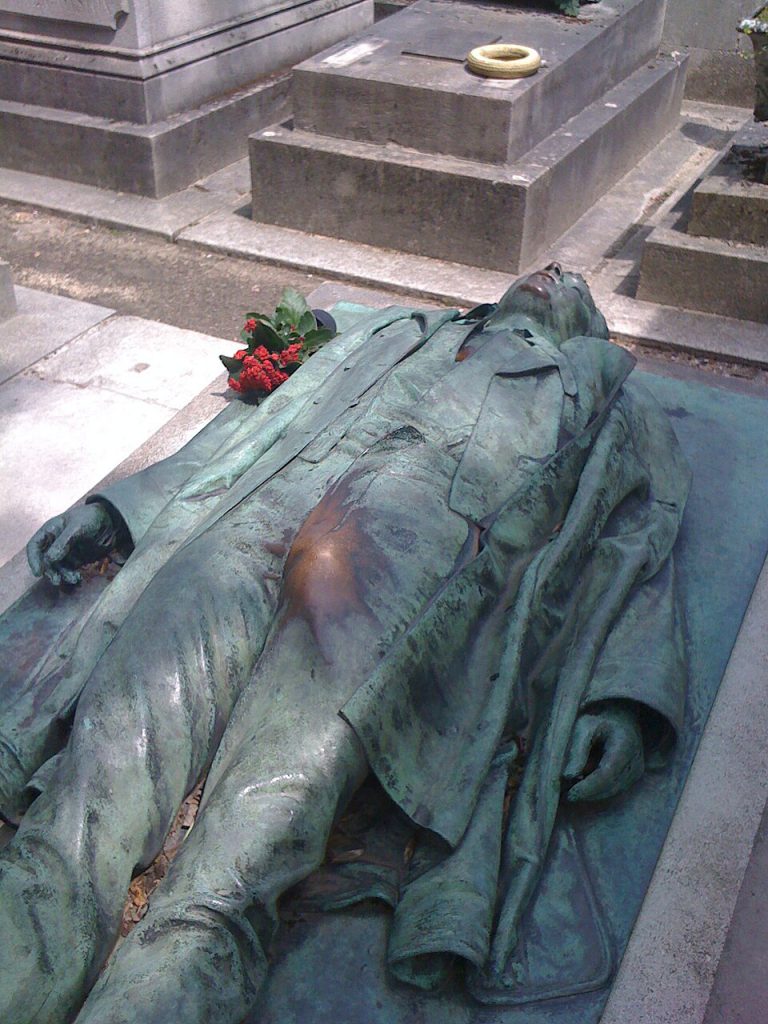 By Gaël Chardon - originally posted to Flickr as Victor Noir, CC BY-SA 2.0, https://commons.wikimedia.org/w/index.php?curid=12255853
Due to the tomb statue's prominent crotch bump, it's become a tradition - particularly for women - to rub his crotch. Over time, this has burnished the copper back to nearly the original colour. You can use this in miniature painting to add some realism to your verdigris effect. Where copper plates move against each other, or human (or non-human) hands repeatedly touch the surface, bring back the original copper colour to show this process.
Painting Verdigris is very simple - Army Painter Verdigris Effect is very opaque, very matte and absolutely perfect for quick verdigris painting. The main thing to think about is if you want light or heavy verdigris.
Before starting with either, though, remember the progression. Verdigris doesn't tend to strike shiny copper statues, unless you're buying something for your garden with a tacky verdigris effect.
Don't start off with a bright metal basecoat. Verdigris progresses through a dark brown layer first, so no matter what your bright copper colour is, start with a base of dark metal paint - Army Painter Fanatic Death Metal looks to be the most appropriate from the Fanatic range.
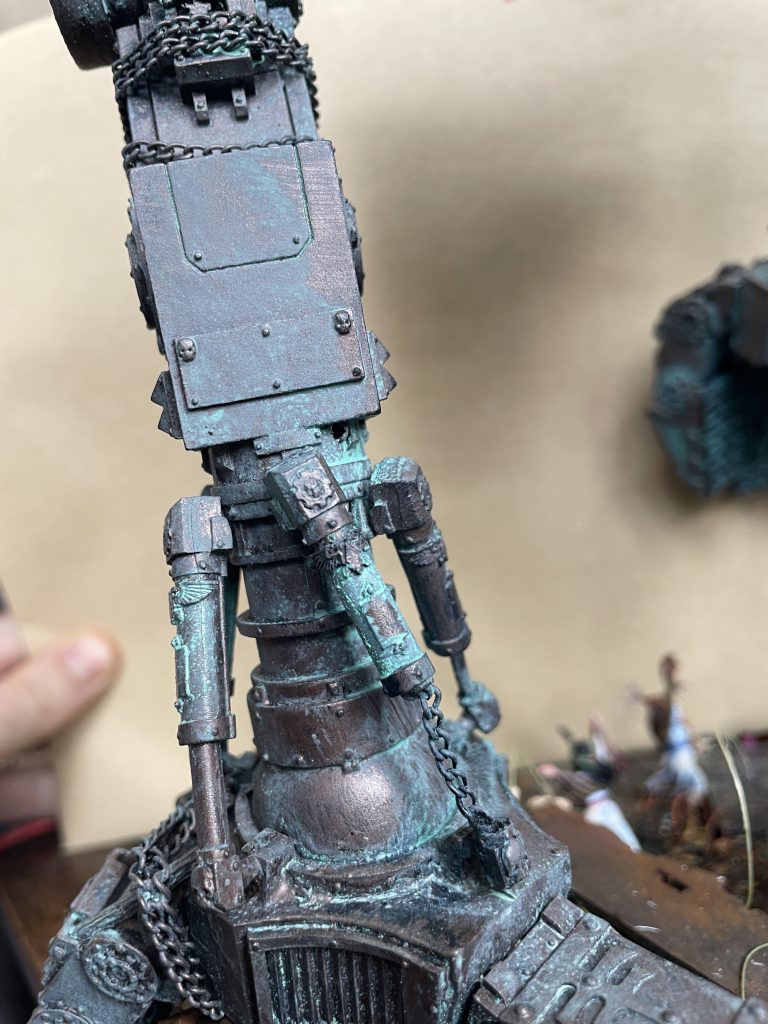
Light
A little bit of verdigris is very simple - add the Verdigris Effect over the dark metal coat. You can either water this down and it will run into gaps and leave the majority of the model exposed metal, or leave it as it is and aim for a consistent, light coat.
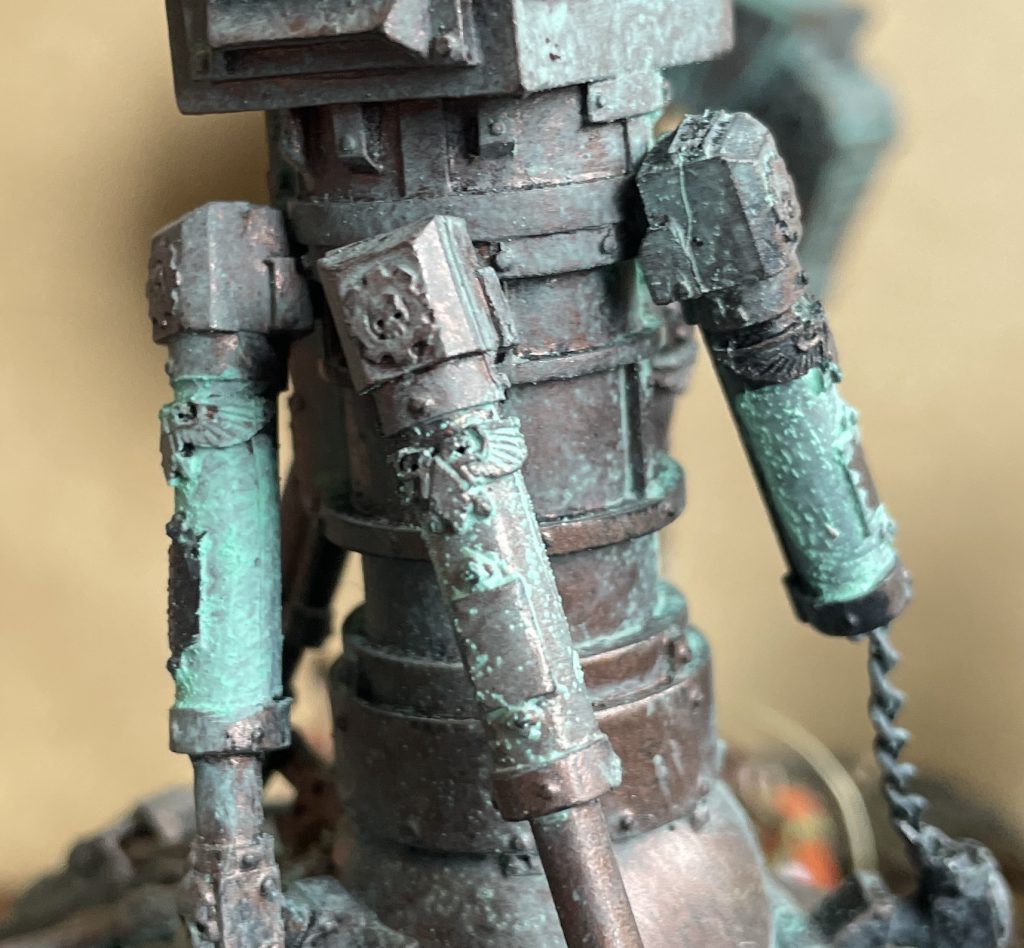 The central piston has a nice, light Verdigris effect, credit: lenoon
It's common - and effective - to then drybrush over the verdigris with a lighter copper or brass layer, and this looks great for very little effort. Go back to your base colour first, then step through highlights until you achieve an effect you're happy with.
Loading...
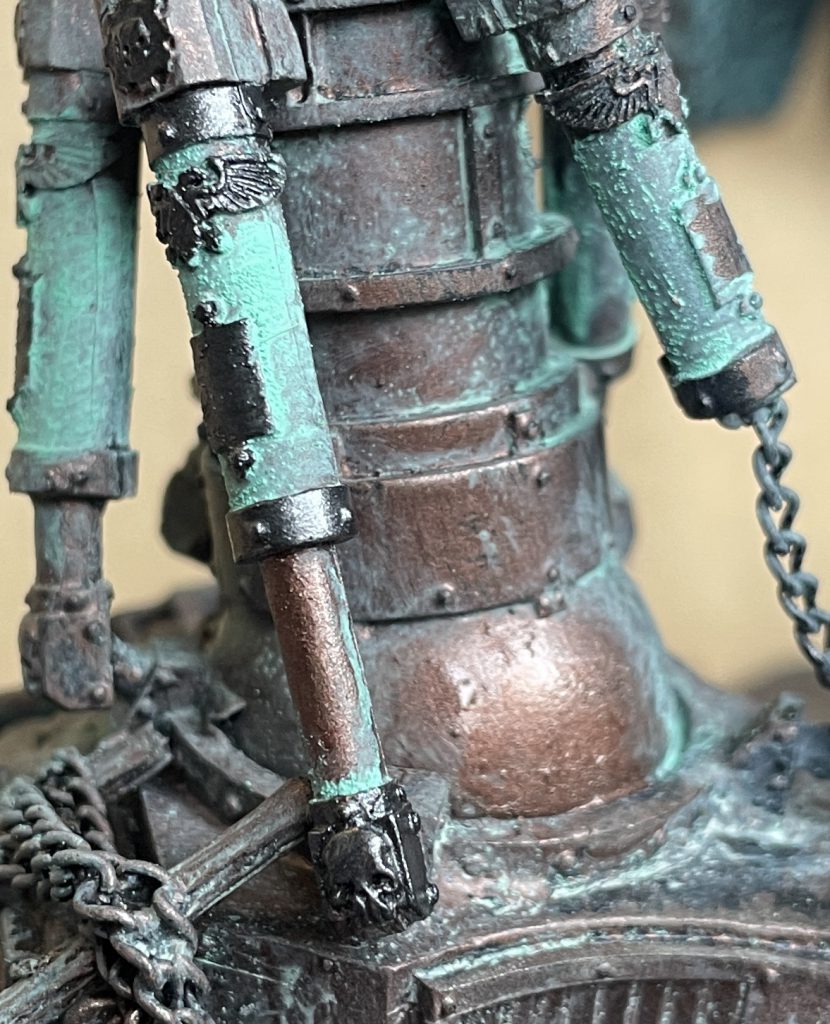
Heavy
Heavy verdigris is that famous, lovely bright green colour - I'd really recommend slopping it on! If you'd like the paint to have a thinner consistency while retaining the coverage, add in some Stabiliser at a 3:1 paint:stabiliser ratio. You can brush this on and leave it at that.
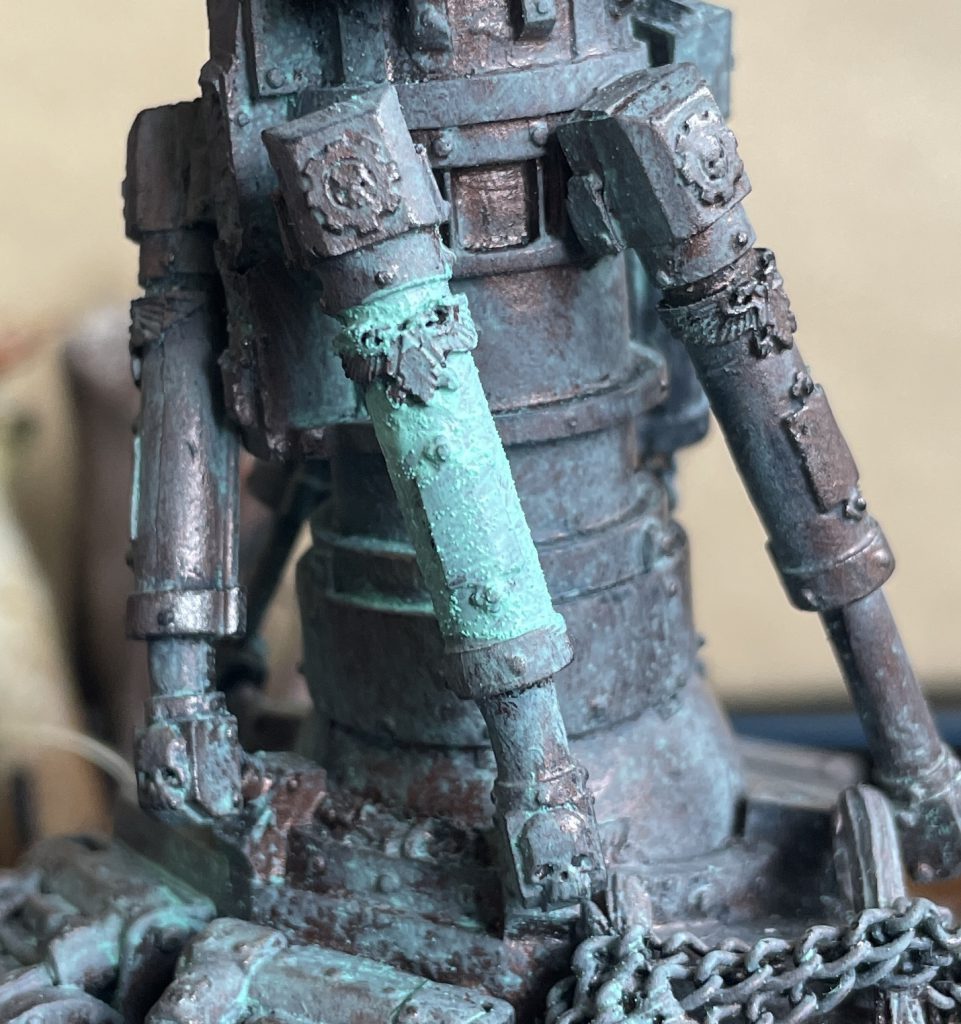 Now that's what I call heavy! Verdigris effect, credit: lenoon
If you'd like to take this a little further, a second, patchy coat gives you some visual difference that has a very natural feel to it and builds up a light texture.
 A second coat adds a little more texture. Verdigris effect, credit: lenoon
Burnishing/Polishing
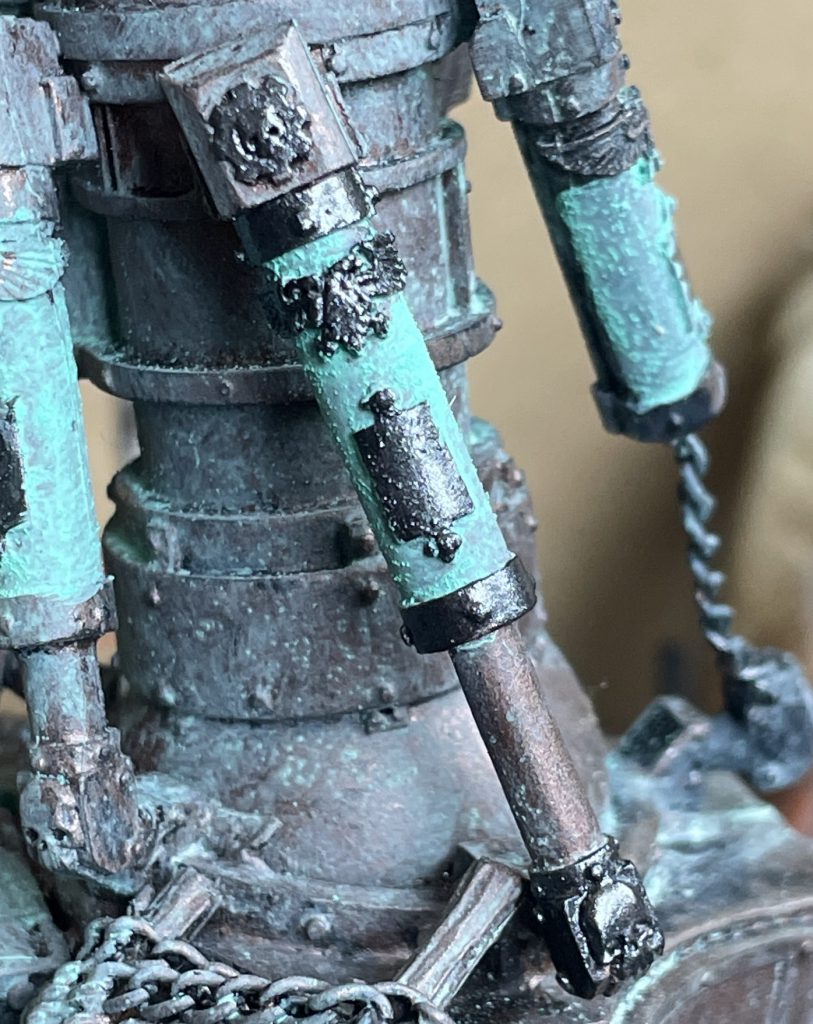
Once you've got your surface appropriately green, you can start thinking about burnishing and polishing. Both processes will remove verdigris selectively where consistent pressure has been applied, either through deforming the metal or removing the top layer. This is worth planning out before you begin. I'll use the above piston and this ball socket as an example:
 Verdigris effect, credit: lenoon
Once verdigris-ed, use the base colour (Dark bronze metal) to define a strip or area of metal that will be burnished. For the piston, this is a long lozenge where the interior of the piston rubs against the connecting rod. For the ball joint, it is a large circular area. I'll highlight these up in two different paths - bronze and brass.
 Areas of burnishing defined with dark metal. Verdigris effect, credit: lenoon
Once you've defined the area with the dark metal base colour, use a little verdigris effect to soften the edges and blend it into the corroded metal. After that, successively highlight smaller areas within the burnished area with lighter metallic colours.
Loading...
Loading...
If we return to Victor Noir (ok, I just want to post this picture twice), you can see a very bright spot where the majority of people have touched the statue, and darker areas around it. As you highlight smaller and smaller areas, you're picking out the places touched/polished/burnished hardest and most often.
By Gaël Chardon - originally posted to Flickr as Victor Noir, CC BY-SA 2.0, https://commons.wikimedia.org/w/index.php?curid=12255853
You can really take your time here to make this pattern make sense with the metal you're painting - especially if you're envisioning that the polishing has been done by hand. It could follow the curve and flow of sculpted cloth, focus on important places, or grind down areas where the metal meets the metal to very bright, fresh, copper. While it might seem like a pointless additional bit of fiddliness, it really sells that whatever you're painting moves, or is touched, and can help you to paint a narrative right onto your model.
Pitted Copper
If you want to paint truly ancient copper or brass that has become riddled with verdigris - perhaps ancient barrow-wrought weapons that hobbits might find, or similar - repeated small applications of verdigris effect with some additional colour mixing is what you're after.
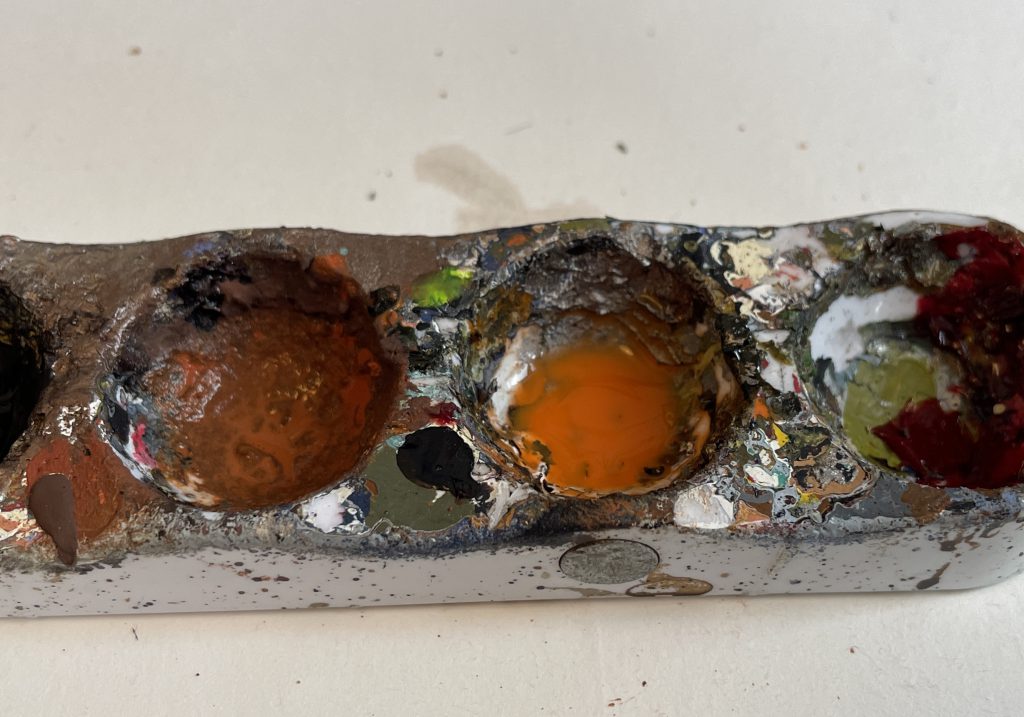
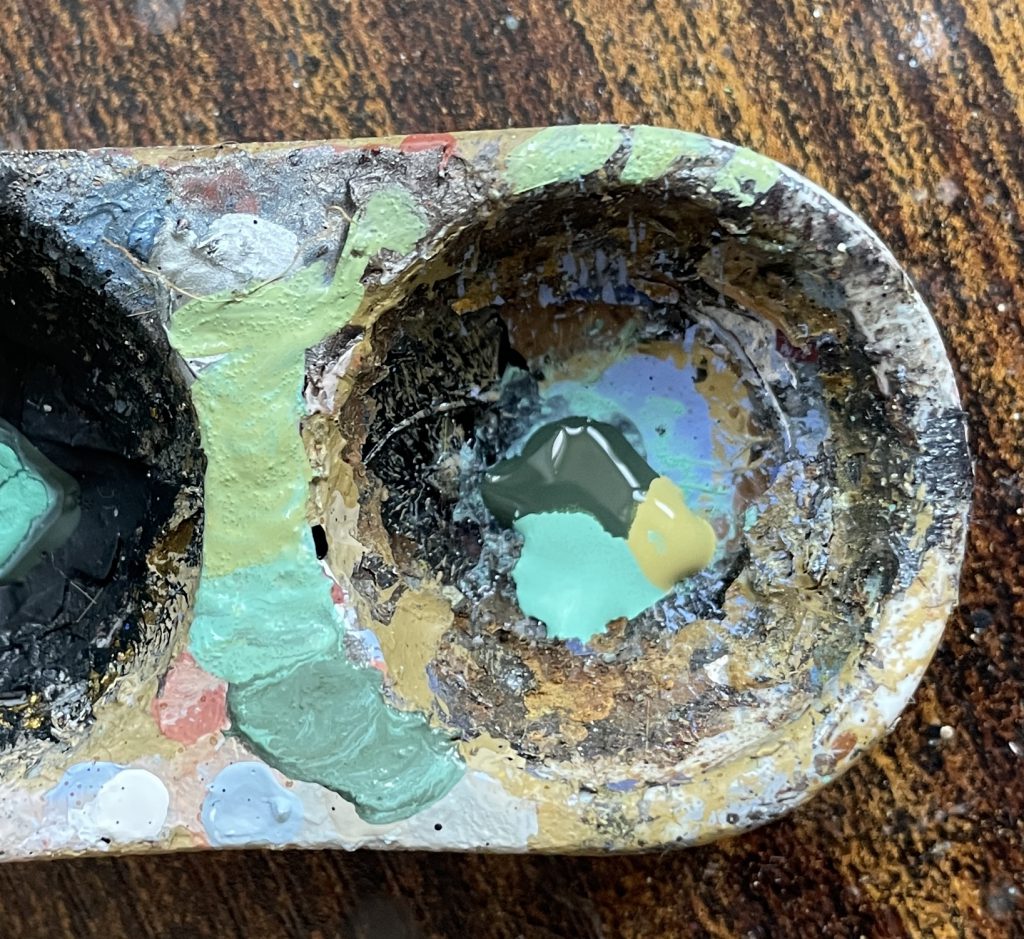 Colours for pitted copper. Verdigris effect, credit: lenoon
Add a dot of verdigris, a light green and a dark green to your palette and let them come together. Then dip a fine brush into the paint and dab it onto the model. Alternate between light, dark, and verdigris, and then start to mix them up. You want to include at least a little verdigris effect in each bit of dabbing to help build texture, and can keep doing this as long as you like. It's quite a meditative process!
Loading...
You can really sell this effect by adding chips and lines of bright copper and stark black, representing places where verdigris has flaked off exposing fresh metal and where it has burrowed through the metal altogether. It's a nice effect that rewards the time spent on it.
Get Corroding
You can just keep going down the rabbit hole of corrosion effects. Everything that works with iron works with copper (and vice versa), and you could even start thinking about silver tarnish (same process with black) and Lead bloom (same process with white). The best thing about painting corrosion effects is that they're out there in the world around you. Iron is doing its best to return to Iron Oxide, and Copper absolutely hates being bright and shiny, so your surrounds are very much the inspiration for all sorts of plans and schemes. The techniques here will serve you well to explore, so get out there for reference photos and then get corroding.
Have any questions or feedback? Drop us a note in the comments below or email us at contact@goonhammer.com. Want articles like this linked in your inbox every Monday morning? Sign up for our newsletter. And don't forget that you can support us on Patreon for backer rewards like early video content, Administratum access, an ad-free experience on our website, and subscriber-only content covering competitive Warhammer 40K!Thank you for being a friend.


 Goonhammer App and Patron Updates: April, 2026
 Kill Team Tournament Report: Engage, Party, Repeat's March Madness 2026
 Goonhammer Reviews: Tribal Conquest