The internet hobbysphere understandably talks a lot about painting, but what about building? We’re going to scroll all the way back to basics and deal with this topic in a more neophyte-approachable way. For the uninitiated, putting together a miniature may seem rather daunting, but don’t worry, we’ll do our level best to demystify the process so that you can build with confidence.
With thanks to our sponsors The Army Painter for providing the tools used in this article.
I’m keewa; ordinarily I’d say I’m the resident painter here, but since we won’t be pushing any pigment today, perhaps I should call myself the builder instead. First we need to have a short conversation about materials. Yes, that’s right; there are various different materials from which our beloved miniatures are made, and it’s absolutely vital to understand which material it is you’re dealing with, because like Space Marines, Orks, Eldar, and what have you, you’ve got to treat ‘em differently.
The Video Version
If you’d like to watch a video version of this article, we’ve got you covered here:
We Are Living in a Material World
First up is plastic - the vast majority of consumer miniatures you might get from the shelves of your hobby shop will be made from this. They’ll typically be on a frame and made by injection moulding plastic between steel plates. The exact formulations of each brand’s plastics are kept closely guarded, but for all intents and purposes, the plastic is polystyrene. Polystyrene is typically quite hard and somewhat springy; it isn’t brittle, and pieces bend rather than snapping. Since making plastic miniatures via injection moulding requires both very expensive machinery and a lot of factory space for mass-production, it’s only really available to medium and large companies; no one’s going to be producing plastic kits in their shed (unless it's a very big and well-appointed shed, of course).
There is another kind of plastic, known as “soft plastic” to distinguish it from the hard plastic of Games Workshop and similar companies; this kind of material, which is used in a lot of board-games that use miniatures as part of their concept, in budget miniature lines like Reaper Bones, or even those green plastic army-men you used to have in a bucket as a child - these are all made of softer plastics.
Who are you calling "Soft"?
Next is resin - resin production is, at least in many cases, cheaper and more accessible than making miniatures from plastic, so most small-to-medium businesses will be producing resin rather than plastic miniatures. There are plenty of different types of resin, and many different ways in which resin miniatures are produced, but for our purposes, there are three kinds we can talk about. The first is Forge World (and other high-quality casting) resin, from Games Workshop’s erstwhile quasi-sister company. This resin is premium high-quality stuff, with razor-sharp detail and a price tag to match. It’s produced by casting, with liquid resin poured into moulds; rather than in frames, it comes attached to these weird trapezoid lumps - if you think of the mould as a negative of the miniature, these lumps are where the resin is poured in from.
Next is 3D printer UV resin, which is the sort of thing small companies and home printers can use to make very detailed miniatures from .stl files sculpted in a 3D rendering program like Blender. This is the new kid on the block in terms of miniature-making material, but it is by far the most accessible for people who want to produce their own miniatures.
Last on this list is Finecast. Everyone’s least-favourite miniature material, much digital ink has been spilt on the topic of Finecast and why it sucks so much. Long story short, Finecast is a cheapo polyurethane resin that our friends at GW used to use to make miniatures. It’s terrible; it feels like it’s made from melting down those awful cups you used to have orange juice in at birthday parties. It’s very brittle and exceptionally unforgiving to work with. Fortunately for everyone, GW seems to be phasing out Finecast, with the majority of its Finecast offerings being replaced by new plastic kits in the last few years. The internet is rife with speculation that Finecast only existed so that Citadel could continue making models using the moulds created for metal miniatures, but with a cheaper material.
Which brings us to...
Metal. The earliest miniatures in the wargaming sphere were made of metals of various kinds, tin, and lead-containing-pewter in particular. Since the end of the 1980s, we’ve cooled quite a lot on the whole “having lead around and playing with it” thing, so metal Citadel miniatures are made with “white metal”, a catch-all term for lead-free tin alloys. Obviously, the exact materials are still a trade secret, so we don’t know, but Games Workshop have at least confirmed that their current metal miniatures do not contain any lead. Metal miniatures are cast on a frame in the same way as Finecast (they use the same moulds after all), molten white metal is poured into a mould, and once it’s set, the pieces are removed from the frames and packed for shipping. The frame tends not to be included, presumably so the metal can be reused.
Building
So now you know what the materials are, how do you actually use them? Let's start with the most venerable miniature-making material.
Metal
First off, your model is probably covered with odd little bits of flash, these spindly bits that are sometimes folded around, and give away where the metal from the frame flowed through the gates into the actual model mould.
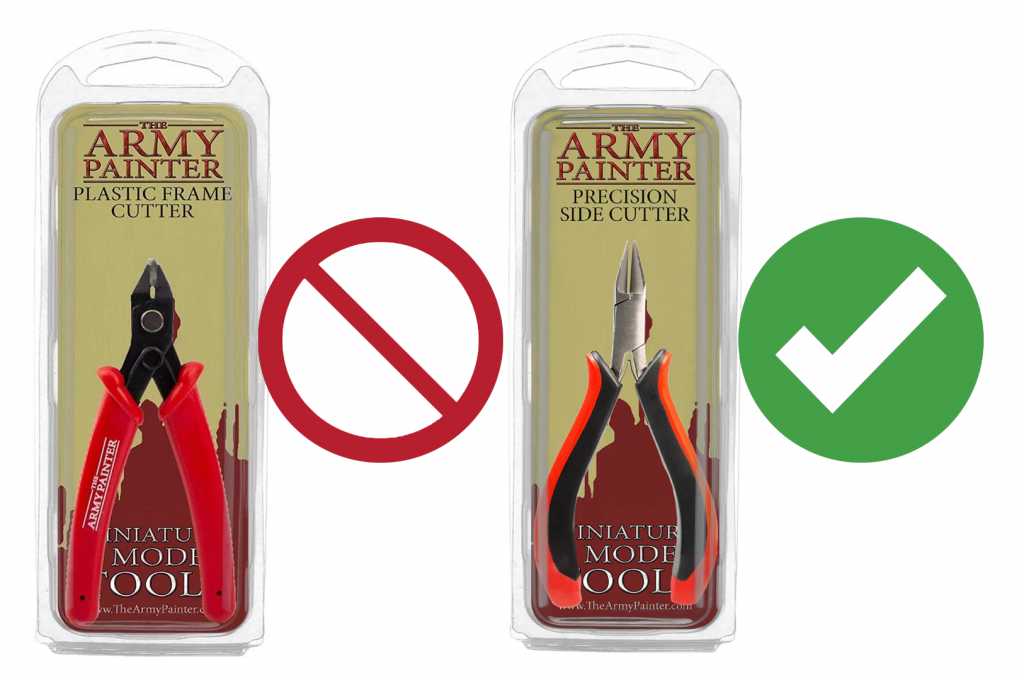
Grab a pair of clippers, ⚠️ Not plastic frame cutters! Oh my god do not use your plastic frame cutters to cut metal! You will absolutely ruin them! ⚠️ and use them to clip off the bulk of the flash. Once you’ve done that, take a diamond file and gently smooth the part until you can’t tell where it used to be. Ideally, you should wear some kind of mask for this - you really don’t want to inhale little particles of metal, especially if that metal *might* contain lead.
To put the metal together, you will need to use cyanoacrylate, also known as superglue; in theory you could use an epoxy putty like Green Stuff to stick metal parts together, but honestly save yourself all that trouble and use some superglue. Just try not to get it on your fingers, or your lips, or your eyelids, yeah?
If your metal model is large, superglue alone may not be able to hold such heavy pieces together, in which case you’ll need to use an auxiliary technique called pinning to hold it together, but that’s quite complicated, so we’ll cover that separately another time. Dry-fit the pieces together and make sure that they fit snugly, or at least as snugly as you can get them. Then, put some superglue on one of the surfaces and pinch them together with a bit of pressure. Hold on tight, even if your fingertips are hurting from pressing into bare metal, you can do it! Before long, hopefully, your pieces will be nicely adhered to one another, and not to your fingers, or between your fingers.
Something important to note is that superglue will not stick to dried superglue, so if you mess up, you'll need to scrape all the old superglue off the piece before trying again.
Forge World Resin
Forge World is a kind of subsidiary of Games Workshop that produces high-quality resin miniatures. It’s since been sort of folded into Games Workshop proper and subsumed into Warhammer, but you’ll still need to know how to work with resin!
Let me be your Dad for a moment: Resin is verybad for your lungs, whether as fumes or as dust. You might think, “But keewa, I’m not going to breathe in my model kit, ha ha ha, who's out there grinding up their Horus Heresy kits and snorting them, ho ho ho I don't need to wear a mask like I'm a little baby,” but if you use a file to smooth out pieces, you’re producing some very fine resin dust in relative proximity to your face, dust which through the vagueries of Brownian motion, you will probably breathe in. Breathing in resin dust can cause a myriad of conditions, from short-term dizziness and occupational asthma, to permanent scarring of the alveoli and lung cancer.
So do yourself a favour, stow your machismo and get a respirator mask if you’re planning on doing anything with resin; your lungs will thank you. It doesn't hurt to be careful.
Addendum: If you're using resin from less professional/industrial sources than Forge World, there's also a chance that your model wasn't cast very well and might still contain some liquid resin inside large pieces; it goes without saying that uncured resin releases fumes containing particularly nasty Volatile Organic Compounds (VOCs), and is very toxic. If you're working with resin from these sources in addition to some form of respiratory protection, you should wear gloves and work in a very well ventilated area. GW labels these models as 15+ for a reason, and it's not that they're difficult to build.
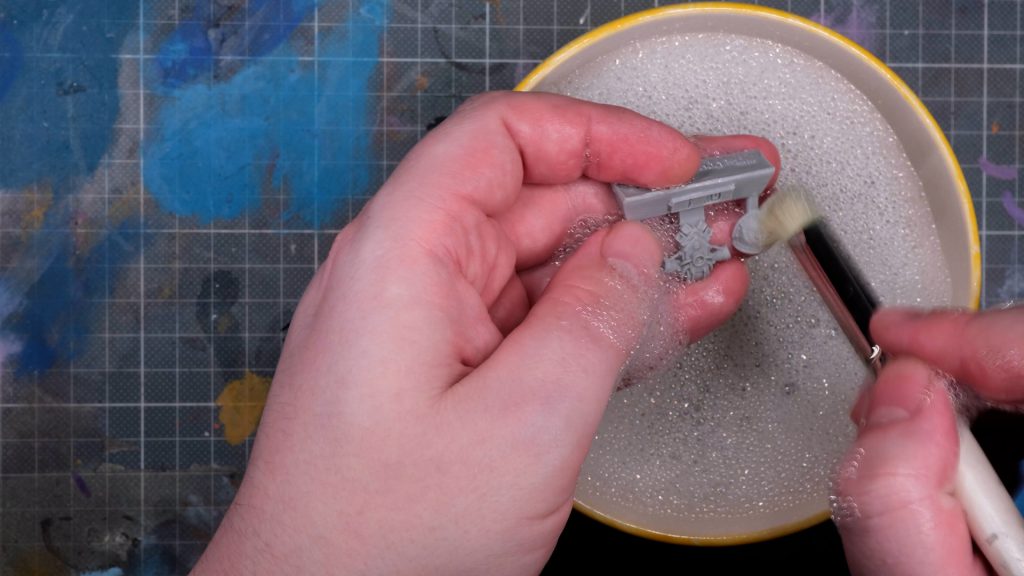
So to start with, we’ll need to wash the pieces in some warm, soapy water. Why? Well, in order for the factory to get the model out of the mould once the resin has cured, the moulds are smeared with a release agent, a bit like using Vaseline or something similar. Forge World doesn’t wash off the release agent, so you’ll probably have some on your resin pieces. You absolutely need to get rid of this because it’s hydrophobic; if you leave it on, then paint will simply fail to adhere to your model at all. Imagine if you smeared a layer of butter all over your model before you started painting it.
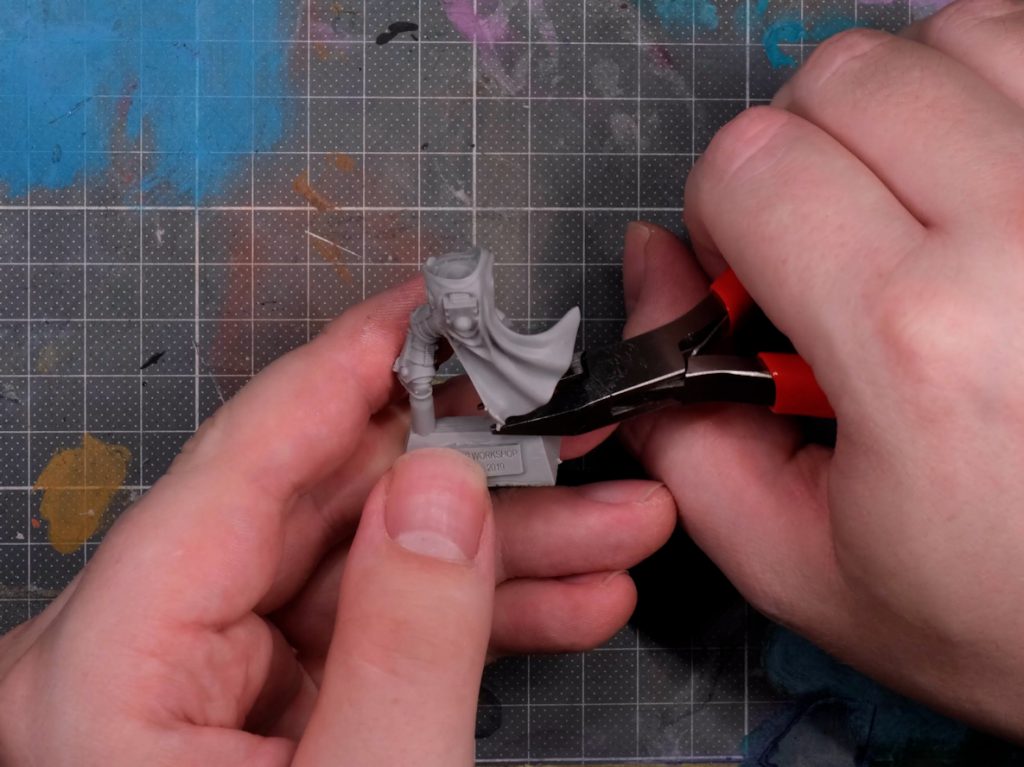
Each piece will typically be attached to this sort of trapezoid lump (this handy lump is where the resin is poured into the mould), so use your clippers to cut through the channels and get the pieces off. Once you’ve done that, you can very, very carefully slice any leftovers off with a sharp hobby knife before using your diamond file to smooth the pieces.
One particular quirk of resin is that it can get bent quite easily in the packaging, but this is totally fixable with a bit of know-how. Get yourself a cup of boiling hot water and a cup of cold water. What we’re going to do is heat up the piece in the hot water until it’s malleable and floppy. Often, this, combined with gravity, will be enough to straighten out the piece. Then you dunk it in the cold water like a medieval blacksmith forging a sword, this will “fix” the piece the way it is when it gets cold. You might need to do a fair few “heat-up, rapid cool” repetitions before it’s perfectly straight, so be patient.
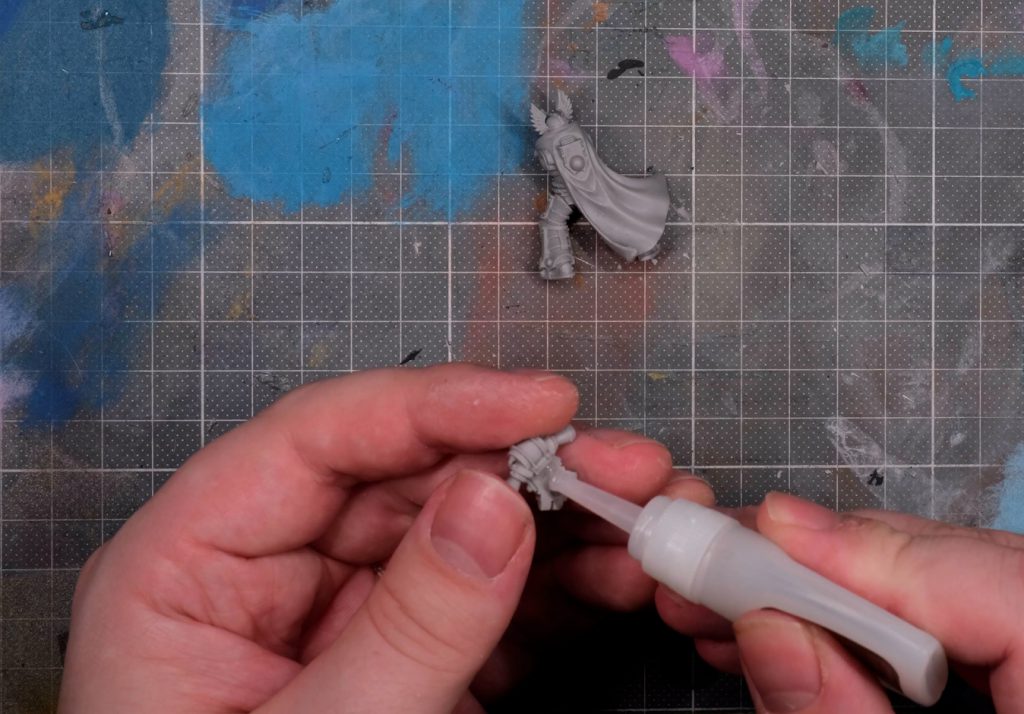
As with metal, resin needs to go together with cyanoacrylate - superglue, that plastic cement you have from the hobby shop won’t work, and if you try it will damage your resin irreversibly, so do yourself a favour and stick to the superglue. Make sure to dry fit the pieces, making sure that they go together neatly, without leaving any significant gaps. If there should be some unfortunate gaps, you can patch them with a bit of green stuff or another two-part epoxy putty.
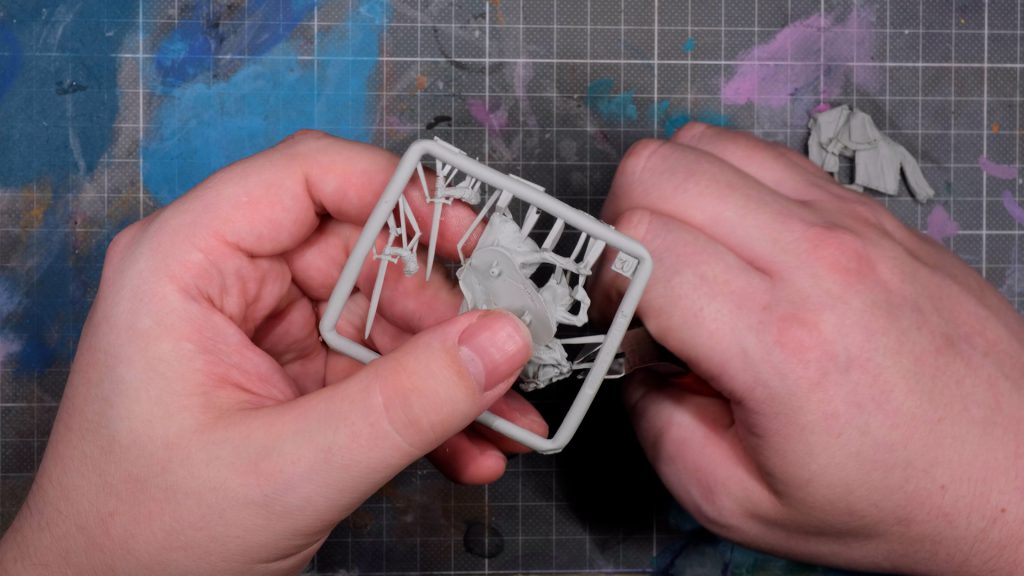
Finecast
Next, we move on to the devil’s own material - Finecast. In a way, Finecast is similar to Forge World Resin, only much, much worse. Since Finecast models are cast in the same moulds that metal miniatures were cast in, the process is mostly the same, but with a few key differences. Compared to metal, Finecast is both very weak and very brittle; it’s very easy for pieces, especially thin ones like swords and spears to snap while being handled.
Snip the model out of the frame using clippers; unlike their superior metal cousins, Finecast models are typically still on a frame, presumably to protect them from the rigours of packaging and shipping. Once you’ve done that, carefully slice off the remaining gates with a sharp hobby knife.
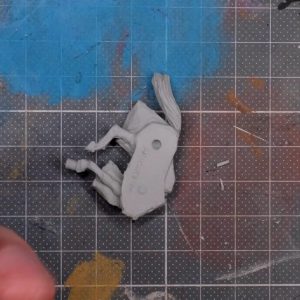
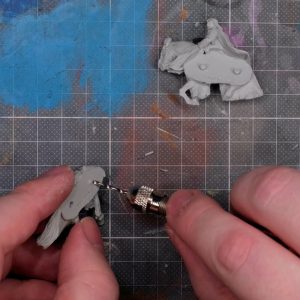
Because Finecast is The Worst, one of the peg-holes to fit Aragorn’s horse together is completely filled with resin. To deal with this, we’ll use an AP drill to clean out the excess resin inside the hole, before dry fitting and supergluing the pieces together.
Not only that, the pieces don't fit together well, so I had to fill a big gap with some greenstuff, awful.
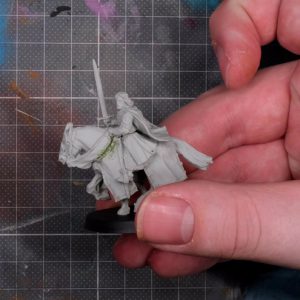
My main advice for anyone considering getting a fFnecast model is: Don’t! Just don’t bother, it’s not worth it. Try and find the metal version second-hand, if that's an option - bonus, it's a lot easier to strip old paint off metal than it is off resin or plastic.
Plastic
Plastic is by far the most common miniature material you’ll come across these days, and with good reason - it’s not as heavy as metal (and cheaper to produce), but is relatively sturdy, it’s easier for mass production than resin, retains good detail, and isn’t toxic or harmful. Typically, assembling plastic miniatures is a much more laborious process, with lots of small pieces that go together in a very specific order as outlined by the instruction book. Resin and metal miniatures often don’t even have any instructions!
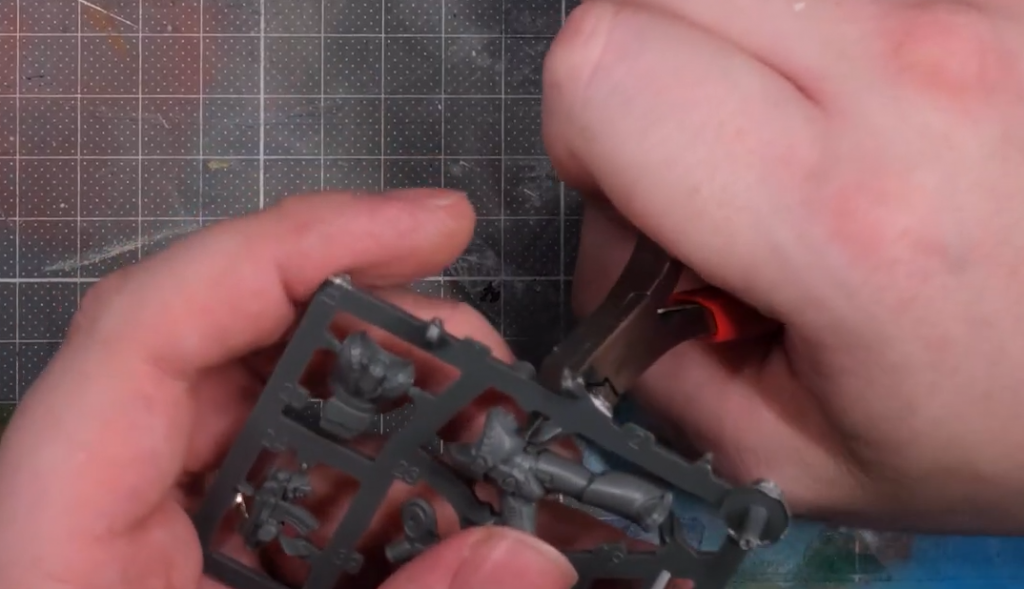
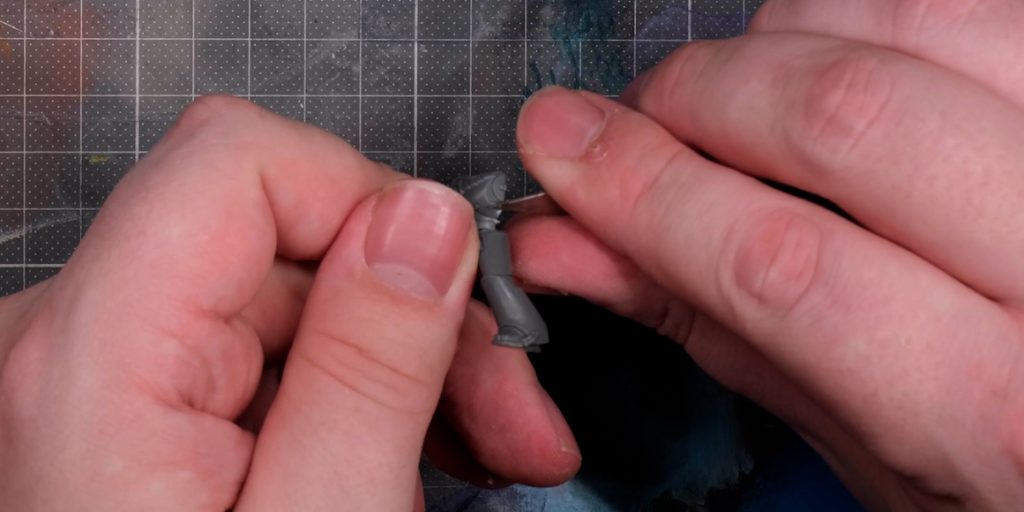
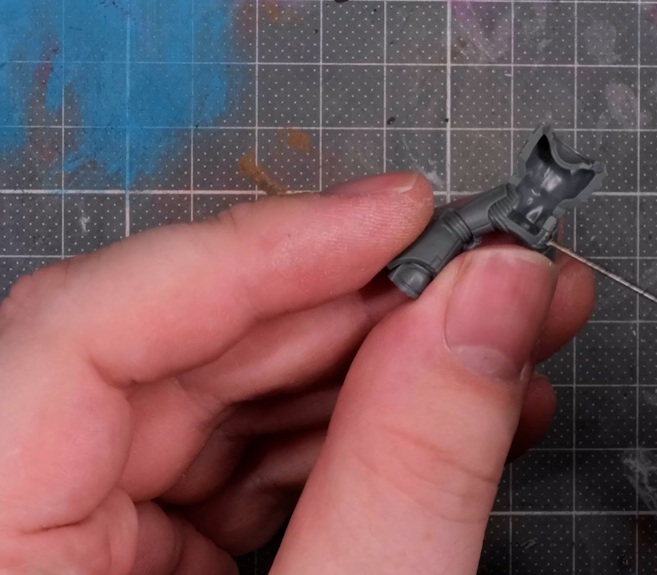
Start by snipping the pieces off the sprue with some plastic frame cutters, with that done, we’ll tidy up the place where the piece meets the frame using a sharp hobby knife and file if necessary. We’ll also look for any mould lines and clean them off by scraping them with the blunt side of the hobby-knife blade. Modern kits have become very adept at hiding mould lines in places where you’d never ordinarily see them, so this necessity gets less and less as time goes by, but for older models, you’ll probably see some truly egregious mould lines. Cleaning them is the same, just scrape them with the blunt side of the hobby knife.
With that done, dry fit the pieces to make sure that they do, in fact, fit together the way they should. Once you’re satisfied that the pieces are correct, you have a choice - you can use superglue, or polystyrene cement (also known as plastic glue). The method and mechanism of action for each is different; unlike superglue, plastic glue works by melting the pieces together, fusing them into a single part. It usually comes in a bottle with a hollow needle to help you be as accurate as you can with it, or in some cases with a small nail-brush applicated. As a solvent, plastic glue absolutely honks, and sniffing it too much might make you a bit dizzy so be careful and use it in a well-ventilated area. Also, if you get some on your finger and then press the model you’ll probably leave behind a fingerprint so be careful and keep it away from your fingertips.
Because of the mechanism of plastic cement actually changing their form (melting parts together), you need to consider how likely you are to want to change pieces after you've already built them. Why? Well, the bonds made by superglue are decently strong, but they're not very resistant to shock, which makes them quite brittle - if you want to change a superglued part, it's often as easy as sliding the point of a hobby knife blade in between parts and twisting it. If you want to change plastic glued parts, however, you're going to be cutting and cleaning - that's not so bad if it's a flat-to-flat piece like a Space Marine hand, but if it's something like a head attached by a ball-and-socket joint? Forget it.
So concludes our brief foray into the world of materials, I hope this was useful and will enable you to build with confidence!
Have any questions or feedback? Drop us a note in the comments below or email us at contact@goonhammer.com. Want articles like this linked in your inbox every Monday morning? Sign up for our newsletter. And don’t forget that you can support us on Patreon for backer rewards like early video content, Administratum access, an ad-free experience on our website and more.

 Who are you calling "Soft"?


 Goonhammer App and Patron Updates: April, 2026
 Kill Team Tournament Report: Engage, Party, Repeat's March Madness 2026
 Goonhammer Reviews: Tribal Conquest