Greetings my friends, welcome back for another Hobby 101 article, I'm keewa, your resident hobby houdini, your helping hand in the world of miniature painting. Today, we’ll be talking a little about magnets and how you can use them to improve your hobby experience.
The Video Version
If you’d like to watch a video version of this Hobby 102, we’ve got you covered here:
The first question you might ask about magnets is "How do they work?" “Why do I need magnets?” and the answer is “you don’t!” Ok, article over, everyone go home.
Have any questions or feedback? Drop us a note in the comments below or email us at contact@goonhammer.com. W-
I kid, of course. You don’t need magnets in your hobbying; plenty of people go their entire hobby lives without ever using them, but they can be super useful in several different ways - especially if you play Warhammer (other tabletop games are available; ask your doctor if Warhammer is right for you).
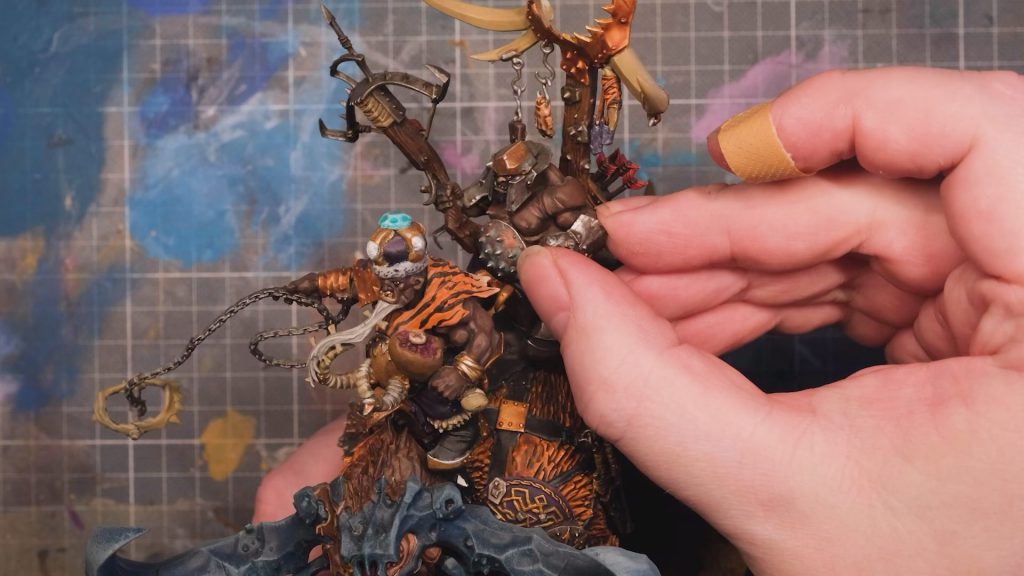
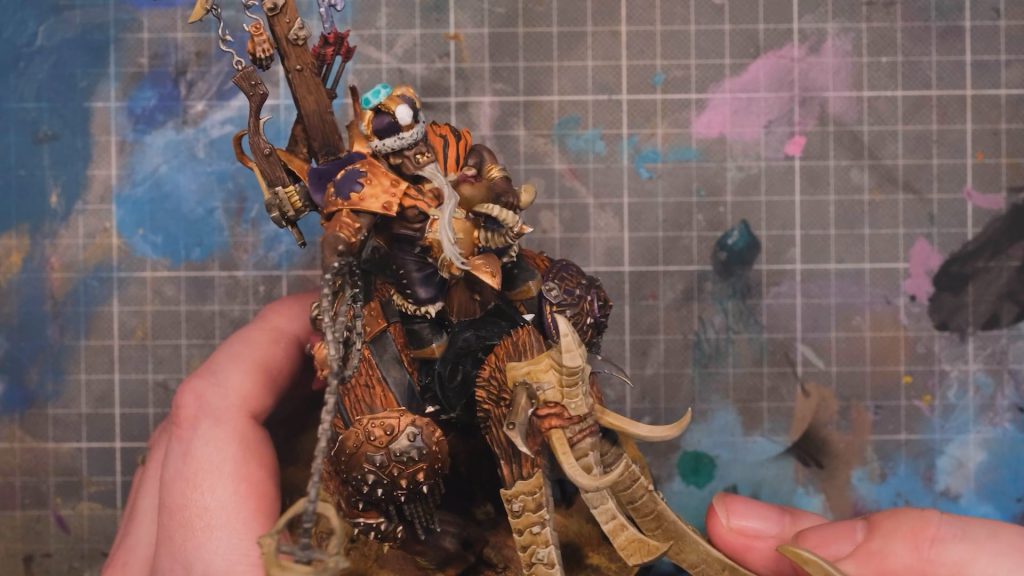
Flexibility - by installing magnets in your miniatures, you can change parts as often as you’d like. For example, my beautiful Ogre beastie has been magnetised in a few different ways - the second rider can pop off quite easily thanks to a very uncomfortably positioned magnet in his bum (ouch).
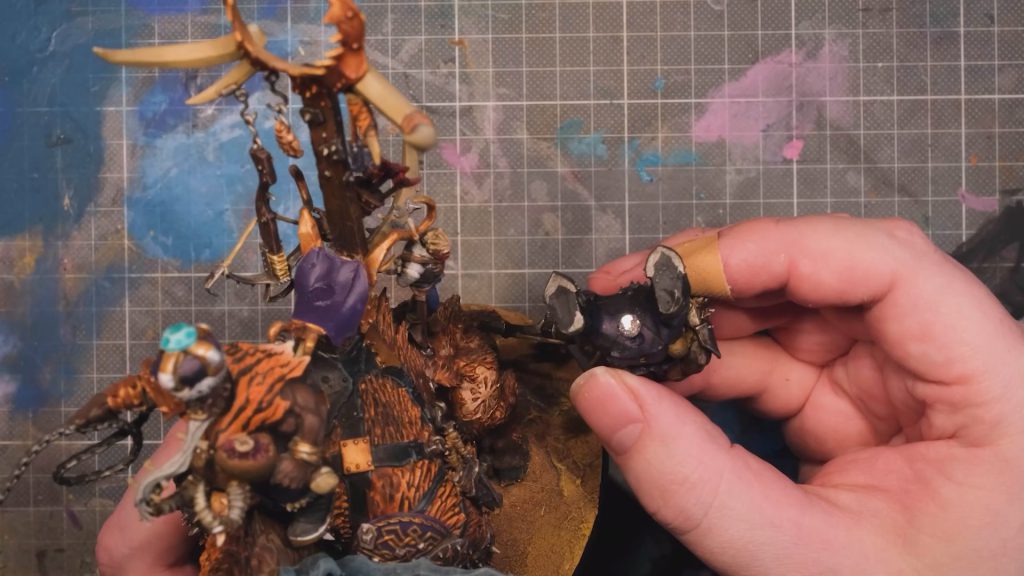
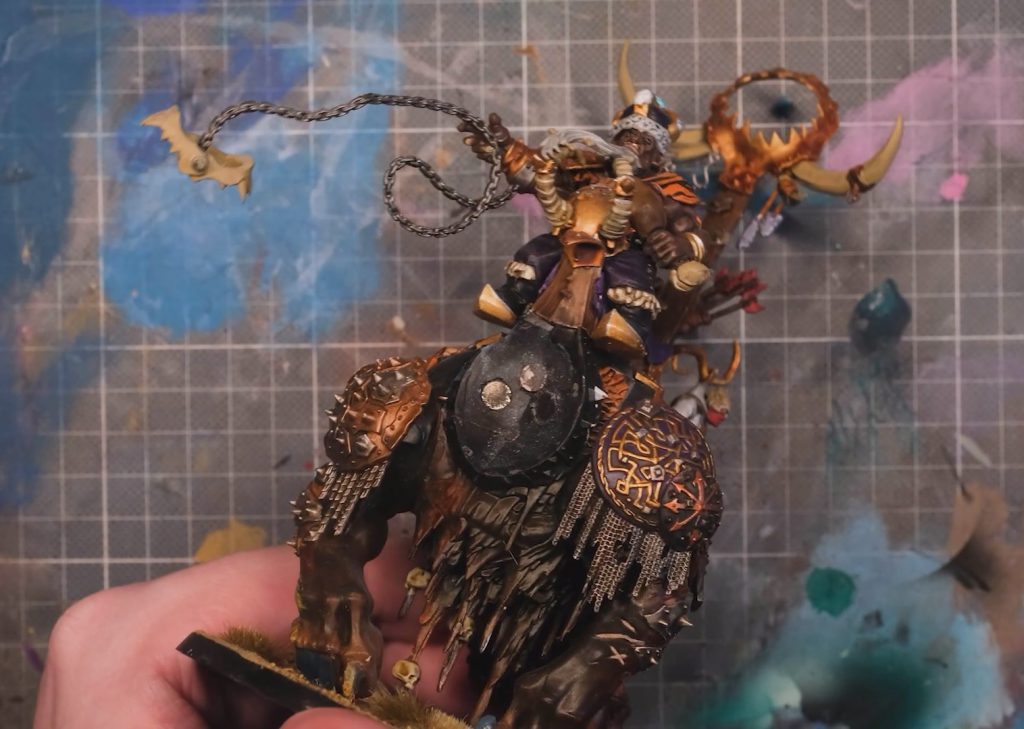
With some larger magnets on board, I can swap the beast’s head to make it into the other kind as easily as changing your trousers, and with some magnets cleverly hidden in the shoulder join (this one was a little tricky what with the angles and everything), I can easily swap the weapon in the hand of my very regal looking ogre king; that’s a ton of options from one kit.
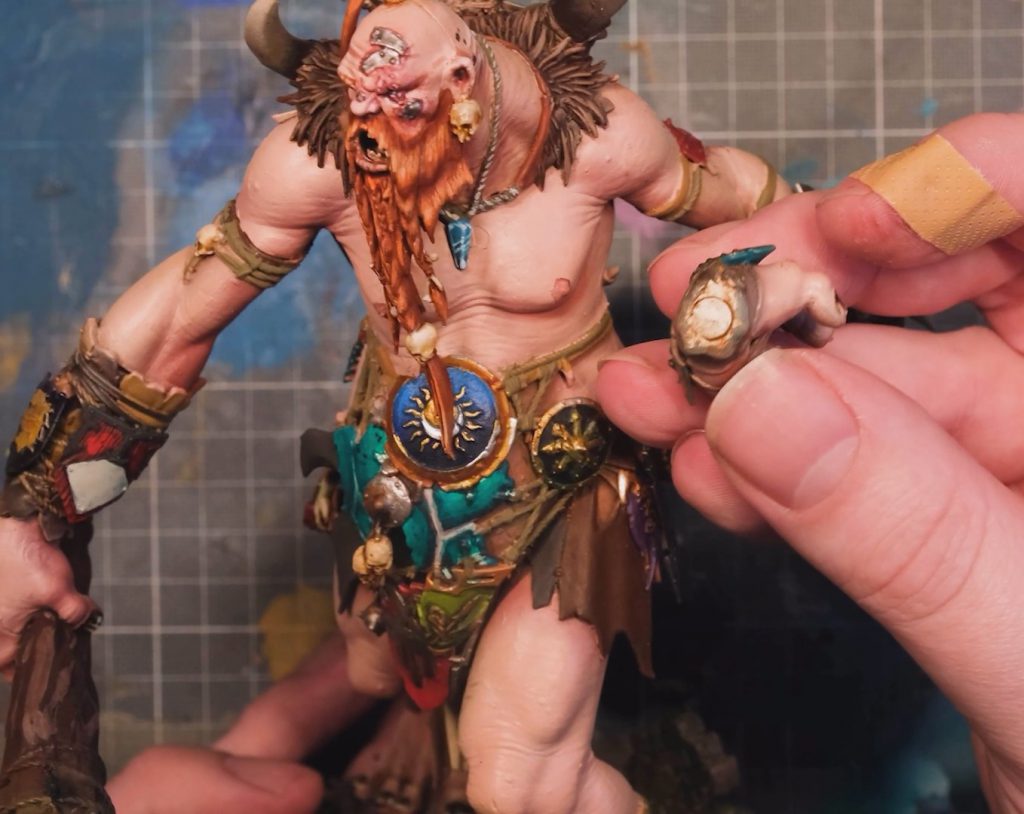
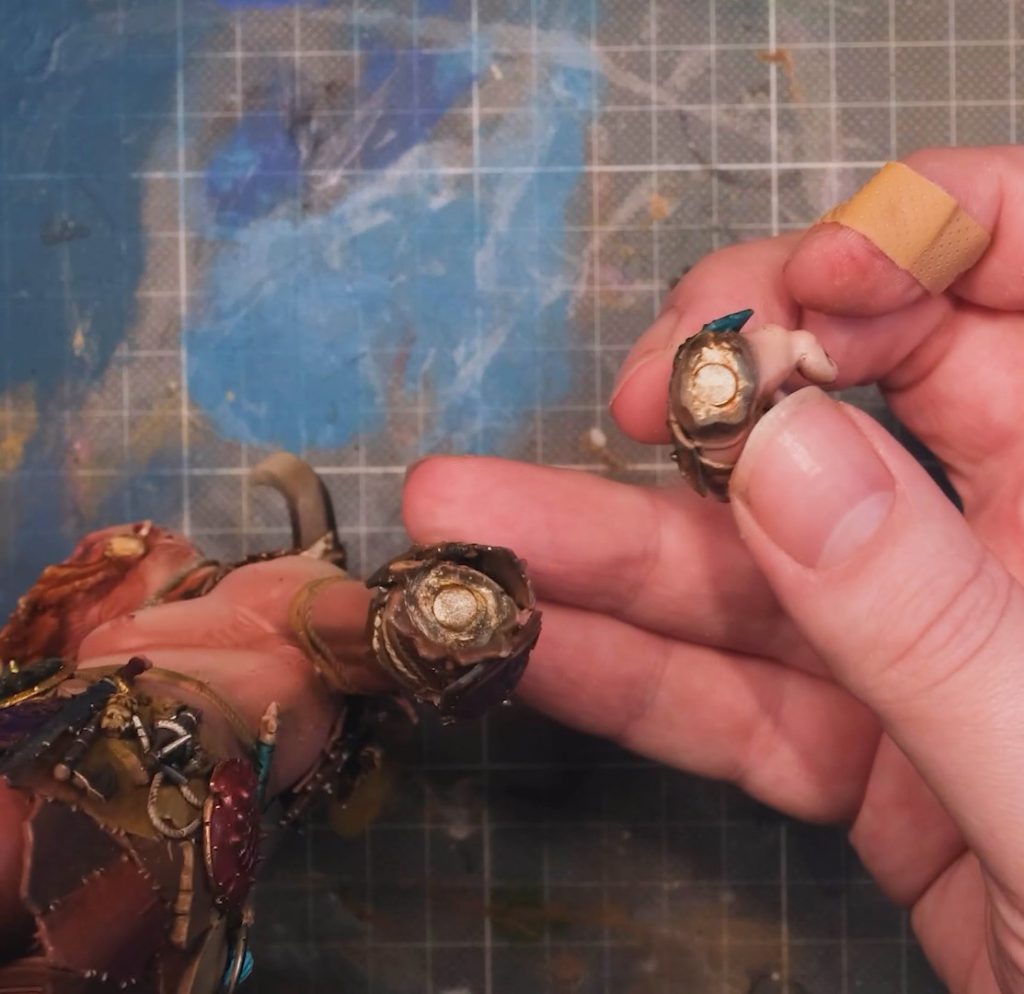
This mega-gargant of mine also has some magnets drilled into the end of the hands and tucked away (with a little Milliput as padding) inside the wrists. I can swap the hand configuration as much as I like.
You can magnetise the head as well if you fancy; I've left mine unglued, because it fits quite nicely with just friction alone. Although he doesn’t look much like a Kraken-Eater, if we’re playing a game and loadout is king, I can just swap the hands and he's ready to eat them Krakens!
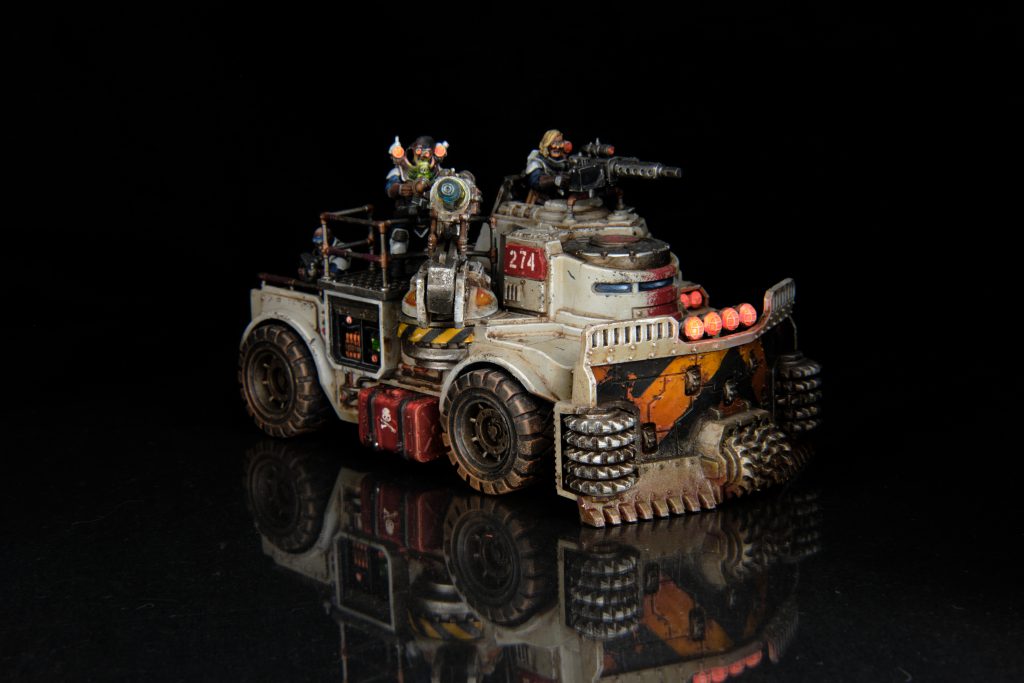
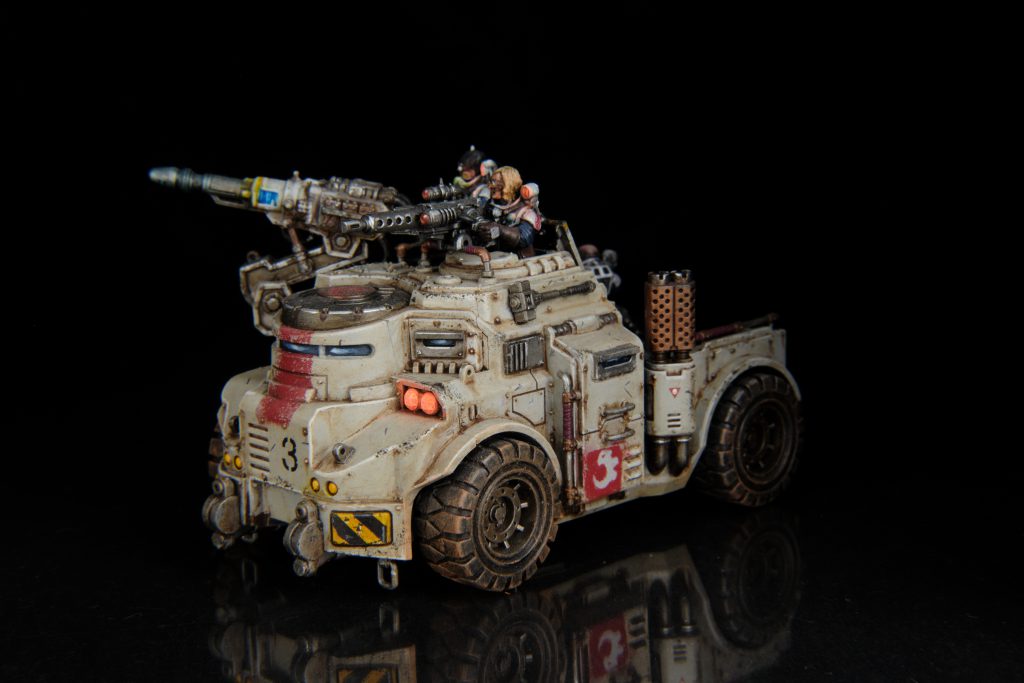
Same truck, can you see the magnets? Credit: keewa
My Goliath Truck has some very carefully hidden magnets (not really, they just happen to glue onto the bumper quite nicely without being too obvious) that let me put on the Rockgrinder blade if I want, while my Wraithlord also has magnets to let me swap the shoulder weapons if I fancy it. This approach works best on large models and vehicles; it’s much more difficult to magnetise anything smaller than, say, a Space Marine (though not at all impossible).
With some magnets inside the sponsons of this Leman Russ and hidden inside the body, I can swap them on and off as much as I like. Handy!
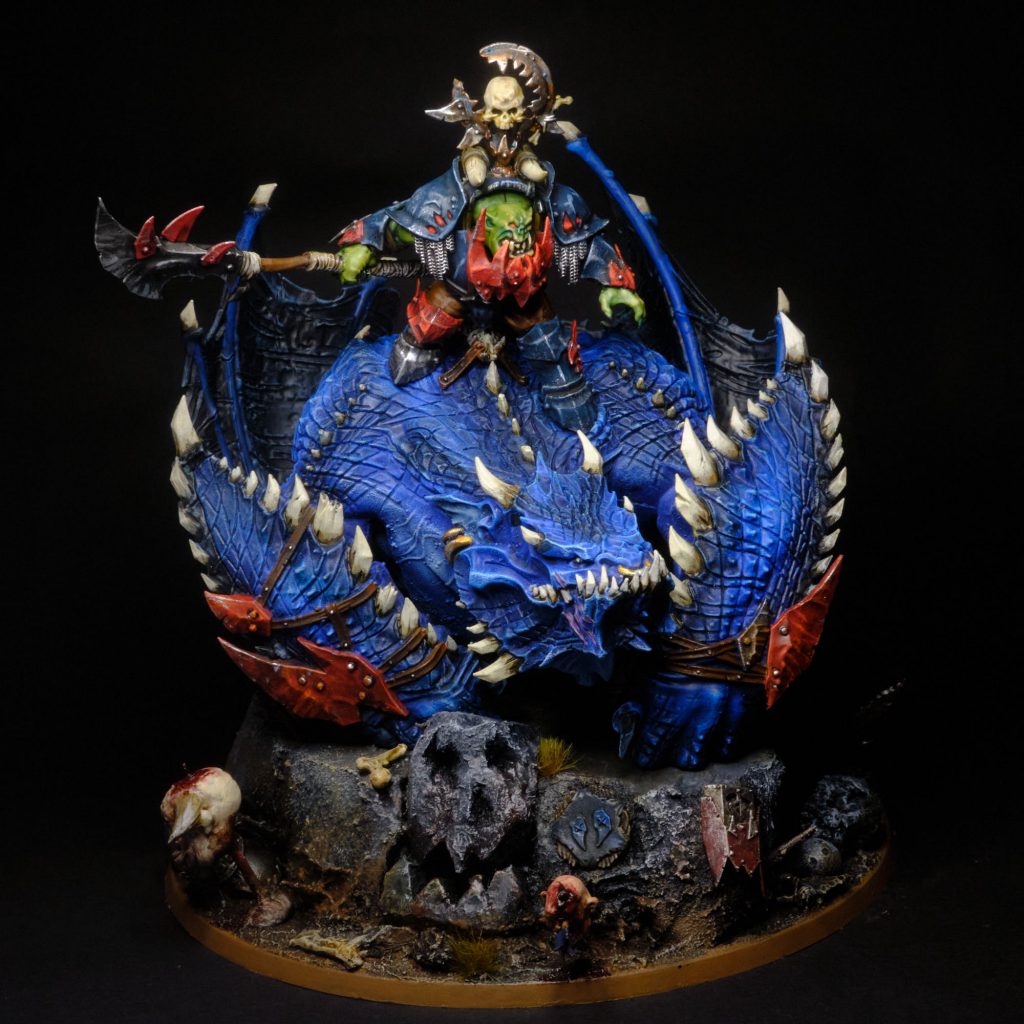
Ironjawz Maw-Krusha - Credit: keewa
Transportability - Some of our favourite models are really big, and carting them around fully-built can be a bit of a pain. By clever use of magnets, you can disassemble your bigger models, transport them to wherever you’re going, then reassemble them easily. No more turning up to a tournament to find that your Wraithknight’s arm has snapped off in your case! The rider of my Ironjawz Maw-Krusha is magnetised such that he can pop off for transport - I left off the chains to make it a bit easier.
It’s not only large models that can benefit from magnets, though; loading small miniatures into a box is fraught with the possibility that they’ll smash into each other like when you were a teen at the Linkin Park concert, only this time their arms might actually snap off. With magnets, you can just stick them to the inside of a metal box, and they won’t budge until you come to take them out.
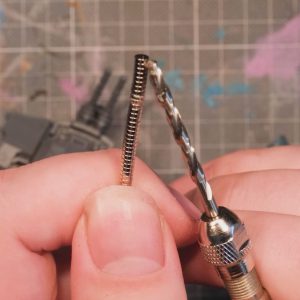
So that’s what magnets are good for, but how do we use them? Well, for our purposes there are a few different things to consider. Not just any old magnets will do; your magnets need to be strong and small enough that your drill can make an appropriately-sized hole, meaning you’re going to need some neodymium magnets, the higher the rating the better. The Army Painter sells a pack of magnets that are ideal for miniature applications, with 80 3mm diameter and 20 5mm diameter magnets.
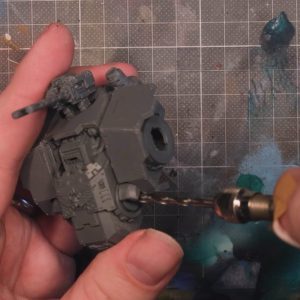
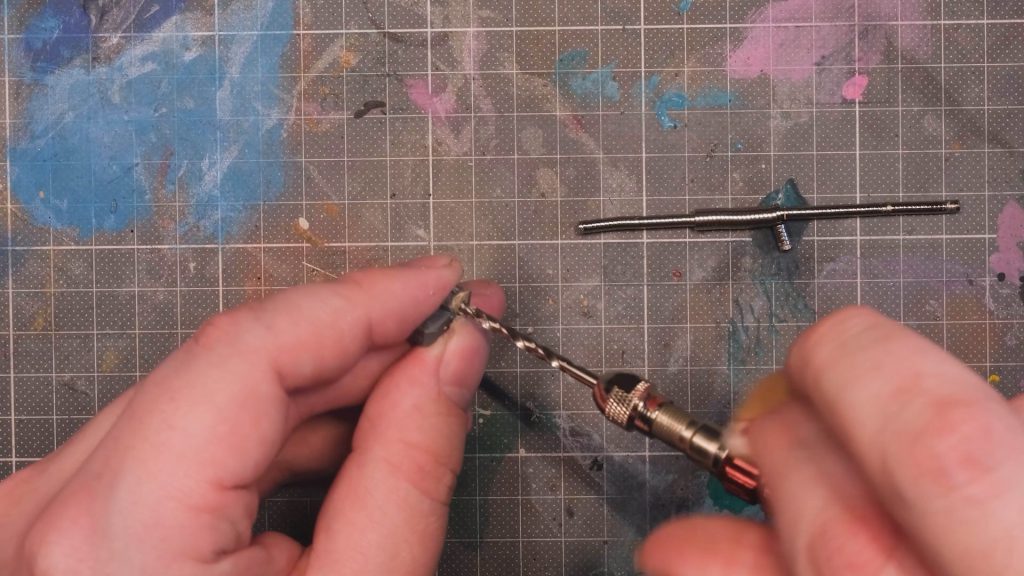
This time I’ll be magnetising the chest guns on this Space Marine Brutalis Dreadnought. Here you can see the completed magnetisation of one side that I finished earlier, and how easy it is to just pop the guns in and out, safe in the knowledge that they won’t fall out. To demonstrate the process on the other side we’ll need a hobby drill and some magnets, make sure that the diameter of the drill-bit you’re using matches up to the size of the magnets so the fit is really snug. We’ll start by drilling a hole here, the angle isn’t perfect because of an overhanging piece I should have left off, but with a bit of care I drilled out a nice neat circular hole.
Next I splurged a bit of superglue into the hole, making sure to get on all surfaces of the cylindrical hole. After that I used a little trick to get the magnet to sit snug inside the hole - by sticking it to the blade of a hobby knife, then putting it into the hole and “wiping” the blade off sideways - if I’d just pulled it straight backwards the magnet wouldn’t have stuck, but by breaking the magnetic field perpendicular to the polarity, the magnet stays stuck nice and tight in the hole. It’s important to let the glue dry completely before doing any of the other bits, or you risk simply yanking the magnet back out.
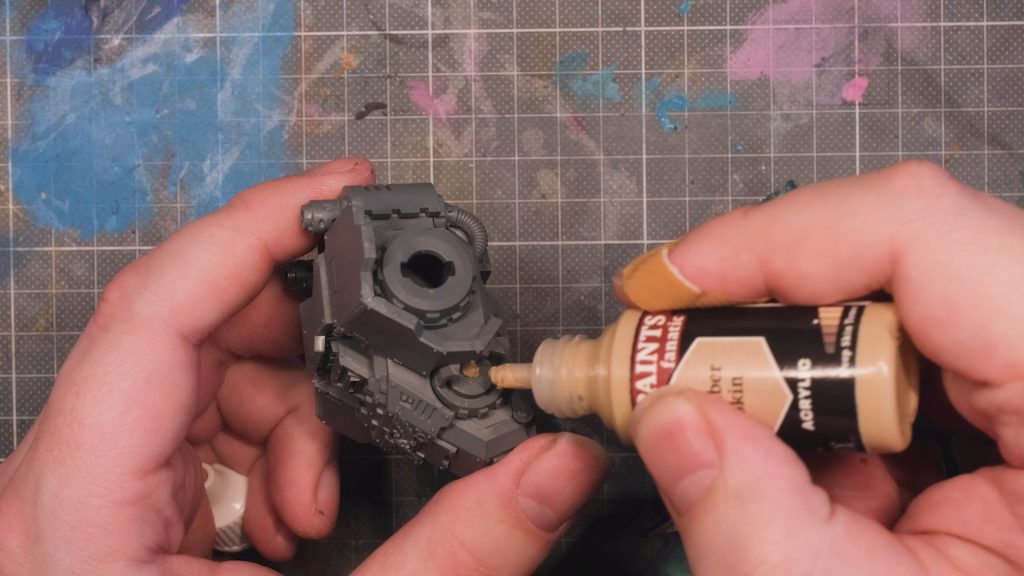
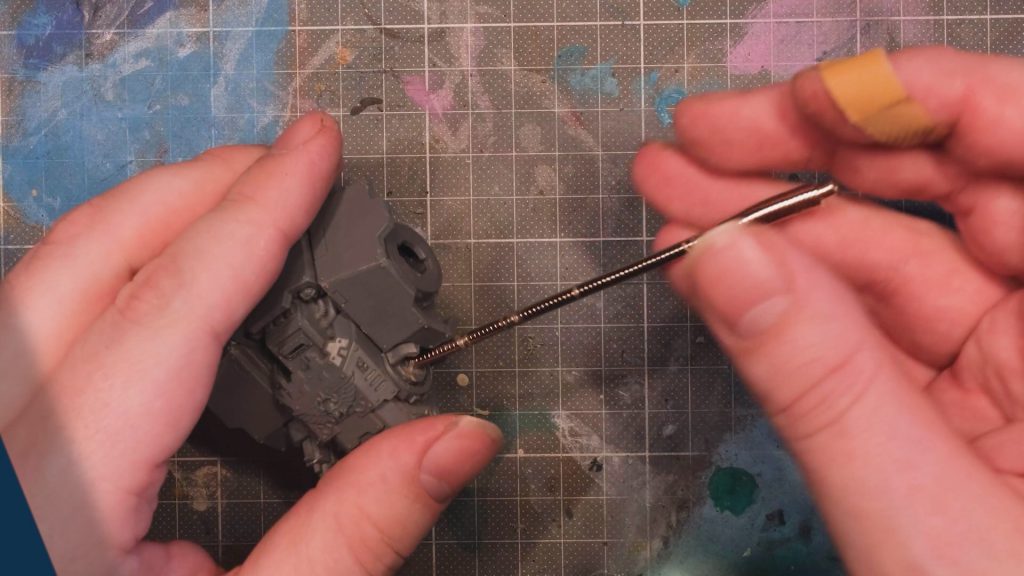
Okay, so how do we make sure that the holes match up properly so the magnets meet correctly? It’s actually quite simple: By putting a blob of paint on the magnet that’s already glued in and then putting the pieces together while the paint’s still wet, we get a handy mark on the undrilled piece - in this case, since we’re pushing the paint forwards into the model when we put the pieces together, we can be sure that the point where the paint stops is the outmost edge of the magnet. By drilling there, we get a nice hole that should line up perfectly. Once you’ve done that, scrape the excess paint off the magnet so you don’t make a mess.
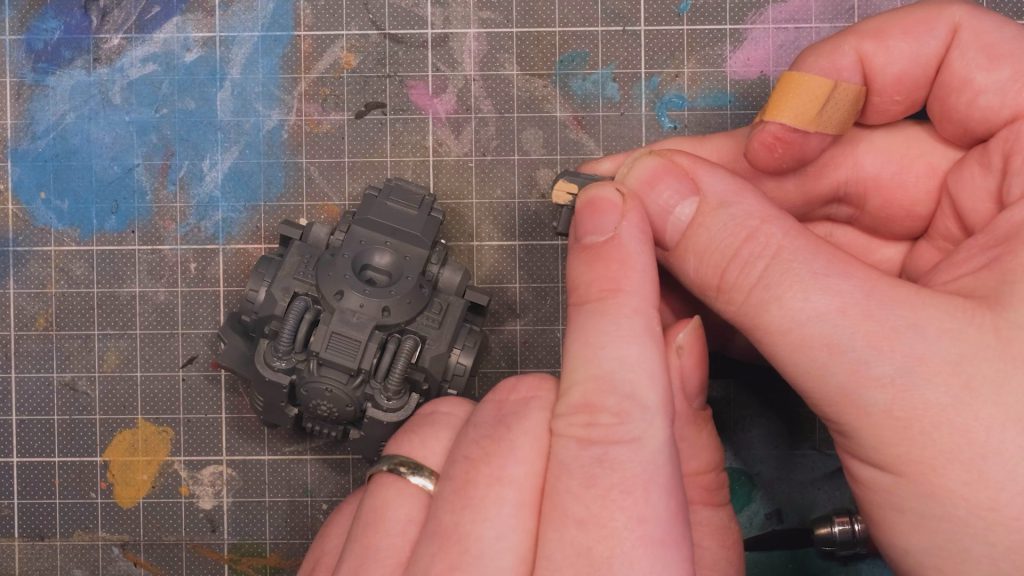
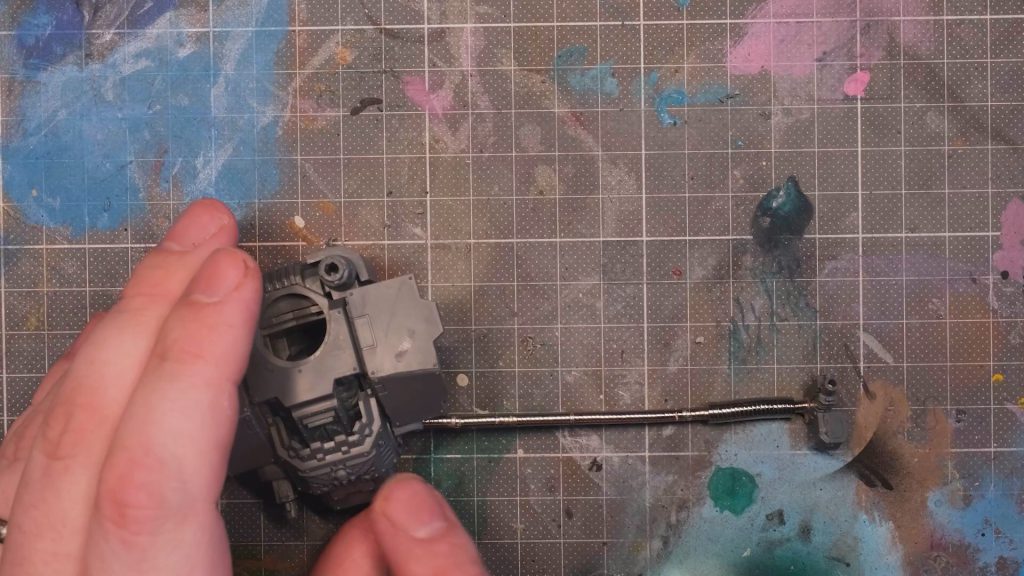
Almost done. Putting in the second magnet is often the trickiest part, the reason being polarity; we all know that the north pole of a magnet attracts to the south pole of other magnets, and is repelled by other north poles, if we make a mistake and put the magnet in the hole the wrong way around, we’ll end up with pieces that can’t go together! An easy way to make sure the polarity is correct is by making a sort of pole out of the magnets with one end connected to the already-installed magnet, then it’s simply a case of putting the endmost magnet in the other socket and then “wiping” it off - be careful that the magnet doesn’t flip around as you move the pole of magnets away, if necessary, you could use a knife to keep it from moving as you do it.
Another, perhaps more sane way of doing this is through marking one side of a magnet with a Sharpie or other similar permanent marker pen. Make sure you get it right, though, if you get the magnet in backwards, you'll have to dig it out with a hobby knife, which is not fun.
And there you have it! Magnets installed in two pieces to keep them together, while keeping the option to swap them if you want.
Have any questions or feedback? Drop us a note in the comments below or email us at contact@goonhammer.com. Want articles like this linked in your inbox every Monday morning? Sign up for our newsletter. And don’t forget that you can support us on Patreon for backer rewards like early video content, Administratum access, an ad-free experience on our website and more.

 You can magnetise the head as well if you fancy; I've left mine unglued, because it fits quite nicely with just friction alone. Although he doesn’t look much like a Kraken-Eater, if we’re playing a game and loadout is king, I can just swap the hands and he's ready to eat them Krakens!
 Same truck, can you see the magnets? Credit: keewa
 Ironjawz Maw-Krusha - Credit: keewa
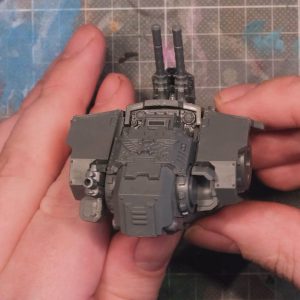
 This time I’ll be magnetising the chest guns on this Space Marine Brutalis Dreadnought. Here you can see the completed magnetisation of one side that I finished earlier, and how easy it is to just pop the guns in and out, safe in the knowledge that they won’t fall out. To demonstrate the process on the other side we’ll need a hobby drill and some magnets, make sure that the diameter of the drill-bit you’re using matches up to the size of the magnets so the fit is really snug. We’ll start by drilling a hole here, the angle isn’t perfect because of an overhanging piece I should have left off, but with a bit of care I drilled out a nice neat circular hole.
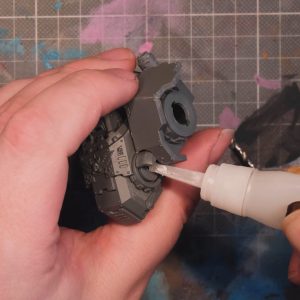 Next I splurged a bit of superglue into the hole, making sure to get on all surfaces of the cylindrical hole. After that I used a little trick to get the magnet to sit snug inside the hole - by sticking it to the blade of a hobby knife, then putting it into the hole and “wiping” the blade off sideways - if I’d just pulled it straight backwards the magnet wouldn’t have stuck, but by breaking the magnetic field perpendicular to the polarity, the magnet stays stuck nice and tight in the hole. It’s important to let the glue dry completely before doing any of the other bits, or you risk simply yanking the magnet back out.
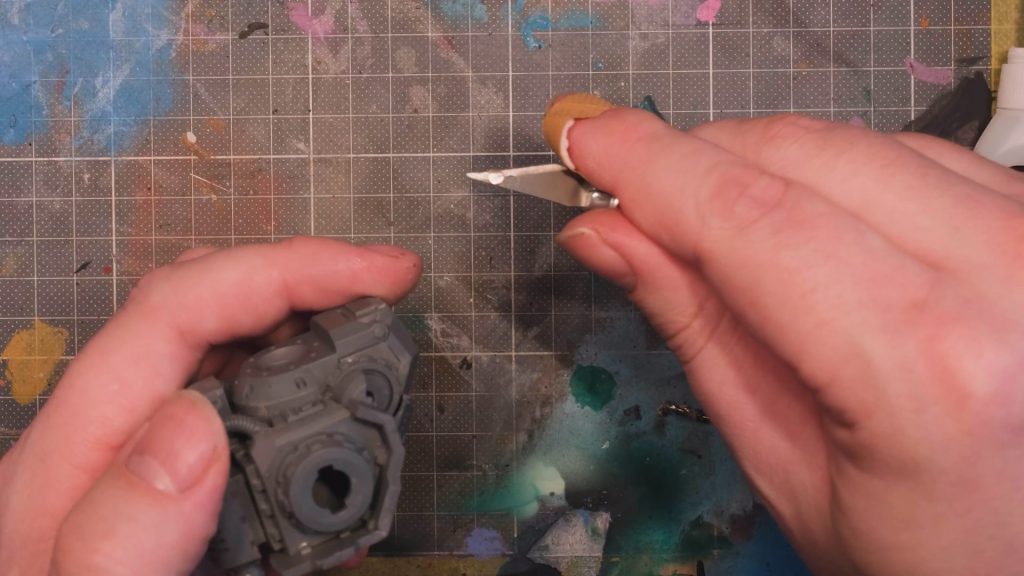

 Goonhammer App and Patron Updates: April, 2026
 Kill Team Tournament Report: Engage, Party, Repeat's March Madness 2026
 Goonhammer Reviews: Tribal Conquest