"OSL" is a much pithier way of saying "Object-Source Lighting," i.e, that the light on the object comes from an element
of the object. This is distinct from, and separate to, simple "dramatic lighting," although the two are often conflated in online hobby spaces in such a way that the initialism is used as a stand-in for any kind of fancy or dramatic lighting. Here, though, we need to be clearer in our terms, hence the particular discussion over what is and what isn't OSL.
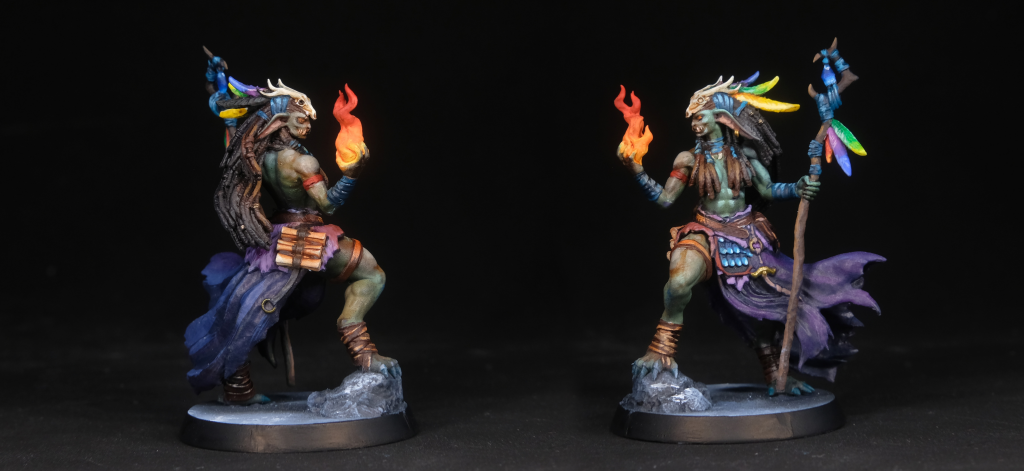
 The various magical flames on these models cast a soft-ish glow on nearby surfaces - the source of the light is on the object, thus it is Object Source Lighting.
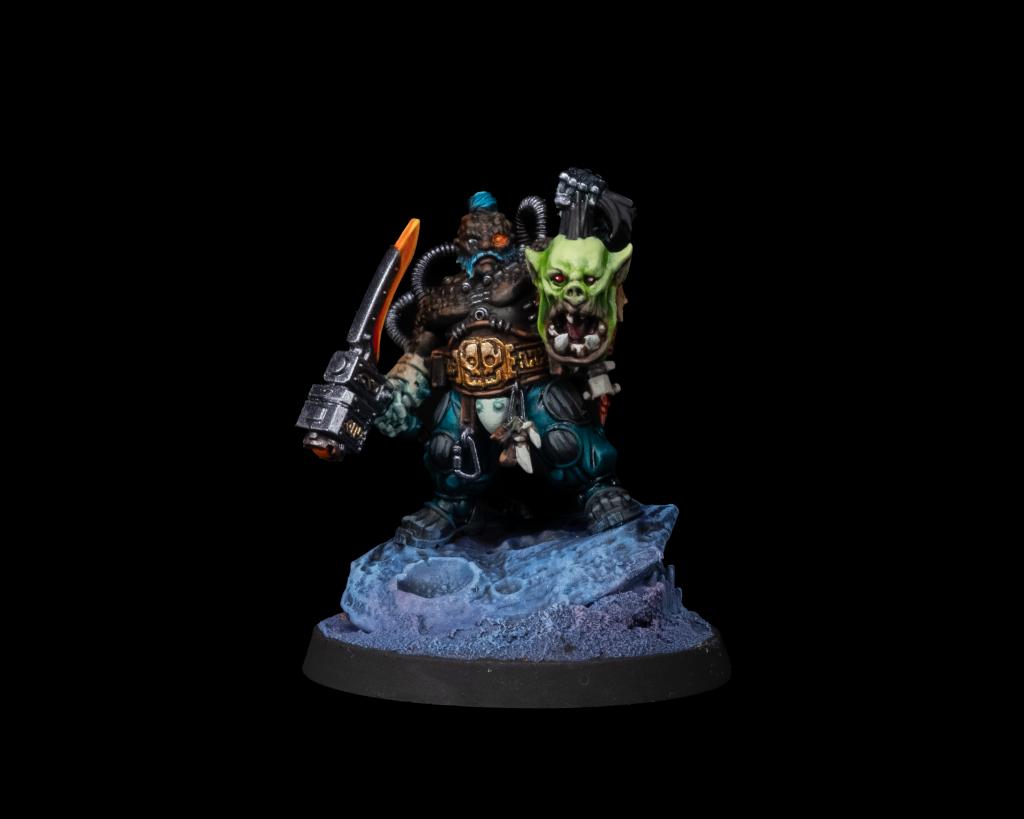
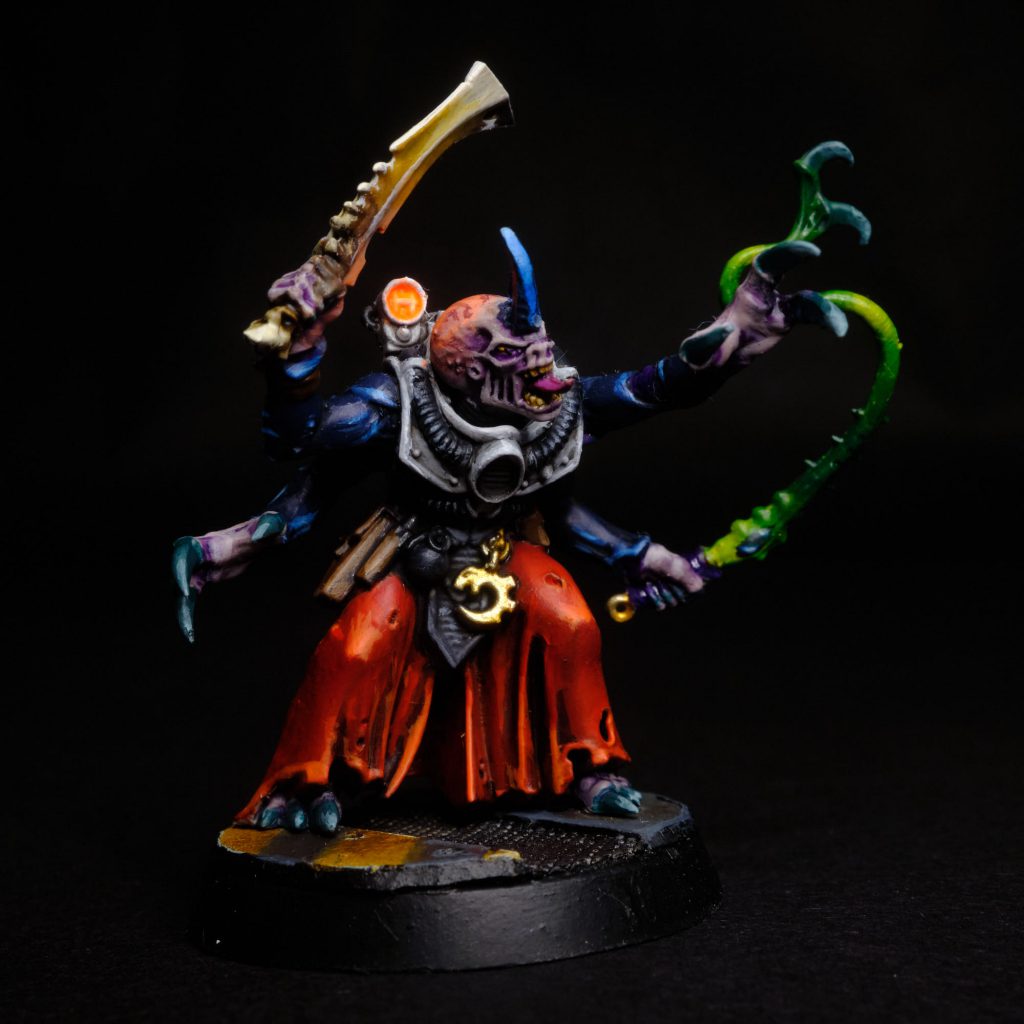 The shoulder-mounted lamp on this Genestealer Acolyte Hybrid casts an orange glow on the parts nearby.
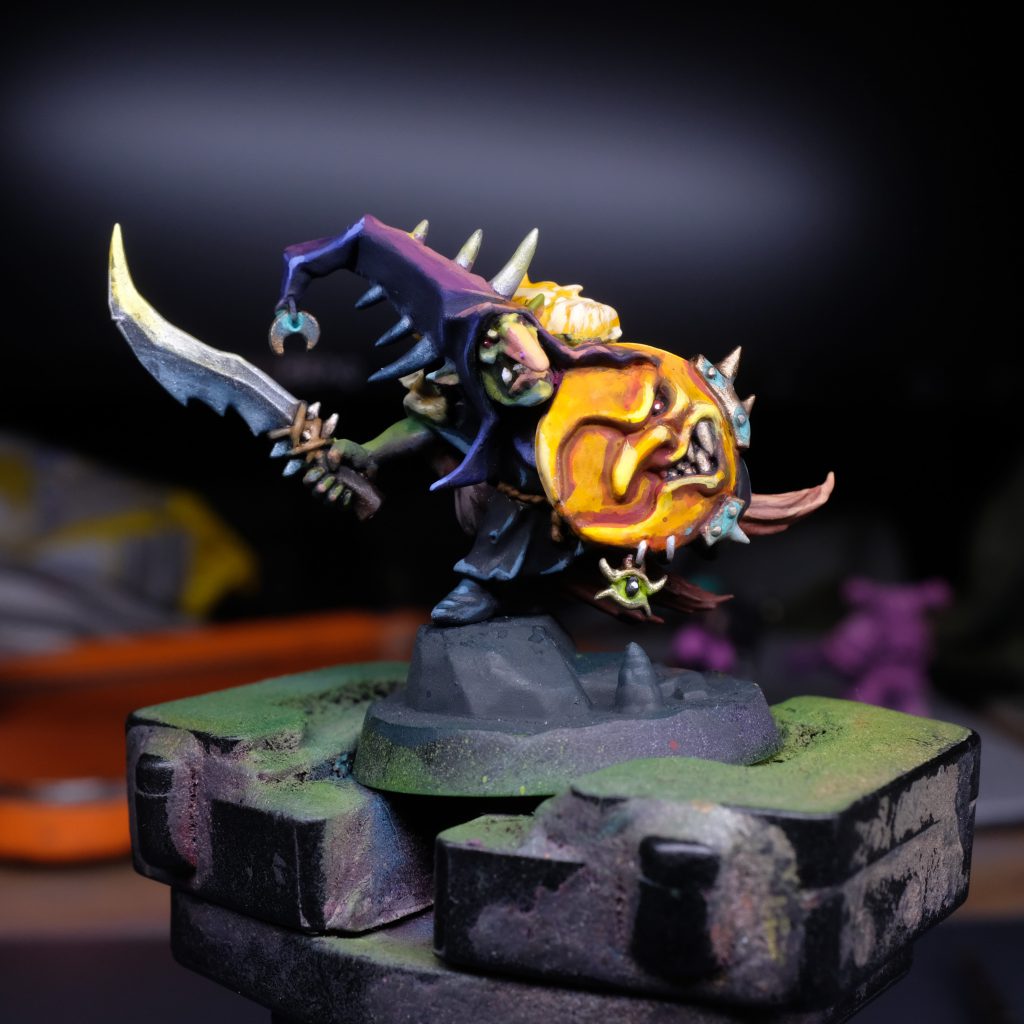 This Goblin is lit very dramatically, but the light source is an imagined warm environmental light, one that does not come from an element of the model itself. It is not OSL.
In order to paint convincing OSL we need to understand how light works as a physical phenomenon. If we fail to convey that information adequately, our brains will notice the impossibilities, and the illusion will be broken. The first thing you'll need to know about light is that it travels in straight lines in every direction from a light source, unless it's contained in some kind of housing. I find it helpful to imagine myself as a disembodied eye, floating next to the miniature, all jelly and goo, bobbing through the ether like something from a Kentaro Miura illustration. I imagine myself (as the floating eye) on the surface of my miniature and ask myself: "Can this part of the miniature "see" the light source, or is there anything in the way that blocks the view?" If the answer to that question is Yes, then that part of the model is a candidate for some object source lighting, if the answer is no then OSL will not be gracing that particular surface. Yes, light can diffuse and "bend" slightly around objects, but for the purposes of this tutorial we can consider that fact negligible enough that we don't need to worry about it.
Once we've determined whether a place is an apt candidate for Object Source Lighting we have to consider another physical property of light: The Inverse-Square Law. What does that mean, exactly? Do I need to wear a lab coat for this article?
Put simply, the Inverse-Square Law governs the
intensity of the light striking a particular surface. When our light-source gives out its photons, they scatter (in straight lines) in every direction from the source. The further away something is from the source, the fewer photons strike the surface, and therefore the light is less intense. Here's a scientific diagram to show what I mean:
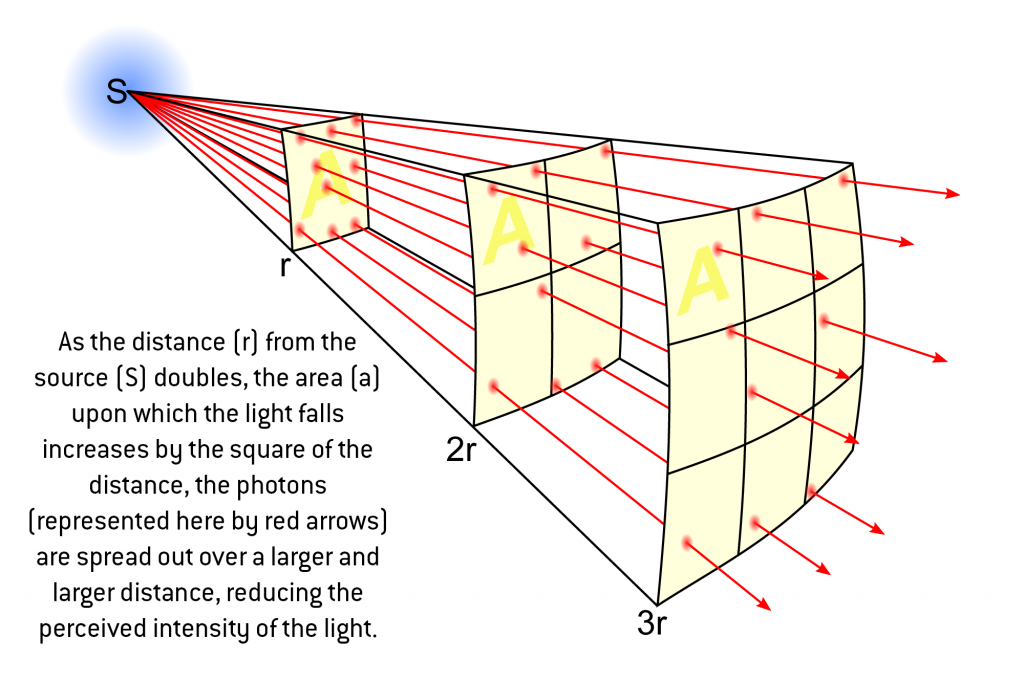
What a fine diagram! What that means in simpler terms is that the further away from the light the weaker it is, but not simply "it's 3x further away, so it should be 3x weaker" but actually "it's 3x further away so it should be
9x weaker". This consideration is super important when it comes to attempting to create legible object-source lighting on our miniature. Here's another extremely scientific diagram. I've identified 4 points or "zones" on this goblin shamaness for which there's an uninterrupted line of sight (floating eye, remember) to the light source. These are the face, the shoulder and arm, the thigh, and the foot (there are obviously others but let's keep it simple for the sake of demonstration).
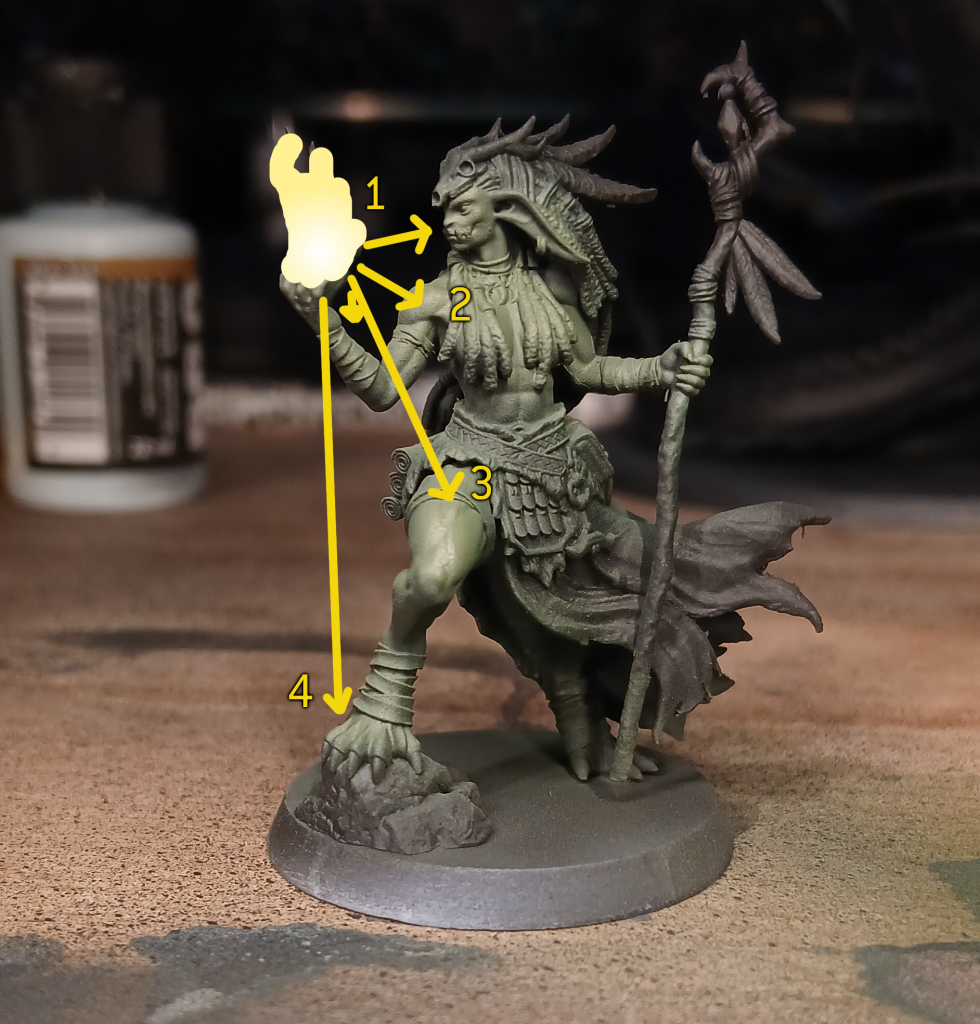
The face and the wrist/arm/shoulder are closest to the flame in the hand, so they need to be bright.
Not as bright as the flame itself, which should naturally be the brightest point, but bright and saturated. Next, we have the thigh, it's roughly twice as far away from the light as the face and shoulder, so following our inverse-square law we can work out that it should be approx. 1/4th as bright (and saturated) as points 1 and 2. Finally we have zone 4, the foot. The foot is roughly four times as far away from the light as the face/shoulder, and thus - thanks to the inverse-square, should be about 1/16th as bright as points 1 and 2.

Chucking some values on our diagram gives us this: Zones 1 and 2 are very bright, while the light falls off dramatically in Zone 3, giving only a very slight brightening of the colour; any change in Zone 4 is almost imperceptible.
The diagram there is clearly a very stark example, and ultimately I decided to paint the flame orange rather than bright yellow so the overall effect is considerably more subtle, but I think you can see the artistic thinking that went into it.
Speedpaints are really useful to create a low-effort OSL glow through glazing, I used Speedpaint Nuclear Sunrise to glaze the soft hue-shifted highlights on shoulder of the Goblin Shamaness. You can certainly go further and produce more complicated OSL with an airbrush (and I often do) but that is somewhat outside the scope of this particular article.
 Berekh Stornbrow - Credit: keewa
The goblin Shamaness isn't the only time that I used Nuclear Sunrise to do some OSL, on Berekh Stornbrow I glazed a little Nuclear Sunrise on the parts that would receive a slight glow from the axe blade, taking care not to overdo it - the axe blade isn't glowing brightly, it's a dark orange, so in order to read correctly the OSL glow needs to be very slight, only a minor hue-change on the required parts.
So that's how to do an easy OSL with Speedpaints and glazing! If you've any questions, you can find me on the discord as keewa or email me at
keewa@goonhammer.com
Have any questions or feedback? Drop us a note in the comments below or email us at contact@goonhammer.com. Want articles like this linked in your inbox every Monday morning? Sign up for our newsletter. And don’t forget that you can support us on Patreon for backer rewards like early video content, Administratum access, an ad-free experience on our website, and subscriber-only content covering competitive Warhammer 40K!
Thank you for being a friend.


 Goonhammer App and Patron Updates: April, 2026
 Kill Team Tournament Report: Engage, Party, Repeat's March Madness 2026
 Goonhammer Reviews: Tribal Conquest