You've mastered the basics of basing,
especially now you've read Hobby 101: How to Base Models, and you can confidently add tufts, basing material, small rocks and tie it all together with a drybrush. Fantastic!
Pushing your basing to the next level can elevate the look of your models above and beyond a similar level of improvement to your painting. High impact, highly effective, basing does a huge amount of work in showcasing your characters and larger models, as well as pulling together an entire force.
There's a million ways to base, and
we've covered a lot of great examples , so for Hobby 102: Advanced Basing, we'll have a look at what makes a great base, how you can pull off interesting and exciting basing and what you'll need to do it.
Straightforward Techniques
A good base adds context and framing to a model, without becoming the main event. A base is different from a diorama, where you're deliberately making a wider scene - here you want just enough to draw the eye, emphasise the model and situate it within a context.
An okay base makes a model look like it's standing on something other than a piece of plastic. A good base tells a story about the model. There are a lot of very quick ways you can upgrade an okay base into a good one - let's have a look.
Drybrushing
 New Antioch Yeomen. Credit: SRM
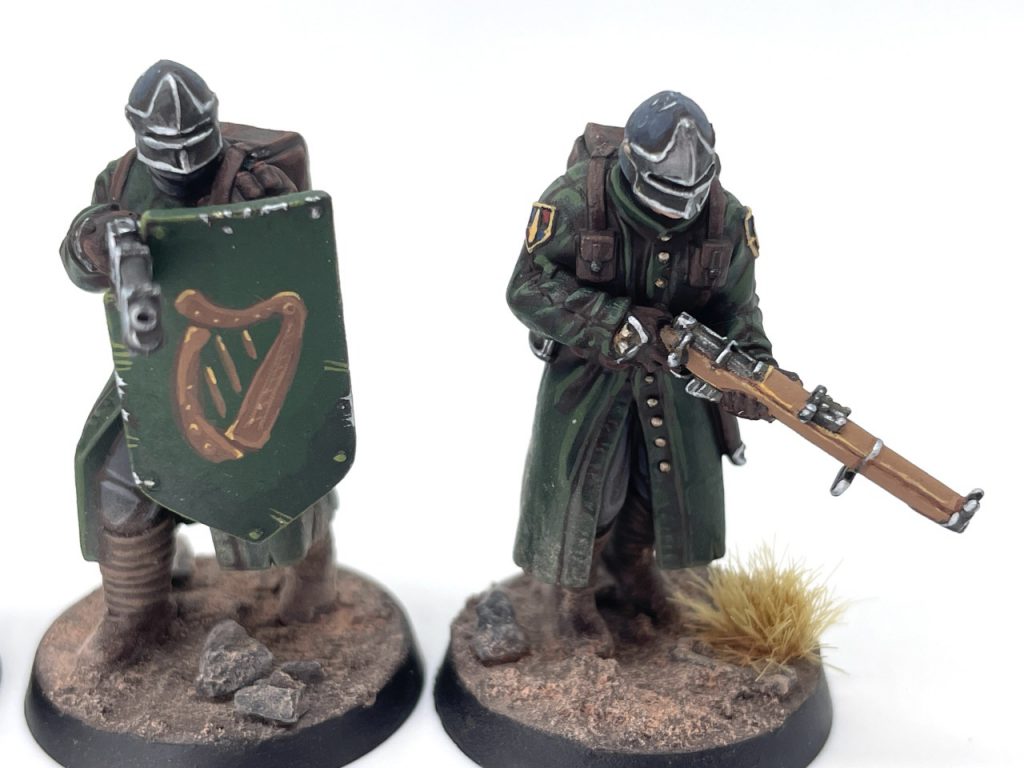
There's not much in SRM's lovely New Antioch Yeomen that you won't see in Hobby 101: Basing. Texture paste, some small stones and tufts, drybrushed. What makes this a simple but highly effective more advanced basing technique is the dust and weathering. Weathering is an entire other article, but for basing purposes it's very simple: add some of the basing colour to the feet, legs and lower 5th of the model.
This simply and easily elevates your basing. I like a squared, angled drybrush for this to give some directionality - the Army Painter drybrush is a good example. You want a very light application of paint, almost to the extent that nothing is coming off your brush with a single pass. Drybrush the lightest colour you've used on the base across the feet and lower legs of the model. Done!
Loading...
You can see how quick this is on this Bad Squiddo Resistance model - a two second application of the top tone (Warpaints Fanatic Worn Stone) onto shoes and legs connects the model to the base. You're not just perched on top of some soil, but standing on it. Across a whole force this incredibly simple technique makes a huge difference.
Elevation
This is also known as the Hero Rock strategy, and you're probably already familiar with it, because it seems like half the models anyone makes these days are perched on one! Raising up your model on a hero rock is really simple, very effective and adds commanding height and dynamism. However! It can easily go wrong.
 Saturnine Terminators. Credit - Lenoon
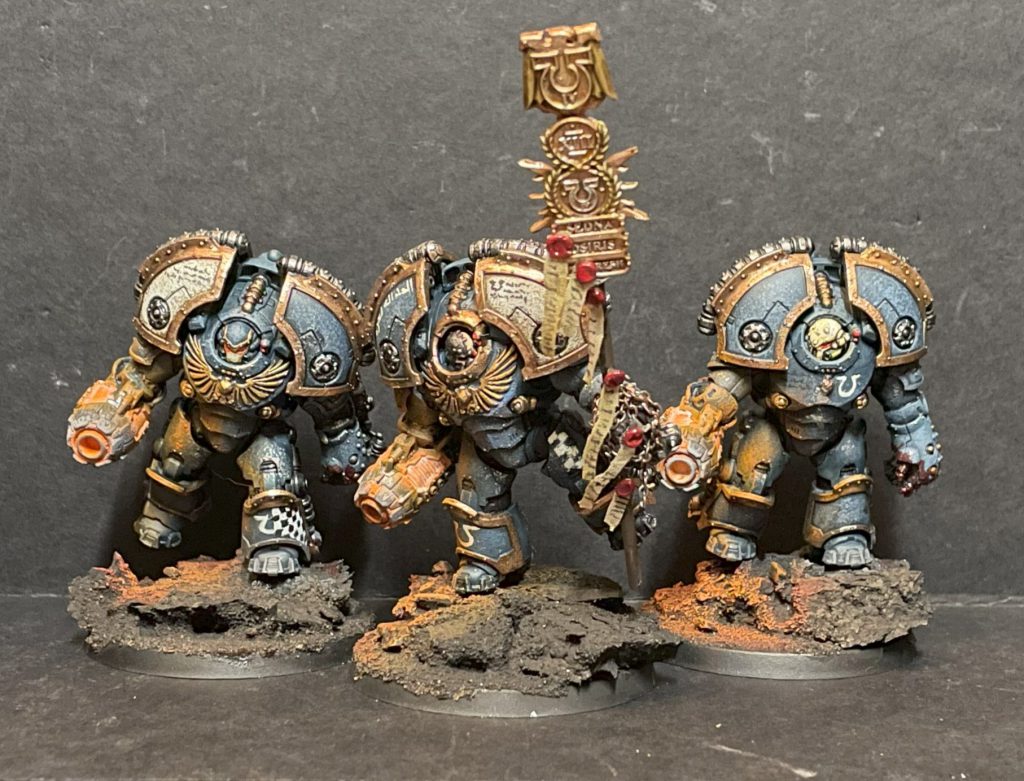
There's a good example of how not to do it in my Saturnine Terminators. I took a very traditional approach - chuck a load of cork on the base, glue the model to it. They look like they're falling off the rocks, not a very satisfactory look for these waddling superhumans.
To do it right, think about your model's feet and centre of mass. If both feet are flat, the rock should go underneath both, with the centre of mass aligned over the rough centre of the base and your hero rock. Crab-Stuffed Mushrooms absolutely nailed it with this Allarus Shield Captain:
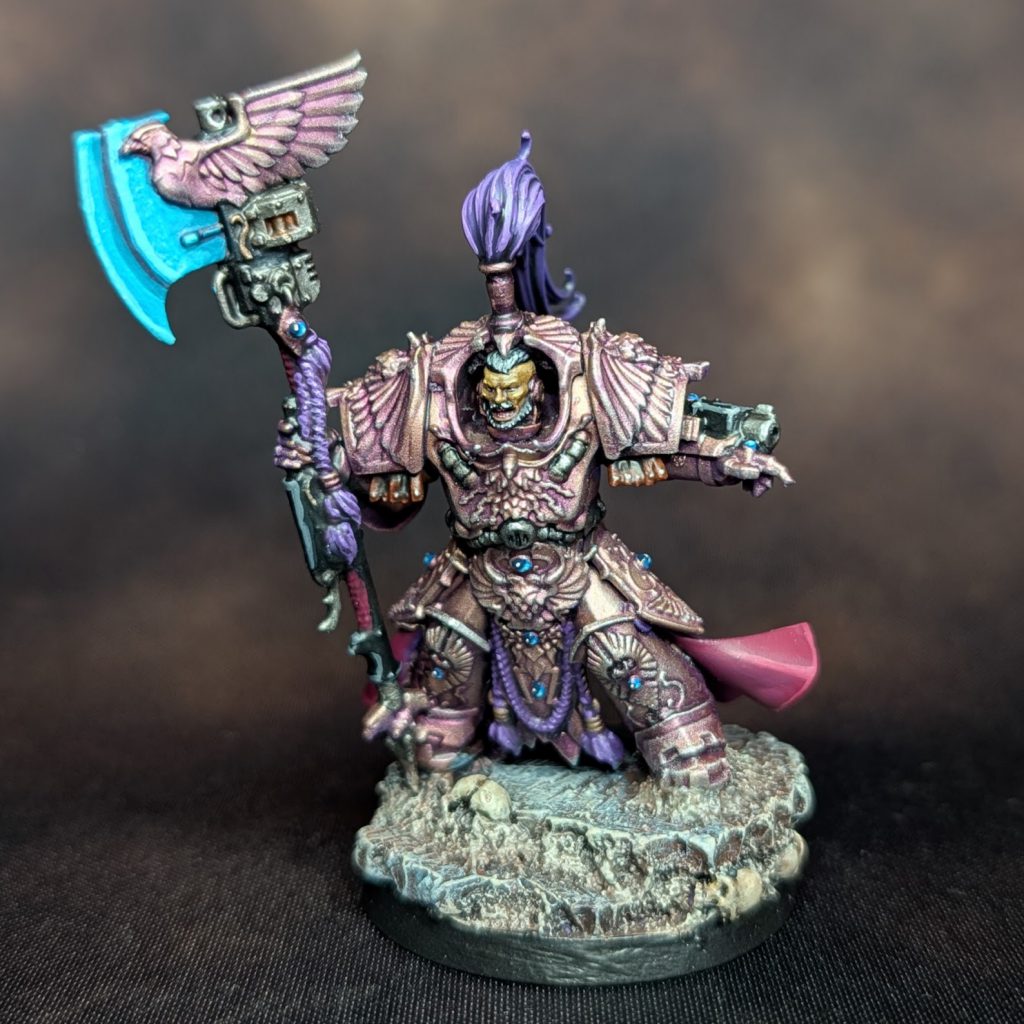 Allarus Shield-Captain with converted axe (Admonimortis) painted by Crab-stuffed Mushrooms
To make a hero rock, use rock, wood, plastic or mdf - whatever looks right! - to create the height you want. A flat surface works best - slate, balsa and cork sheets are the most commonly used materials. I like to use balsa to build up height, then bark to provide a rock-like texture.
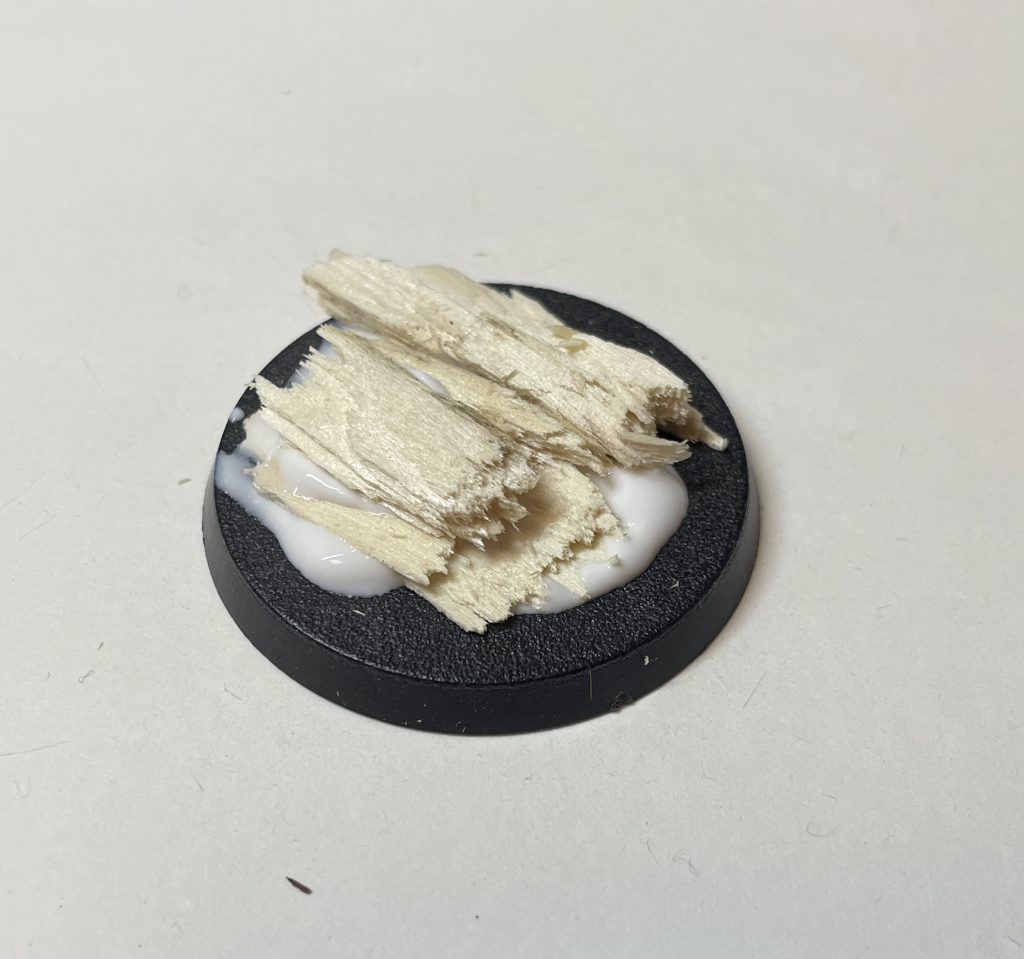 Balsa for height. Advanced basing techniques. Credit: Lenoon
Glue the rock, bark, whatever you're using, onto the base as normal, and top it off with something that gives you an appropriately level surface to stick the model to.
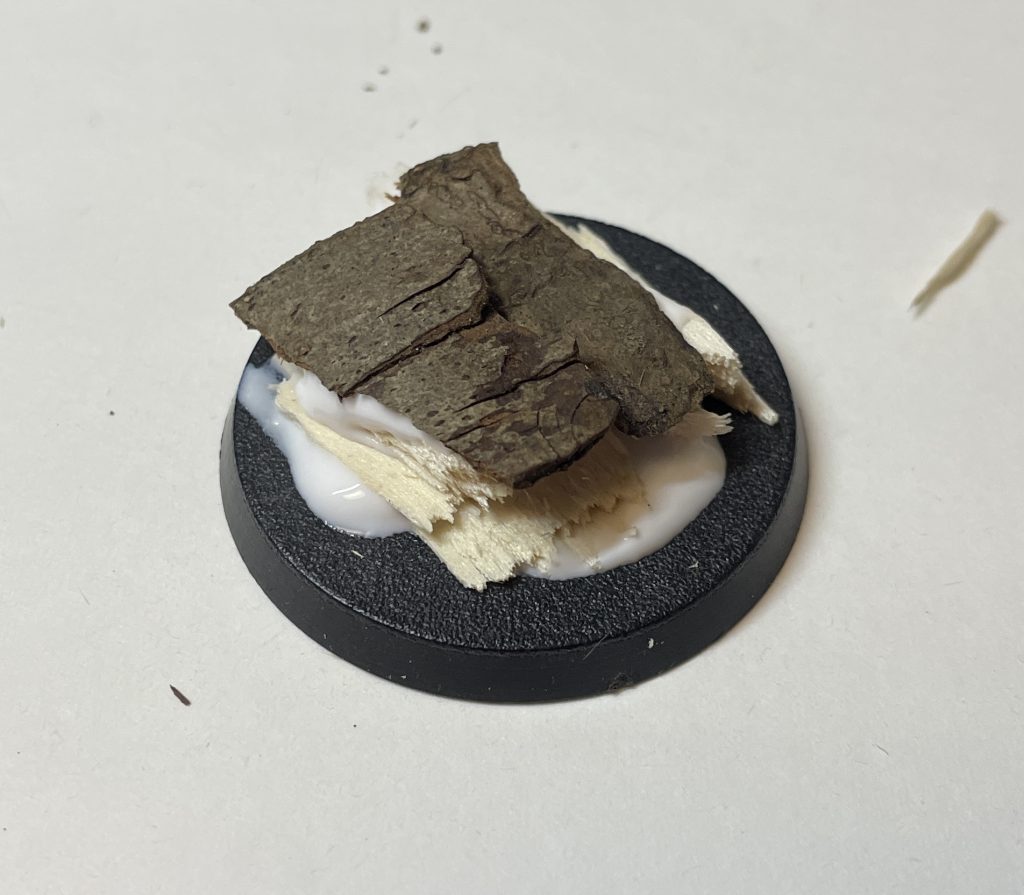 Bark gives a level surface. Advanced basing techniques. Credit: Lenoon
Whatever you're using, and contrary to GW's model making wisdom, a single rock outcrop on it's own that your model just happens to be standing on tends to look naff. Use some smaller rocks, or chunky basing material (irregular cork fragments, like Army Painter's Battlefield Rocks) around the hero rock to provide a graded transition from hero rock into the base.
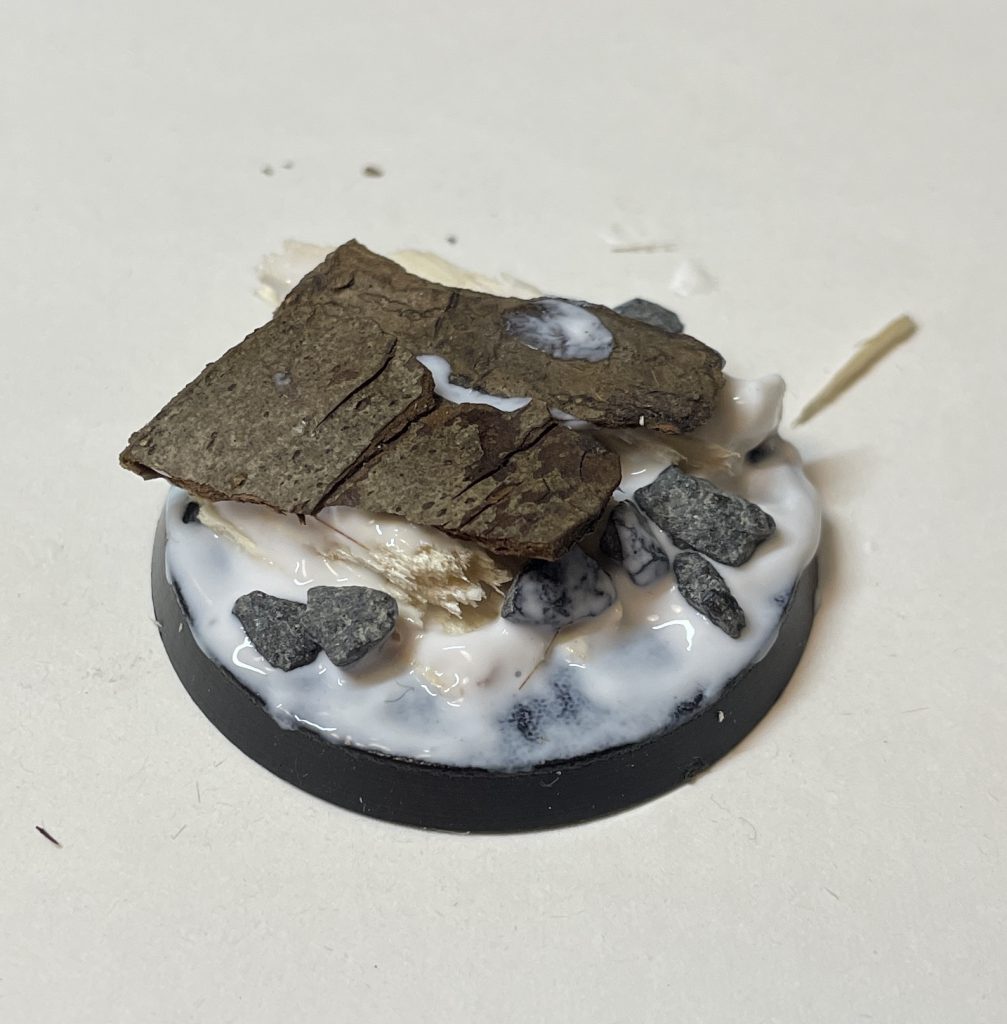 Rocks blend the hero rock into the base. Advanced basing techniques. Credit: Lenoon
You can then sand, paint, flock, static grass, or anything else you like to do. In the grand tradition of Blue Peter, here's one I made earlier:
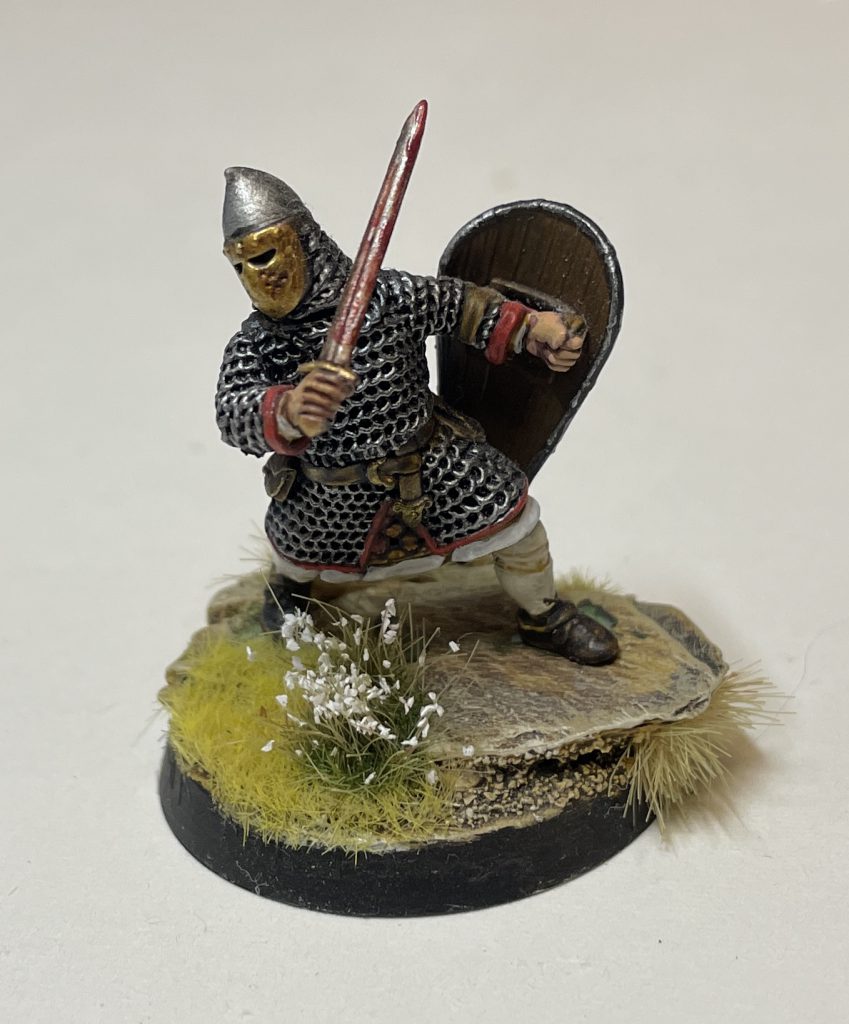 Advanced basing techniques. Credit: Lenoon
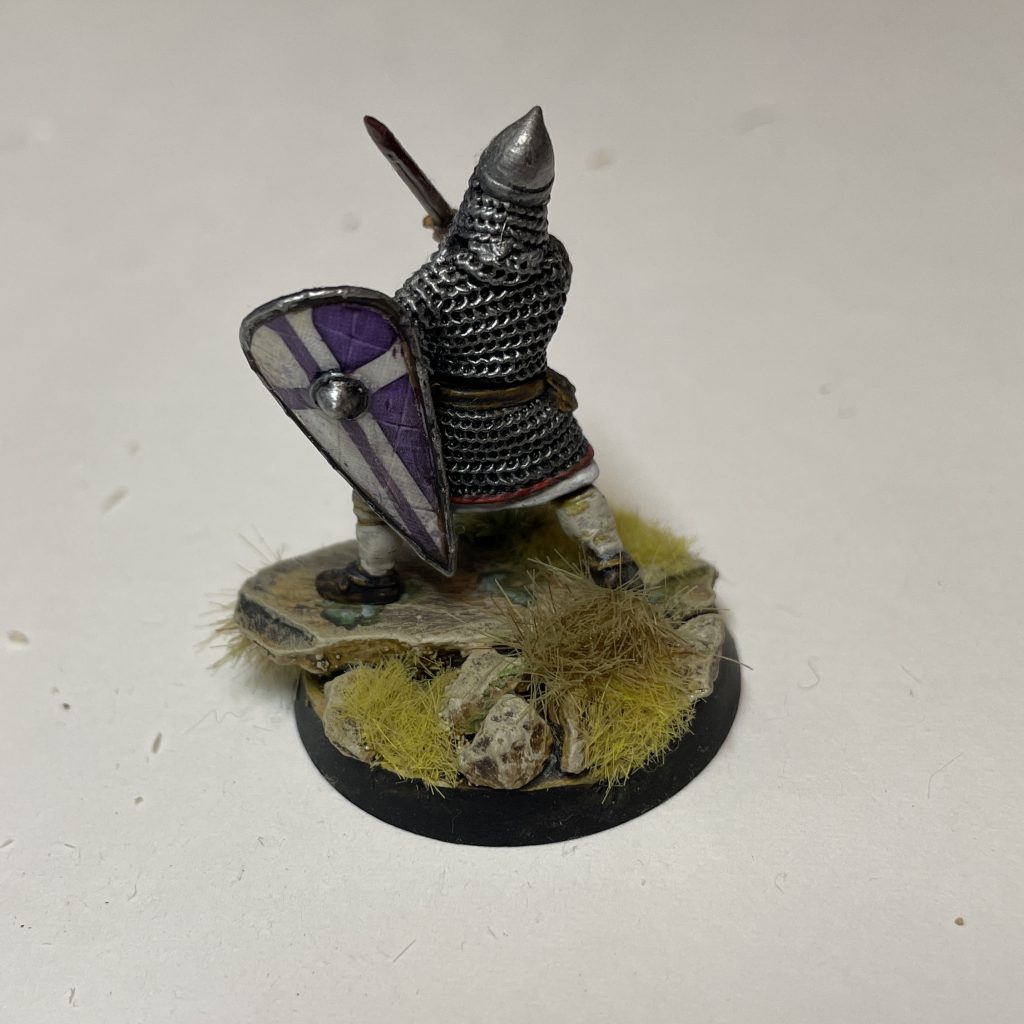 Advanced basing techniques. Credit: Lenoon
Advanced Tufts
We love basing tufts over here at Goonhammer, and
you genuinely can't go wrong picking up a pack or two. We covered their use in Basing 101, but you can elevate your use of tufts very simply - mix them up! Pick up a variety of colours (you get a variety of sizes in the pack) and mix them liberally on bases. Army Painter
Flowers and
Shrubs tufts add more verticality and texture to bases, as well as pops of different colours, as on these French Dragoons below:
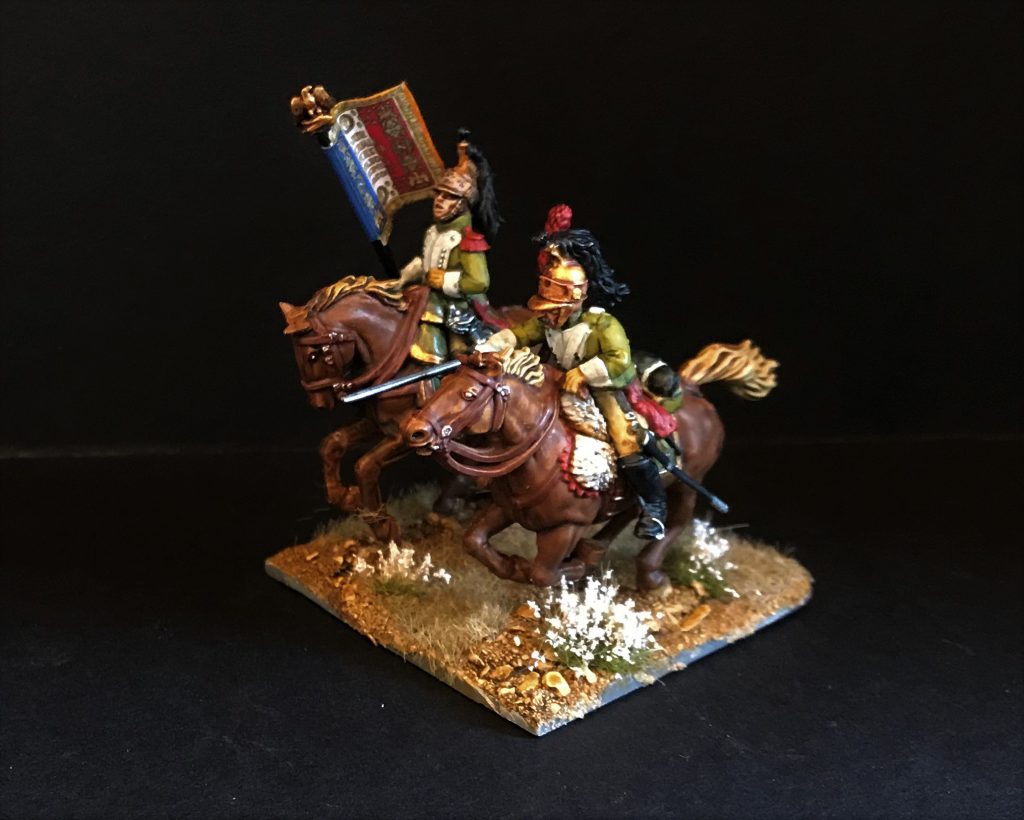 Flowers mixed with basic tufts adds a lot of variety
Break these up naturally, with flower tufts interspersed with grassy tufts, and you'll produce very quick, nicely varied bases.
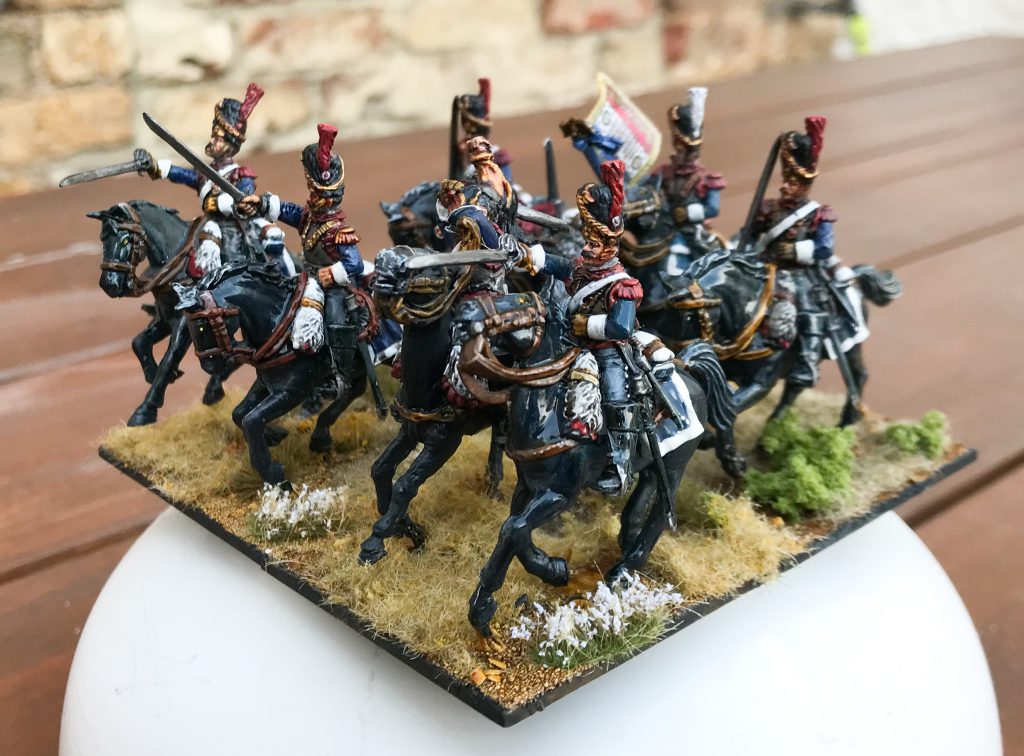
You can take this further by adding additional organic-looking basing materials in the same way. Just as you'd add a blob of PVA and then a tuft, clump foilage (usually used for making model trees) can be pinched off and glued on to provide yet another different bush texture. This also handily takes up a lot of space, making it perfect for large bases like Dreadnoughts, characters and, of course, units of French Cavalry:
Static Grass
Static grass is a common basing material, essentially tiny lengths of dyed nylon that stands on end when exposed to static electricity, usually through applying it via a specific applicator.
You can make one yourself if you're interested, but I tend to find applying via fingers is just as good! Static grass can be used to blanket a base in long grass, or to create your own tuft-like clumps. To do either, simply load up a base (or a patch of a base) with PVA -
a dropper bottle is very handy for this - pinch a clump of static grass between your fingers and mash it onto the glue. Wait until the glue is dry then shake off the remaining loose static grass. Nice and simple!
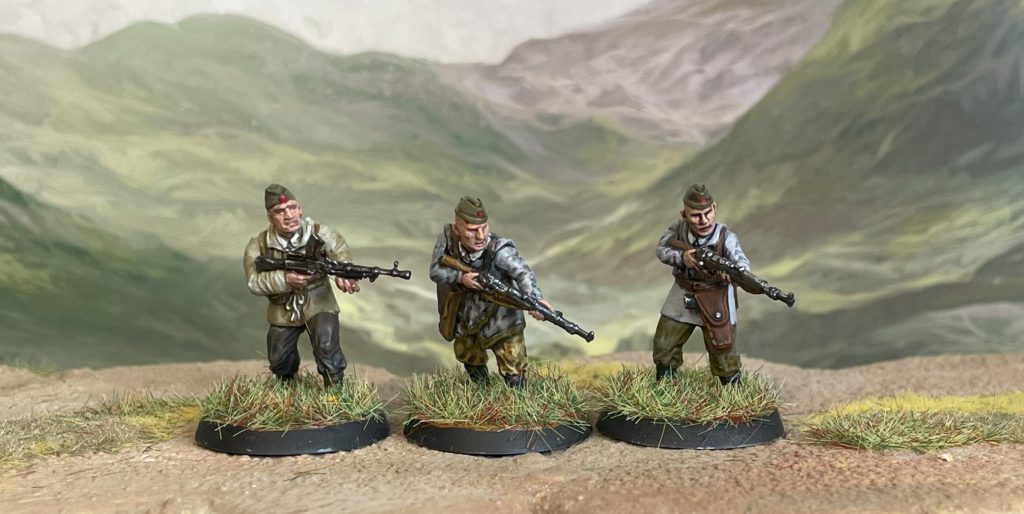 Static grass! Wargames Atlantic Partisans. Credit: Lenoon
If you want a slightly trampled look, leave it there, but if you want to pick up the grass a little, use a damp brush (that you don't care about - it will get static grass glued to it) and very gently flick the static grass up after around 15 minutes of drying time.
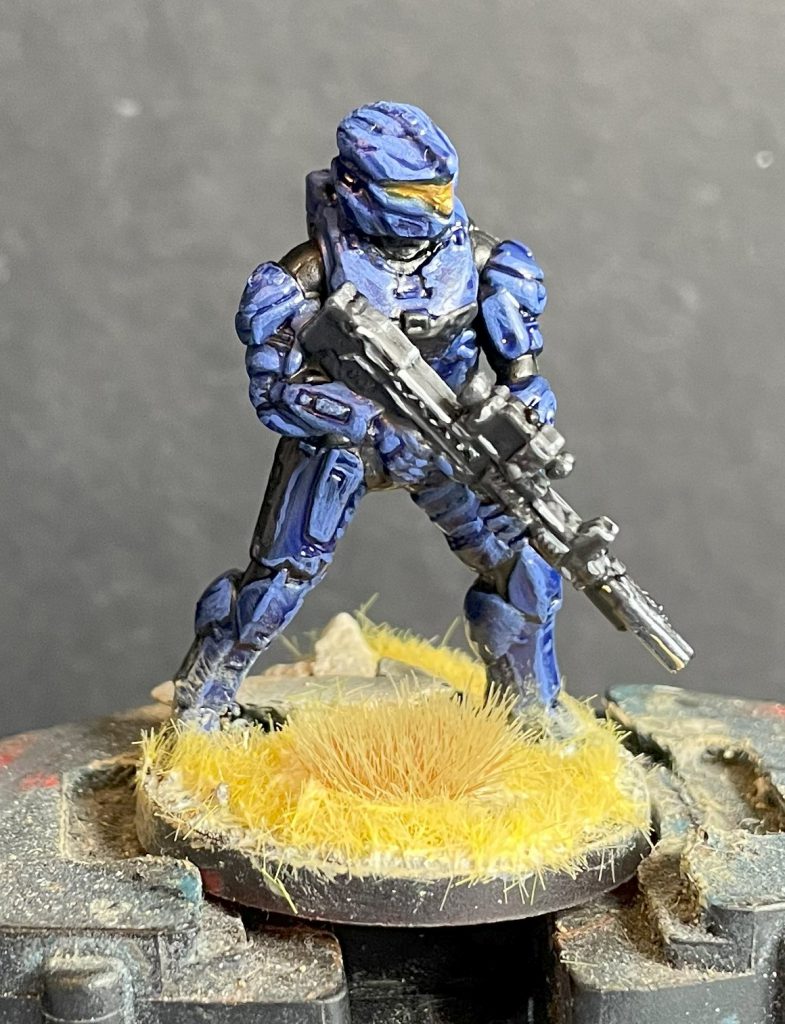 Static grass, got to love it! Lenoon's Spartans
Other basing materials act in a similar way - leaf scatter, ash, coloured sand, hay, rubble, etc etc. Add glue, pinch and stick, poke with a brush!
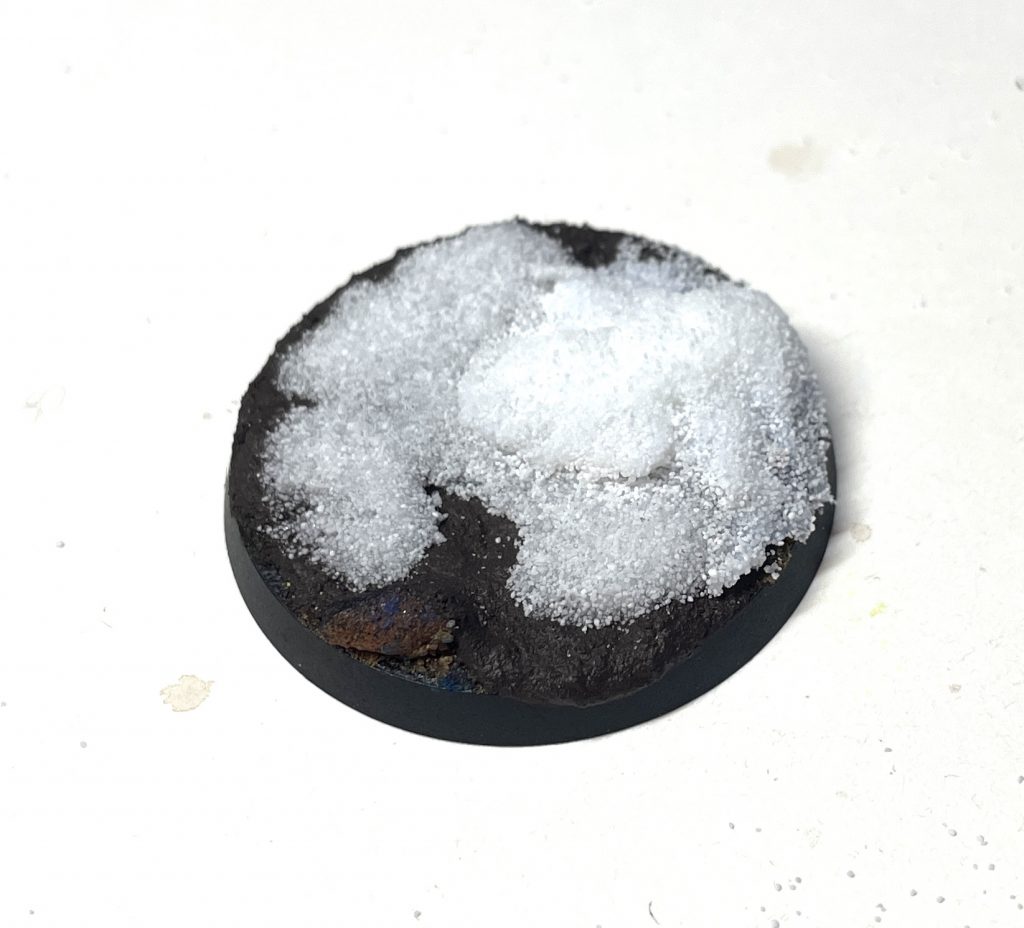
Snow (and the Effects of Glue!)
Snow effects tend to operate much like static grass, with the additional wrinkle that the glue you use makes a huge difference to the overall look. You can achieve a variety of snow effects with Army Painter Battlefield Basing Snow just by changing the type of glue you're using. Let's start with a very plain texture:
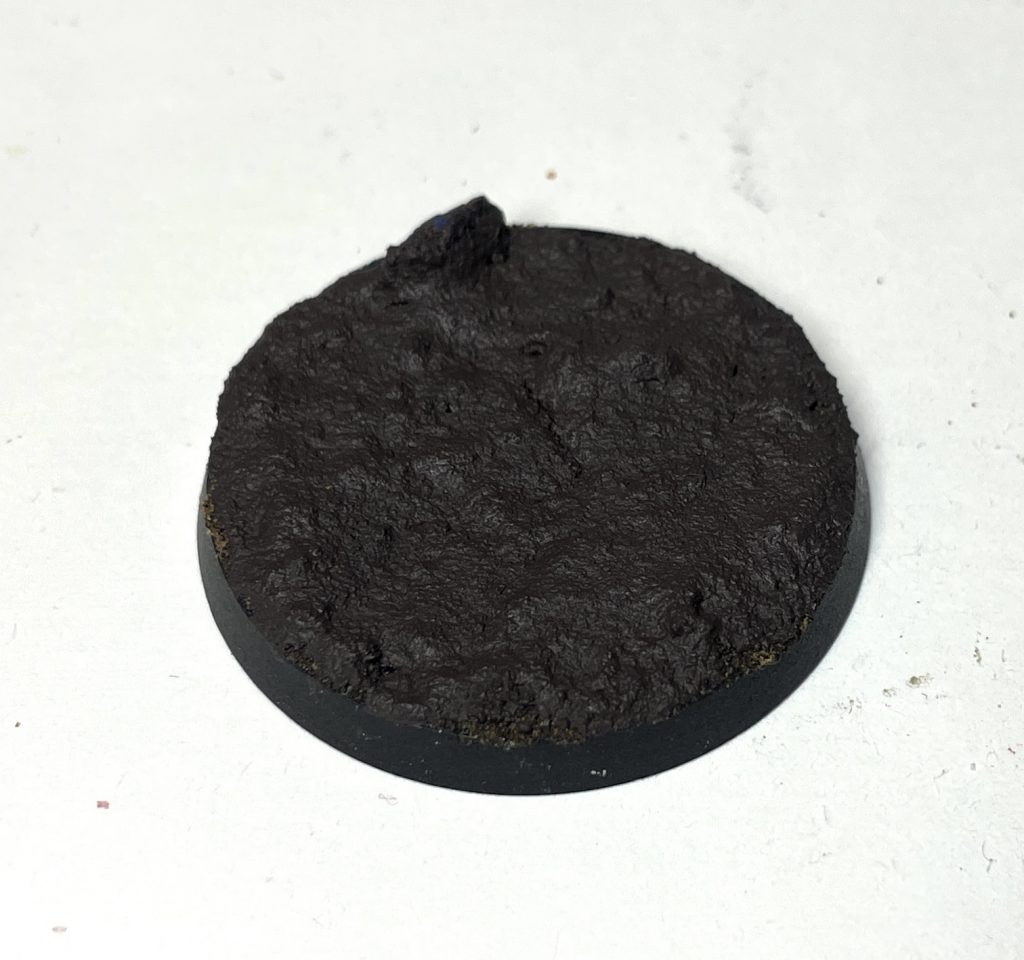 Snow basing Step 1: texture paste or sand
Superglue gives a frosted, semi-transparent look to snow which transforms it into dirty, broken ice. By no means clear, but also far from white, fluffy powder. Simply drop superglue onto the base where you'd like to have an icy crust of snow, then scatter the snow effects on. Multiple layers of this will build up height. Drop more superglue on to finish off without adding more snow and you'll have a nice, obvious, crust on top of your snow effects that sells a thawed-and-refrozen look. If you add superglue then quickly cover the base with a piece of scrap card, the superglue fumes may settle over the rest of the base, giving you a very budget frost look too.
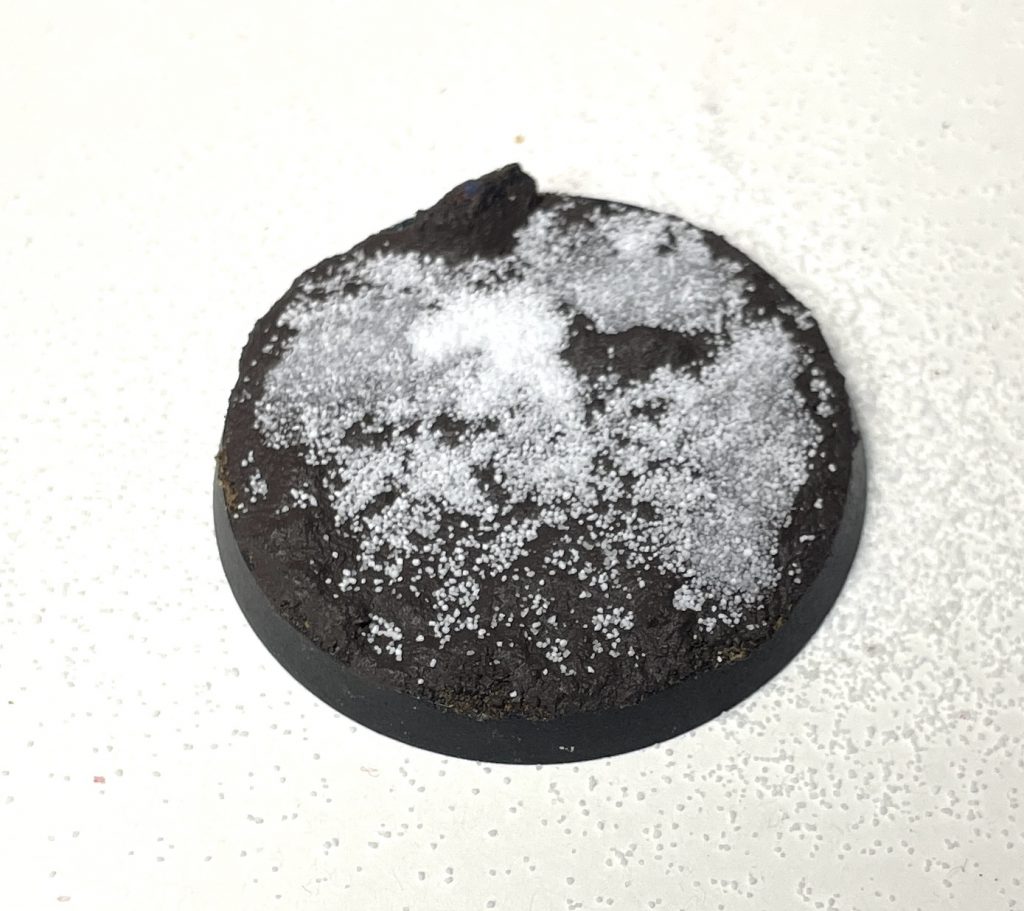 Snow basing Step 2 - first layer (with some snow still to remove)
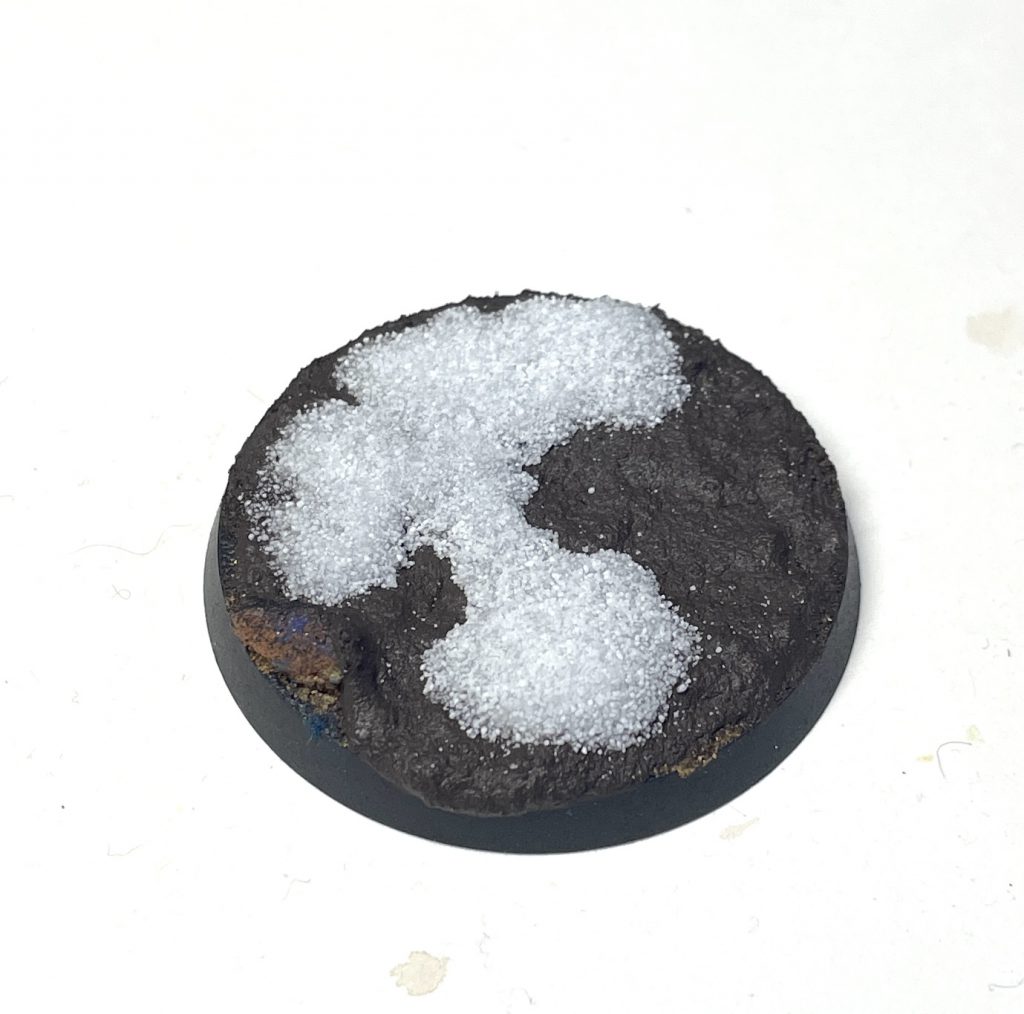 Snow basing Step 3: second layer of superglue
PVA acts as you'd expect - use multiple layers to build up a fluffier, whiter, snow look. This is, to be honest, a deeply tedious process (though very effective), so cut out the middle man and use a glue stick instead. Leave the cap off for half an hour, then scoop out a slab of half-dried glue, mash it onto the base and scatter the snow effects on top.
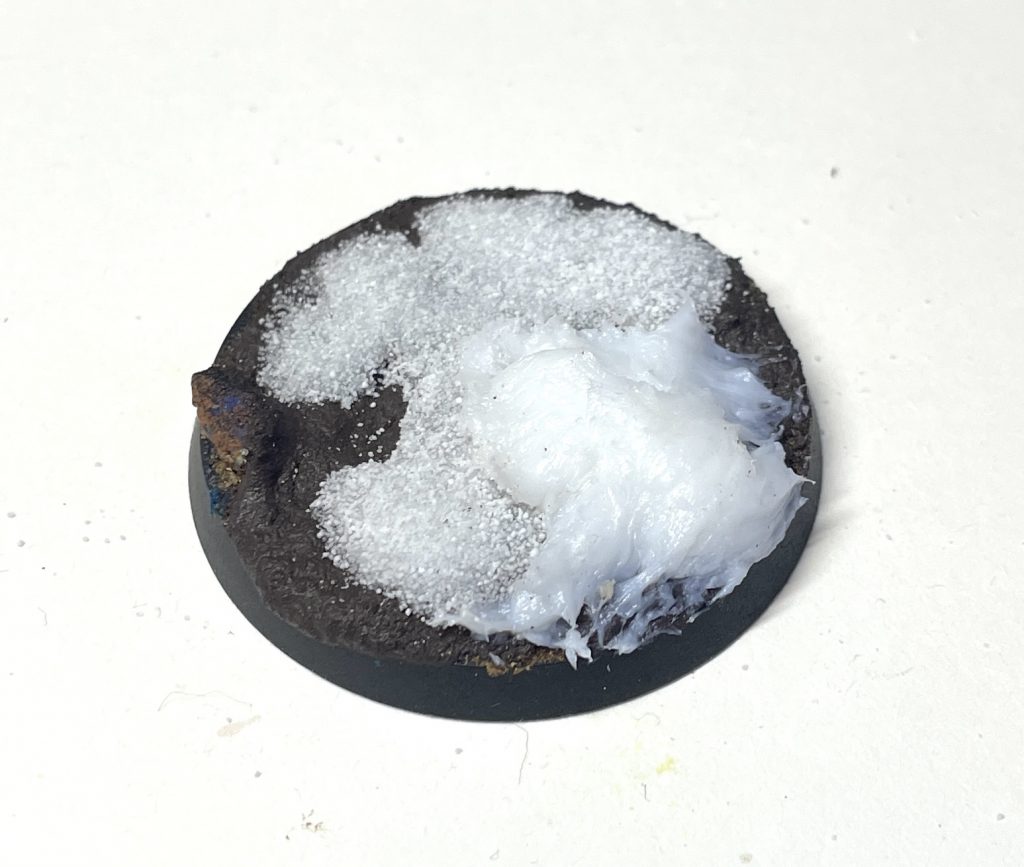 Snow basing Step 4: Glue stick time. Really mash it on there.
Use a finger to press that scatter into the glue, then add another one - and hey presto! Single coat, high relief, fluffy snow drifting on your bases.
 Snow basing Step 5: add snow to the glue stick mess!
The patterns of different glues doing different things holds across all basing material. Superglue provides very flat, hard, encrusted layers, PVA gives you a little bit of body, and glue sticks (or, I'm told Uhu glue) can be shaped into mounds. Trying different glues with flock and static grass will have different effects - go experiment!
Even More Involved Basing
If you've mastered tufts, static grass and hero rocks, you're well on the way to making incredible and memorable bases. The next level is to think about the composition of your bases and to try out some messy, multi-stage techniques with mud and water, before combining it all for large diorama bases.
Framing
Think about the base as a frame for your model. A good frame supports and highlights the contents, rather than overshadowing, obscuring or pulling focus. This is particularly important when incorporating basing elements that stand up off the base - large rocks, trees, bushes, lampposts, servo skulls. Whatever enters our sightline first becomes the focus, so large or obscuring basing draws focus - this might be what you want, but probably isnt! When looking at a model straight-on, imagine a rough rectangle around it., with a line bisecting the centre of the model. High basing elements should stay on the edges of that rectangle and come no higher than the centre point.
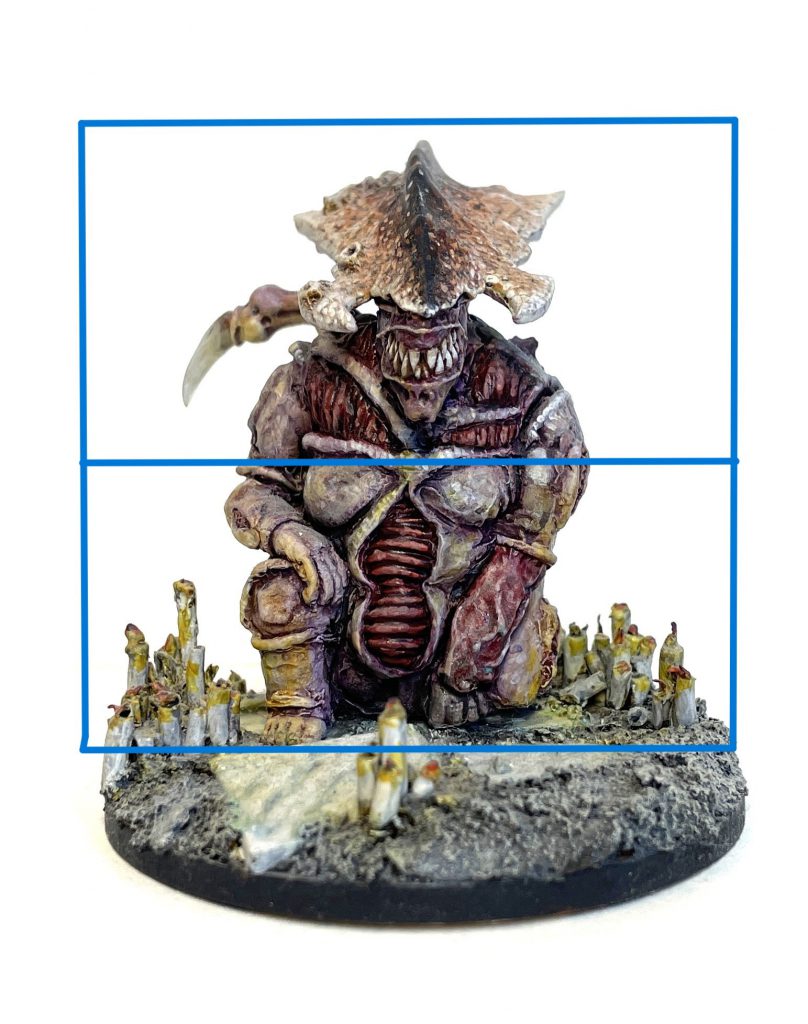 Imagine, if you will, a rectangle around a monster. Advanced basing techniques. Credit: Lenoon
Jack Hunter's Farsight is a good example. The modelled base, with it's on-theme cherryish blossom doesn't reach up and behind the centre of the model. The branches sweep along the bottom and up the right side, adding a frame without drawing focus away from Jack's extremely well done red armour.
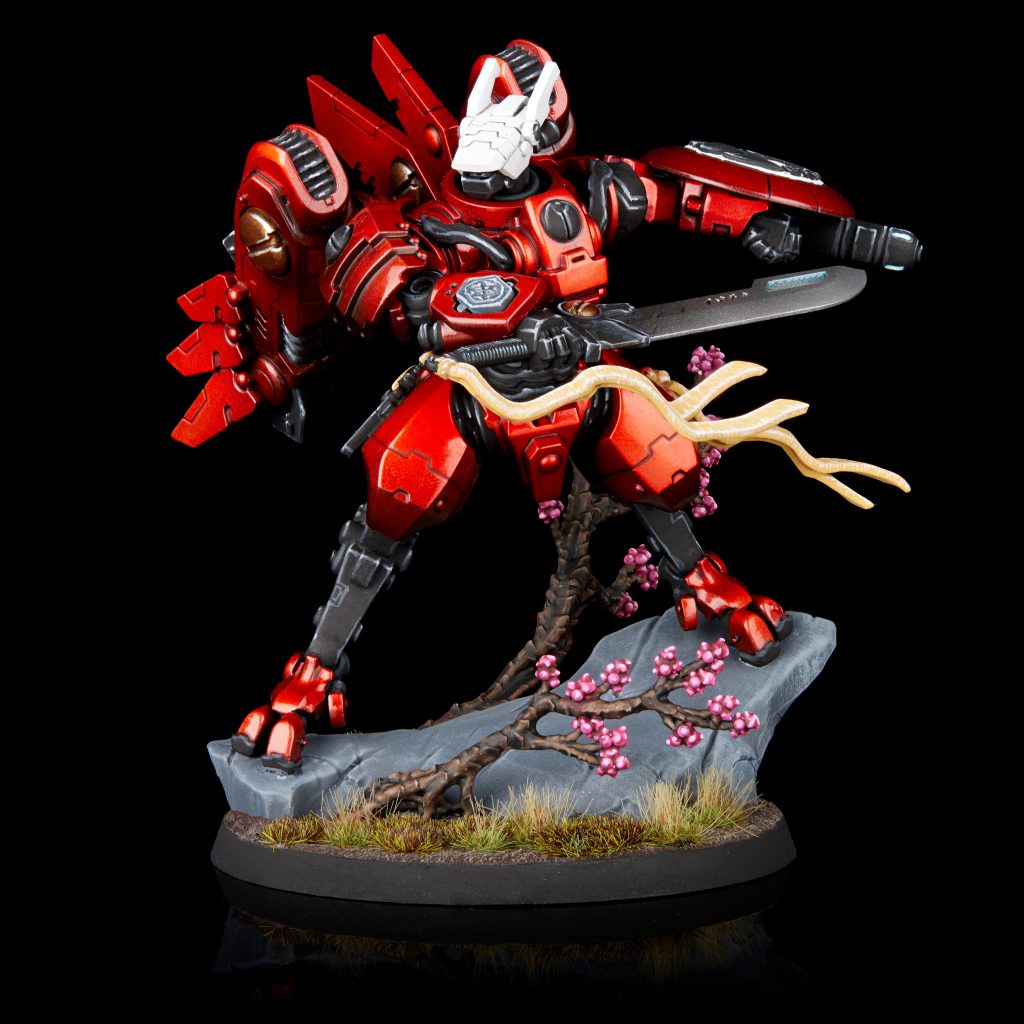 Commander Farsight. Credit: Jack Hunter
I have got this wrong many, many, times, but let's have a look at the rare place I got it right! This Genestealer Patriarch is on a very simple scenic base, with small candles around it. The focus is on the giant, leering, bloody monster, with the candles providing a touch of story - perhaps the Patriarch as a mobile shrine to the God-Devourers of the Cult. Candles are on either side of the model and stick to the bottom 1/5th of the model height overall.
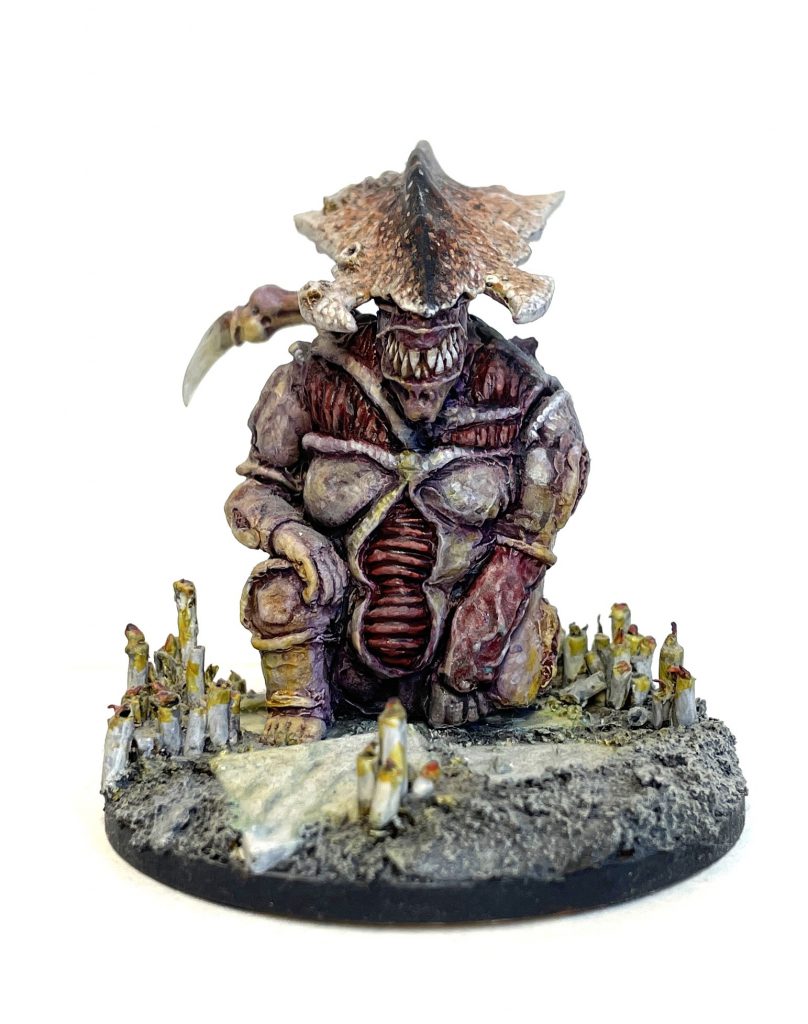 Advanced basing techniques. Credit: Lenoon
You can, of course, break this rule to great effect, but knowing that you're doing it deliberately requires knowing why it works - and now you do!
Water and Water Effects
Adding water effects to a base can vary from the simplest bit of gloss varnish through beautifully gross mud all the way to complicated resin pours. I hate working with two-part epoxy resin for water effects - it's sticky, it runs everywhere and it can do all sorts of things to paint and basing with the heat of the reaction. Instead, I use gloss varnish - and lots of it. I'm on my third or fourth bottle of
Warpaints Air Gloss Varnish, which comes in a nice fat bottle at a good consistency for a good price. There's a couple of ways I use it for basing.
The first is very simple. Drop varnish over textures you'd like to look muddy. The more the merrier here, I drop it on until a base is swimming and then wait for it to dry. It'll add a fantastic glossy finish to basing materials that makes them look waterlogged. Over sand painted with any number of browns it will transform a dry basing material into mud. I've added a light coat to the bases of these Medieval Sergeants to create a nice, very budget, muddy look:
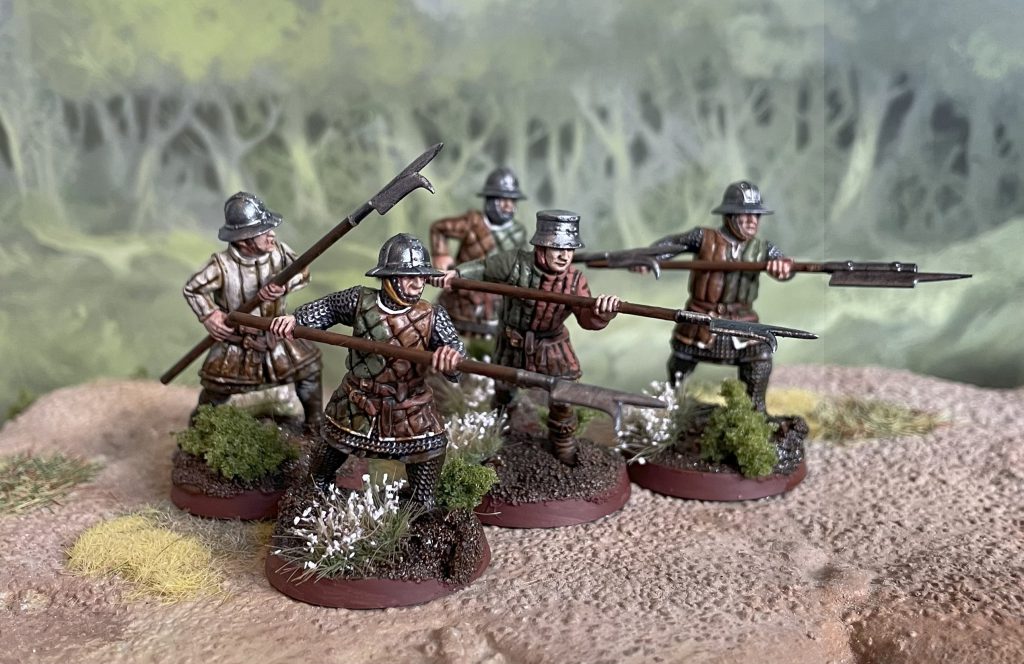 Victrix Foot Sergeants. Credit: Lenoon
If you're going for a heavy coat of gloss, let the first coat at least partially dry (2-3 hours) before you add the next one, or it will cloud. The more coats, the shinier and wetter the mud! The Cossack light walker below had 3 coats applied to the mud - nice and wet!
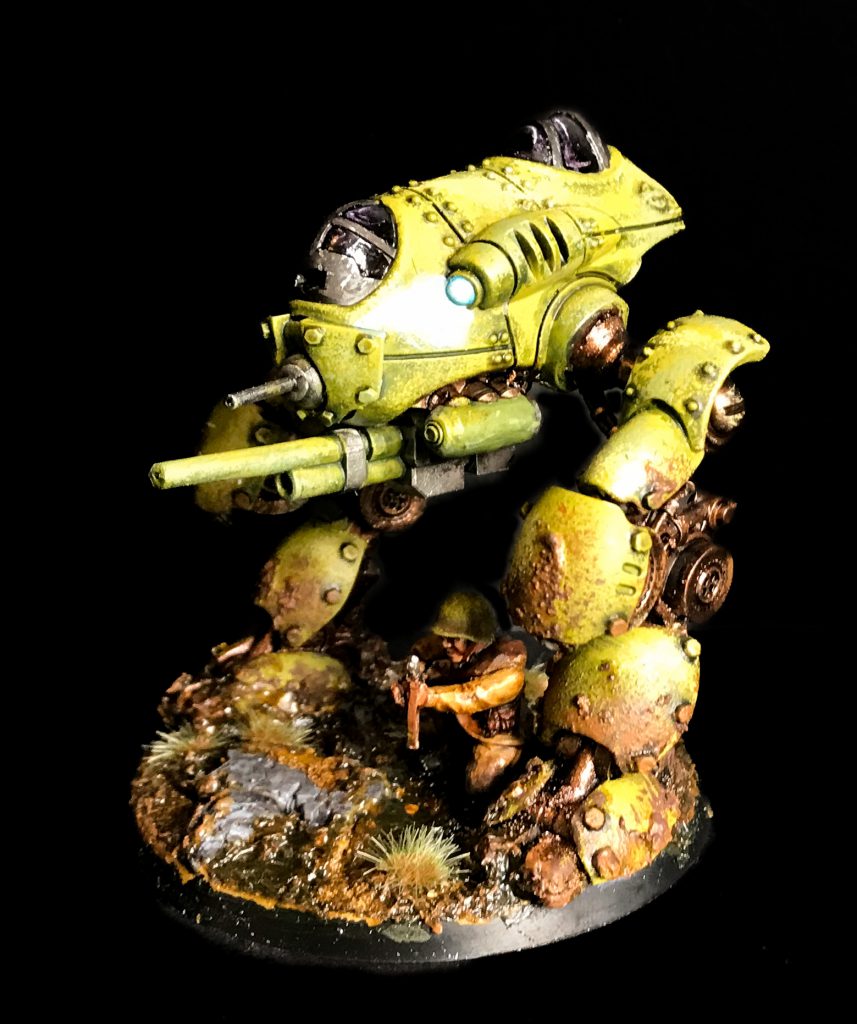 Cossack Light Walker, Credit: Lenoon
Craters and Ponds
The next step up for gloss varnish water effects is in making craters and ponds on your bases. This is perhaps better suited for large bases like vehicles, Knights, titans, and so on, but could be applied anywhere - perhaps your models are even standing in water?
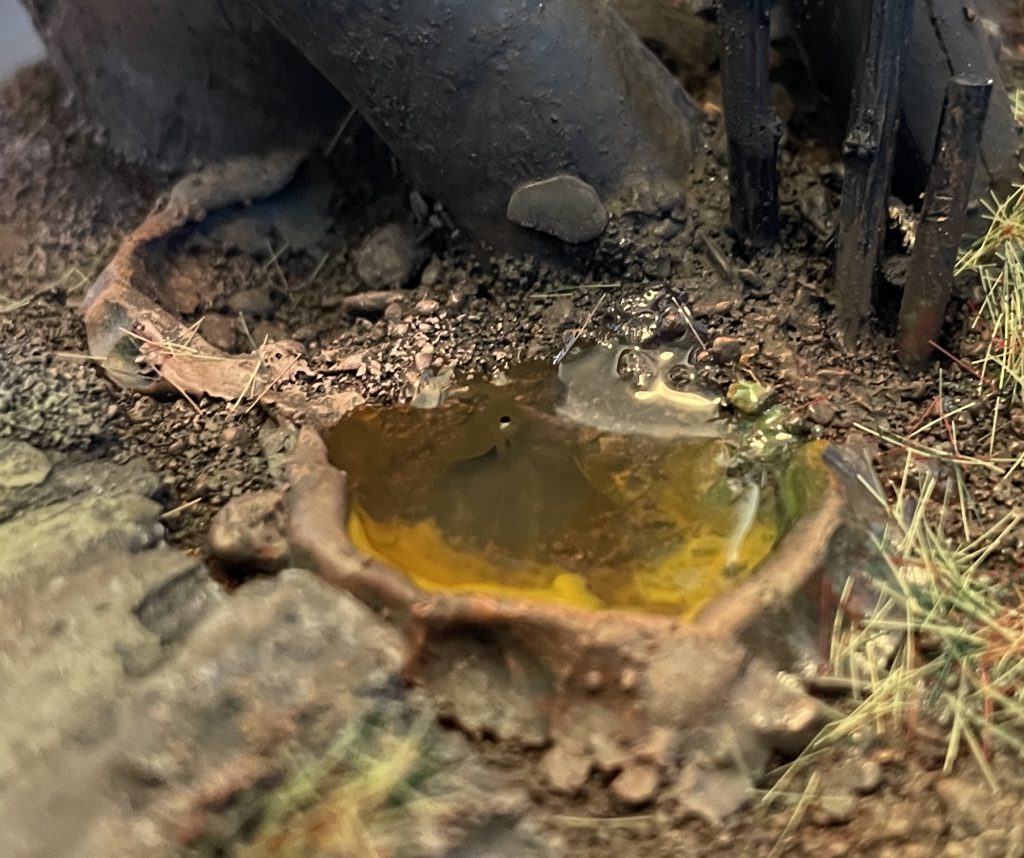
To start off, you want to define an area for the puddle/pond. I use milliput, rolling out a sausage to the required length and smushing that onto the base. I'll then pinch a small ridge to provide a defined boundary that will - once the milliput dries - hold in the varnish that will form the water. Paint this as you would the rest of your base.
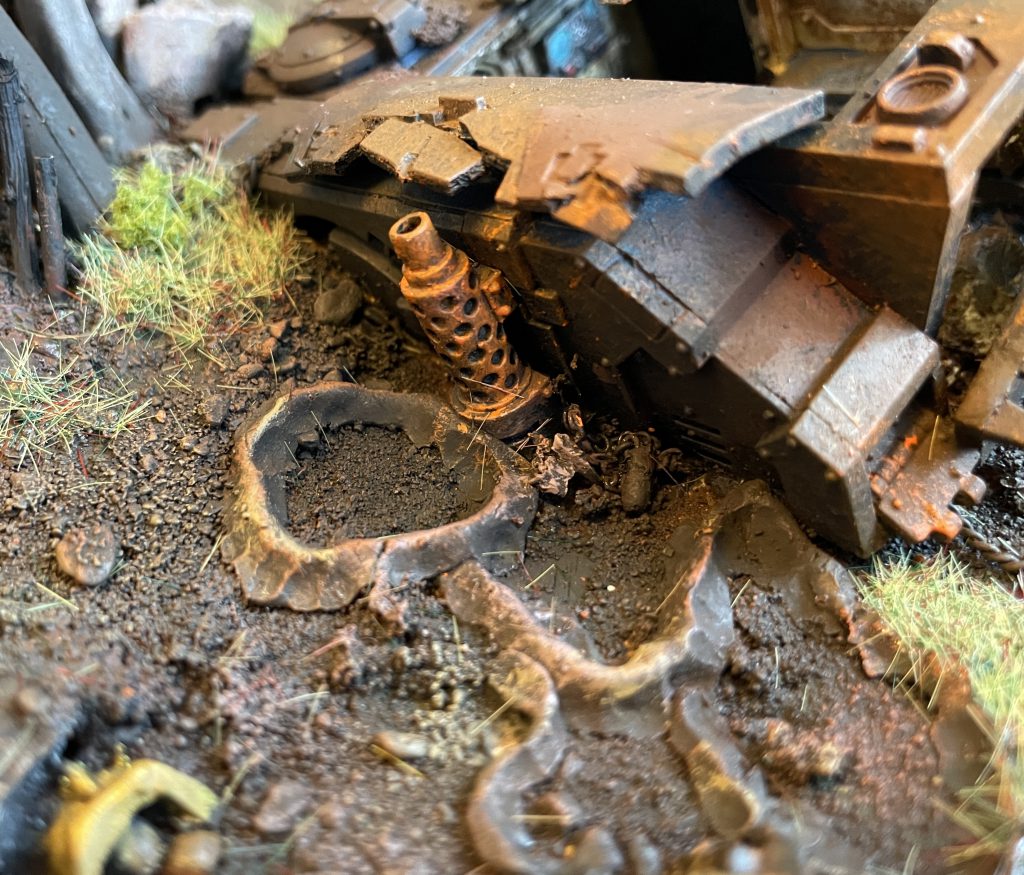 Filling craters with water effects: Step One. Advanced basing techniques. Credit: Lenoon
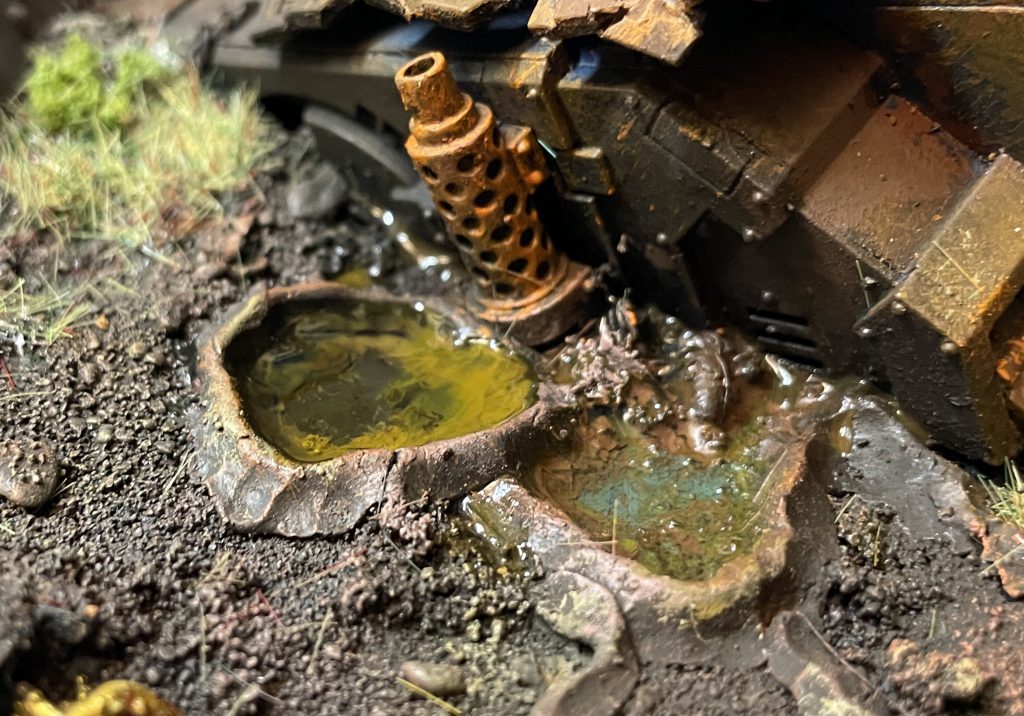
Once that's dry, use a dropper bottle to add in a variety of different colours and tones of watered down paint,
washes or shades.
Speedpaints work well for this, as do most paints
pre-thinned for airbrushes. These colours will form the murky, swirling water of your crater/pond/whatever.
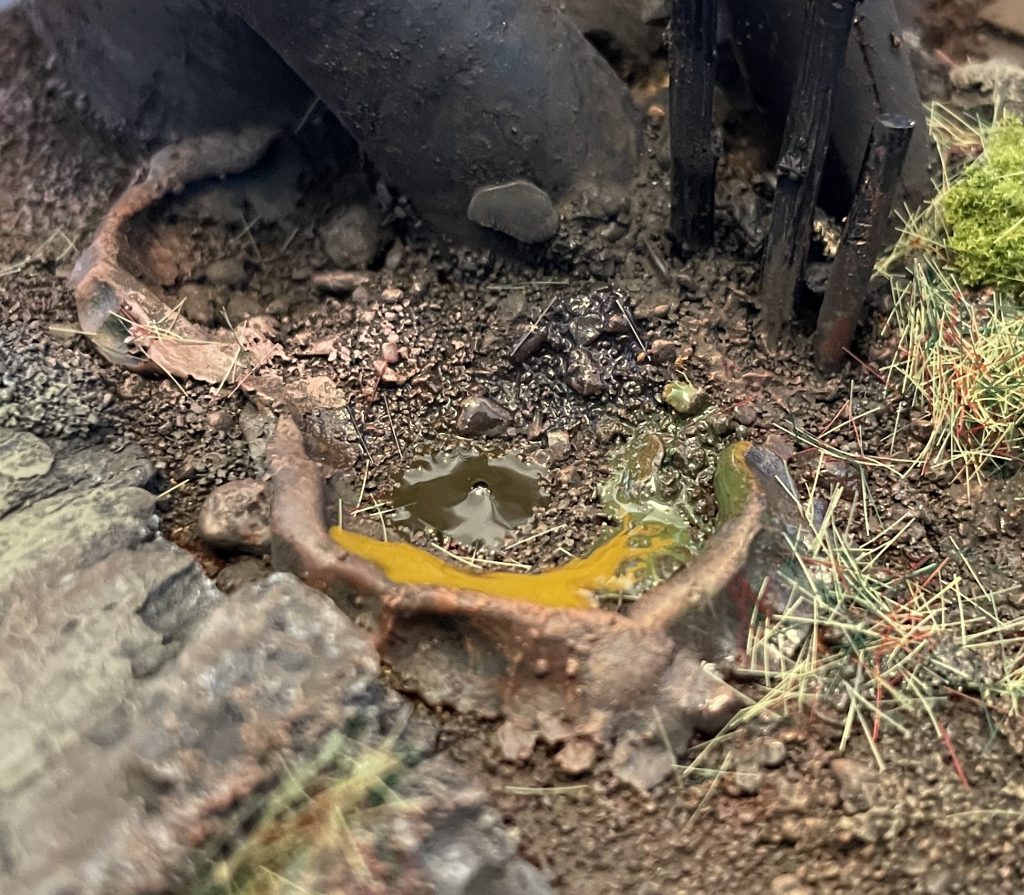 Step Two. Advanced basing techniques. Credit: Lenoon
While these are still wet - immediately, in fact! Start dropping in your gloss varnish. Gloss will shrink much much more than a dedicated water effect, and as you're adding colours to this there's little need to worry about clouding, so just fill it up!
 Step 3. Advanced basing techniques. Credit: Lenoon
The colours you've added in will naturally pool and move around. If they aren't looking the way you'd like, agitate them a bit with a cocktail stick or brush handle until you're satisfied. You'll find the drying process moves the paint around in a lovely uncontrolled way.
As the varnish dries, it will form a concave surface, so drop in more varnish to gradually fill up the puddle until you're happy with the level. This can take several applications, and varnish is likely to get everywhere! That's good! Since when are puddles in mud perfectly defined anyway?
 Finished! Advanced basing techniques. Credit: Lenoon
You can spice this up further by adding some scattered leaves, bits of static grass or tufts to the puddle or rim. The gloss varnish will soak into them, leaving them looking waterlogged and muddy - ideal!
You can even mix varnish, pva and paint to create horrible, sticky, voluminous mud you can slather all over the place, or pick up some water effects and stain with your favourite muddy shades to avoid the mixing altogether. There's no recommended recipe for this, just try it out and prepare to get your entire workspace covered in acrylic mud!
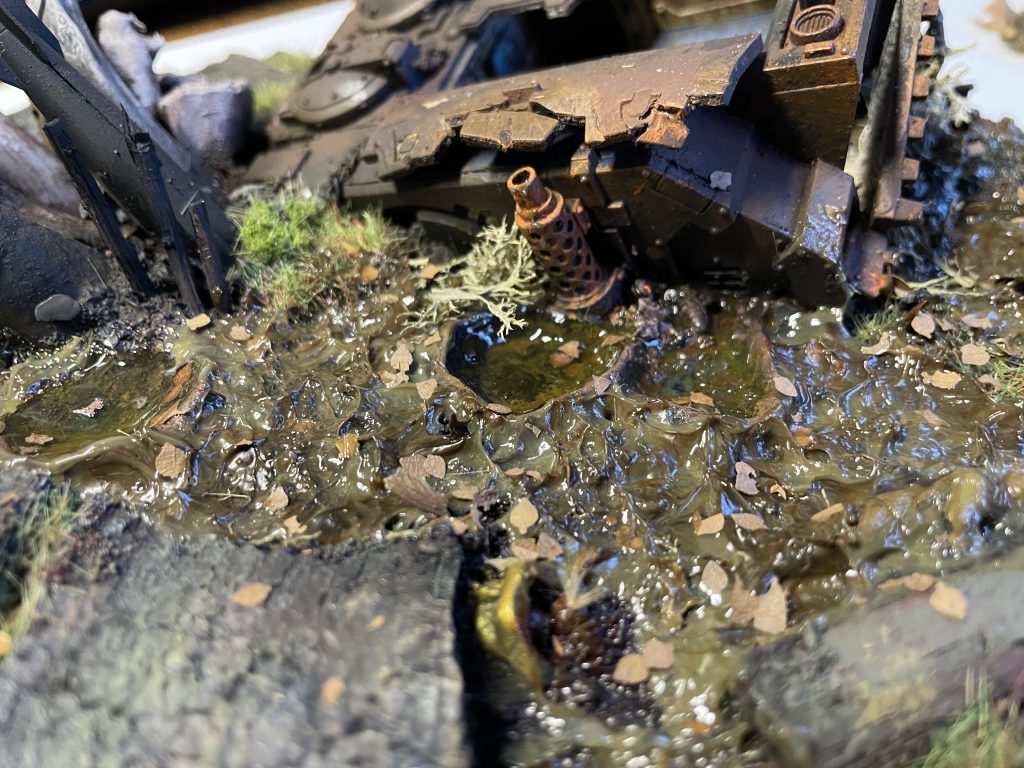 Even muddier mud. Advanced basing techniques. Credit: Lenoon
Leaf Scatter
You'll note in the picture above there's a lot of tiny leaves, which brings me onto the final technique for advanced basing - leaf scatter! This couldn't be much simpler. Pick up a Leaf punch, punch holes in leaves and scatter them on a base! Doing so while paint, varnish or gloopy mud is drying allows them to adhere without any additional glue, but if you want to add them afterwards, try a wet brush of watered down PVA, then scatter. I love the effect that leaf scatter has, and use it often.
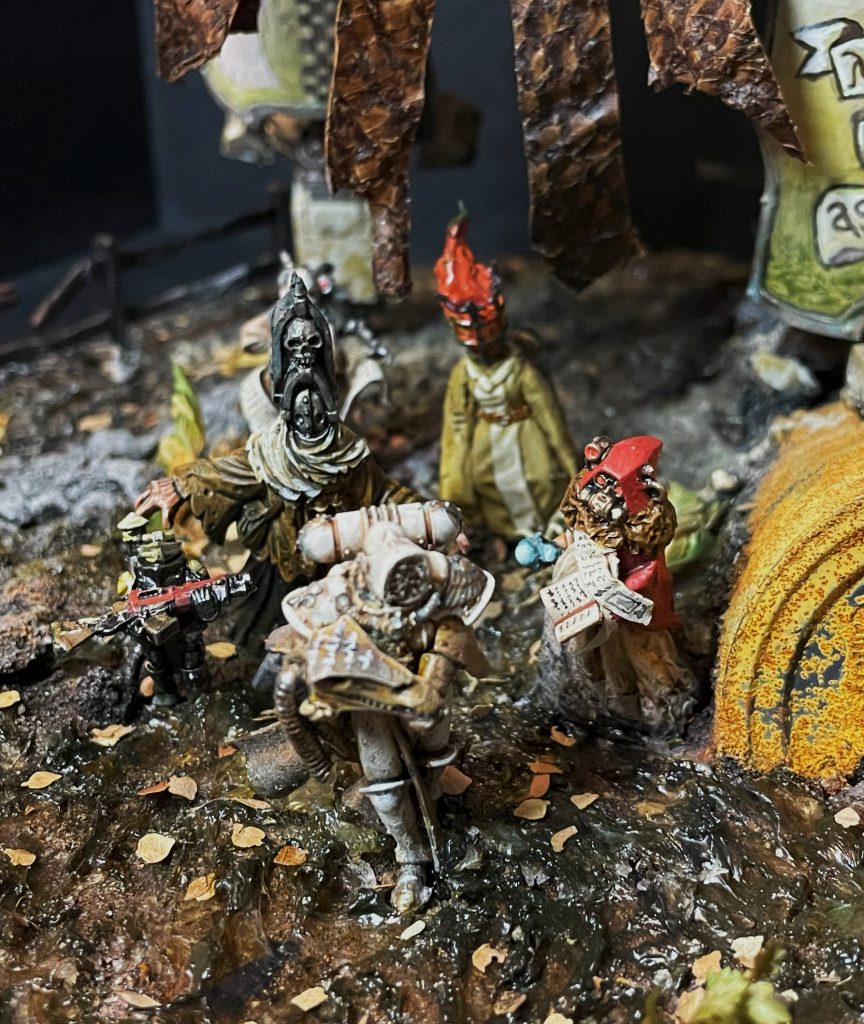 Weirdoes, Leaves and Mud
Large Bases - Vignettes and Dioramas
Large bases are a challenge and an opportunity to do something fun and interesting with your models. The techniques for approaching a large base are the same as with any other - think about the framing of the model, apply your tufts, grass, mud and rocks, even think about a giant hero rock (or wood equivalent). It's more important than ever to tie a large model into the base, so think about your weathering, drybrushing and colour placement. It's also an opportunity to have your base affected by your model - use wheels to push tire tracks into milliput, model footprints for walkers and cavalry, or radically change the shape of the base with large built-up areas.
There's no single way to do it, so I thought I'd dig up a couple of large base examples to discuss what works about them. They're not even all my own!
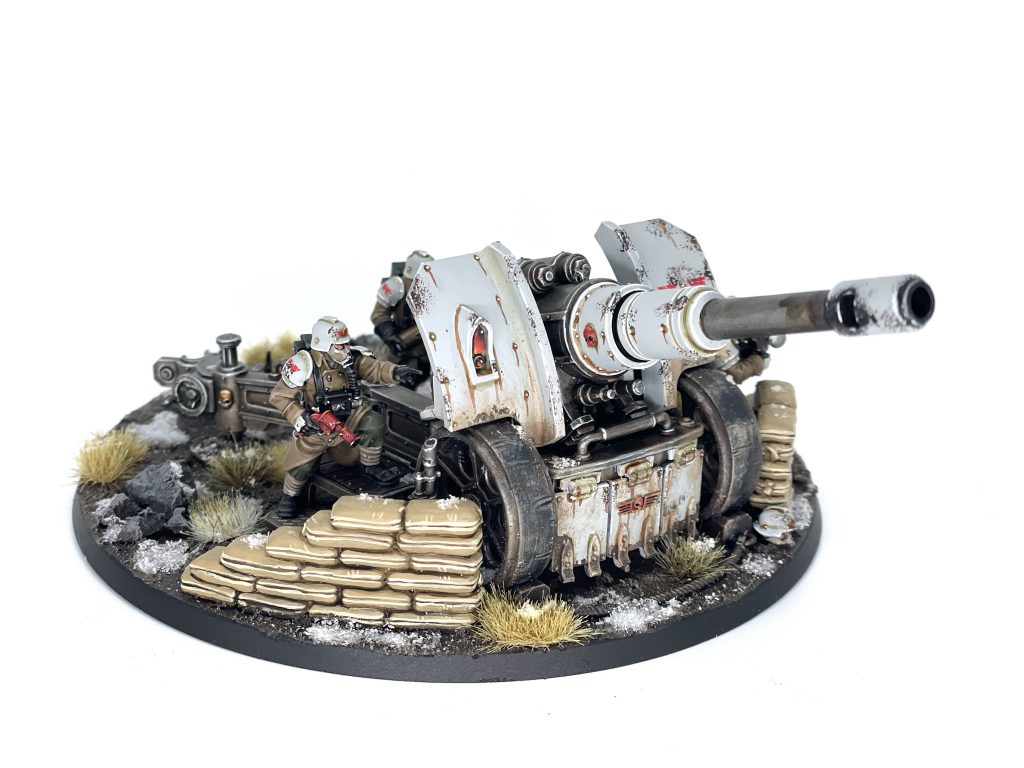 Death Korps of Krieg Artillery Team. Credit: SRM
Let's start with SRM's Artillery team. I love this base. Artillery tends to be fun to do - you have the gun, the crew, and a large open space to deal with. SRM has kept it simple with rocks, snow and a variety of tufts, while the model comes with sandbags to form an emplacement. Look at the framing of the sandbags - not directly in front of the gun, and in the bottom third of the model. It's tied nicely together by incorporating some of the basing elements onto the gun carriage with spots of snow and dirt using the same colours as the base. Lovely work, SRM!
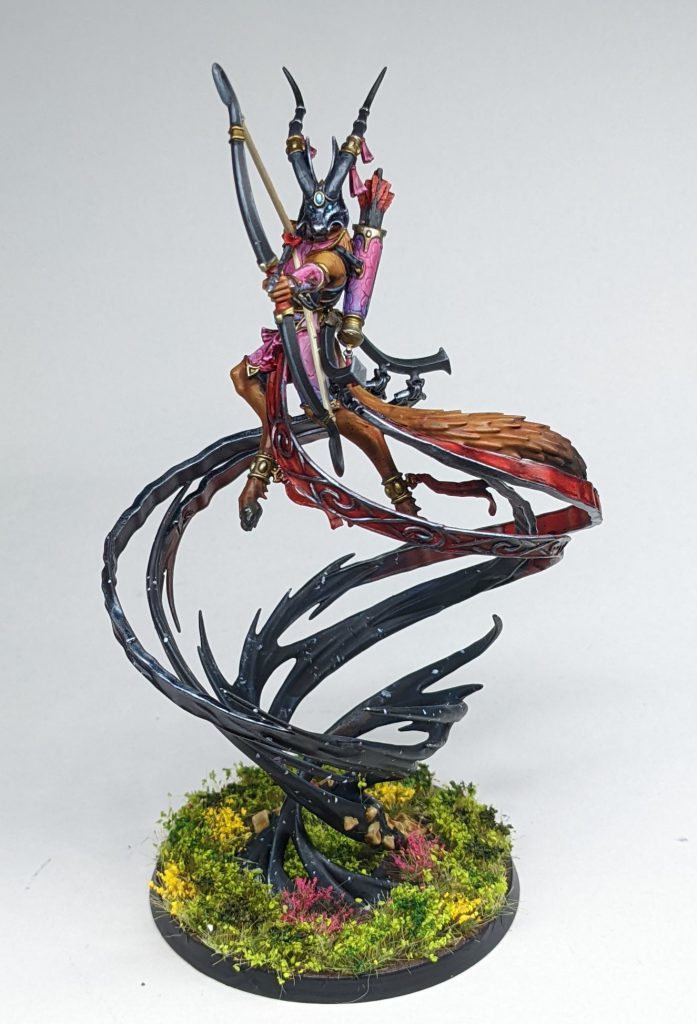 Hurakan Spirit of the Wind. Credit: Rich Nutter
Rich's Hurakan (when did the elves get weird deer people?) is another really nice base, this time using a wild variety of tufts and grass to produce a vibrant, exciting frame for a very colourful model. This is great colour placement too, with the top and bottom of the piece having a riot of different colours, while the big swirly black bit provides a ton of contrast.
 Lenoon's Lancer
Finally, I'm going to succumb to ego and include my own Lancer as an example of good large diorama basing. I've used a variety of techniques here - sticky mud, leaf scatter, elevation through the hero tree and everything else mentioned here to produce a very natural looking base, including bringing many of the colours and tones used up onto the legs of the model to situate it into its landscape.
Advance Your Basing
There are hundreds of other materials and techniques you can use to up your basing game, but from here on out it's largely up to you! If you've got your tufts, textures, gloss varnish and PVA, the world of basing is very much your oyster. Combining these core elements can give a wild and near infinite variety of looks and schemes, so get experimenting and let us know what you come up with.
Have any questions or feedback? Drop us a note in the comments below or email us at contact@goonhammer.com. Want articles like this linked in your inbox every Monday morning? Sign up for our newsletter. And don't forget that you can support us on Patreon for backer rewards like early video content, Administratum access, an ad-free experience on our website and more.Thank you for being a friend.


 Goonhammer App and Patron Updates: April, 2026
 Kill Team Tournament Report: Engage, Party, Repeat's March Madness 2026
 Goonhammer Reviews: Tribal Conquest