It's possibly the most divisive and intimidating topic in the hobby world - some people hate it and view it almost like cheating, while others (including me!) really love it as a massive time saver that can speed up your painting process significantly and make gradient blends easier as part of the bargain.
That's right, it's the airbrush. Are you someone who's "airbrush-curious" but too intimidated to take the leap? In this article, we'll show you why there's really no reason to be afraid of owning and using one as part of your hobbying.
Isn't an airbrush fragile? I'm afraid I'll break it.
This is a fairly common concern with people who are airbrush-curious but who haven't actually taken the plunge yet. It's understandable because there's plenty of truth to that worry. Yes, airbrushes can be quite fragile. There are specific
parts of an airbrush that are not robust, not least because they're so finely machined - the nozzle and the needle, but there are ways to protect both of them built into the airbrush itself. As long as you don't bypass those measures, you'll probably be fine.
The needle
protrudes from the front of the airbrush, which is why it has a guard or protector that extends further, preventing the needle from bending if the airbrush is bumped into something.
If the needle does get bent, even by an extremely tiny amount, it will redirect the flow of paint from the nozzle of the airbrush and alter how your airbrush behaves, so you
really need to take care of it. It's also extremely sharp, so it really hurts if you stab yourself in the hand with an airbrush needle; don't ask how I know.
The nozzle itself mostly gets damaged by inexperienced airbrushers ramming the needle forward like they're loading a musket when they insert it after cleaning; gently does it. The needle obviously tapers to fit the chuck of the airbrush; if you push it too far, it'll deform the nozzle. Steel is harder than brass, y'know? Push the needle forward gently until it comes to a stop, and then
no further.
If the worst comes to the worst, both the nozzle and the needle are replaceable parts of the overall assembly; even if you bend the needle and crack the nozzle, your whole airbrush will not be destroyed.
That said, if you're just starting out airbrushing, buying an inexpensive airbrush is something I recommend - you'll probably have no idea what you're doing and break it anyway. (I "broke" two airbrushes before I got any good at it, but don't worry, I'm a hamfisted idiot; you'll probably only break the one.)
Aren't airbrushes expensive?
Like any hobby tool, there are options for pretty much every budget. Indeed, like I just mentioned earlier, it's probably best to start with something cheap while you're learning rather than leaping straight into buying a Harder and Steenbeck Infinity CR+, you wouldn't start learning to drive in a Ferrari (unless you've got more money than sense), so it's best to start with something reliable and robust like a Skoda. Note though, that when I say cheap I do not mean £20 no-name junk off Amazon or Temu or whatever - those super-cheap airbrushes are almost always badly made and nothing is going to make you bounce off airbrushing faster than trying to wrestle with a crappy brush.
If you're in the US, your cheap-but-decent option might be something like a Badger Patriot, in the EU, something like a Harder and Steenbeck Ultra, or an Iwata Neo. These three are really sturdy, relatively inexpensive, and beginner-friendly.
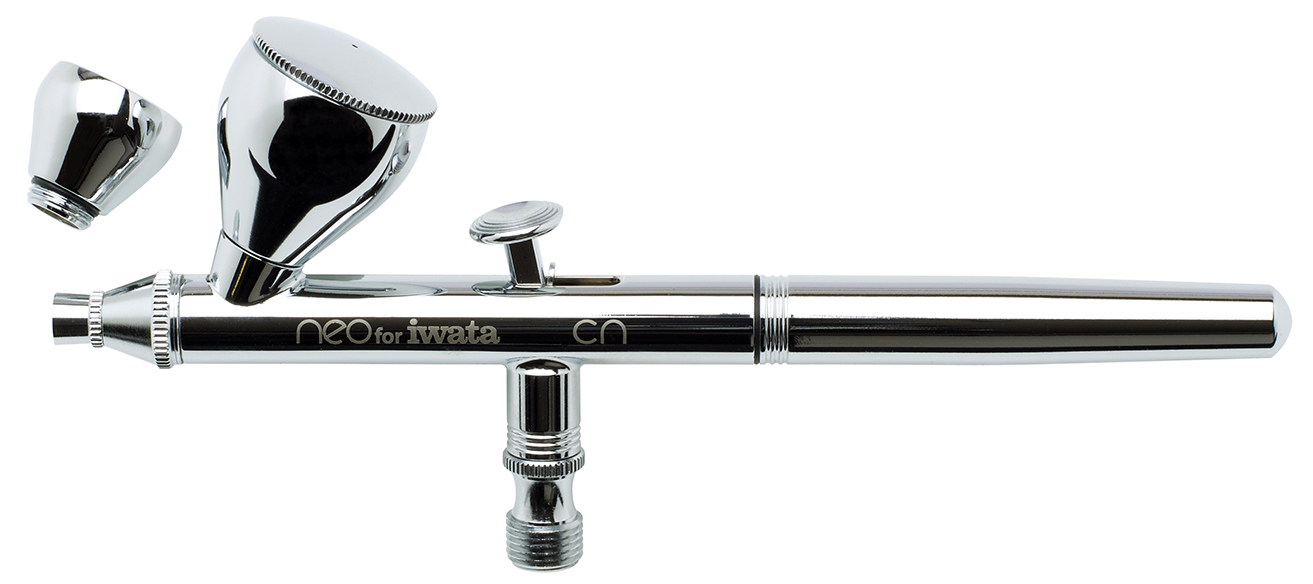
The more expensive top-line airbrushes like Iwata Hi-Line and H&S Infinity series typically have some extra bells and whistles, like adjustable needle brakes, built-in regulator valves, stuff that you don't
need, but it's nice to have.

You'll also need some kind of compressor as part of your setup, and again, there are options for every budget. I favour the Fengda FD-186 (which, as a Chinese product, is available all over the place with various different re-badges on it); ideally you want a compressor with a tank so that it isn't running all the time, along with a moisture trap and pressure regulator.
I dunno; it feels a bit new-fangled, sterile, and technological to me.
You might think the airbrush feels futuristic, and maybe compared to some hairs stuck on a stick it is, but new-fangled it really ain't - here's a short list of things the airbrush is older than: Radio, TV, X-Rays, the Diesel engine, the tractor, Penicillin, the electric toaster. Your airbrush predates
acrylic paint by about 40 years! See what I mean?
How much should I thin my paint?
Simply put, undiluted miniature paint is far too thick to pass through an airbrush nozzle and will cause a myriad of problems if you try. The space between the nozzle and the needle is
extremely small, even with the needle pulled back and the airbrush wide-open. You
must* thin your paints if you want to airbrush with them.
The typical rule-of-thumb for thinning your paint for airbrushing is that it should "look like skimmed milk." I don't find that to be super helpful, personally; I think rather that it's the
mobility of the paint that matters most, you want it to be
runny and flow easily - using some kind of flow aid like Airbrush Medium is very handy here because it lets you make the paint runny without having it split (which is what happens when you add too much water). Some hard-earned advice I can offer you here is that, unless you're using specially formulated airbrush paints (Like Army Painter Warpaints Air) or an already very-thin ink (Like Speedpaints),
do not introduce undiluted paint to the cup of the airbrush. It might be tempting to just put thick paint from the pot/bottle directly into the cup, add your medium, and swirl it around a bit with a brush - my friend, avoid this temptation, or you're on the express bus to Clogtown. For the sake of your own sanity, mix your paints
outside your airbrush.
I mix my paints in those little waxed-paper cups ketchup used to be delivered in at McDonalds (1 euro for 100 from an online retailer). I add my paint, a little medium, some water, and mix them with an old brush, and once I'm happy with the consistency, I'll crimp the cup a bit into a spout and pour it into the cup of my airbrush. Doing something as simple as mixing and thinning paints
outside the brush has reduced the amount of clogs I suffer by 95%. Sure, there's a little waste left in the cup but it's worth it to avoid the headaches.

*Unless they're pre-formulated airbrush paints or inks.
What PSI should I use?
The unhelpful answer is "it depends." I often change the pressure on my compressor during a painting session, although typically I hover around 2-3 bar. The pressure you use really depends on the thickness of the paint and how close you are to the surface you're spraying. If you're getting "spider" patterns when you spray, your PSI is too high, and you're too close. If your airbrush is splattering, the pressure is probably too low or your paint is too thick.
Don't you spend most of your time cleaning it?
I do not. Why? Because I take measures to prevent it from getting too dirty in the first place. An ounce of prevention is worth a pound of cure after all - that really is the key to having fun airbrushing without banging your head on the desk trying to figure out why it's not working. Keeping the paint properly thinned (as described above) is number one on the list. The main source of all your problems will be a clogged nozzle from using paint that's too thick.
In a similar vein, try to avoid spraying with your airbrush until the cup is completely empty; when you get down to the last dribble of paint, stop spraying and flush out the cup and reservoir - if you keep spraying down to the last dribbles, the dry air coming out of your compressor will dry a little bit of the paint left in the nozzle, which will build up over time until it becomes clogged like the toilet if you don't eat enough fibre.
To flush out the cup and reservoir of your airbrush, use a squeezy bottle filled with clean tap water and squirt plenty of it into the cup before dumping it, I used to use an old Tupperware filled with paper towels as my water-dump, I've since upgraded to one of those nicer airbrush cleaning pots, but you could use any old container you like. Repeat until the water is coming out clean, and then spray out the excess. Another trick you can use to clear stubborn bits of paint in your nozzle is backflowing the airbrush by pinching the end, pushing the trigger, and pulling back the needle a bit - the air will bounce off your finger and go back through the nozzle and into the cup, making some bubbles. This backflow will push the paint out of the nozzle and into the cup, where you can dump it out. Do not simply try to blow these little lumps of paint through the nozzle, because they won't fit through the tiny gap between the nozzle and the needle, and they'll clog it. Use this judiciously; if you backflow too much with paint in the brush, it'll go up to the back of the reservoir before the trigger part and make a mess. Hell, if you backflow too strongly, the paint will violently bubble up out of the container and splatter you in the eye (this happened to me, learn from my mistakes, children).
The next step is making sure to rinse the airbrush
very thoroughly after using either primer or varnish. Why? Well, primers and varnishes are very, very
sticky in ways that normal acrylic paints are not. If you were to paint a piece of metal with some ordinary miniature paint, it would rub straight off. Now, imagine you don't rinse out well after priming, and it dries inside the nozzle. What happens? You've basically primed the inside of your nozzle; paint
can stick to it!
At the end of a session, disassemble your airbrush and wipe the needle down, if there's paint left on the needle overnight, it can dry to the inside of the nozzle, getting stuck in the process.
If you've
really messed up and let a quantity of primer or varnish dry inside your airbrush, the only thing to do is to use something more aggressive, commercially available Airbrush Cleaner acts like a paint stripper that detaches the paint from the metal and lets you fettle and wash it out, which you'll need to do by disassembling your airbrush and using wire brushes/pipe cleaners/nozzle cleaning tools.
Note: Be careful when using acetone-based airbrush cleaners on cheaper airbrushes; cheaper O-rings tend to be made from a less durable plastic, which can be damaged by contact with acetone.
Don't you spend most of your time trying to figure out why it's not working?
The learning curve is somewhat steep - one of the biggest problems is that airbrushes
seem very complicated, with lots of small parts. However, once you've learned how your airbrush works and what to avoid, you'll be able to solve any problems that arise pretty quickly. You'll know, for example, that if you have bubbles in your cup and nothing is coming out, there's a clogged nozzle, or a problem between the cap and the nozzle, and you'll be able to just sort it out on the spot without much trouble.
I'm worried that airbrushing in my apartment will be bad for my health. Don't you need a booth that vents outside?
This is only my opinion and is NOT health advice. If you feel ill after airbrushing, consult with your doctor.
That's a valid concern, and I think in order to tackle this worry, we'll need to draw a distinction between solvent-based paints and the water-based acrylics we use most often in our particular hobby. Some of the more serious "scale modelling" paints for people who like to paint things like model trains, remote-controlled cars, and historicals and stuff are enamel or alcohol-based (Tamiya, Revell, Humbrol, etc) and, as such, need to be handled with more care. Spraying enamels on something and breathing in what bounces back is not good for you. Enamel paints release VOCs (Volatile Organic Compounds) that can make you ill if you breathe them in. Breathing in a cloud of vaporised alcoholic solvent isn't great for you either. I found that I get very dizzy after a while, which lasts about half an hour after I stop, and it's super unpleasant. On the other hand, the water-based acrylic paints we use are mostly safe; they're inert, rated non-toxic by government agencies, and most importantly, don't release any VOCs.
Primer and Varnishes are the sort of exceptions to this in my experience; if I'm priming or varnishing something, the fumes can certainly get pretty funky. If I'm planning on spraying for a long time or with something smelly or fume-y, I wear a half-face respirator mask from the DIY shop equipped with a class P1 particulate filter with a Type A for organic vapours. What this means is that each filter on the mask has a layer of fabric to catch any particulate and a load of activated carbon to absorb any gases. Honestly, this is probably overkill for spraying with water-based acrylics, and you could use a standard FFP2 facemask to catch any particulate. For the benefit of the other people in the house, I'll also open the big window next to my desk. I very, very rarely spray anything like that, though - the acrylic paints I use (incl. Army Painter Fanatic + Warpaints Air) are safely rated as non-toxic by the EU.
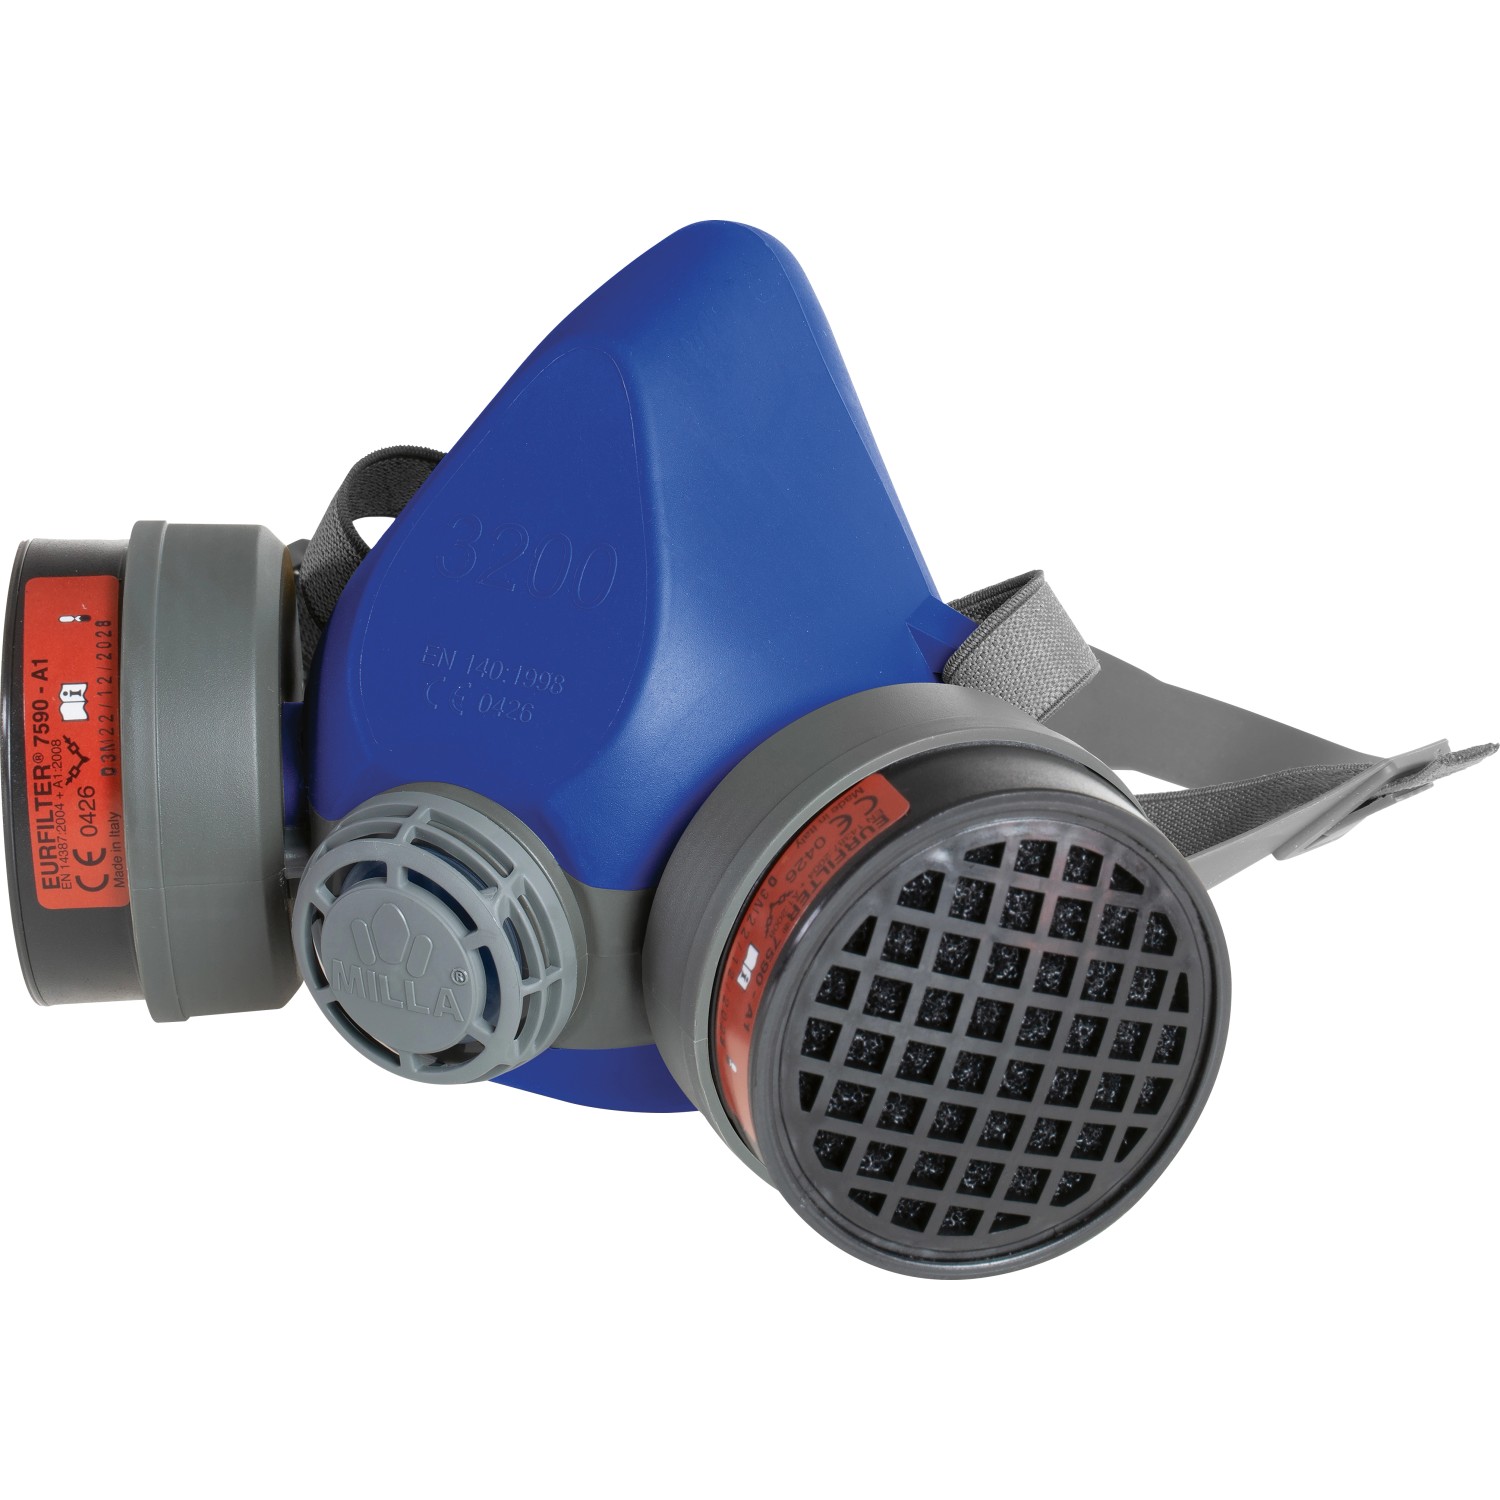 My mask, it's comfortable enough that I can wear it for a few hours without issue. The brown coloured labels on the filters indicate that they're class A1 - suitable for Organic Gases with a boiling point greater than 65 °C
Isn't the compressor really noisy?
The only real answer here is "yes," although there are levels to just how loud they can be. An industrial compressor would be so loud you couldn't safely be nearby without some kind of hearing protection, a "normal" compressor is moderately loud, not quite loud enough to aggravate your neighbours, unless you live somewhere with very thin walls. "Quiet" compressors do exist, but even then, they're not really very quiet in the grand scheme of things; if you're expecting something that gently hums, you'll be disappointed. It turns out that squishing air into a small space will inevitably make a bit of noise. The only thing I
can say, though, is that the compressor I use isn't any louder than my hairdryer.

The compressor I use is the Fengda FD-186; it's good quality and not very expensive, with a moisture trap, an adjustable (and locking) pressure regulator, and a tank, so the noisy compressor doesn't have to run the entire time. It also doesn't take up much space, sitting comfortably underneath my desk with about the same footprint as a desktop computer.
How do I know how much to thin my primer by?
Airbrush primers like
the Army Painter Air Primer don't need thinning to go through the airbrush, but
make sure you rinse the airbrush thoroughly after you use it for the reasons listed above.
Doesn't it take a long time to set up/tear down?
This obviously varies by your living situation; it will certainly take longer if you have to bring your compressor out of the cupboard every time you go to paint with your airbrush, or if you need to set up an airbrush booth/extractor fan each time. But for me? Not really, no, I can start airbrushing in less than a minute, I just turn my compressor on, wait for it to reach pressure, and then I'm good to go! The key is making sure that your airbrush is clean at the end of each session. If you, for example, leave a bit of paint in your airbrush, and it dries out, it'll gum everything up; you won't be able to move the needle because it'll be stuck inside the nozzle. To prevent this from happening, remove the needle at the end of your session and clean it off (carefully). Being ready and prepared to paint and finding out that your airbrush has a clog and you'll need to work it out is the
worst.
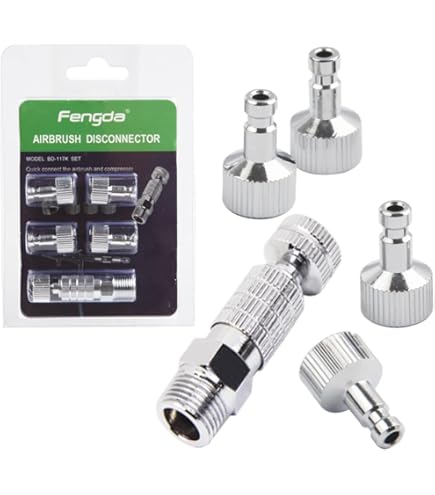
Fengda makes some great quick couplers for all kinds of airbrushes, so I can pop it on and off the hose whenever I like without unscrewing the brush from the hose end and letting out all the air in the process.
What if I don’t have a spray booth?
Obviously, this is only my experience, but I've found that I don't need one - I rarely spray anything with VOCs or harmful fumes. If you watch most professionals on YouTube (Angel Giraldez, Juan Hidalgo, Marco Frisoni, etc.) or wherever else, they don't use spray booths either. I defer to their greater expertise and experience. I think that the booths with turntables on or whatever are really designed for people painting things like RC cars with enamel paints, we're not really doing anything like that, so I view a booth as being a bit "overkill", but that's just
my opinion, if you don't feel safe doing it without a booth then you're going to have to get one and set it up, which will definitely take up both space and money.
Where do I even start?
Even if you do nothing else with it, airbrushing is a great alternative to priming with spray cans (empty cans make a lot of waste, and overspray wastes a lot of paint) or varnishing with aerosols (high chance of making an irretrievable mess of your model) - just make sure you clean your airbrush after! From there, it's really only a short skip to painting an all-over basecoat with any colour you like, and then once you're comfortable with
that, you can try doing a zenithal highlight on something! The Army Painter Warpaints Air are really great for this, coming in triads as they do. Try using masking tape or putty on a model to paint things like hazard stripes or camouflage! Next, you could try glazing through your airbrush with Speedpaints, letting you blend, weather, and feather with very little effort. Jumping in at the deep end might seem tempting, but your chances of encountering annoying problems rise the more fancy you try to be; however, with some solid practise you'll be more able to counter those problems when they arise. Take it one step at a time, and you'll see how powerful a tool the airbrush can be, I promise!
Airbrush Tips
- Always return the trigger to the neutral position before stopping the air; if you don't, droplets of paint will collect on the end of your needle, and as soon as you press the trigger again, they'll splatter onto your surface.
- Likewise, always blow a little clean air off to the side before you aim at the model and pull back the needle, mostly for the same reason.
- Keep an eye on the tip of your needle - if there's a build-up of paint on it, wipe it away either with a damp brush or with your fingertip (careful of the sharp point!)
- Use clean, dry air from your airbrush to dry your paint - be careful, though, if you've put too much paint on at once and you blow it with clean air, it could ripple.
- Rock your finger a little on the needle, alternating between paint and clean air will dry paint pretty much as soon as it hits the surface, letting you put down several thin coats very, very fast. It might be tempting to just lean on the trigger and flood the thing, but airbrush paints will flood a model and gum up details just like ordinary paints.
- Empty the moisture trap on your compressor from time to time. This stops the water vapour in the air from going through the hose into your airbrush; instead it condenses and stays in the trap, from where you can remove it. You do need to remove it, though, if too much builds up in the trap, it can escape into your air hose. The last thing you want is a big drop of water going up the air line, into the chamber of your airbrush, and spewing forth from the end to ruin your hard work.
- Use masking tape and putty to protect already-painted parts of your model from airbrush overspray.
- When using metallic paint, be aware of the size of the metallic flakes and how they'll affect your airbrush (clogs, etc)
Airbrushing is
great. I prime everything with mine, and I airbrush
at least the basecoats on pretty much everything I paint nowadays. I can paint much faster, with easier blends and shading, and it's just
fun!
Have any questions or feedback? Drop us a note in the comments below or email us at contact@goonhammer.com. Want articles like this linked in your inbox every Monday morning? Sign up for our newsletter. And don't forget that you can support us on Patreon for backer rewards like early video content, Administratum access, an ad-free experience on our website and more.Thank you for being a friend.


 Goonhammer App and Patron Updates: April, 2026
 Kill Team Tournament Report: Engage, Party, Repeat's March Madness 2026
 Goonhammer Reviews: Tribal Conquest