Welcome to Hobby 101. This series will lay the groundwork to teach you the fundamentals and best practices to make your models shine. In this article, we're looking at how to paint a large number of models quickly.
The Hobby 101 Series is sponsored by The Army Painter.
Not every model is going to be a Golden Demon entry. More often than not, your goals are less "a jewel-like object of wonder" and more "looks good from three feet away and is ready to go on the tabletop for Saturday." And more often than not we, like you, the reader, just want to get our stuff on the table as possible with a coat or two of paint that looks decent on the tabletop. Which isn't to say we
can't win awards - many of our team certainly do - but even award-winning armies sometimes need to mash out multiple models at a time.
Zach: That’s what’s most important at the end of the day. I wrote a whole thing about embracing “good enough” last year that still rings true, and always will, and you should go read that after you read this.
Rob: Even when I'm painting for an event I plan to win best painted at, I'm usually in the situation of having to paint multiple models at once, or mash out several at a time. And when I do this, the process often involves a technique called
Batch Painting. Batch Painting is when you work on multiple miniatures at a time, usually by doing one color or step at a time across multiple miniatures.
 Zach: The vast majority of what I do starts with a very old paint technique called underpainting. In social modernity you may hear this referred to as "slapchop." I’ve been painting like this since I got back into the hobby a bit over a decade ago because it just works well for me; I can’t point to one person and say that they taught me, it came over time of figuring out what worked well for me and grabbing small bits and tricks from the various people that came into the local Games Workshop store where I worked part time. They also tried to get me to edge highlight everything and I’m still not doing that. I refuse.
But really, if you’re simply wanting to get some models looking OK like mine and thrown onto the tabletop as soon as you can with some paint slapped onto them then have a look at the various tips/tricks/bits of advice I can offer; this is pretty much all I can offer when it comes to painting but think it’ll help out at least a few of you, even if it does seem obvious.
Zach: The vast majority of what I do starts with a very old paint technique called underpainting. In social modernity you may hear this referred to as "slapchop." I’ve been painting like this since I got back into the hobby a bit over a decade ago because it just works well for me; I can’t point to one person and say that they taught me, it came over time of figuring out what worked well for me and grabbing small bits and tricks from the various people that came into the local Games Workshop store where I worked part time. They also tried to get me to edge highlight everything and I’m still not doing that. I refuse.
But really, if you’re simply wanting to get some models looking OK like mine and thrown onto the tabletop as soon as you can with some paint slapped onto them then have a look at the various tips/tricks/bits of advice I can offer; this is pretty much all I can offer when it comes to painting but think it’ll help out at least a few of you, even if it does seem obvious.
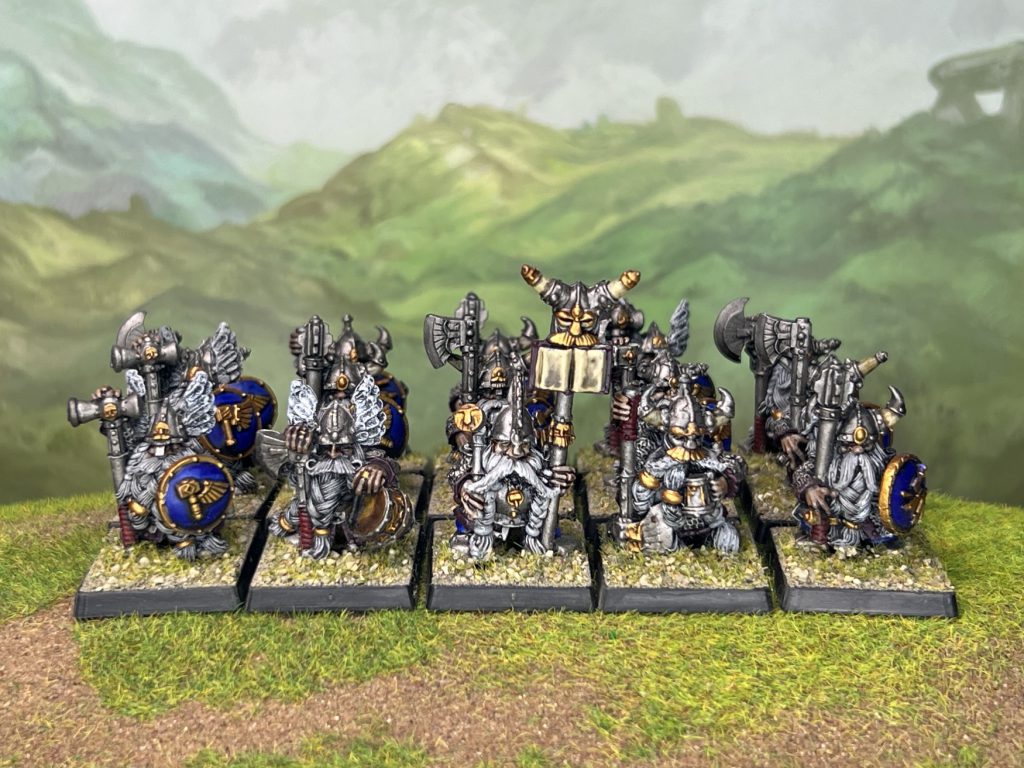
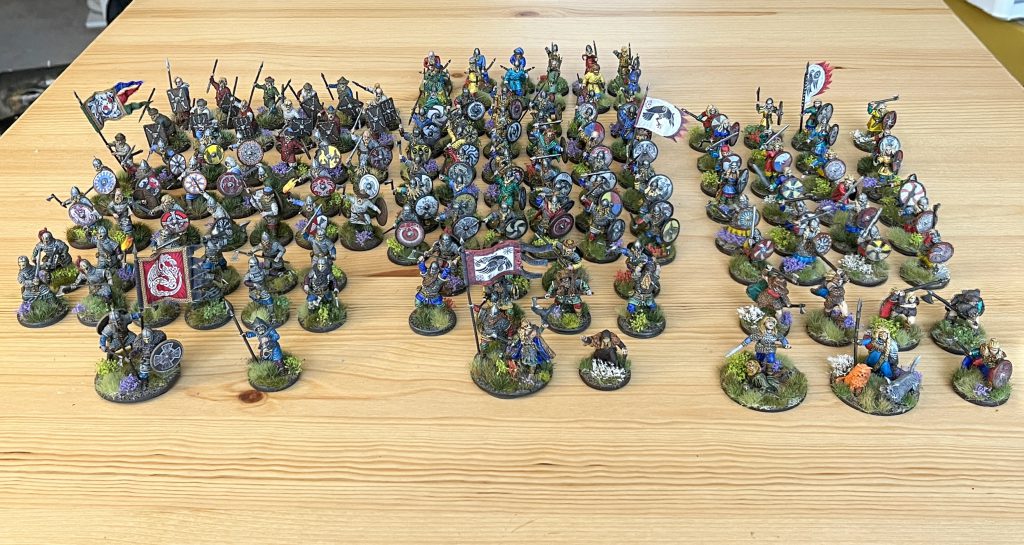 140 Vikings done in collectively about 2 weeks of batch painting
Basecoating
Zach: Picking the best basecoat for your models is a very important step in batch painting and I go about this one of two ways; spraying the model the colour that it will mostly be or starting with a brown basecoat. Some examples:
- Knights that are mostly armour - Silver
- Nearly all other historical minis - Brown
- Kharadron Overlords - Silver
- Tomb Kings - Brown
- Ents - Brown
- Squigs - Red
- Imperial Fists - White, then Yellow
I’m either choosing the colour that will make all other colours easier to apply on top or that will save me the most time later. For yellows I never like spraying yellow straight over grey plastic, there’s a lot to be said for spraying them pink first in some way but I’ve never done it, just a white undercoat first so the yellow looks a bit brighter and goes on easier.
In short: Set yourself for quick success with a basecoat that makes sense. Lighter colours will want a lighter basecoat, darker basecoats will help achieve natural shadows when drybrushing.
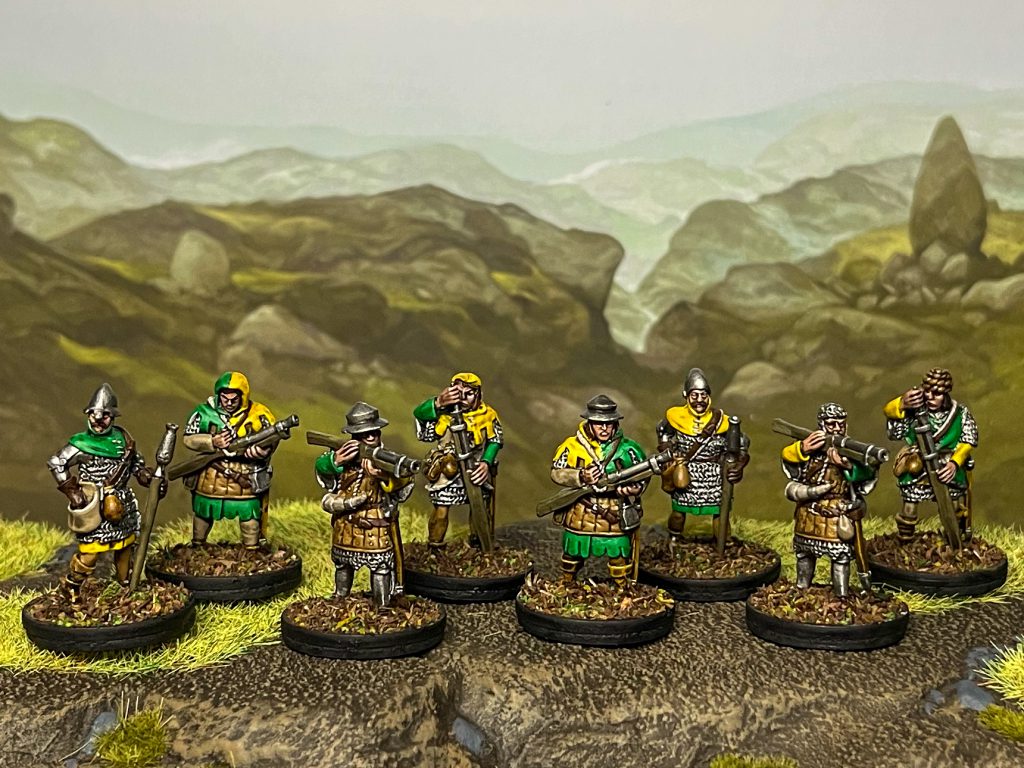 1st Corps Minis Handgunners - Credit Bair
Rob:
1st Corps Minis Handgunners - Credit Bair
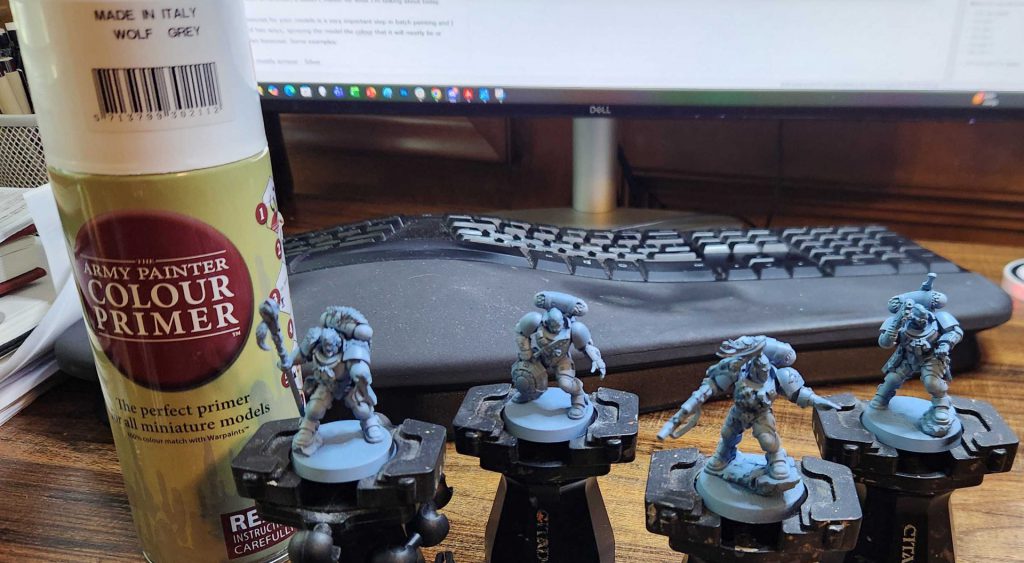
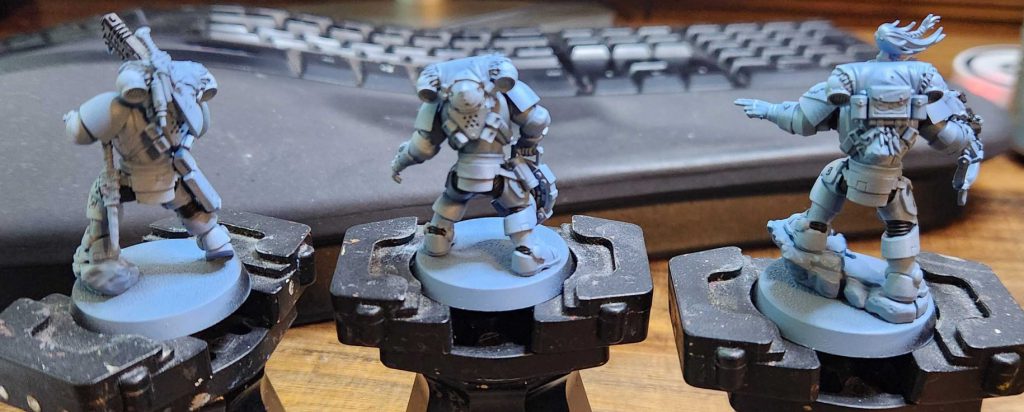
Rob: For this article I'm painting some Space Wolf Wolf Scouts and I agree with Zach - when you're doing batch painting, primer color matters quite a bit. The goal is in part to make your life as easy as possible. For these my plan is to literally leave the primer showing as much as possible, using it as my basecoat. Which means I need a good, consistent spray with the right color. Fortunately, I've found that The Army Painter's
Wolf Grey primer is perfect for this.
First Paints
We're breaking this section up two different ways because batch painting can vary wildly depending on whether you have something with lots of different colors or if your models are predominantly a single color.
Mostly One Colour Models
Zach: Your focus here is going to be getting that main block colour looking good before moving on to any details and the quickest way of doing that is always drybrushing. Space Marines have a lot of edges to them and you can absolutely spend the next week very carefully applying a highlight to each edge, but that's not often going to be part of a batch painting process.
If you were able to prime your models with their primary armour color, you're off to a great start! If not you'll want to start with a darker tone of the colour you want and apply a
very heavy drybrush of the colour that you
do want afterward. That drybrush needs to be so heavy that it basically paints over that layer but just leaves those recesses nice and dark. Then either way you'll be applying a light drybrush that is a few tones brighter than you'd expect to want to apply to create stark, obvious, highlights on the points of armour and the highest raised parts of the model. Don't worry if they're a little too bright for your liking right now, they'll get toned down later with a wash. My general rule of thumb is that you want your models to be a bit lighter/brighter than you might think so that they stand out and look good on the table; your local club or game store's lights are not going to be as bright and focused on your models as your desk lamp!
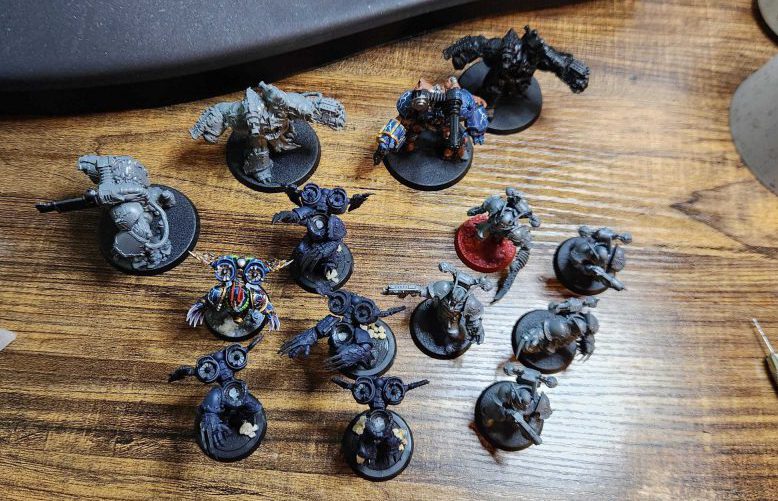
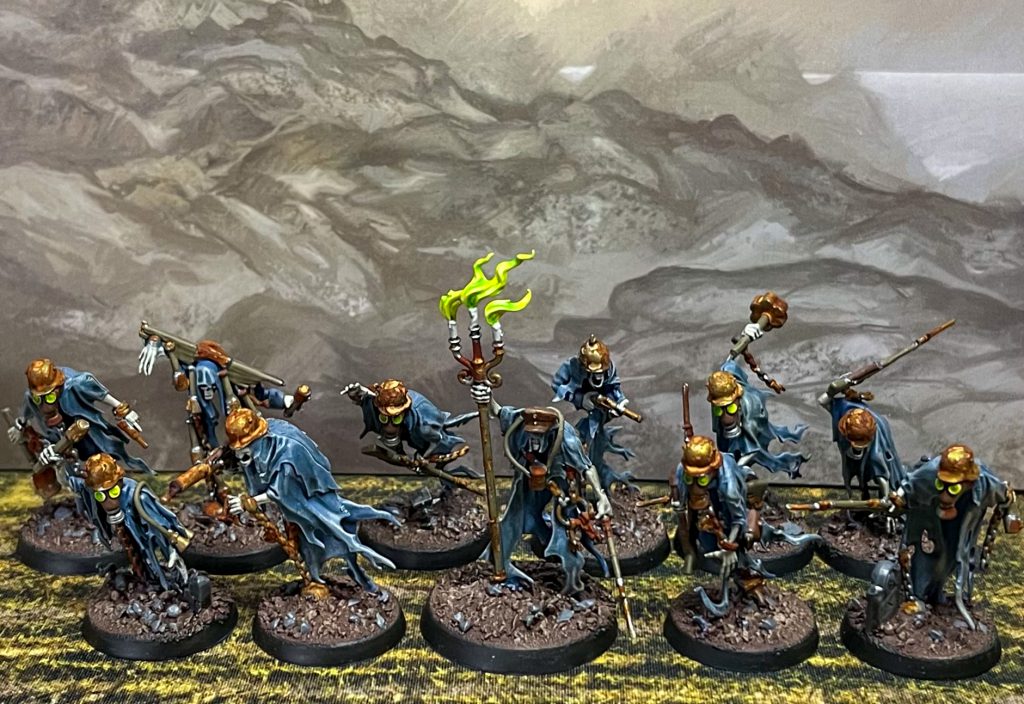 Trench Crusade, Trench Ghost Warband - Credit: Bair
Rob:
Trench Crusade, Trench Ghost Warband - Credit: Bair
Rob: Also when you "drybrush" here your brush can in fact, be pretty wet. I do a kind of wet drybrushing often when I'm batch painting my minis to do gradients and fades.
For me, batch painting is about getting a group of models about 50-60% to completion. If I absolutely need to base them at that point and get them on a table, I can live with it, but the plan is always to come back to them later. Even if I'm not planning to put a bunch of them on the table, I'll often start a project by batch painting several models. This is something of a lifehack for me - it's
way easier to pick up and finish a model that's already 50% completed later than to start a new one from scratch, and sometimes when I need hobby motivation, being able to pick up a model and go "well this is already half done so I may as well finish it" is great.
For these Wolf Scouts, I'm mostly interested in blocking them in. That starts with black on the recesses of their armor - but note that this is because I'm going to come back and painstakingly edge highlight these later. If you want an easier way to do that, I'd start by drybrushing them with a really light blue/offwhite like Ice Storm,
then start doing the recesses, and come back later and fix up any edges you need.
The goal here is to hit each model with the same color, hitting all of the relevant spots as I go along. The time you save batch painting is going to come from two things:
- Not closing up and opening bottles of paint repeatedly, and fully cleaning your brush and changing your water, and
- taking a bit faster approach to block in key colors, at least on these initial passes.
I don't want to make more work for myself later, but I'm also not going to sweat small errors as I do this. I start with the black recesses because I'm going to come back with the armor basecoat and highlights later, and will naturally cover those up. I'll also hit the gun casings.
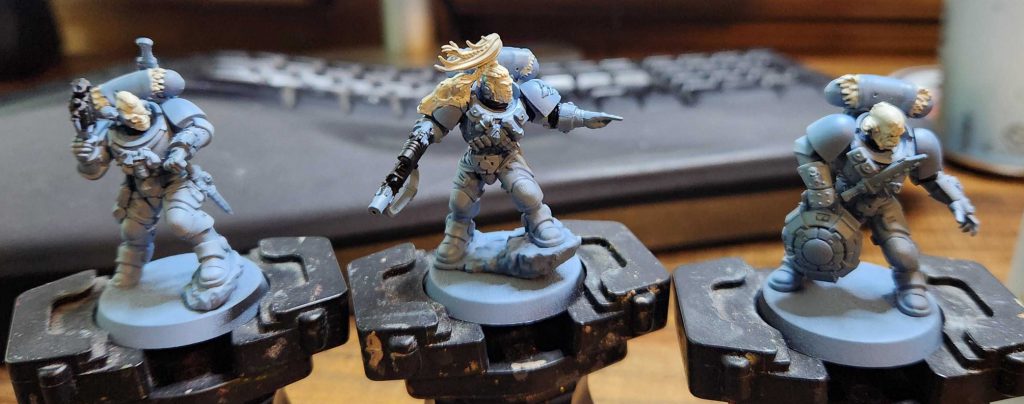
Next I hit the bones, skin, and fur parts with an offwhite bone color like Pale Sand. I'm going to hit that later with washes to change the tone, and all three of these guys will have lighter starting tones that I'll darken with washes like Sepia Tone, Strong Tone, and Soft Tone later. The different shades will ultimately give them slightly different shades of skin, which is something I like to do in my armies.
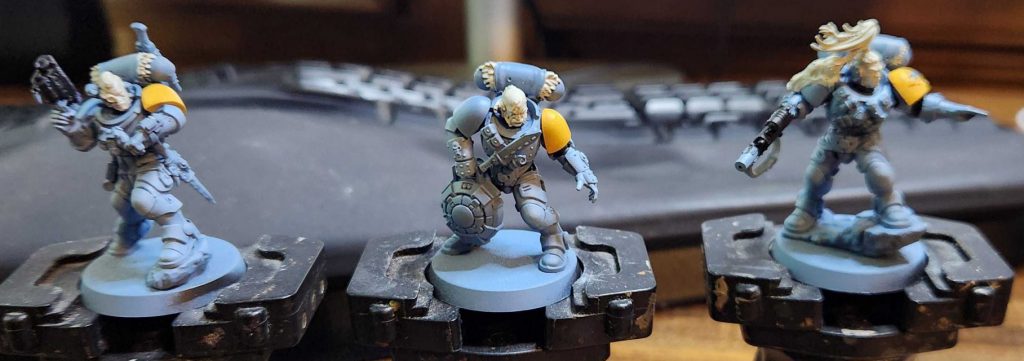
Next up I do the left shoulderpad with Fiendish Yellow, which is a good starting golden yellow color. I'll eventually come back and highlight/shade that up with a brighter yellow and edge highlight it, but in this process I'm just blocking in key colors quickly.
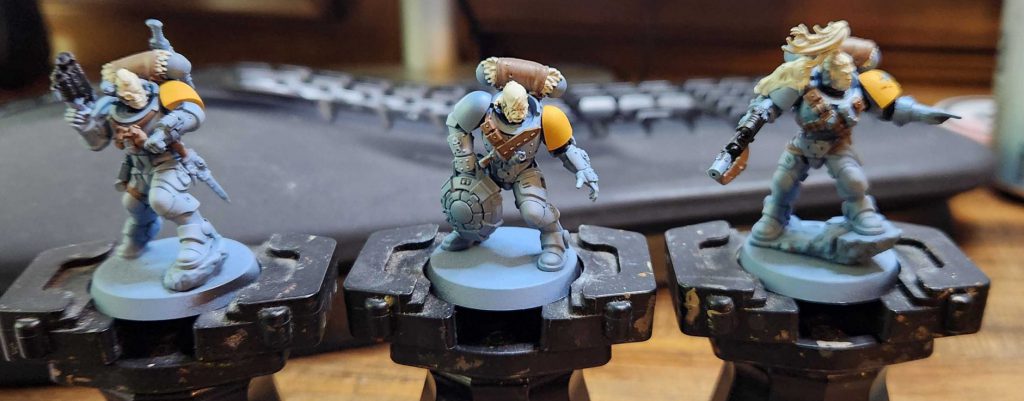
Next comes the basic brown I use for leather, painted on the belts and leather backpack coverings. This is The Army Painter Onyx Skin, but any relatively light brown will do - I need something I can shade with a dark brown wash like Strong Tone later.
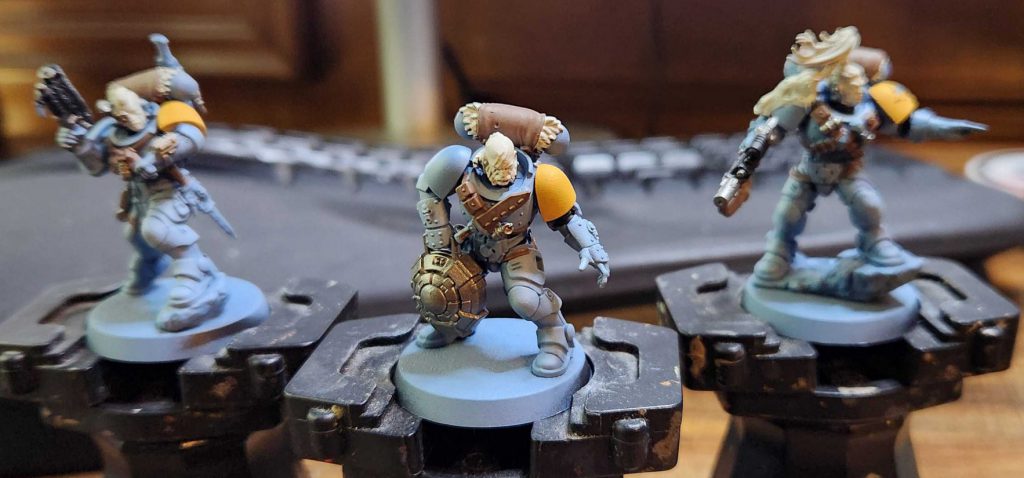
Then I come through and do the metal parts using Gun Metal. At this point I still have a lot of work to do on them but I'm nearing the point where I'd stop doing batch painting and move on to painting them individual - it would just depend on how big a hurry I was in. That's because the major blocking here is done. There are lots of elements that are specific to individual models at this point - like the gauntlets on the Wolf Scout with the Haywire mine - that don't really cry out for batch painting. The next step here would be using a dark blue wash like Dark Blue Tone to do the recesses in the armor and hitting the fur, skin, and leather parts with Strong Tone. But after that point I'd absolutely be switching back to individual painting, as edge highlighting and individual model work is really a process where I want to sit down and just get a single model done.
That said, those are very much in a state where I could quickly knock out some major parts on each (doing this whole process took about an hour), and looking at them encourages me to do more - I immediately think "Yeah, I could finish that pretty quick."
Nearly Everything Else
This covers...the rest, really. I've used the below method when working on historical models across many time periods, fantasy models like dwarfs and Gloomspite Gitz, Burrows and Badgers, and Star Wars Legion.
As above I'll typically use an underpainting method where I start with a darker basecoat, brown usually, and then hit the model with a very heavy drybrush of a pure white. If you wanted to set yourself for warmer, less bright, tones over this layer then using an off-white ivory kind of colour would work great.
When approaching your batch of models you want to create the least amount of future work for yourself during each step. That means starting with the most recessed parts of the models and working your way out and up. Most often that will mean starting with skin: faces, arms, hands, etc. I tend approach skin by using a one coat solution like Speed Paints, where tones like Crusader Skin, Warrior Skin, or Peachy Flesh can create a fine base to work from.
Next Colours
Zach: We're back to the same steps from here on regardless of what you're working on. As with the "everything else" model section above you're wanting to start with the colours and parts of the model that are more recessed and work your way out. This will mean less paint spilling over onto parts you've already done; this takes up time to fix later and that's not the point!
This will often be the clothing followed by any pouches, straps, or weapons holstered on belts. Generally attacking the details that are are
on models not being
held by the model which will usually be a bit further away and you can get to afterwards. Intermediary details like hair which sit between a layer you've already done but still sit under armour follows. End the process with all the highest parts, often armour, weapons or shields being held by the model, and any smaller details like belt buckles, rings, or anything else your minis might have on them that you want to stand out.
 Credit Bair
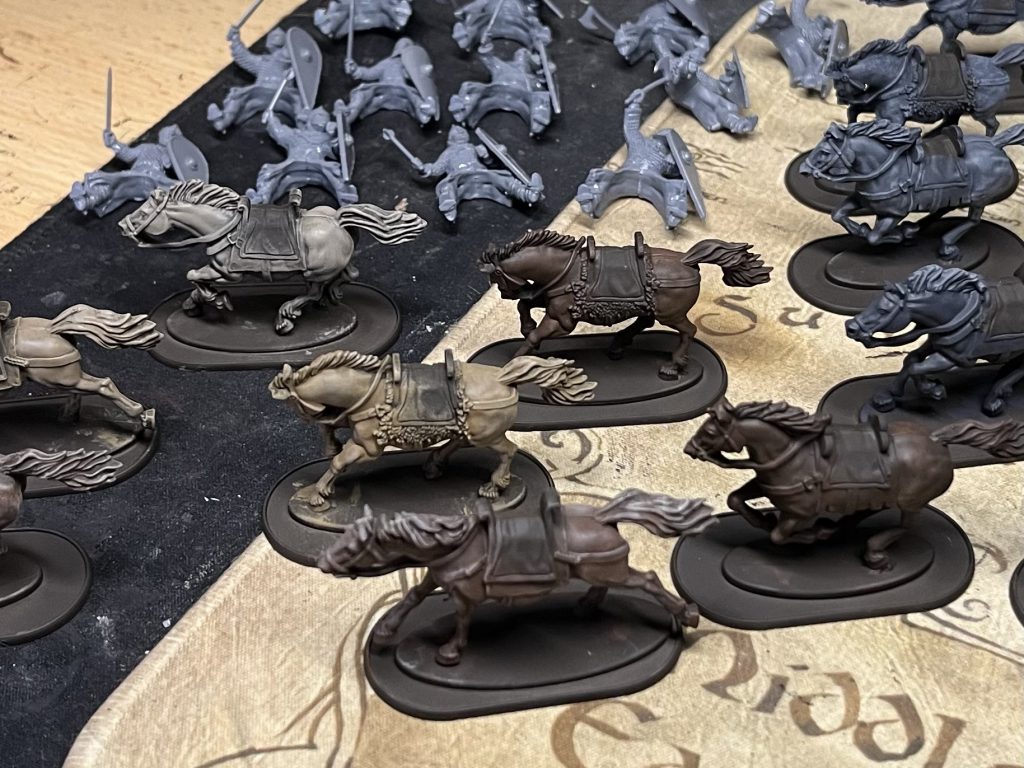
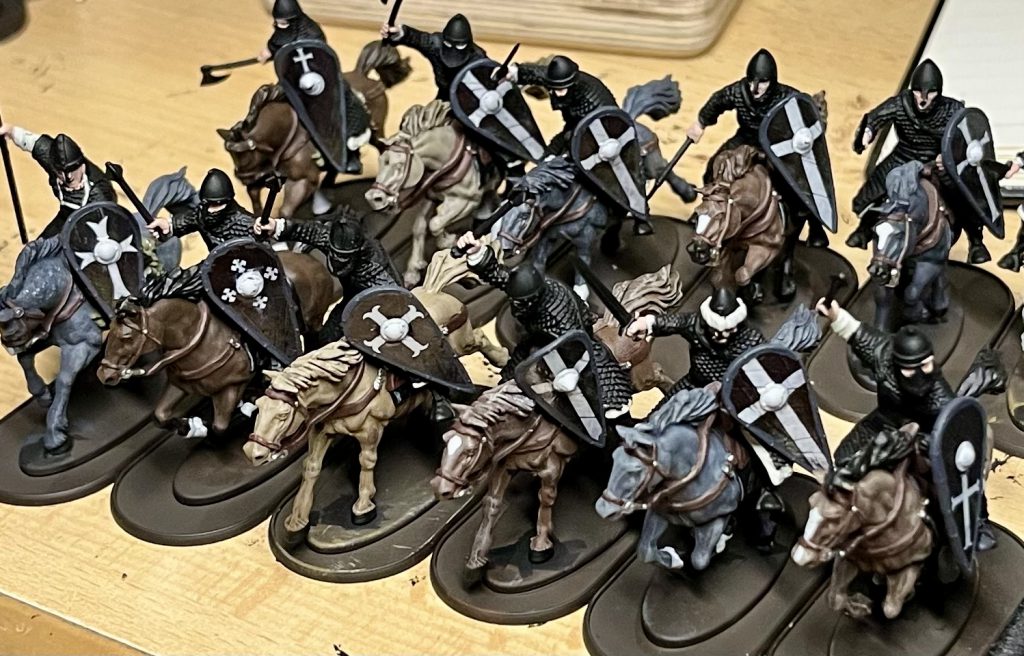
Norman/Crusader Cavalry
I batch painted these across one evening after work and finished them the next morning before work; I work from home and have a few hours either end of my day when I can sit down for some painting. These are Victrix's Norman Cavalry that I painted and use as a Milites Christi (Knights Hospitaller) Warriors in Saga. They're a great example of both parts here since the horses were painted first, separate from the riders, as they were largely just one colour each before adding on details adding the riders on later.
The horses were all sprayed brown and I ran out of brown so the riders got a coat of black spray instead. For variety I read Ilor's fantastic article on
painting horses so I won't reiterate too much of that here. The short of it is I chose a few browns, tans, and greys to paint each horse with a solid basecoat first before drybrushing them with a lighter tone. Some of the greys I decided to be a little fancy with and added dappling by using the same drybrush and stippling it on in parts instead of focusing on raised areas like normal, you can see that on the grey in the top right of the below image.
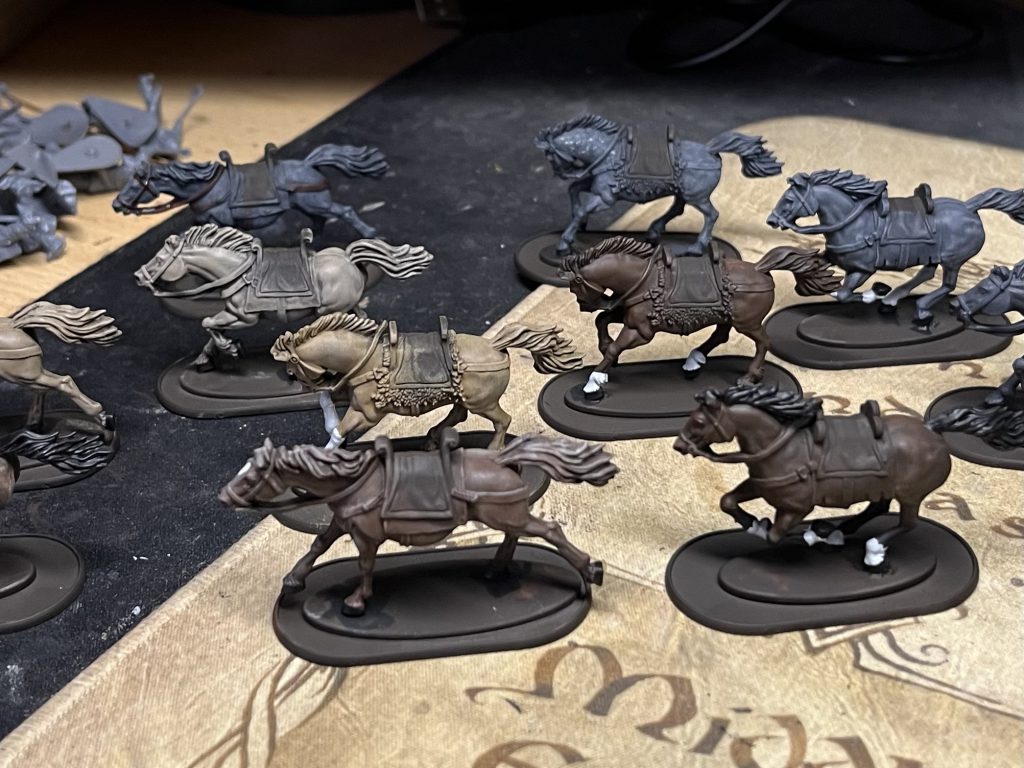
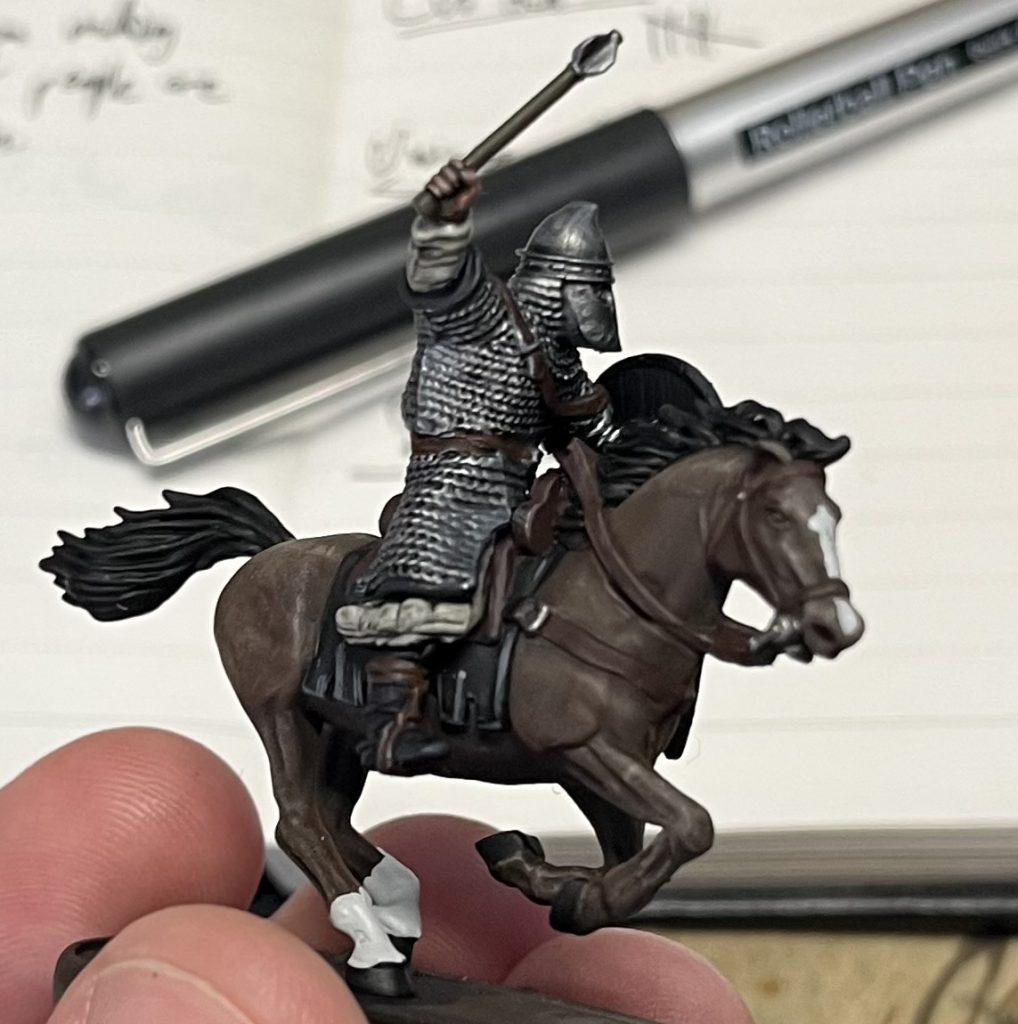
 Base coating horses
Next up: Adding a few details in white for socks and and face markings. A really simple step that you'll get done in just a couple of minutes but adds some nice variation. Paint the hoofs black after, a couple horses got black socks instead which is nice and easy to do while doing hoofs!
Then add the following details in order, working from the lowest point working out:
- Black blankets with a careful grey drybrush or tan fur blankets depending on model
- Brown leathers for the saddles and straps followed by a careful lighter brown drybrush just following the edges
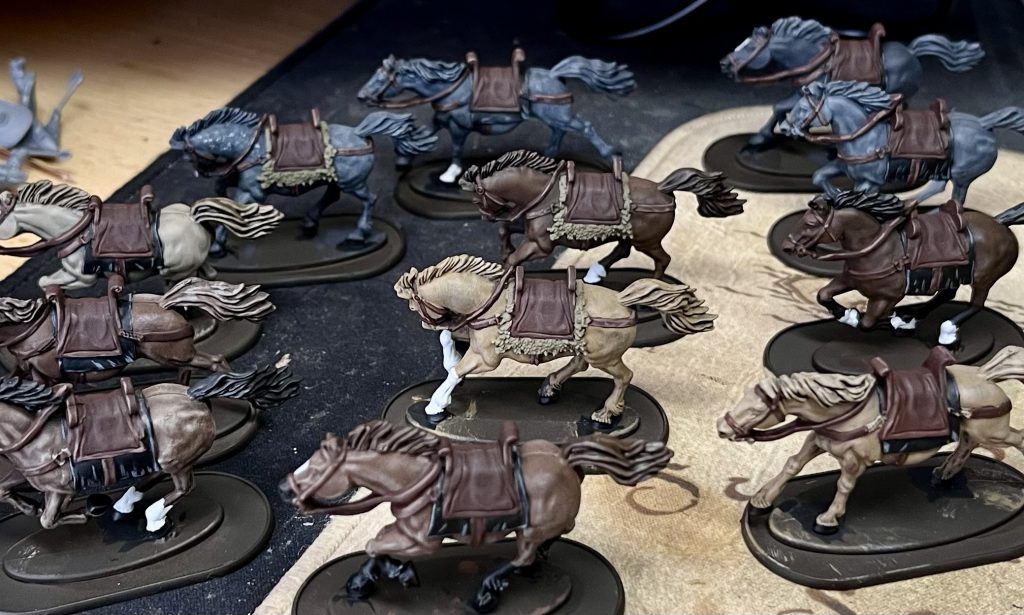
These are already looking great and it hasn't even taken that long! A quick dab of silver on the metallic parts of the reins helps those details stand out.
Now we super glue the riders to the horses making them easier to paint giving you something to hold onto. If you'd rather, you could easily temporarily glue or otherwise stick them to paint pot lids or something else but I find that tedious.
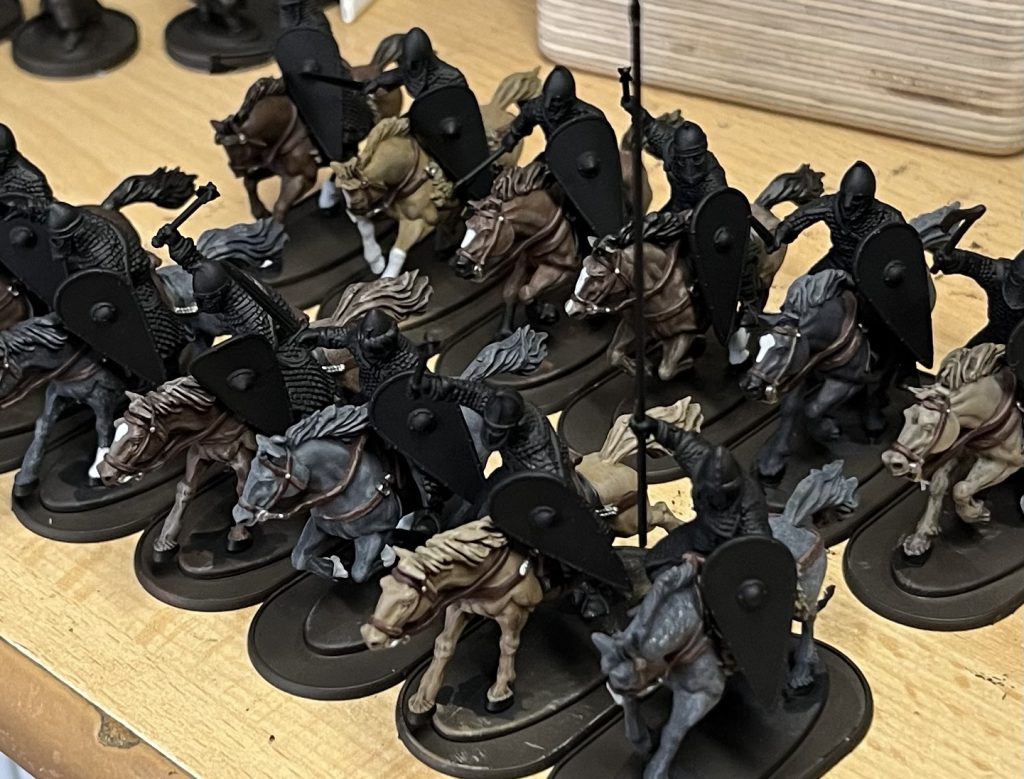
After they're stuck on the next step working inwards-to-outwards is all the skin and ivory cloth. The shield transfers get stuck on after so I can paint the boss of the shields and fill in any gaps between transfer and shield. These are Little Big Men Studio transfers which means the shields need to get painted white before they get stuck on. I use Matt White for that.
In this step it's very OK for paint to spill over helmets because you're painting them next!
Add brown to the weapon shafts of wooden weapon handles, like the mace below, before painting the rider's armour silver. Follow that with the straps in brown. Lastly cover the whole model with a black wash like Dark Tone to make that armour really stand out and add some very quick shadows to the whole model.
When applying washes remember that less is more!! Be careful and apply the shade in an even coat over the model, don't allow it to pool up too much anywhere or you'll get some very weird splotchy dark spots.
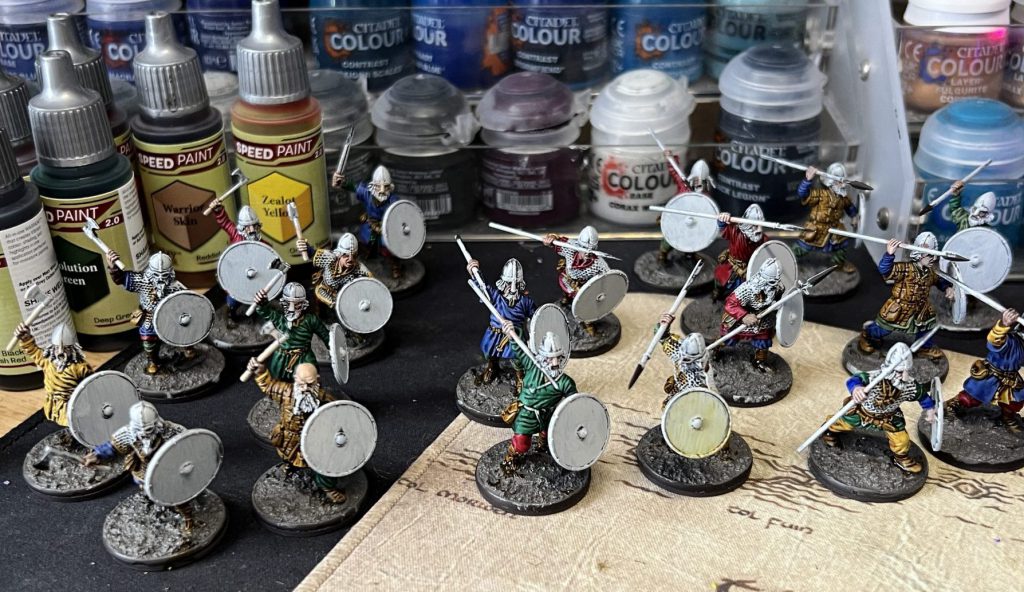
Speed Paint Vikings
These I have less progress shots of but the basics remain the same. For these I used one coat paints - primarily The Army Painter Speed Paint 2.0 paints - for everything other than the metallic parts.
Start with a brown spray before a heavy Matt White drybrush and then apply, in order:
- Skin tones
- Lower/recessed cloth
- Leather pouches
Follow that up by, in order, painting:
- Weapon handles
- Leather straps
- Hair and beards
- Shield transfers on
- Shield rims painted
- Silver shield bosses, helmets, armour, and weapons
- Texture paint thrown on
Follow that up by shading the whole model (and yes, the base texture paint!) with a black wash like Dark Tone, again being very careful with how you apply it and now allowing it to pool up too much.
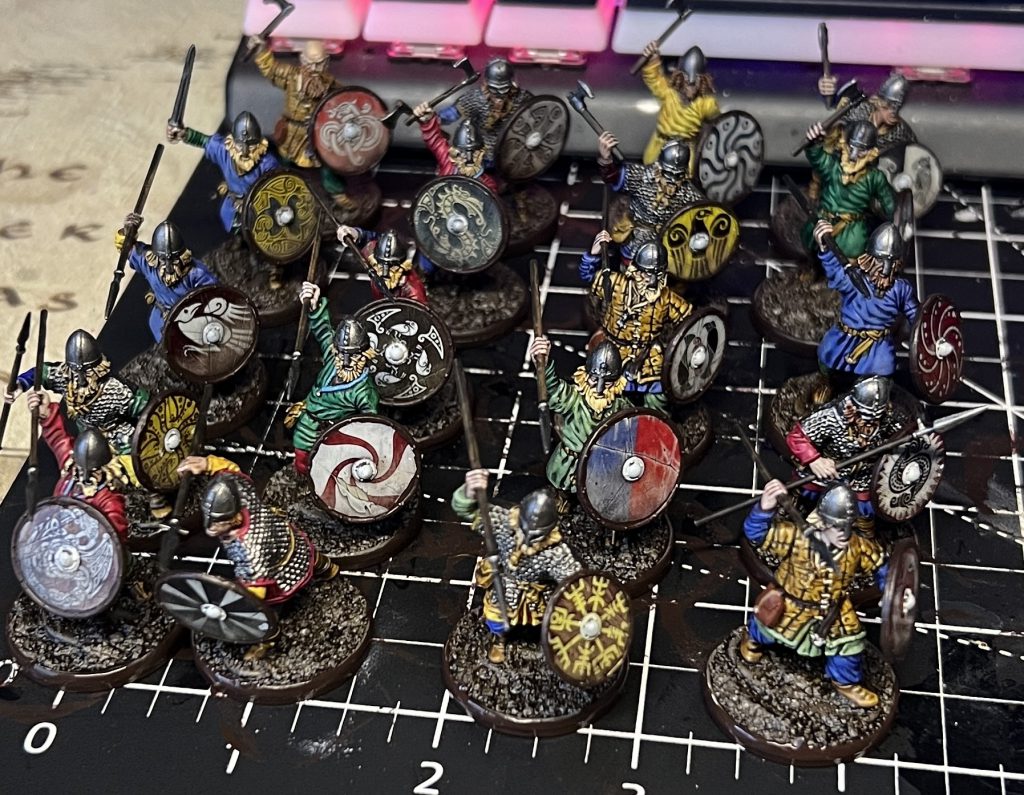
Finally, once all dry, apply tufts, matte varnish, and take some photos!
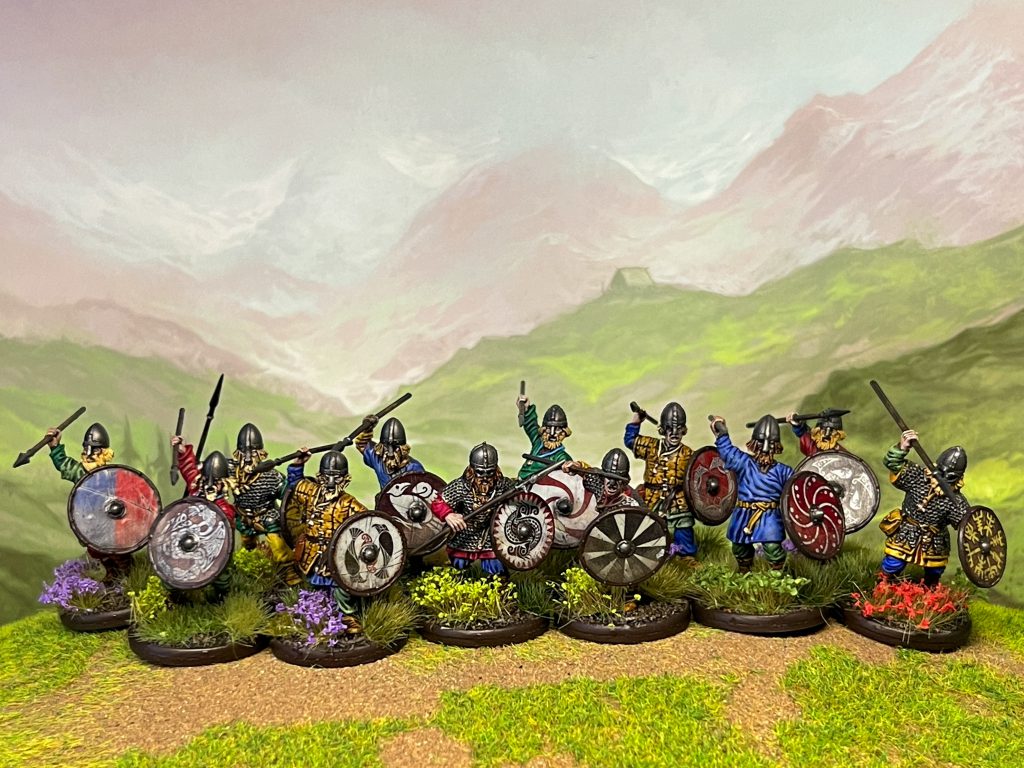 Saga Viking Leveis with Javelins - Credit Bair
Keep it Simple and Paint!
Rob: Remember that batch painting is all about making your life easier by making the most of your paints and getting paint on models quickly. It doesn't have to be how you paint the whole model by any means, and even on projects where I plan to paint something to best painted standard I'll often batch paint several models at a time to about 50% completion before switching to individual painting on them to get them over the finish line.
Zach: All of this is just about making it as easy and painless as possible to get your brush in your hand and some paint on your minis. As you go you'll figure out your own little tricks, how best to hold and use your brush in your hand, and get much quicker at it. It really is just practice and doing it. Hopefully this helps you with the simpler part of it and can get that pile of shame done!
Have any questions or feedback? Drop us a note in the comments below or email us at contact@goonhammer.com. Want articles like this linked in your inbox every Monday morning? Sign up for our newsletter. And don’t forget that you can support us on Patreon for backer rewards like early video content, Administratum access, an ad-free experience on our website and more.
Thank you for being a friend.


 Goonhammer App and Patron Updates: April, 2026
 Kill Team Tournament Report: Engage, Party, Repeat's March Madness 2026
 Goonhammer Reviews: Tribal Conquest