We’ve looked at the rules for the Murderwing and Celestian Insidiants, plus the new models. In this article we’re going to look at the new Descent rules, in which teams can climb up and down between two small killzones.
The Descent rules in the Shadowhunt Dossier can be used for Matched Play, Solo/co-op and Adversary Ops, where teams fight each other and NPOs at the same time - probably resulting in total chaos.
If you prefer a video then check out this one by John at Can You Roll a Crit?
https://youtube.com/watch?v=TRERnPNMy6c&feature=youtu.be
Thanks to Games Workshop for providing us with a Shadowhunt set in advance that we could play with.
What’s in the Box?
As well as the two teams, their cards and tokens, you also get two new boards for Descent missions. One is for Open games with Volkus on one side and Octarius on the other. The other is for ITD games and has Tomb World and Gallowdark designs. It’s interesting that they went with Octarius and not Bheta-Decima, as giving us a map with a hazardous area would be helpful for that.
Loading...
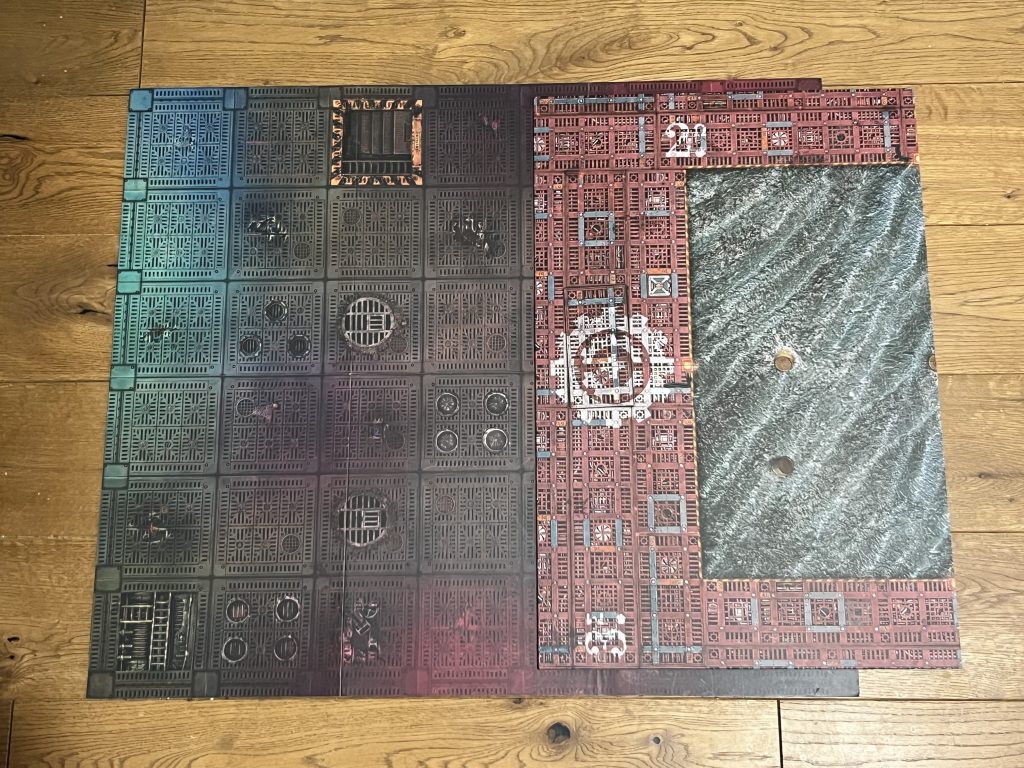
You don’t need these boards to play Descent missions, which is good as I don’t know if they’ll be available outside the limited run of the Shadowhunt box. For Open boards you just fold the board in half, while for ITD you use a grid 6 squares by four. The simplest way to do that is to put your other board on top of the ITD one.
 Setting up Kill Team boards for Descent missions. Credit: NotThatHenryC
Here’s what it looks like to just stick the folded BD board on top of an ITD board - before terrain of course. The BD board would be pretty weird to play across but that’s where the fold is. You could probably put the big tank thing in the hazardous area to make it more accessible. Any other kind of open board would be fine, so maybe just avoid BD for Descent games.
You don’t necessarily have to use one Open and one ITD board. You could have two of the same kind of board, perhaps fighting through multiple levels of a ship or something. However, all the maps in the book are for one board of Volkus and one of Tomb World.
Oh and Nightbringer isn’t in the box. Some of the early posts on WHC sort of implied it was. You do get rules for it though.
Setting up Kill Team boards for Descent missions. Credit: NotThatHenryC
Here’s what it looks like to just stick the folded BD board on top of an ITD board - before terrain of course. The BD board would be pretty weird to play across but that’s where the fold is. You could probably put the big tank thing in the hazardous area to make it more accessible. Any other kind of open board would be fine, so maybe just avoid BD for Descent games.
You don’t necessarily have to use one Open and one ITD board. You could have two of the same kind of board, perhaps fighting through multiple levels of a ship or something. However, all the maps in the book are for one board of Volkus and one of Tomb World.
Oh and Nightbringer isn’t in the box. Some of the early posts on WHC sort of implied it was. You do get rules for it though.
Setting Up the Board
To play Descent you’ll need two Killzones worth of terrain, which is the biggest barrier to using these rules. It would be cool to see them used at events but that probably means organisers having one fewer table and two fewer players at the event, which isn’t ideal.
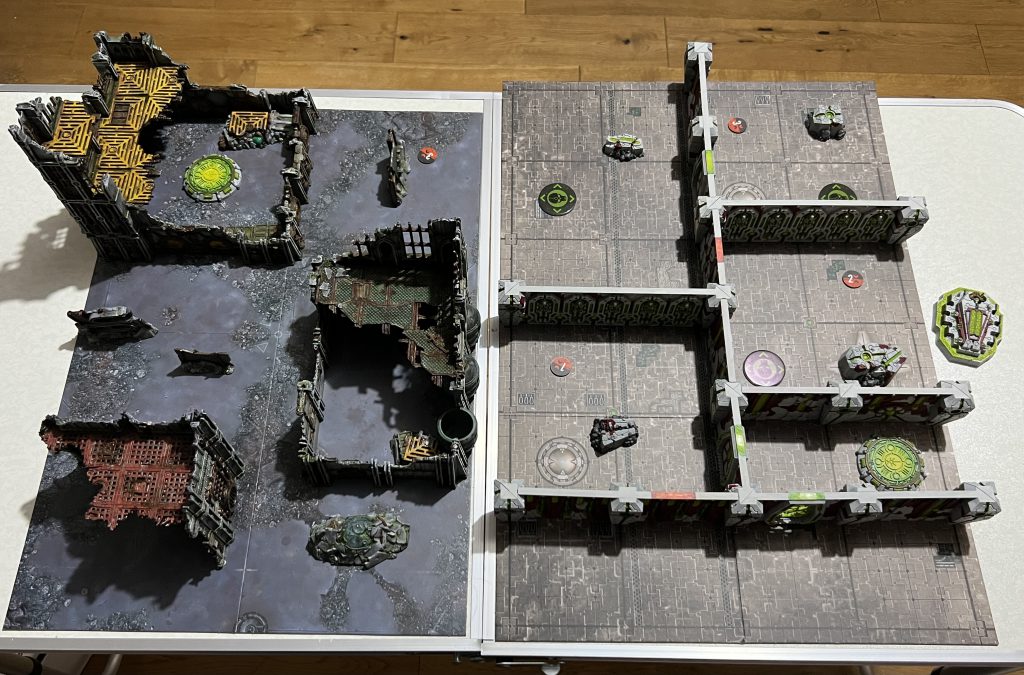 Descent Joint Ops Mission 1 boards set up. Credit: NotThatHenryC
As it happens I’ve painted up a few killzones recently so I was able to set it up quite easily. It takes longer to set up than normal, but not too long.
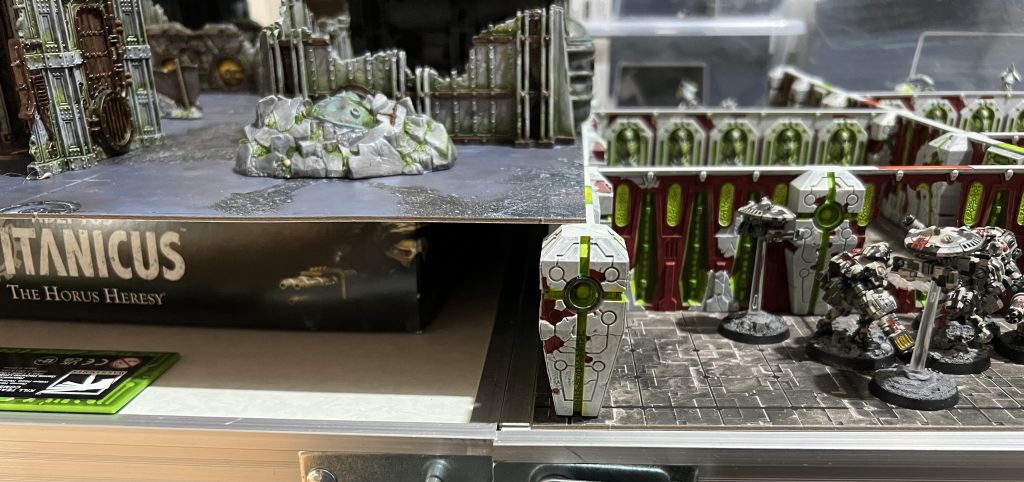
I decided to actually raise up my Volkus set to make it more visually obvious which was upstairs. This is purely cosmetic but somehow I found it made the board more believable. It turns out that the box from the Titanicus starter set is just the same height as a Tomb World wall, so I used that and rested one edge along the board. Oh and I used spare walls to mark that boundary, though that does trim a little bit of board off the edge.
Descent Joint Ops Mission 1 boards set up. Credit: NotThatHenryC
As it happens I’ve painted up a few killzones recently so I was able to set it up quite easily. It takes longer to set up than normal, but not too long.
I decided to actually raise up my Volkus set to make it more visually obvious which was upstairs. This is purely cosmetic but somehow I found it made the board more believable. It turns out that the box from the Titanicus starter set is just the same height as a Tomb World wall, so I used that and rested one edge along the board. Oh and I used spare walls to mark that boundary, though that does trim a little bit of board off the edge.
 Raising up the Volkus board for Descent missions. Credit: NotThatHenryC
Descent Rules
The rules for going up and down between the two killzones are fairly straightforward. The maps have three pairs of 20mm tokens (Entryway markers) marking the places you can move between them. You can move between the number 1 token on one board to the number 1 on the other, from the number 2 to the other 2 and so on.
This is done as a climb, using 3” of movement as part of a Reposition, Charge or Fall Back. As usual, you can’t climb during a Dash. When you move to within control range of one of the markers you can pay 3” of movement to set up within control range of the corresponding marker on the other board, then carry on moving from that point. You can only set up in the control range of enemy operatives during a Charge, as usual.
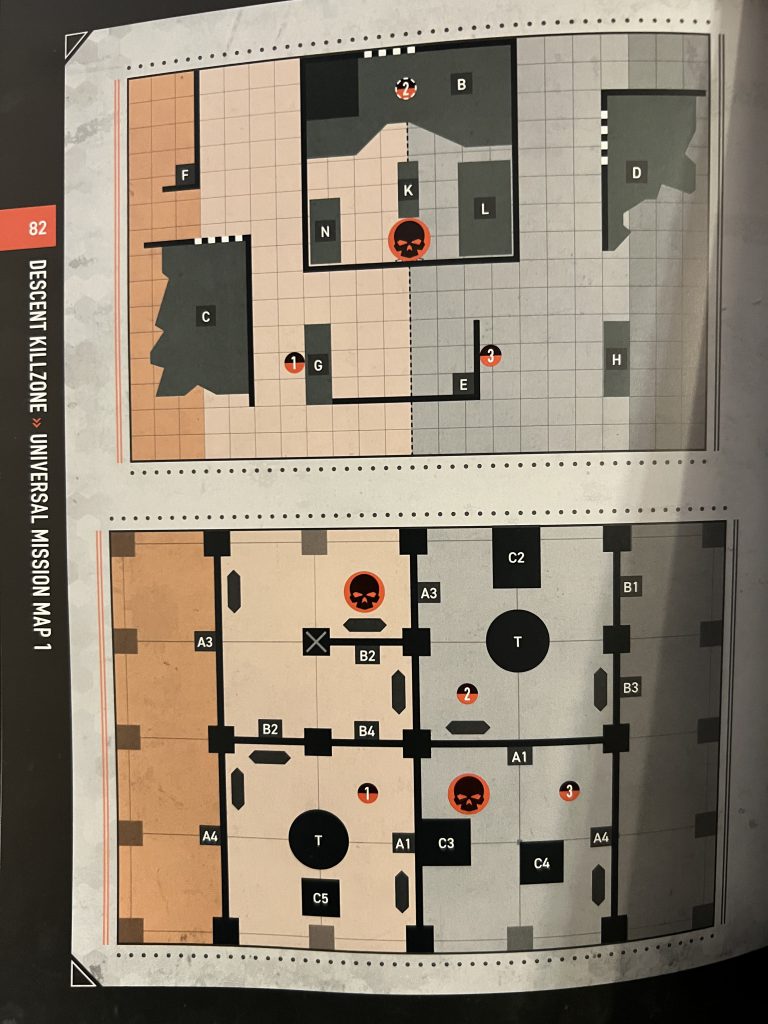 Descent matched play map 1
You can also shoot up and down a bit. If you’re in control range of an Entryway marker then you can shoot people in control range of the other one. The target can’t be in cover or obscured and you ignore the range, so even things like fusion pistols can be used. I think this will mean you won’t want to stand in control range of a marker if you can avoid it.
For shooting, you use the rules of the killzone the target is in. If they’re in an ITD board then blasts will get Lethal 5+, for example. An operative on an ITD board can also go on Guard to shoot anyone who appears above, but someone upstairs isn’t allowed to.
Since the maps in the book use the Tomb World terrain they also feature the teleport pads with one on the surface, meaning there are four ways to get up and down. Occasionally these are even on top of a Vantage on the Volkus maps. This doesn’t make a lot of sense if the teleporter was built before the ruin but offers some interesting opportunities.
Teams with special rules involving movement or tokens will tend to find they don’t work across the two killzones. You can’t fly (like Vespids) or teleport (like Mandrakes) between them for example, you have to take the “stairs”. Aquilons and Raveners have to pick which board to put their drop tokens or tunnel on but they’ll sometimes be able to progress those markers further up that board, if it’s played side to side.
Descent matched play map 1
You can also shoot up and down a bit. If you’re in control range of an Entryway marker then you can shoot people in control range of the other one. The target can’t be in cover or obscured and you ignore the range, so even things like fusion pistols can be used. I think this will mean you won’t want to stand in control range of a marker if you can avoid it.
For shooting, you use the rules of the killzone the target is in. If they’re in an ITD board then blasts will get Lethal 5+, for example. An operative on an ITD board can also go on Guard to shoot anyone who appears above, but someone upstairs isn’t allowed to.
Since the maps in the book use the Tomb World terrain they also feature the teleport pads with one on the surface, meaning there are four ways to get up and down. Occasionally these are even on top of a Vantage on the Volkus maps. This doesn’t make a lot of sense if the teleporter was built before the ruin but offers some interesting opportunities.
Teams with special rules involving movement or tokens will tend to find they don’t work across the two killzones. You can’t fly (like Vespids) or teleport (like Mandrakes) between them for example, you have to take the “stairs”. Aquilons and Raveners have to pick which board to put their drop tokens or tunnel on but they’ll sometimes be able to progress those markers further up that board, if it’s played side to side.
Matched Play Maps
The last thing in the book is three double-page spreads of maps for standard PvP games. Each uses Volkus and Tomb World, with two objectives on one floor and one on the other. This is the easiest way to play Descent as you don’t need any NPOs - though of course you do need both sets of terrain.
There are three objectives as usual, meaning that one killzone will have one of them and the other two will be in the other. The single objective is usually the one on the centreline but not always.
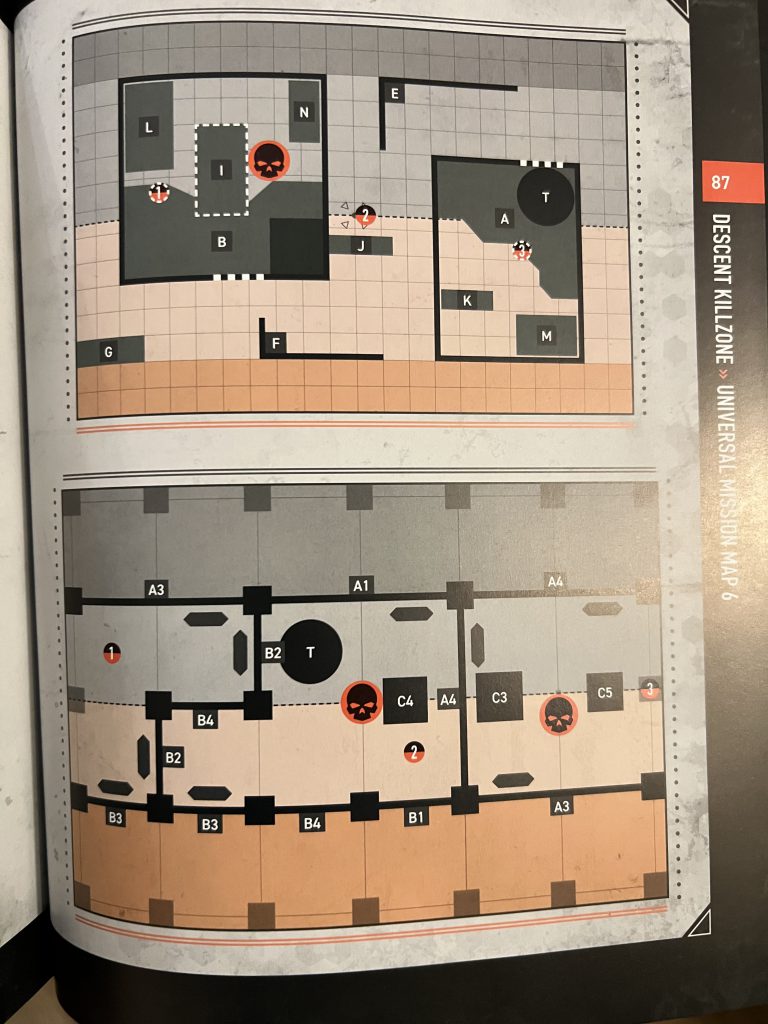 Descent matched play map 6
It makes a huge difference which way round the maps are, as the distance across the narrow direction is pretty small. On Tomb World in particular you’ve got maps where the teams deploy on either side of a single room, just two board squares apart. If the boards are the other way they’re four squares apart.
I expect these maps to favour melee teams somewhat, and not only because they’re smaller. You can charge up and down on these maps but you can’t shoot, so it creates a lot more paths to melee. The Volkus maps also seem even more dense with Heavy terrain than usual. On the other hand, shooty teams will have ways to get across the board without going through a melee team and they might be able to get shots off against operatives who thought they were safe, only to be shot in the back. I haven’t had a chance to try these out yet but I look forward to it.
Descent matched play map 6
It makes a huge difference which way round the maps are, as the distance across the narrow direction is pretty small. On Tomb World in particular you’ve got maps where the teams deploy on either side of a single room, just two board squares apart. If the boards are the other way they’re four squares apart.
I expect these maps to favour melee teams somewhat, and not only because they’re smaller. You can charge up and down on these maps but you can’t shoot, so it creates a lot more paths to melee. The Volkus maps also seem even more dense with Heavy terrain than usual. On the other hand, shooty teams will have ways to get across the board without going through a melee team and they might be able to get shots off against operatives who thought they were safe, only to be shot in the back. I haven’t had a chance to try these out yet but I look forward to it.
Joint Ops
For Solo/co-op play we have three missions in which your teams go looking for a mysterious power source in a tomb complex. If you’ve seen any of the promo images for Shadowhunt you won’t be shocked to learn that things go a bit wrong when they find out what they’re dealing with. As you’d expect we’re pretty interested in solo play here at Goonhammer dot com, so I gave it a go.
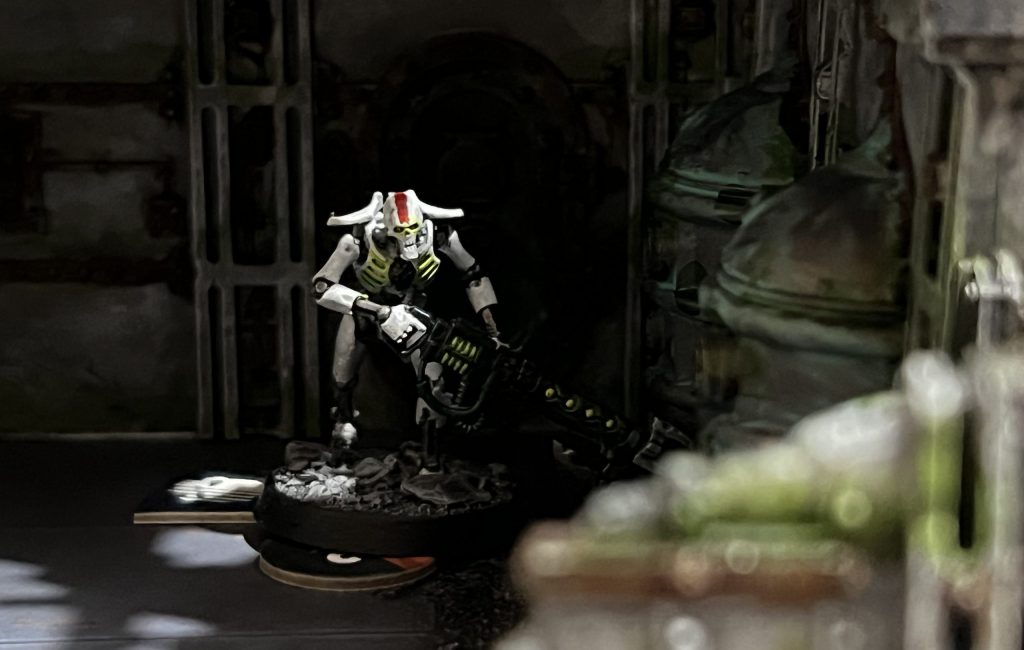
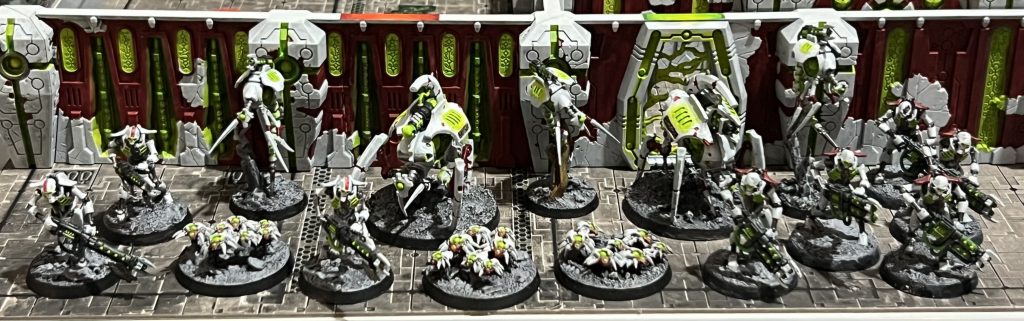 Necron Goons. Credit: NotThatHenryC
The writers seem to have had a lot of fun here designing some scenarios for you to play. None is a straightforward fight so they present very different challenges to normal games. To briefly summarise:
Necron Goons. Credit: NotThatHenryC
The writers seem to have had a lot of fun here designing some scenarios for you to play. None is a straightforward fight so they present very different challenges to normal games. To briefly summarise:
- Mission one has you looking for a power source which will appear in a random room (though usually the last one you get to).
- Mission two has your team split in half, with some operatives guarding the “prize” while others bring a big drill to open it up with.
- Mission three has you see what’s in the box and run away from it as fast as you can.
I’ve played through the first and third missions and I’m looking forward to giving mission two a go. I started but never finished a Necron 40k army a few years ago so I had plenty of warriors and scarabs to use as NPOs, as well as a hastily painted Canoptek team. I was also able to descend into the depths of my pile of shame and unearth a Void Dragon to use in scenario three. It’s the wrong model but it’s the right size and it has scary-looking things it can do in melee and at range, so it’s close enough. And it’s one thing crossed off the painting backlog.
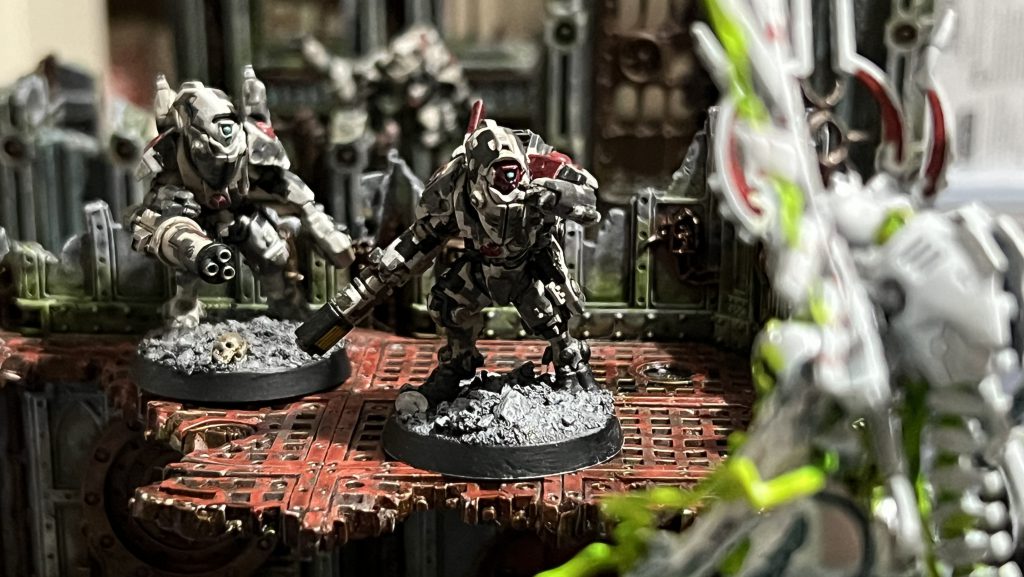
For the good guys I sent my Stealth team. They’re a fun team to use but not especially powerful right now, so I wasn't going to have an easy time.
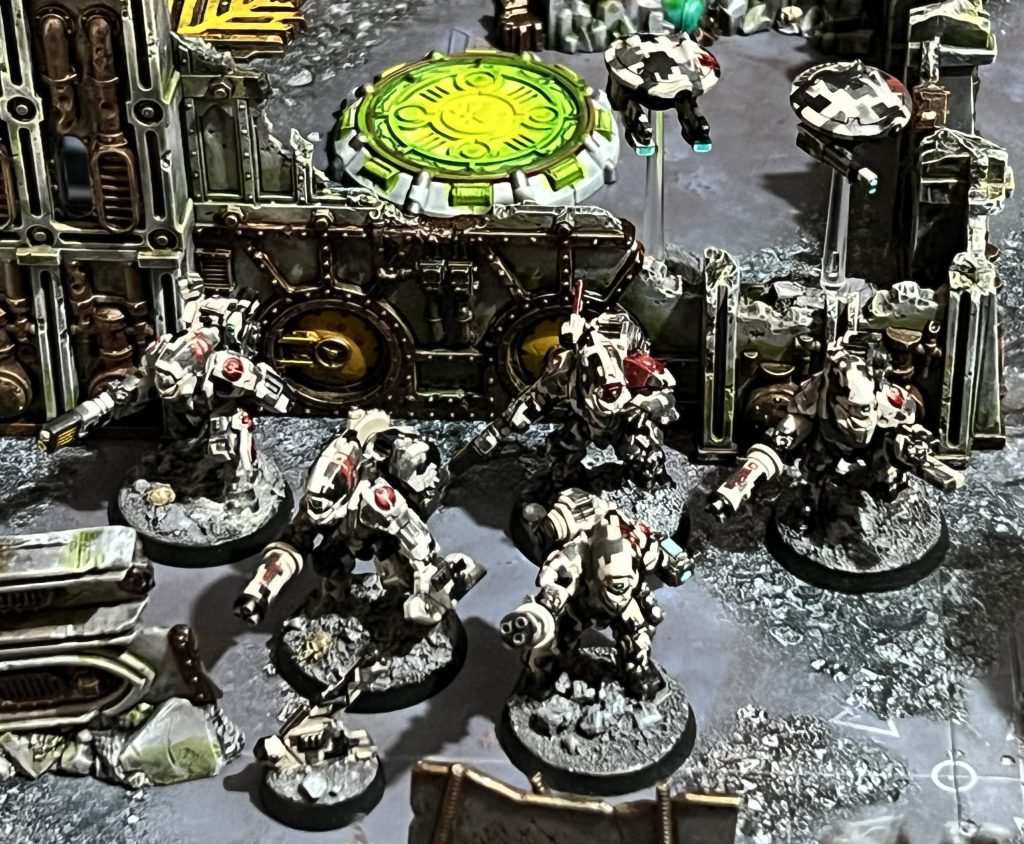 T'au XV26 Stealth team. Credit: NotThatHenryC
Mission one starts with your team in the tomb, but with no way through to the rooms you need to search. You have to head to the surface, fight your way across and find a way down. Meanwhile there are Necrons spawning all over the place and coming at you from the various Entryways.
Fighting the NPOs is very unlike playing against a Canoptek Circle team because they don’t have any buffs or rerolls - but they don’t stop coming. It’s annoying to finally kill a Tomb Crawler only for a new one to walk out of a door right next to you the following turn. You need to limit the damage you’re taking and find a way to make progress towards the objective, which feels pretty far away at first.
My T'au were just about able to slog their way through the tide of living metal and make it back into the tomb. They eventually came across the Sarcophagus in the final room and got through the three activations required to search it. By that point I had four T'au alive, but only just. They had eight hit points between them.
T'au XV26 Stealth team. Credit: NotThatHenryC
Mission one starts with your team in the tomb, but with no way through to the rooms you need to search. You have to head to the surface, fight your way across and find a way down. Meanwhile there are Necrons spawning all over the place and coming at you from the various Entryways.
Fighting the NPOs is very unlike playing against a Canoptek Circle team because they don’t have any buffs or rerolls - but they don’t stop coming. It’s annoying to finally kill a Tomb Crawler only for a new one to walk out of a door right next to you the following turn. You need to limit the damage you’re taking and find a way to make progress towards the objective, which feels pretty far away at first.
My T'au were just about able to slog their way through the tide of living metal and make it back into the tomb. They eventually came across the Sarcophagus in the final room and got through the three activations required to search it. By that point I had four T'au alive, but only just. They had eight hit points between them.
 The Sarcophagus is found. Credit: NotThatHenryC
The second mission has your team go and fetch a big drill to open the sarcophagus but my copy deadline didn’t allow time for that. I imagine my T'au just shot it with their Fusion blasters instead and we progressed to mission three.
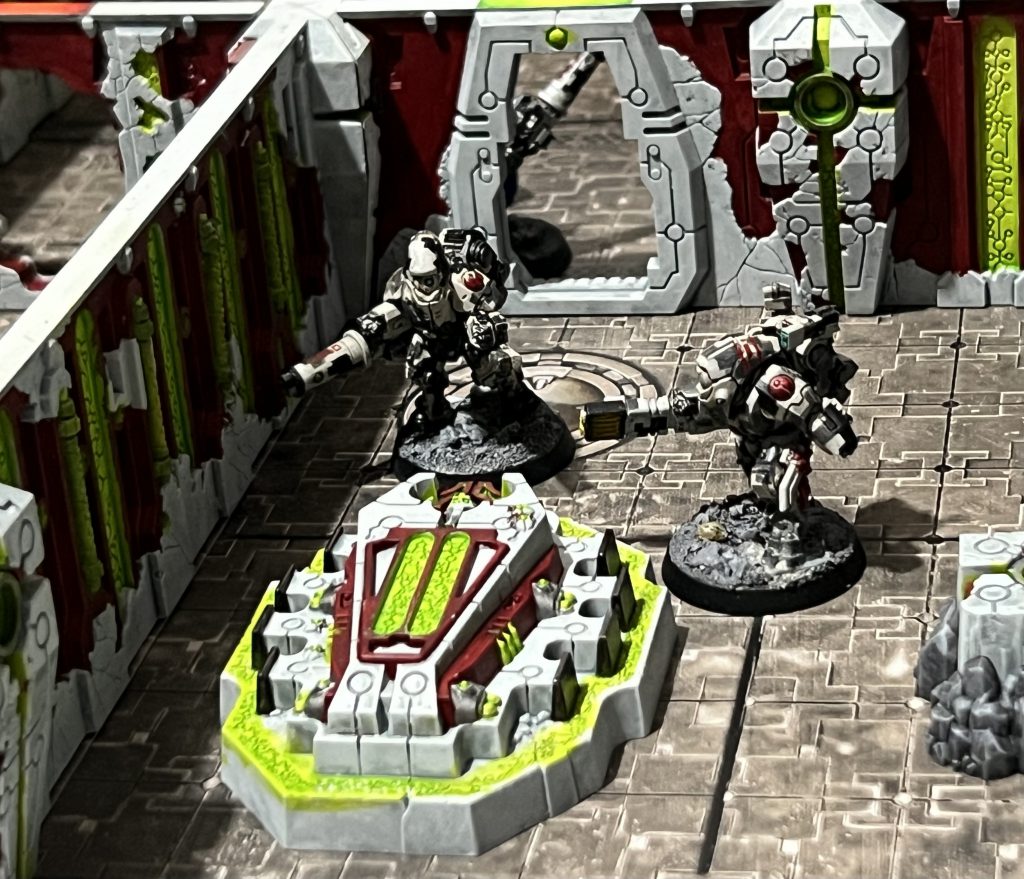
The first problem you have in mission three is that you’re in a room with no doors, meaning you have to break through one of the three Breach points to escape. I’m not sure how your guys are supposed to have got in there in the first place, but maybe the walls of the tomb moved or something.
T'au, with two Fusion Blasters and the Liberator (a Grenadier), are pretty happy to break down walls, so we made a run for it straight away. My first activation was to have my Neutraliser open the door and Charge a Tesla Macrocyte, so it couldn’t blast everyone in the room. This led to a vicious fight where to everyone’s surprise my T'au killed the Macrocyte, though ended up injured and limping towards the exit.
The Sarcophagus is found. Credit: NotThatHenryC
The second mission has your team go and fetch a big drill to open the sarcophagus but my copy deadline didn’t allow time for that. I imagine my T'au just shot it with their Fusion blasters instead and we progressed to mission three.
The first problem you have in mission three is that you’re in a room with no doors, meaning you have to break through one of the three Breach points to escape. I’m not sure how your guys are supposed to have got in there in the first place, but maybe the walls of the tomb moved or something.
T'au, with two Fusion Blasters and the Liberator (a Grenadier), are pretty happy to break down walls, so we made a run for it straight away. My first activation was to have my Neutraliser open the door and Charge a Tesla Macrocyte, so it couldn’t blast everyone in the room. This led to a vicious fight where to everyone’s surprise my T'au killed the Macrocyte, though ended up injured and limping towards the exit.
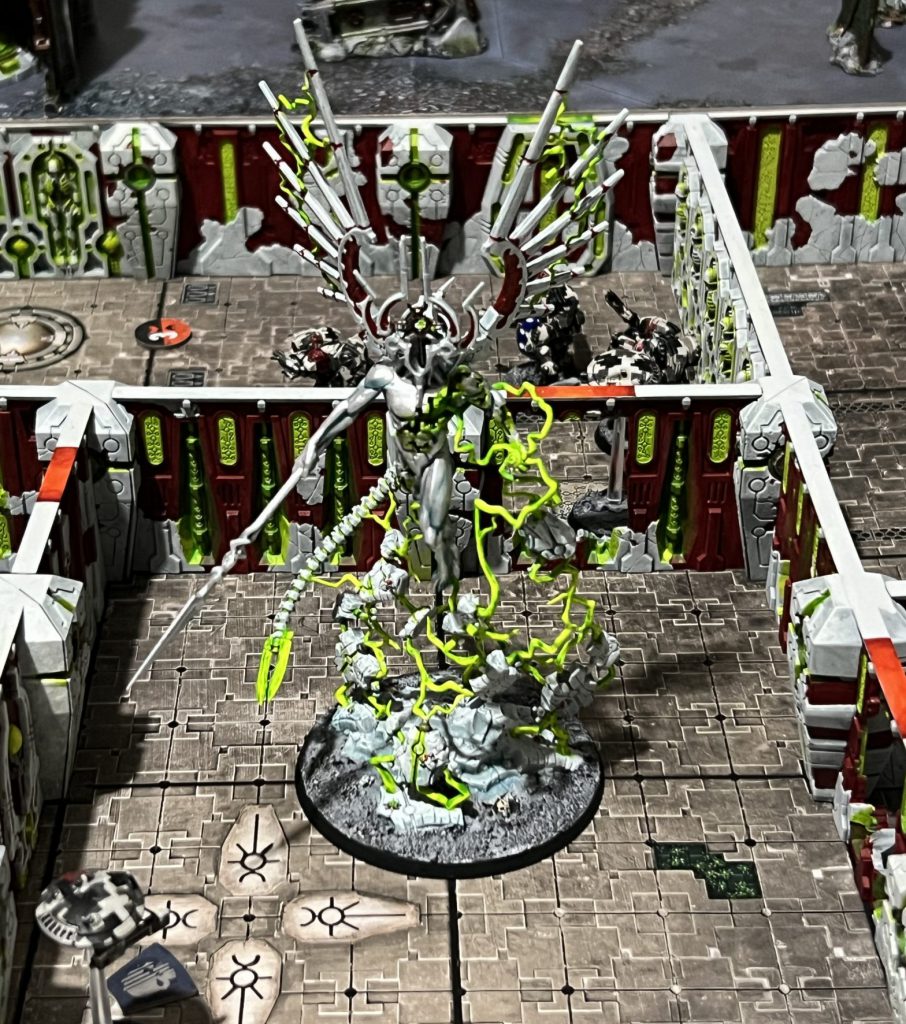 The Void Dragon emerges. Credit: NotThatHenryC
The second problem is the C’tan that spawns at the end of the first turning point, then presumably bangs its head very hard on the ceiling. It’s really quite unpleasant and can activate multiple times per turn, potentially carving up your team. It can move through terrain, including the Tomb World Walls, and even finish its move on operatives - who then end up in melee with it. That’s not where a T'au wants to be.
My plan was to have my two drones stay back to delay the C’tan while my T'au ran away and dealt with the Necron NPOs. I thought maybe the C’tan would whiff its attacks and fail to kill one of them but no. My marker drone managed to land a crit for a mighty three damage, while taking four crits in return. My gun drone then rocked up and, helped by having Accurate (3) against a target in my deployment zone and terrible saving rolls, shot the Void Dragon for sixteen damage!
The NPOs didn’t put up too much of a fight so my T'au running away had a fairly easy time. They don’t respawn in this mission and I’d randomly generated three scarab swarms, which are fairly harmless, though there were also a pair of crawlers to deal with. I got a bit of a shock when the seriously damaged C’tan popped out of the ground in control range of two T'au. However New Model Syndrome struck, the C’tan rolled badly, I rolled well and my Designator can now claim to have killed the Void Dragon in melee - albeit most of the work had been done by the heroic drones already.
The Void Dragon emerges. Credit: NotThatHenryC
The second problem is the C’tan that spawns at the end of the first turning point, then presumably bangs its head very hard on the ceiling. It’s really quite unpleasant and can activate multiple times per turn, potentially carving up your team. It can move through terrain, including the Tomb World Walls, and even finish its move on operatives - who then end up in melee with it. That’s not where a T'au wants to be.
My plan was to have my two drones stay back to delay the C’tan while my T'au ran away and dealt with the Necron NPOs. I thought maybe the C’tan would whiff its attacks and fail to kill one of them but no. My marker drone managed to land a crit for a mighty three damage, while taking four crits in return. My gun drone then rocked up and, helped by having Accurate (3) against a target in my deployment zone and terrible saving rolls, shot the Void Dragon for sixteen damage!
The NPOs didn’t put up too much of a fight so my T'au running away had a fairly easy time. They don’t respawn in this mission and I’d randomly generated three scarab swarms, which are fairly harmless, though there were also a pair of crawlers to deal with. I got a bit of a shock when the seriously damaged C’tan popped out of the ground in control range of two T'au. However New Model Syndrome struck, the C’tan rolled badly, I rolled well and my Designator can now claim to have killed the Void Dragon in melee - albeit most of the work had been done by the heroic drones already.
 The Void Dragon gets killed in melee by a T'au. Credit: NotThatHenryC
In the end this was a much faster game than mission one. The Void Dragon respawned but by that time everyone had run too far away, so it just got shot dead again. All my T'au made it to the extraction point on the structure’s vantage by turn four.
This was quite a lot of fun to play through but it’s not all that accessible as a game. You need to have two killzones and a bunch of Necron NPOs - though you got all you need in the Tomb World box if you were able to get hold of it. And in theory mission three needs a C’tan, which most people won’t have. It would obviously be more fun to play through as doubles but even then I’m not sure you’d want to buy and paint a C’tan just for one mission.
If you’ve got the stuff, or at least stuff you can proxy for the stuff, then these missions give you a really nice bit of bonus content. They’re also very useful for a reviewer who has access to rules and nobody to play them with, but that’s a bit of a niche. Across all the recent Kill Team expansions I’ve been impressed by the thought they’ve put into designing missions that feel interesting and set your team different challenges.
The Void Dragon gets killed in melee by a T'au. Credit: NotThatHenryC
In the end this was a much faster game than mission one. The Void Dragon respawned but by that time everyone had run too far away, so it just got shot dead again. All my T'au made it to the extraction point on the structure’s vantage by turn four.
This was quite a lot of fun to play through but it’s not all that accessible as a game. You need to have two killzones and a bunch of Necron NPOs - though you got all you need in the Tomb World box if you were able to get hold of it. And in theory mission three needs a C’tan, which most people won’t have. It would obviously be more fun to play through as doubles but even then I’m not sure you’d want to buy and paint a C’tan just for one mission.
If you’ve got the stuff, or at least stuff you can proxy for the stuff, then these missions give you a really nice bit of bonus content. They’re also very useful for a reviewer who has access to rules and nobody to play them with, but that’s a bit of a niche. Across all the recent Kill Team expansions I’ve been impressed by the thought they’ve put into designing missions that feel interesting and set your team different challenges.
 You can't see me! Credit: NotThatHenryC
Adversary Ops
There are three missions for Adversary Ops, which are narrative missions and look like a lot of fun. You have two teams competing to achieve similar objectives while NPOs cause chaos attacking both teams.
They follow a similar format to the Joint Ops missions. In the first mission you look for a Tomb, deploying on the surface and then descending to secure four objectives - and you get an objective #4 in the token sheet for just this mission. In the second you race to open it, deploying side by side on opposite sides of a Tomb World wall. Then in the third you grab a relic from the middle and run away before the Nightbringer kills you. That’s a welcome change from the Joint Ops, where it’s not clear what you’ve achieved apart from unleashing an angry star god.
If you play these missions you should expect a chaotic game with the NPOs intervening at random, potentially in ways that benefit one player over the other. They’d make a great “palette cleanser” if you’d like a change from the Approved Ops deck but not necessarily a “fair” game where both teams have an equal chance of winning*. Narrative missions like these will always be a bit more memorable somehow, compared to the fairly abstract objectives of the matched play games.
*Not that this necessarily exists with Matched Play either given the state of the meta. Fingers crossed for that January Dataslate.
Final Thoughts
 The Necrons will be back! Credit: NotThatHenryC
The Descent missions all present you with some new and entertaining ways to play Kill Team. Ultimately all of this stuff is optional stuff that you get with your FOMO box, rather than core content for the game but it’s good fun nonetheless. The designers have really put some effort into the scenarios, which is great to see.
It’s nice that you actually don’t need much stuff to play Descent missions. If you have the book, two killzones and three pairs of 20mm tokens you can tell apart (such as the generic ones you get with the core rulebook) then you’re good to go.
Playing Joint Ops and/or Adversary Ops requires getting a bunch of NPOs, which is a bit more of a challenge. It’s nice that the Canopteks and Warriors in the Tomb World box have everything you need - except of course for the Nightbringer. I don’t know if I’d recommend buying that thing just to use as a NPO in occasional games of Kill Team but it is a very cool model, so use your best judgement.
The Necrons will be back! Credit: NotThatHenryC
The Descent missions all present you with some new and entertaining ways to play Kill Team. Ultimately all of this stuff is optional stuff that you get with your FOMO box, rather than core content for the game but it’s good fun nonetheless. The designers have really put some effort into the scenarios, which is great to see.
It’s nice that you actually don’t need much stuff to play Descent missions. If you have the book, two killzones and three pairs of 20mm tokens you can tell apart (such as the generic ones you get with the core rulebook) then you’re good to go.
Playing Joint Ops and/or Adversary Ops requires getting a bunch of NPOs, which is a bit more of a challenge. It’s nice that the Canopteks and Warriors in the Tomb World box have everything you need - except of course for the Nightbringer. I don’t know if I’d recommend buying that thing just to use as a NPO in occasional games of Kill Team but it is a very cool model, so use your best judgement.
Thank you for being a friend.


 Goonhammer App and Patron Updates: April, 2026
 Kill Team Tournament Report: Engage, Party, Repeat's March Madness 2026
 Goonhammer Reviews: Tribal Conquest