Most entry-level 3D print hobbyists have heard of Bambu Labs, especially their supremely popular A1. I
reviewed it last year in a sizable
two-parter. My tl;dr for the A1 is that it's an excellent first-time FFF (fused filament fabrication) printer in its price bracket. For those looking to scale up their printing or add more exotic features, Bambu Labs has other printer lines. Among them, the H2 series. This line is defined by larger print volumes (minimum 300mm3, varies by model and configuration), heated enclosures, and special features.
Last year, I took delivery of an H2D (40W Laser Combo Edition) and I've put over 600 print hours into it at time of writing. Here comes another mammoth review. So big, in fact, we're running it in two parts! This part will cover the main printing and maintenance of the unit in full; the second part will focus in on the laser cutting aspect of the printer.
Note: I thank Bambu Labs for providing this unit and some accessories (0.2mm nozzles) to Goonhammer for review purposes. I was not otherwise compensated for this review. Bambu Labs had no editorial control over its content, nor did they see it prior to publication.
The Featureset
The H2D was Bambu Lab's first H2 series printer. While other players in the market specialized into printing with complex multi-material systems (see: the Prusa XL), Bambu went
wider. The H2D is a large consumer printer that emphasizes versatility over print volume or extra toolheads. The H2D always ships with a blade cutter and
plotter, and is optionally compatible with a 10W or 40W laser suitable for engraving and cutting.
Pricing varies depending on availability and model, but Bambu Lab's' US site lists an MSRP of $1999 for the most basic version and $3649 for the most feature heavy 40W Laser Combo (incl. AMS 2 Pro). These US prices may differ from international prices due to tariff fiascos imposed by the second Trump administration.
 I expected much in terms of print reliability and the H2D delivered.
3D Printing
The H2D is a
CoreXY FFF printer with
one toolhead with
dual-nozzles. The printer uses one nozzle at a time, and switches nozzles as needed. Its minimum configuration seamlessly manages multi-material prints with 2 different filaments. It's also compatible with Bambu Lab's AMS (standard and 2 Pro) devices to manage larger numbers of materials with filament auto-loading. The nozzles, heatbed, and chamber reach temperatures of 350°C, 120°C, and 65°, respectively. The H2D's specs are suitable for some specialist materials, including ASA, PAHT, and PA12. Cooling is supplied by a part fan on the toolhead, a large horizontal fan, and a ventilation system that exhausts hot air. The listed maximum chamber temperature is 65°, but the chamber can technically reach higher temperatures if the chamber heater is running, the printer is closed, and the heat bed is running at maximum temperatures.
The side-by-side nozzles necessitate a non-uniform print volume. The H2D has a maximum print volume of 325mm x 320mm x 325mm when using a single nozzle—its maximum print volume. When printing with both nozzles, the maximum print volume is 300mm x 320mm x 325mm. Each nozzle has a dead zone that it can't reach, so multi-material prints that use almost all of the build plate must be arranged properly.
Multi-material printing is supported by the newer AMS 2 Pro
material" frameborder="0"> management device. It holds 4 spools of 1kg filament that allow its corresponding nozzle to switch between stored materials automatically. It is also a filament dryer with heating and automated ventilation. The AMS 2 Pro is the
intended multi-material add-on for the H2D and its combo packages include one. The H2D is backwards compatible with the older standard AMS, but it's not compatible with the AMS Lite used by A1 printers.
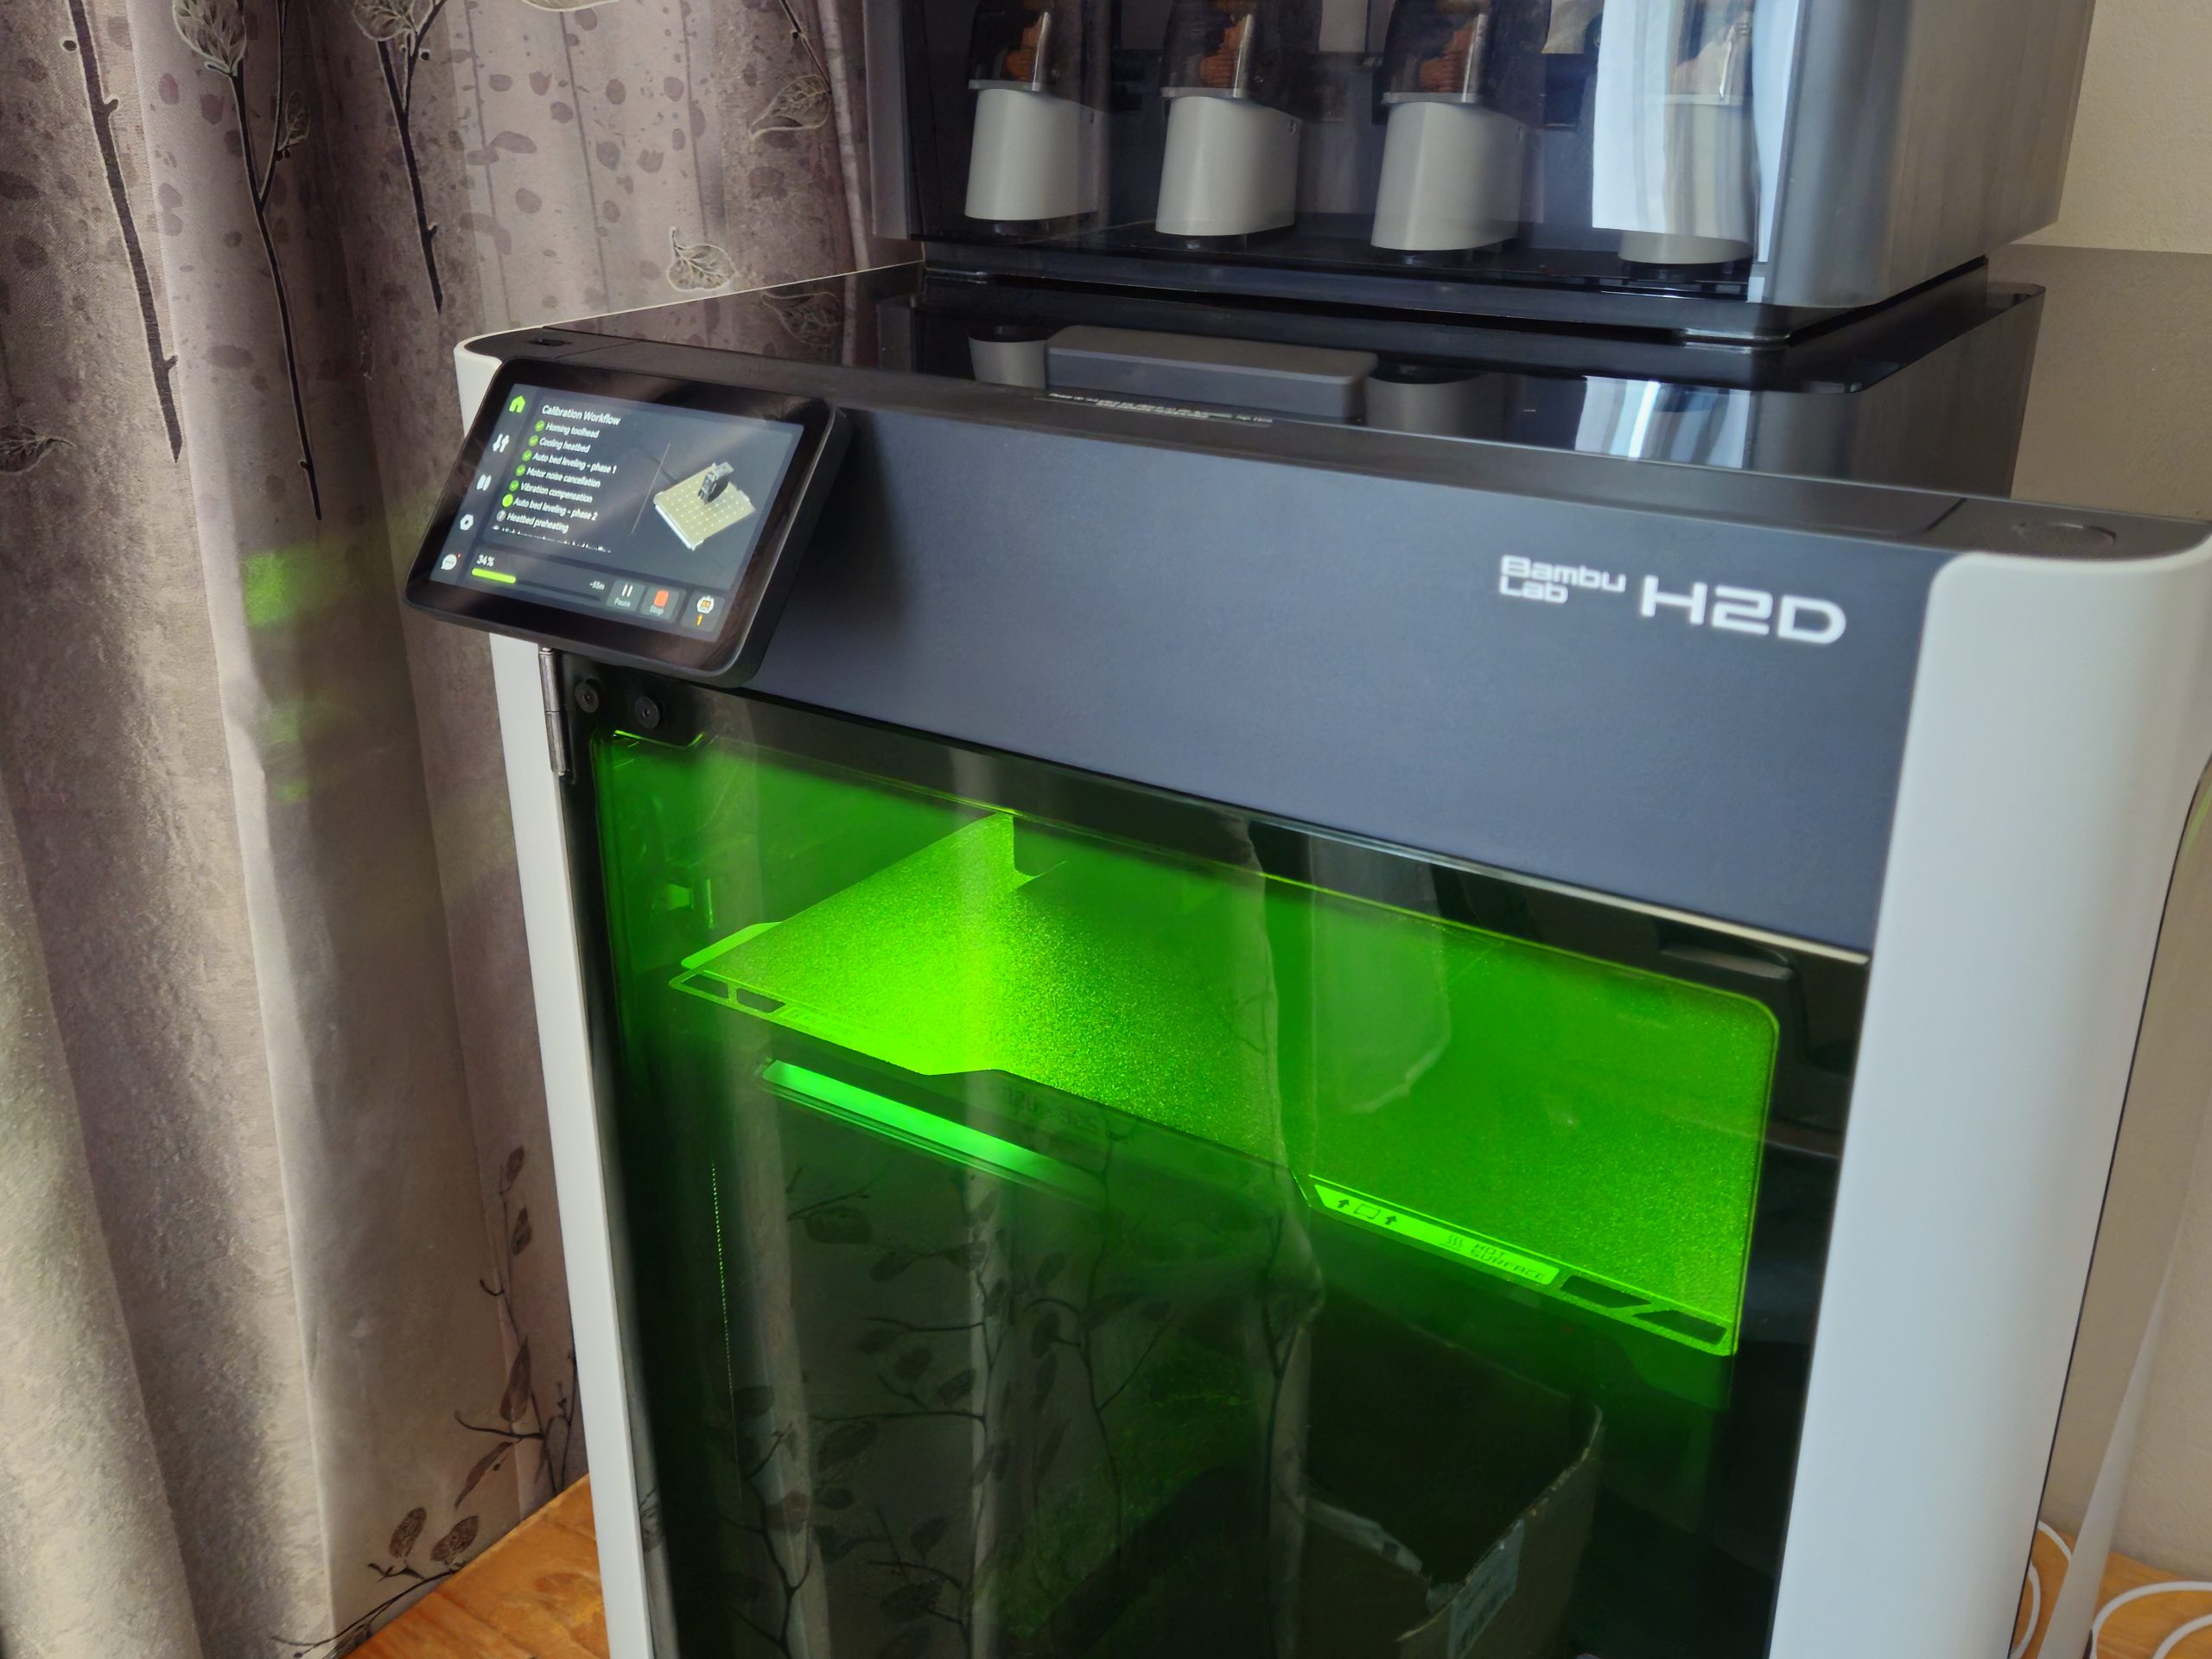
 The H2D's basic calibration is customizable and fully automated. It also walks users through basic maintenance processes like cold pull and cleaning.
The AMS 2 Pro's largest departure from similar devices is filament drying with ventilation. Many dedicated filament 'dryers' don't have active ventilation so moisture that escapes the filament condenses in the container and raises its humidity, reducing the value of any drying. Proper drying only occurs if the airborne moisture can escape, which the AMS 2 Pro allows. When closed, the AMS 2 Pro is decently isolated from the ambient environment (but not fully airtight) and is viable for long-term filament storage once you get
desiccant in there.
The H2D has a host of 'soft' features, some expected at its price point and others that are more novel. Automated bed-levelling and calibration, guided maintenance, wireless support, timelapse video, error detection, and power-loss recovery are all here. Every H2D has 3 1920x1080 cameras for various forms of monitoring (incl. wireless monitoring via app), and the Laser Editions have a 3264 x 2448 BirdsEye camera to assist laser cutting setup. The touch screen is responsive and a joy to use, and the interior lighting is excellent. There are some AI features, and I found them unobtrusive. I'm more tolerant of AI integration that's not aggressively imposed, like Gemini trying to finish my sentences or
whatever this is.
Laser Cutting
This is the one that had people talking.
The clearest sign of Bambu Lab's effort to go versatile rather than specialise was the inclusion of a laser cutting and engraving add-on. All H2 series printers support laser cutting and engraving via an optional 10W or 40W laser. Pre-release impressions ranged from calling it the
worst idea ever to the
best idea ever. Many people had understandable reservations about burnt laser residue dissipating into the moving parts of a machine that lives and dies by precision. Conversely, others were optimistic that this could be
the way to get into with basic laser cutting and engraving without buying a much larger setup.
The laser module is a semiconductor/diode laser that operates at 455nm (blue). The module
clips" frameborder="0"> on to the toolhead. As a diode laser, it's not as powerful as
CO2 of fiber lasers that can sear through metal. The H2 laser add-ons can't cut metal and some acrylics (white, blue, translucent), but they reliably etch and cut 'soft' materials like wood and leather. They can cut some acrylics, depending on color and type. My 40W laser engraves and marks metals, but performance varied widely depending on the material and settings. Users can buy a complete Laser Edition with a prepackaged laser, or upgrade a non-Laser Edition H2D manually
using a kit.
Laser cutting is substantially more dangerous than filament printing and warrants additional safety measures. It's also inherently dirty work that requires ventilation. Laser Edition H2Ds have green acrylic windows that neutralize the laser light, and the door sensor automatically shuts the laser down if the door is opened during laser operation. The H2D's quite-powerful ventilation system always runs at maximum output during laser work, and it ventilates smoke out the rear into a flexible hose. The hose can be directed outside, or into
a smoke purifier for setups that can't access The Outside. Honestly, The Outside isn't that impressive. I've been there.
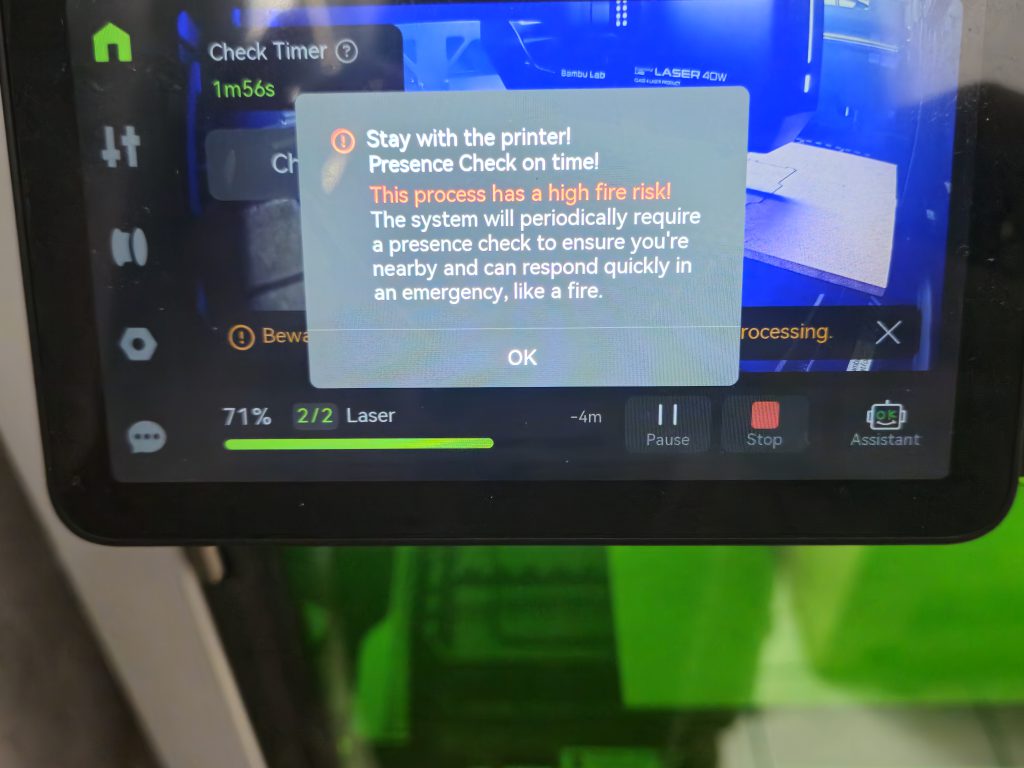 Laser projects more than a few minutes long require periodic physical interaction with the H2D to ensure that a user is nearby for safety purposes.
Laser cutters carry inherent fire risks and the H2D addresses that as follows: 5 internal flame sensors, a fire alarm, an emergency stop button (that kills the power outright), and an automated fire mitigation system (
not active fire suppression), documentation, and enforced user presence. There
is an
active CO2 fire suppression system available
as an add-on.
The H2D's default fire mitigation was adequate for me and should be satisfactory as long as the laser is used correctly (by always having an operator present). On the
one occasion my laser project ignited in the chamber, it was due to unavoidable debris from the project catching fire during a high-power laser pass. The printer reacted as follows:
- It detected the fire and stopped the laser.
- It triggered an audible fire alarm.
- It shut all vents to starve the fire of fresh oxygen.
- The alarm could only be deactivated at the printer's touchscreen, not wirelessly.
By the time I got to the printer (on the other side of the room), the open flame had died to oxygen starvation and I did need to use the emergency stop. I disabled the fire alarm via the touchscreen, checked for an open flame (there wasn't one), and ventilated the chamber using the fans to remove smoke.
The laser also has soft features to improve its safety. For one, all laser projects
must be started by physically pushing a button on the printer. This prevents… wireless fire-starting. Laser projects that last longer than a certain threshold (a few minutes) initiate a countdown on the touchscreen. If the countdown hits 0 and you haven't interacted with the touchscreen, the laser stops. This further ensures that a person is nearby at all times during laser operation, especially longer projects.
Blade Cutting and Pen Plotting
All H2Ds ship with a blade cutter and pen plotter. The blade cutter is
also" frameborder="0"> a clip-on attachment that uses the toolhead's motion system for cutting instead of printing. The blade cutter is suitable for soft materials like paper, vinyl, some fabrics, and some thin woods.
The" frameborder="0"> pen plotter fits into the blade cutter attachment and uses the toolhead's motion system to draw.
These tools complete the H2D's '4-in-1' versatility angle. The blade cutter and pen plotter are not headliner features like the laser, but it's evident that Bambu Lab engineers went out of their way to get the most out of the printer's toolhead and motion system. People have long been converting their old printers into laser engravers and pen plotters. Bambu Lab made it more accessible.
Setup
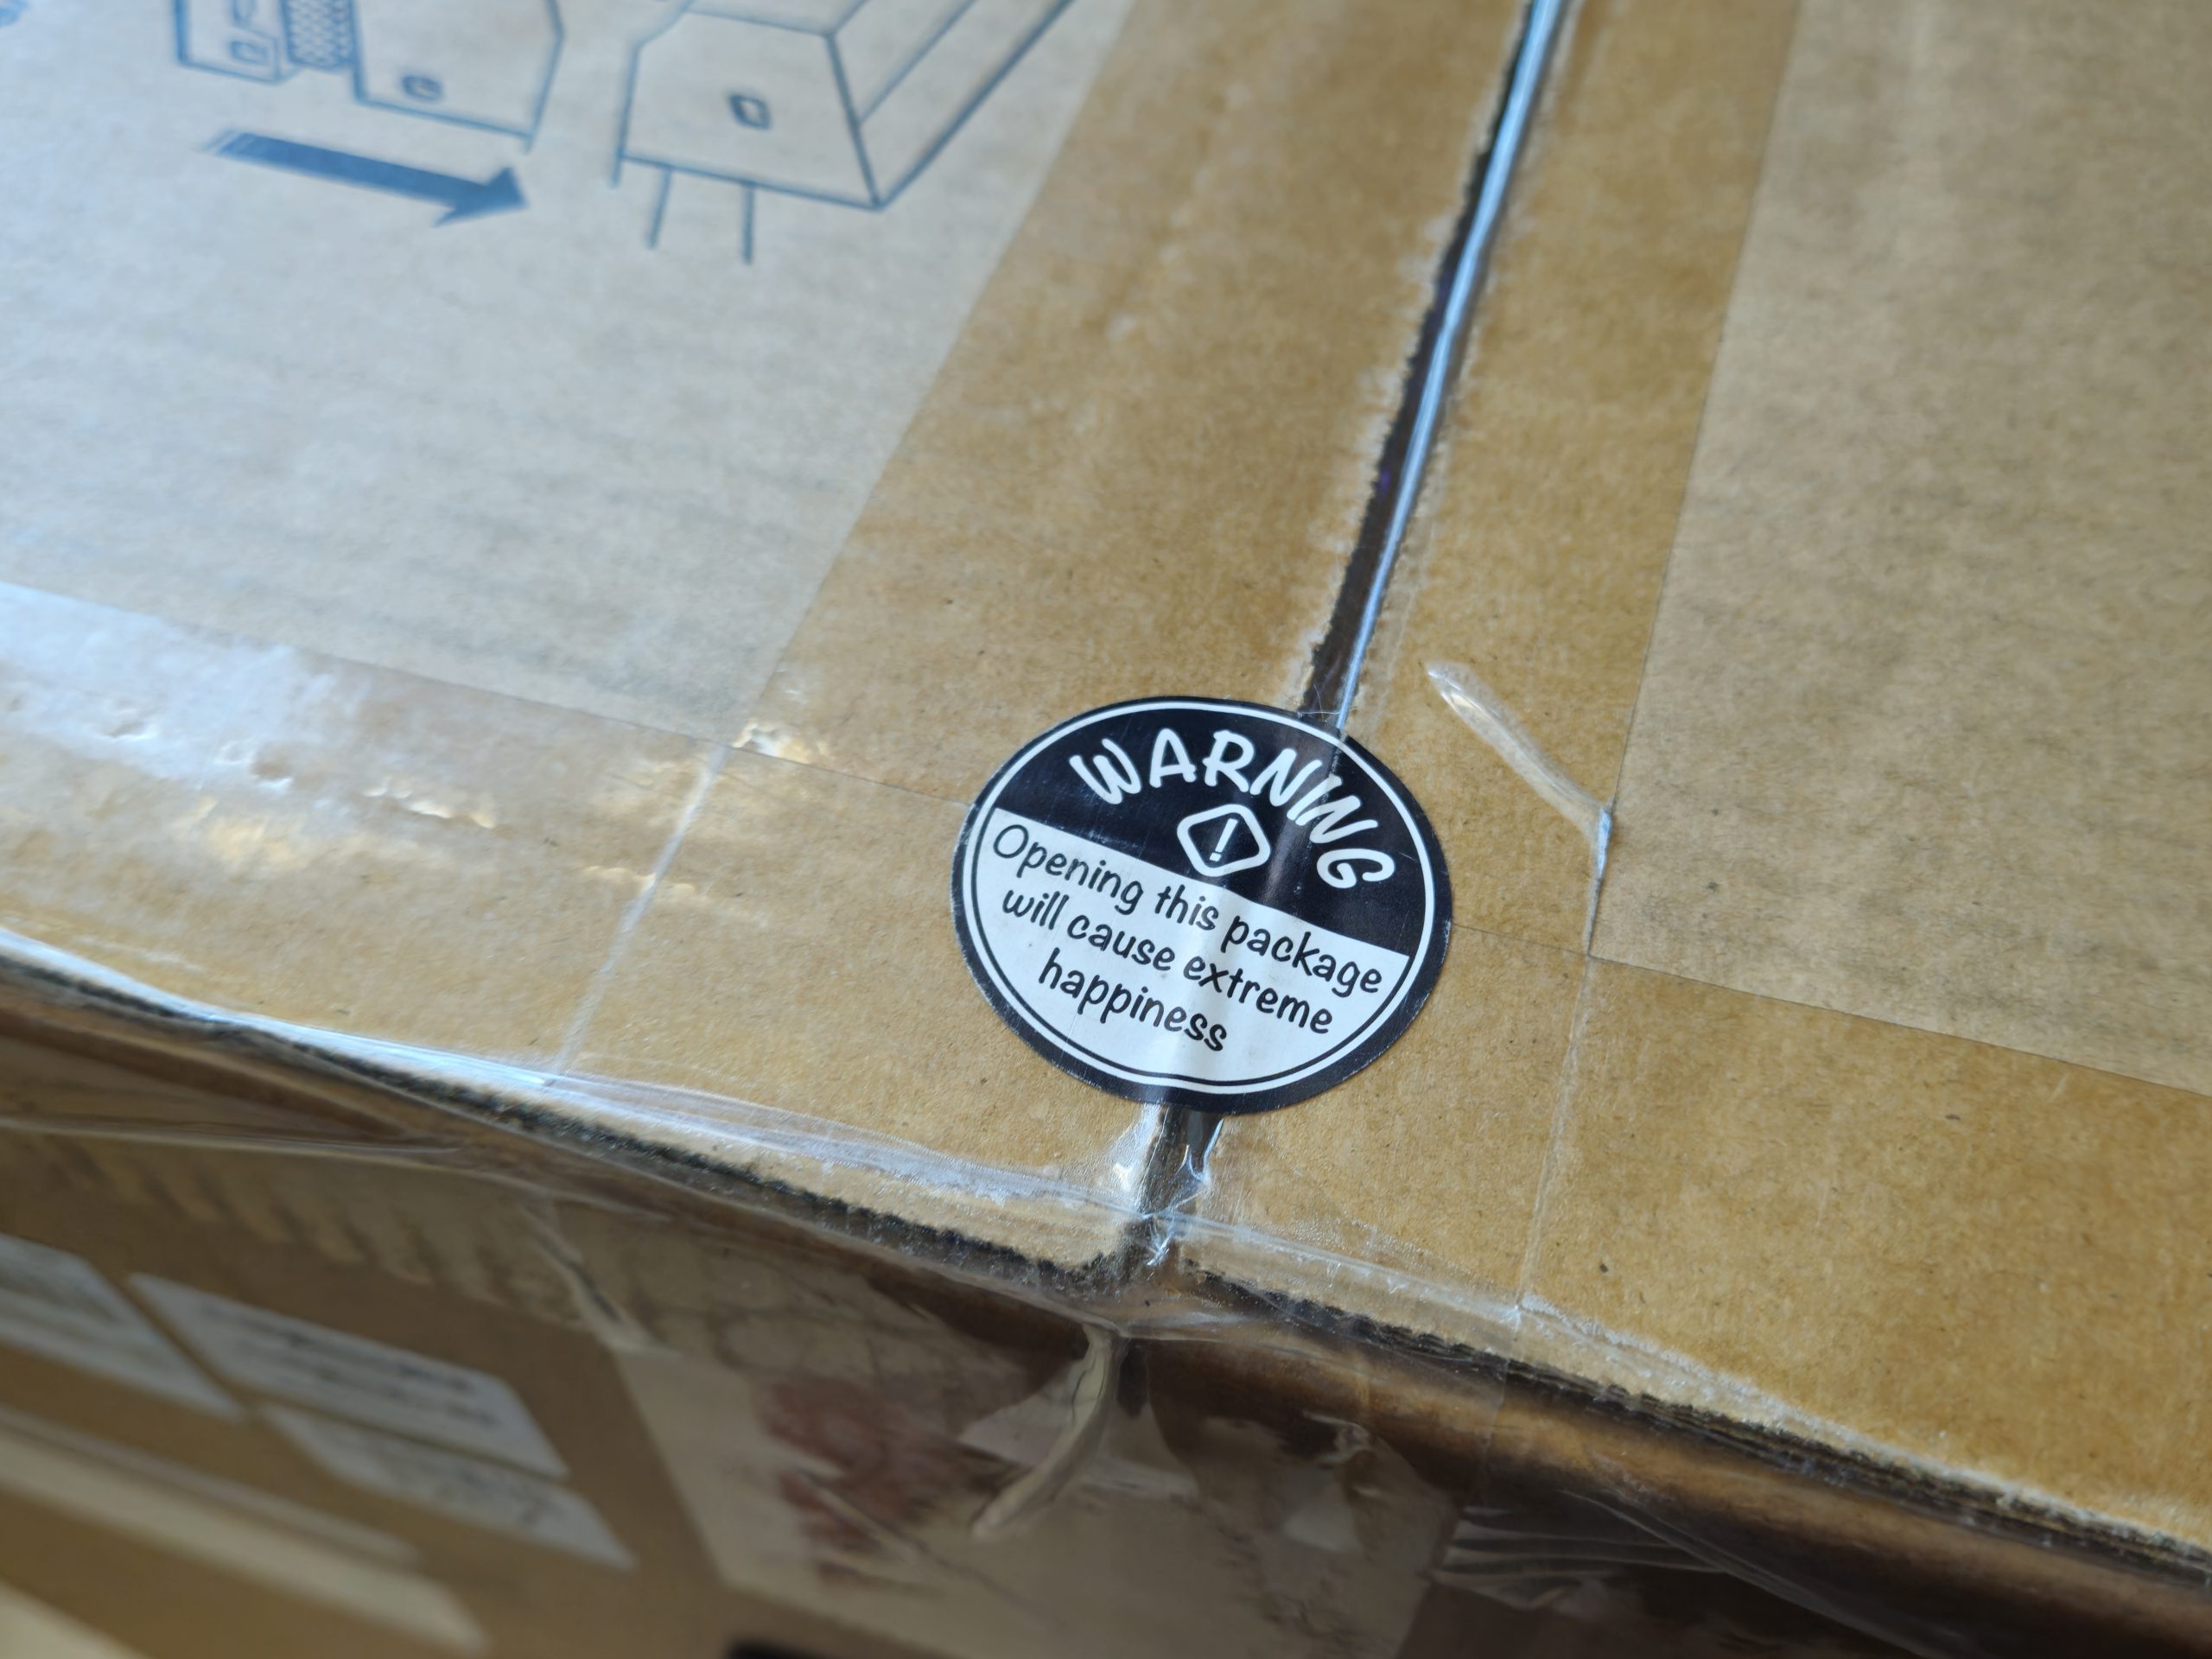
My H2D Laser Combo arrived in a box weighing over 35kg (77lb in Wrong Units). The delivery driver and I dragged it up two flights of stairs together. Once inside, I (a disabled girl weighing under 60kg) had to get this thing onto the table that would be its new home. This isn't a complaint—I knew what I was getting into. Thankfully, the packaging is well-designed and includes a number of quality-of-life additions that clearly had speed setup in mind. There are even unboxing instructions on the exterior. The box also dutifully points out that it's unsafe to lift solo.
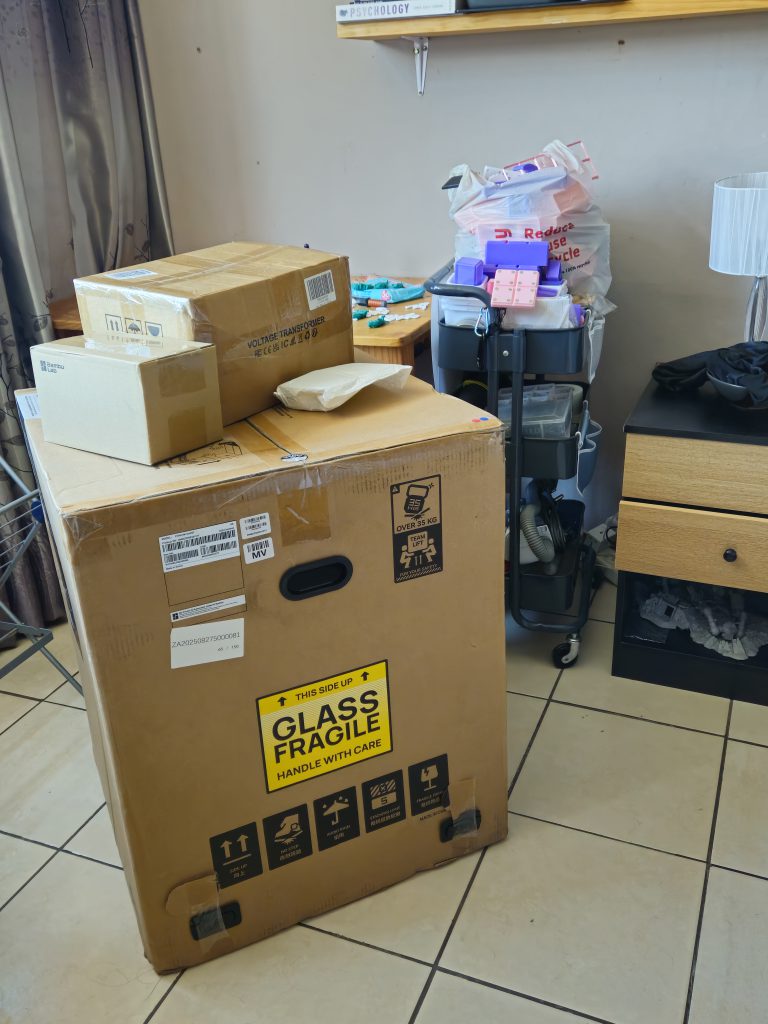 The H2D's packaging doesn't fool around.
After ramping it onto my bed and then flipping it onto the table, I had it upright and ready to unbox. My scrawny body took 45 minutes to do what two regular bodies would do in 3 minutes.
The machine was packaged and nestled in high quality air cushion packaging and dense styrofoam (not the flaky kind). Everything that
could be made of recyclable cardboard
was made of recyclable cardboard. Just like its little cousin (the A1), the motion system was locked in place for transport by dense packing foam sections and plastic fittings. Even better than the A1, there were stickers inside pointing to screws for the plastic fittings. This keeps inattentive or confused users from mistaking the plastic transport brackets for actual parts and leaving them on, as I did when I got my A1.
The H2D is sturdily constructed and I noted zero rattles, misplaced gaps, or misaligned seams. It's constructed out of aluminium, steel, and plastic. Laser Edition H2Ds have green, plastic safety windows. The machine is hefty and densely packed. Internal space was effectively used—the AMS 2 Pro was securely stored in the chamber to save space. Accessories and add-ons were all neatly packed into respective cardboard inserts and I noticed zero loose items. There are too many accessories to individually list, but they include: add-ons (blade cutter, pen plotter, cutting platform), toolkits, spares (screws, nozzle cleaners, calibration stickers), and material samples (metal tags, cork, cardboard). If you have the
spirit of a Mekboy and love gubbins, this will be your panacea.
The setup manual was intuitive and easy to follow. Notably, one of the instructions called for the removal of a specific screw and even pointed out that it should be removed
very carefully to avoid dropping it into the printer. I read those instructions, tried to remove the screw, and promptly lost it. Well, I was appropriately warned and messed up. Unlike 2D printers, every 3D printer I've tried connects to my wifi without complaint and
stays connected. The first-time calibration and firmware update proceeded without any issues. The AMS was similarly easy to set up. I merely needed to plug it in and feed a
PTFE tube of the correct length into place. It quickly accepted my (off-brand) filaments without fuss.
 This charming sticker on the topside of the box was correct.
My first prints were test prints at various settings and qualities. I found myself using the H2D's default settings on off-brand filament to surprising success. Of course, PLA and PETG as entry-level filaments and a machine at this price point
must be able to handle them out-of-the-box. I used the H2D as a 3D printer exclusively for two weeks despite my laser-related anticipation. I wanted to get acquainted with its workings because it's my first enclosed CoreXY printer. I felt that trying out
every accessory and add-on without getting to grips with the printer left a higher risk of unforeseen failures.
When I
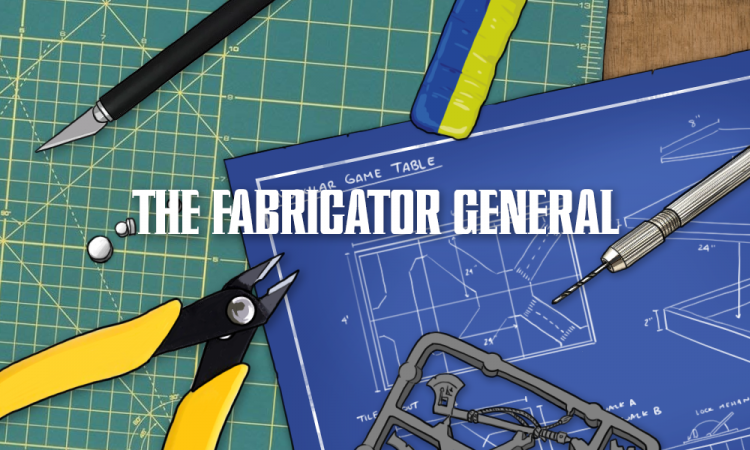
did get to laser setup, it was similarly intuitive. In fact, the most difficult part of setting anything up for this printer is shifting it. If your printer is placed against a wall, you'll get used to pulling it out at an angle or tilting it to reach access points on the back (filament feeds, waste chute, power supply). The most important fitting for the laser was a flexible hose and its exhaust adapter. Fitting the laser itself was genuinely as simple as removing a toolhead dust cover, sliding the laser module into place, clipping it, and plugging the laser in. The only other chamber setup I had to do was replacing the build plate with a durable laser platform and securing my test materials with slats and magnets.
The H2D's non-printing add-ons are supported by magnetically swappable platforms. The laser cutting platform is almost entirely metal. It holds materials in place and provides laser calibration areas. The cutting platform is included with all H2D variants and houses a semi-adhesive cutting mat. The cutting mat surface is slightly tacky and special instructions for its storage are provided to maintain that tackiness. The pen plotter add-on also uses the cutting mat. That's great, because the H2D has a
lot of accessories and spares in the box that need to be organized.
If you're using an H2D to its full potential, you will need to reconfigure it for different tools. Reconfiguring is universally simple—if you can handle clipping things into place, plugging a cable in, and making sure the correct platform (laser/cutting) is fitted, you're good to go.
Software
Any machine of this complexity is going to be software mediated. The H2D uses Bambu Lab's
in-house software: Bambu Studio (3D printing), Bambu Suite (laser, blade, plotting), and Bambu Handy (mobile print control). Bambu Suite is the newest addition and handles the H2 series' non-printing add-ons. Bambu Studio is (to my knowledge), the only slicer software that readily supports H2 series printers. If other slicers
do support the H2D, it won't be easy as Bambu Labs purposefully avoided making the newest parts of their software ecosystem open source.
I've used all three apps extensively alongside the H2D. Previously, I only used the Handy app for my A1 because the A1 supported open source slicers. With the loss of that open source support in the H2 series, I'm now using Bambu Studio. Bambu Suite (the laser/blade software) is understandably mandatory since it's not just specific to one manufacturer, but currently specific to one line of machines made by one manufacturer.
I found Bambu Studio intuitive to use because I'm accustomed to Orca Slicer, which was originally an open source fork of Bambu Studio. Although nearly identical in UI and workflow, separate development means that Bambu Studio has some features that Orca Slicer doesn't and vice versa. These are usually technical and specialized settings that have little bearing on typical projects. As a Bambu Labs product, Bambu Studio
does show file recommendations on its first page from their in-house file repository of
MakerWorld. These can be disabled in the Preferences. Those same Preferences gave me default Dark Mode, which I always always apply immediately. Overall, Bambu Studio is a comprehensive and detailed slicer with a good workflow. The Advanced settings lists are dense (as they should be), but the printer works well using default settings. Advanced settings are for enthusiasts and people looking to undertake challenging projects (like me).
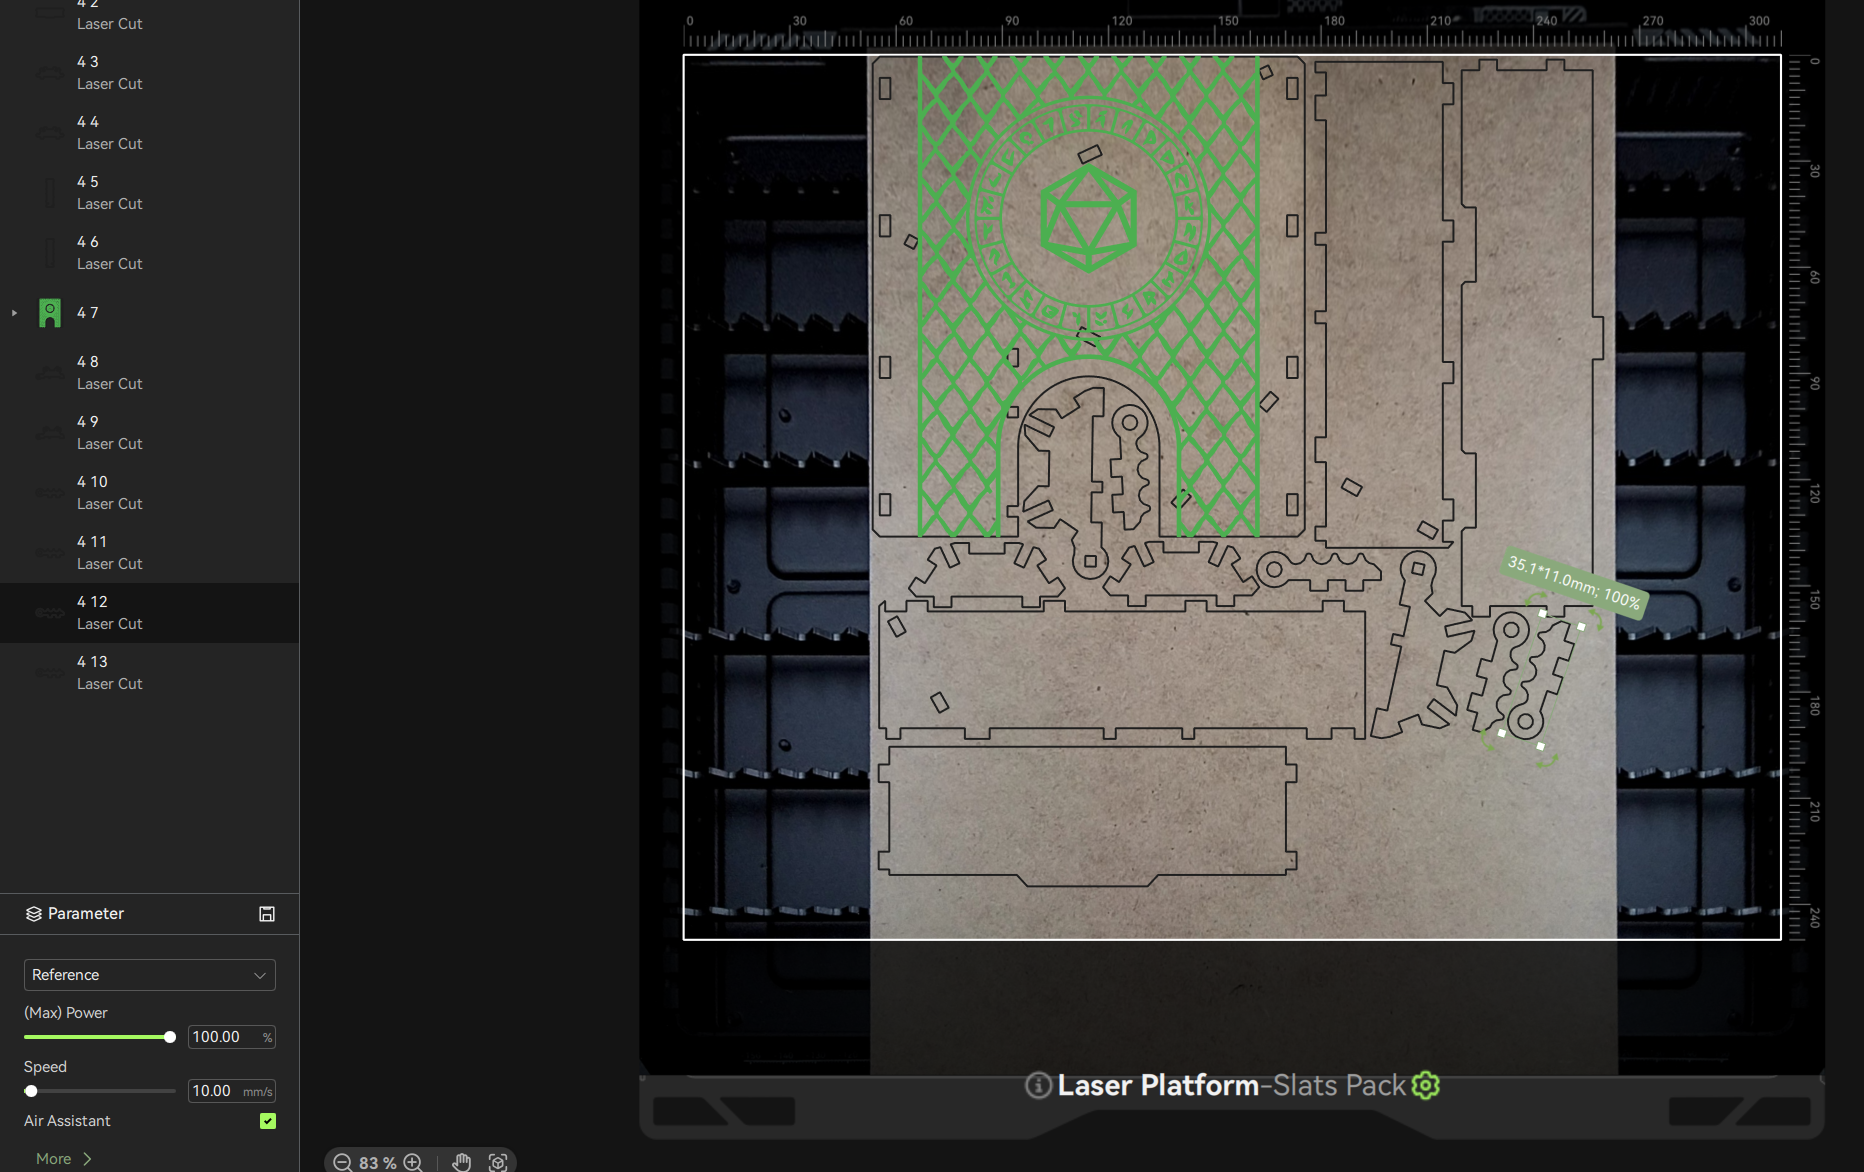
 H2D Laser Combo machines have a top-down camera that reduces guesswork when prepping laser, plotting, and blade cutting jobs.
Bambu Handy lives up to its name. This mobile app has been a mainstay since I got my A1. It gives users wireless control and monitoring of their machines. Its features like start/stop, speed controls, camera monitoring, and skipping objects on the plate have been consistently useful to me. Better yet, the H2D has HD chamber cameras with a usable framerate—a vast improvement over the A1's stuttery webcam and completely expected at the H2D's price point.
Bambu Suite controls the laser, blade cutter, and pen plotter. The printer's chamber mounts a high definition camera that provides a birds-eye view of the plate that greatly eases lining up materials for a project. The top-down camera is
very helpful and isn't a standard feature in entry-level laser cutters. Bambu Suite is reasonably followable, but it's the least intuitive of their software offerings I've used. Its main shortcoming is separating the preparation screen (where designs are imported and prepared) from the material screen (which shows the material via the BirdsEye camera). Adjusting my designs and projects was a constant hassle because I had to tab back and forth between the two views while making small changes. It's oddly
unintuitive for a Bambu Lab product and doesn't follow a forward-moving workflow as one might expect. Bambu Suite is necessary and usable, but it's not as enjoyable to use as Handy.
Printing
I've spilled many pixels over lasers and pen plotters, but the H2D is still a 3D printer at its core. Its printing capability was critical to me, so I'll spare nothing in my evaluation.
Characteristics
It's been so long since my brief summary that I feel compelled to outline the printer's mechanical characteristics again:
- CoreXY motion system
- Enclosed chamber with active ventilation and heating
- Single toolhead with dual-nozzles—one nozzle prints at a time
- 325 x 320x 325mm³ maximum build volume with a single nozzle
- 300x320x325mm³ maximum build volume using both nozzles
- Peak nozzle temperature: 350°C
- Peak heatbed temperature: 120°C
- Peak chamber temperature: 65°C (may be higher due to heatbed temperatures)
The whole setup is controlled by a responsive and comfortable touchscreen. Some AI failure detection features are also included. The AI failure detection has both correctly identified failures,
and given me false positives on perfectly good prints. The AI features can be toggled on or off, and their sensitivity can be adjusted in the printer's settings. I ended up settling on Low Sensitivity to reduce the number of false positives. It still detects failures effectively.
The H2D's defining feature is its dual-nozzle toolhead. This differentiates it from the H2S (single-nozzle) and the H2C (dual-nozzle + fast nozzle exchange system). The H2D is the mid-runner in its lineup. It has a second nozzle than the more affordable H2S, but less capable at
ultra-complex multi-material projects than the pricier H2C.
Dual-Nozzle Functionality
This dual-nozzle toolhead is Bambu Lab's effort to address the problem of multimaterial inefficiency. Using multiple materials (colour or type) in a single print is more wasteful because the printer needs to change materials. Each material change generates waste due to purging during reloads. This step is mandatory to preserve the consistency of materials. Otherwise, the two materials mix in the nozzle and affect the appearance or structural characteristics of the material. e.g., switching from PETG to PLA after an inadequate purge will result in two incompatible filaments mixing and creating weak points. The other key inefficiency is time. Automated filament changes are fast, but are still time-consuming over a large number of changes. This is especially the case in machines with a single nozzle which must extract and replace the filament with each change. Different manufacturers have different solutions for these inefficiencies. Two examples:
The Bambu Labs H2C does a
mechanical" frameborder="0"> ballet to swap out its toolhead and heats the replacement nozzle with a fast convection heater. Efficiency via nozzle swaps, and speed via convection heating. The Prusa XL's answer
is inelegant, but effective: it has
five separate toolheads with individual filament feeds. The next toolhead preheats ahead of time and swaps out extremely quickly. Efficiency via pre-loaded filaments, and speed via toolhead swaps.
The H2D's nozzles manage waste when both nozzles are loaded by only purging a small amount between filament changes. Swapping from one nozzle to the other necessitates a small purge, but nothing as wasteful as a full reload. Speed is provided during the very fast switchover. When it happens, a plastic cover flips to the 'stored' nozzle to prevent oozing/stringy filament from contaminating the other material, and then the 'in-use' nozzle deploys for printing. The left nozzle is mobile and can be raised or lowered. The right nozzle is fixed. The left nozzle always moves during a switch—it either retracts above the right nozzle to allow
the right to print, or lowers below the right nozzle to print using
the left.
The H2D only begins reaching 'normal' levels of waste when the nozzles need to fully switch filaments via the AMS.
Then the toolhead goes through the process of purging, cutting, feeding, and purging that's standard for FFF printers.
 Camera monitoring and timelapse features are responsive and satisfying on this machine.
The Possibilities
The immediately obvious use case and saving here is when you do multicolour prints that are mainly one colour with a secondary accent, you get
superb material efficiency and good speed.
This zebra would be a material waste nightmare on a single-nozzle printer because it would require a filament change on almost every layer. Meanwhile, an H2D loaded with black and white would print with only marginal waste from brief purges. Material (and time) savings can also be realized in more complex projects. If you have 1 AMS, you can run the primary colour from one nozzle and have extra colours loaded into the AMS and channeled into the other nozzle. Reloading material from the AMS will generate more waste, but switching back to the primary colour will always be quick and breezy. Connecting multiple AMS units expands this capability; the H2D can support up to 4 AMS 2 Pro units
and 8 AMS HT units simultaneously for 24 material printing… if that's your thing.
The next use case for dual-nozzle printing is my main interest: mixed material printing. Having two nozzles available enables simultaneous printing of non-compatible materials. You can easily print PLA models using PETG supports that don't adhere to PLA to leave less scarring. You could have a mixed-material print consisting of a flexible TPU outer sheath and a hard ABS core for structure. The most intriguing one to me was printing high-detail PLA models using PVA supports. PVA filament is purpose-designed as a support material that is water soluble—instead of roughhandling a delicate piece with pliers and tweezers for ages, you can drop the model into water and the supports will dissolve to leave a clean model. If that works, it'd be
remarkable for miniature and model printing. And you can put a pin in this one because I will address miniatures in greater depth in another article.
Some Printing Results
I've put over 600 hours into this H2D since receiving it at the end of last year. A quick calculation tells me it's been running an average of 10 hours a day, which sounds about right. I've made sure to print a variety of models that test the printer in different ways without doing anything that
">would void the warranty. First, some notes:
- I only used non-Bambu Lab filament in my prints because Bambu Lab doesn't ship to South Africa. This is a chance to see how the machine fares with less familiar materials.
- I used a mixture of machine-default filament settings and custom slicer settings.
Multi-color fidget
An H2D with an AMS 2 Pro
can support five materials so I forced the issue and
made it do five materials. I
recolored this fidget using Bambu Studio's intuitive Color Painting tool for the sole purpose of torture-testing the printer's multi-color capabilities.
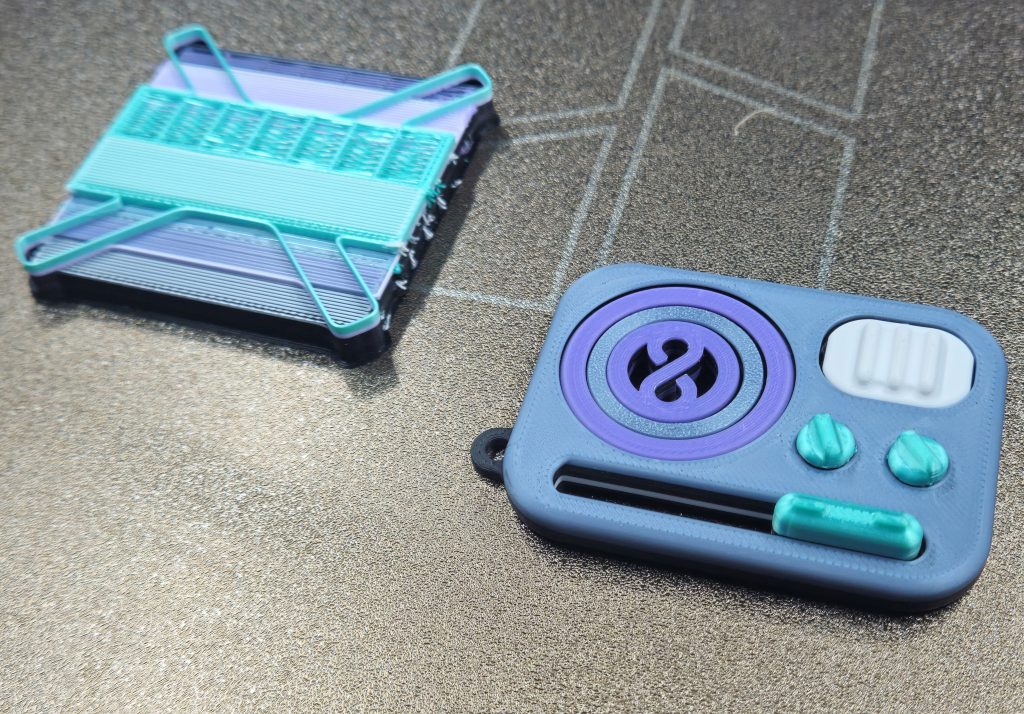 The five-color fidget using differently textured materials from various manufacturers was very successful. Note that this many mixed colors necessitated a larger purge tower (left). The purge tower would be the same size for 1 item or a full plate of identical items.
It came out great. Besides using multiple materials, this object was printed with PLA from different manufacturers (ESun and Sunlu),
and a mix of silk and traditional PLA. I was looking for strong adhesion between different materials
and no color bleeding between any of the pieces. Color bleed could be a result of inadequate purging during reloads or stray material getting pushed around by the dual nozzles. The H2D handled that trial without complaint and the piece was aesthetically excellent—using the machine's stock PLA settings.
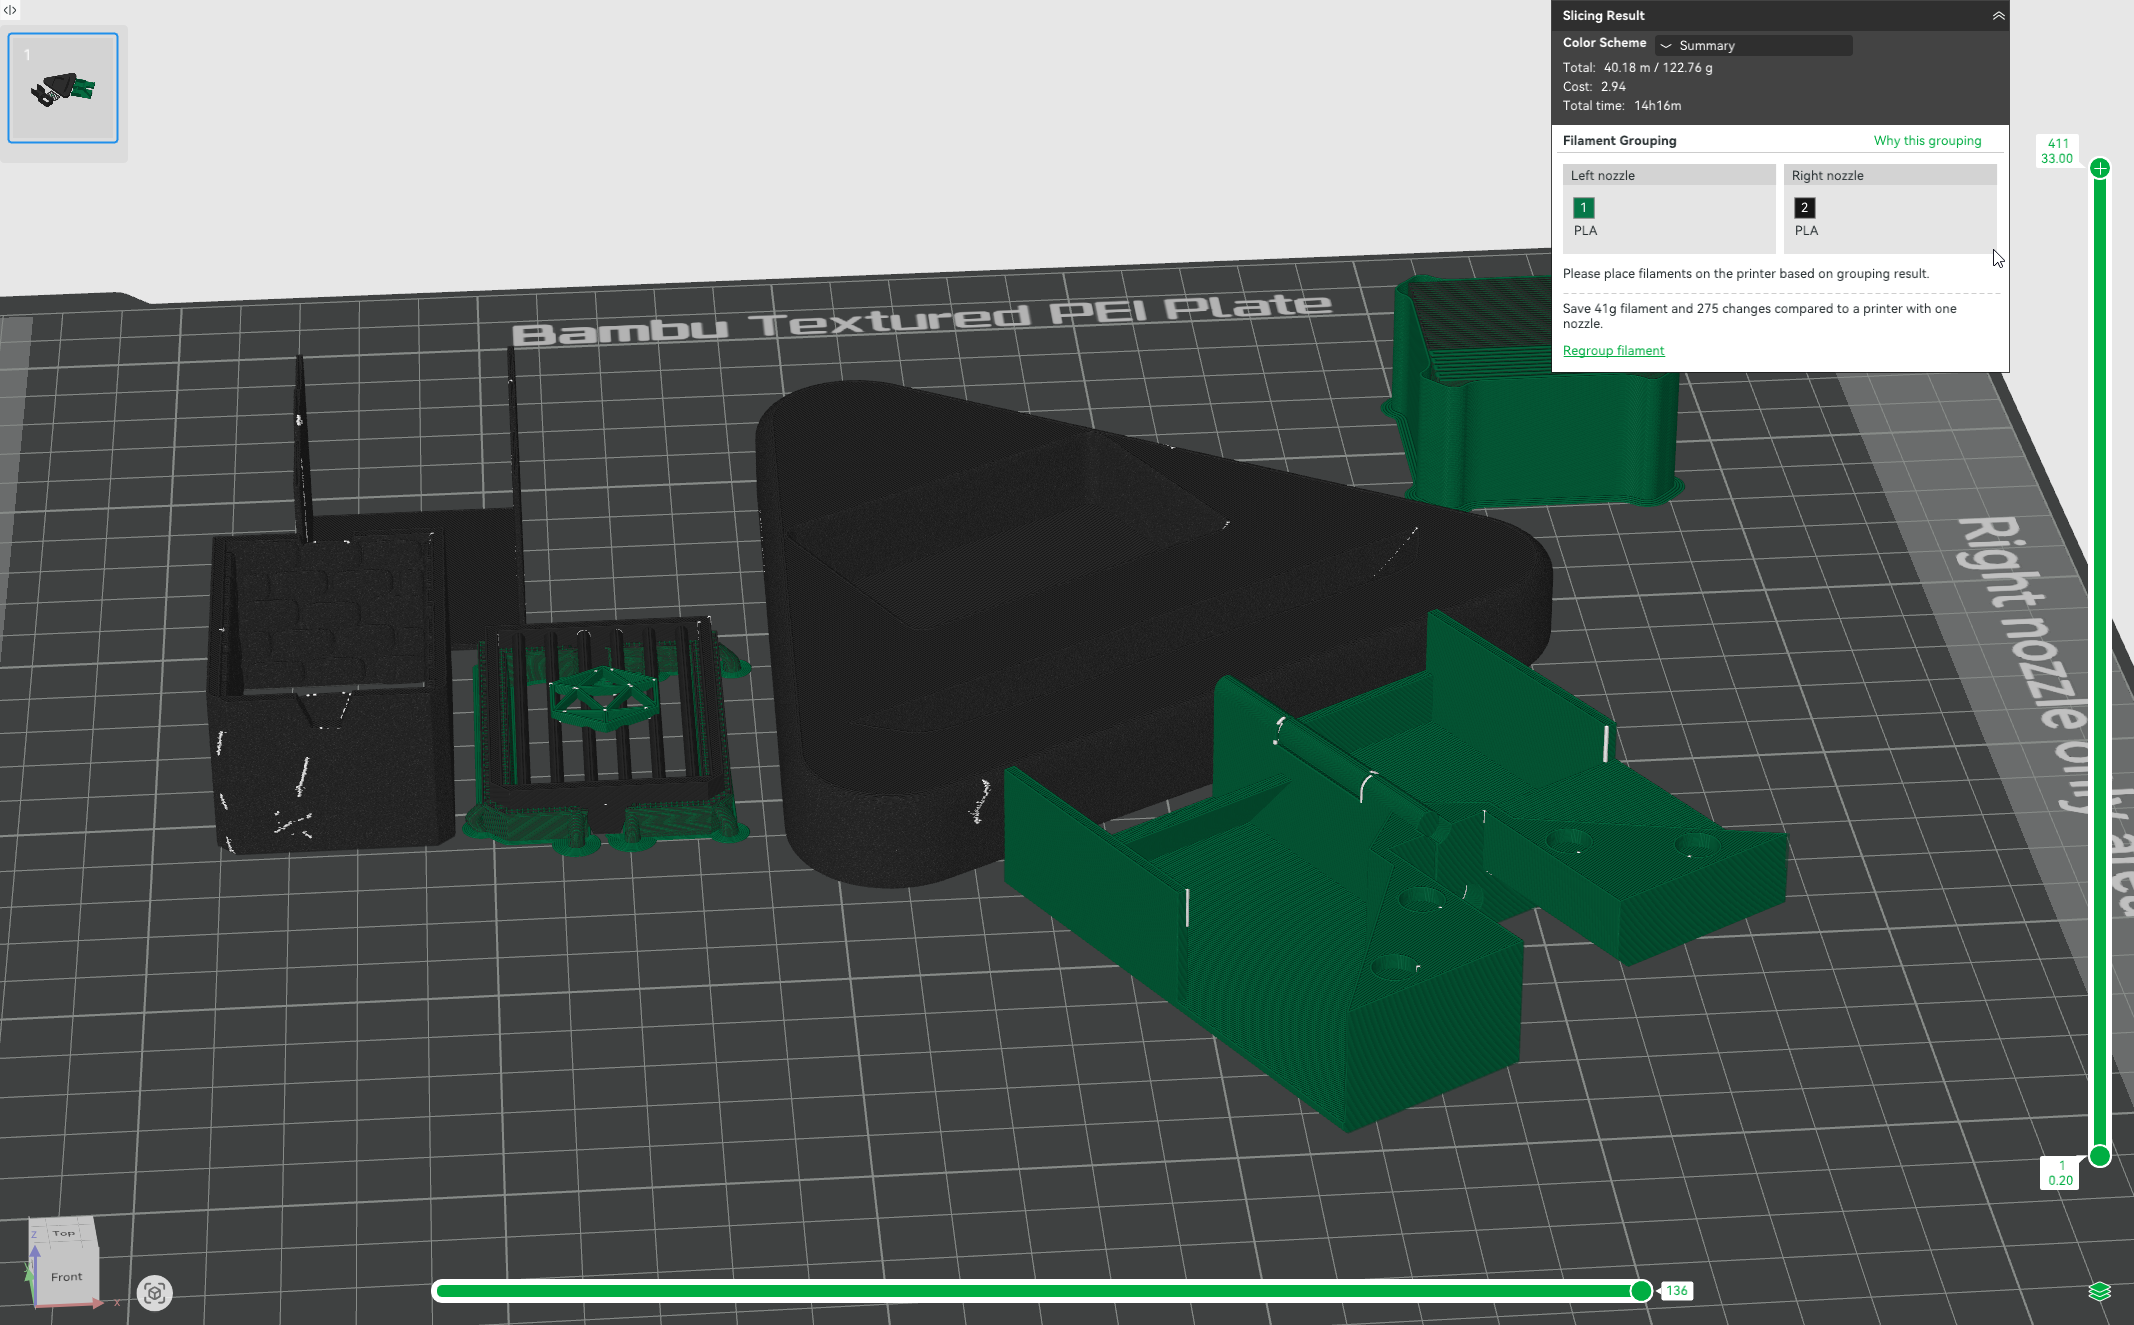
Dungeons and Dragons Player Kit
This
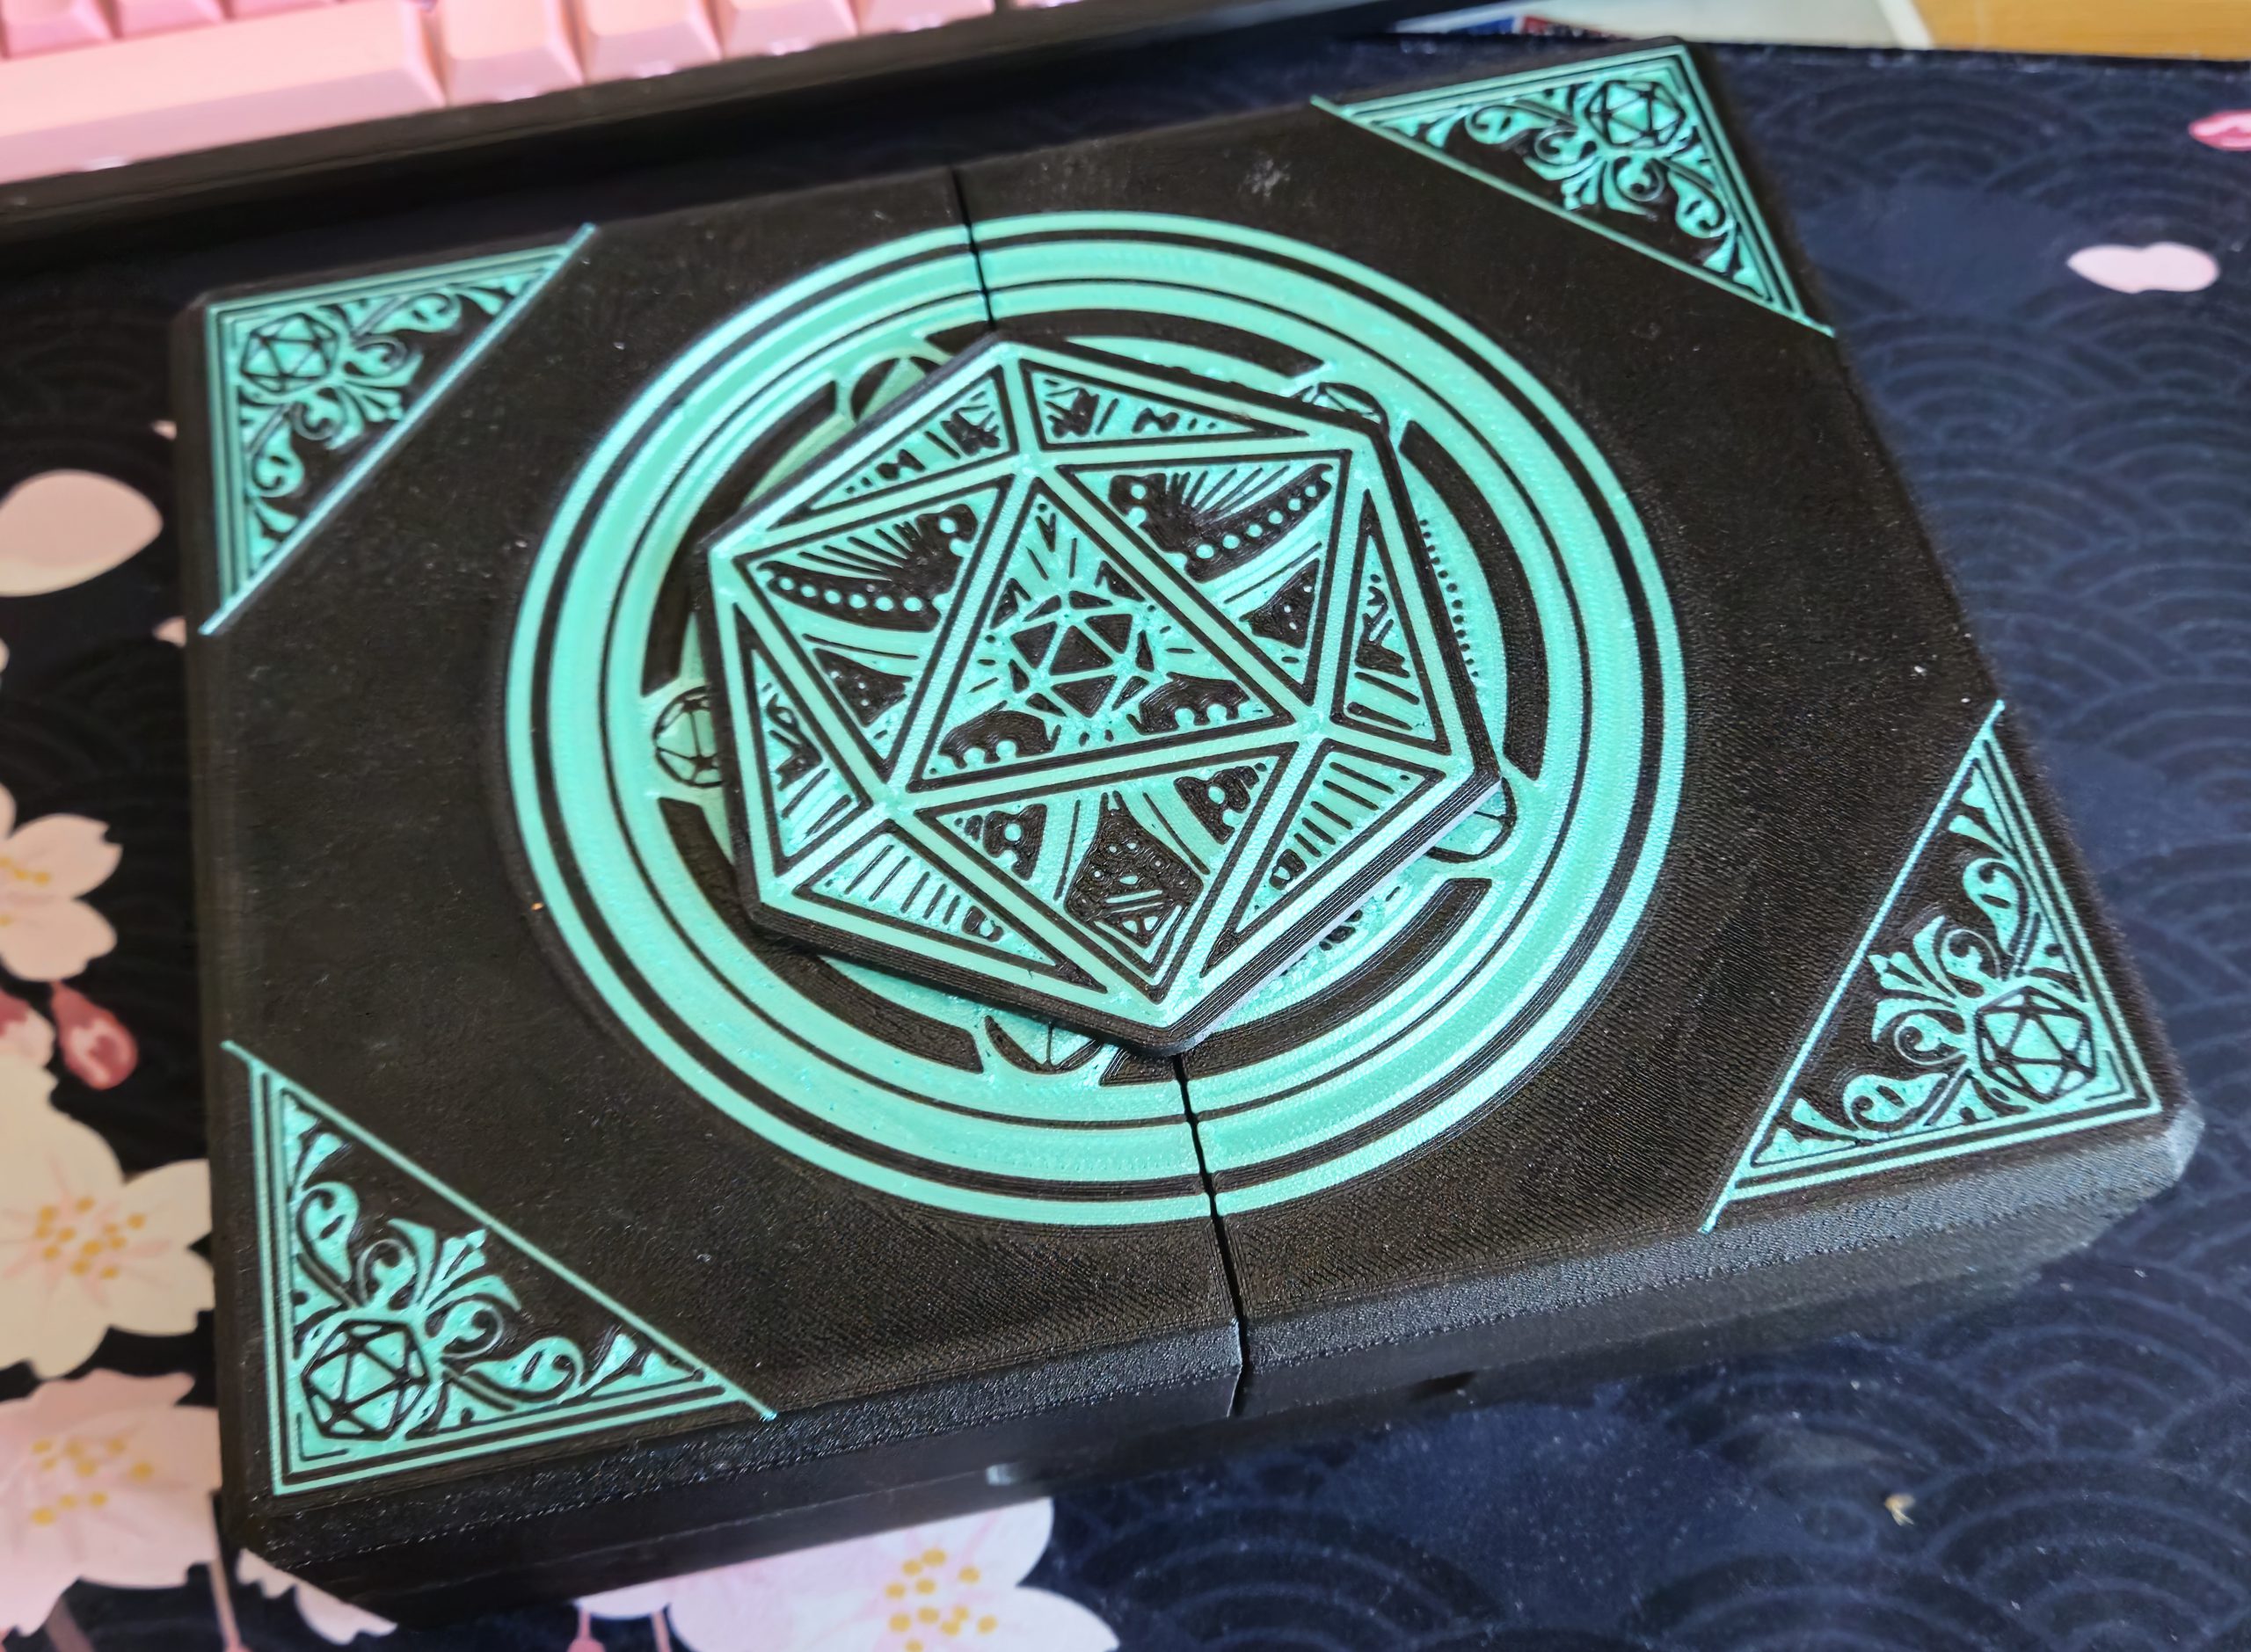
hefty print took around 1kg of filament in two different colours. Assembling the thing was by far the most laborious process, but I persevered until I had a very functional, sturdy result.
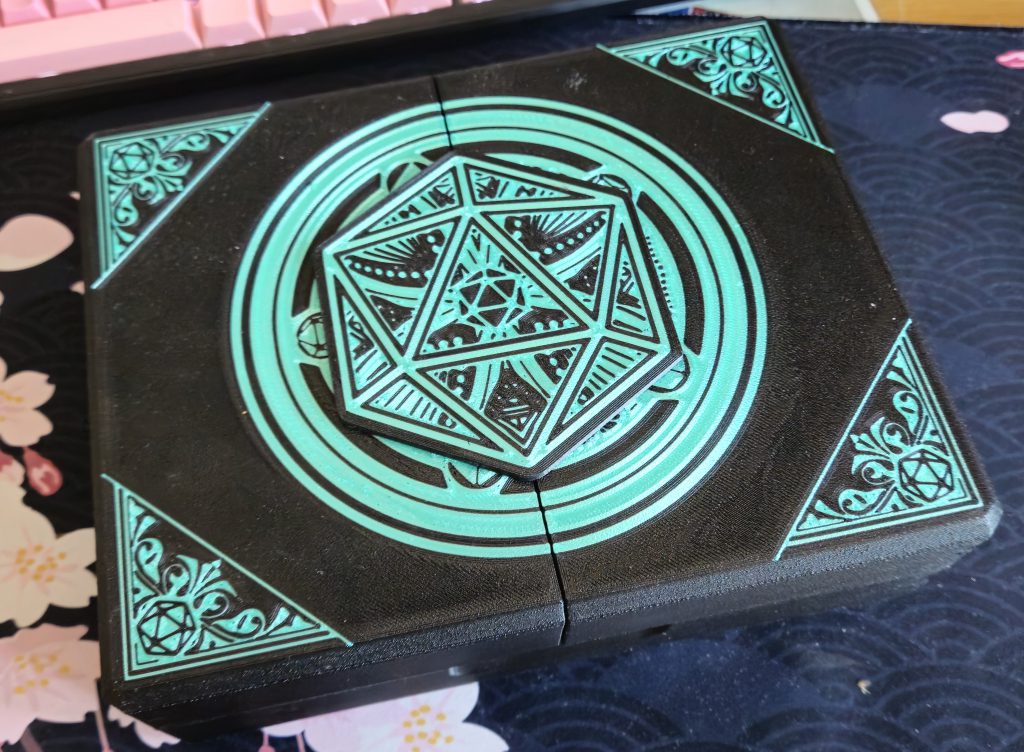 The front of this project featured a cleverly designed inlay using an accent color. It was printed face-down onto the plate.
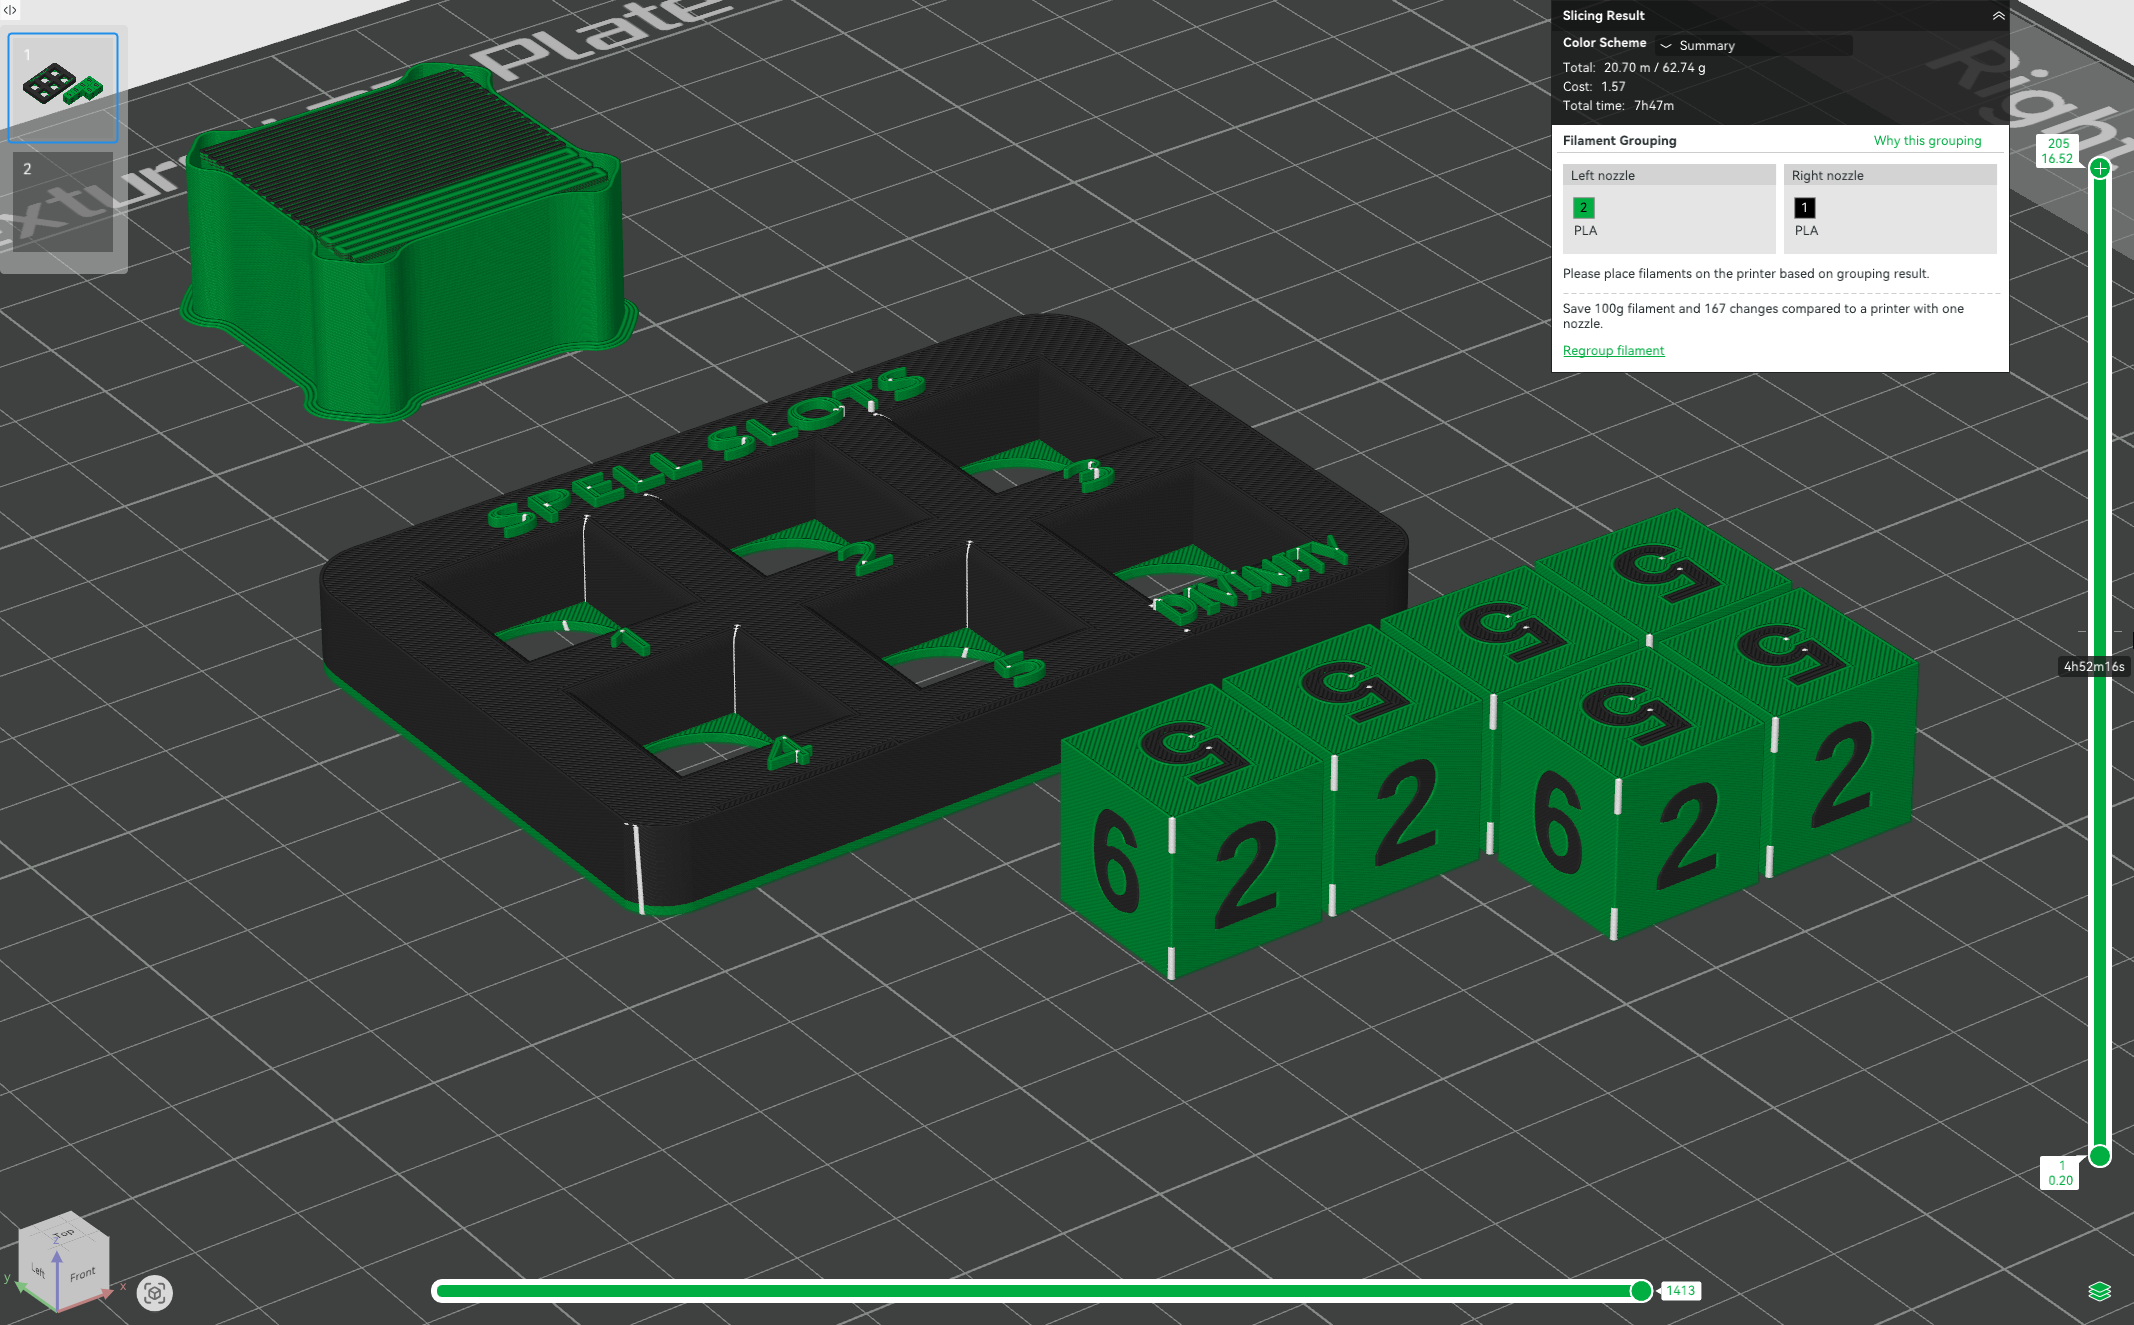
There was plenty of space for add-ons, so I added a
spell slot tracker and a set of
custom dice. The result is hefty and durable. It uses filament hinges, which thread a single strand of filament through the hinge tunnels. Many creators use filament hinges because filament is readily available, and it allows for easy replacement of a hinge's internals if it's ever damaged.
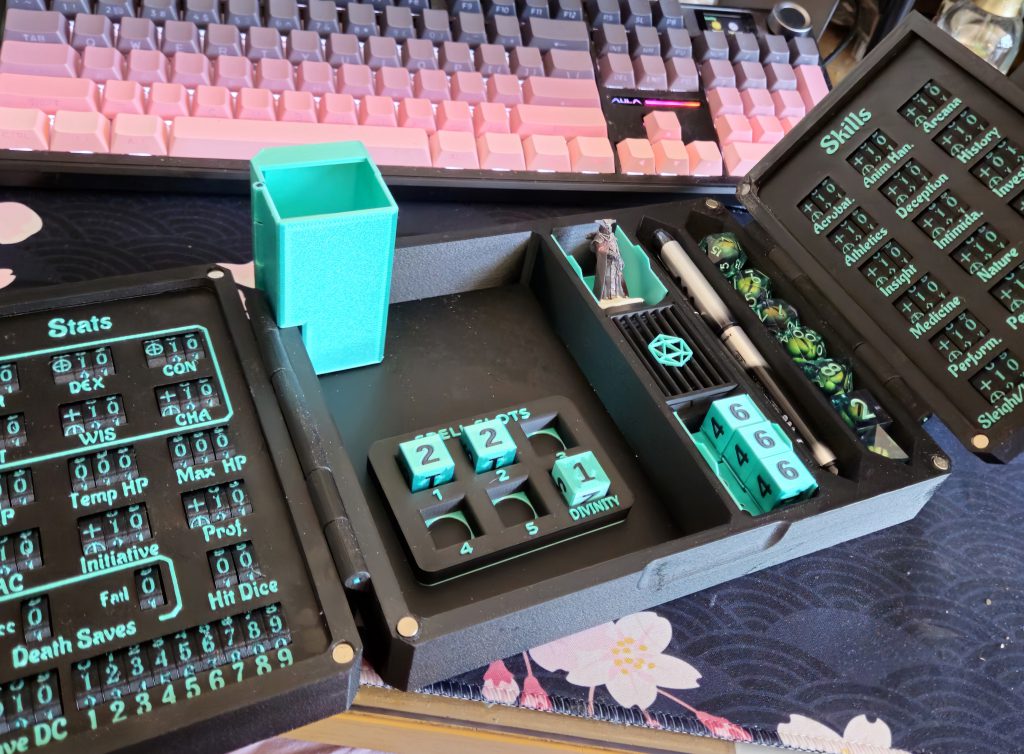 3D print file creators often leave space for customizations and add-ons, such as this miniature dice tower. I added custom D6s with a matching DND spell slot tracker to complete the set.
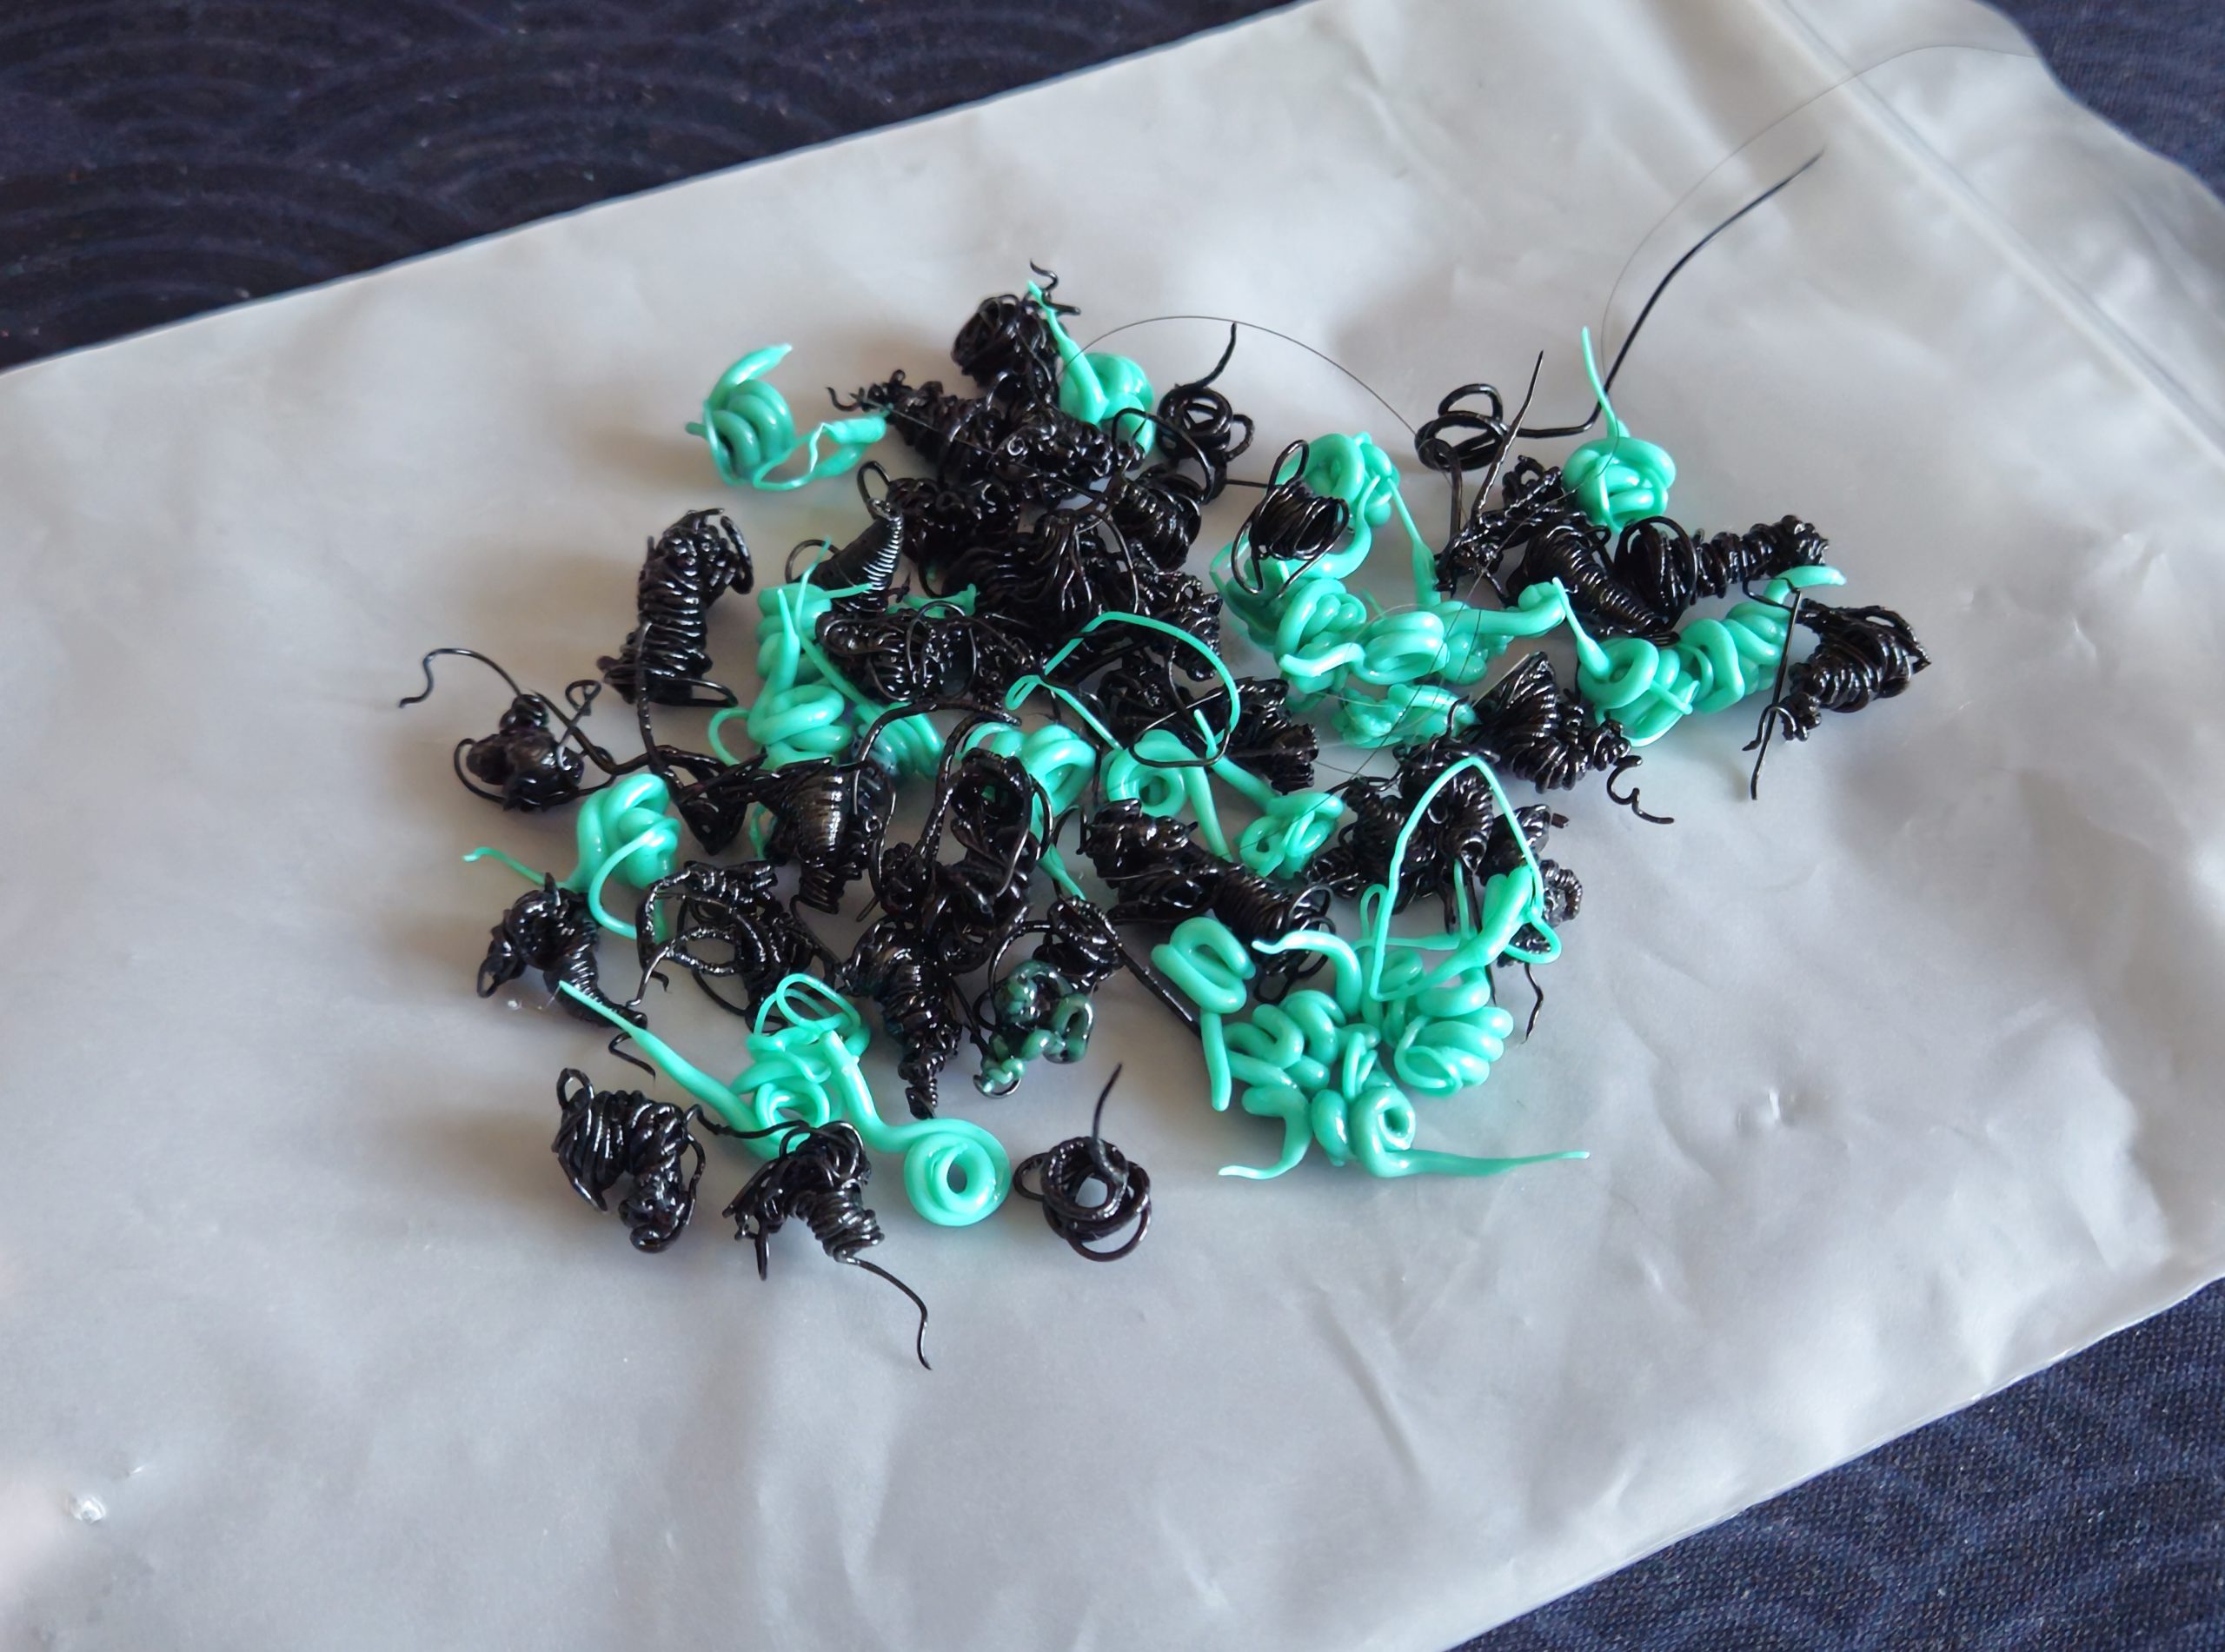
Most notably, this multi-day print with two different colours produced a fairly marginal amount of waste. I went for very high detail settings (0.08mm layer height + fuzzy skin). My printer ran around the clock for almost a week, but the H2D's dual nozzle waste efficiency really shined on this complex two-material print. Nearly one kg of filament was spent on the project and barely a handful of discarded extruder waste remained.
 Almost a week of two-color printing for this project resulted in literally a small handful of print waste, pictured here.
Sci-Fi Gothic Urban Scenery
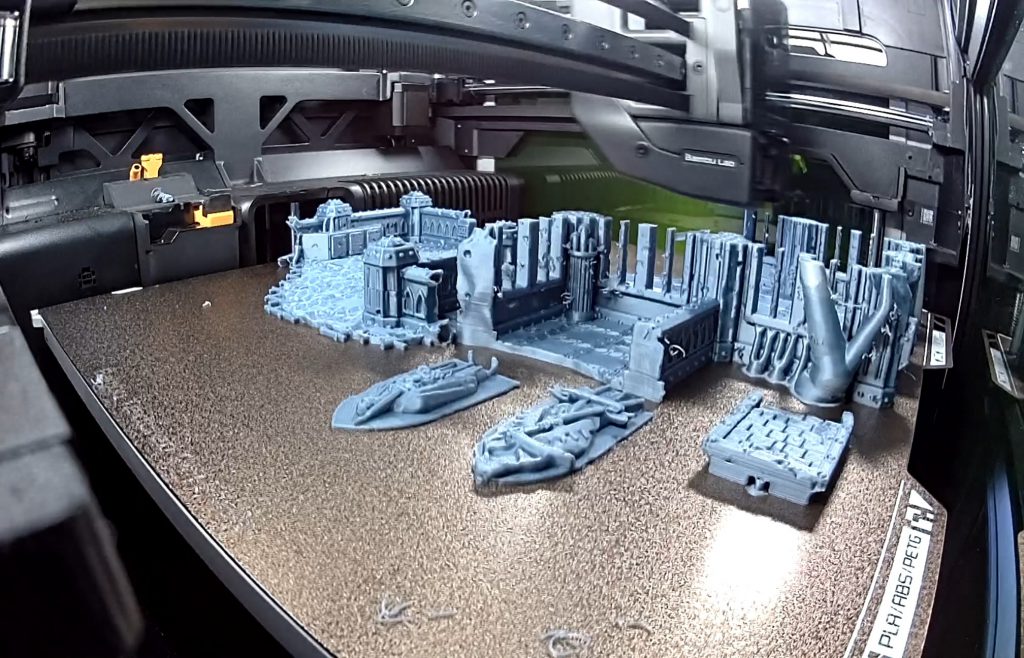
The H2D's default 0.4mm nozzle is capable of impressive detail. I printed a few pieces of
Sci-Fi Gothic Urban terrain using the H2D's stock PLA settings. The large build plate came in handy since I could cram sizable objects into a single print run.
 These scenery pieces made full use of the H2D's print width.
I photographed this close-up right after completion to showcase the off-the-plate quality. The details are reflected very well. Stringing is marginal. There are no layer shifts, and flaws are only visible on the smallest curved parts. This project used stock filament settings, stock 0.4mm nozzles and third-party filament (ESun).
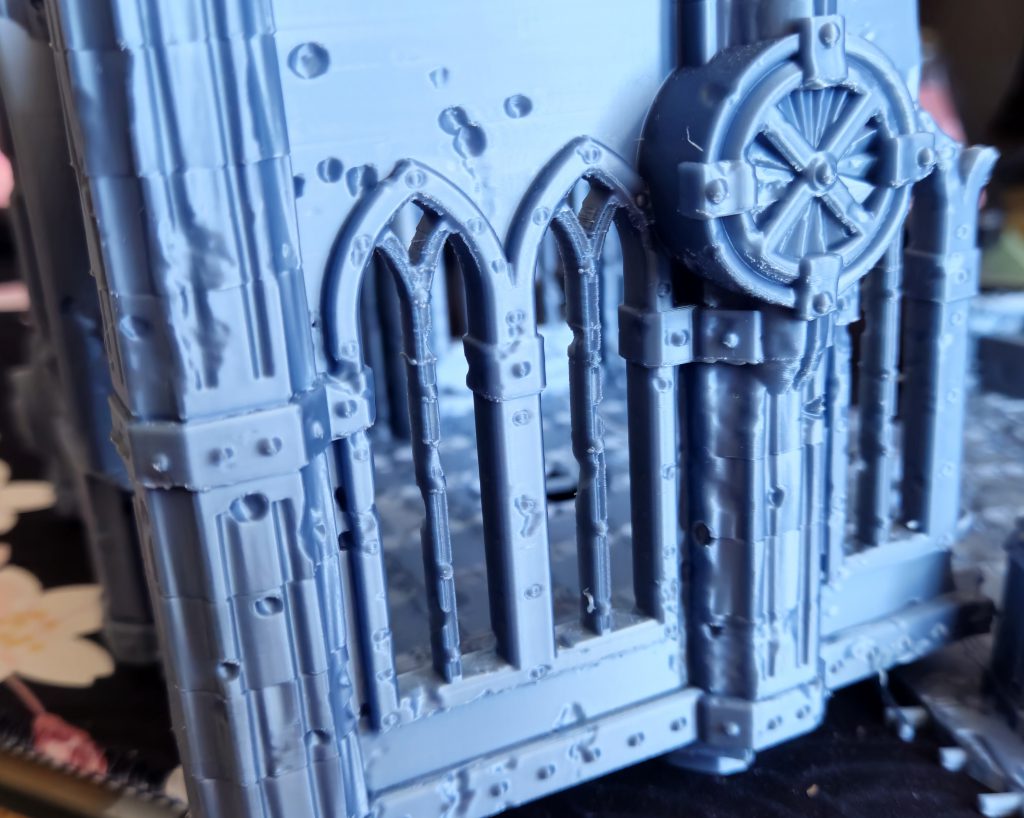 The H2D captures detail surprisingly well using un-optimized settings and off-brand filament. Further tweaking would resolve the slight flaws visible in this terrain piece. It is otherwise impressively smooth with barely-visible layer lines right off the plate.
Magic: The Gathering Card Box (Commander format)
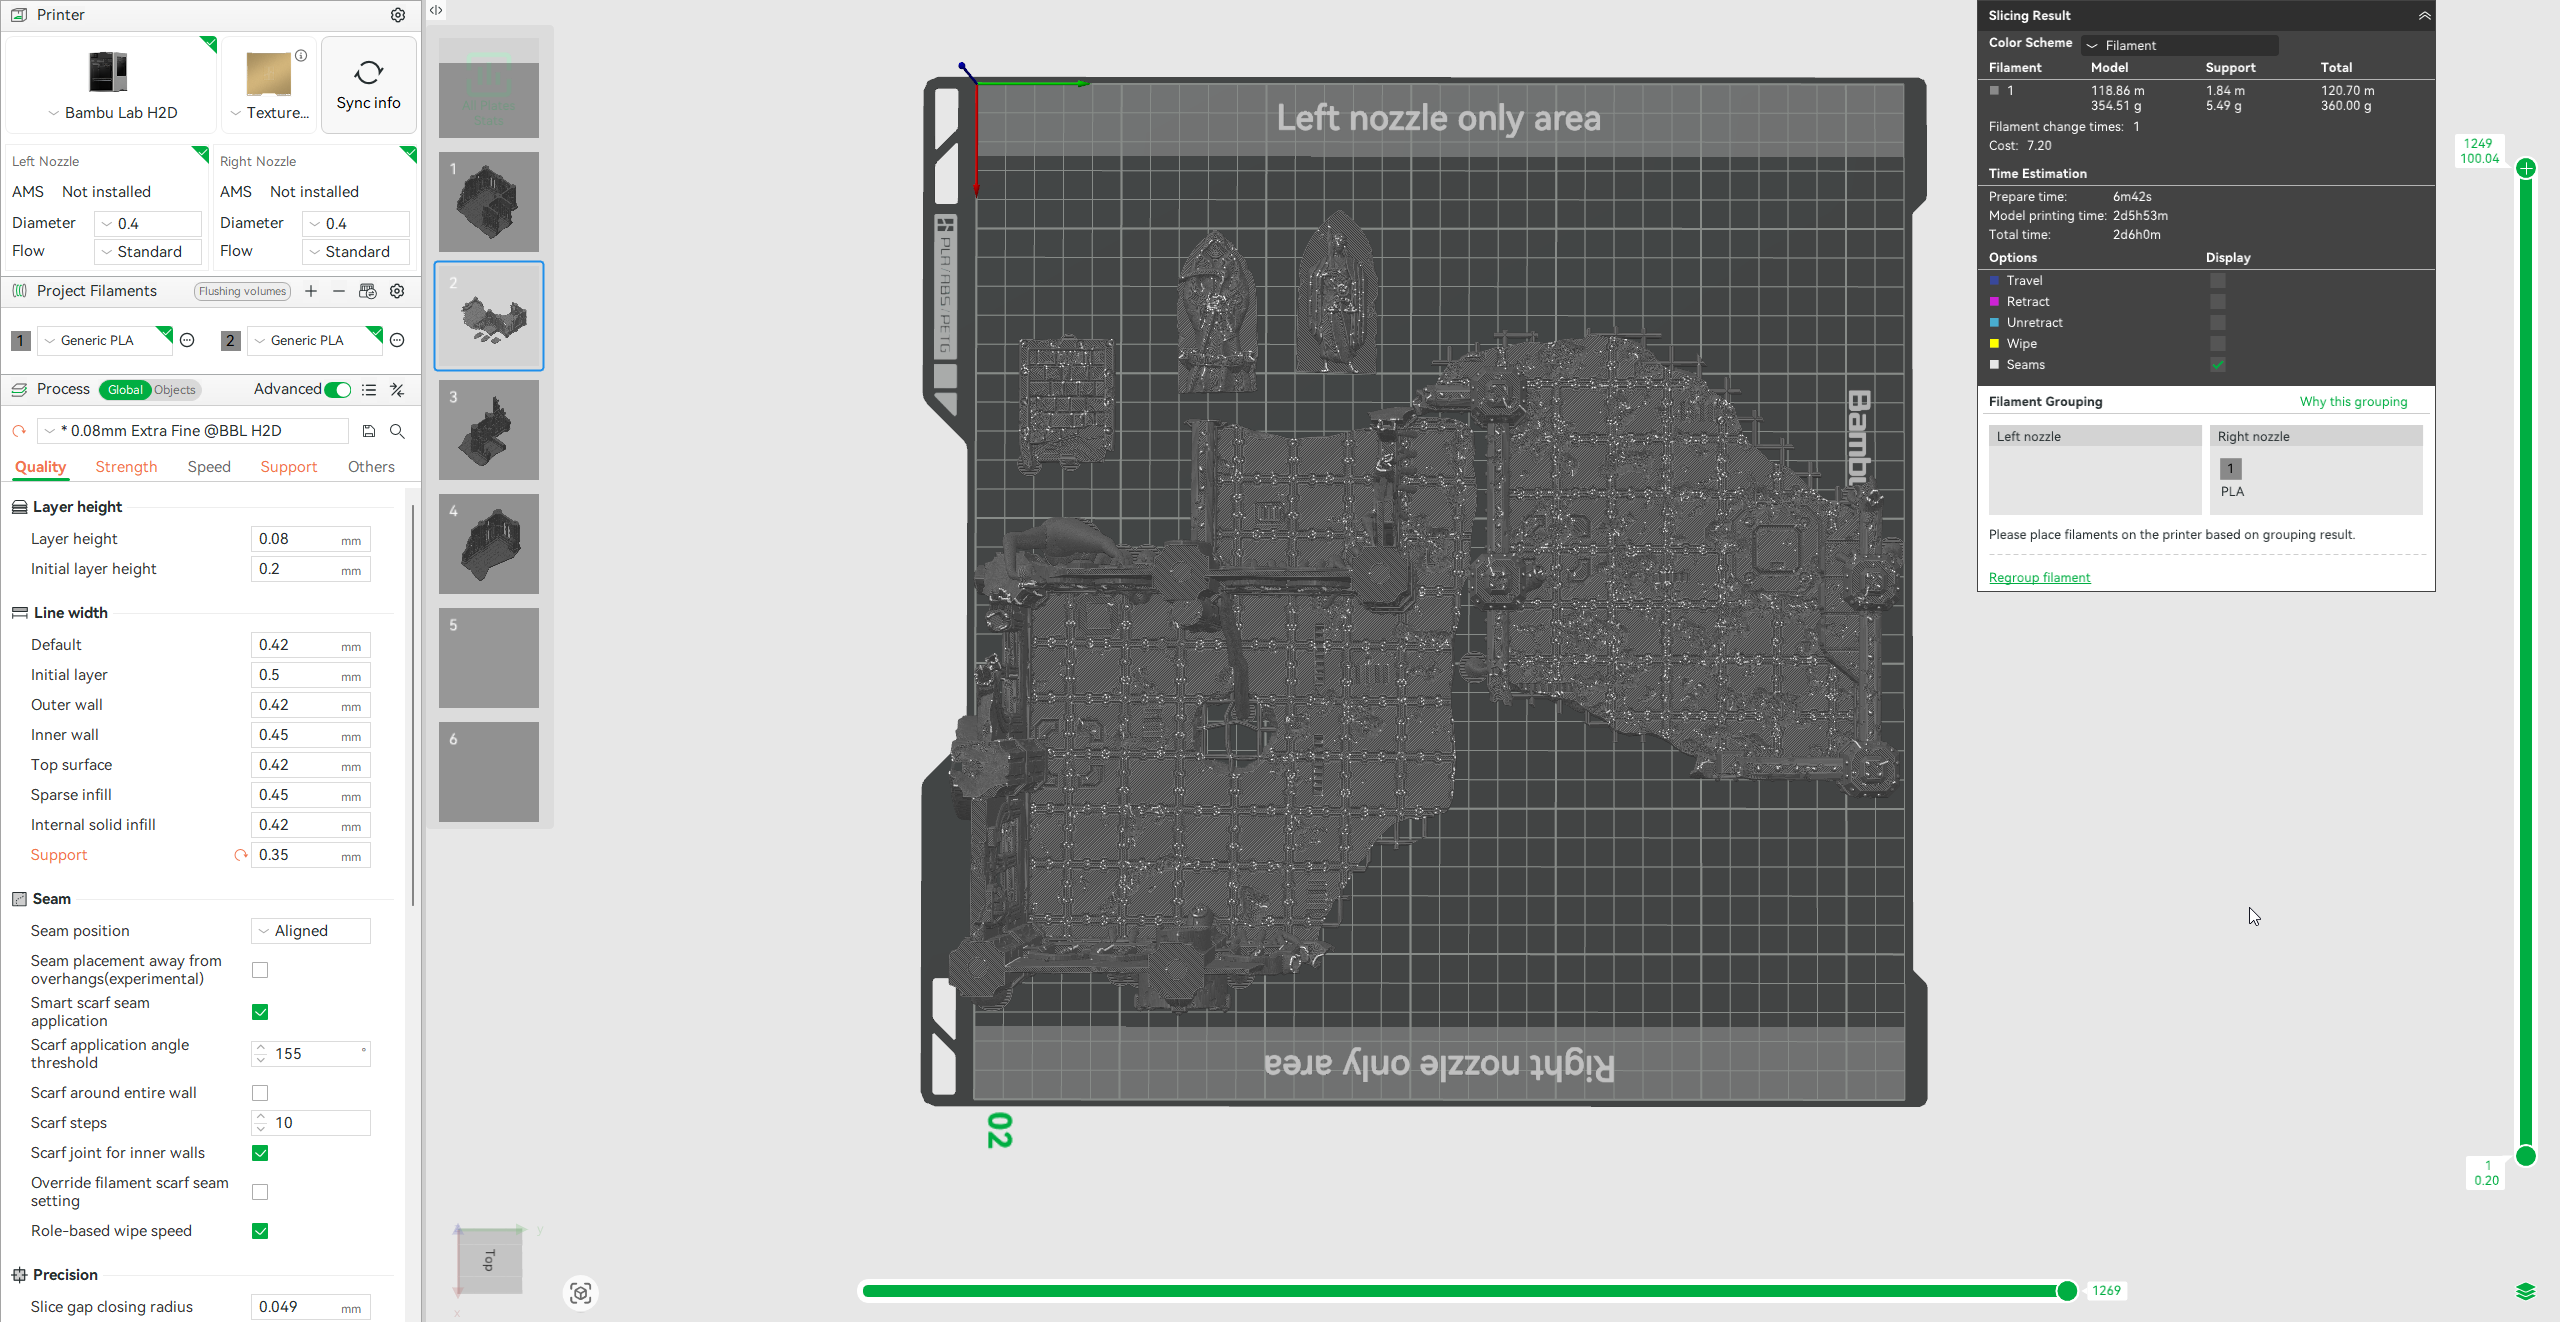
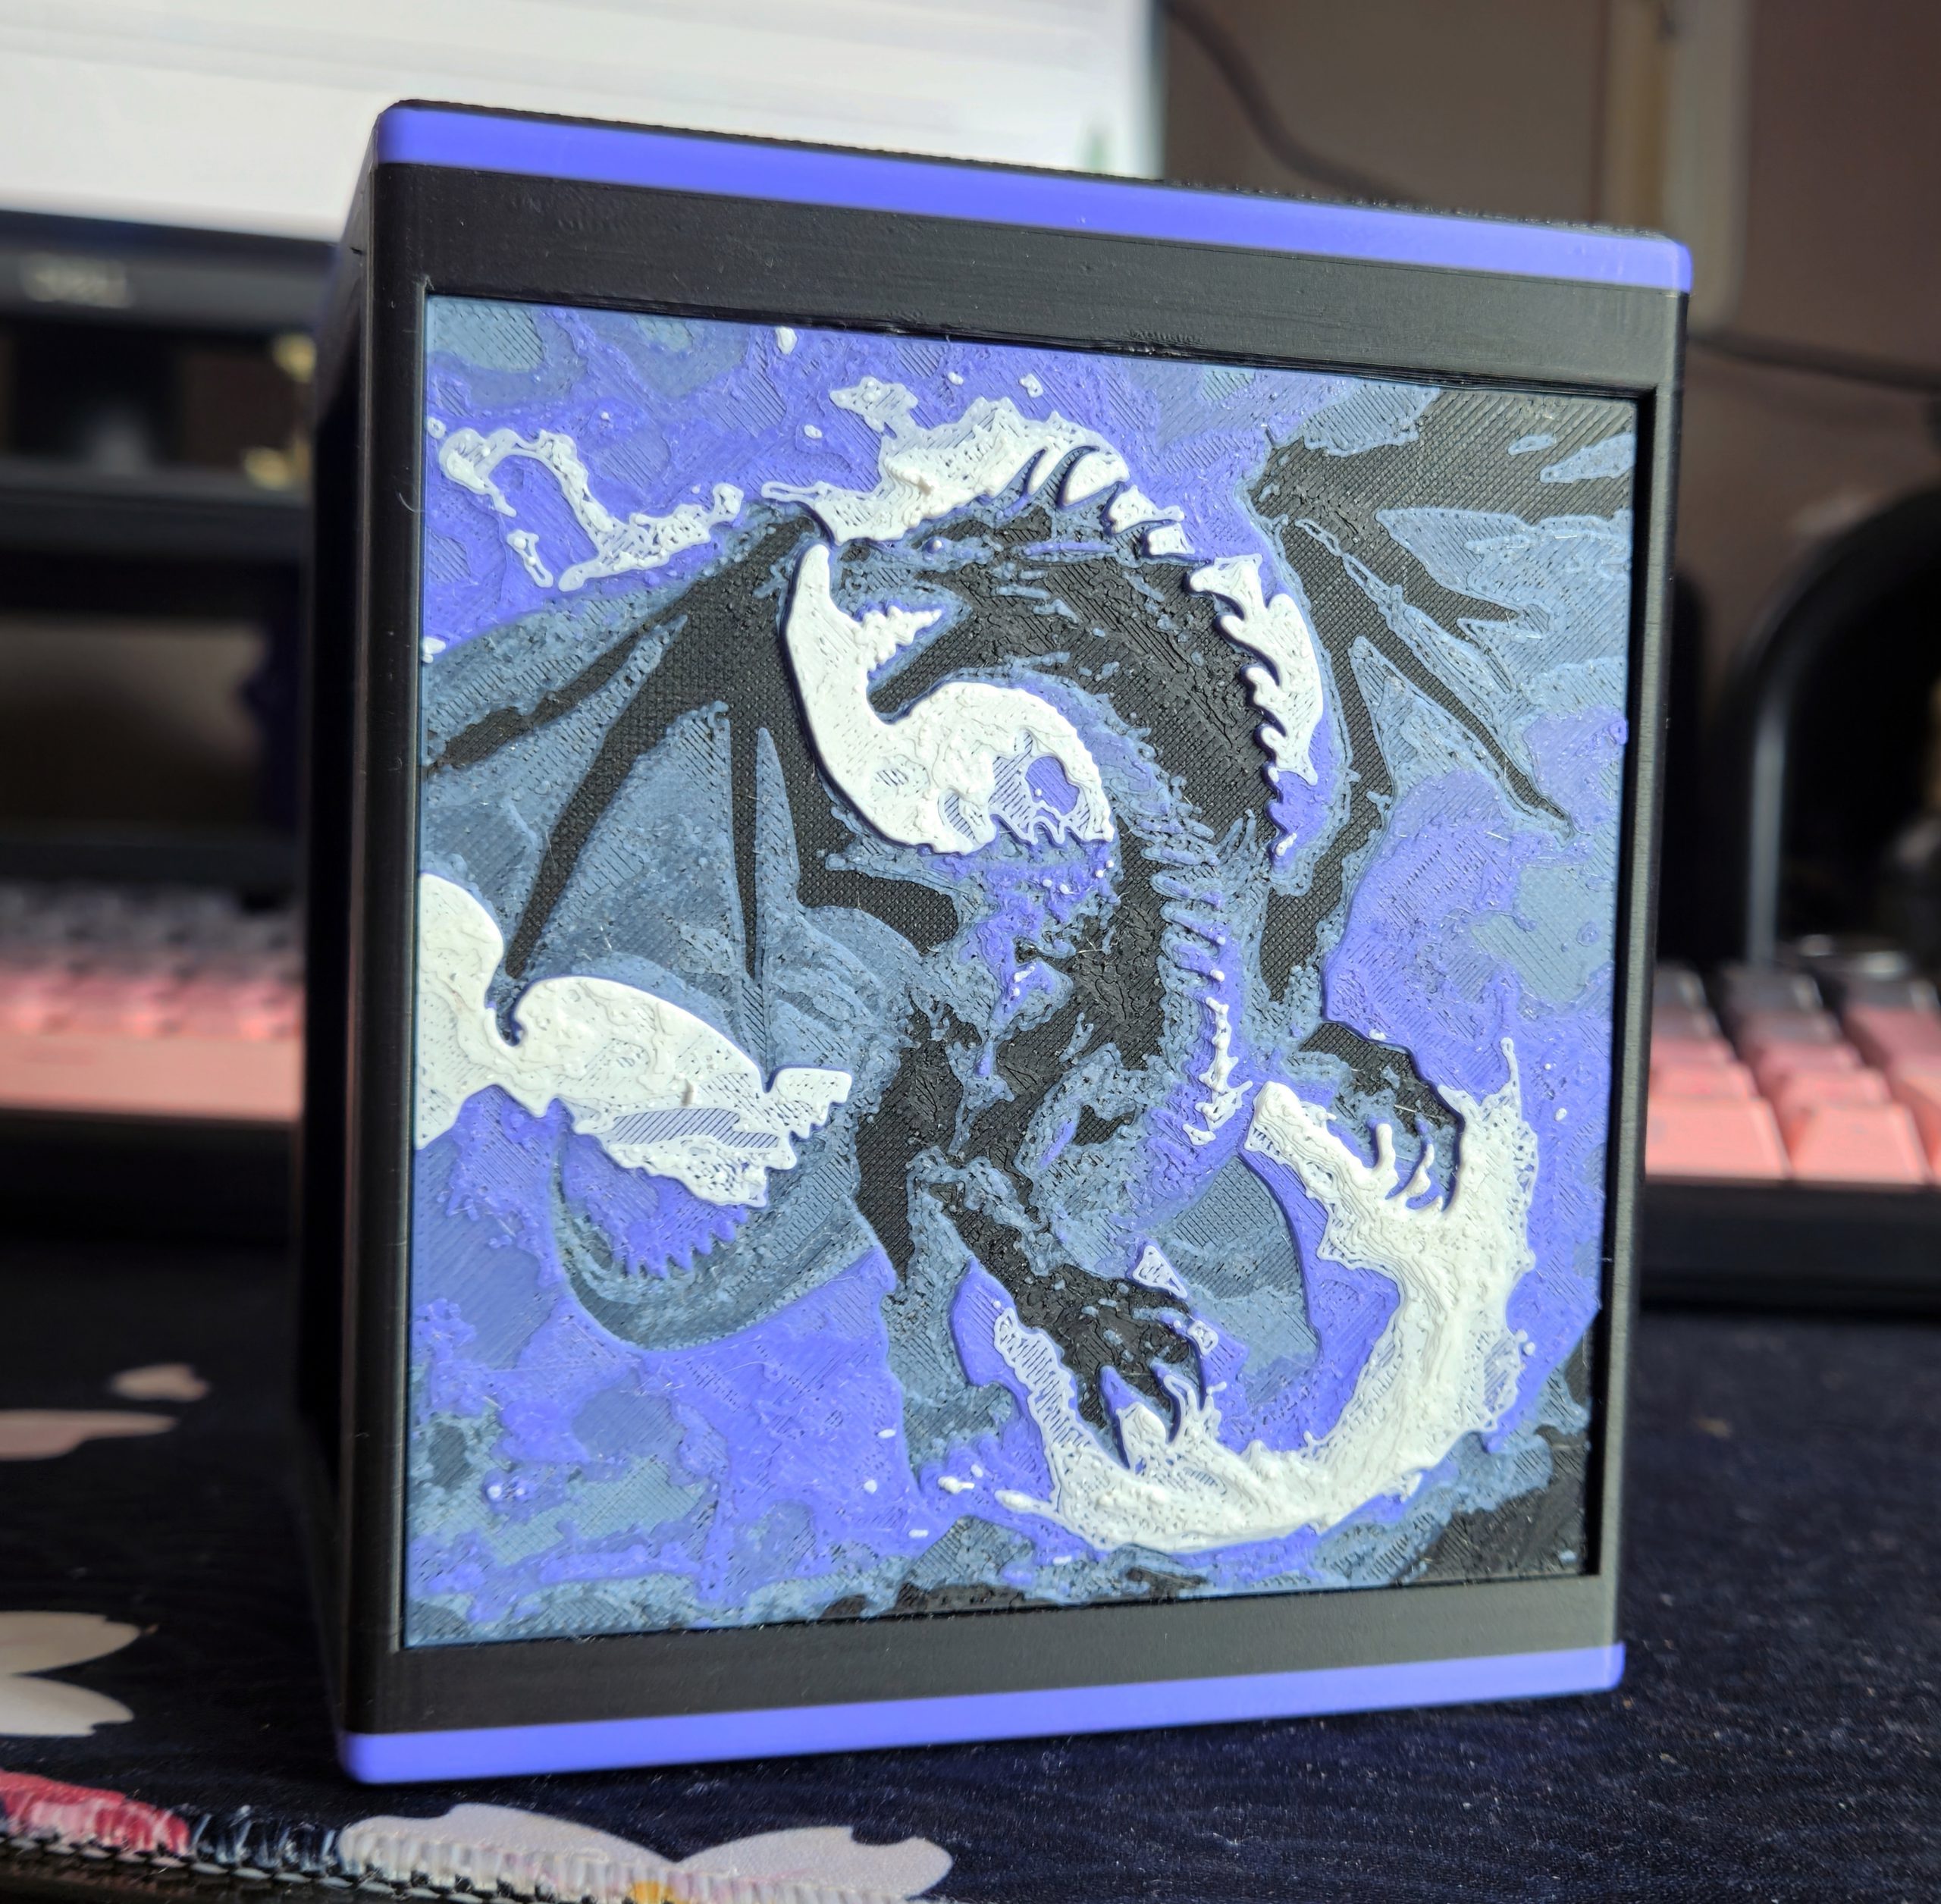
Keeping the spirit of personalization alive, I downloaded this
MtG Commander Card Box and prepared the file for printing using the filament colors I had available. I was short on red and orange, so I opted for a moody purple look. I also used the Color Painting tool in Bambu Studio to add some tasteful purple trim at the top and bottom of the box.
 Unusual multi-color projects are well-within the H2D's capabilities.
Of course, most people are inevitably drawn to the dominant dragon art panels. The side panels contain four colors (black, white, purple, grey) and the designer cleverly used single layers of colored filament to allow color underneath to bleed through and create new shades. Modelmakers will know this technique
as pre-shading and it applies to 3D printing too. The side panels are also
very durable seeing as 3D printing fuses plastic layer-by-layer. That whole dragon is effectively one piece
Most 3D printer owners limit themselves to 'basic' multi-color printing with separated colors like Pikachu. 3D printers are capable of far greater feats than that. Software like
HueForge allows people to create striking and durable
art pieces that fuse multiple layers of filament for painterly effects. These prints are textured by dozens of filament layers during printing and the outcomes bear a resemblance to oil paintings.
Printing High Points
I see the H2D as a 3D printer first and foremost, and I'm happy to report that it's an excellent printer.
High Print Success Rate
The H2D has a remarkably high success rate compared to my A1. I attribute this to the enclosed chamber, CoreXY motion system, and excellent base configuration. The enclosed chamber prevents ambient air from interfering with even cooling. I almost never have cooling-related print issues like edges curling off the bed. The absence of a moving bed also subjects projects to far less force during printing, which improves adhesion. Lastly, synchronicity between mechanical parts, software, and sensors is
excellent. The H2D just
works without excess noise or inefficiency.
The success rate extends to some failure modes. During 600 hours of printing, my home lost power twice while prints were running. On both occasions, I left the chamber closed and hoped the power would return before bed adhesion was lost. The longest of these two cuts was over 40 minutes and the printer resumed without issue. The power-loss resumption feature on the H2D is reliable and more importantly, the enclosed chamber maintained internal conditions long enough to save the print. My open air A1 can only resume prints from a power loss if it's been less than 15 minutes or I break out PVA glue and stick the print to the bed (if it looks stupid but it works, it isn't stupid).
Printer reliability is always critical. It gives users the confidence of being in control of the machine, rather than having a machine that behaves unexpectedly. Reliability also becomes scalability: It allows users to trust their presets and expect consistent results with minimal wasted time and material spent troubleshooting.
Excellent Built-In Material Presets
The A1 has a reputation for good built-in settings that behaved
quite well across different manufacturers. It's a far cry from the days when individual materials from each manufacturer required separate presets and calibration pieces. Hell, users sometimes needed to dial in settings for different colors of the same material. The H2D elevates this established standard further with fantastic filament presets. I've grown used to configuring a spool of PLA as 'Generic - PLA' and expecting great prints. The H2D's filament presets also handled silk PLA, PETG, PLA-CF, and a few other materials without any issues.
Most of the prints I previously showcased used some combinations of Bambu Labs' presets and built-in quality settings. Flaws only show up in high fidelity work (wargaming scenery closeups) or unusually complex projects. Even more so than the A1's already good performance, I
expect my H2D to succeed at printing. Failures are the minority, and troubleshooting always feels manageable.
Material Efficiency
One of the H2D's headline features was its dual-nozzle toolhead aimed at achieving a compromise between print speed and material efficiency. I'm happy to report that in my experience, the H2D lives up to that design goal.
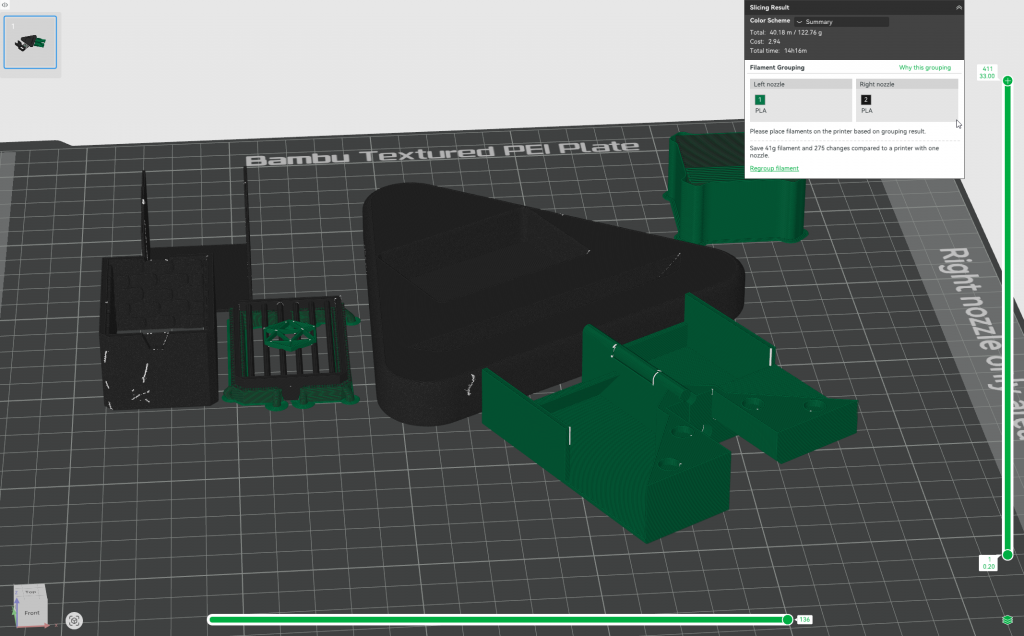
Being a total nerd, I was
very happy to find that Bambu Studio notified me of how much material my prepared file was saving on the H2D vs. a single-nozzle printer. Better yet, it also advises on more material-efficiency load orders for the AMS. If you don't want to do the optimal load order of filaments, a Convenience Mode slicing option prepares the model with the materials as they are loaded in the machine.
 The material efficiency calculation presented in the slicer sparks joy in me.
The H2D's waste generation comes from two main sources: purge waste and the prime tower. Purge waste (colloquially known as poop) is material expelled as waste during nozzle preparation and filament loading. It's usually discarded away from the print area (the H2D ejects it out of a rear chute). A prime tower – sometimes known as a purge tower – is an object that is printed on the build plate alongside the object.
Prime towers improve multi-material printing by further cleaning the nozzle of obstructions and stabilizing internal pressure using actual print settings. This further reduces material cross-contamination, reduces minor print defects, and – in Bambu Lab's case – improves the smoothness of their timelapse video features. Where purging pushes filament through the nozzle quickly to clean it between reloads, building a prime tower fine-tunes nozzle performance during a print.
With that explanation out of the way, how well
does the H2D handle material efficiency?
Honestly? Quite well. For starters, printing two colors on two nozzles means they'll never have to reload filament. This drastically reduces purge waste and saves time.
Material efficiency drops once filament switches get involved. Even then, if your project's 'primary' color (if it has one) never changes, you're still gaining efficiency. Yes, the H2D will generate waste switching between secondary/accent colors. But when it returns to the primary color on the other nozzle, there is almost no waste during the handover between nozzles.
This is best illustrated in the pre-slice material efficiency calculations the H2D does. It's incredibly satisfying to prepare my print and see that I'm saving dozens or hundreds of grams of material over a single-nozzle printer. At that point, the material savings (and follow-on waste reduction) can be measured in dollar value.
 Material efficiency peaks at 2-material prints, which account for a large proportion of all multi-material prints.
While not as efficient as its larger cousin, the H2C, the H2D's dual-nozzles make multi-material and color printing a much more relaxed affair. I'm incredibly comfortable running multicolor projects using the H2D, and the responsive AMS 2 Pro makes it even easier to stop messing around and go straight to printing.
MakerWorld Integration
I'm usually wary of any manufacturer's in-house software and storefront offerings, but I've grown accustomed to
Makerworld. MakerWorld is Bambu Lab's in-house 3D printing file repository. You'll know because Bambu Studio and Bambu Handy both open onto a MakerWorld recommendations list. When Bambu Lab only did 3D printers, MakerWorld was primarily a 3D printing file repository. It has the usual features: ways to follow and support creators,
theme contests to encourage creations, and a good search function.
With the H2 series' introduction of new tools, MakerWorld is now
the place to find projects
compatible with the H2D. Laser and blade-cut models have
their own section on the site, and many of them use printed parts from the 3D print section. The H2D can of course handle laser and blade projects from elsewhere, but I've found that MakerWorld is the surest way to ensure ease-of-use. MakerWorld integration is included in all Bambu Lab software, but you can deprioritize it from your Bambu Studio and Bambu Handy front pages if you want. I did it to bring my work closer to me. However, I still reach for MakerWorld's large, and growing file repository by default—it usually gets me a completed project because the user definitely designed the file with a Bambu Lab printer on hand.
Printing Failures and Challenges
Home 3D printing is a remarkable technology. It's open-air molten plastic manufacturing in the conditions of your home, running on consumer hardware. I always approach this hobby with childlike awe at the appliance in my home that would have blown the shorts off engineering faculty thirty years ago. The incredible diversity of objects that can be printed (in an uncontrolled room no less) means that
all printers have failure modes. The reliability of a printer isn't determined by how many perfect prints it can squeeze out, but how few failures it encounters and whether they can be resolved. By those criteria, the H2D is impressive.
Failure Modes
I didn't keep a concrete accounting of print failures with the H2D, but I can say with certainty that it handled projects with excellent reliability. H2D print failures are the exception, not the norm. Most of my failed prints could be traced back to user error or incorrect setup in the slicer. Typical print failure modes like adhesion loss, edge curling/warping and support breakages are far less common on the H2D than my open-air A1. When these failures
did occur, the solution was usually simple to implement in the slicer. The H2D has yet to encounter a project it couldn't print successfully after adjustment. I've yet to give up on a project out of frustration.
The H2D has given me seven spaghetti failures (loss of adhesion with wasted material) in 600 hours, which is very impressive. Four of them were detected by the AI monitoring, which paused the print and notified me. I caught the others as they happened. In most of these cases, the solution was to re-orient the print in the slicer or wash the build plate with dish soap to remove oils/residue.
The most common failure mode I've encountered with the H2D is support failure. Denser or more complex support structures are notorious failure points. However, the support failures my H2D has experienced seem related to support robustness, rather than mechanical issues (like the nozzle striking a support and breaking it). In all cases of support failure I encountered, increasing the strength or line width of my supports would result in a successful print. The H2D's precision is a noticeable improvement over the A1—as it should be. I've yet to have a support failure with the H2D that could be explicitly attributed to nozzle-knock or other mechanical imprecision.
Issues and Difficulties
The H2D is an excellent and capable machine. My complaints about it are quality-of-life issues, not dealbreakers.
Filament Access Without AMS
Although Bambu Labs furnished me with the combo H2D that included an AMS 2 Pro, I also used the machine extensively without the AMS to see how a 'naked' H2D would fare. I came away feeling like the H2D was designed with AMS users in mind. Manually loading filament is a finicky and sluggish process that requires eyesight, feel, and some guesswork. Any improper seating of a PTFE tube could result in an obstruction. At one point, a magnet in the filament buffer (the part that accepts incoming filament) somehow ended up facing the wrong direction and obstructed incoming filament. I had to remove the buffer and partially disassemble it to readjust the magnet.
The H2D ships with a single external spool. Anybody who wants to print from both nozzles without an AMS will have to buy or print a second spool holder. Thankfully, the community has
many solutions for running your H2D without an AMS. I felt like the ergonomics of hand-loading the H2D left something to be desired. My A1 is easier and faster to hand-load, and it purges more quickly during hand-loading.
Manual Nozzle Swaps
Although my H2D hasn't experienced major nozzle blockages, changing the dual nozzles was unpleasant. The nozzles are nested into the toolhead with fairly little room. Getting in to change the nozzle by hand is often an exercise in frustration, and I possess small, dextrous hands.
The worst issue I've had with nozzle swaps has been their tendency to get stuck in the toolhead. I don't know how, but the filament left in the nozzle after cutting can pin the nozzle in place. It'll be firm enough that I must wrap some paper towel around the nozzle for protection and use pliers to gently extract the nozzle. Fresh nozzles go in without hassle. This occurs more frequently with my 0.4mm nozzles than the 0.2mm and I don't know why. Suffice to say, my experience with the H2D's nozzles has not been as breezy as videos suggested.
AMS 2 Pro
An AMS 2 Pro is included in H2D Combo packages. This material management device has 4 slots for 1kg filament spools (and fits most manufacturers). Your materials can be manually defined or automatically recognized if they're Bambu RFID spools. By itself, it's an improvement on the older AMS. Maintenance access is easier and the new ceramic filament feeds are more resistant to wear and tear. The AMS mainly allows Bambu Lab printers to automatically swap between up to four materials during printing. The printer will automatically perform a full reload during swaps and notify of any issues. Any H2D Combo package supports automatic use of 5 materials out of the box: 4 in the AMS 2 Pro and 1 external feed.
Its performance during printing is completely satisfactory. It loads and unloads filament at a good speed. As long as I've set my filament colors and types correctly, I've never had an error. On rare occasions when it
does have a feed issue or error, the print pauses and I'm promptly notified. It does exactly what it should do for the printer: Manage your materials and multi-colour printing.
The AMS 2 Pro's other key feature is integrated filament drying. It has a self-contained heater, automatic air ventilation, thermometer, and hygrometer. These are necessary tools for effective filament drying. It also automatically rotates your spools and ventilates excess moisture during its drying cycles. Lesser filament dryers lack ventilation and must be periodically opened, or propped open by the user. Even though the H2D's chamber has a filament drying function, I find myself using the AMS 2 Pro's drying more often because it's simpler and more reliable. I suspect it's also more energy-efficient than heating the entire chamber, too.
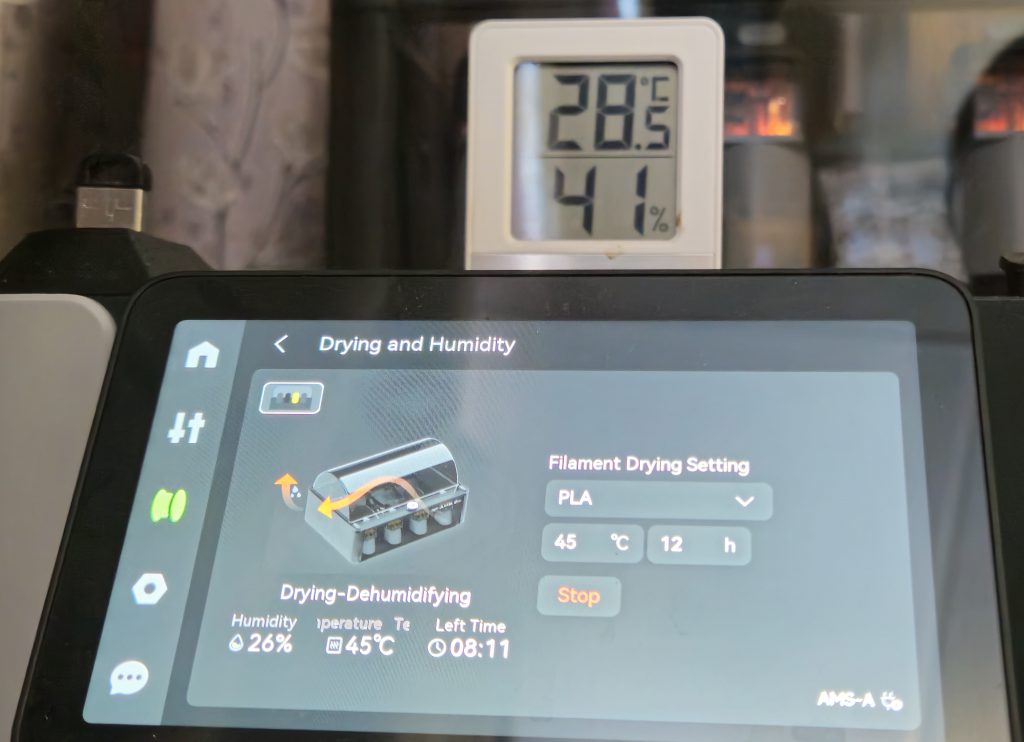 The AMS 2 Pro's drying function makes a much healthier environment for filament than open air.
It's a massive quality-of-life improvement to know that my filaments are stored in a suitable environment. Even when the AMS 2 Pro is not running, it's a semi-sealed environment loaded with desiccant that stays drier than outside.
That's it for the first part. Stay tuned for early next week, where Summer covers the laser cutting functionality of the Bambu Lab H2D in detail!
Have any questions or feedback? Drop us a note in the comments below or email us at contact@goonhammer.com. Want articles like this linked in your inbox every Monday morning? Sign up for our newsletter. And don't forget that you can support us on Patreon for backer rewards like early video content, Administratum access, an ad-free experience on our website, and subscriber-only content covering competitive Warhammer 40K!Thank you for being a friend.
 I expected much in terms of print reliability and the H2D delivered.
 The H2D's basic calibration is customizable and fully automated. It also walks users through basic maintenance processes like cold pull and cleaning.
 Laser projects more than a few minutes long require periodic physical interaction with the H2D to ensure that a user is nearby for safety purposes.
 The H2D's packaging doesn't fool around.
 This charming sticker on the topside of the box was correct.
 H2D Laser Combo machines have a top-down camera that reduces guesswork when prepping laser, plotting, and blade cutting jobs.
 Camera monitoring and timelapse features are responsive and satisfying on this machine.
 The five-color fidget using differently textured materials from various manufacturers was very successful. Note that this many mixed colors necessitated a larger purge tower (left). The purge tower would be the same size for 1 item or a full plate of identical items.
 The front of this project featured a cleverly designed inlay using an accent color. It was printed face-down onto the plate.
 3D print file creators often leave space for customizations and add-ons, such as this miniature dice tower. I added custom D6s with a matching DND spell slot tracker to complete the set.
 Almost a week of two-color printing for this project resulted in literally a small handful of print waste, pictured here.
 These scenery pieces made full use of the H2D's print width.
 The H2D captures detail surprisingly well using un-optimized settings and off-brand filament. Further tweaking would resolve the slight flaws visible in this terrain piece. It is otherwise impressively smooth with barely-visible layer lines right off the plate.
 Unusual multi-color projects are well-within the H2D's capabilities.
 The material efficiency calculation presented in the slicer sparks joy in me.
 Material efficiency peaks at 2-material prints, which account for a large proportion of all multi-material prints.
 The AMS 2 Pro's drying function makes a much healthier environment for filament than open air.

 Goonhammer App and Patron Updates: April, 2026
 Kill Team Tournament Report: Engage, Party, Repeat's March Madness 2026
 Goonhammer Reviews: Tribal Conquest