In this new series we’re looking at various terrain layouts for Warhammer 40,000 and exploring how they work, what you need to know about playing on them, and how you can improve your play when you play with those layouts.
Many games of Warhammer 40k are won or lost in deployment and a key part of that is terrain. In this series we’re going to look at various terrain layouts, looking at how the affect the game and how you can use them to your advantage. In this article we’ll start by looking at Layout 8 from the
Games Workshop Tournament Companion, specifically with regard to the Chapter Approved 2025-26 Missions Pack.
This is the eighth article in the series – if you missed the prior ones, you can find them here:
A Note on Terrain
In these articles I’ll be using Games Workshop terrain but it’s worth noting that terrain will change from event to event, and the layouts shown in the Games Workshop Tournament Companion are guidelines more than hard-and-fast rules about how terrain has to actually look. Most often you’ll find that terrain features may be longer or shorter than the layouts dictate, based on what the tournament organizers have available.
With that out of the way, let’s get into the layout:
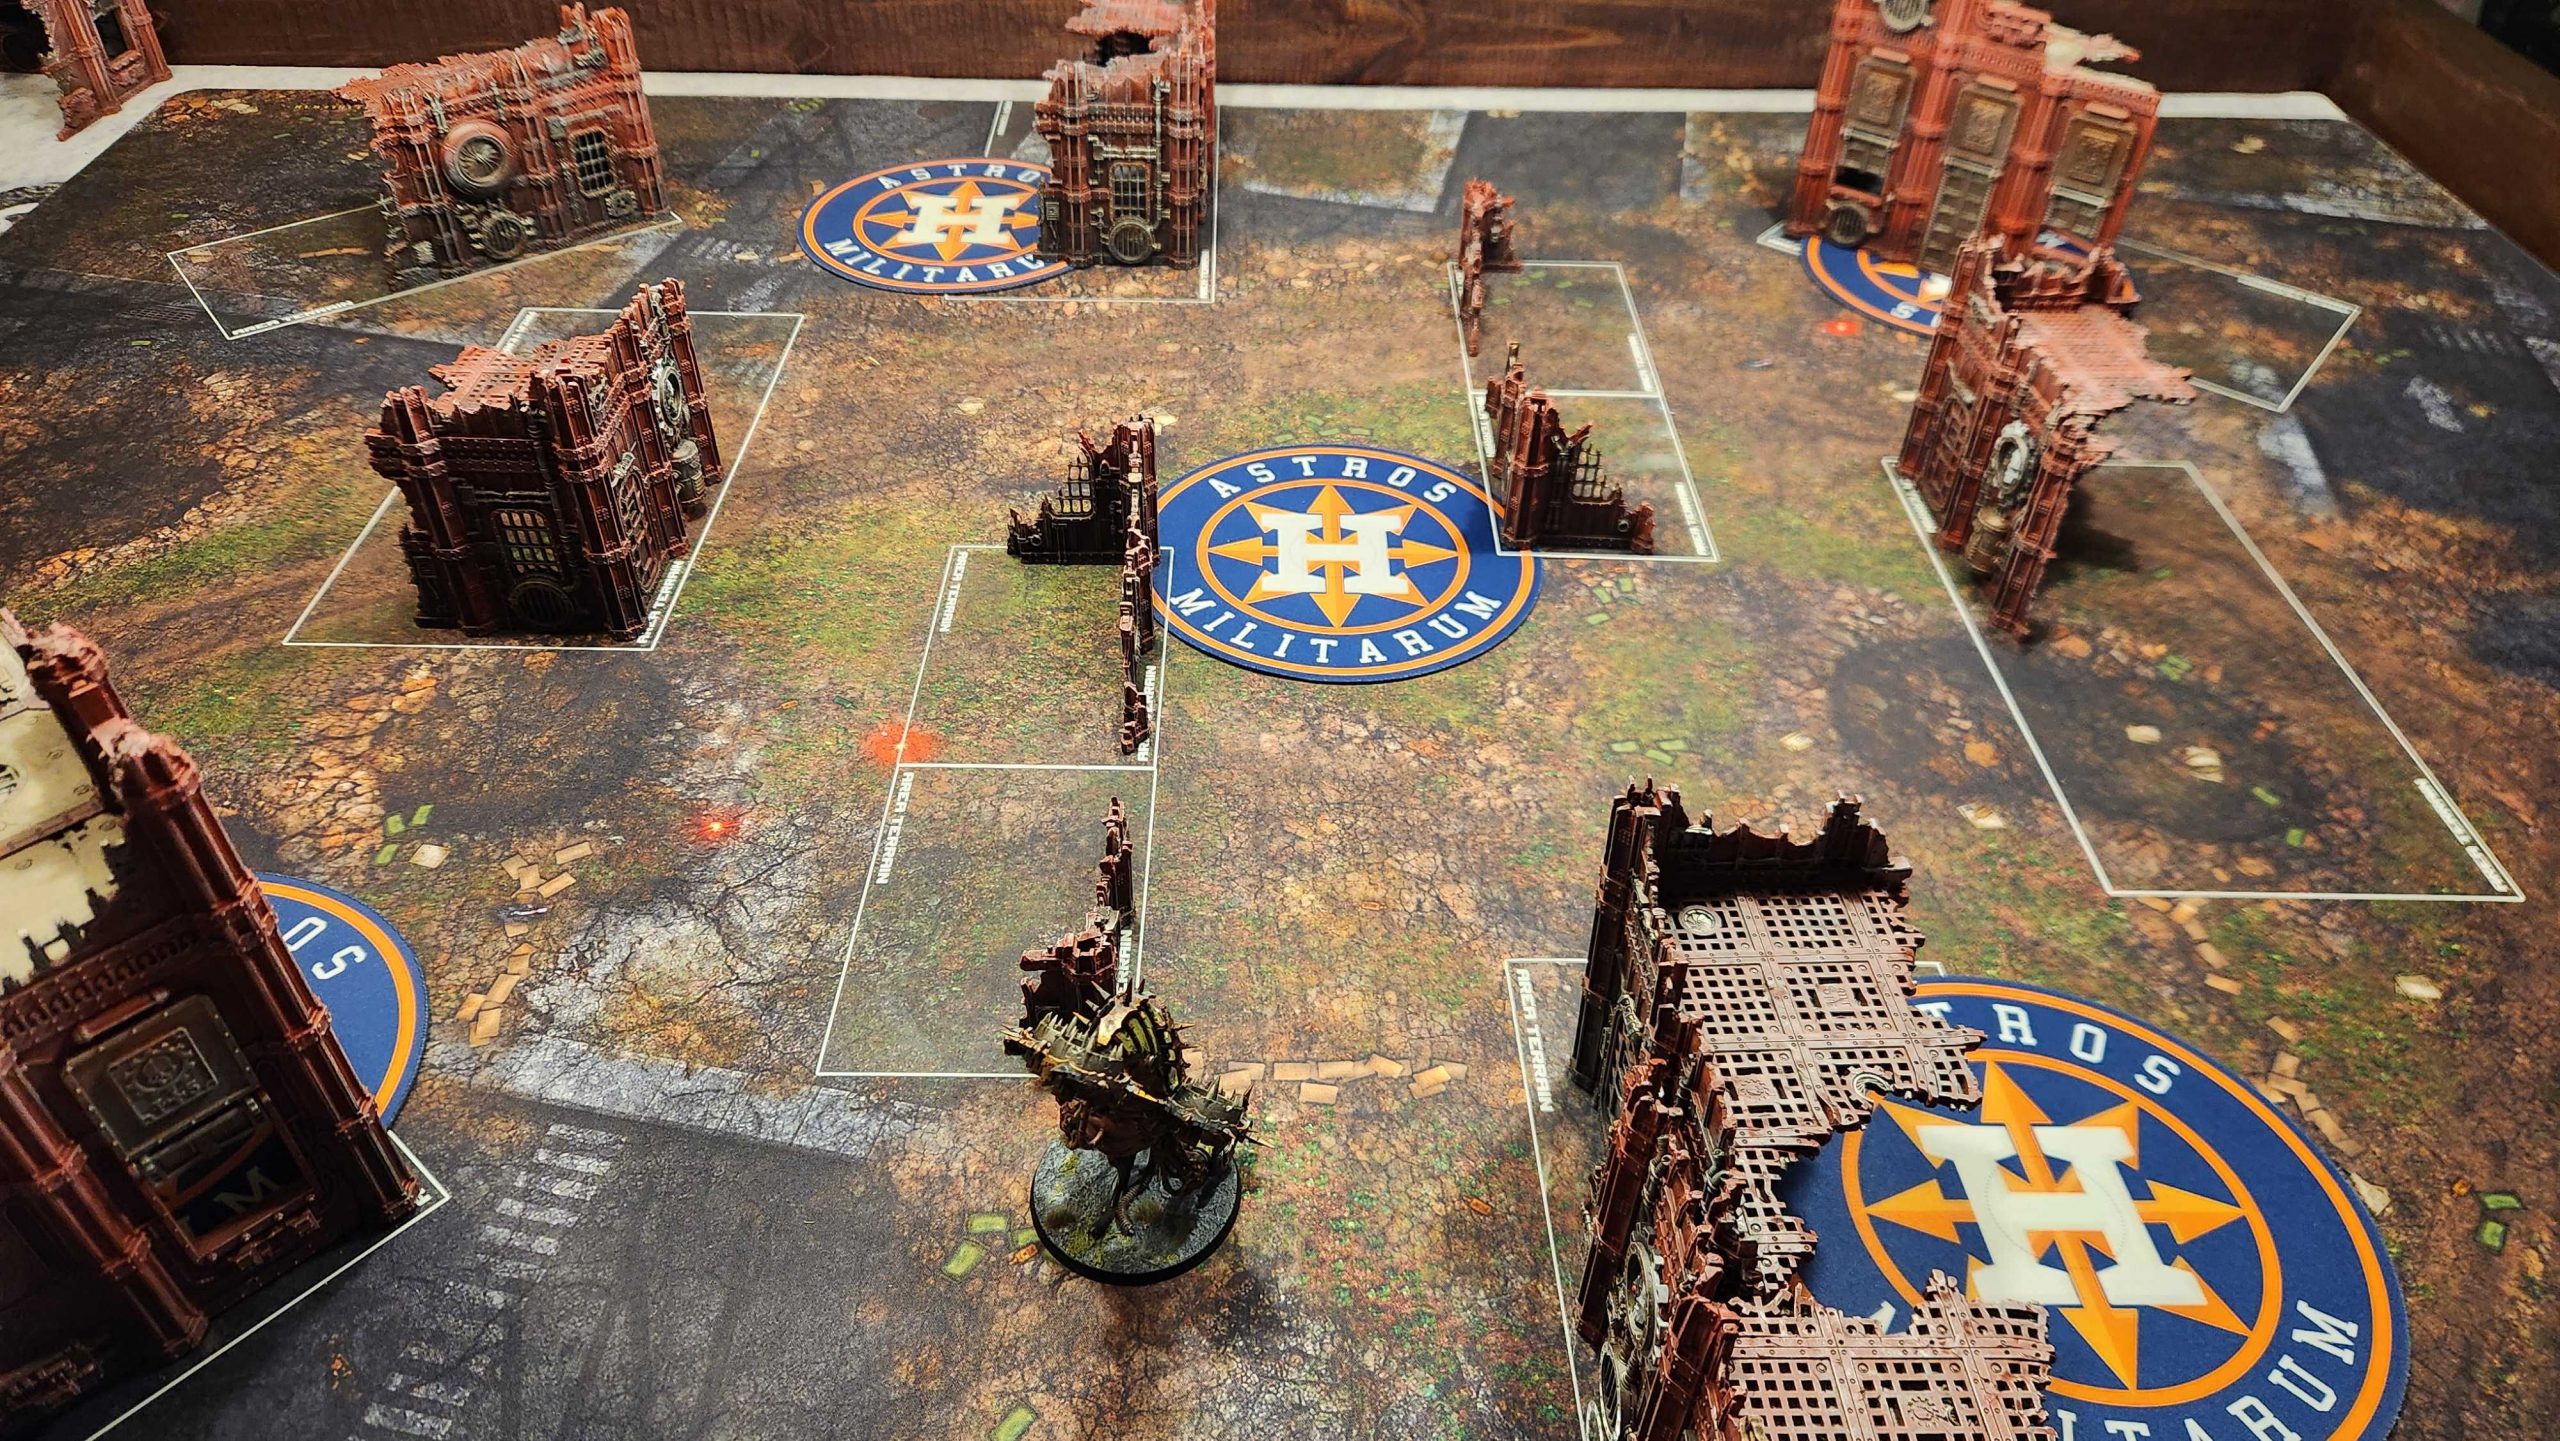
Layout 8 is recommended for missions running the Tipping Point, Crucible of Battle, and the Hammer and Anvil deployments. I think it works OK in a pinch in Search and Destroy if you had to run it there (the big issue is the placement of the expansion objectives more than the deployment zones), and I'm less enthusiastic about running it in Hammer and Anvil just because I don't like how that layout lines up the three objectives down the middle line of the table, even if it takes some work to reach them. This map is doing its best work on Tipping Point, where it provides the best mix of layout, objective placement, and deployment zones.
This layout is also incredibly easy to build, as it only features two flipped L-shaped ruins, and is easy to build with terrain you already had lying around from Pariah Nexus. the four small ruins have been combined into two long ruins in the middle of the table, running 4"x12" and creating a rather tight set of lanes down the middle of the table. This is more or less the most dense and melee-friendly table of the GW layouts.
It's worth noting that the U-shaped ruins are supposed to leave a 2" gap between the ruin wall and the edge of the table, which is enough room for units on 40mm bases or cavalry to pass through. Those may or may not exist on the terrain you're using but ideally those are available to provide some extra movement and charge options and make it harder to just completely move block an opponent trying to move through the ruins.
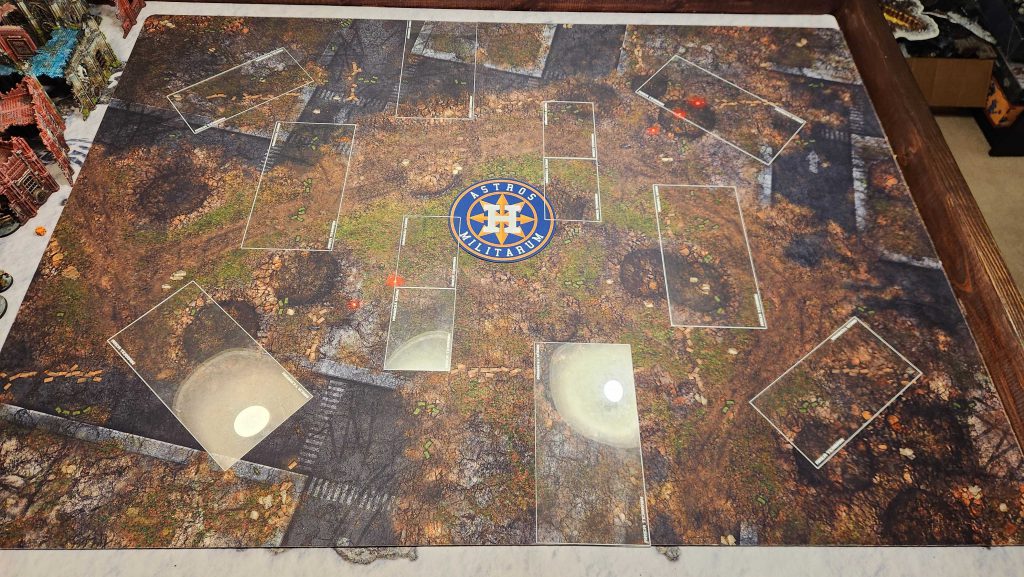
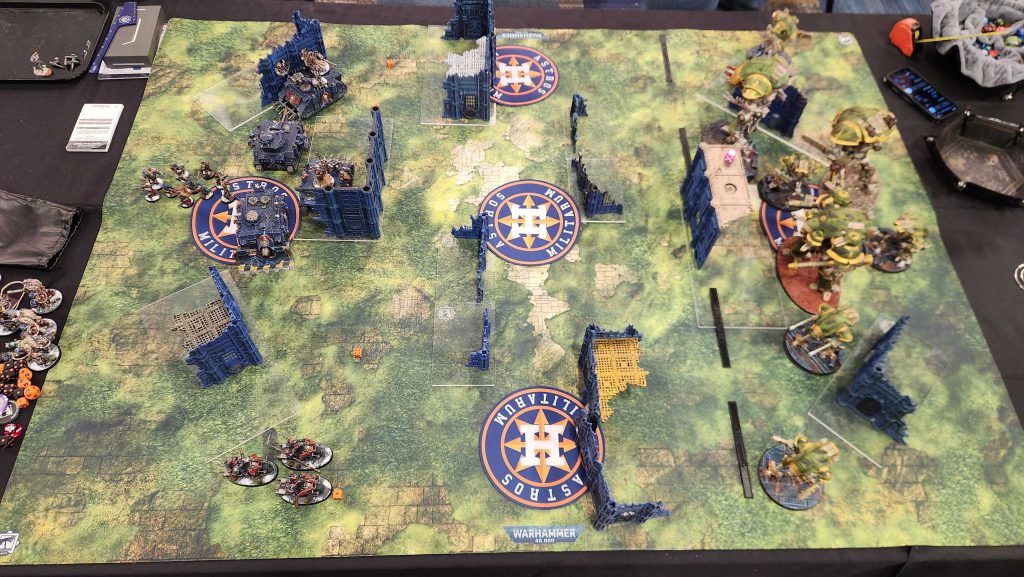
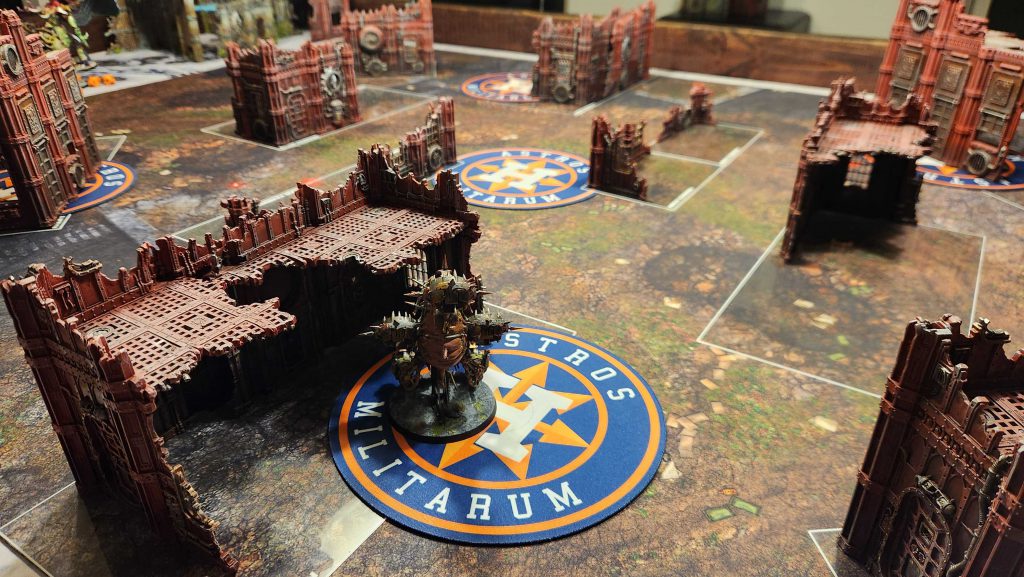
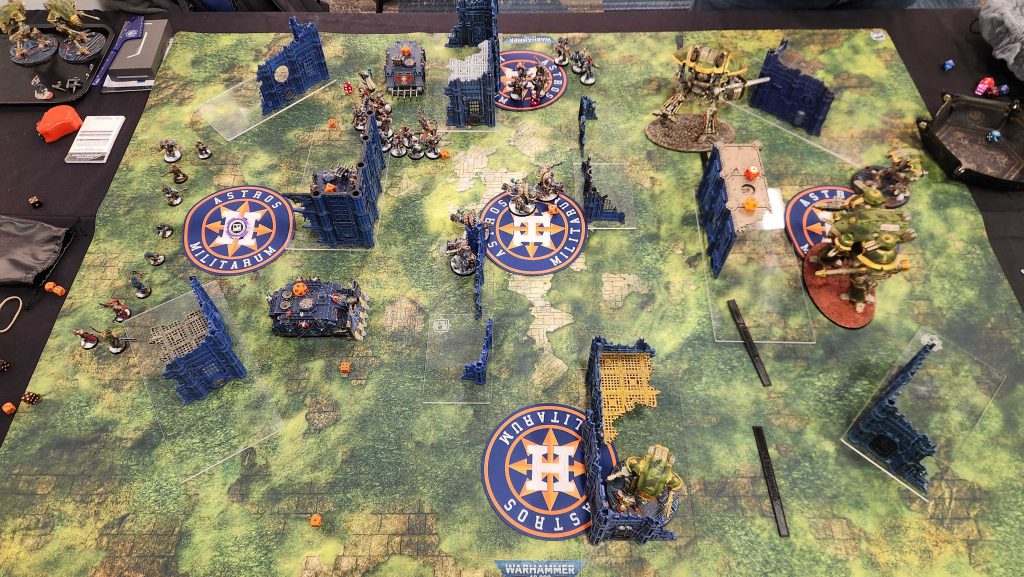
I like to put a note in these articles that terrain can change dramatically at these events but it's worth showing that off in practice. Here are two different Layout 8 tables I played on at Games Workshop's World Championships of Warhammer this year:
That's Hammer and Anvil, and here's Tipping Point:
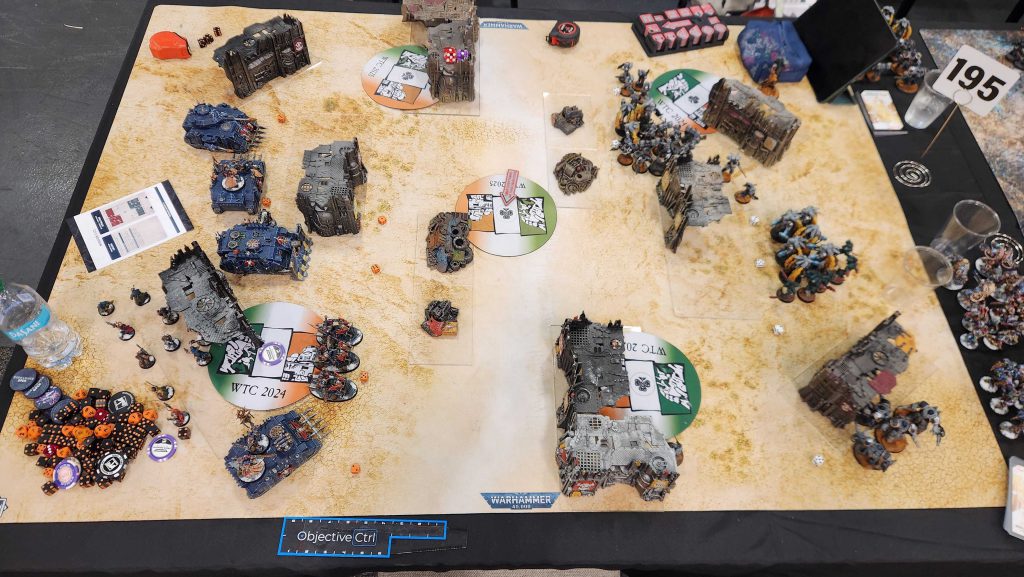
Note the large differences in how each table plays based on the terrain used - the gaps along the wall on the U-shaped ruins are smaller on the Ork terrain layout, and the wall there itself much longer. The scatter terrain on the middle ruins changes significantly how models move through/onto them, and the L-shaped ruins on the small corner ruins are facing the wrong direction, making it harder to safely hold those objectives. These guides are here to help you understand the layouts, but be sure to actually look at the table before your game to ensure that you're playing around the ground truth.
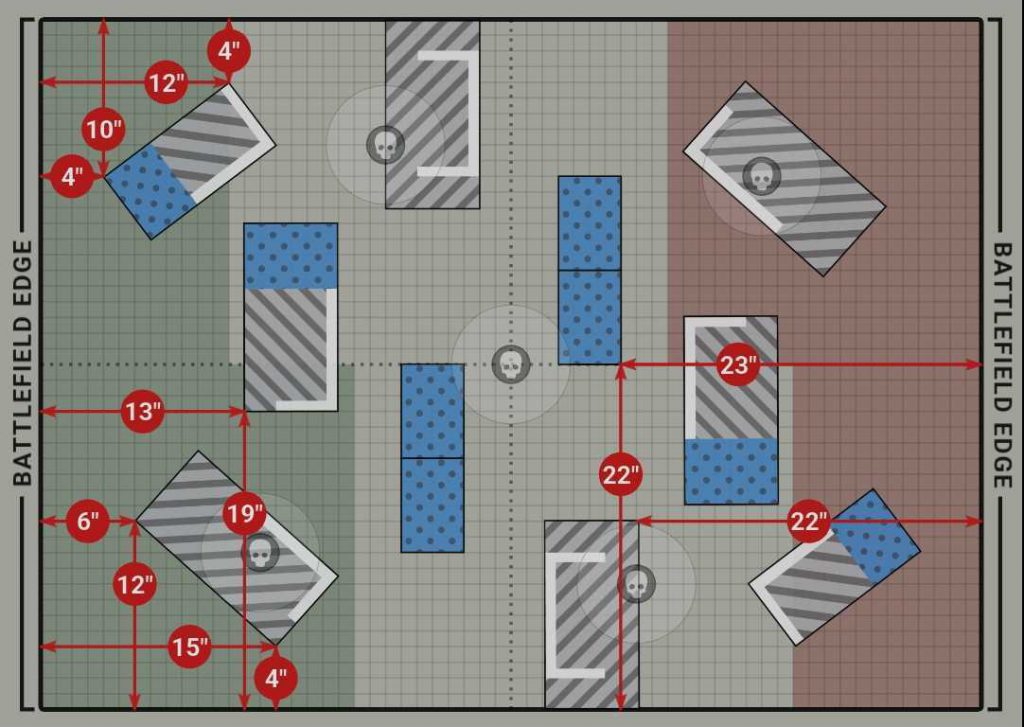
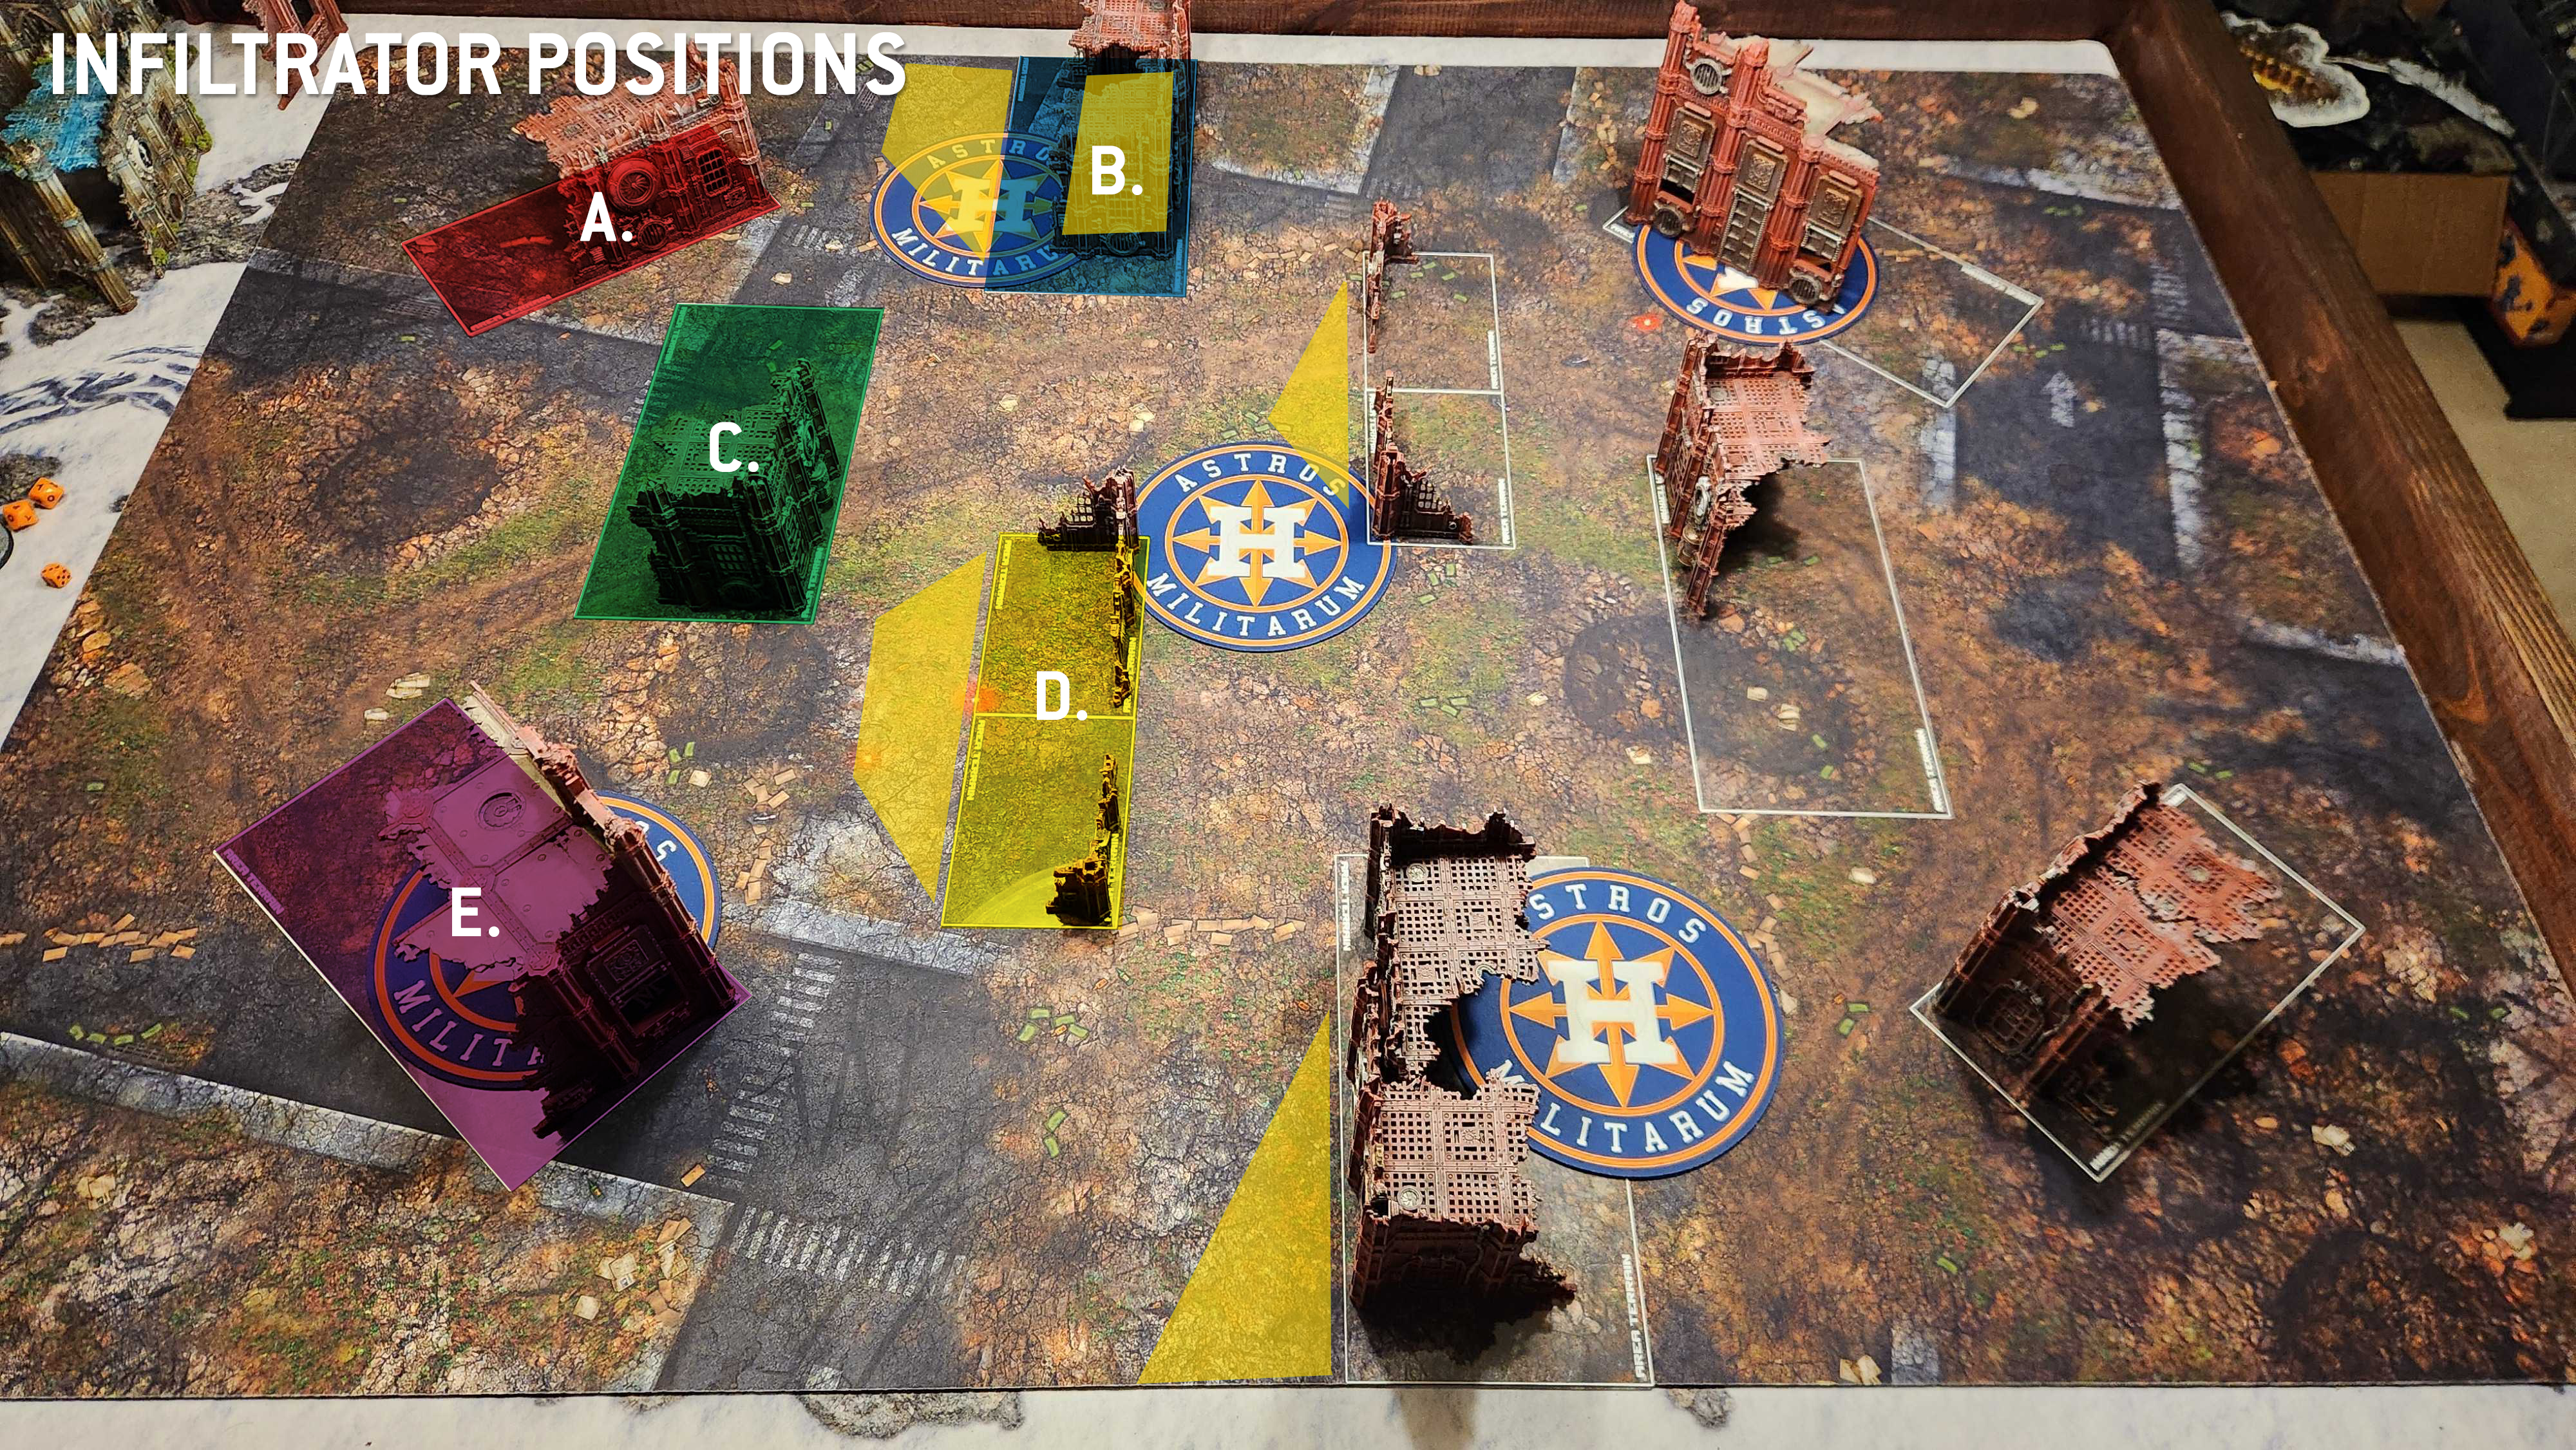
Okay with all of that out of the way, let's label these ruins:
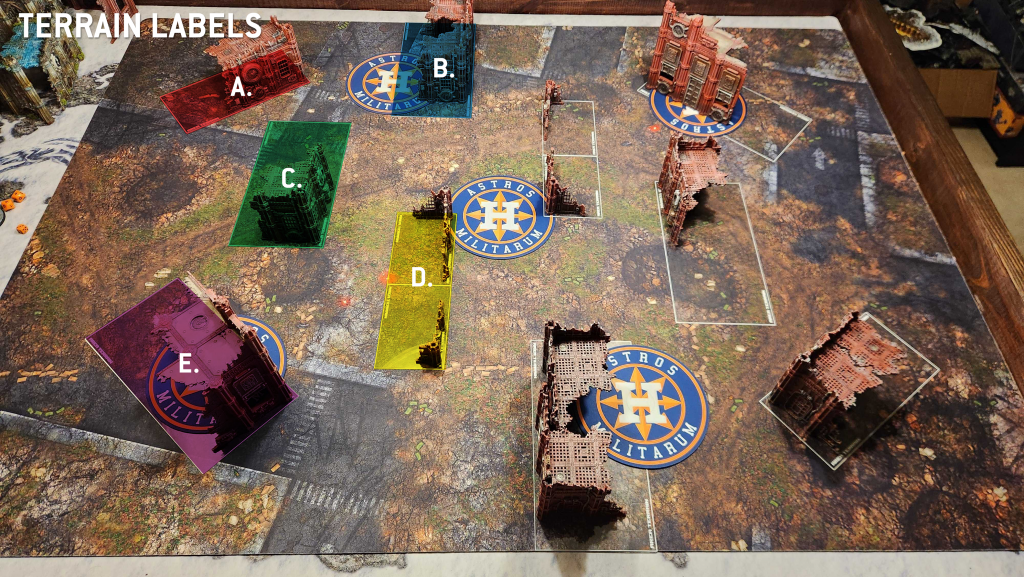
There are five key pieces of terrain here:
A. The small corner ruin. This ruin sits at an angle to the corner and serves two main purposes. The first is that it provides cover for a unit trying to move onto the expansion objective on B. during the first turn. The second is that it provides an easy shield for deep striking units late in the game.
You can easily walk from this ruin to the point on B on either Tipping Point or Crucible, but you'll generally want to advance to make sure you get far enough to either hide behind the ruin or inside the walls. Jump units and other units which move 12" can trivially go from the corner of A. to against the walls of B. with any Advance roll, setting them up to push through the following turn. This is easy on Tipping Point and Hammer and Anvil, and more of a chore on Crucible.
B. The forward U-shaped ruin. This ruin acts as protection for units holding your expansion point on Crucible/Tipping Point and also a key melee staging area. You can easily screen out enemy units from charging with 6+ models here, forcing them to go around (or over the top), but note that if the ruins are placed correctly most units can walk around the side of the ruin closest to the table edge.
From this ruin you can typically see to the opposing U-shaped ruin, so if you're in this ruin make sure you've placed your models in far enough to actually hide.
 C. The middle 12x6" ruin.
 This ruin acts as a shield during deployment, and the ruin on it should be big enough to hide a unit of infantry or a small tank. Sitting in this ruin can give you a good view past the B. ruin while still being protected from the line of sight on your enemy's B. ruin.
D. The middle 4x12" ruin. This single ruin, made from two 4x6" ruin pieces, features 2" tall terrain and is treated like one large piece of terrain. It's a fine shield for blocking line of sight to your units while being easy for tanks and vehicles to move over, making the middle of the table relatively closed to line of sight but open with regard to movement.
E. Your large corner ruin. This large ruin gives you a protected spot with which to hold your home objective on Tipping Point/Crucible and similar to the small ruin, can act as a shield for Deep Striking units later in the game.
Objectives
Loading...
This map is absolutely not viable for Dawn of War or Sweeping Engagement, and I don't personally care for how the objectives are all lined up and in the open on Hammer and Anvil, even if they're equidistant from each deployment zone. As mentioned, Search and Destroy is doable - I was surprised to find that it wasn't a recommended option - in part because it lets you hold the expansion objective from the A corner ruin while still being vulnerable to staging and deep strike threats through the U-shaped ruin at B.
On Crucible of Battle you'll have a longer distance to travel to reach your expansion objective safely, and it's harder to hold from the safety of the B ruin - there's very little space there to be out of line of sight and also on the objective. Crucible also lines up the objectives a little more directly, making it easier to draw a line between them that advantages ranged armies.
On Hammer and Anvil you have a longer way to go to each objective, but while they're lined up down the middle of the table you can easily hold an objective safely from inside your U-shaped B ruin, which is more or less the plan on this map. Doing this with more than 1-2 models while screening the wall can be a challenge, but it's ideal for knights and vehicles that can toe on with more OC.
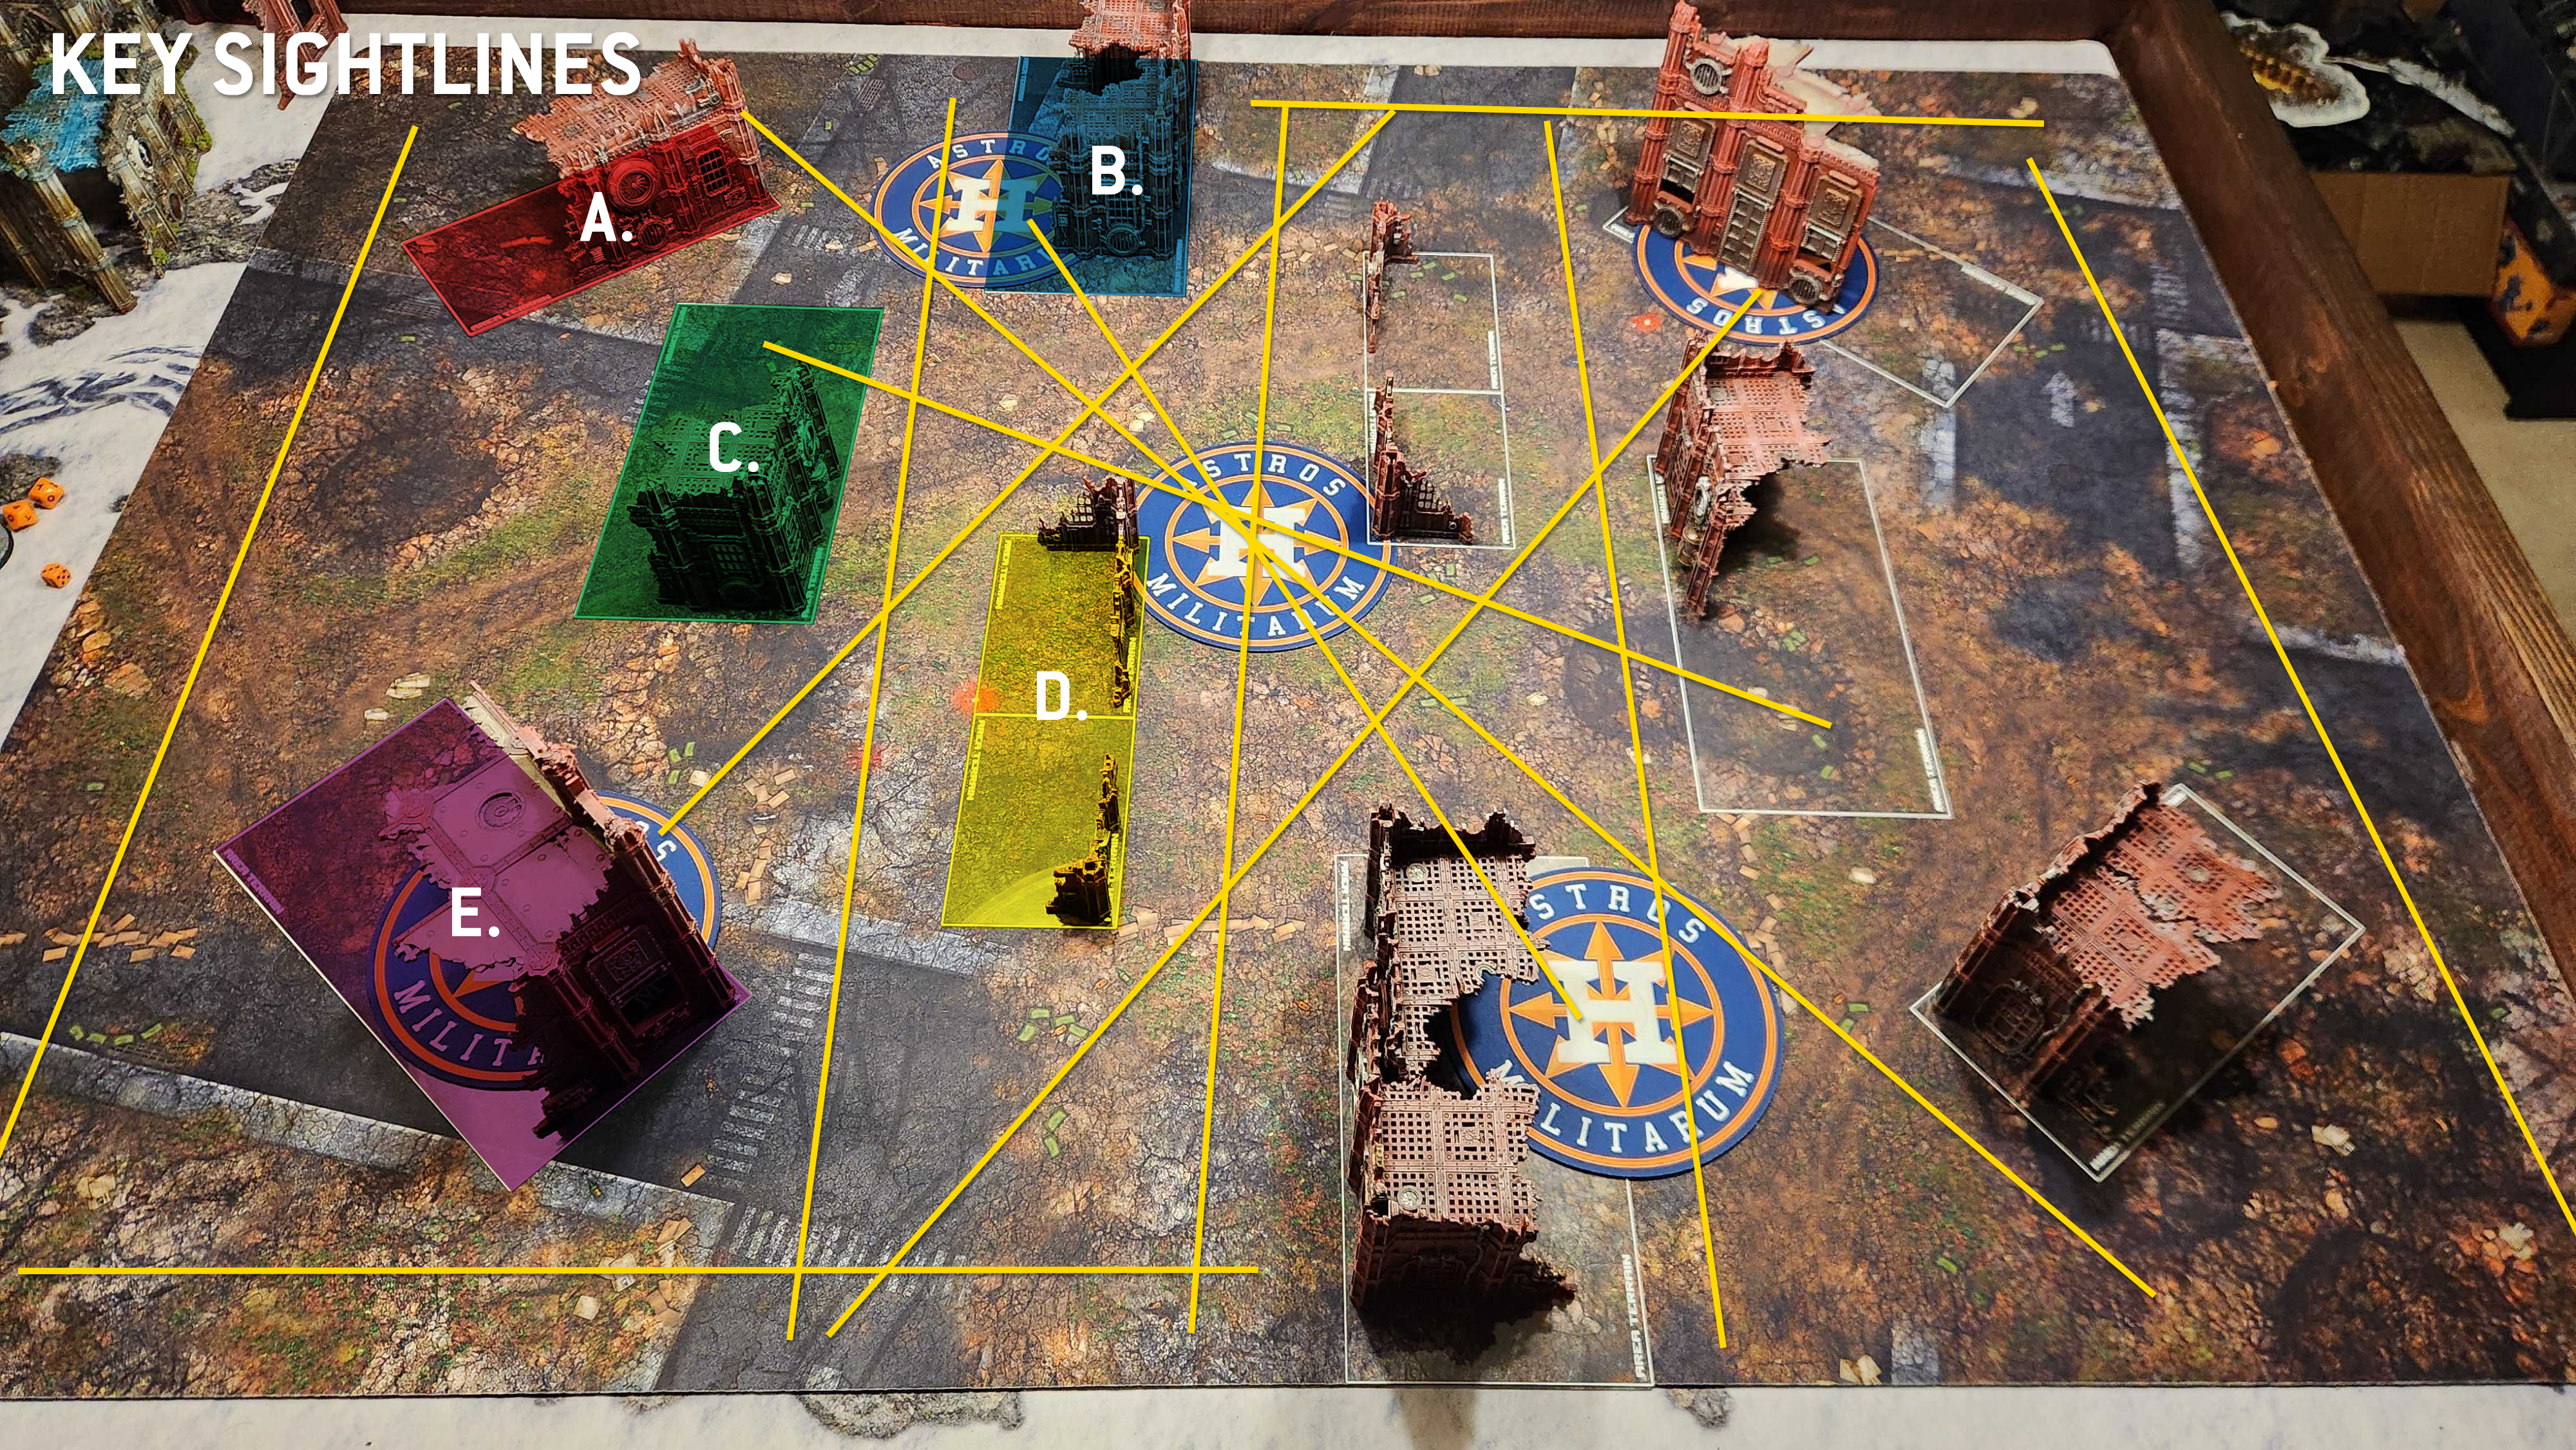
Sightlines

Layout 8 doesn't offer up any sightlines that run the full length of the table and while you have two in each deployment zone which run down the short table edge, there's often little reason to be back in that column unless you're screening your backfield or trying to take out a deep striking unit. The big sightlines here are diagonal, and they both take movement to reach, while also leaving you exposed to other sightlines. Because movement on this table happens horizontally, it's relatively easy to hide from those long diagonal sightlines and those need significant range - 36" or more - to actually hit their targets across the table.

There's an interesting tradeoff on this map: Moving around the bottom of your D ruin to take a good shooting position on the opponent is relatively easy, especially for units with a good movement characteristic, but also leaves you vulnerable to being charged through the walls of the nearby B ruin - and once a unit charges out of there they'll be in a good position to sweep forward onto your home objective.
Melee Staging

Layout 8 offers some juicy, but predictable, melee staging points. The key ones are through the two B ruins. Your own B ruin is great for charging through and into your opponent's home objective - but your opponent can do the same if you aren't blocking their movement through the wall. The wide D ruins at midtable also offer solid protection for a unit looking to charge something on that center objective. Note that on Tipping Point you can fight something next to the B wall then consolidate through it onto the objective - something that isn't possible on Crucible of Battle.
What Does Well Here?
Melee units have a much better time on Layout 8 than any other layout, and the pair of tilted corner ruins makes it good for deep strikers as well. Because of how this map is set up, movement flows tend to just be the same as what you'd see on Layout 7, moving horizontally across the table or turning in diagonally to hit the middle. Because the middle is pretty exposed on this map, more skirmishes tend to happen around the two side objectives as players attempt to hold their own while capturing the opponent's objective.
Conversely, ranged units can struggle to get good lines of sight here, since the longer sightlines are relatively narrow or require being in a position to get charged through the walls on the B ruins.

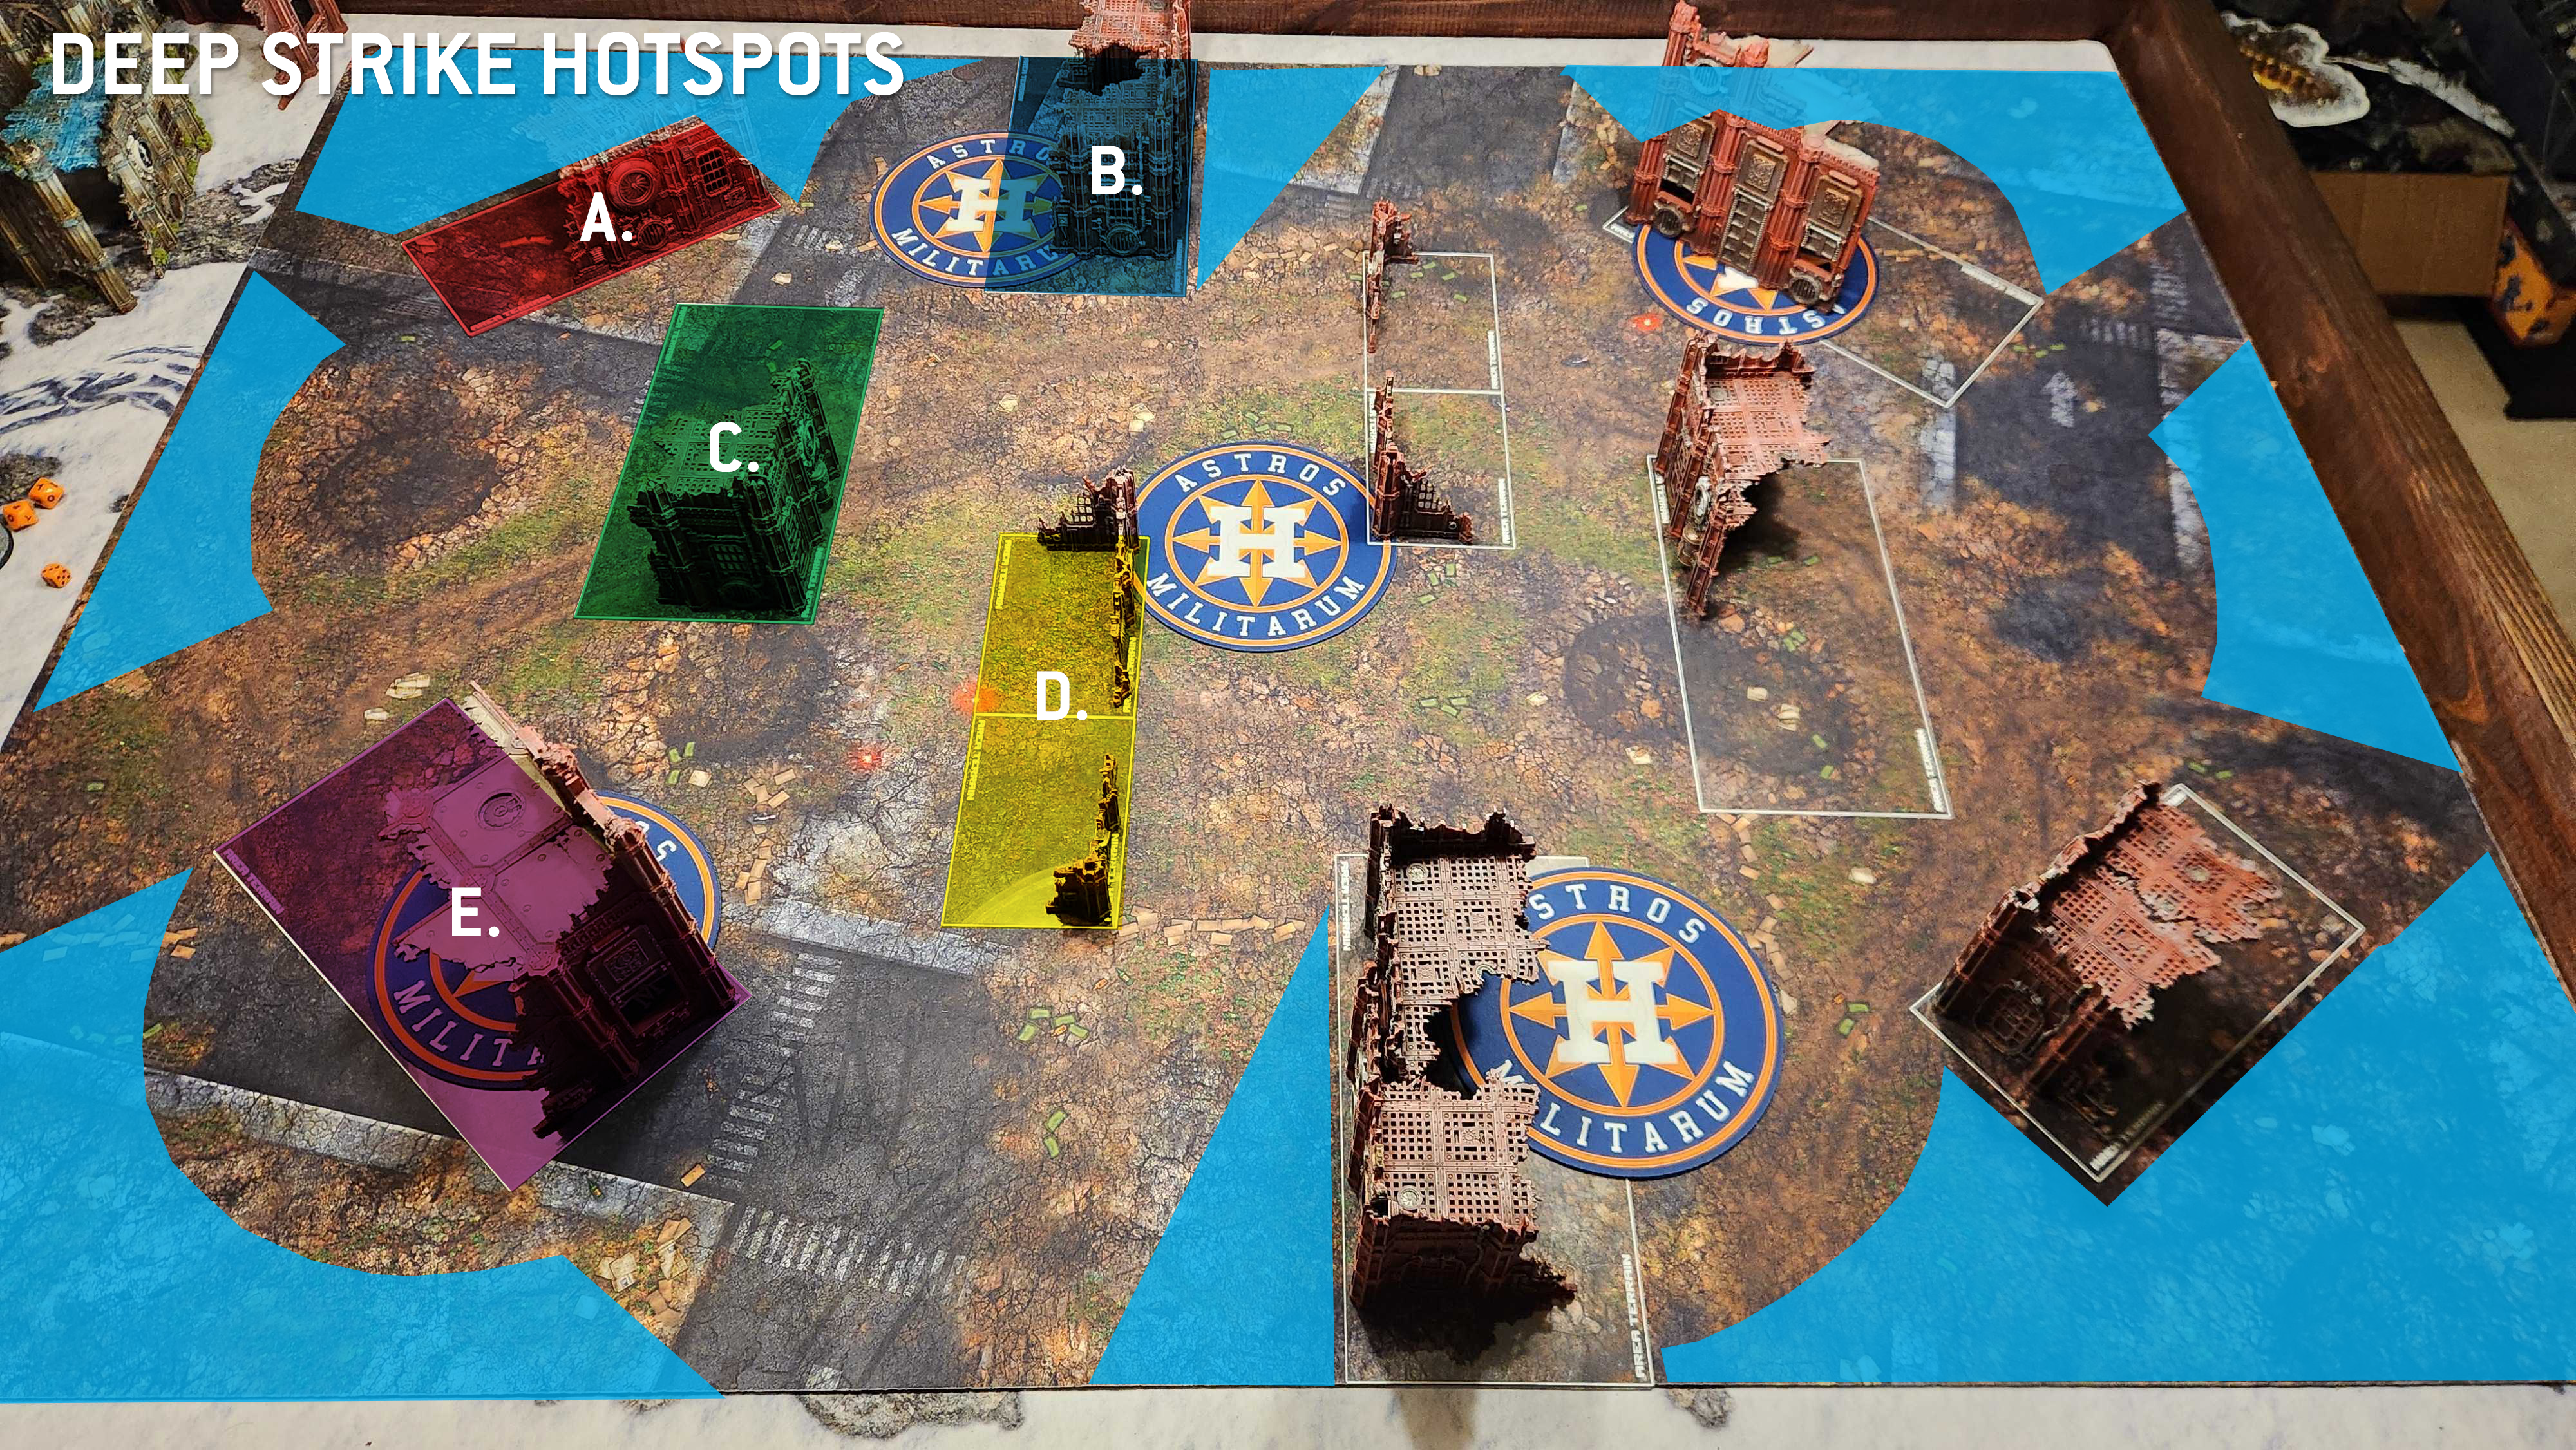
Infiltrators tend to want to set up in the B ruin, where they can be safe behind a wall and touching an objective. Particularly aggressive units or those with Scout and Infiltrate may deploy in or around the D ruin or the opponent's B, with a plan to Scout backward if need be. Because those D ruins are only 4" across, it's easy to deploy on the safe side of them and just walk to the middle to score something like Establish Locus or Area Denial.

This map has some great deep strike positions. The two corners have what I'd consider to be a deep striker's dream: They are protected by angled ruins from units sitting on the nearby objectives, and they're in spots where you don't want to be - the only reason to be in those corners is for screening purposes, as neither has good sightlines to play with. On Tipping Point and Crucible, screening your home objective is relatively easy; you'll need to string back from your point but a big unit can easily do this. The expansion objective is harder, especially on Tipping Point - stringing back to the corner leaves you visible to that diagonal sightline running from B to B, and gives an opponent easy shots.
On Hammer and Anvil, both corners are basically free real estate, and screening both while actively devoting units to the forward attack can be a real pain for some armies.
Final Thoughts
Layout 8 is in my estimation the best of the Games Workshop layouts. It fixes the problems Layout 7 has by putting a ruin against the long table edge at mid table, closing off a table-length firing lane, and putting a tilted ruin in each corner to make the layout more interesting for deep striking units. It's a shame you don't see it at more events because I think it should be a staple of events running two days. It has a good mix of solid melee staging points, great deep strike spots, and good cover while still being perfectly navigable by larger units like Knights and Defilers.
Have any questions or feedback? Drop us a note in the comments below or email us at contact@goonhammer.com. Want articles like this linked in your inbox every Monday morning? Sign up for our newsletter. And don’t forget that you can support us on Patreon for backer rewards like early video content, Administratum access, an ad-free experience on our website and more
Thank you for being a friend.


 Goonhammer Hobby Round-Up: March 2026
 Goonhammer Reviews: Tribal Conquest
 Conquest: Weaver Courts Gemred Knights and Scaile Dancers Model Review