In this new series we’re looking at various terrain layouts for Warhammer 40,000 and exploring how they work, what you need to know about playing on them, and how you can improve your play when you play with those layouts.
Many games of Warhammer 40k are won or lost in deployment and a key part of that is terrain. In this series we’re going to look at various terrain layouts, looking at how the affect the game and how you can use them to your advantage. In this article we’ll start by looking at Layout 5 from the
Games Workshop Tournament Companion, specifically with regard to the Chapter Approved 2025-26 Missions Pack.
This is the fourth article in the series – if you missed the prior ones, you can find them here:
A Note on Terrain
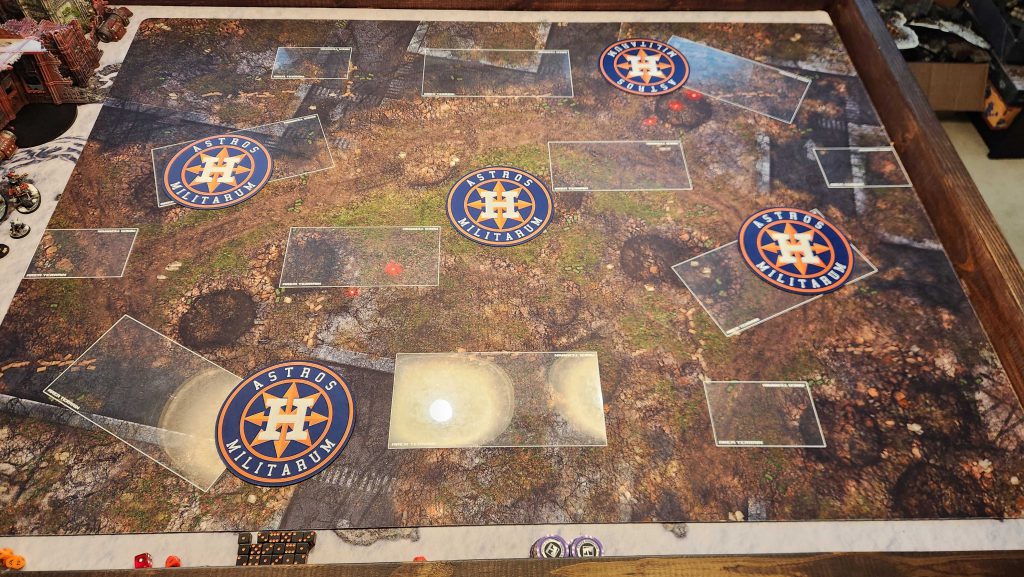
In these articles I’ll be using Games Workshop terrain but it’s worth noting that terrain will change from event to event, and the layouts shown in the Games Workshop Tournament Companion are guidelines more than hard-and-fast rules about how terrain has to actually look. Most often you’ll find that terrain features may be longer or shorter than the layouts dictate, based on what the tournament organizers have available.
With that out of the way, let’s get into the layout:
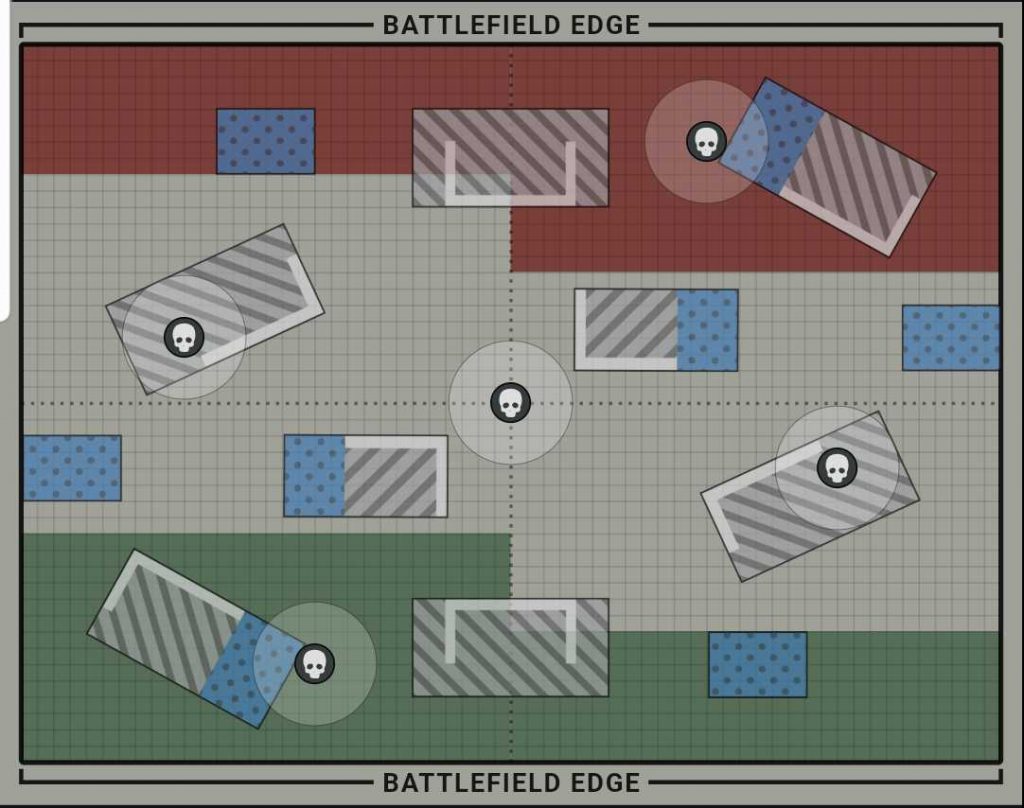
Layout 5 has only horizontal and mostly horizontally-oriented diagonal ruins, designed to block line of sight going across the board. It's only recommended for missions using the Sweeping Engagement or Dawn of War deployments and it's an extremely cursed map to play with any other deployment.
You pretty much only see this one at Games Workshop events or teams events looking for an additional "open" layout. It tends to be pretty open, even on those Sweeping Engagement/Dawn of War deployments, and will heavily favor fast gunline armies. This is exacerbated a bit by the fact that one of the few missions recommended for this deployment is Terraform, a mission that advantages going first.
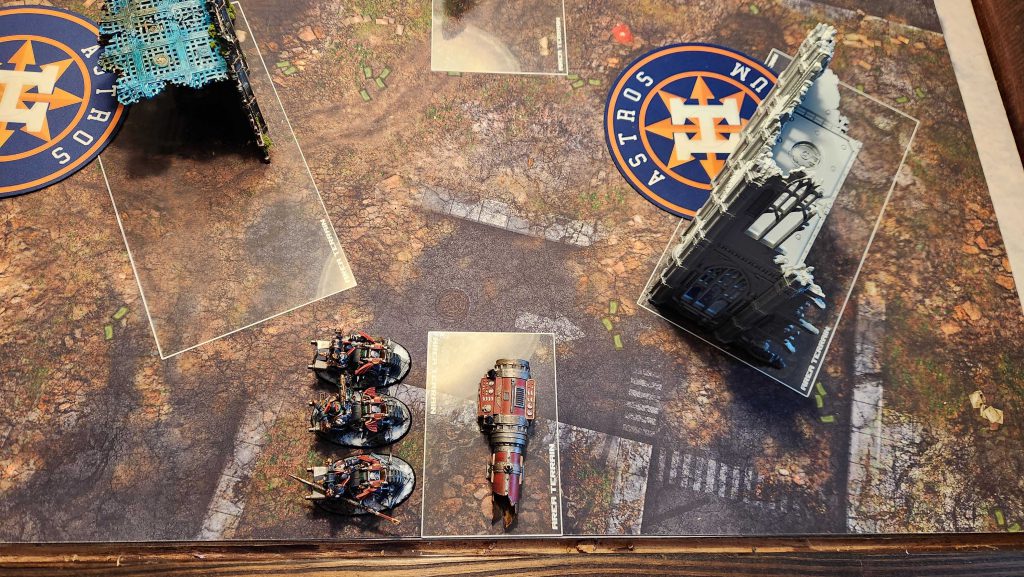
Because this is a pretty open map in the middle of the table, you can easily fit some of those larger vehicles and bases through its ruins. A Defiler can navigate to the middle of the table pretty easily, though hiding in deployment is going to be difficult to impossible.
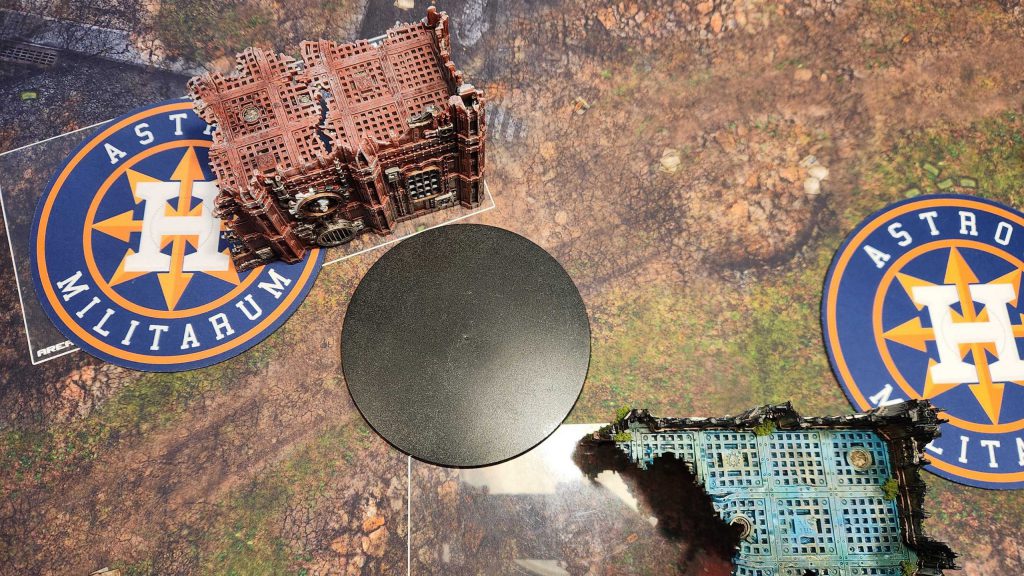
That hiding part is tough - you don't have a lot of space here to hide, with only two larger ruins to hide behind horizontally. One of those is 4" from the long table edge, which means it can't hide wider vehicles like Rogal Dorns or Plagueburst Crawlers. Your better option will be the corner behind your tilted ruin, but that's a cramped space and moving out of there can be very difficult or time consuming.
Similarly, your "home" objective isn't well protected, either so you'll really want to have a unit which can sticky that objective as soon as possible. Remember that a battle-shocked unit can often sticky an objective if it's under your control, so consider putting a second unit on there if your opponent has indirect fire to kill your unit off that home objective on turn 1.
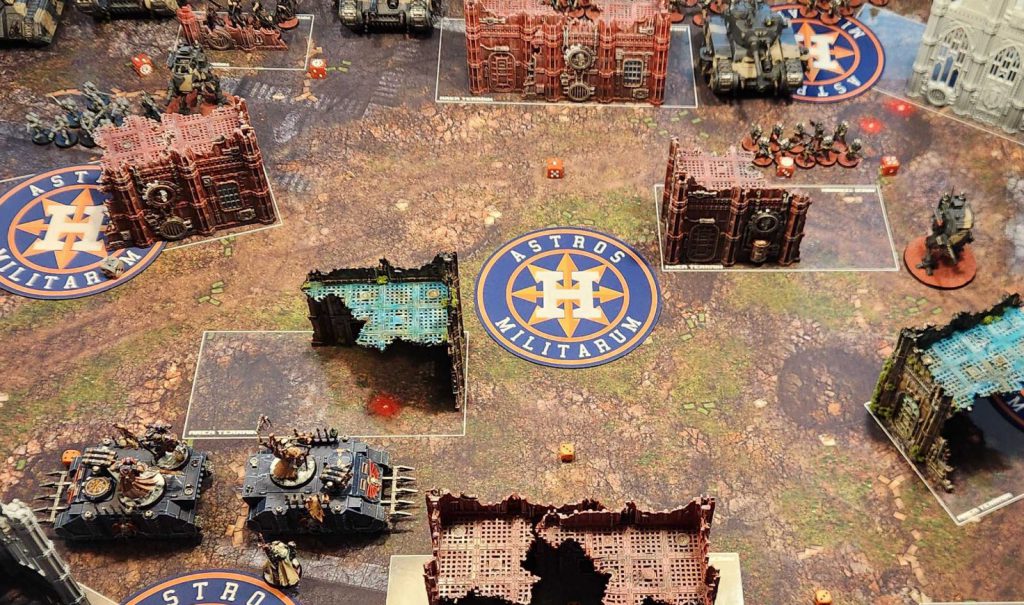
Let's label these ruins:
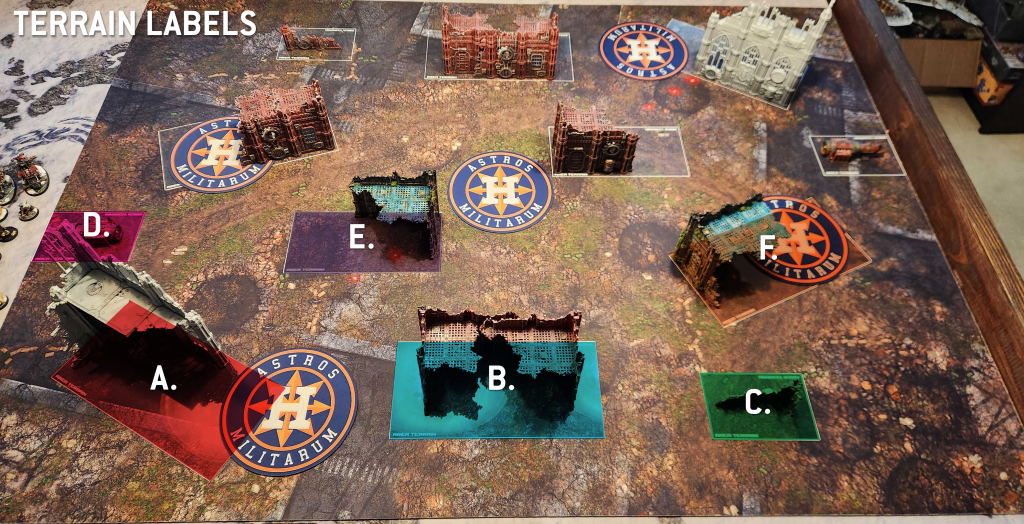
They key pieces here are:
A. Your corner ruin. On Sweeping Engagement this is where your home objective will be, and there typically won't be anywhere to hide on it if you're using the recommended terrain. On Terraform that's a problem - that objective counts. This is also the only really "safe" hiding place for your units, but it's also deep in your deployment zone and time-consuming to dig out of. The good news is that if you're behind this run, you're likely to be more than 48" away from a unit in the opposite corner, so you
can hide from mortars over there.
B. Your big home ruin. On Dawn of War this is where your home objective will be, and it'll be a lot safter spot to hide. This ruin also
can give some protection to wider vehicles if you place them correctly, just by virtue of having a big u-shaped set of walls to block line of sight for you... which might work if you can fit around them to get out. On Sweeping Engagement you won't have many other options, and an 8" deployment zone will only
just barely fit a Rogal Dorn with the big cannon.
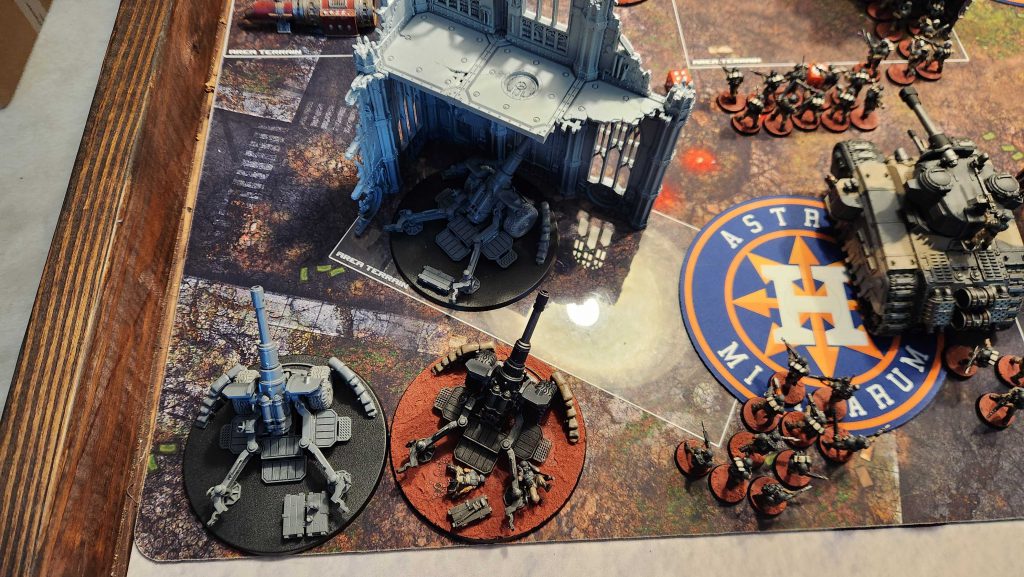
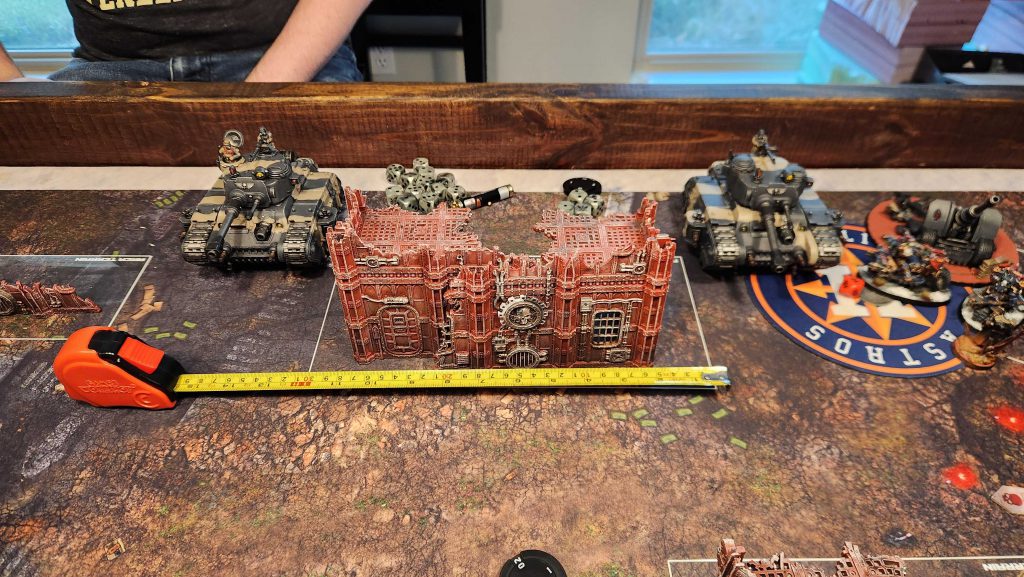
Note that because this ruin is 12" across, you'll need to be careful about how you deploy if you need to hit 12" range for things like auras or issuing orders. In the below example, at least one Dorn needs to be deployed with a sponson over the ruin in order to ensure the Tank Commander can issue orders to the other.
 C. Your little home ruin.
 It's hard to get a lot of value out of this one. The real upside is mostly that you can sit in the corner behind this and it blocks line of sight diagonally across the board, but even then you'll need to be careful about what you put there to ensure you're out of line of sight.
 D. The little side ruin.
 For such a small piece, this is one of the most important terrain pieces on the board. It prevents having a full-length shooting lane across the table and acts as an important staging spot for a unit attempting to shoot into your opponent's deployment zone. It won't give you full protection from units off to the side, but it can protect you from Overwatch and will cover your advance up the table with help from the F ruin.
 E. Your Horizontal midtable ruin.
 This is essentially your key protection moving up the table on Sweeping Advance... and that's not amazing. It can protect you from fire across the table but it's difficult to hide behind it effectively with anything but small infantry units. And even then, you're very vulnerable to being shot at from the side.
 F. Your angled midtable ruin.
 The other part of your forward protection, this combines with the two small C. and D. ruins to give you a more protected corner moving up the table, which more or less means that you'll be using this avenue to move a large portion of your army toward your opponent's deployment zone... and they'll be doing the same.
Objectives
Loading...
You do not want to play this map on any deployment besides Sweeping Engagement or Dawn of War, and as much as I loathe playing Dawn of War it at least feels slightly better given the protection you get on your home objective. You may occasionally see this one at teams events, where having a weird unintended super open layout is part of the appeal of being able to choose your terrain layout, but I'd generally avoid it otherwise.
As mentioned, on Sweeping Engagement your home objective is pretty risky on this map, since one of the longer sightlines on the map can reach it. You have more hiding/contesting options with the two midtable objectives that aren't the center, and those ruins should be able to hide a unit while it sits on a point. Otherwise well, that middle objective is a death trap.
Sightlines
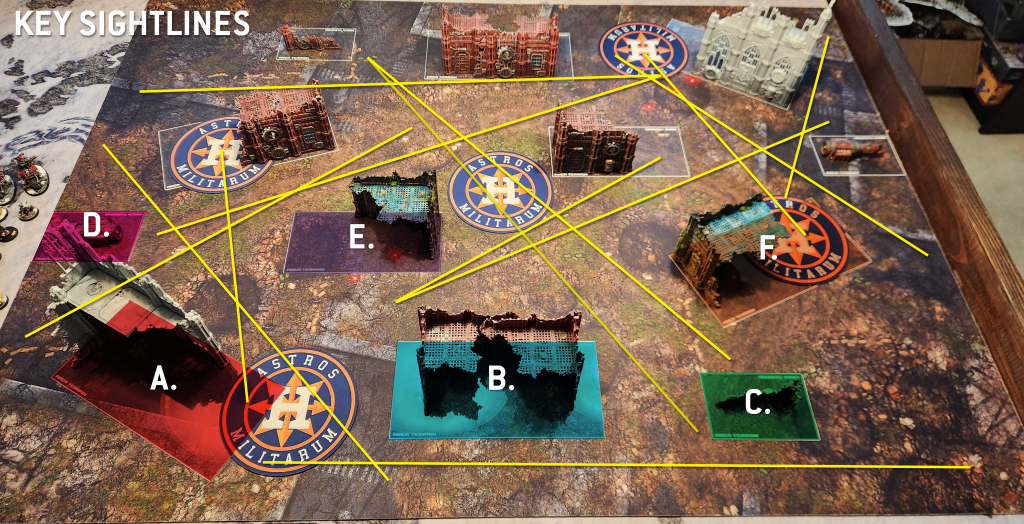
This is an open map. Not only are there some very long sightlines here across the map on the intended deployments, but there are also not a lot of hiding spots, giving a big advantage to units with good movement and ranged attacks - particularly when going first. That sightline from C to C across the middle objective is particularly rough, and both home objectives give easy sightlines to most of the middle - and that middle objective can't be held from the E. ruins.
The big blocking to take advantage of here is the D. ruin on either short table edge; this is key to moving up the table safely. Note as well that the two small ruins do combine with the F. ruin to make a
relatively safe area, though it's still pretty open on either end.
Melee Staging
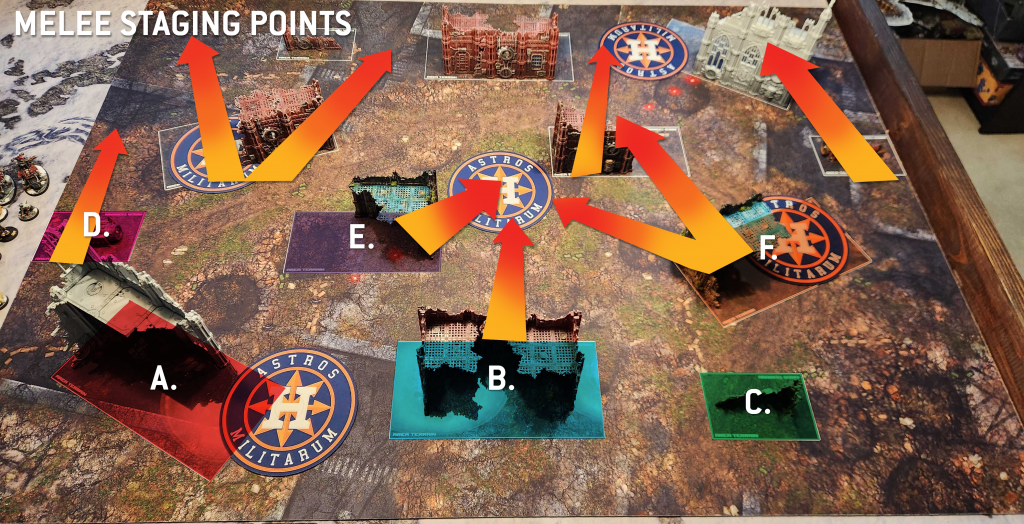
The staging options here are also not great; your center E. and F. ruins are both pretty small and easily visible to shooting units in your opponent's deployment zone. Again here, the D. ruins are crucial to moving up, particularly if you have a faster unit who can sit behind them for a turn without dying. There's not much else to say; the middle is a death trap.
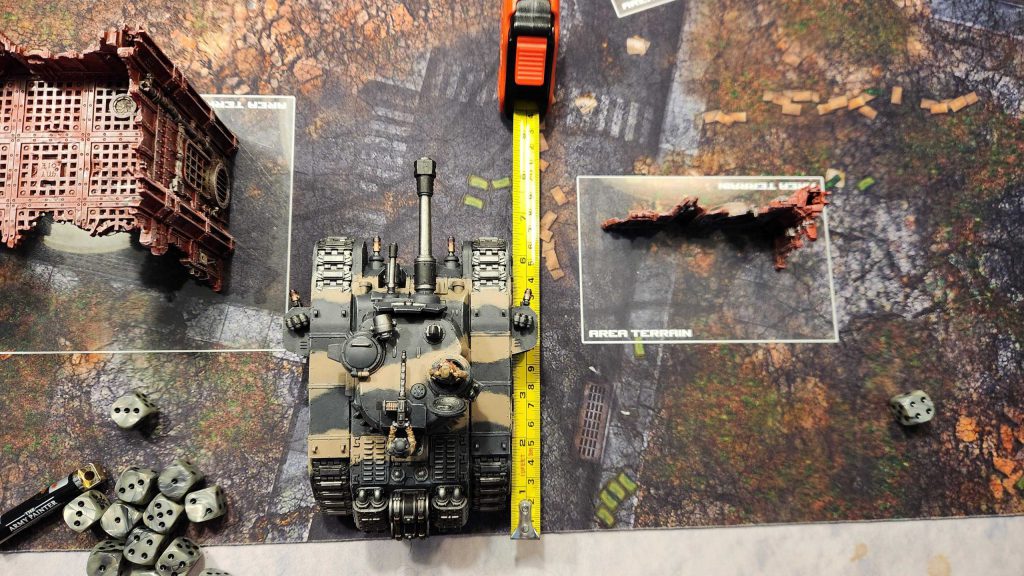
It's worth noting that the center ruins are pretty close - around 8" apart - making charges across them pretty easy, though typically the play will be to walk out and charge through the wall.
Who Does Well Here?
Fast gunline armies, mostly. Shooting armies have a ton of open space to work with and the hiding options just aren't great, so if you're a shooting army, going first can be very lucrative. Layout 4 may have longer sightlines down the table sides, but it has better hiding spots thanks to ruin placement. Here it's difficult for units to hide well in deployment unless they just drop so far back they have to spend a turn digging out anyways.
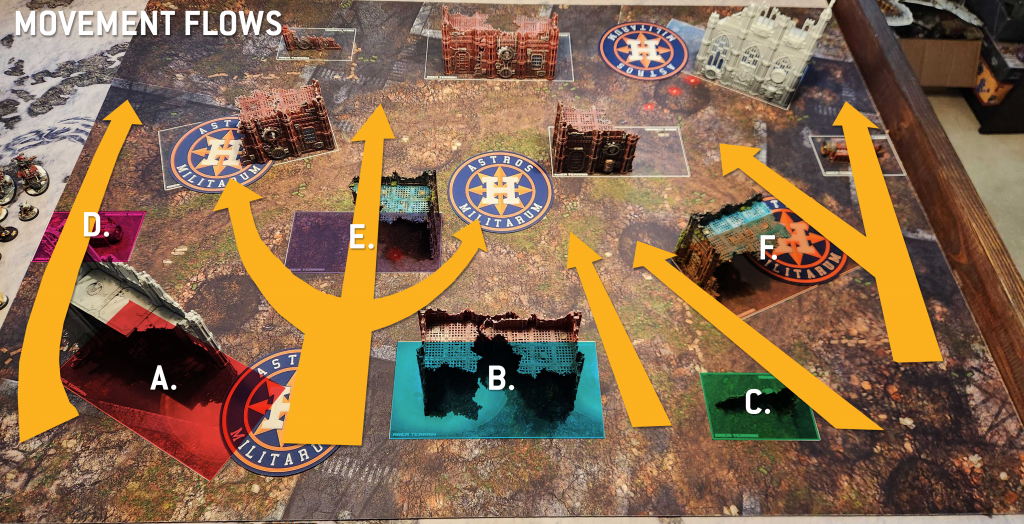
Because the D. ruins are only 2" terrain, they mostly act as cover for units moving up the short table sides. Here the home objective being relatively close to the corner makes for a natural push toward the opponent's objective. Just keep in mind that your opponent will likely do the same, creating a "swirl" pattern, where you move up the right side of the table and turn in, while your opponent does the same.
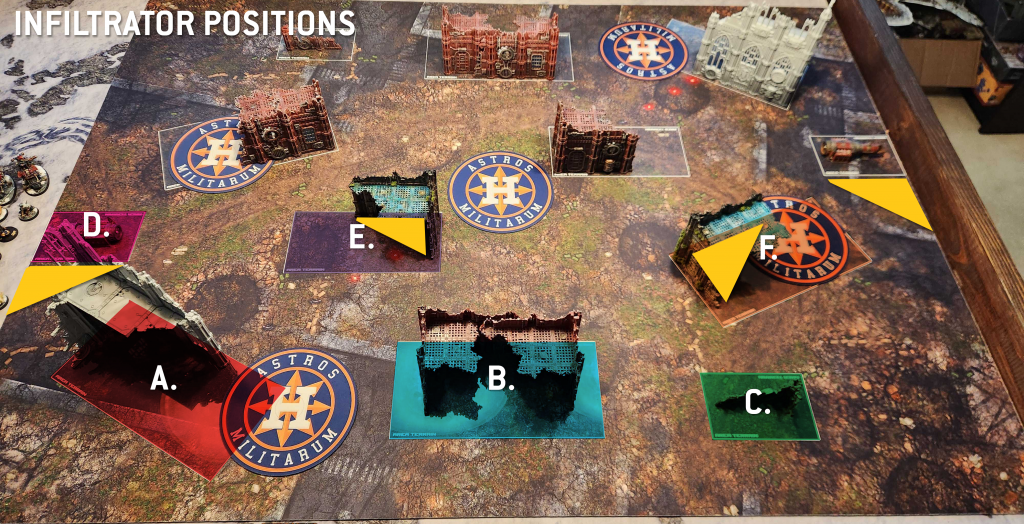
There's almost nowhere good for Infiltrators on this map. A few areas in ruins I might consider, and even those aren't too hard to just get to from your deployment zone with a fast unit or a decent advance roll.
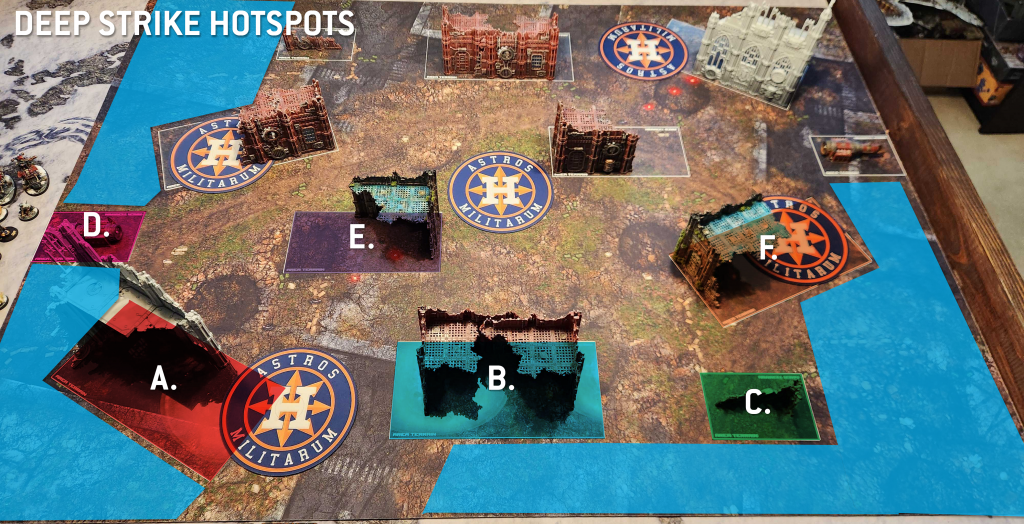
Because this table offers a lot of deployment zone lengthwise, it's typically difficult to screen the entirety of it out. This means that the table has some pretty large deep strike hot spots, typically using the D. ruins for cover or dropping into one of the corners after you've moved out of that area.
Because it's so difficult to hide in deployment, this map rewards good use of Strategic Reserves, and that's also the case given some of its open sightlines. Make sure you aren't needlessly exposing a unit when you could have just held it in reserves.
Final Thoughts
Layout 5 is just not a great layout, and that was bound to be the case for anything designed only for play on Sweeping Engagement/Dawn of War. It's incredibly difficult to hide units here, and that can lead to some brutal first turns that are lost on deployment. This one doesn't see a lot of play, mostly (and mercifully) because most events don't use Dawn/Sweeping deployment.
Have any questions or feedback? Drop us a note in the comments below or email us at contact@goonhammer.com. Want articles like this linked in your inbox every Monday morning? Sign up for our newsletter. And don’t forget that you can support us on Patreon for backer rewards like early video content, Administratum access, an ad-free experience on our website and more
Thank you for being a friend.


 Infinity N5 First Principles: Understanding the Outcomes of Face to Face Rolls
 Tactical Feedback: Timing the Go-Turn
 SRM's Roundabout to Adepticon 2026: Curd Is the Word