Infinity is quite a complex game, and uses rather unusual dice-rolling mechanics, which can be a paradigm shift for gamers used to IGOUGO wargames. I initially started writing this article to the probabilities in-depth, in the vein of Goonhammer’s Hammer of Math series, analysing different Face to Face (FtF) rolls that come up in the game, and offering a summary of how probable the outcomes were. That proved too big a task - the variety of different interactions, and the variables at play within each FtF roll, were too great and my draft was unmanageably long.
Instead, this article is going to give some broad reminders about likely outcomes in Infinity, and how that should be planned for in your tactics and gameplay. We will also explore the idea of the impact of various outcomes - that is, looking beyond the direct results of an Order, to what it could possibly mean for the rest of the game. To make this manageable, we will focus on the interplay of BS Attacks and Dodges. Once you take into account all the situational options players have for declaring Orders/Automatic Reaction Orders (AROs), like placing direct template weapons and avoiding the FtF roll altogether, the breadth of possible outcomes expands significantly.
As with all the articles in this series, this assumes the most basic knowledge of how the dice rolls work in Infinity, what the core game terms mean, etc. Although we will keep most of the math ‘behind the curtain’, it is the underpinning of this article, and all credit here to the makers of Infinitythecalculator.com - an incredibly useful website which any player can use to check their gut instinct on whether actions are a good idea. It is an intuitive interface which lets you enter the stats on both sides (1 model vs 1 model only) of a FtF roll, and tells you not just who will win, but how likely each model is to suffer damage. As we’ll see, there can be an important gap between those two probabilities!
Part two of this article will go into more depth on the gaps between expected outcomes as opposed to variance, which plays a big role in how experienced players should try to manage risks and prevent themselves ‘tilting’ in the face of unexpected results.
The Active Player Advantage
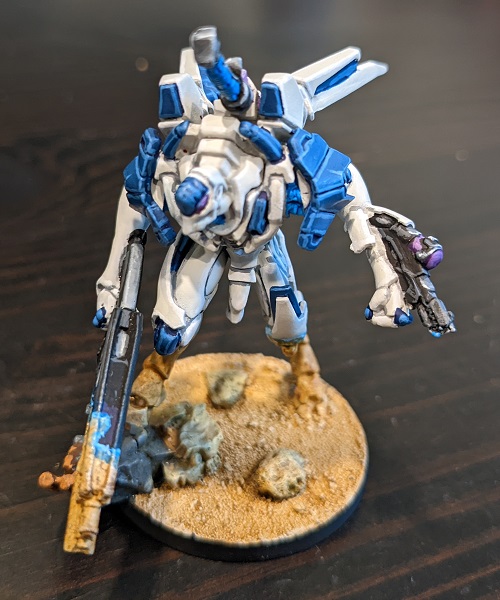
Maghariba Guard. Credit: Corvus Belli
A key underpinning assumption of how Infinity works is that the Active player has the whip hand - they choose which models interact with each other, and by that choice, by moving where necessary, and by their access to the full Burst of weapons, they can generally set up advantageous fights. Conversely, the Active player won’t ever knowingly engage in disadvantageous fights, unless they have absolutely no other option. In practice, this means the Active player typically uses their active model to engage one enemy ARO at a time, allowing them to concentrate their full Burst. This is generally the surest way to inflict casualties and preserve momentum. Multiple, simultaneous AROs only tend to be provoked by the Active player when: templates offer the possibility to cause multiple casualties in one fell swoop; when potential AROs offer no risk of harm to the activated model, so splitting Burst is a gamble, but without any major consequences for losing; in close quarters brawls where the Reactive player simply has too many models already in position; and in the end-game, where there simply aren’t enough Orders to take the normal, one-by-one approach and still achieve the Objectives.
Reactive players don’t really get many chances to force their opponent into multiple shooting AROs. The only common method is revealing Hidden Deployment models in ARO, which is potentially devastating, but relatively few Sectorials have access to suitable units. Newer players sometimes think that if they position several ARO units ‘watching’ the same area, their opponent will have to engage them all simultaneously - this is not the case. Line of Fire (LoF) is open information in Infinity, and geometry is a harsh mistress. Unless two Reactive models are perfectly in line horizontally (but can still see because they are at different elevations), the Active player can always ‘slice the pie’ and provoke one ARO before the other, even when the position difference is extremely fine. This method, part of ‘playing with intent’ sometimes strikes new Reactive players as unfair, but it’s part of what makes the game work. Without it, decision-making devolves into 10-minute laser pointer sessions before crucial moves. The Reactive player has more options for pressuring the Active player when we consider close quarters, with Dodge moves, direct templates and hacking AROs - but those are not being discussed here.
So what? The bulk of this article will be considering probabilities and outcomes between 1 Active model shooting at 1 Reactive model. Everything we will go through applies to more complex interactions as well, it’s just extrapolated.
Understanding Outcomes
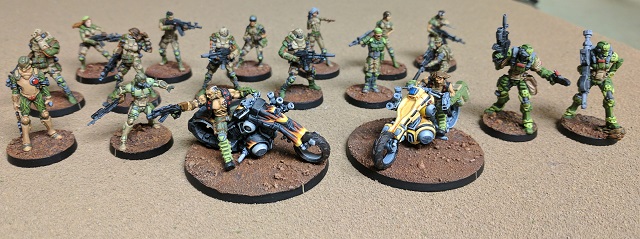
Credit: Mike Bettle-Shaffer
Fundamentally, when the Active player spends an Order to declare a BS attack against a Reactive model, and the Reactive model declares an ARO to shoot back, the Active player can expect one of three outcomes: positive, negative and null. We are going to explore those here, but the reason to break down that fairly basic concept is that most players’ plans count on the positive outcome. It’s human nature - we identify a line of play that can accomplish our aims or objectives, and we think “I’ll move here, do this, and that will let me win”. The point of this article is to help players understand why, and how, things don’t always work out like that.
Positive outcomes are the ones we’re hoping for - killing the reactive model. This is a combination of the chance of winning the FtF roll, and the chance that the Reactive model will fail enough survival rolls. To labour the obvious, for this outcome to be realistic, the Active model needs to have a real advantage from BS stats, the presence/absence of Partial Cover, being in effective range for its weapon, and ideally outside of the Reactive model’s effective range, and from any ‘gunfighting skills’ like Mimetism which apply. But it also needs to be using a weapon with sufficiently low Possibility of Survival (PS) or ammunition types that the Reactive model won’t shrug off any hits. There are several situational caveats to what constitutes a Positive Outcome. Normally knocking the target Unconscious is good enough; the presence of Doctors/Engineers or a Speedball-carrying ally make that much more recoverable than sending the target to fully Dead. Various non-lethal ammunition can approximate the effect, but most can be recovered from later, albeit with challenging Dodge/Reset rolls. In many situations, putting hits onto a Reactive model, but not knocking it out, is explicitly unwelcome for the Active player - it will let the Reactive model make a Guts Roll move, ducking back out of LoF. At least in the early game, this is usually a welcome chance for the Reactive player to preserve their model from likely death. The reverse situation can apply, usually in the endgame - when the Active player is only trying to defeat AROs to clear a path to the Objective, forcing a failed Guts Roll can be as good as knocking out the Reactive model. It is very common for players to analyse the FtF roll, but over-estimate their chance of actually getting the positive outcome.
Rather special to Infinity, the negative outcome is the chance of the Reactive model knocking out, neutralising or killing the Active model. Clearly this is also the product of the FtF roll values, but for this it matters how tough the Active model is. More than ARM/BTS stats, there is surety in multiple STR/VITA - it drastically minimises the chance that you will be killed outright, including by critical hits. Some damage is repairable, revivable, or Speedball-able. Ultimately, any damage which Wounds the Active model, but doesn’t knock it out/kill it, isn’t that seriousa negative outcome (it may have big implications later in the game). If the Active model has the ability to take a Wound and keep on trucking, that’s a freedom their player has in planning and taking risks. Ammunition types which can stop an Active model even if it isn’t Unconscious or Dead, or which threaten that possibility via multiple or continuous saving rolls, are very valuable for Reactive models. Reactive players are looking to maximise the negative-outcome chance. It will almost always, by definition, be a minority chance, the Active player won’t commit to a long-odds fight unless in an endgame, do-or-die situation. But by presenting a healthy chance of failure in repeated interactions, the Reactive player is gambling on causing a big problem to the Active player at some point in the game.
Null outcomes, for an Infinity Order, are those times when nothing happens. Both models miss, or the one hit passes their saving roll(s). This usually favours the Reactive player - almost always, in the early-mid game, where the Active player needs to inflict casualties and build up momentum to take control of the game. It also has to do with the tactical dynamics - in most situations, the Active model is sticking in partial cover, shooting at one ARO-ing model, and the Active player isn’t advancing further towards their goals until the ARO piece is knocked out, or at least forced (or chose) to Guts Roll out of danger. This dynamic can be tempered if the Active player is choosing to move onwards, and their priority for declaring BS Attacks is more to avoid their model being damaged by AROs. That situation is more common in the endgame, and/or with Aerial Vehicles, which are fast enough to move past ARO lines toward their chosen targets, while not caring about Partial Cover due to their special rules. Most players underestimate the likelihood of nothing happening in an Order. Null outcomes present a major psychological trap: the Active player may want to try again, even repeatedly, and realise too late that they do not have enough Orders spare to accomplish the other vital actions they need to take during their turn.
Basic Infinity Probability
It’s common to hear online that Infinity is a lethal game. Without going into the maths too much, this varies enormously based on the individual FtF roll taking place. The important questions, for the purpose of the article, are the rough percentages of positive/negative/null outcomes on any given interaction, so here are some examples, all calculated on the Infinity Calculator mentioned above. Some percentages add up to 99% or 101%, this is due to rounding, don’t come at me in the comments:
An Active turn TAG, shooting an HMG at a light infantry model, from favourable range bands, while the target shoots a rifle back at a penalty for range, with both models in Partial Cover, has about an 84% chance to knock out the Reactive model (and about 54% to kill it). The null outcome is only 16% and the negative outcome, the TAG taking a wound, just 1%, because of its extreme resilience against the target’s weapon. This represents about as heavily weighted a FtF roll as you will usually encounter in a game - it means that the Active player is successfully manoeuvring to bring their strengths to bear against soft targets, or the Reactive player has left models exposed. But note that the null outcome chance is still very similar to rolling a 1 on a D6 - hardly a foreign experience to most wargamers! The most exceptional part of this interaction is the tiny negative-outcome chance, so let’s look at something a touch less one-sided.
If we take an Active turn, BS13 medium infantry with Mimetism-3, armed with a spitfire, and set them to attack the same light infantry, in both models’ positive range bands, things are a bit riskier because there isn’t the same total insulation of ARM and multiple wounds. Here the chance to knock out and kill are lower (71% and 35%), the null outcome chance increases (25%), as does the negative outcome chance (3%). This is another example of a dominant FtF roll, but note that the negative outcome, while still tiny, has tripled, and is much more serious - the Reactive model can actually drop the Active model. We will discuss this sort of variance in part two of the article.
For a more even FtF roll, we can look at one rifle-carrying, BS13 medium infantry attacking another, both in Partial Cover and at their ideal range. Here the combatants are equal in target numbers for the FtF roll, and both fairly well armoured against any hits suffered. As one might expect, the Active model has a significant advantage due to their higher Burst, but the outcomes are far less decisive. Only 39% chance of a positive outcome, with 52% chance of nothing happening and 9% for a negative outcome. This is why competitive Infinity players try not to take fights where the FtF roll is not weighted in their favour - it wastes Orders.
Many FtF rolls will be more decisive, because of deadlier ammunition or less armour, but still risky. Take the case of a TAG firing at a missile launcher-toting heavy infantry in a Fireteam (so benefiting from +1 Special Dice), with both models in cover and in favoured ranges. Here the TAG has a 53% chance to wound the target, but only 24% to knock it out or kill it - again we see the advantages of multiple STR/VITA. There is a 28% chance of a null outcome, and 18% for the TAG to take damage. This is a good example of a considered offensive risk. Competitive players will be looking for ways to further stack the odds, instead of gambling with outcomes on important models.
These are few of the almost infinite number of possible examples - readers may find it interesting to punch in the numbers for FtF interactions they can remember as hinge points from past games! Whether you are a maths enjoyer or not, at some level, understanding these chances is key to making good decisions in the game. But rather than bore on about the numbers, we want to discuss the implications.
Understanding Risk
An Ikari Co Wu Ming in action. Credit: Greg Strom
In risk management (the real life professional field, we don’t mean in-game), there are two main measurements, likelihood and impact. That might seem like rehashing the above points around the probability of losing a FtF, and the probability of taking damage, but it’s not, bear with us. In almost all situations, when you Activate a model and incur shooting ARO(s), there is some likelihood that the Active model will cop a hit, and therefore some likelihood it will get damaged, knocked Unconscious, or killed. That is something most games-minded players will start to get a feel for, as outlined above, and it’s easily checked via the Infinity Calculator if you’re unsure. (socially, most groups and opponents probably prefer you do this in your own time, rather than consulting it before individual decisions in-game!) What is harder to quantify is the impact on the wider game.
When you Activate a model and face the resultant AROs, you should of course have thought about the numbers beforehand, and since most enemy models’ stats, weaponry and skills are Open Information, you can have a good ballpark idea of the likelihood of the three types of outcome. What we encourage good players to keep at the forefront of their minds, is what do those outcomes mean for the outcome of the game? It’s all too common for players to be guided by their lust to destroy enemy models. That actually makes tactical sense in almost every game of Infinity, at least in the early-mid game, but it has to be tempered by, and used in service towards, the overall objectives. Many players will shape their turns by simply going after enemy models they see advantageous FtF rolls against, looking to score kills.
Fairly obviously, you should take fights where winning them is necessary to achieving your objectives. You also can or should take fights you can afford the Orders to take, while still reliably achieving your objectives elsewhere. Doing this will reduce your opponent’s options in their future Turns, by removing Orders and potential pieces for activation. But you should be cautious, when taking fights in that second category, about risking models you need for your own objectives.
Human beings are preconditioned to plan for success. This can lead us to disaster in Infinity, and there are a few key questions to ask yourself, before committing, on what will happen if your Activation is unsuccessful.
“If I lose my model doing this, will it cost me the game?”
You should always be aware, at some level, of what will happen if your Active model is killed/knocked out/wounded or suffers some show-stopping negative State as a result of its Activation. Especially in the early game, you might be taking fights with a very valuable firepower piece, and losing access to it will make controlling the table, and fighting efficiently in later turns, more difficult. Later on, you might be taking a fight with a piece which is your only Specialist, or just the only model in position, to complete the specific Mission Objective that will score you the points to win the game. There are other examples, like a model which is your only remaining access to smoke/Discoballers, or your only Pitcher, or any one-deep capability that you know will be crucial to completing your objectives later on.
To some extent, this risk impact is something you just have to accept, when the likelihood of a negative outcome is low enough. Using your primary gunfighting model, in the first turn, to knock down ARO units, even though they have some gunfighting skills or deadly weaponry, is a standard tactic. The Active player accepts some chance that the game is going to suddenly become more difficult if they fail. It is worth it because the more likely outcome is dead/down ARO units, it will mean spending fewer Orders than indirect solutions, and it’s helpful to inflict casualties on the Reactive player.
“How many Null Outcomes can I accept?”
This is an element of risk management which is unique to Infinity, because the Active player is drawing from a finite pool of Orders to set each activation in motion. Clearly, if they try a fight and nothing results, that’s bad, and it gets worse if it happens repeatedly. The real impact is whether the Active player, following a null outcome, can still hope to achieve their goals for the turn, and indeed still achieve their overall objective in the game, before running out of Orders. Now that Order pressure applies when experiencing negative outcomes as well - even more so, if the Active model which was lost was the most efficient option for other necessary actions. But the impact of that negative outcome is immediately obvious, and most players will pause to rethink their plans. It is all too common to lose a game due to null outcomes, and not notice until you have finally achieved the positive outcome you were chasing (or simply run out of Orders completely). It’s very easy to get psychologically fixated on the task in hand. If you want to kill one specific enemy model, and repeated Orders spent fighting it are producing null outcomes, you need to stop and think. Assuming you had a plan for the turn, and a plan for the game, it may well be that you are now doing more harm to those plans by trying again. Let’s assume that killing that model was mainly desirable because it opened up other options. If you no longer have enough Orders for those options, are there more productive things to do? This can be mentally difficult, especially if the FtF roll was statistically very likely to produce a positive outcome - see the section on variance below.
Methods for Mitigating Risk
Units like the Sphinx are built to maximise the chance of winning the FtF roll. Credit: Ilor
Set up favourable FtF numbers. To really labour the obvious here, it is advisable to set up the best possible odds for a FtF roll before actually submitting yourself to the will of the dice. E.g. you might spend ‘set-up’ Orders covering your MSV shooter with smoke, or moving to flank an enemy model so that it doesn’t receive Partial Cover at the point you attack. You might bring a model with more suitable weaponry or gunfighting skills over from another part of the table, instead of committing with another model that is already in LoF of your target. These things are sound tactics, so long as you can afford the Orders to do so and still achieve your overall objectives. Count your Orders beforehand!
Force Reactive models to Dodge. This article is mainly talking about FtF rolls where both targets declare BS Attack, but a major advantage to stacking negative modifiers onto opponents’ potential shooting AROs is that you can force them to Dodge. Dodge rolls will often be a higher target number for AROs, because they are not affected by Partial Cover, negative range bands or Mimetism. From the Active player’s perspective, when their target declares Dodge ARO in ARO, there will usually be higher chance of a null outcome - that’s why Reactive players select it - but of course there is no direct chance of a negative outcome. This is a powerful tactic to ensure your Active turn firepower piece can take repeated fights without worrying too much about variance. It can engage, and hopefully destroy, multiple targets, where if each successive Reactive model returned fire, the chance of a negative outcome at some point would be quite high. But be very wary, as the Active player, of situations where Dodging Reactive models produce such a high null-outcome chance that they are likely to waste all your Orders. Even worse are situations where a successful Dodge, while not directly harming you, creates a catastrophe by moving the Reactive model into a troublesome position, like into melee combat or into template range of key models.
Use models which are not threatened by enemy AROs. Multi-wound and heavily armoured models are very popular as Active turn pieces in Infinity, and a big part of that is they are dramatically less likely to be stopped by common AROs. Normal-ammunition weapons can only normally cause 1 wound per ARO. 2 if they crit, but even in that case, the chance of failing both survival rolls simultaneously makes the multi-wound model more survivable than a single-wound model taking a single survival roll. We need hardly remind readers that this safety is fleeting; once your multi-wound attack piece has been damaged, it is facing similar risks to other models. Deadly ammunition like T2, DA or EXP rounds will also counteract this method.
Use models which you don’t care about losing. This method is usually concerned with direct template weapons, or at least the threat of them, rather than FtF rolls, but the precept is the same - take the fight with a model that doesn’t have any other mission-critical jobs to do. This can even be something you consider when it’s not quite the best FtF roll you have available - a slight reduction in positive-outcome chance is outweighed by avoiding the negative outcome you really care about (i.e. to a different model). We should note that sacrificial models aren’t always your cheap pieces. That thinking can predominate in the early game, but in Round 3, it doesn’t matter how many points a model costs [in most missions]. What matters then is if that model can score you the Objective.
Don’t have a fight at all. Frequently, enemy models that are risky to engage in your Active turn have been put there by your opponent, specifically to restrict your options. You should always consider whether you have any method to move past them, or render them irrelevant, without taking a direct fight. Vision control (e.g. smoke grenades) is the most common way to do this. Cautious Movement, or movement under a marker state, can also work, or you could consider hacking attacks. Many of these could also be used to set up a more favourable FtF roll, if you still need the Reactive model dead to accomplish your long term goals.
Have a fight without relying on a FtF roll. If you don’t like your odds in a FtF roll, you can always consider threatening a direct template attack instead. Such attacks are quite difficult to make stick against a Normal Dodge roll, so this normally requires the Active model to threaten a ‘fork’ - something we will get into in another article.
When to Take Risks
In this sense, ‘taking’ a risk has a specific meaning. It means spotting when something is highly risky, and seeing the opportunities that risk presents. What we mean here is attacks where the FtF roll is less advantaged - even a near coin flip - most rarely, an actively disadvantaged FtF roll. Such a thing is vanishingly uncommon in competitive Infinity. Why would the Active player ever commit to an Order where they know they're more likely to lose their own model, than remove the opponent's?
The answer is in situations where the impact is disproportionately high. If the Active player can risk a low cost trooper, for which they have no mission-critical tasks, by spending a single Order, to neutralise or kill the Reactive player's key model, how high does the chance of success have to be to justify that risk? Arguably, 50% in this case is a no-brainer.
Such situations won't arise often against competent opponents. Removing enemy models while preserving your own is a key part of building control in an Infinity game, so high risk attacks are also much easier to countenance in the late game than at the top of Round 1. Most strong play depends on taking highly advantaged rolls. But players should always have an eye to impact, and not automatically reject any attacks which aren't mathematically favoured.
When to Minimise Risks
In proper parlance, this would be a combination of ‘treating’, ‘tolerating’, and ‘terminating’ risk. Basically, you will never win a game of Infinity without rolling the dice at some point. There is an attritional aspect to Infinity. Every mission is easier if you have established an advantage over the opponent by removing more of their models in the early and mid-game. So the circumstances described above, where you can take extra steps to reduce the risk in a FtF roll, or even accept an unusual level of risk in search of a strategic payoff, won't always exist. In a lot of situations, your best option is to take the best gunfight you can, without any delay or further Order expenditure. If an attack has a higher chance of a positive outcome than a combined null/negative outcome, if the negative outcome isn't existentially bad, and most importantly, if you don't see any better options, just do it.
Our point here is that while you should always examine ways to improve the odds of your attack, very few Infinity plans are entirely free of risk. If you are too risk-averse, you may find yourself losing games by spending too many Orders trying to circumvent powerful ARO pieces.
Assorted Haqqislam Forces (credit: Ilor)
Conclusion - Planning for Outcomes
A very basic, beginner-level piece of advice is for players to ‘count the numbers’ for FtF rolls before they commit to spending an Order. This means working out that your Active model will be shooting on 4x 13s against an ARO of 1x 14, or whatever it is. Most players can quickly grasp this and intuitively understand how favourable a proposed attack will be at winning the FtF roll.
The first, rather obvious advice we have is for players to also consider the chances of positive/null/negative outcomes by thinking about the numbers of any survival rolls that are likely to result. Again, most players, soon after learning the rules, will come to grips with this concept. The maths required to reach a quick conclusion of ‘is this a good idea’ are considerably harder, however! The deeper consideration, which players should develop with time, is for the impact of the possible outcomes from a FtF roll on the wider game state. A calculator can tell you the odds of each party surviving a FtF roll in Infinity. Until our AI overlords purge humankind, it is up to the players to think about the potential consequences of a FtF roll for board control, achievement of the Objectives, firepower advantage and all the other intangibles.
The other element is to always balance stacking the odds in FtF rolls, with the need to accomplish your aims as Order-efficiently as possible. Generally, spending more Orders on set-up manoeuvres means less risk in the key FtF rolls. This is a balancing act. It needs to be judged at the start of each Turn, and re-assesses whenever unexpected outcomes occur.
Generalising even more, the most common type of strong Active Turn play is to take decisive FtF rolls that are heavily advantaged, but do involve some real risk to the Active piece. To avoid such risks altogether is impossible, but good players are always aware of opportunities to strengthen the FtF roll by very cautious spending of set-up Orders. The next most common type of strong play is getting to and achieving Objectives without any direct FtF rolls at all (typically by means of vision control). This type is more typical of the late game, mission depending, just as the first type is typical of the battle for dominance in the early game.
The rarest situations are those ‘big-brain’ plays which either involve extensive set-up, or taking unusually risky FtF rolls. These manoeuvres fall far from the ‘median line’ of balancing risk and Order expenditure. Often they are often just signs the Active player has lost control of the game; they are out of other options. But we urge developing players to keep an eye out for such unorthodox plays. Occasionally they can open up a game where your opponent thought they had restricted your options. Spotting the chances for such unusual tactics is one of the great joys of the game.
Look forward to part two next week, where we will discuss how Orders in Infinity can go against the odds, what to expect from this, and how to deal with it.
Have any questions or feedback? Drop us a note in the comments below or email us at contact@goonhammer.com. Want articles like this linked in your inbox every Monday morning? Sign up for our newsletter. And don't forget that you can support us on Patreon for backer rewards like early video content, Administratum access, an ad-free experience on our website, and subscriber-only content covering competitive Warhammer 40K!
 Maghariba Guard. Credit: Corvus Belli
 Credit: Mike Bettle-Shaffer
 An Ikari Co Wu Ming in action. Credit: Greg Strom
 Units like the Sphinx are built to maximise the chance of winning the FtF roll. Credit: Ilor
 Assorted Haqqislam Forces (credit: Ilor)

 Infinity N5 First Principles: Understanding the Outcomes of Face to Face Rolls
 Tactical Feedback: Timing the Go-Turn
 A Brush With Greatness, Part 1: Introductions