In this new series we’re looking at various terrain layouts for Warhammer 40,000 and exploring how they work, what you need to know about playing on them, and how you can improve your play when you play with those layouts.
Many games of Warhammer 40k are won or lost in deployment and a key part of that is terrain. In this series we’re going to look at various terrain layouts, looking at how the affect the game and how you can use them to your advantage. In this article we’ll start by looking at Layout 7 from the
Games Workshop Tournament Companion, specifically with regard to the Chapter Approved 2025-26 Missions Pack.
This is the fourth article in the series – if you missed the prior ones, you can find them here:
A Note on Terrain
In these articles I’ll be using Games Workshop terrain but it’s worth noting that terrain will change from event to event, and the layouts shown in the Games Workshop Tournament Companion are guidelines more than hard-and-fast rules about how terrain has to actually look. Most often you’ll find that terrain features may be longer or shorter than the layouts dictate, based on what the tournament organizers have available.
With that out of the way, let’s get into the layout:
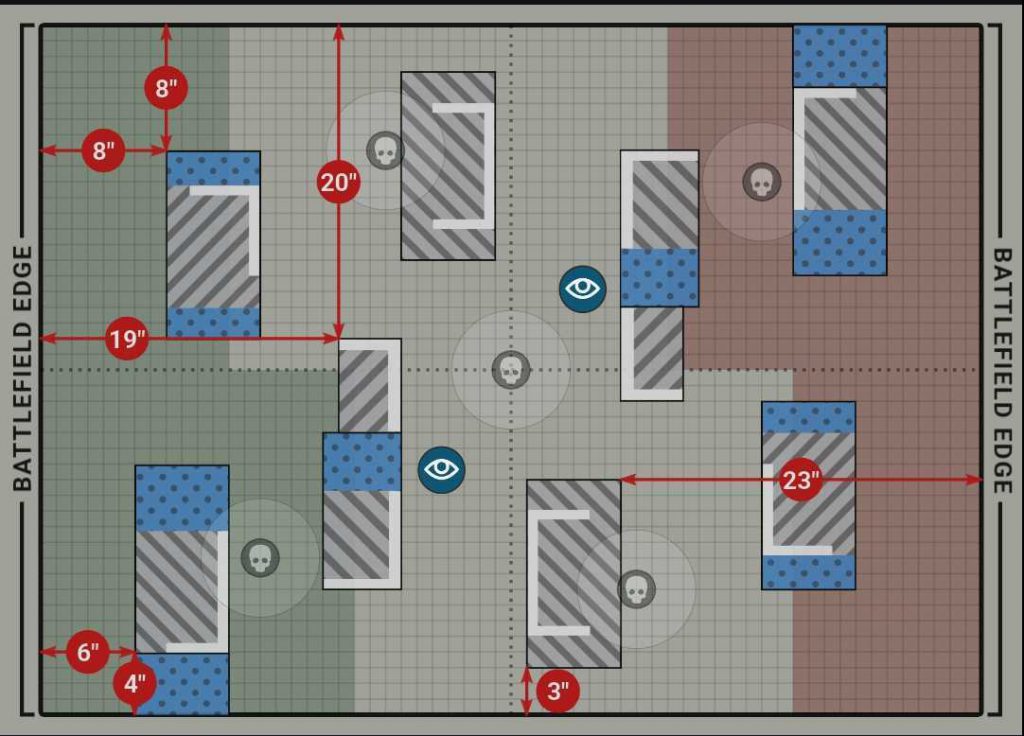
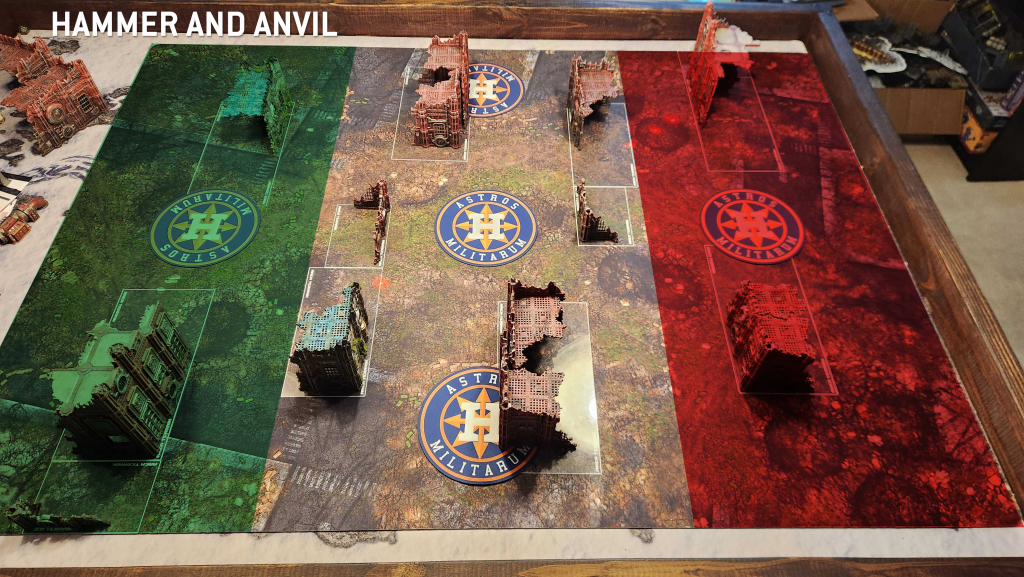
Layout 7 is only recommended for missions with the Tipping Point and Hammer and Anvil deployment maps. It's... kind of functional for those but leaves some big sight lines down the long edges of the table which are fairly trivial to gain access to. This layout really doesn't work for any other deployment maps, either. In most respects, Layout 8 is a much better version of this map, with angled ruins thrown into the mix.
The only major upside to this layout is that it's easy to build, and doesn't require a bunch of extra L-shaped ruins. It's worth noting that this layout theoretically puts small L-shaped ruins on the 4x6" terrain bases, and so with many terrain setups you may end up overhanging the sides of those terrain bases.
Of note here is the fact that those middle ruins made from 10x5" and 4x6" terrain bases are considered one continuous ruin, and something hiding in that terrain will be able to easily see the objective on the other side of the table unless the walls on that 4x6" feature are sufficiently tall.
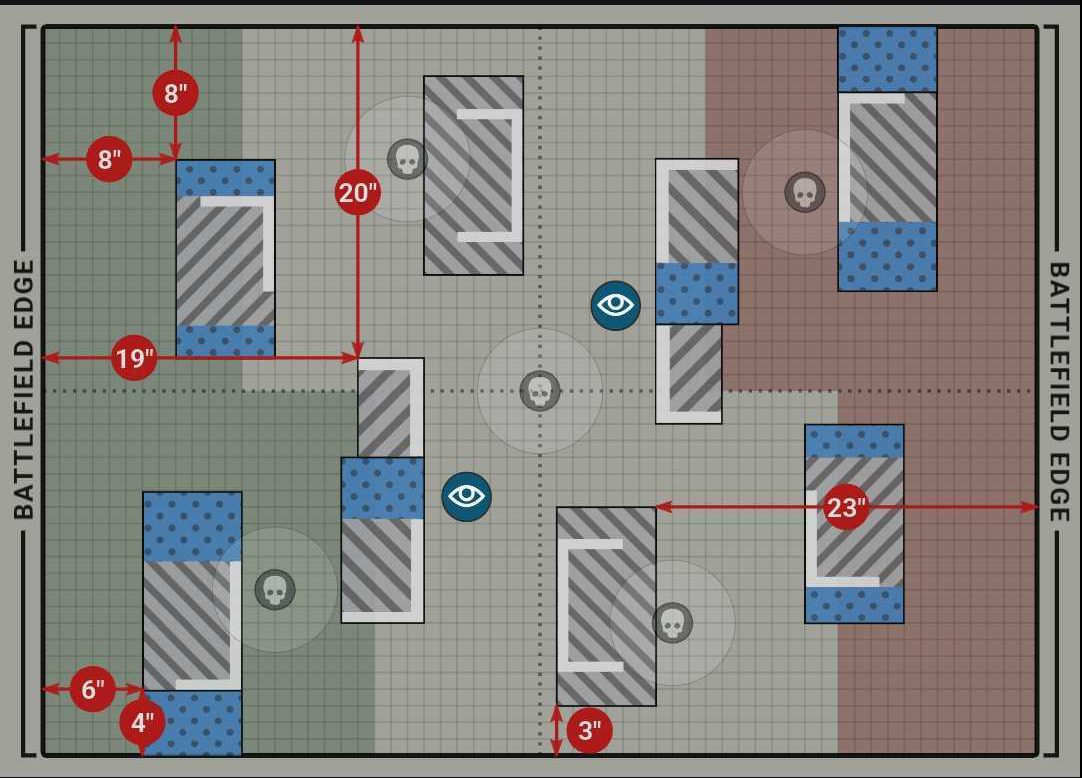
On that note, let's label these ruins:
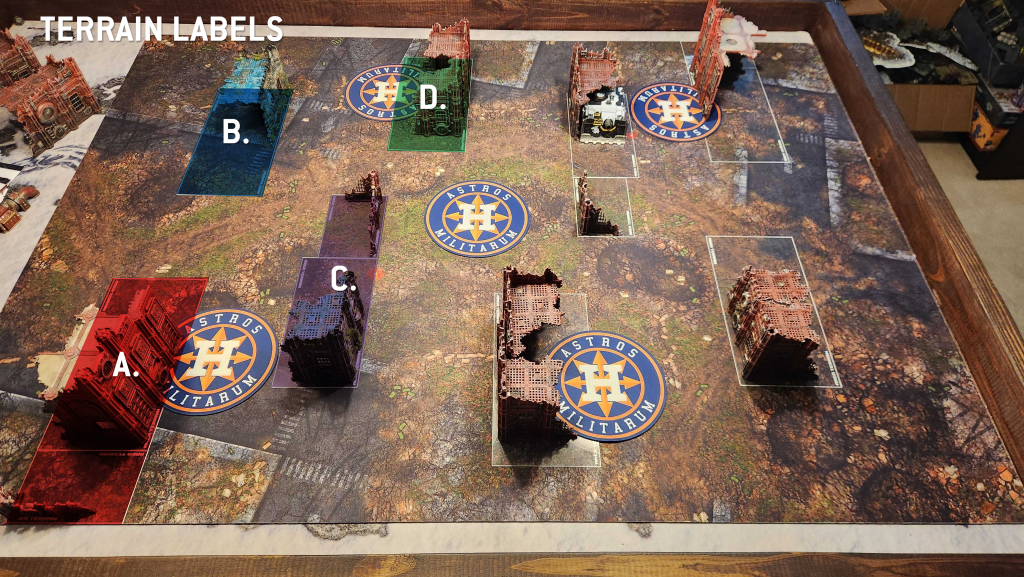
You only have four pieces of terrain here:
A. Your Home Objective Long Ruin. This is a combination of a 12x6" and a 4x6" terrain base with a single L-shaped ruin on it. On Tipping Point you'll be able to hide behind that wall while still holding the objective, and that's useful for staying out of line of sight from threats trying to slink around the long table edges. On Hammer and Anvil, this becomes a much less useful ruin. But generally the idea is that you can hide on one side of it, then move out and see down that lane running down the entire long table edge.
Note that the 4x6" ruin part of this is wide enough for small tanks to drive over, provided they have the movement to actually clear any terrain sitting on that area base. It's a tall order for say, a Vindicator, but a Predator or anything with 10"+ of movement should be able to clear it unless you've got something really gnarly on there.
B. Your second home ruin. This is another L-shaped ruin on a 12x6" base. It sits 8" from either table edge. This is a more useful ruin on both Hammer and Tipping Point deployments, as it provides an easy wall you can walk through on your way to the point on D. (if you're playing Tipping Point), or see to the objective in the middle of the table.
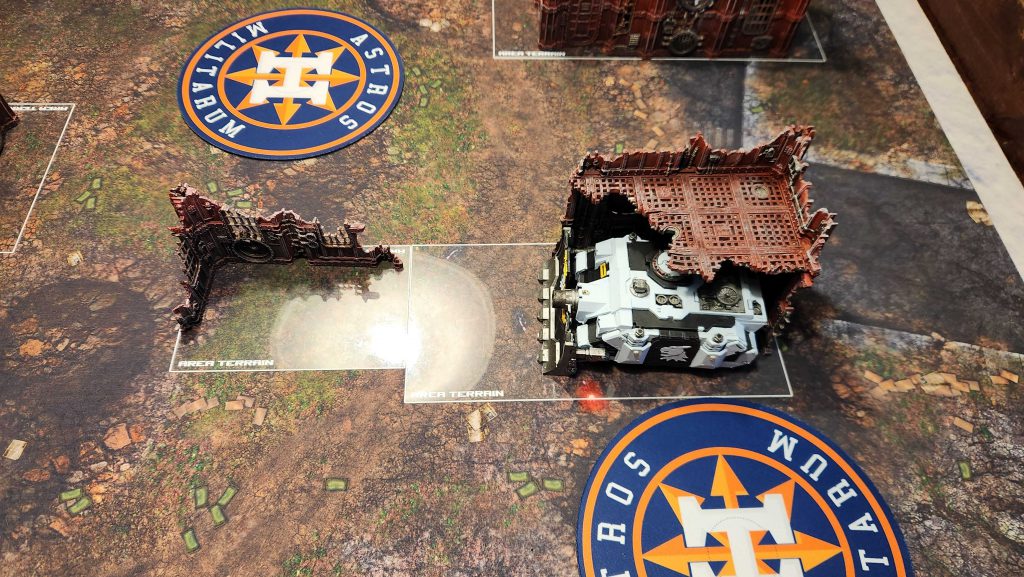
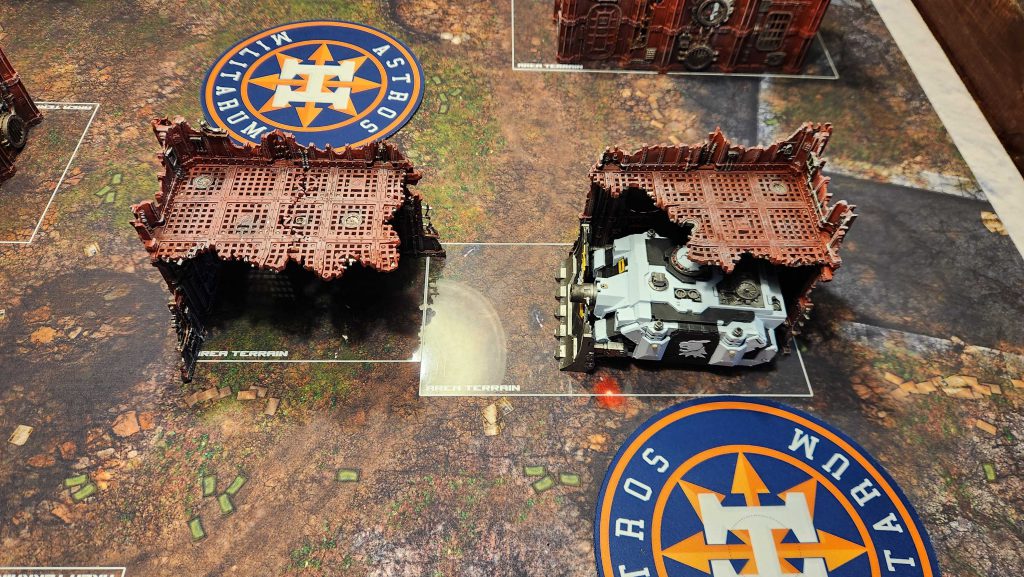
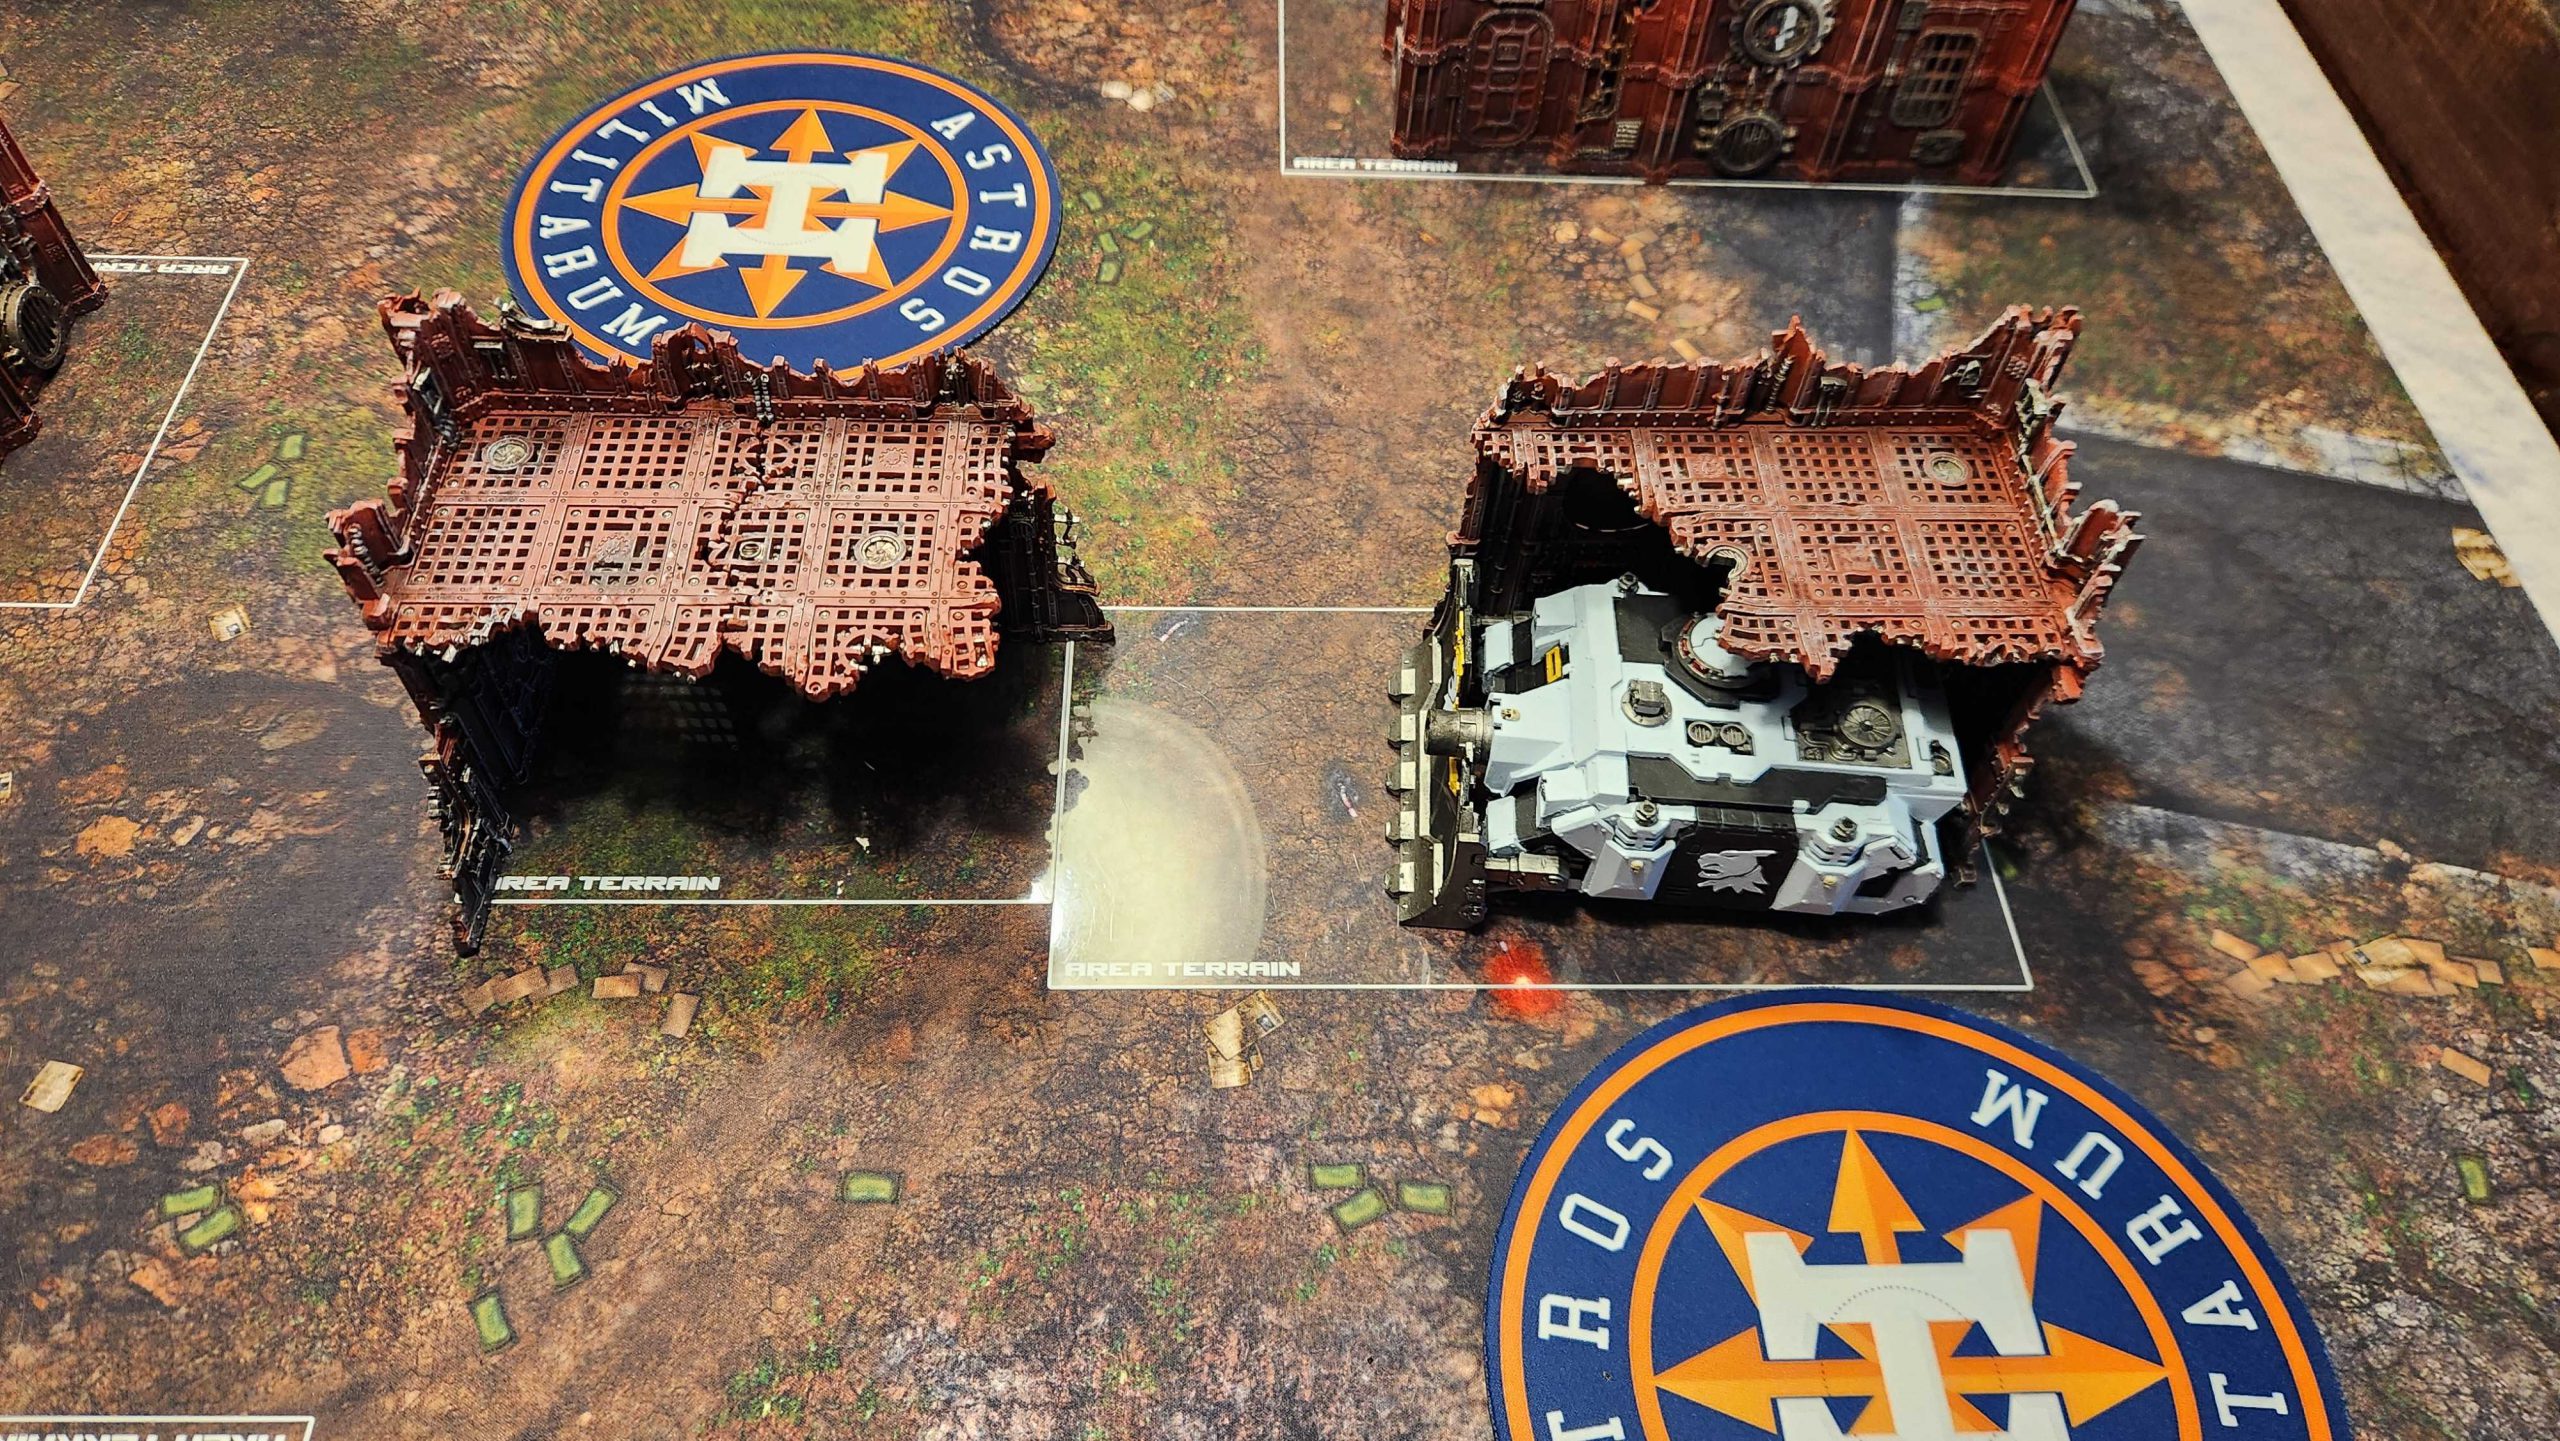
C. Your long ruin toward the middle of the table. This is made by combining a 10x5" terrain base with a 4x6", and should feature two L-shaped ruins with a 4" gap between them. They're treated as one big ruin in the layout guide, which means if you're hiding behind the L in the big half, you may have full line of sight across the table, depending on what the ruin on the other, small terrain base looks like. The gap here should be wide enough for most small tanks to drive through. As drawn, it looks like you are not intended to be able to drive vehicles over the walls on the 4x6" terrain piece here, forcing you to go through the gap or around this ruin.
 Option 1
 Option 2
Pay attention to which type you have and note the distance between them for tank driving purposes. This ruin will have a major impact on line of sight and while an event
should have an extra piece of terrain per layout to cover this as Layout 7 doesn't use more terrain, if they have the wrong Ls or Ls that are too large, this could end up easily being a small terrain piece instead - or nothing at all.
D. The other 12x6" ruin toward midtable. This is the other 12x6" ruin, placed 3" from the long table edge, with a U-shaped ruin on it. The U-shaped ruin is supposed to give you 2" of clearance on either side from the terrain base, so there
should be room for most tanks to maneuver around the bottom of the D ruin. That said, this is definitely one of those things that will vary by terrain used.
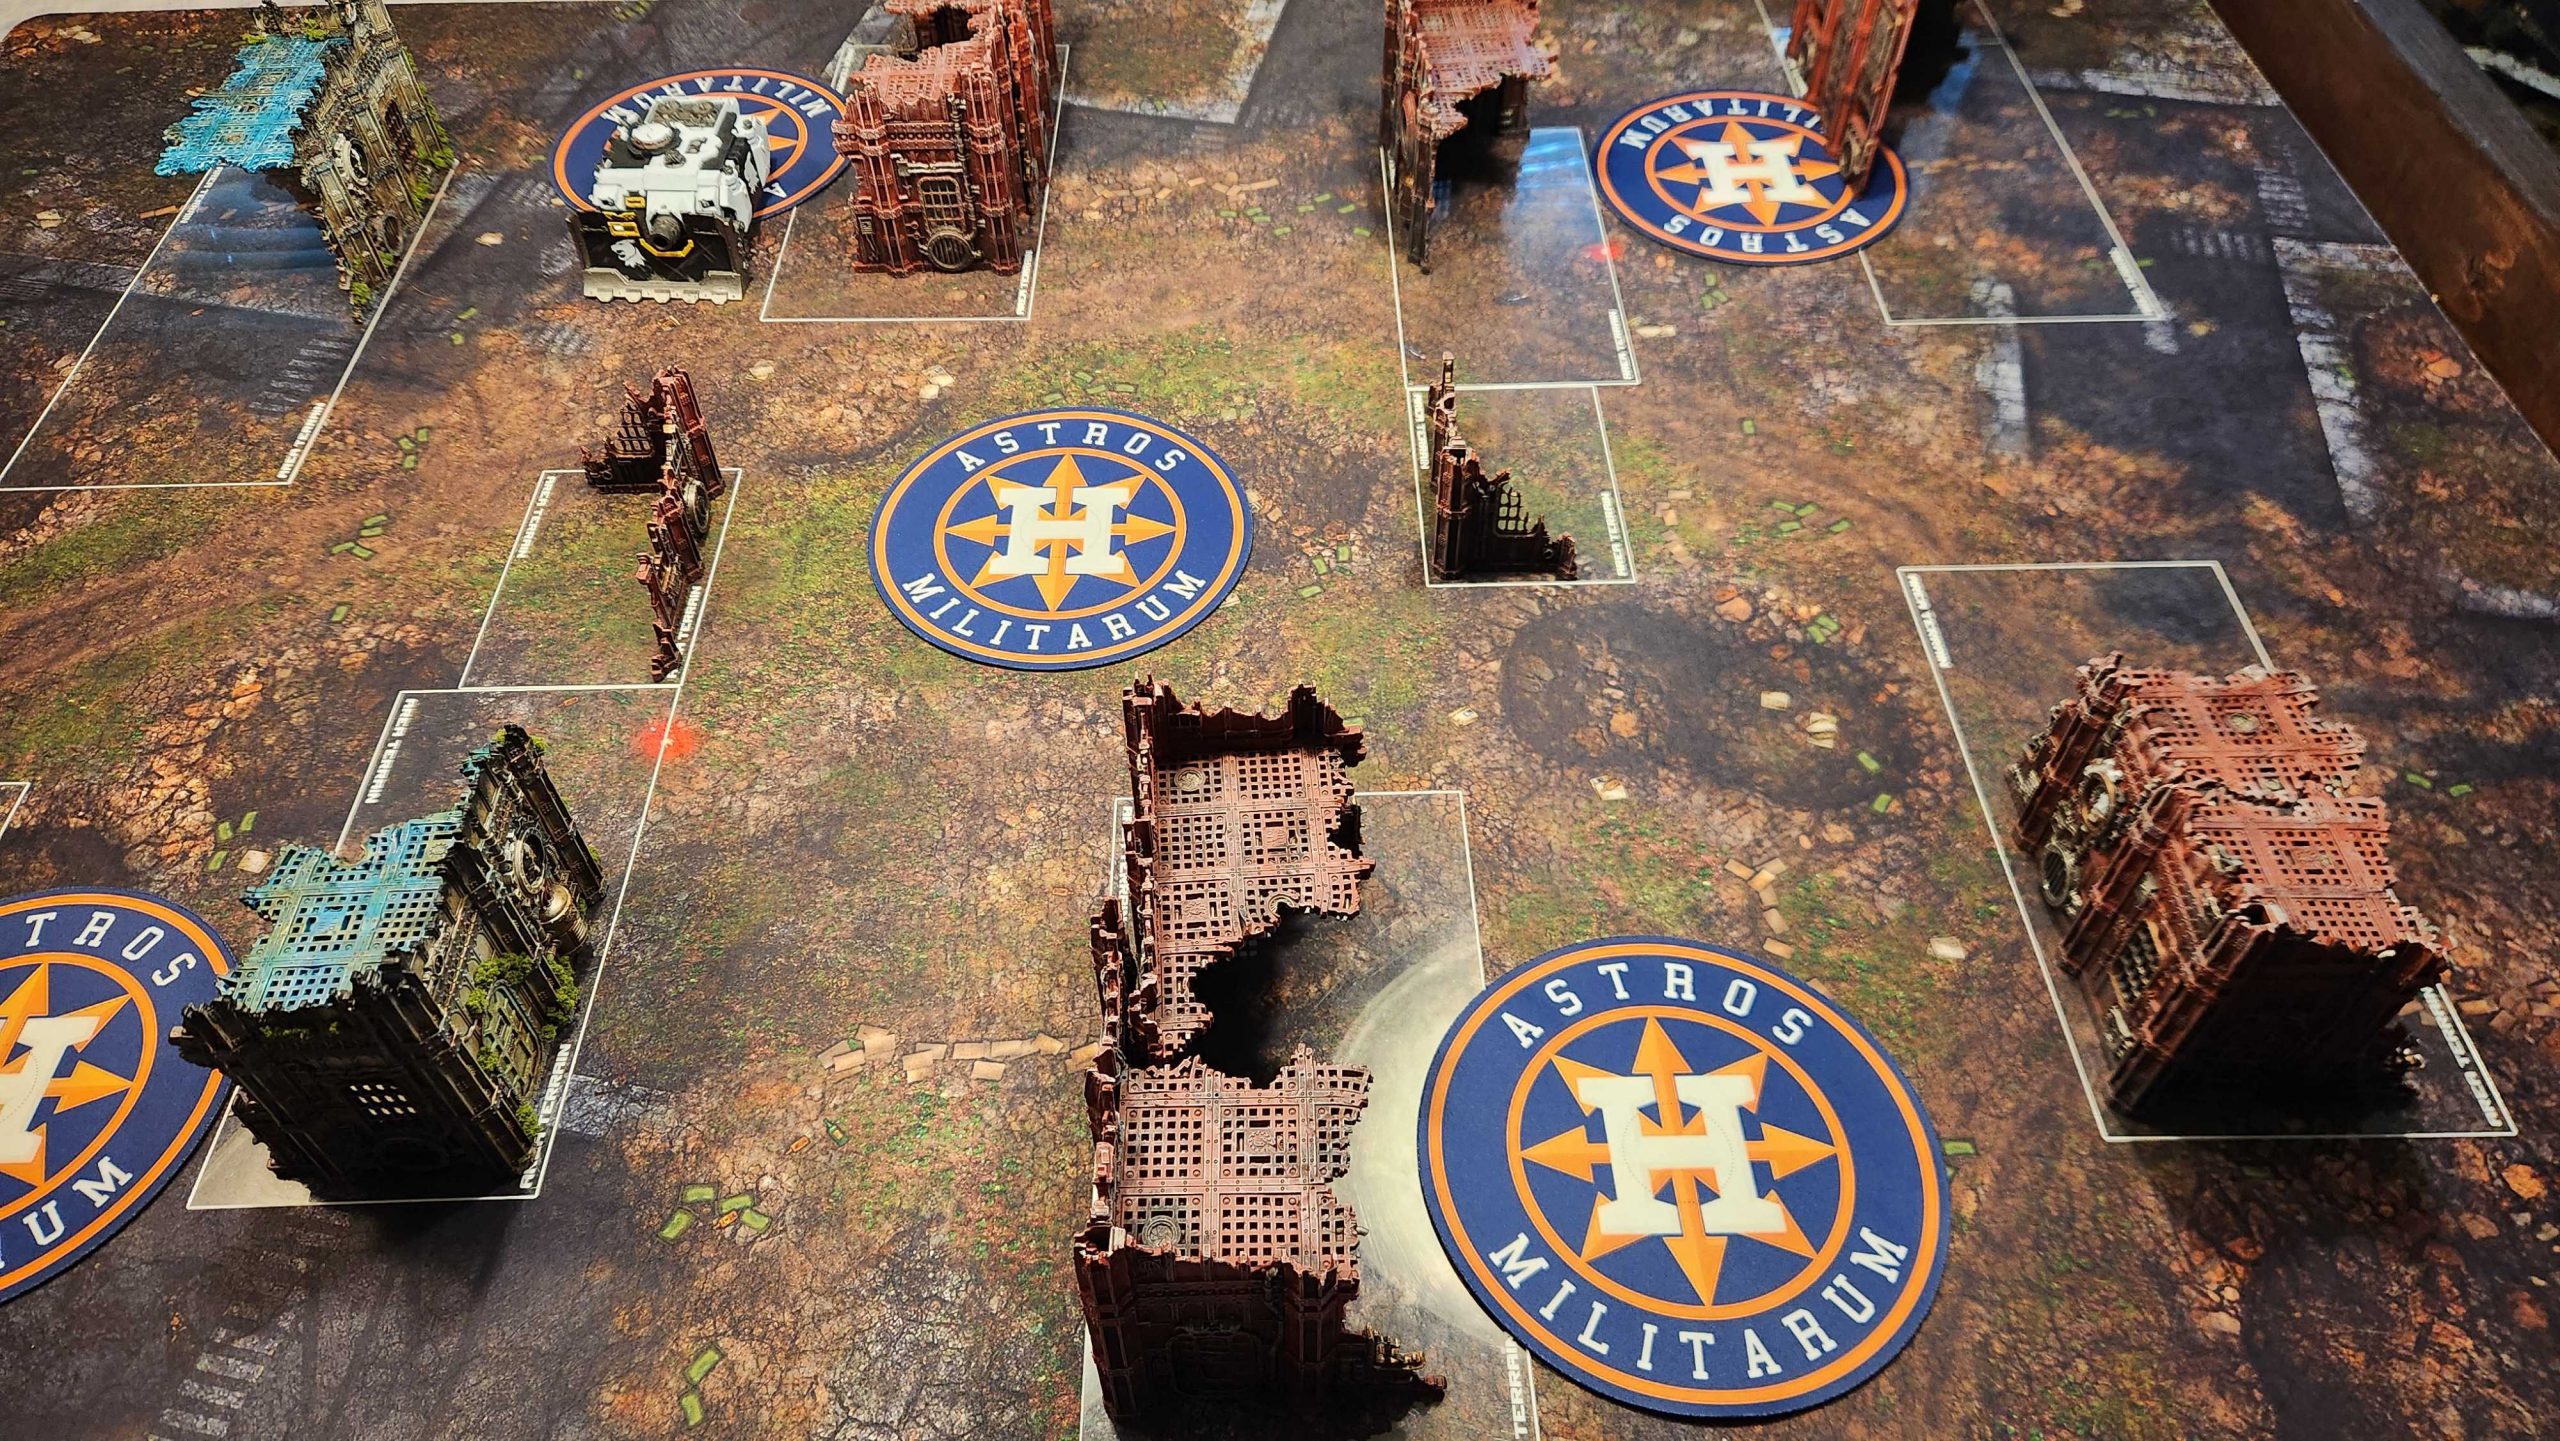
Objectives
Loading...
You really do not want to play this map on Sweeping Engagement or Dawn of War, and I'd really only recommend it for Tipping Point. It's recommended for Hammer and Anvil but I personally dislike how all three of the midtable objectives are lined up here and visible to each other. It makes the middle of the table very open and exposed on that map, even if there are some OK staging points behind the D. Ruins.
The big one to note here is that on Tipping Point, your B ruin gives you cover for a unit attempting to run out to the objective on your D. ruin. that'll typically need to include an advance - the objective itself is half an inch too far away to reach with a standard 6" move from your deployment zone, and you'll want the extra movement anyways to get behind that ruin.
Sightlines
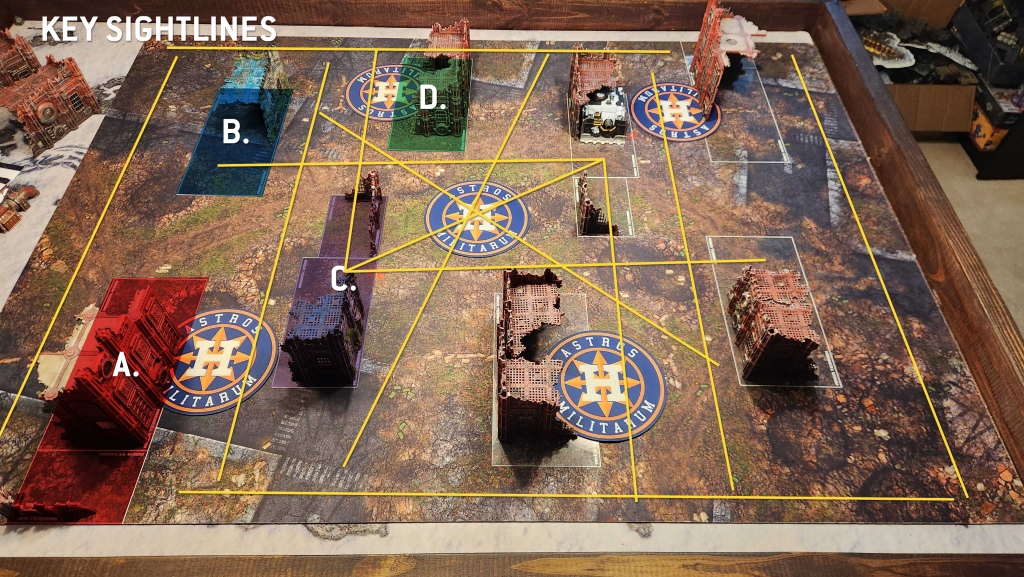
There are some long sightlines on this map. The big ones down the long edges of the table are among the most notable and while they're fairly narrow, it's easy to hide a tank behind the A ruin, drive it across on turn 1, and then see down the entire table. You'll want a 48" gun to do this, but it'll otherwise be difficult to hide in that lane. That said, the D ruin does give you
some cover from this lane, but not a ton.
The middle of the table is also fairly open, though the C. and D. ruins cut down on visibility between the expansion objectives. You can easily hide behind the D. ruin from threats on the middle and opposite side of the table while holding the objective there, but you'll be vulnerable to threats coming at you from the other side of the wall.
It's worth remembering those combined C. ruins - they can give you some wonky lines of sight, both to the middle of the table and also the D ruin if that small terrain base doesn't have a full-sized wall on it. The other sight lines to note here are the ones going across the table vertically - they're going to make Deep Striking on this map particularly dangerous if your opponent has anything that can easily see or move to that back column. The hiding spots behind the vertical ruins aren't particularly large on this map.
Finally note that on Hammer and Anvil, those three middle objectives are all lined up down the center of the table, and can see each other easily, though they can be held from the other sides of the walls on their respective D. ruins.
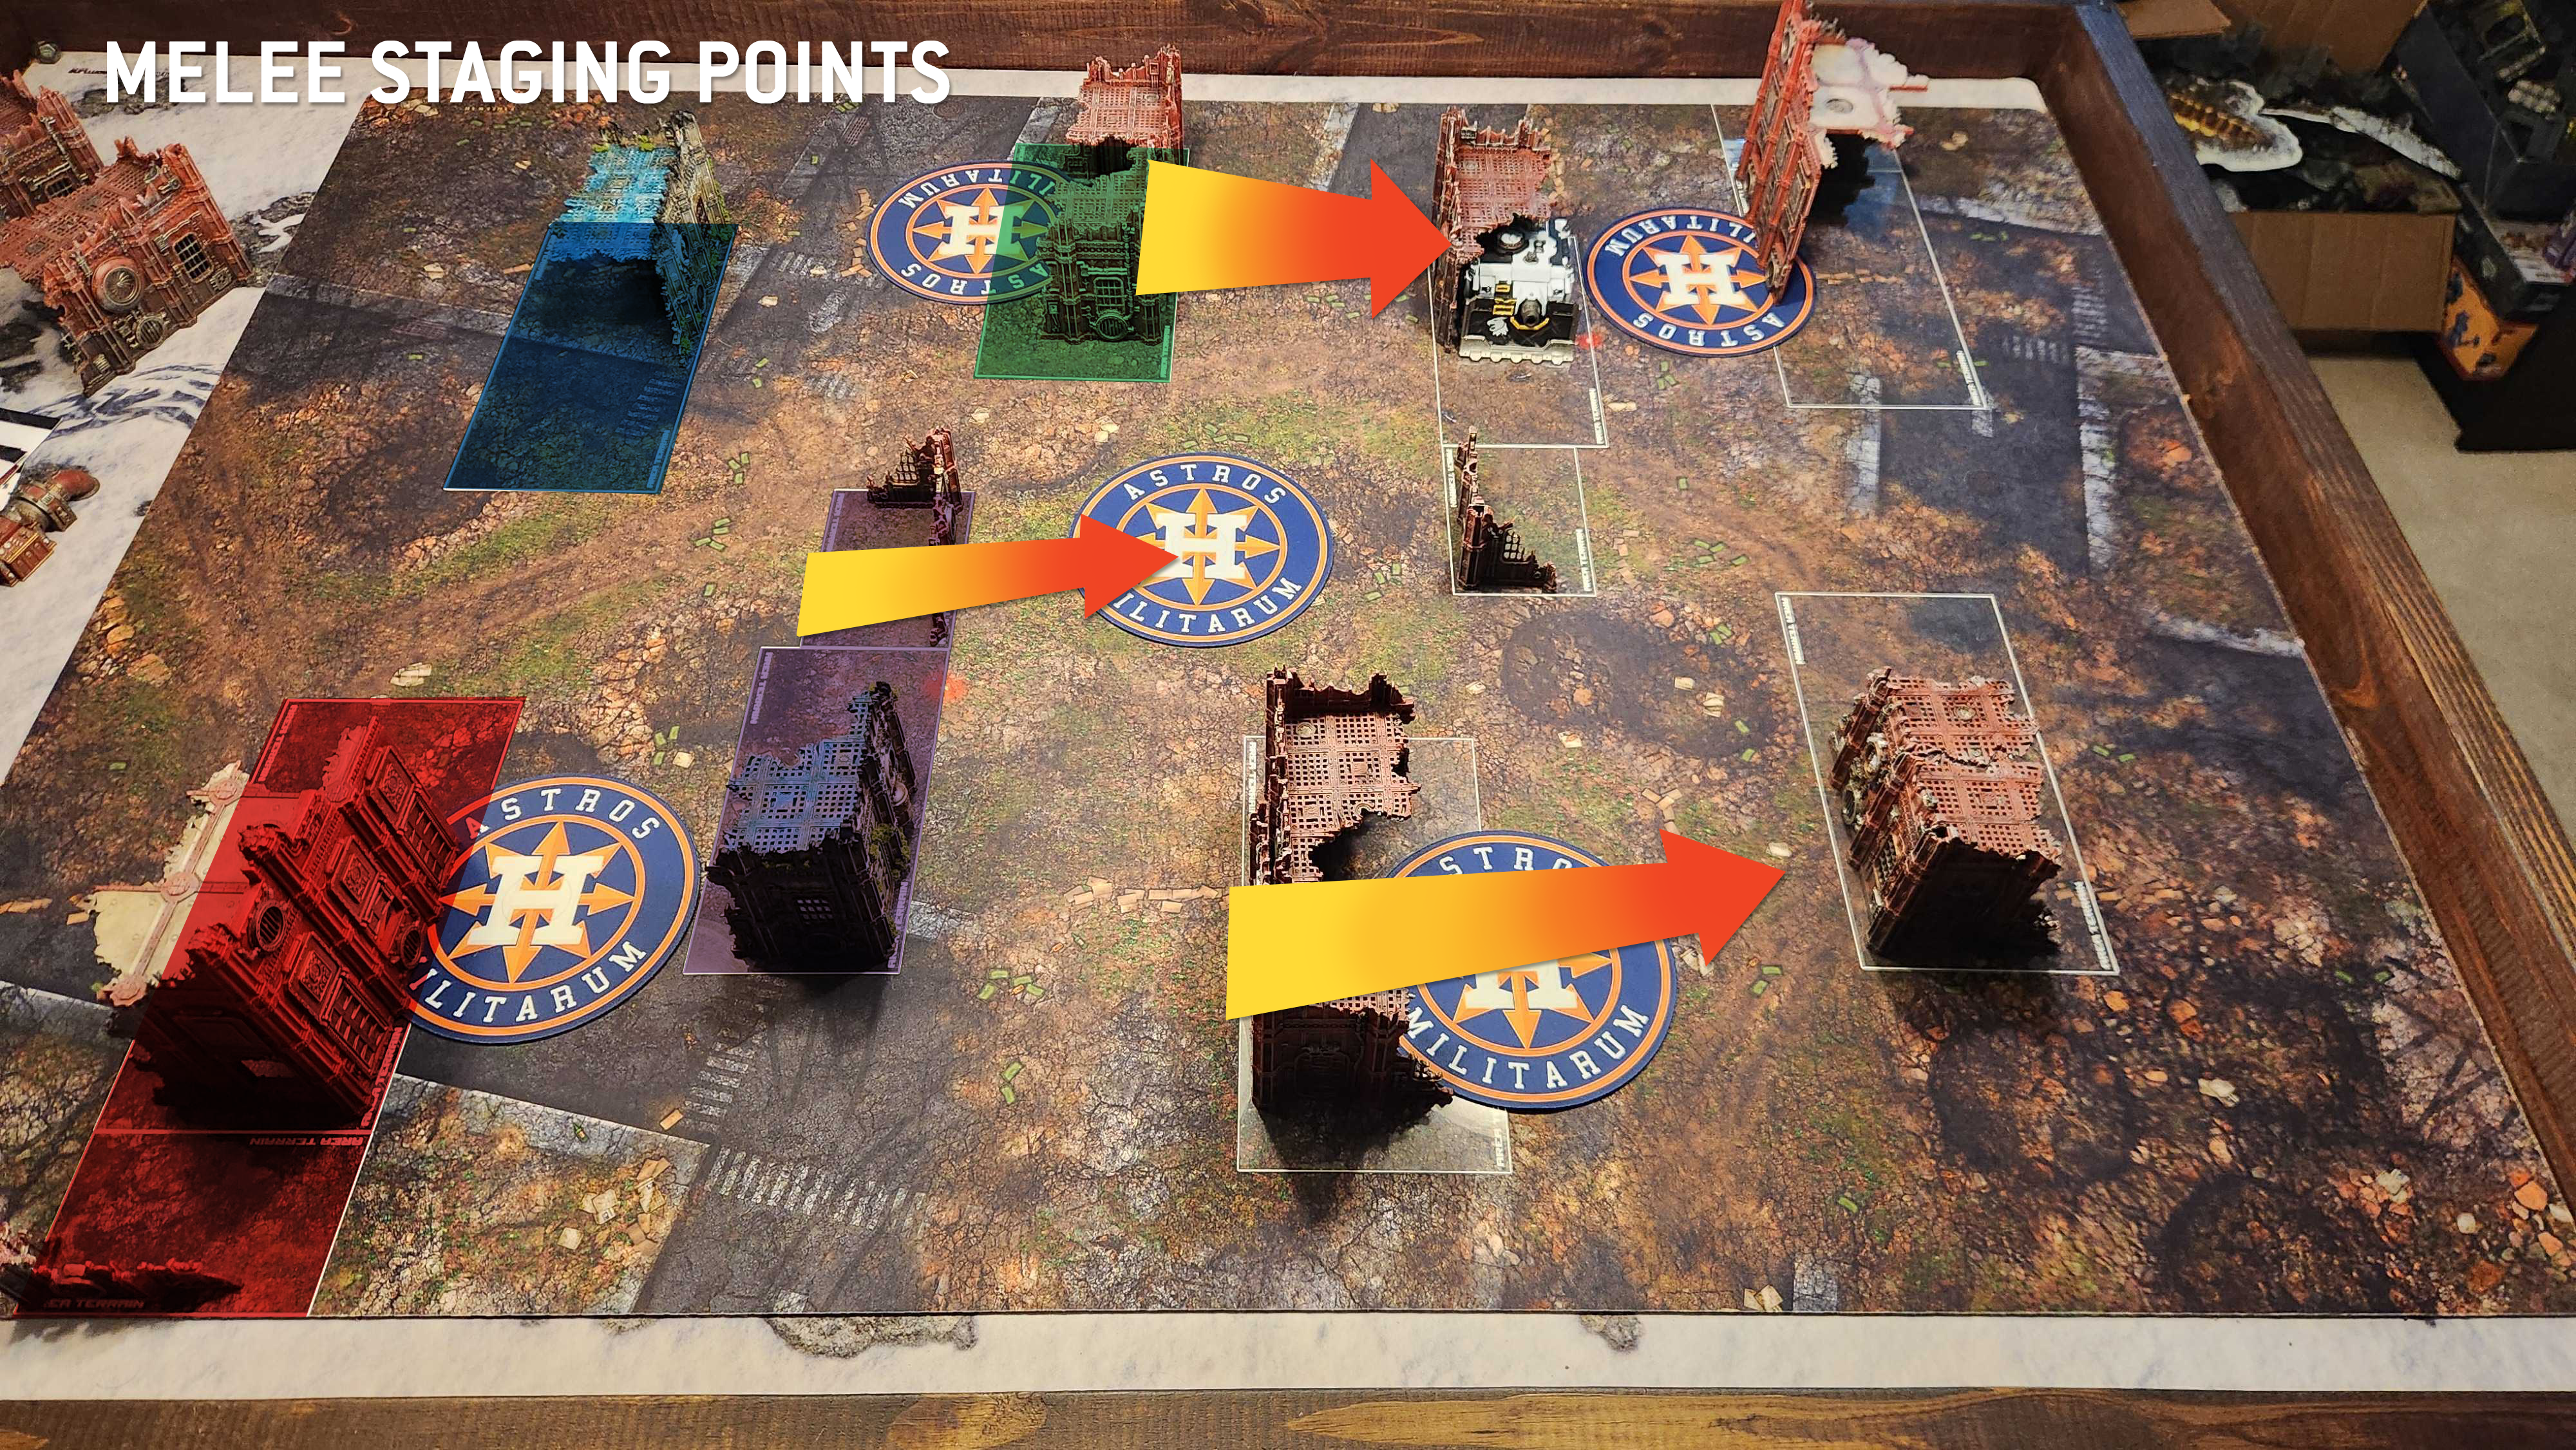
Melee Staging

This isn't a hard map to stage on, but the points you can stage from are very predictable. There are essentially three spots you're going to use: Behind the C. ruin, or behind either D. ruin, pushing through those walls toward the next objective. Going from your home D. ruin can be especially dangerous; it's easy to get screened out of that terrain by a unit set 1" back from the wall of the C. ruin, and the gap between those two buildings - the C. and D. ruins - is 8", so even if you can charge something going from ruin to ruin, you'll probably need a 9+ unless both units are pushed right up against their respective walls.
That said, the three staging points you
do have here aren't terrible, though if you're staging from behind your opponent's D. ruin, you're going to be in the open and vulnerable to any unit moving through or around their C. ruin to get line of sight across the table down the middle column. This makes staging here pretty risky, but you can mitigate this by also staging in your own D. ruin and being ready to charge anything that comes around the facing C. ruin.
What Does Well Here?
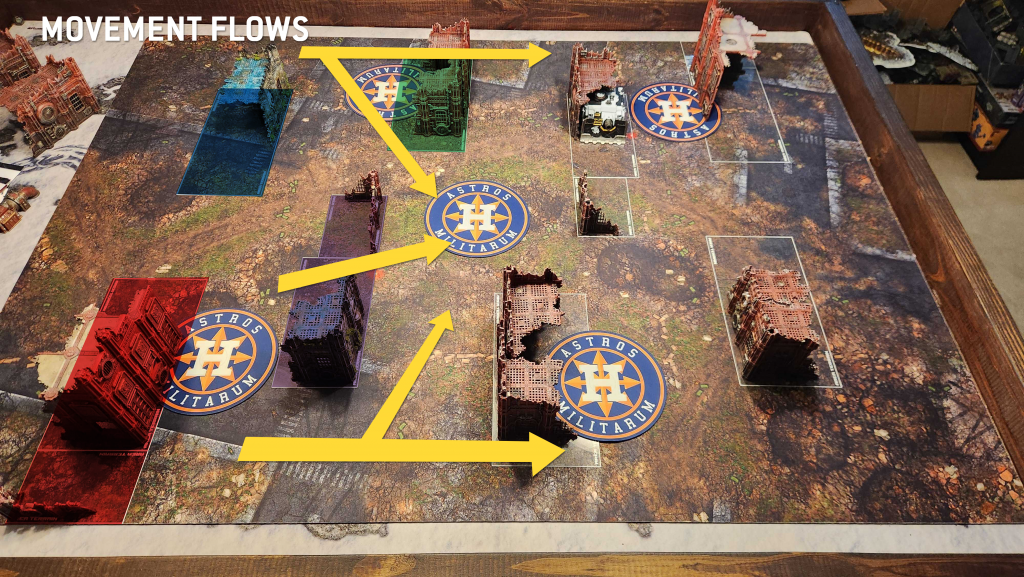
Ranged units, mostly. Tanks have an easy time getting around this map, though they'll have three fairly predictable channels to move along unless they're able to pass through the gap on the C. ruin. There are some pretty long sightlines here and the predictability of staging means that opponents can easily play around or plan for those charges. Melee units can eke out some OK cover on this map, but those long sightlines down the long table edges and diagonally through the middle of the map mean that you'll want to ping-pong between the D. and C. ruins as you move up the map with melee units to stay out of sight.

This map doesn't really have any good Infiltrator positions. Your best bet is going to be deploying forward onto objectives on the D. ruin closest to you for an easy early objective grab. On Hammer and Anvil your options are even more dire, though your opponent's D. ruin will give you some protection if you want to stage aggressively for a turn 1 charge through the wall into your opponent's deployment zone.
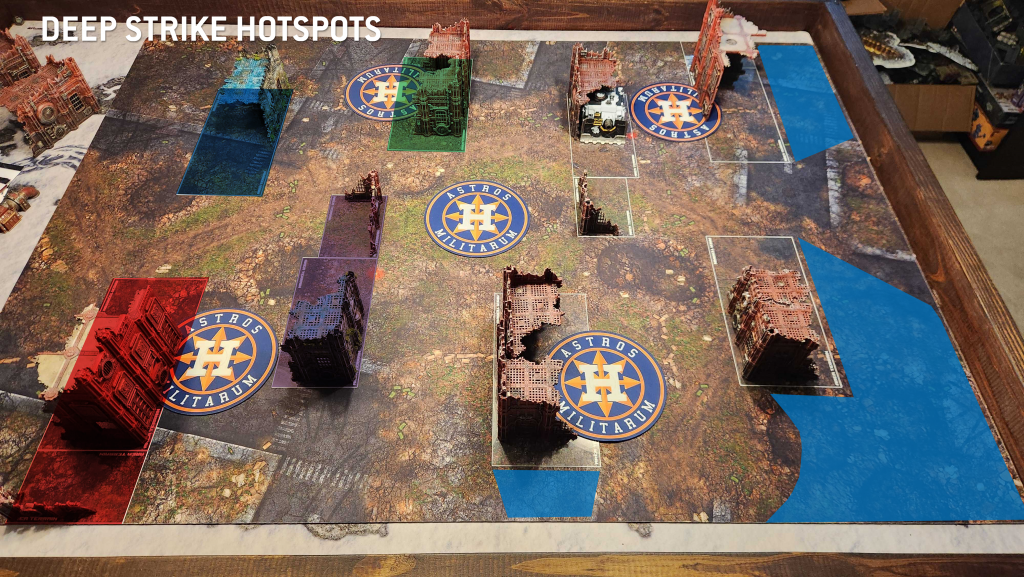
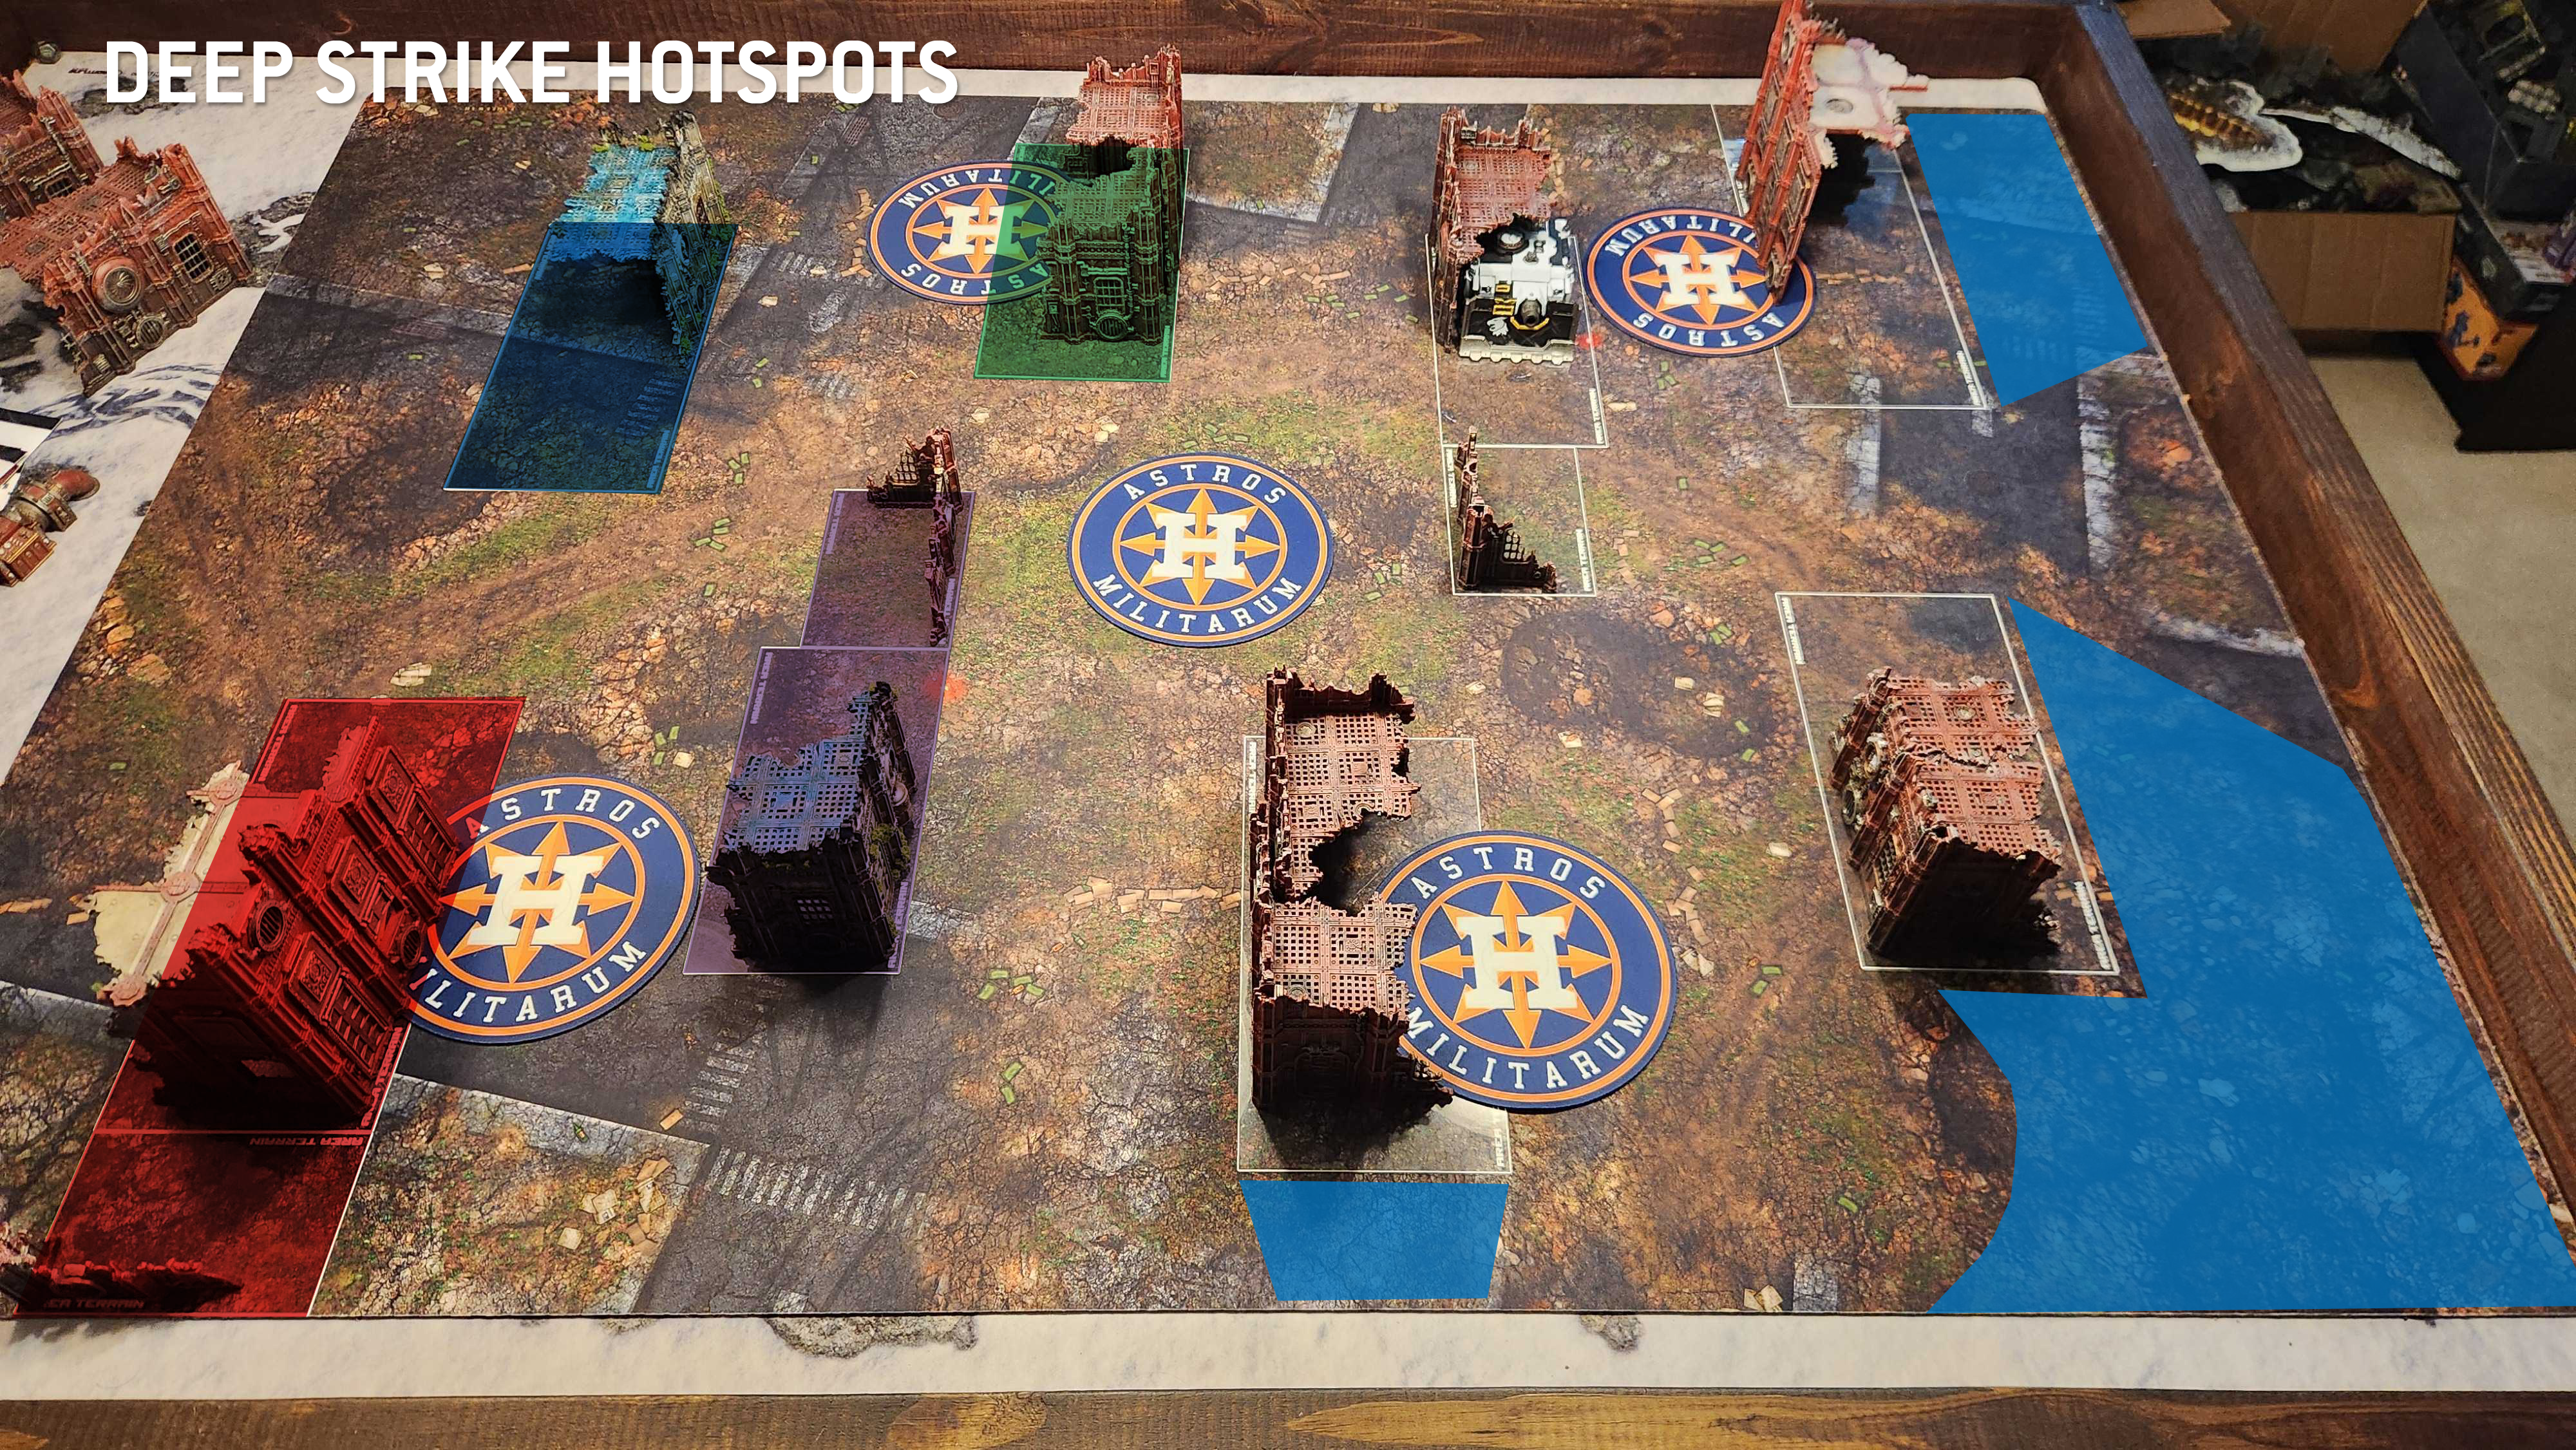
Deep Striking on this map is relatively easy if you're playing Hammer and Anvil, and a nightmare if you're playing Tipping Point. Those vertical ruins can provide absolute cover if your opponent pushes up too far and you can put them between your unit and theirs, but they offer very little hiding room from an opponent who is able to move into his backfield and the long sightlines will leave you a sitting duck if they have good ranged shooting that can reach that column.
Here your most likely deep strike spot is the corner behind your enemy's B. ruin, where there's just a big swath of empty space to work with, especially on Hammer and Anvil deployments. The big thing to watch for here is a tank that can easily cross the small part of the A. ruin, going back and forth across it to get sightlines down the entire table length from either corner as needed. Screening out your entire deployment zone will be much harder on Hammer and Anvil but you'll have an easier time seeing anything that lands in your deployment zone.
Final Thoughts
Layout 7 is weird. In almost any situation I'd rather be playing Layout 8, which is one of, if not the best layouts GW have created. in that sense, 7 feels like a worse version of 8, and one with an odd terrain piece in the center of the table. The long sightlines here aren't ideal, and it's one of the game's toughest maps for deep striking and infiltrating units. It'll be better to play on Tipping Point, but I'd still recommend Layout 8 over this one.
Have any questions or feedback? Drop us a note in the comments below or email us at contact@goonhammer.com. Want articles like this linked in your inbox every Monday morning? Sign up for our newsletter. And don’t forget that you can support us on Patreon for backer rewards like early video content, Administratum access, an ad-free experience on our website and more
Thank you for being a friend.


 Option 1
 Option 2


 It's worth remembering those combined C. ruins - they can give you some wonky lines of sight, both to the middle of the table and also the D ruin if that small terrain base doesn't have a full-sized wall on it. The other sight lines to note here are the ones going across the table vertically - they're going to make Deep Striking on this map particularly dangerous if your opponent has anything that can easily see or move to that back column. The hiding spots behind the vertical ruins aren't particularly large on this map.


 Infinity N5 First Principles: Understanding the Outcomes of Face to Face Rolls
 Tactical Feedback: Timing the Go-Turn
 SRM's Roundabout to Adepticon 2026: Curd Is the Word