Hi, I'm Zac, and
since January I have been
slowly putting together a warband for the Victrix/Noodle wargame called Pillage. Pillage is a fast-paced skirmish scale game that includes both sheep miniatures and a whole phase given over to setting fire to stuff. I don't yet know if these two things are ever combined in game, but this is something I intend to find out.
The aim is to have a full 600 Gp warband and a decent understanding of the game ready for the finish line in APRILlage. This is of course nothing compared to the absolute lunatics who paint hundreds of miniatures in a weekend, but when setting yourself challenges its important to choose attainable goals. I'm joined in this by my friend Lee, who is collecting an Irish warband built mostly with Wargames Atlantic minis, whereas I am building a late Saxon warband out of Victrix kits.
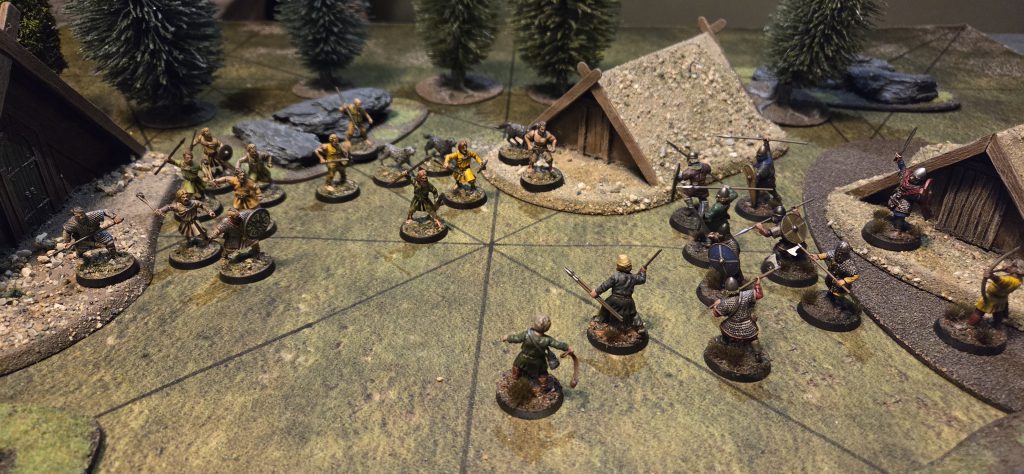 Lee's warband are mostly Wargames Atlantic, with a couple of Victrix models thrown in. (Credit: ZAC)
When last we spoke, my chieftain was spitting out insults (and a few broken teeth) at Lee's victorious Irish, while limping off to recruit some missile troops and gain his revenge.
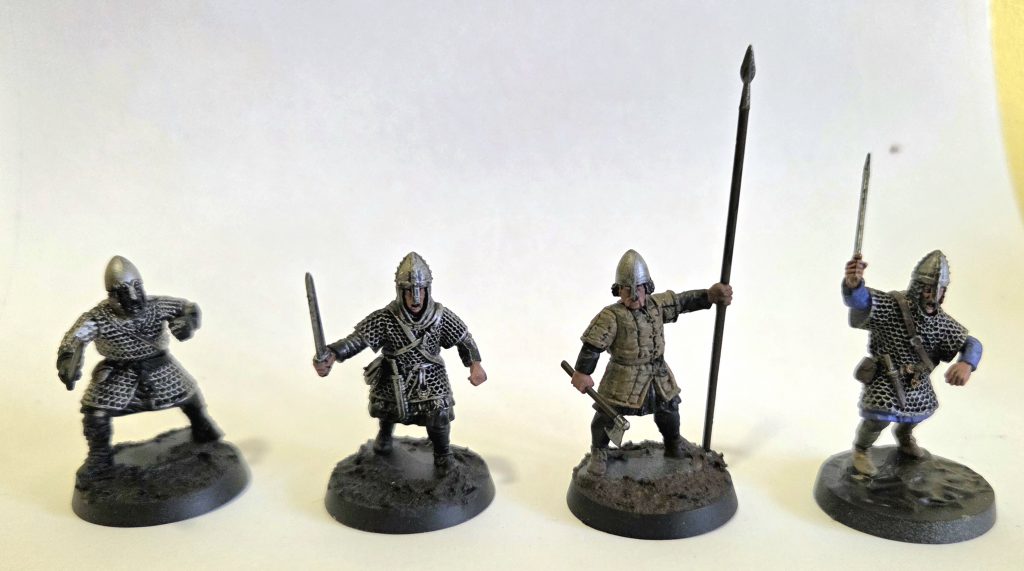
Having added an extra four Saxon warriors to my somewhat elite warband, we headed back to Lee's Irish village, with the aim of setting fire to some buildings, and running off with some treasure. Unfortunately, Lee had also been busy, adding an extra four soldiers to his warband too, therefore maintaining the numerical advantage. Thankfully, in this scenario his warband was split. If I could overwhelm the miniatures in the village early on, it would be an easier fight once his reinforcements arrived.
It's probably worth saying that at this point, we are intentionally planning these games in order to learn the rules. It's very tempting to jump straight in and try out all of the rules day one, but in my experience this is too much mental load for me. In last month's game we completely ignored the rules for loot and fire, so that we could begin to get the hang of the basic ruleset. This month we're adding in these missing rules, and including a few more different missile troops as well, namely a bow and some javelins.
The game started out well for me. Having the initiative in turn one allowed me to move up and begin threatening Lee's buildings straight away, with two warriors ready to set fire to his big hall. My main force closed in on his beleaguered defenders, and my missile troops tried to make up for the fact that I had deployed them incredibly badly.
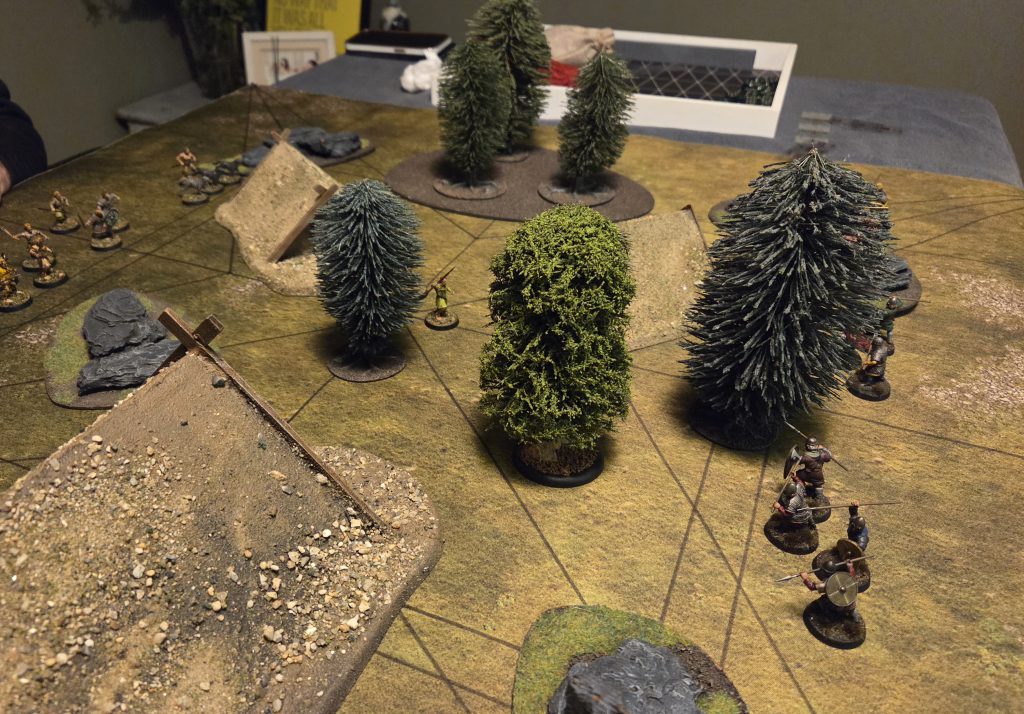 The dastardly Irish must have heard I was bringing a bow, so they planted lots of trees in their village. About 80 years ago. (Credit: Zac)
Then it started going wrong. And continued going wrong. I didn’t win a single initiative roll, and it felt like I also didn’t make a single armour save. It started with losing one of my huscarls to an unarmoured spearman. Losing a 60gp miniature to a 10gp one is a hefty blow. My strike back was to kill a dog, which is not only a bad trade, it also made me feel bad as well. By the end of the game I had failed to burn down a single house, only killed 3 enemies and was in possession of 2 pieces of loot. Lee had killed all but 3 of my own troops.
Its really tempting in a situation like this to blame the bad dice rolls (they were bad), and then learn nothing, but the whole point of this series is to learn the game, so what could I have done better?
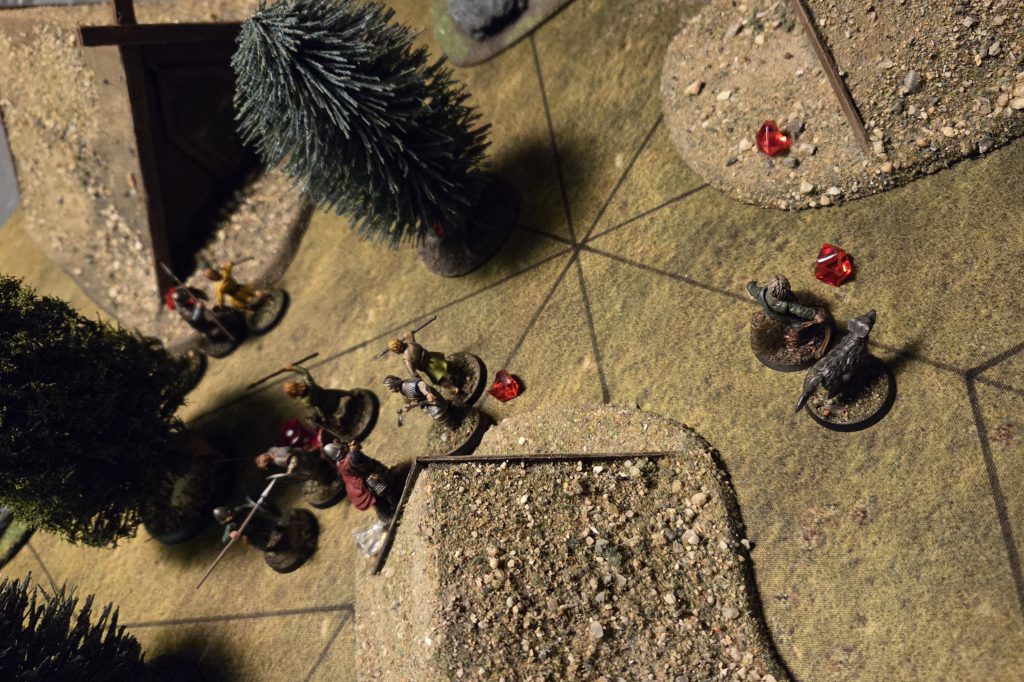 Things went south quickly. (credit: Zac)
Firstly, my missile troops were badly deployed. I put them all on one flank, which meant that they were out of range of most enemy troops, and unable to support. Putting the archer in the middle would have allowed them to threaten the whole battlefield. The bow has the longest range, but suffers the most from moving and shooting, so I really need to get that placement right.
Secondly, I have misunderstood the point of huscarls. They are EXPENSIVE, but rarely do much work for me. So much so, that Lee and I went back to the book to find out exactly what they are good for. As well as striking at normal tempo with a Daneaxe, the huscarls also have a rule that allows friendly models to make a second move once per game when within a 6” bubble. It turns out they’re probably better used on the flanks to get my models where I want them to be, than what I had assumed, which was a bodyguard unit for my chieftain.
Finally, in a game where very few rolls are on a 3+, numbers mean a lot more than armour. An extra 10gp of a shield and armour gets you a 50% chance to ignore a wound, but 10gp will also get you a whole extra warrior. As someone who loves historical armour, that does make me sad.
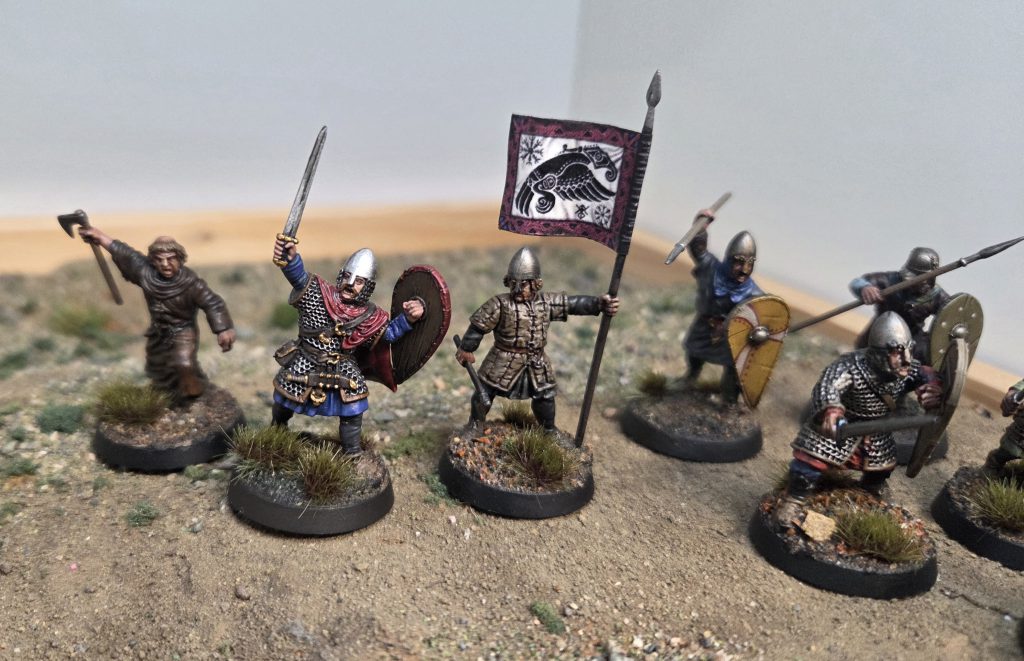
So I’m going to ignore that last point. That’s right, for this month’s new miniatures we’re going for three more heavily armoured warriors, a healer (who thanks to the new FAQ gives a new 5+ ignore wounds) and a banner bearer.
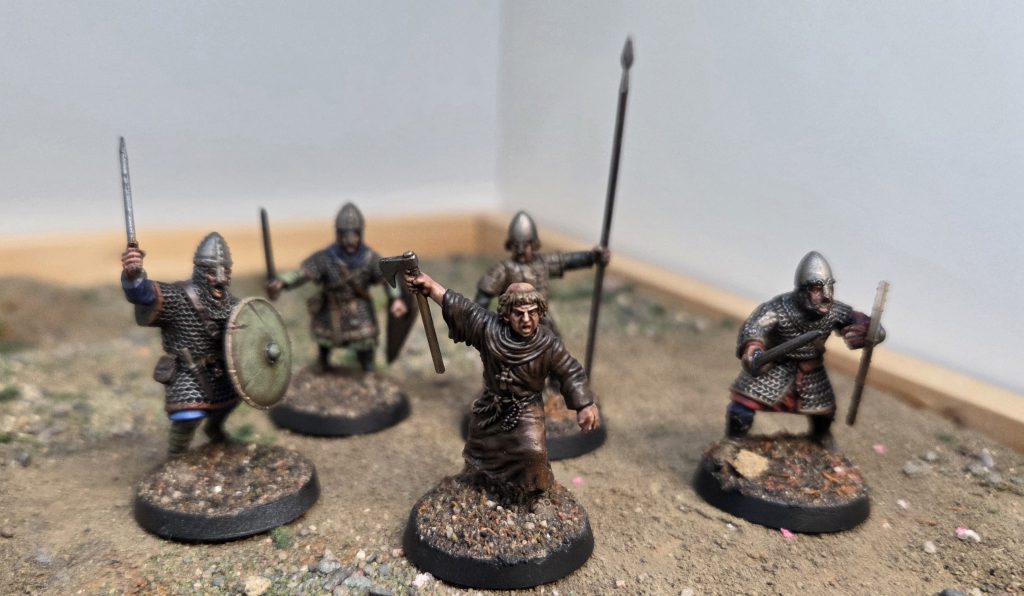 The monk model is a great healer, but I wanted to give him an axe instead of the cosh. Somehow, having an axe for chopping wood seems more likely than a purpose-made club (Credit: Zac)
The healer will hopefully keep my more elite warband alive a bit longer, and the banner allows me to reroll ones when attacking. We’re going to buff up the few guys we have, and see if we can win that way.
Painting
When batch painting a warband like this, I tend to go through a few stages. There are no uniforms at this point in history, so I can’t just paint everything the same colours, but I also don’t need to paint everything individually.
 Metals, Skin, Browns, Colours. The process that works for me. (Credit: Zac)
Step 1: Metals
After spray undercoating, I drybrush all the metals at once. This is the messiest stage, so worth doing first, plus its the same colour on all the models, so they can all get done at once.
Step 2: Flesh
Another colour which will be mostly the same is their flesh. The small variety in skin colour you would see amongst 10th century Saxons can be represented by doing an extra layer of flesh wash, or an extra highlight on a few of the miniatures, but the colours will remain the same.
Step 3: Browns
Getting out two different browns, I go around each model painting things in a variety of browns. Its still batch painting, but I’m freely mixing between the two pots, and the paint is going on different places on each model: One might have dark brown shoes, while the other may have light brown.
Step 4: Colours
The “dark ages” were actually full of colour, no matter what film and TV want us to believe. Choosing three different colours, I go around all the models, putting one or two colours on each model. I try to avoid replicating schemes, but don’t pay too much attention: If it looks good, its alright with me.
Step 5: Washes and Bases
Washes and bases are the key to making this approach work. While each individual is, well, individual, if you use the same washes and bases on all of the miniatures that will tie them together well enough: They will look like they inhabit the same world as each other, whether they wear the same colours or not.
With the reinforcements done, now its time to play my final game against Lee. Will my Saxon Warlord win out, or will he lose again, and with that, lose all control of his fledgeling warband. Join me next month for Aprillage, to find out.
Have any questions or feedback? Drop us a note in the comments below or email us at contact@goonhammer.com. Want articles like this linked in your inbox every Monday morning? Sign up for our newsletter. And don't forget that you can support us on Patreon for backer rewards like early video content, Administratum access, an ad-free experience on our website, and subscriber-only content covering competitive Warhammer 40K!Thank you for being a friend.

 Goonhammer Hobby Round-Up: March 2026
 Goonhammer Reviews: Tribal Conquest
 Conquest: Weaver Courts Gemred Knights and Scaile Dancers Model Review