Customizable units were first announced by AMG back in March 2025 at AdeptiCon. Since then, the community have been waiting with baited breath to see how AMG would handle them. Cries of:
"They'll be the answer to the Imperial misery"
"I'm expecting 25 different upgrades"
"They will shake up the meta"
Well, at the very least, we now know what they do. In this article I'll breakdown the Rebel customizable Officer and Agent and then take a look at few initial tactics and unit combinations to consider.
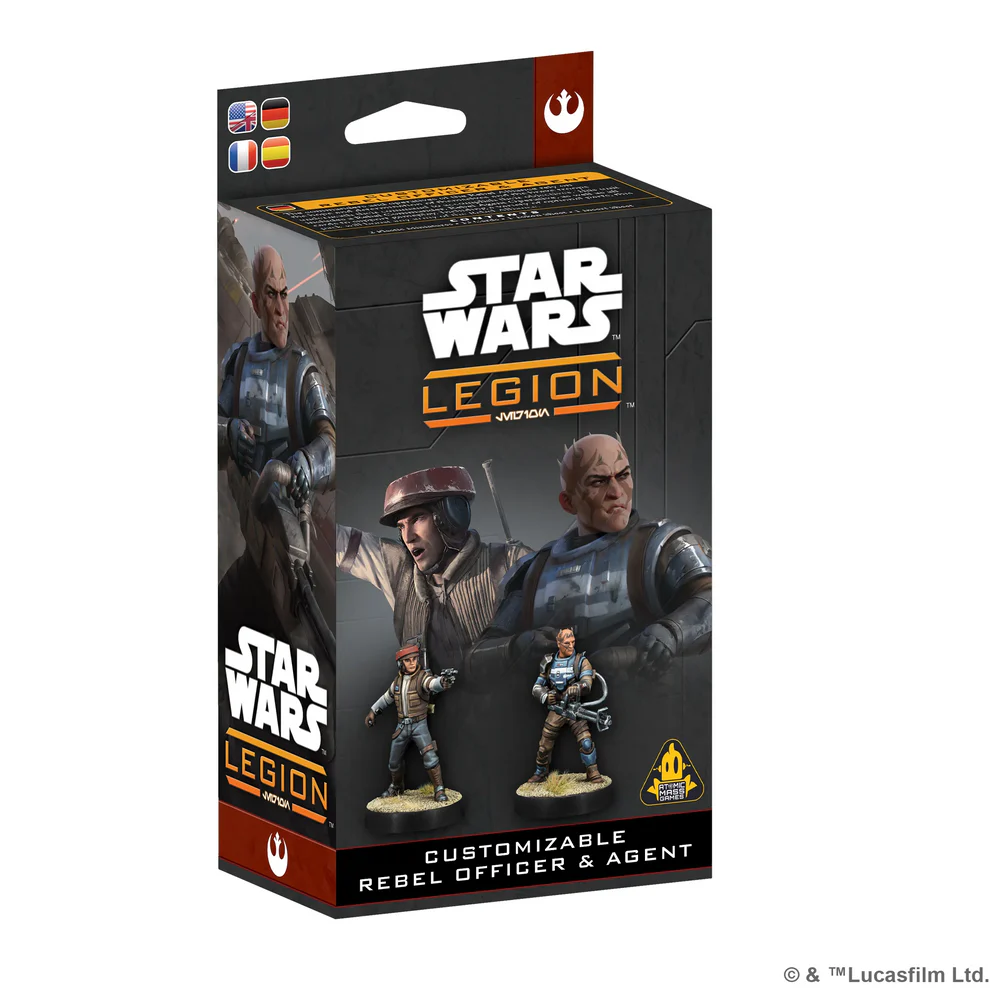
What's in the Box?
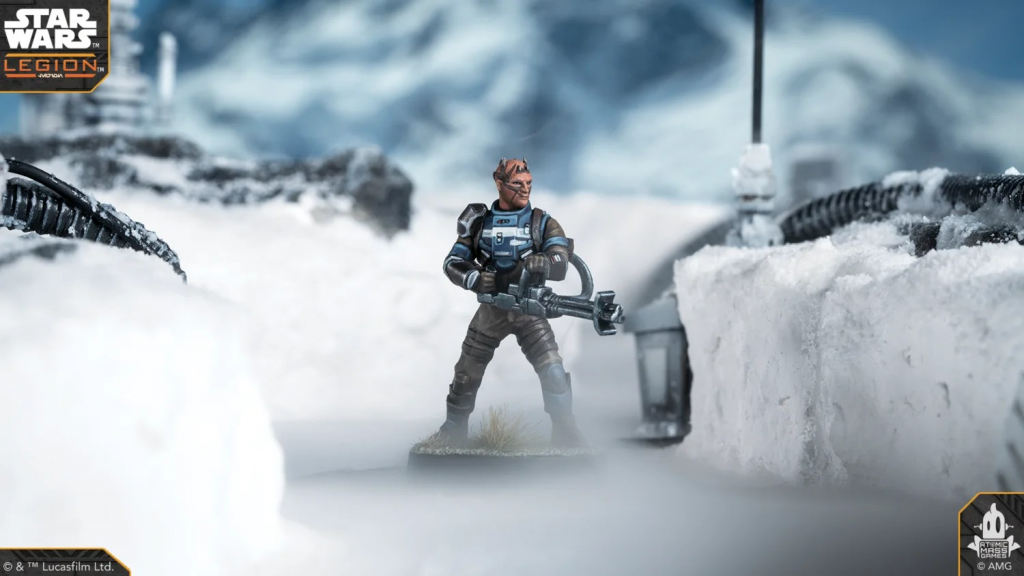
The box contains enough plastic to create two miniatures. With 7 head options, one copy of each of the three equitable weapons, multiple left and right arm combinations and three backpack options there’s plenty for hobbyists and players to get stuck into. Whilst the poses for both models are the same you can give each one enough character for this not to stand out too much. It would have been nice to see more flexibility with the leg and torso options but at least you can distinguish between your Officer and Agent models with different armour and clothing.
Unit Cards
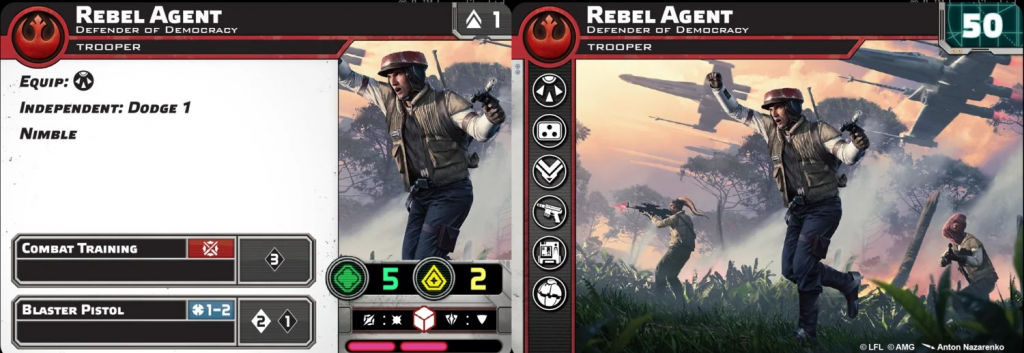
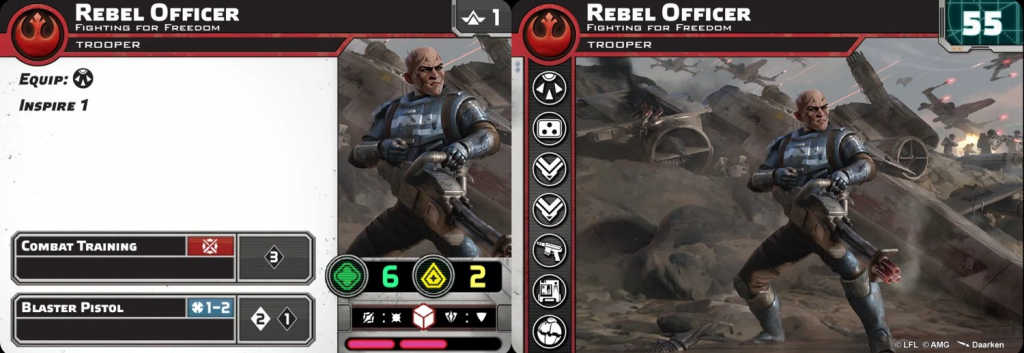
The unit cards themselves are not what we’re here to talk about. They are a pretty standard for a Rebel hero with their white defence dice, surging both ways, 2 courage and fairly mediocre range and melee weapon profiles. The Officer has
Inspire 1 whilst the Agent brings
Independent: Dodge 1 which pairs nicely with
Nimble, to help keep that dodge lasting longer. Both units have a plethora of upgrade slots with both having the ability to equip a Grenade, Gear, Armament, Training (the Officer has 2 of these), Command and finally the new Doctrine upgrade. It’s the doctrines followed by the range of equipable upgrades which allow you to take these units from a customizable miniature to a customizable unit. Coming in at a base of 55 points and 50 points respectively, both the Officer and the Agent are cheap enough at the outset to kit them out in multiple different ways.
Doctrines
There are 4 different doctrines available in the box. 3 of these are available to the Officer (a commander) and 2 to the Agent (an operative).
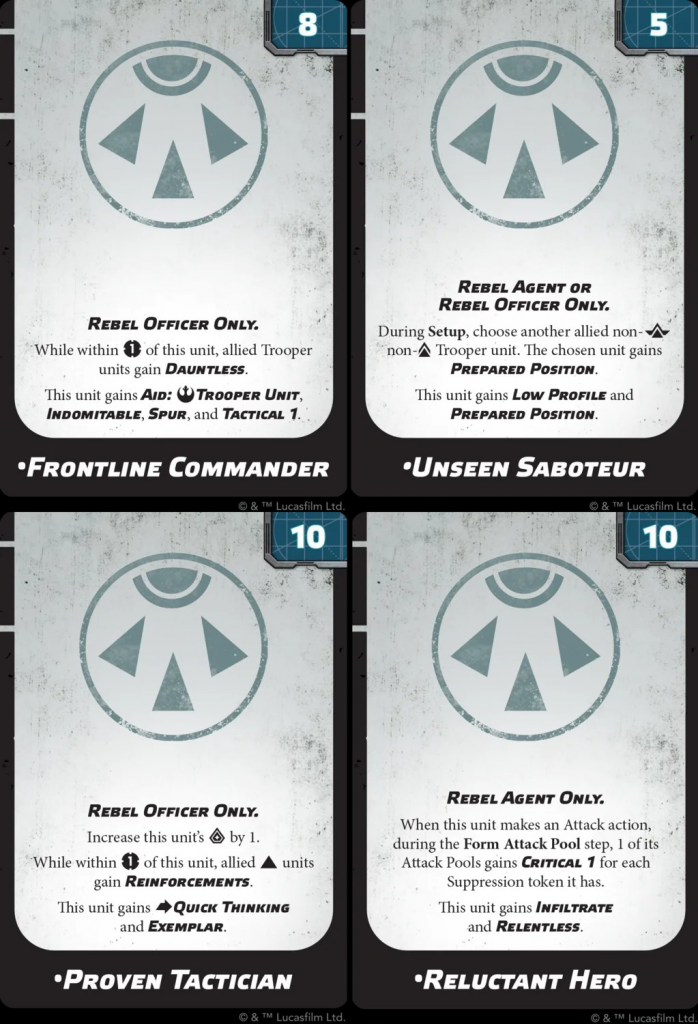
Frontline Commander
This doctrine is here to represent your Officer who is leading from the front. Giving
Dauntless to nearby trooper units represents the Officer pushing allied units forward despite the fear of what might be ahead of them (note the Officer also gains
Dauntless as it is within range 1 of itself).
Spur allows the Officer to move Speed-3 if you want to keep pace with some other fast-moving units.
Tactical 1 gives the Officer an aim every time it makes a move, whilst
Aid allows the Officer to hand off an aim (or a dodge or surge) every time it would gain one to a trooper unit at range 2 instead, at the cost of a suppression. With
Aid,
Dauntless and
Spur all loading suppression onto the Officer,
Indomitable is a nice way to try and mitigate some of that suppression. I can see this unit being paired with a bunch of close range or melee-based trooper units such as Fleet Troopers, Sleeper Cell or even Wookiees to allow the Officer to handout tokens whilst allowing the units to keep moving through
Dauntless. Getting the free aim from
Tactical means the Officer wants to move.
Proven Tactician
This is doctrine turns your Officer into a stalwart troop supporter. The courage 3 provides nearby troopers with a rock-steady courage bubble, decreasing the chance of panic, whilst
Exemplar (one of the current meta defining keywords) allows the Officer to support allied units with green tokens (apart from standby tokens).
Quick Thinking makes getting those tokens easier in the first place and so you don’t have to decide between an aim of a dodge.
Reinforcements is an added bonus, allowing nearby corps units the ability to make a free speed-1 move at the end of turn 1 to help with that all-important turn 2 positioning. A Proven Tactician will pair nicely into a Rebel gunline and offers a cheap source of courage 3.
Unseen Saboteur
The only doctrine available to both the Officer and the Agent, this might be the most nuanced of the four. The unit gains
Prepared Position allowing it to start within friendly territory at the start of the game and
Low Profile helps the unit to stay alive a little easier. You can also choose a non-Commander or Operative trooper unit to give
Prepared Position to. There’s no affiliation or faction restriction on this and so I could Ewoks or Wookiees being chosen, to help them get up the table earlier in the game. The hard-hitting fleet troopers could also find this a useful keyword. Coming in at the cheapest of the 4 doctrines I could see this one seeing the least play, but there are definitely some interesting combos to try out.
Reluctant Hero
As the sole Agent only doctrine, this one is pretty simple.
Infiltrate is the best of the deployment-based keywords, allowing you to place the unit anywhere in the friendly territory when it activates, effectively giving it a range 1.5 advantage.
Relentless gives the Agent a free attack after a move action in its activation, increasing the efficiency of the unit. The
Critical 1, whilst nice, can be mostly ignored for now. This doctrine turns the Agent into a killing machine and pairs nicely with some of the Armament and other upgrades on offer.
The Armament Slots
Now, annoyingly the box only comes with 1 of each weapon and so you can’t make 2 models with the same weapons. On the flip side, all 3 weapons available look great and will have their uses in the right scenarios. They are all available to both the Officer and the Agent
.
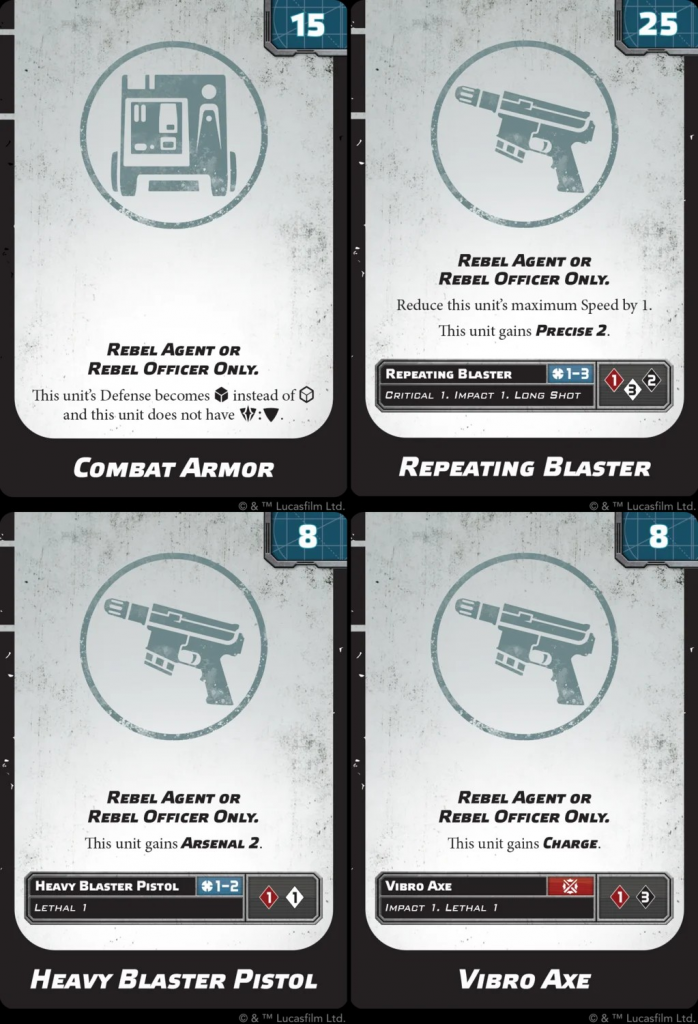
Vibro Axe
The only melee-based weapon of the 3 and also gives the unit
Charge. With
Lethal 1 it is aim-hungry and so pairing it with a Frontline Commander will help to make the most of that
Tactical aim. Gaining
Charge means you can gain 2 aims and still attack!
Heavy Blaster Pistol
A range-2 weapon with 2 dice, I hear you say! But that’s not all. The upgrade also gives you
Arsenal 2 allowing you to throw 1 red, 2 blacks and 3 whites at range 2 with the chance of getting
Pierce through
Lethal 1. Pairing nicely with the Reluctant Hero’s ability to start closer to the energy and
Relentless I can see this combination seeing more table-time that you might expect. It also synergises nicely with an as yet unmentioned upgrade unique to these units – the famous Thermal Detonator. A 1-time use grenade which adds 4 red dice and
Blast and
Impact 4 to the pool, it packs a punch for 3 points. The
Arsenal 2 given by the Heavy Blaster Pistol allows the unit to throw 5 red and a white, hopefully with
Pierce 1 if you have an aim. This is not far off a lightsabre’s dice pool for a round! With neither the Armament slots or this Grenade being unique or limited, I could see a world where this combination shows up multiple times in a list.
Repeating Blaster
The third and final Armament is the wild card of the three. Offering the user a 6 dice attack at range 3 with
Critical 1,
Impact 1 and the ability to shoot at range 4 with
Long Shot whilst also gaining
Precise 2 is fantastic, but it comes at the price of a slower unit, with your speed decreased by 1. I can see this pairing with the Reluctant Hero. The
Relentless helps to mitigate the decrease in speed. The Unseen Saboteur could also see use from the weapon as it starts closer to the enemy thanks to
Prepared Position. It’s likely to be an aim hungry unit thanks to the
Long Shot and half of the dice in the pool are white. At 25 points this is a luxury choice. It’s probably slightly overpriced, but seeing 4 of these in a list could be a problem, so the pricing is probably set to avoid that scenario.
It’s great to see 3 very different weapon profiles here. With 2 cheap options at just 8 points and the third wildcard choice, there’s something for everyone.
The final upgrade card to discuss is the Combat Armor, available to both units. Giving a unit non-surging red defence dice instead of surging white for 15 points might be great. With a number of the combinations above urging units to get up close and personal the added defensive reliability could be important. Combining with the training upgrade Into the Fray could allow a melee-based Vibro Axe wielder to be defensively astute when it gets close to the enemy.
Command Cards
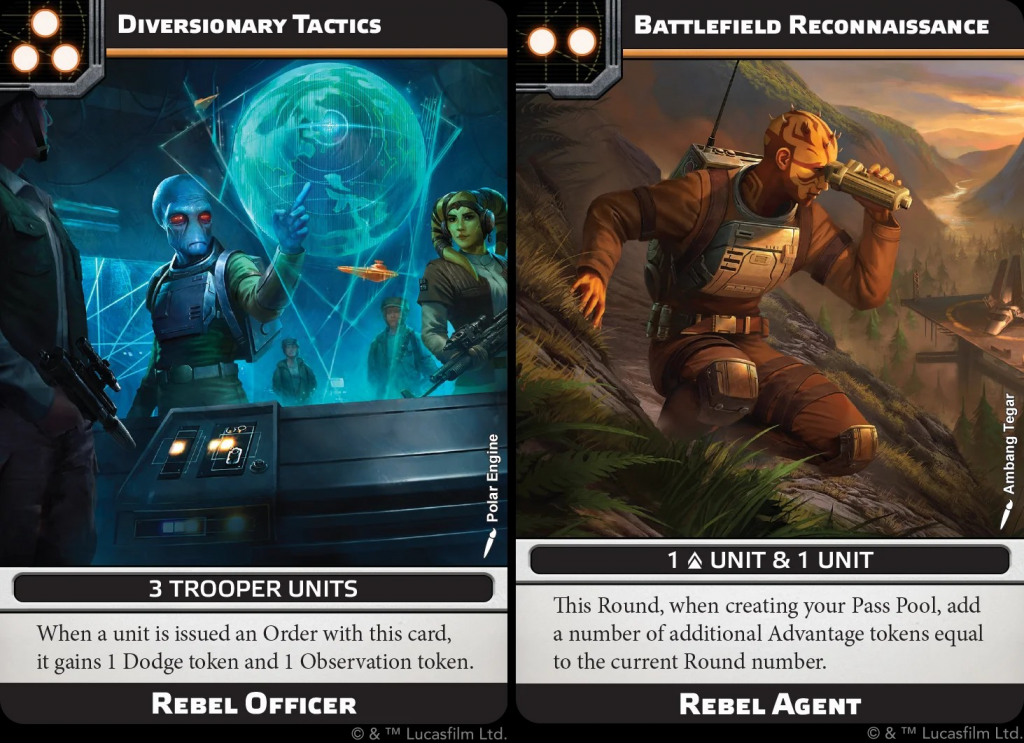
Each unit comes with 1 Command Card. The Officer’s 3-pip is fairly non-descript. The best thing about it is the 3 orders it gives out. It could be a good turn-1 play to hand out some dodges and to help gain some order control, which Rebel lists often struggle with. The Agent’s ‘Battlefield Reconnaissance’ on the other hand is a fantastic 2-pip. Giving out a fairly flexible 2 orders as well as giving you an additional pass equal to the Round number. Passes typically lose their potency the further into the game you get. Whilst 5 passes in Round 5 might sound great, you often don’t want to be continually delaying at this point of the game. Using it Round 1 to get the 1 pass could be a good use of it if you want to delay a unit going whilst also having better order control than Standing Orders. I can see this card being played Round 2 most of the time. Getting those 2 pass tokens in this Round forces your opponent to show their hand earlier than you and might allow you to delay formulating your plan until you have a good idea as to what your opponent intends to do.
Rebels already have access to a plethora of good heroes, especially in the Operative slot. I expect to see plenty of these in lists over the coming months. It’s likely most of these units will come in between the 68-85 point mark, unless you’re giving the Repeating Blaster a go. This prices them competitively against the likes of Leia Organa and Jyn Erso. Given these are the first iteration of customizable units we have seen in Legion from AMG, I expect to see more in the future which give even more flexibility to the hobbyists and competitive list-creators in the community.

Thank you for being a friend.


 Infinity N5 First Principles: Understanding the Outcomes of Face to Face Rolls
 Tactical Feedback: Timing the Go-Turn
 SRM's Roundabout to Adepticon 2026: Curd Is the Word