This is the continuation of
Dockyard – Republic Navy. I started with optimistic ideas about covering the entire faction in a single article, but the word count grew out of control and I wanted to get paid twice, so here we are. Let’s get straight back into the ships. I’m gonna do the
Acclamator and
Venator some justice.
The Ships – “With thunderous applause.”
Victory I-class Star Destroyer
The Republic is a faction filled with cost-effective generalist warships. The
Victory I is neither of those things, which puts it in a weird position. It
is arguably still better than its Imperial counterpart. It gets a Support Team slot and a
Salvo token to replace the duplicate Redirect. It trades the Turbolaser slot for a duplicate Ordnance slot, which I consider a downgrade given the role it fulfils in the Republic Fleet. Even with the upgrades, you can’t ignore the elephant in the room: it’s still the overcosted
Victory I. Now, it's in a faction that has an outstanding medium hull in the
Acclamator. I bashed my head into many experimental builds and in the end, there really was one thing the
Victory can do that no other ship in its roster can do.
It’s the cheapest way to put
SPHA-Ts onto the field.
I can’t think of a single other role it can fulfil that isn’t done better by another ship. It’s a worse battlecarrier than the vaunted
Acclamator I. It’s a worse combatant than the
Acclamators due to worse mobility and higher cost. There are cheaper support ships that can mount Projection Experts. It’s too slow and too inflexible to be a fleet flagship. It has no titles, so there’s nothing else going for it. But SPHA-Ts? Yeah, it can do that.
 Credit: Fantasy Flight Games
Here's a ‘short’ primer on the
SPHA-T. It goes onto ships with ‘Star Destroyer’ in their name. It’s a
modification, so you can't take other modification upgrades. It ruins your ability to command squadrons. What you get in return is an
Ignition attack with up to six dice. Ignition attacks are a rules nightmare that allow ships to make artillery attacks at ranges beyond the limit of the normal range ruler. The SPHA-T’s attack ends at
long range rather than extreme range, but does provide the ship with a six-die attack out of its front or sides at long range. Compare this with say, the
Venator II’s side attack of four dice, of which the two blue dice never even reach long range and you start to see the usefulness. At the cost of the card, a
Concentrate Fire token, and your utility as a carrier, it gives your ship a potent and long-ranged attack.
There are three ships in the Republic Navy that can fit this upgrade: the two
Venators and the
Victory. The SPHA-T upgrade is size-agnostic; it has the same effect irrespective of the ship it goes on. A cheaper ship benefits more from it. The
Victory is the cheapest candidate and is the least interested in being a carrier out of the whole bunch. If you ever start getting ideas about using the Republic
Victory to fulfil any other role besides SPHA-T boat, please refer back to my list of ships that are more cost-effective in those roles.
For fitting a Republic
Victory? It’s hard to go wrong with the SPHA-T. I don’t see why it shouldn’t be there. SPHA-T requires Concentrate Fire tokens to use, which means you’ll need a source somewhere in your fleet. Think
Munitions Resupply,
Clone Navigation Officer or even
Hondo. A continuous supply is preferable, but anything to keep your guns firing. Thankfully, SPHA-T builds tend to be quite self-sufficient besides the need for tokens. They spill a lot of reliable blue dice and your faction has no Ion Cannon slots to fiddle with blue dice anyway. Dice control isn’t high on the list, but a spare
Intensify Firepower can help if you roll an excess of accuracy results.
Everything else on the ship is backup. The obvious candidates for the Weapon Team slot are
Engine Techs and
Projection Experts. The
Victory’s worst characteristics are speed and turning, both of which Engine Techs address. It’s an expensive upgrade, so its inclusion should be carefully considered, but it vastly improves the ship. Projection Experts is for a second line build that intends to use its long range to provide supporting fire while feeding frontline ships with spare shield HP. Ergo, Engine Techs orient your ship to mobility and aggression, while Projection Experts orient you to fleet support. If you’re building aggressively, I’d always consider
External Racks for the inevitable clash.
There’s also a build I’ve been bouncing around in my head, but haven’t gotten to testing. An aggression oriented
Victory with SPHA-T, Engine Techs,
Ordnance Experts,
Assault Proton Torpedoes and External Racks. This hull is getting overloaded with upgrades and needs a source of Concentrate Fire tokens, but the ship is twisty and hits like a hammer. It’s an oversized
Demolisher in spirit, but with the benefit of a strong long-ranged SPHA-T attack, too. Someone test it out for me, please.
So there. It’s telling that most of my
Victory discussion was just SPHA-T content, but that’s what this ship is for. It doesn’t give The Republic a taste of the Imperial aesthetic, but it does give the generalist faction a specialist.
Acclamator-class Assault Ship
Ship
We need to talk about one of the best middleweights in Armada. The
Acclamator is the developer’s love letter to the Republic, and an unmitigated slap to every Imperial player who owns
Victory-class Star Destroyer. It’s the
Victory in role and shape, but better. An incredibly cost-effective medium ship, your main options for fitting are combatant, and carrier. It behaves as a middleweight should: it’s affordable enough to insert into lists without compromising their overall structure, but it’s an imposing threat on the battlefield. The
Acclamator I is the cheaper, short-ranged variant with a fantastic upgrade bar for carriers. The
Acclamator II improves on the gunnery a bit and adds a Defensive Retrofit slot for more resilience. The basic choice of which ship to use is fairly straightforward. If you want an affordable
battlecarrier, take an
Acclamator I. If you want a medium base combatant with some staying power, take an
Acclamator II. The extra durability of the
Acclamator II even makes it a candidate for medium flagship, if you’re so inclined. For titles, you have a support-oriented
Implacable that allows your ship to take hits on behalf of friendlies. This works better on a build that won’t be in the thick of the fighting and has a plan to
recover shields. Then, there’s the squadron-oriented
Nevoota Bee.
Nevoota Bee is mandatory on a carrier build. It’s discussed in depth later.
 Credit: Fantasy Flight Games
Most players can and should start with the
Acclamator I. The Republic fields elite squadrons similar to the Rebel Alliance, and they get extraordinary value out of each
Squadron command. The
Acclamator I’s upgrade bar was made for carrier work. Start with
Nevoota Bee because it defines the ship’s carrier capabilities.
Nevoota Bee only works on your generic squadrons, which you should have in abundance because Republic aces are expensive anyway. Whenever this ship activates a Squadron, it gives them
Swarm. Whenever the ship activates a Swarm squadron (including those from the earlier ability), the Swarm re-roll applies to attacks against ships. It’s dice control for
any generic Republic squadron.
ARC-170s and
Y-wings get improved fighter defence and something approximating
Bomber Command Centre for cheaper. You can even trigger Bomber Command Centre for an additional re-roll.
Deltas and
V-19 Torrents become a credible anti-ship threat. Deltas can still use their Adept re-roll and become even more brutal against squadrons. Note that the second line of
Nevoota Bee targets any squadron you activate with Swarm, which
includes aces. Only the
first half the ability stipulates non-unique squadrons. This title is fantastic. It gives every generic squadron in your faction (and a few aces) dice control when activating them.
Okay, that’s a lot of gushing about
Nevoota Bee. The rest of the ship still needs fittings. Two Offensive Retrofits on a carrier are magnificent.
Expanded Hangar Bay should be a priority because
Nevoota Bee’s ability improves with more activations and like the Rebels, your squadron activations are very valuable due to the high price per squadron. For a dedicated carrier, your second Offensive Retrofit could be
Boosted Comms,
Reserve Hangar Deck, and
Hyperspace Rings. On a
less durable ship, I’d consider Boosted Comms the default option. However, the
Acclamator is acclimatised (hah) to frontline combat and can survive frontline combat. You also have two specialised options in Reserve Hangar Deck and Hyperspace Rings. The former goes well with lots of V-19s, allowing one of them to cheap death – once. The latter is for admirals of culture who appreciate the
ARC-170, but lament its atrocious speed value. Hyperspace Rings let you forward-deploy a number of squadrons up to your Squadron value. It’s used on ARCs to mitigate their weak speed, or used to bring a small squadron screen way ahead of the main battleline. Since it’s based on Squadron value, it benefits beautifully from Expanded Hangar Bay’s bonus point in that stat. You could even get zesty with a
Flag Bridge and start getting
Fleet Commands involved. The double Offensive Retrofit on the
Acclamator I warrants as much discussion as most whole ships because it’s
so hot.
For your Weapon Team, the most common carrier upgrade is
Flight Controllers. This card keys into your large number of squadron activations, and also adds an extra die that can be re-rolled with
Nevoota Bee’s ability. Your Officer slot is more flexible. The
Flight Commander increases your squadron threat range if you don't take Boosted Comms. There is rarely a reason to take Flight Commander
and Boosted Comms. Any situation where two squadron command range upgrades are necessary should have been avoided with better piloting and deployment.
Obi-Wan fleets love
Expert Shield Tech for the damage mitigation. There’s also space for a cheap
Skilled First Officer, since battlecarriers are
reliant on switching between different command types as the situation develops.
By this point, you should consider cost reductions on a carrier loadout. You’ve got a title, an officer, two offensive retrofits and possibly a weapon team. Your
Acclamator is becoming a piñata. If you want to add more things, the remaining slots are Ordnance and Turbolasers. Turbolasers are easy:
Linked Turbolaser Towers. All of your arcs have red dice, and the Republic suffers at dice control. The Ordnance slot can be omitted or filled with
External Racks. External Racks are fantastic, but come with a caveat for carriers. They have a way of making inexperienced players feel like they
must fire them as soon as possible. This can encourage reckless driving, which is bad for a carrier. External Racks on a battlecarrier are not for delivering an opening hammer-blow, but to
support the eventuality of close combat. Fighters are still their primary weapon. External Racks also make the ship costlier; so unless your strategy plans for the battlecarrier to engage in fisticuffs, it’s best to leave them at home.
That’s an incredibly long segment describing the intricacies of fitting the
Acclamator I as a carrier, so I’ll sprinkle in some warship fun at the end. Try
External Racks.
DBY-827s.
Clone Gunners if your fleet is able to provide the necessary tokens, and
Skilled First Officer for that crucial dose of combat responsiveness. This is the build for people who see External Racks as an impulse, rather than support. The
Acclamator flies in at Speed 2 with a diverse stack of Command Dials (that
always has a Navigate somewhere). It punches things with External Racks. When it gets hit, it punches back with Salvo and DBYs. At some point, you’ll use the Skilled First Officer to reach forward in time for a new command. Maybe you need to bail out with the Navigate when you were planning on using Concentrate Fire. Flexibility and strength. Want to know something tragic? This entire ship build is only 5 points more expensive than a stock
Victory-I and somehow 7 points cheaper than a stock
Victory-II. This is how the
Acclamator makes
Victory captains weep. Cost effectiveness.
Okay, take a breather. There’s one more hull variant.
The
Acclamator II. The dedicated combatant of the two. The loss of all carrier-oriented Offensive Retrofits, addition of a Defensive Retrofit and extra blue die (for main battery consistency) makes the role clear: WAR! The Defensive Retrofit opens up great possibilities. You’ve got something
simple and consistent,
protection against small attacks, and a
nightmare card that deals with fewer, powerful attacks. Kindly consult the bottom of
this article for an explanation of Thermal Shields and the possibilities inherent to it. Do not contact me about using Thermal Shields. I know, I know. Back in the first
Armada article I ever wrote, I said that veteran players would love to show you how Thermal Shields work. That was a joke for the veterans. We actually hate explaining Thermal Shields.
For Turbolasers,
Linked Turbolaser Towers are your first consideration. They’re consistent and always useful. Other options like
Swivel Mount Batteries or
Spinal Armament go onto niche builds and are quite expensive. In general, Turbolaser upgrades are expensive and niche, or cheap and sub-par. Linked Turbolaser Towers is the gold standard because it strikes a balance between high cost and high value. Officers…
Clone Navigation Officer for a fleet support orientation, or
Skilled First Officer for increased responsiveness.
Expert Shield Tech goes great with
Obi-Wan as commander. I exclude
Adi Gallia because she performs best on ships with more shields, and the
Acclamator is only a middleweight.
Weapon Team selection for an
Acclamator II is dominated by
Clone Gunners and
Gunnery Teams. The former for more consistency in your firepower, and if you have the tokens to fuel it. The latter is for a
Spinal Armaments build designed to drill enemy fleets down. You could leave it blank if you don’t have the Concentrate Fire tokens to spare, or if neither fits your strategy. Keeps things cheap. In the spirit of keeping things cheap, the one-shot
External Racks make another appearance here. They add a lot of punch and if you can source accuracy from somewhere (like those Clone Gunners), you have a combo.
This is a lot of different cards, but the general advice applies to every Republic combatant: procure dice control, integrate token sharing and team play and select appropriate Defensive Retrofits and officers. That’s the key to a Republic general-purpose fit, and by the gods, the
Acclamator is an excellent generalist.
I have to stop myself here. I’d love to keep talking about the
Acclamator. It’s a magnificent ship in aesthetics and purpose. The whole platform was designed to be an excellent middleweight support ship. You can’t anchor fleets on an
Acclamator, but it’ll support your anchor with fire and fury. You can’t dominate the table with it, but it’ll provide unrivalled squadron support. You can’t flank with it, but it’ll pin an opponent down for the
flankers to work. Use it. Earn its love.
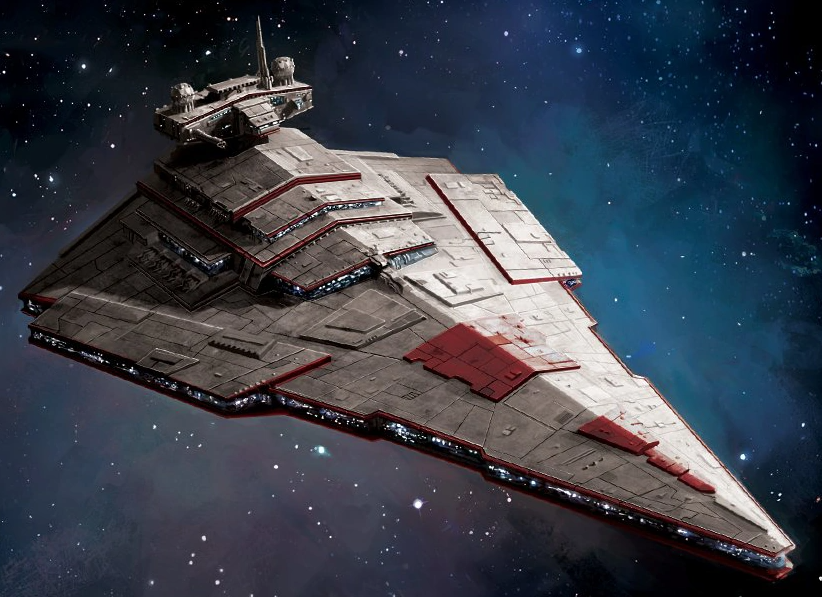
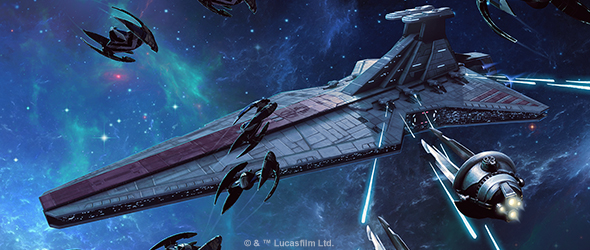
Venator-class Star Destroyer
This is my favourite ship in the Republic Navy, so forgive me for gushing. The Republic’s large offering arrives with robust characteristics, a
slew of cool titles, and a versatile upgrade bar. It’s an elegant weapon for a more civilised age, lacking the frailty of the
MC80 Liberty or the brutishness of the
Imperial-class Star Destroyer.
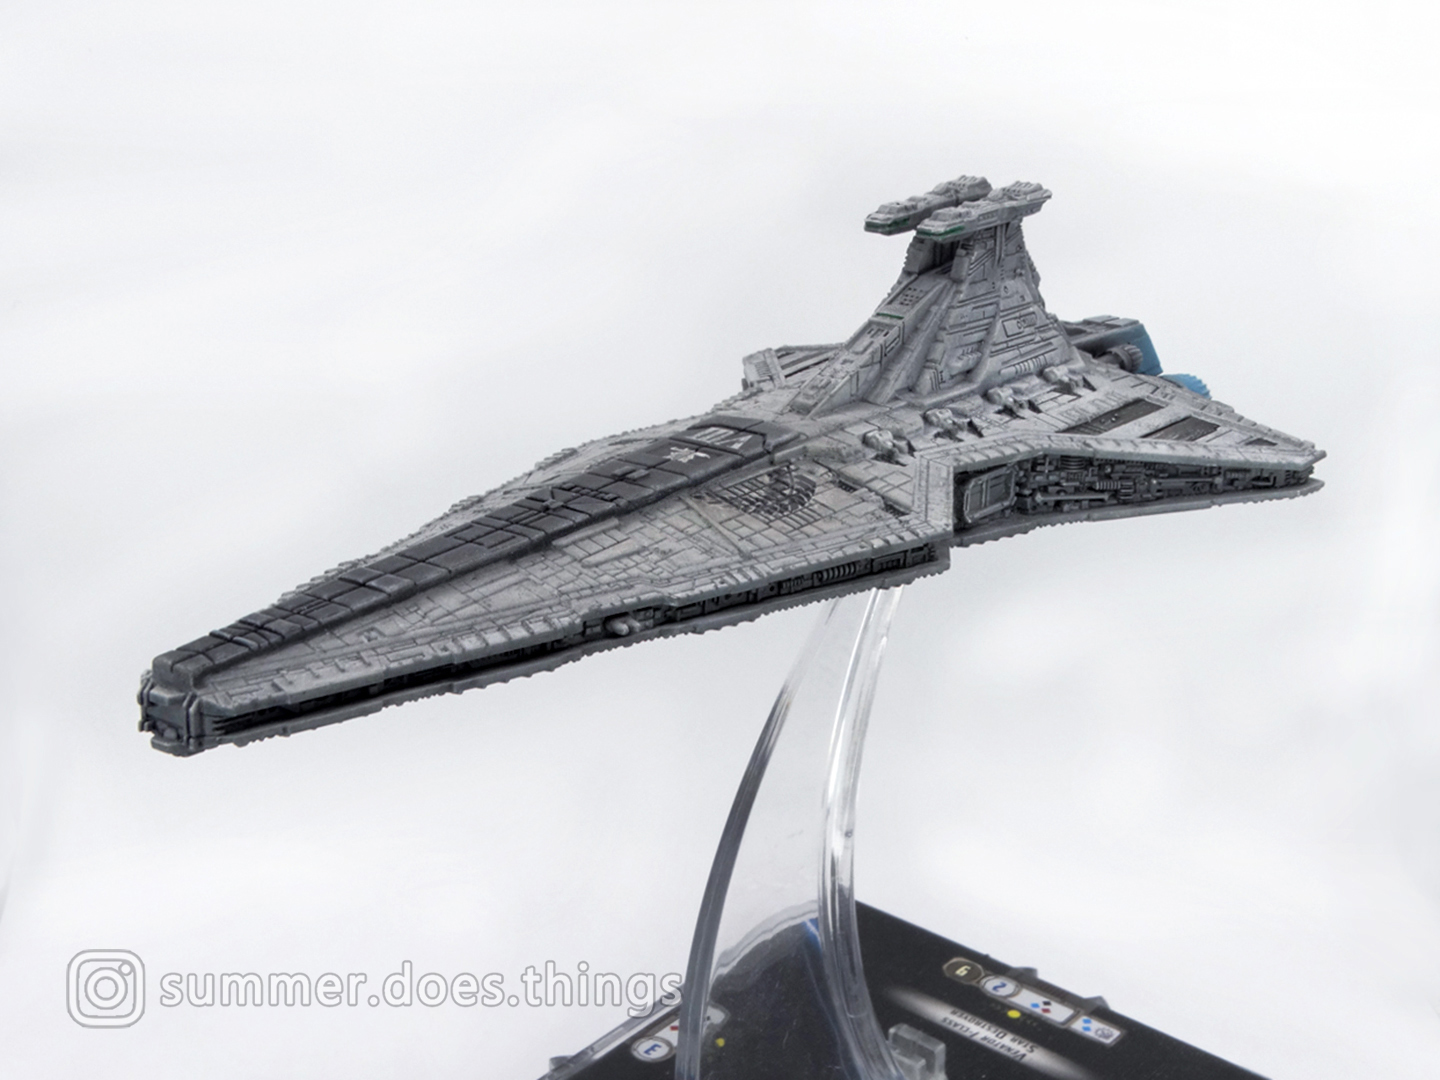
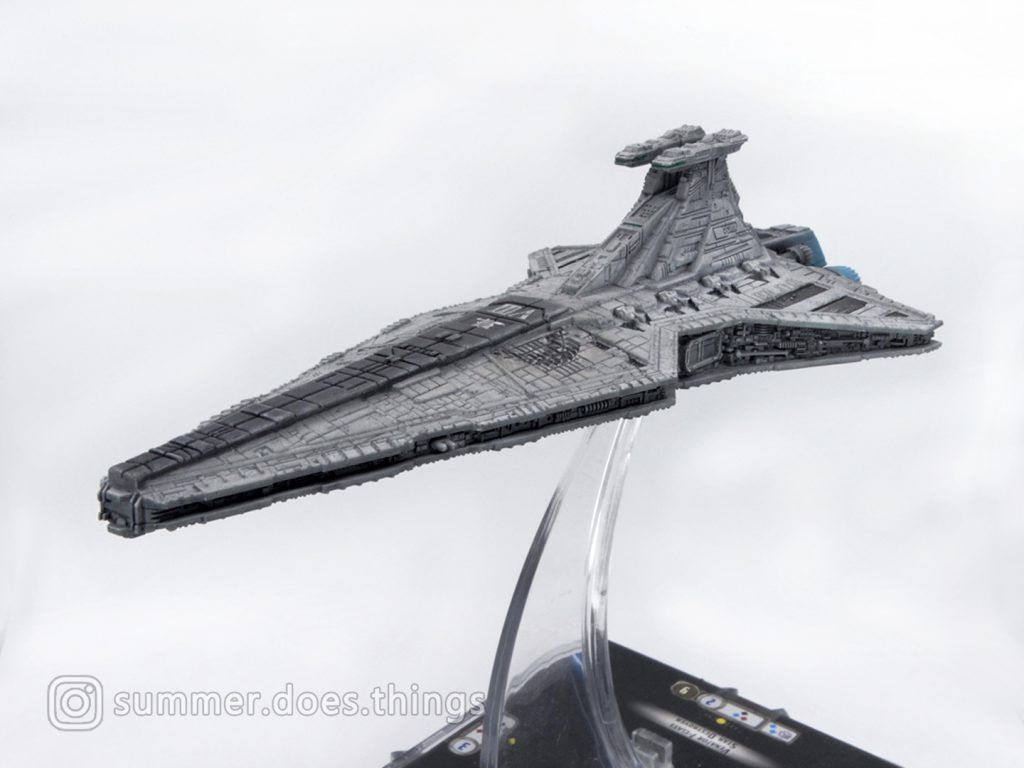 Credit: Summer
The ship’s base characteristics are middling-to-good. Great top speed with awful turning, well-balanced defences and decent firepower. That’s typical of the faction. The
Venator starts standing out with its Squadron values. The
Venator I has an on-par Squadron value of 3 and the
Venator II has a best-in-class value of 5. The
Venator II’s prodigious squadron command ability matches the Imperial Light Carrier and is only exceeded by the fantastically expensive
Star Dreadnoughts. With such great squadron offerings as the
Nevoota Bee and
Pelta, you shouldn’t feel compelled to make your
Venator the only carrier in the fleet. But you always have the option.
Fitting and flying a
Venator goes well-beyond the scope of this article, but I encourage the aspiring Republic admiral to see the
Venator I as a general-purpose warship and the
Venator II as a ship for people-with-a-plan. The
Venator I does the job of
combat well, and stands out for being the only Republic ship with a native
Fleet Command slot. It’s cheaper and that slot opens up a lot of options for your whole fleet. Note that in any other faction, a ship with the
Venator I’s stats would be considered a premier flagship carrier. It’s just that it has competition from the…
Venator II. I describe the
II as a ship for people-with-a-plan because its increased price tag needs to be justified. The
Venator II’s main shtick is that its firepower is longer ranged, but it trades the Fleet Command slot for a Defensive Retrofit. This reshapes the ship into something altogether more specialised and expensive, and you shouldn’t take a
II for jobs that the
I can do cheaper.
The
Venator I does most of the frontline fighting for the class, although the developers cleverly deprived it of a Defensive Retrofit so that it suffers for its successes. I’d go as far as to say the ship revolves around its Fleet Command slot.
Fleet Commands provide fleet-wide bonuses that allow all of your ships to coordinate as one or simultaneously shore up their weaknesses. The foremost candidates I’d consider here are
Intensify Firepower (which you’re sick of hearing about),
Mercy Mission,
Take Evasive Action, and
All Fighters, Follow Me. All of them have a different purpose, and can direct your entire fleet’s overarching strategy. Intensify Firepower is the safest choice – you’re always strapped for dice control, and you will always have ships that can benefit from it. A deviation from that command is usually justified elsewhere. Mercy Mission combines with the
Consulars I discussed earlier and can tilt the game in your favour, or be disastrous. That makes Mercy Mission the
super fun option. Take Evasive Action lives up to its name and goes best in a ship-heavy fleet (think
Kenobi) that uses the extra manoeuvrability to the max. All Fighters, Follow Me is a bit of a niche pick for your sluggish ARC-170 fleet or an aggressive squadron build. In any case, if you take a
Venator I, it should have a Fleet Command upgrade. This ship is the Republic’s sole source of reusable Fleet Commands, since the other candidates are single-use and obtained through a
Flag Bridge. In the world of Fleet Commands, a Flag Bridge is a boost, and a Fleet Command Slot is continuous buff.
Fitting the ship comes next. It’s easy to see a Salvo build for the
Venator I and that’s covered in detail in the
relevant article. Salvo
Venators play exceptionally well with
Tranquility and
Luminara Unduli. Artillery builds are also an option. Although
Venators are a more expensive way to put
SPHA-Ts onto the table, they’re a more flexible and robust way to do it. SPHA-Ts benefit this hull in a couple of ways. Namely that it provides a potent and long-ranged side arc to a ship that suffers from poor range and mediocre side batteries. This is also where I’d slot the manoeuvrability-enhancing Take Evasive Action command so that you can get your arcs on target more consistently. That still leaves plenty of fitting space.
Hondo Ohnaka or
Resolute provide token support (you’ll need it). I’ve even seen lists involving two SPHA-T
Venators using
Clone Navigation Officer to generate Concentrate Fire tokens to fuel each other’s SPHA-Ts. Even with SPHA-Ts, you still have the space for
DBY-827s and
Local Fire Control to make most of a
Luminara-style Salvo build. That’s a rather controversial build, and I personally believe that SPHA-T ships get value by staying out of close-combat. To that end, I’d like to recommend
Ordnance Pods because large ships tend to get mobbed by squadrons. Keeping things cheap and supportive.
 Credit: Fantasy Flight Games
The
Venator II’s crowning glory is its best in size-class Squadron value of 5. That’s a sizable portion of the cost increase over the
Venator I and you should be using it. Besides the carrier potential, the
Venator II is also the more selfish variant. Swapping a Fleet Command slot for the vaunted Defensive Retrofit greatly increases local survivability, but leaves your fleet out to dry. Buyer beware.
When I look at a
Venator II, the first thing I smell is a
battlecarrier par excellence. That means
Boosted Comms to give you reach across the battlespace and
Flight Controllers which cooperate beautifully with your insane Squadron value. Why Boosted Comms over
Flight Commander as your range upgrade? Firstly, Boosted Comms’ effect is measured from the ship’s base and the large base of a
Venator gives it extra impact. You get more boost from your Boost. Secondly, Battlecarriers bear the burden of reaching for many different Commands, so I recommend the flexibility of a
Skilled First Officer in the officer’s chair. Then, there's the
battle part of battlecarrier. You paid for the Defensive Retrofit, so use it.
Thermal Shields to tank big hits,
Early Warning System if you expect swarms, and
Reinforced Blast Doors for simple-and-good.
Linked Turbolaser Towers are consistent and round out your firepower. I tend to omit the Ordnance slot to keep things cheap. Now you have an anchor ship for your squadrons, or a colossal piñata. Enjoy it.
Being a battlecarrier isn’t the
Venator II’s only role, but it’s the one thing it does vastly better than its cheaper sibling. You can still do a SPHA-T build on it, and the longer-ranged batteries on the
II allow you to put more dice on target while maintaining a standoff distance. You can assemble a
Salvo build, and benefit from the secondary power of cracking the opponent over the head with five squadrons. I just felt compelled to place a spotlight on the carrier capability of this fine vessel.
Considerations for Republic Players – “Good old Oddball. Always on target!”
Own the skies
You may have noticed that the Galactic Republic has a disproportionate number of ships that can support squadrons.
The Pelta-class Medical Frigate,
Acclamator I and
Venator are all masterful squadron support ships in their own ways. The Republic also benefits from elite squadrons that benefit from well-placed
Squadron Commands, and each command goes far due to the high cost of their fighters. It’s telling that a
solid half of the
Republic Commander list strongly benefits Squadrons. I won’t go as far as to say this faction is defined by naval aviation, but it certainly gives players every asset they need to develop fighter superiority.
Listen, I’m a gunboat player – I love it when big warships clobber each other. In fact, I constantly lament the primacy of naval aviation in the real world because it deprived me of nuclear battleships and decisive naval gunfire. Still, I will die demanding that Republic players use their squadrons. Limiting yourself to gunboat play in this faction will limit you to
Obi-Wan and
Luminara Unduli, and you’ll be missing out on
keystones that compensate for the faction's weakness in gunnery. Strangely, I’ve found this faction to be a great entry point for Squadron gameplay. Its squadron roster is much smaller than the Empire or Rebel Alliance, which simplifies fleet-building. Unlike the Separatists, Republic squadrons also don’t have the challenging
AI keyword. Many of your carriers are also potent warships – battlecarriers, if you will. This leaves a lovely transition area from gunboat gameplay to carrier gameplay. It allows new players to experiment with a small, focused roster of squadrons and support them with carriers that are not
devastatingly specialised. The Galactic Republic holds the tools to own the skies, and it’s up to good commanders to wield them.
Notable Upgrades
Clone Captain Silver
Silver has exactly one trick, and it’s quite extraordinary. He lets a ship alter its current speed by
up to three as long as the ship doesn’t resolve a
Navigate command this round. Speed changes for ships typically happen in increments of one, requiring Navigate commands or
special abilities. Silver’s main uses are sudden deceleration to avoid danger or sudden acceleration to speed up the break-contact-and-survive phase of the game in Round 5. The fact that he only activates on a non-Navigate token is a potential strength, because it frees up your command for something else, like repairing your ship or pushing squadrons. He also looks great on a
Mercy Mission Consular where he turns the ship into a game-winning sprinter. His card comes with a free reload for his ability, which is great. Two uses per game is the maximum you should need.
Hyperspace Rings
A card the Rebel Alliance can only daydream about. Hyperspace Rings give
non-Rogue squadrons the
Scout keyword, which lets them forward deploy. Non-Rogues account for the majority of your fighters, and you can affect up to the ship’s Squadron value in squadrons. Hyperspace Rings work optimally on ships with high Squadron values –
Venator IIs and
Expanded Hangar Bay Acclamator Is come to mind. This card was made for
ARC-170s, which are durable, hard-hitting and shit-slow. However, you should be thoughtful. Have a plan to use your squadron's newfound threat range. You’re not pushing a blob of
Delta-7s ahead and hanging them out to dry. Whatever you deploy ahead needs to be safe, self-sufficient, or well-supported.
SPHA-T
SPHA-Ts give the Republic access to the complicated and powerful
Ignition attack. The Ignition gimmick allows a ship to make powerful and very long-ranged attacks using non-standard arcs, at the cost of considerable setup. SPHA-Ts bring a long-ranged and blue-dice heavy (read: consistent) Ignition attack that is an appropriate foil to the
Onager’s heavier, less controllable devastation.
DBY-827 Heavy Turbolasers
DBY-827s are a cornerstone of
Salvo-built ships. This card singlehandedly elevates Salvo tokens from useful to a force of nature, and a ship’s ability to build for Salvo is frequently judged by whether it can mount DBY-827s and
Flak Guns in tandem. It’s a simple card with a simple effect: an optional dice modification to any face with a Critical icon, including the lethal Hit + Crit of
black dice. Its pairing with Flak Guns extends that guaranteed Hit + Crit black die out to medium range, which is a frankly awful thing to face.
Nevoota Bee
Just scroll back up to the
Acclamator portion of this article for the extended explanation of why
Nevoota Bee is notable. And remember to pay respects to the trail of shattered enemies left in its wake.
Conclusion – “We're keepers of the peace, not soldiers.”
That’s the Repbulic’s ships and the most basic guidelines on fitting and usage I can think of for each hull. There are still options beyond what I’ve listed, from commander-specific builds to strange and wonderful fleet strategies like
Projection Expert spam. Honestly, I started this article just to write about my precious
Venator and that’s a life well-lived.
See you in the next article. Summer out.
Have any questions or feedback? Drop us a note in the comments below or email us at contact@goonhammer.com.Thank you for being a friend.

 Credit: Summer

 Infinity N5 First Principles: Understanding the Outcomes of Face to Face Rolls
 Tactical Feedback: Timing the Go-Turn
 SRM's Roundabout to Adepticon 2026: Curd Is the Word