Once upon a time, the Galactic Republic was brought low by forces from beyond, and within. This spawned a chain of events that would somehow culminate in
The Rise of Skywalker. I'm still trying to figure out the progression, but this is the first article in a two-parter summarising the potent and noble warships of a more civilised age.
How Liberty Dies – “I will create a grand army of the Republic to counter the increasing threats of the Separatists.”
Today, we’re here
for the Republic! So let’s say you’re a
privileged noble or a
ranking Jedi living the prelude to darker times. Evil is everywhere. The Separatist droid armies are on a rampage. What do you have to stop them?
Kuat steel. Clone blood. Jedi leadership.
The Republic Navy is steady and versatile. Their fleet plays like a more elegant Empire. A Galactic Empire writ noble
– fitting, considering where they’d eventually end up. Their warship sub-variants tend to follow a simple trend: a close-combat type with highly unpredictable firepower, and a medium-ranged type with more flexibility and less damage output. A true jack-of-all-trades faction, the Republic neither shines at
extreme ranges, nor will it be comfortable
screaming into combat at speed. Your roster is rounded out by
elite squadrons, some
gimmicks, and excellent access to
Fleet Support upgrades. In fact, the Republic is the only faction that has Fleet Support slots on more than one ship, and it's the second faction to get the powerful
Ignition attack. A clear delineation between close and medium-ranged combat, strong squadron complements, and a need for support… it’s starting to smell like a fleet.
A conversation about coordination and dice control should start early with this faction. The faction has no
Ion Cannon upgrade slots, which contain many of your dice control options. Your
shorter-ranged (and cheaper)
hulls have terribly unpredictable main battery dice. Failure to manage this shortcoming will lead to underperformance. On the upside, you have
solid options to manage this while squeezing your fleet for every benefit possible. My experience playing the Republic is exactly that – they’re a nickel-and-dime faction. You’re using their network of upgrades and teamwork to squeeze countless little buffs out of each ship that add up to something bigger. You have to take on the mindset of an
avenging bean-counter to enjoy this faction.
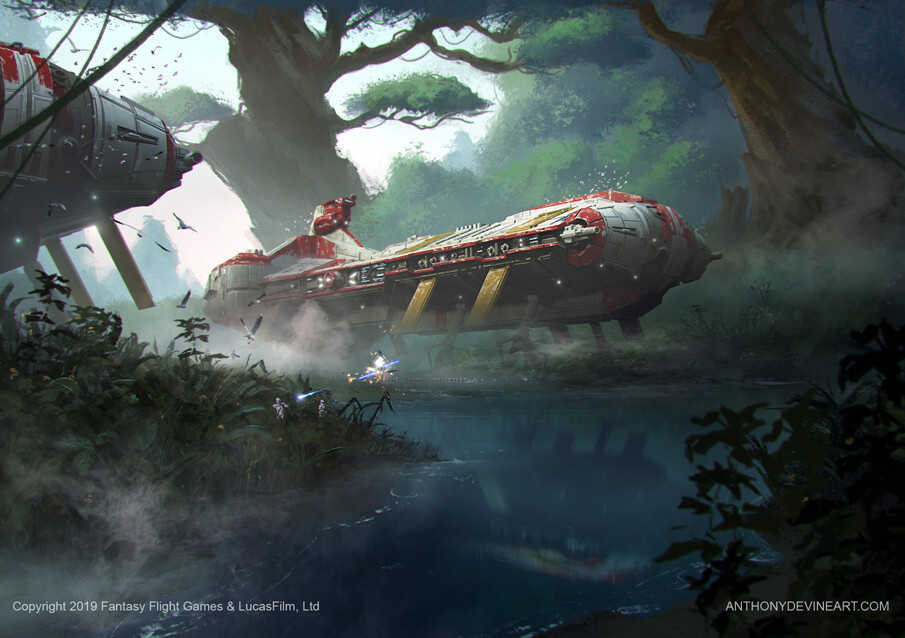 Credit: Anthony Devine via Fantasy Flight Games
The Ships – “That's the Grand Army for you. See the galaxy, meet fascinating new species, and snack on them.”
Consular-class Cruiser
This is the Republic’s do-everything small ship. Both of the base variants get plenty of use, and you’ve got a sneaky third option in the
Radiant VII. It might seem overwhelming at first, but that’s the nature of Clone Wars factions – tiny rosters, big dreams. People can point at
Hammerheads or
Gladiators and identify a single main role, but not here. Here’s the rundown: the
Armed Cruiser is a diplomatic transport and… torpedo ship. Aggressive negotiations and all that. It’s a strange conceptualisation of diplomacy, but stick with me. Then, the
Charger C70 is a… long-ranged fire support ship. The naming is terrible, but the rationale is there – Armada’s design philosophy assumes that a ship with longer range is more combat-focused and almost always gives it a more expensive price tag. This can conflict with lore a bit. Lastly, the
Radiant VII is a conversion that turns your
Consular into a fleet support boat with a bit of firepower.
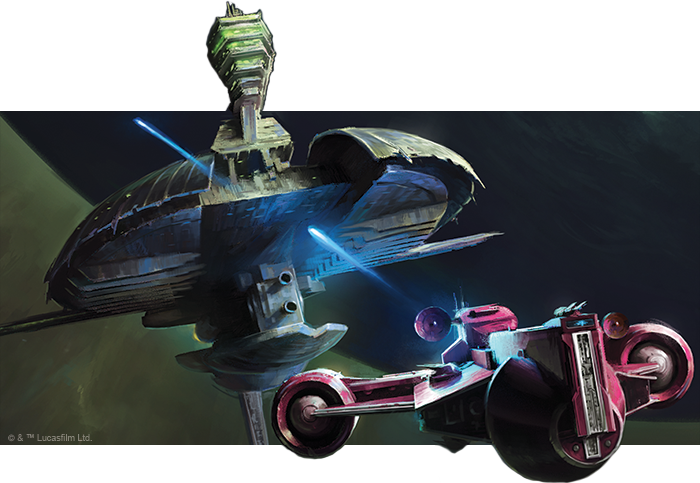 Credit: Fantasy Flight Games
The Cruiser variant is normally fitted and flown akin to a
Hammerhead. It’s dirt cheap, speedy and has an Ordnance slot. That makes it a dead ringer candidate for
External Racks. The rest of the upgrade bar leans it away from the
Hammerhead’s love for offence and toward survivability. You get a nifty Defensive Retrofit and if you’re feeling lucky, there's even space for
Engine Techs. All of this
greatly detracts from the cheap base hull. To me, the Armed Cruiser drives like a Republic
Hammerhead until you load it down with upgrades. Just compare the
Armed Cruiser and
Hammerhead Torpedo Frigate cards. The Republic contender costs a single point more. It gets an entire extra speed bracket, a usable side arc, an actual rear arc, and more flak dice. It trades off one HP and gains two points of shielding. Sure, it won’t turn as well, but it turns well
enough. The Armed Cruiser's fantastic hull loses its shine when it’s bogged down with upgrades. Put External Racks onto your Cruiser. Fly it. Add only what's necessary. Most of the Defensive Retrofits don’t work well on a small ship, because they tend to get value out of repeated use and small ships aren’t survivable. A
Clone Navigation Officer fits well, but adds over 10% to the ship’s price tag. I never go beyond a cheap officer and External Racks with this boat.
The Charger C70 is best-compared to other skirmishers. Like the
Arquitens or
CR90. The replacement of a couple dice and the addition of a Turbolaser slot (and Offensive Retrofit) makes a completely different ship. The ship’s main battery dice are mostly red, which means it’s begging for dice control. Onboard dice control comes from
Linked Turbolaser Towers, but some people fly with
Turbolaser Reroute Circuits. The former is a safer and more spammable option. The latter eats one of your precious defence tokens to guarantee maximum damage out of a red die. Republic fleets should fly with external sources of dice control like
Intensify Firepower and
Clone Navigation Officers, so you might not need such drastic measures. Clone Navigation Officers may not be as reliable as on other ships, due to the propensity of Chargers to fight at the fringes of a battle.
The rest of a Charger usually has
Swift Return and
Clone Captain Zak, who is literally part of its canon.
Swift Return is similar to the wildly broken
Jaina’s Light. They’re both titles that go onto fast skirmishing builds that turn obstacles into an asset.
Jaina’s Light takes less finesse to use; it actually kind of rewards charging headlong into asteroid fields.
Swift Return gives you most of a
Navigate dial as long as you’re near an obstacle, which is pretty impressive. Next is Zak, the officer made for
Consulars. His ability fishes out bonus firepower for your sides and rear. Since his ability is so arc-dependent, he gets preferential seating on a…
nimble ship with access to
enhanced manoeuvrability. There. That’s the lecture. The basic Charger build has long been
Swift Return + Zak + dice control. With that combo, you can easily get a two-arc attack from your front and side on a target. In that situation, using Zak’s ability and a
Concentrate Fire dial pushes your total dice thrown to seven. That’s
more dice than your
capital ship. That’s the default Charger build and the rationale behind it. Your first Charger will almost always be
Swift Return + Zak + Linked Turbolaser Towers. Give those filthy Imperials and their light cruiser reason to cry.
Radiant VII is a title, but it converts the
Consular into its third option. It strips out the crucial weapon upgrade slot that both combat variants rely on and gives you a
Fleet Support upgrade slot. What is that good for? Lots. Compared to the Separatist’s lonely
Fleet Support ship, it’s a substantially cheaper way to get utility onto the table. Compared to the
Republic competitor, it’s faster and cheaper while retaining similar firepower. Compared to
Rebel and
Imperial flotillas that fulfil the same role in those factions,
Radiant VII gives the Republic a much toothier support option. This is the safe and low-investment way of getting fleet support into a Republic fleet without devoting
something more specialised to the role.
What are your options? I consider
Bomber Command Centre,
Munitions Resupply and
Parts Resupply the default options. If you’re running a bomber-heavy fleet,
Radiant VII is the cheapest way to get a vital Bomber Command Centre in. Bomber fleets are tight on points due to a high investment into squadrons and carriers, so you might not have the points to add a
Pelta just for that upgrade. A
Pelta as a support carrier with the upgrade maybe, but always solely for the upgrade. Munitions Resupply and Parts Resupply are in the same boat (heh): they spit out an incredible number of tokens to friendly ships. As always and forever, the Republic is in grave need of dice control and Munitions Resupply offers a solution. Parts Resupply works well in a fleet of larger ships that are spinning many plates and need repairs. In the spirit of keeping things cheap, I prefer putting
Radiant VII onto the cruiser hull to get a 38 point fleet support ship that has workable firepower and awesome mobility. That’s a great deal. There’s also a counter-argument for using a Charger so that you can hang back with your fleet support upgrades while contributing fire support. Either way, the title is fantastic and it’s my favourite way to insert Munitions Resupply into a fleet that needs it.
There’s one last mention for the
Consular and that’s
Mercy Mission, the Republic’s unique fleet command. It’s the first card of its kind - a bonus scoring objective you can build into your fleet. During fleet-building, it goes into a Fleet Command slot, either a
native one or one created by
Flag Bridge. Installing it on a
Venator ensures that your commander is flying the largest ship in your fleet, but cuts off the precious
Intensify Firepower that a
Venator I desperately wants. That leaves a Flag Bridge on an
Acclamator I or a
Victory I. For reasons that’ll become clear later, Flag Bridge is a
really inadvisable pick for the Republic
Victory I. Despite Mercy Mission and Flag Bridge both being ‘free’ upgrades, they bear the sizable opportunity cost of occupying key slots and locking down your flagship choice. Once you reach the table, Mercy Mission gets transferred to a small ship and awards victory points if that ship ends the game in the enemy deployment zone. It’s a blockade running bonus objective. Basically. A
Swift Return Charger C70 is ideal for carrying out the Mercy Mission because it's incredibly fast and plays a safer, skirmishing game than the Armed Cruiser. Mercy Mission is unique in allowing you to build a bonus objective into your fleet, but you’re gambling on the survival of your brave little ship to make it count.
That’s a lot to say about a single ship. In fact, that segment was about three times the length of a standard Dockyard segment about a given ship, because it's essentially several ships rolled into one hull. When I unboxed my
Consular, I thought it was just a chaff lightweight ship that backs up my
proper warships. Flying it has shown me the peerless joy of the Republic small combatant.
Pelta-class Frigate
So you want to go hard on fleet support. Power creep means that compared to the earlier
Rebel Pelta, the Republic gets a much more cost-effective support ship. It sacrifices a single battery die and a Fleet Command slot. As a guideline, the
Medical Frigate can be considered a light carrier and the
Transport Frigate is more of a support-stabbing option. The Medical Frigate has most the qualities necessary to make a good carrier at its size: decent Squadron value and great upgrade slots for bomber command (Support Team, Offensive Retrofit, Fleet Support). Conversely, the Transport Frigate is cheaper and a Defensive Retrofit opens up interesting capabilities. The hull is backed by two safe titles.
TB-73 suits a support build that wants to stay evasive and alive.
FB-88 amounts to a reusable
Skilled First Officer, giving you incredible responsiveness in Command choices and immunity to
Slicer Tools. Neither title is mandatory, but they’re both nice to have. What the
Pelta can’t be is a proper combatant. That’s the
Consular’s job. The Republic
Pelta’s awful mobility and lack of weapon upgrades (Turbolaser/Ordnance) kill off any hope of using it as a warship.
What you get for your points is a fantastic support ship. The
Medical Frigate has the fixings to be a solid backup carrier. The stand-out choice here is
Bomber Command Centre and
Expanded Hangar Bays, which bumps you to Squadron 3 and fills a role the Republic otherwise lacks: bomber support. The key is the
Squadron command. Like the Rebel Alliance, the Republic has powerful and expensive squadrons. Republic squadron activations are more powerful than their cheaper competition, so a push of three
Y-Wings or
ARC-170s can be ruinously powerful. Especially with those Bomber Command Centre rerolls. Dish your carrier up with
Flight Commander and
Fighter Coordination Team to taste. You lack the squadron command range of a
Boosted Comms carrier, so Flight Commander can make up for that deficit. Otherwise, you could use Boosted Comms over Expanded Hangar Bay, but sacrifice some of your squadron command ability. A Fighter Coordination Team in the Support Teams slot is especially useful for ARC-170s. ARCs have awful speed, so let the Medical Frigate give them a speed
and firepower boost.
Now, you
could also fit the Medical Frigate as a fighter carrier, but I advise against it. It’s a good groundwork for a carrier, but the Republic is replete with standout options.
Nevoota Bee glued to an
Acclamator I is the gold standard of fighter carriers. Sure, it costs a lot more, but it’s also a warship and
Nevoota Bee’s unique ability is outstanding. It’s difficult for me to recommend a
Pelta for commanding a fighter strike when the
Nevoota Bee gives so much more value in the role. I believe that the
Pelta-class Medical Frigate’s greatest strength is its ability to provide the Bomber Command Centre platform and second line carrier support.
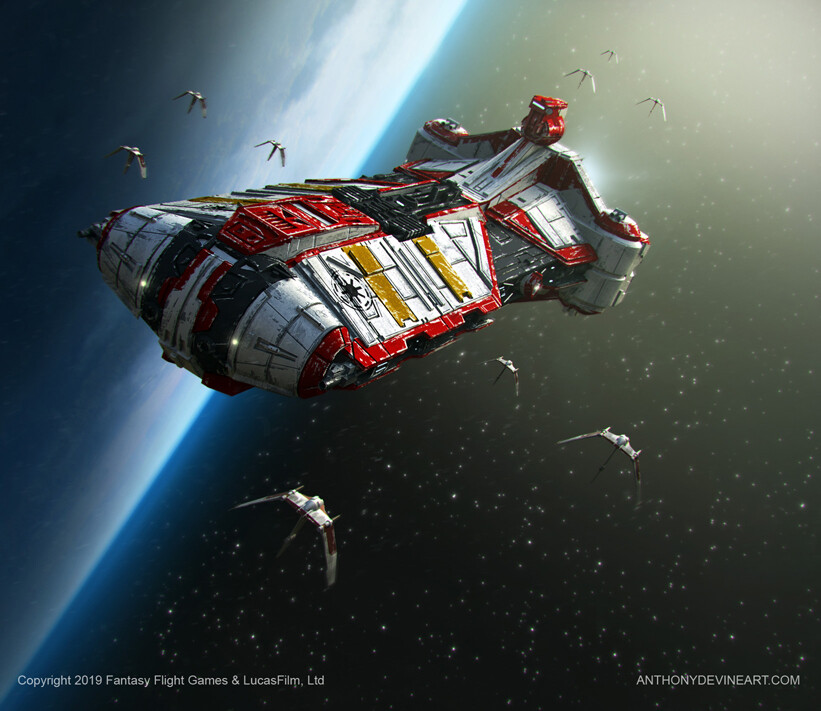 Credit: Anthony Devine via Fantasy Flight Games
That leaves us with the
Pelta-class Transport Frigate. It’s the cheaper, shorter-ranged option. That hardly means it should attack enemy ships like a
Rebel Pelta-class Assault Ship. The Rebel version is substantially better for combat with its ordnance slot and extra battery die. Even so, you don’t exactly see players scrambling to make it the lead torpedo boat. The Republic
Pelta’s weaponry is strictly a nice-to-have for anti-squadron work, finishing wounded enemies and personal defence.
Fitting-wise, your focus area is the Fleet Support slot. With the terrible Squadron value, carrier work is out-of-the-question. Instead, treat this ship as a way to get Fleet Support upgrades onto the field:
Munitions Resupply,
Parts Resupply and
Comms Net are first picks. The two Resupply upgrades serve the same purpose: keeping a very token-hungry fleet stocked with tokens without diverting valuable Commands. Munitions Resupply is normally used to refresh
Intensify Firepower or re-activate the
SPHA-T. If there’s a
Consular with
Zak nearby, you could even pass a token to reload him. Parts Resupply is similar, albeit with a narrower focus. For one, it’s a source of engineering tokens that can repair a needy
Acclamator or
Venator. It supports
Admiral Yularen by adding more engineering points to his squadron repair ability. You’ll mostly use it to support the basic
Repair command and that’s okay. Survival is victory by another means. Lastly,
Comms Net gets extra usefulness on this platform because the
Pelta is the only Command 2 ship with a Fleet Support slot. Unlike Command 1 ships which often sacrifice the token they just generated, Command 2 ships can store a second command token from earlier and retain some utility for themselves. Alternatively, you can store a second command token and have the option to pass either to a friendly ship that needs it, depending on circumstances. Due to all of the command token shenanigans offered by Medical Frigate builds, I highly recommend
Hondo Ohnaka. Use him to pre-stock on valuable tokens and throw spares at the enemy ship worst-suited to it. Give the enemy
Raider a Squadron token or something.
For the Support Teams slot, the most viable option I see is just
Projection Experts. You’re doing fleet support already, might as well do it even better. Being a second-line, low-threat ship means you’re less likely to be shot. So pass your shields to someone who is in danger. I know some people are tempted to put
Engine Techs onto every ship with space, but the
Pelta isn’t made for it. Engine Techs is for ships that have a plan. The
Pelta actually quite enjoys lagging behind and keeping a low profile. Let’s say you spend all those points and a Navigate on Engine Techs to go fast. What’s your plan when you get to the destination? Hang back. Be a bro.
In all, the
Pelta isn’t a ship that slots neatly into most Republic fleets. It’s not an ultra-niche ship, but the inclusion of a
Pelta in your fleet must be thoughtful and intentional. It’s specialised. There are some things it can do that nothing else in your roster can, but it has a lot of shortcomings that keep it from working the frontline. Think before you deploy it, but deploy it in confidence.
Considerations for Republic Players – “Your clones are very impressive, you must be very proud.”
Balance and coordination
The Republic is an oddly beautiful faction. Like the representative democracy it defends, the faction strives for balance and co-operation… often to a fault. The Republic fleet is an interlocking series of moving parts. It’s not as intuitive as the Galactic Empire or Rebel Alliance. Fleet-building for the Republic is a complex process that requires a strong emphasis on balancing your numerous moving parts and making them complement each other.
The Republic is also a resource-intensive faction. Their lack of Ion Cannon slots removes a swathe of dice control options. This makes dice control a necessity on their warships. Their squadrons are powerful, but need carrier support. Their
special upgrades devour Command Tokens. It's not accidental that I place a premium on dice control, token support and carriers. Republic fleets live by the ability to
supply and coordinate a logistically-intensive war machine. Done correctly, you’re rewarded with a sturdy, cohesive unit that has no obvious shortcomings and tremendous stability. If you miss out on one of those key areas and your opponent exploits this, your strategy will tumble out of control very quickly. More than any other faction, the Galactic Republic requires thoughtfulness.
 Credit: Anthony Devine via Fantasy Flight Games
Notable Upgrades
Clone Captain Zak
Zak is a staple aboard the
Consular, owing to his straightforward ability to add a die to your side arc attacks. This pairs well with the
Consular’s love for flanking. He starts readied and can be reloaded once, giving him two shots before he needs further reloading. Zak’s ability amounts to an extra
Concentrate Fire dial, and stacks with that dial, allowing your smaller ships to stack up star destroyer-levels of damage.
Expert Shield Tech
This gets priority seating in fleets led by
Obi-Wan Kenobi. Should you use it that way, Expert Shield Tech’s stacks with Kenobi and allows
Redirects to evaporate two points of damage. A ship built this way with a readied Redirect (Obi-Wan only works on readied tokens) can simply ignore two-damage hits. If you suffer four damage and spend a
Brace plus the aforementioned combo, all of that damage evaporates. Pretty incredible on a
Pelta or
Acclamator; removing whole chunks of damage until your defence tokens burn out.
Linked Turbolaser Towers
Linked Turbolaser Towers have become a de-facto standard for red dice control. They’re practically stapled to
Consulars due to their simple first effect. A free re-roll on a fickle die on everything from anti-squadron to Salvo attacks. You’ll frequently see them slotted wherever the player needs a standalone source of dice control and can't think of anything better. It’s an incredibly reliable and consistent card.
Munitions Resupply
The Republic treats the consumption of
Concentrate Fire tokens like a national pastime.
Clone Gunners,
SPHA-Ts,
Intensify Firepower and even
Zak all need Concentrate Fire tokens to function. If you’re lucky, you might even have one left over to use on its intended purpose of dice control. The quickest way to dump a large supply of Concentrate Fire tokens onto your ships is Munitions Resupply, and your only options for fitting it are small ships: a
Radiant VII Consular or the
Pelta-class Medical Frigate. The card has some drawbacks - namely that it exhausts to use and requires another command to re-activate. You’ll seldom have enough ships in range and need to discharge the entire supply at once, so be prepared to reload it.
Mercy Mission
Mercy Mission is the oddball unique Fleet Command upgrade for the Republic. Like the Separatist
Jedi Hostage, it’s a breakaway piece of game design that uses the Fleet Command slot in an interesting way. Mercy Mission is the only way to generate victory points outside of
Objectives and provides a risky way of tilting the game in your favour. Install it in a relevant Fleet Command slot on a larger ship and pass it to your hardiest
Consular captain for a mad dash to victory.
Conclusion – "Nothing like a little precision teamwork, Deltas.”
That about covers the small ships of the Republic Navy in reasonable depth. It’s a lot to absorb and I’m proud if you made it all the way down here. I’ll go bigger for the companion article, and we can call this dockyard entry done.
Have any questions or feedback? Drop us a note in the comments below or email us at contact@goonhammer.com.Thank you for being a friend.


 Infinity N5 First Principles: Understanding the Outcomes of Face to Face Rolls
 Tactical Feedback: Timing the Go-Turn
 SRM's Roundabout to Adepticon 2026: Curd Is the Word