Welcome back to the Dockyard, where we discuss the many ships of Star Wars: Armada. Today, the small ships of the Galactic Empire. Strap in. There are some pretty intense offerings here.
A Knife in the Dark – “I still remember my last orders. The day the real war began.”
The Galactic Empire’s small ship selection is potent and role-focused. You’re looking at three hulls and six variants that fulfil every light duty in a fleet. Despite having fewer choices than the Rebel small ship range, there are a variety of strong vessels that fly equally well in support of larger ships or in spam lists. Discussing these little friends is pretty joyful for me, since they’re so characterful.
 Credit: Fantasy Flight Games
Across the board, Imperial small ships have comparable hull HP values to the Rebels, but break away from expectations by generally featuring stronger total shield values. They get a good eight total shield points across the board and are only exceeded by the absurd eleven shields on the MC30c. They also get Brace tokens on ships
meant for frontline use, in contrast to the
Nebulon-B and
Pelta – the former which snaps like a twig (See:
Rogue One) despite a double Brace and the latter that often flies as a support ship. Having a usable
Brace is incredibly powerful, because if you reduce two points of damage against a
Raider, you've preserved half of its HP. The Empire loses out in manoeuvrability, especially at top speed. This design philosophy matches the usual pattern where the Empire is generally less mobile and slightly more durable.
Damage output is a little bit biased to close range, high damage black dice. Every Imperial small hull can access black dice in one or more variants, and the
Raider and
Gladiator both perform best in knife-fights. The lack of Accuracy results on black dice places increased value on dice control, and reduces their flexibility compared to Rebels. While the
Raider and
Gladiator favour close-in engagements, the
Arquitens benefits from a long-ranged main battery in both variants and gives the roster some much-needed versatility.
When outfitting Imperial small ships for basic combat, your first consideration is how you plan on managing their unpredictable dice. The roster is biased toward red and black dice, both of which can miss at crucial moments. Small ships also lack the insurance provided by a massive dice pool – a miss in a pool of three dice hurts a lot more than missing once in a pool of seven. This problem is exacerbated by the fact that small ships typically spend less time in combat – sitting in range of an enemy’s main arc is a guaranteed way to lose your ship, so hit-and-run attacks are the norm. You won’t get rounds of combat out of a
Raider and the shots you do get don't always go into the same arc. Your shots must count. Aside from addressing your dice, the Officer slot remains important. Good officer selection can make or break an Imperial ship. Thankfully, officers can solve the dice problem via judicious use of
Darth Vader’s gloved fist.
A summary of Imperial small ships looks like this:
- A good array of hulls with interesting combat specialisations
- Good durability due to high native shield values and well-positioned Brace tokens
- Good speed, but sub-par manoeuvrability at high speeds
- Dependent on dice mitigation
The Ships – “You are unwise to lower your defences!”
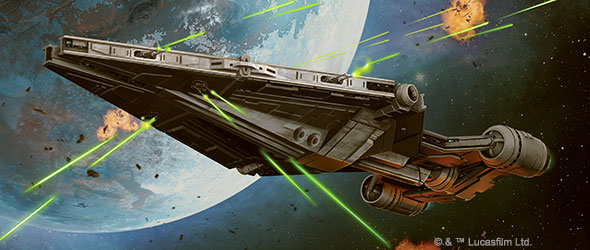
Raider-class Corvette
Hit-and-run. The
Raider is the lightest and fastest option Imperial players have. No long-ranged red dice; you need to get close. Uncomfortably close, if you want to make an impact with its strong front battery. The
Raider’s main purpose is to deliver a devastating round of shooting, then escape and harass. That key round of shooting typically involves
External Racks and a
Concentrate Fire dial. A
Raider’s front arc plus those two bonuses skyrockets it to seven dice for that attack. For reference, that’s
Star Destroyer territory at less than half the cost.
Raiders are a delivery platform for one round of large ship firepower on a nimble ship. Thereafter, your goal is to survive and continue harassing the target from its vulnerable rear, or dart off to hunt small targets and squadrons.
 Credit: Fantasy Flight Games
Kitting out a
Raider typically involves taking the cheaper
Raider-I and slapping
External Racks on. If
Iden Versio is not on a
Gladiator elsewhere in the fleet, she’s probably here.
Admiral Montferrat is also a good choice, with both officers benefitting small, nimble ships.
Ordnance Experts are typically not recommended for once-off attacks, but the
Raider’s massive opening barrage sometimes warrants the use of this upgrade - especially if you can confidently attack again later in the game. Otherwise, have
Darth Vader (Officer) choke out a one-use officer to improve the gun crew’s performance. Special mention goes to the
Corvus title, which gives a lot of utility in a cheap title. Firstly, it's a cheap fake deployment that keeps the opponent on their toes. You can also use it to deploy an independent squadron group away from the rest of the fleet, and redeploy
Corvus elsewhere later. It's a cheap, positional title in a game that is often won or lost on positioning. Both of the
Raider's other titles are geared toward disrupting enemy squadrons, and they cement the ship's reputation as a fighter-killer when fitted appropriately.
There are two other roles worth discussing. For messing with squadrons, a
Raider-I with
Ordnance Experts,
Agent Kallus and
Impetuous is typical. Kallus’ ability pairs with
Impetuous' free anti-squadron attack, so you can always harass a lone enemy ace even if you’re actually prioritising ship attacks. Ordnance Experts work on the black anti-squadron dice, giving you lots of re-rolls. This kind of build is also one of the few times we’d ever consider taking
Flechette Torpedoes, but I prefer External Racks in keeping with the ship’s classic role. This ship’s upgrade bar also has the slots to accept
Boarding Team upgrades. In reality, this is a
Darth Vader (Boarding Team) slot since every other Boarding Team the Imperials get is dependent on the ship’s squadron value, and the
Raider has a terrible squadron value. Boarding Team Vader thrives in settings where fleets are built around key upgrades and a speedy, light ship is ideal for delivering him before the battle develops. Unfortunately, he is usually overshadowed by the versatility of Darth Vader (Officer).
Raiders are an excellent and hard-hitting fire support option, but they also fight well in wolfpacks. The thing to bear in mind about small ship assaults using
Raiders or
Hammerheads is that they need to mob a large ship to drag it down. You want to hammer it with repeated, strong attacks to overwhelm defence tokens, or you’re just blowing away resources. This ship is great as a chunk of follow-up firepower alongside another attack, or added to a fleet that drives repeated sledgehammer attacks into a large target. Keeping it alive after the first strike is usually the problem.
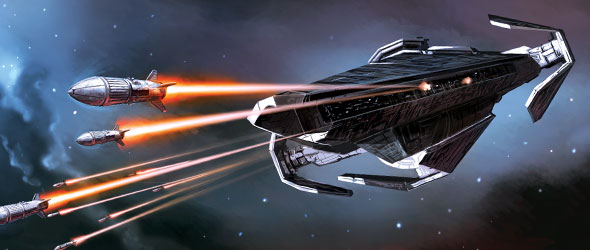
Arquitens-class Cruiser
The
Arquitens has a unique role in the Imperial ship roster: broadside fire support. Its main batteries favour long-ranged side attacks, and it manoeuvres in an ungainly fashion. Its job is to hang back and pelt the enemy like a
CR90 Corvette A, and the first
Arquitens in an Imperial player’s fleet usually matches that Rebel ship in role. Unlike the Corvette, the
Arquitens flies in a more measured manner. Its navigation chart is bad for fighting in close confines, but suited to twisting to keep its broadside on target. This leads to an inevitable conclusion involving consistent, long-range fire support.
In most cases, your first
Arquitens in a fleet will be a
Light Cruiser with
Captain Needa and
Turbolaser Reroute Circuits. Needa turns the mediocre Contain token into a second Evade that allows you to match a CR90 in red dice performance. It’s a consistent and irritating fire support ship and I wholeheartedly recommend it. If a fleet has a second one, it’s normally another Light Cruiser with
Director Krennic and
Slaved Turrets. This combination is hungry for
Concentrate Fire commands, but is also ruthlessly hard-hitting. If you add a third copy of this ship, you’re reaching spam list numbers and
Linked Turbolaser Towers become the usual suspects.
Slaved Turret builds also exist, if you have
another means of managing your dice. The cruiser’s titles fit its supporting role.
Centicore is a fairly cheap way to relay
Squadron Commands through your ship. Useful if you’re bringing a fire support
Arquitens in a squadron-based list.
Hand of Justice is the more versatile option when flying beside a friendly ship to keep it alive a bit longer. Neither is mandatory.
The
Arquitens can be slotted into a lot of fleets as a more discerning CR90-style fire support ship. They should be strongly considered in a fleet led by
General Romodi, where an
Arquitens flying behind a friendly ship can use the friendly ship to increase its firepower while benefitting from obstruction in defence. Make that support ship
Hand of Justice for defensive support and you’ve got something fun going.
Since its release, the Imperial Light Cruiser expansion pack containing this ship has often been out of stock. It’s wildly popular with Imperial players looking for something different to slot into their fleets, or spamming in a broadside conga line style list.
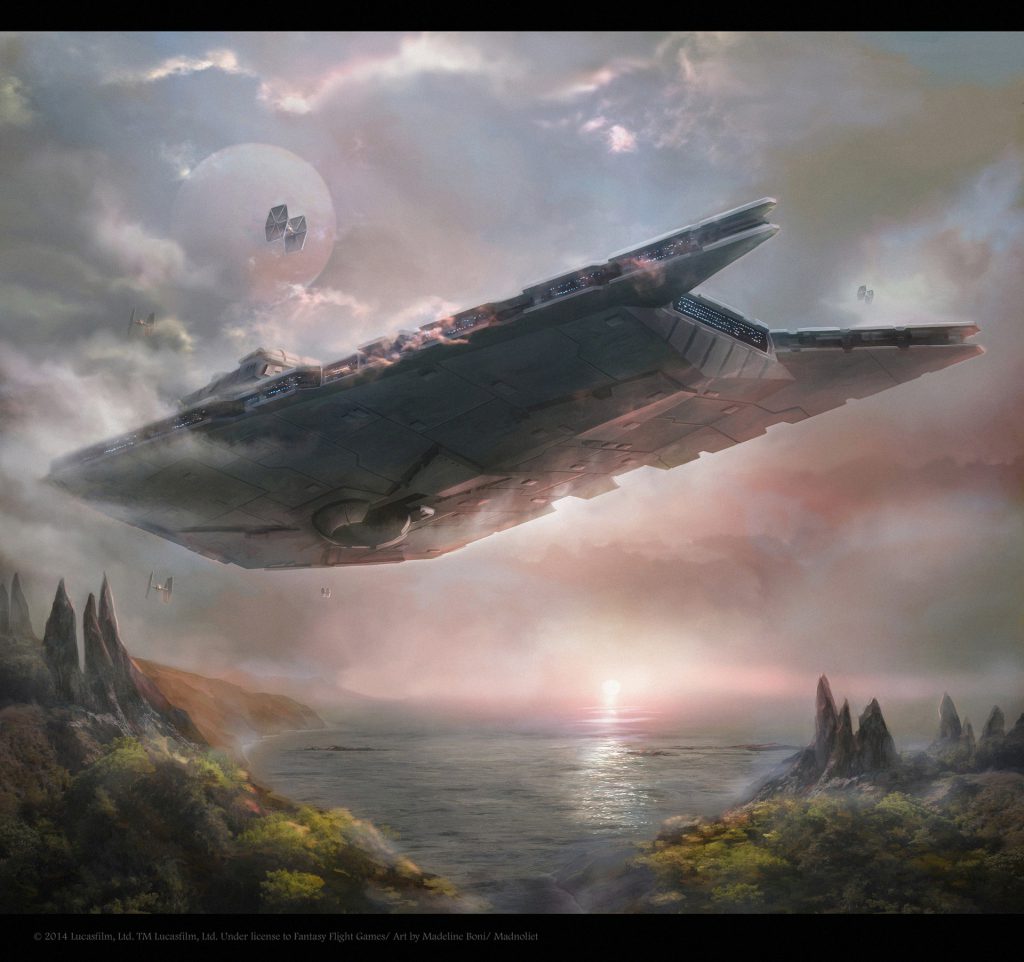
Gladiator-class Star Destroyer
If the
Raider is a scalpel and the
Arquitens is a longbow, the
Gladiator is a jackhammer. This is the Imperial’s aggressive answer to the
MC30c: a torpedo assault ship on a small base. Features include incredibly potent main battery arcs, a solid defence token suite with a Brace, and the
Demolisher title. The
Gladiator’s reputation is essentially defined by
Demolisher. Your first
Gladiator will always be
Demolisher. There are players who refer to the ship as ‘the Demolisher’ because the ship is so synonymous with its title that many players don’t know it by any other name.
So we’ll start there.
Demolisher lets the ship make its second attack after executing its first manoeuvre. This means it’s limited to one attack before it manoeuvres, then it may attack again after making its standard manoeuvre, but before using
Engine Techs. This is one of the few cards ever adjusted to limit a specific upgrade combination, which says a lot. The title lets
Demolisher break the fundamental shoot-then-move rule of the game, which is why it’s been nerfed twice, and still gets picked. Landing your shots is incomparably easy with this title, and
Demolisher's threat range on a given turn is incredibly large. When it was released at full strength, it defined the competitive metagame. If an Imperial player didn’t bring
Demolisher to a tournament, they were intentionally making their lives harder.
Gladiator spam lists were the order of the day. Just like the
Onager transcends a core mechanic and dominated the game (by adding an entirely new range bracket), so did this ship.
 Credit: Madeline Boni via Fantasy Flight Games
Your first
Gladiator will always be the cheaper and better
Gladiator-I with
Demolisher. Due to how easily this ship gets its attacks off,
Ordnance Experts are mandatory to maximise damage in your repeated attacks.
Iden Versio is the first pick of officer, but
Admiral Montferrat makes an occasional appearance.
Intel Officer is for players who want to improve its offensive output. For ordnance upgrades, you get best value out of
Assault Proton Torpedoes or
Assault Concussion Missiles. I favour Assault Proton Torpedoes because I hunt small and medium ships. When fighting a small ship, dealing a face-up damage card outright will chop off 20-25% of its HP instantly. It’s also the cheaper option. Assault Concussion Missiles get more use against large ships due to the need to grind down high shield values and large HP pools.
Engine Techs used to be standard-issue, but a nerf to
Demolisher that all-but names that card directly ensures that it gets less use.
So you’ve got a
Demolisher kitted out to the brim with gadgets and veteran officers. What’s it about? Good
Demolisher piloting relies on a calculated mixture of aggression and caution. You want to put your
Gladiator into combat quickly and start deleting small ships. On the other hand, getting caught by enemy squadrons or being nailed to a wall by an angry large ship is lethal. I find that the ship works best when hunting small enemy ships by killing anything it can’t outrun, and outrunning anything it can’t kill. Its strong defence token suite and above-average HP are well-positioned to weather attacks from small ships and its raw damage output frequently removes them in a single salvo. Getting close to a small ship spells death for it. Your Ordnance Experts almost guarantee a dreaded Hit + Critical result. This critical triggers Assault Proton Torpedoes, shaving off a quarter of the target’s HP. Their redirect can push aside 2 or 3 damage, and small ships often lack a Brace. That's another 3+ points of damage going into the hull of a ship that started on 5 HP, maximum. That
Consular is dead. Then you repeat the process against another target or use your agility to get to a larger ship’s weaker arc and grind into its hull in the same manner.
Demolisher has endured 2 nerfs and 5 years of power creep, and remains a popular pick in tournament and casual play alike. There have been few changes to the game in its favour, but multiple to reduce its usefulness. It’s still here.
There’s also a
Gladiator II variant and
another title. They're seldom taken seriously. The
Insidious exists in the shadow of
Demolisher, and is a situational title that requires a very specific flying style to apply. The majority of anti-ship engagements in Armada happen frontally or side-on - getting behind an enemy requires unusual flying or deployment choices that rarely pay off.
I still think that even if
Insidious was a free title,
Demolisher would still be picked first. That's the nature of opportunity cost.
The
Gladiator II also brings relatively little to the table. It replaces a black die with the longer-ranged red die in the side arcs and gains an extra anti-squadron die. The red die replacement follows Armada's convention of making a pricier and longer-ranged variant, but that's entirely counter to the
Gladiator's role of close assault. You end up with a substantially more expensive hull that loses a black die it relies upon for damage output. That red die misses just as often as the black die it replaced, but can't be targeted with
Ordnance Experts. It makes black dice critical results less likely to appear, denying you crucial black critical hit upgrades. The extra range on the red die isn't even that beneficial - a single red die at long range is easily
evaded, or could just miss.
However, users on the Star Wars Armada Discord constructively disagreed with my assessment of the
Gladiator II as useless. It has niche uses as an anti-squadron flak platform. Such a build would consist of a
Gladiator II with
Agent Kallus,
Flechette Torpedoes and
Admiral Screed at minimum. The resulting combination is pretty unusual and uses the otherwise ignored Flechette Torpedoes to great effect. Agent Kallus adds a black die to attacks against enemy unique squadrons (usually a priority). The result on those black dice is irrelevant, because you always use Screed's ability to spend a blue anti-squadron dice in the pool to turn the black die to the Hit + Critical face. This triggers Flechette Torpedoes, which prevents the squadron from activating. It's an immensely powerful combo against unique squadrons flying in a formation, which is where you'll typically find them. The ability to guarantee damage against an elite squadron and prevent its activation amounts to temporarily removing it as a threat. This specialised anti-squadron build is also one of the few ways to justify taking double
Gladiators in 2022. Since you're running Screed, who pairs beautifully with
Gladiators, why not bring
Demolisher anyway? It's not without downsides. You're still locking your fleet into a specific commander to take a meta-dependent combo. This greatly limits your fleet-building options, but it's a valid use for the
Gladiator II and therefore worth discussing.
The
Gladiator holds a special place in my heart. It’s the quintessential assault ship. In Star Wars: Armada, a fantastic ship is any one that can apply heavy firepower with adequate durability and mobility. The
Gladiator platform has that in spades.
Considerations for Imperial Small Ships – “Set all weapon batteries for point blank range and fire at will.”
Enhancing the Armaments
The Imperial light ships are a good illustration of basic weapon upgrade choices. You’ve got a selection of ships that hit hard, but need support to make their damage consistent. This section is for new players to the world of weapon upgrades.
When picking an upgrade that benefits damage output, the first question is whether it’ll be a once-off or applied repeatedly. This is best seen in the
External Racks/
Assault Proton Torpedoes comparison. External Racks is a once-off that can spike to extreme damage. Assault Proton Torpedoes can be used repeatedly, and applies a weaker effect. In essence, External Racks deliver value once and Assault Proton Torpedoes deliver value over time. This is why you find External Racks on
fragile or
slow ships that only expect to deliver one strong attack before moving on to other things. Upgrades like Assault Proton Torpedoes and Assault Concussion Missiles go on more
agile, but durable ships that apply their damage repeatedly.
For dice control, you’ve got similar choices to make. There are options to
set dice, or
re-roll them. The ability to set a die face is extremely potent on black and red dice, which feature Hit + Critical and Hit + Hit faces, respectively. However, setting a face usually comes at considerable cost. In
Admiral Screed’s case, it’s the cost of the admiral and spending another die.
Turbolaser Reroute Circuits eats your ship defences for offensive value. This is why
Linked Turbolaser Towers are so popular despite having a weaker effect than setting your die to an ideal result - they cost nothing to use besides the points and upgrade slot. Lastly, there’s the brute force option of simply adding more dice.
External Racks,
Slaved Turrets and
Concentrate Fire commands all achieve this. Brute forcing your dice problem comes with high variance. You stand to roll a collection of double-hits that far exceeds what re-rolls could have done. You might also roll a chain of blanks and not have any other options to alter that. It’s the gambler’s choice, but it’s valid.
Knowing which damage upgrades to take and how to manage unpredictable dice is key to Imperial light ships. All of them are heavily dependent on unreliable dice to perform well, so plan for it.
 Credit: Fantasy Flight Games
Notable Upgrades
Admiral Ozzel
Ozzel’s ability to regulate ship speed seems a little counter-intuitive at first. Why would you need a commander who facilitates speed adjustments on your fastest and most manoeuvrable ships? The simplest answer is that the more your ships use (the clumsy and stupid) Ozzel to manage speed, the more commands you free up for
Concentrate Fire. Small ships have the greatest need for sudden deceleration to allow an enemy ship to come into range, or acceleration to facilitate the ‘run’ portion of hit-and-run. They also lack the higher Command value needed to store Navigate tokens that large ships can. Ozzel also increases in value the more often he’s used, so swarm lists get the most out of him. Lastly, he’s dirt cheap so you get more ships in your fleet. Consider Ozzel for any Imperial swarm fleet.
Iden Versio
Like Linked Turbolaser Towers, Iden Versio would still be a balanced card if the second part of her rules was deleted. Imperial players take Iden for the first block of rules, which allows her to get the Evade token’s strong long range effect at close range. She has no impact at medium range but that’s not a problem on an aggressive
Raider or
Gladiator, both of which live and die by their close-range strikes.
Admiral Ozzel (Officer)
It’s Ozzel again. The cheapo Officer version gives you a small bonus move at the beginning of the game for taking an aggressive position or moving on an objective. Then he gets choked out by
Darth Vader. Useful on many Imperial ships, especially if you can coordinate him with your Objective choices.
Engine Techs
The
Arquitens and
Gladiator can both fit Engine Techs, giving them an optional maximum speed of 4, with bonus manoeuvrability afforded by their perfect Speed 1 navigation charts. They need Navigate Commands to use, but give you far more than just a speed boost: flexibility. Engine Techs aren't normally used to exceed your ship’s maximum speed. Rather, they're used to remain at a lower speed and to add a speed boost to get into a more advantageous position. On an
Arquitens, this means staying at Speed 1 or Speed 2 and having optional extra speed and manoeuvrability to reposition that side arc. On a
Gladiator, this means getting into a position to pounce later, or escaping after a daring attack. Expensive, but powerful.
External Racks
I’ve linked to this card so many times, but here it is again. A card that changed the landscape of the Ordnance upgrade slot in Armada. Deceptively simple, but incredibly powerful. This card gives countless ships their teeth by giving them a brutal once-off attack. If you equip them, it's a good idea to have dice control somewhere in your fleet. They're mostly used on
Raiders and other ships that expect to hit once and move on.
Assault Proton Torpedoes
The ability to slap a critical effect onto an enemy ship as soon as the Critical icon appears on a black die is immensely powerful. It’ll chew off a substantial chunk of a small ship’s HP, and small ships with low Engineering values have a much harder time removing that critical effect once it’s attached. Apply often using Ordnance Experts for maximum effect. Mainly used on
Gladiators.
Linked Turbolaser Towers
This upgrade isn’t cheap, but it’s wildly popular due to its versatility. Unlimited re-rolls for an unpredictable red die are invaluable. It works on standard attacks. It works on anti-squadron attacks. It works on Salvo. It even has a second feature that allows a ship to drill a single squadron down with damage. It’s the general purpose way to control red dice. Goes onto the next
Arquitens after the Captain Needa + Turbolaser Reroute Circuits build and Director Krennic + Slaved Turrets build. Also goes well on any ship that needs red dice control and isn’t getting it from elsewhere.
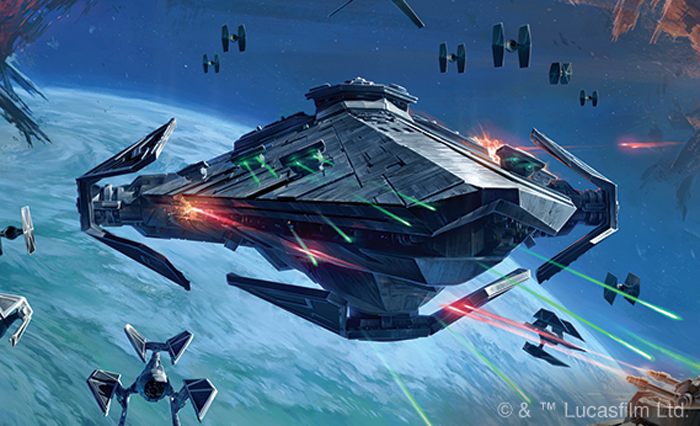
Conclusion – “My duty is to the Empire, and to you, and to the ships and crews under my command.”
Imperial small ships are great because there’s always a pick for the job. They're an excellent adjunct to a fleet anchored on an
Imperial-class Star Destroyer and provide the fast, durable component your heavy hitter needs to survive. All of them are unquestionably effective and hard-hitting in their own ways. The
Gladiator has been a staple for new and old players alike, and stock issues have been plaguing the other two for years. The price of fame, I suppose.
Have any questions or feedback? Drop us a note in the comments below or email us at contact@goonhammer.com.
11 Oct 2022: Expanded the discussion on the
Gladiator II following reader feedback due to the article initially dismissing it wholesale.
Thank you for being a friend.

 Credit: Madeline Boni via Fantasy Flight Games

 Infinity N5 First Principles: Understanding the Outcomes of Face to Face Rolls
 Tactical Feedback: Timing the Go-Turn
 SRM's Roundabout to Adepticon 2026: Curd Is the Word