In the immortal words of Persephone: "I'm back!" I didn't intend for this update to take six months, but a LOT of work on this project is front-loaded. I'm really pleased with how this project is going and am looking forward to this next phase. That phase being, of course, putting paint on models!
If you missed part one of this feature, you can find it here!
The Progress
I don't want to bury the lead, so I'm happy to report that I have painted the 16 Greek Slingers and one phalanx of 32 Spartan Hoplites.
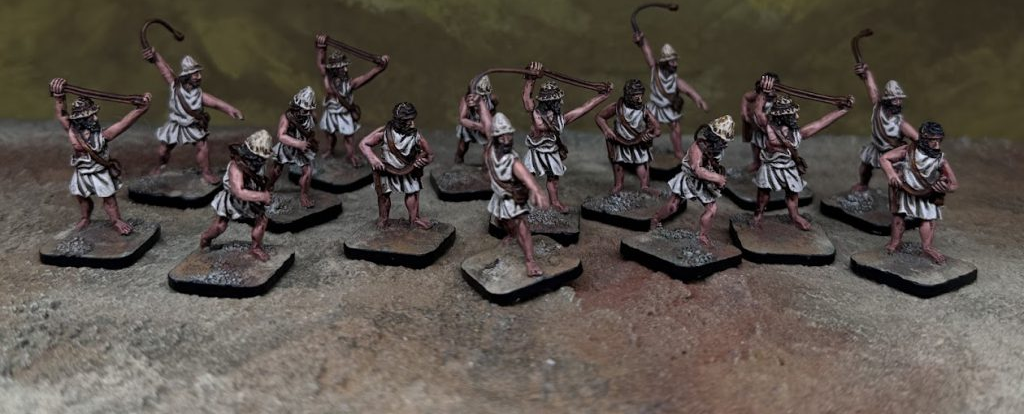 16 Slingers. Credit: Colin Ward
The Slingers are older models, and it shows, but it was cool to These were tackled first so I could get some runs on the board and figure out how I wanted to paint a more Mediterranean skin tone.
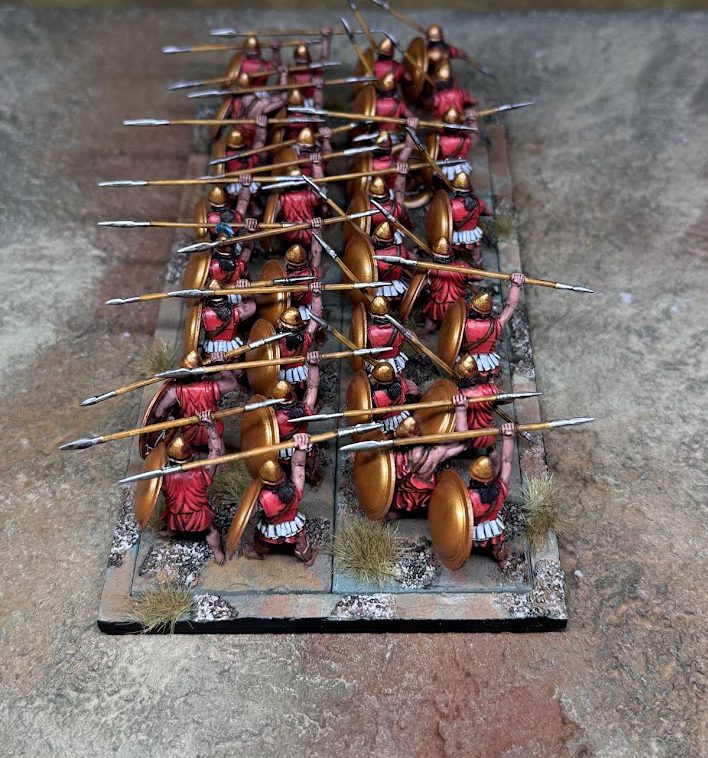
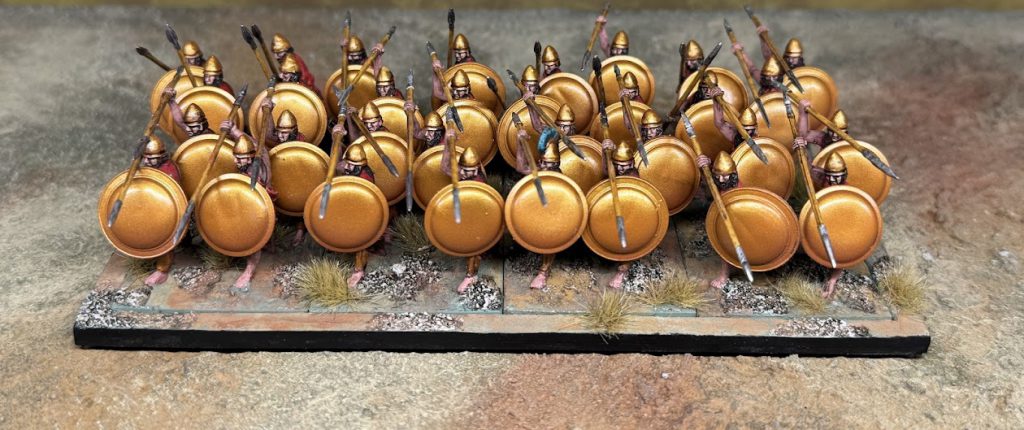 A Phallanx of 32 Spartan Hoplites. Credit: Colin Ward
This Phalanx of Spartan Hoplites is one of my favorite things I've ever painted. It looks so cool! I couldn't be happier with it and finishing the Phalanx in a really manageable timeframe gave me a lot of confidence that I could actually maybe one day finish this project. I'm willfully ignoring the fact that this Phalanx of 32 models represents only 10% of the model count of the army. Also that painting 48 models for a project is great but joke's on me because there are 300 left.
The Process, Step 1: Assembly
I am a VERY process driven painter. I am always trying to find the most effective and efficient way to prep and paint models. I want to balance the desired end result of each model/unit/vehicle against the end result of the project as a whole. I can't devote four hours per model to a project that has 300+ models. (Not looking at you, WHTOW Grand Cathay Project).
Even wrangling assembly is a daunting task for a project of this size. This is offset by the fact that it's easy to sit at the kitchen table and clean the mold lines while watching a movie with the family. I don't need to be at my hobby desk to make progress. To organize everything, I use beading boxes from the craft store.
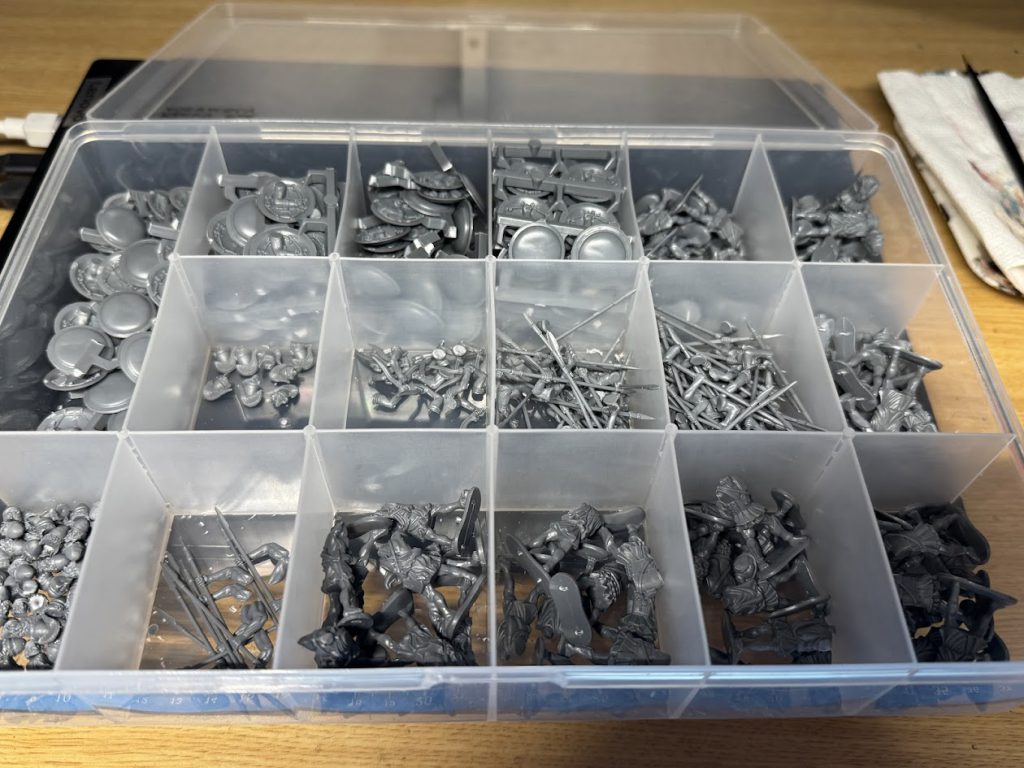 When assembling 96 Spartan Hoplites, efficiency is key. Credit: Colin Ward
I've clipped everything I need off sprue and divvied them up into cells in the box for cleaning. For this project, I actually had two boxes. One for the pieces that had been cleaned up and were ready for assembly. In the box in the photo are all the bits to assemble 96 Hoplites. Tedious and a little time consuming, but easier when it's broken down into manageable chunks. After getting the most egregious mold lines cleaned up, they're ready for assembly.
 Assembly line for Spartan Hoplites. Credit: Colin Ward
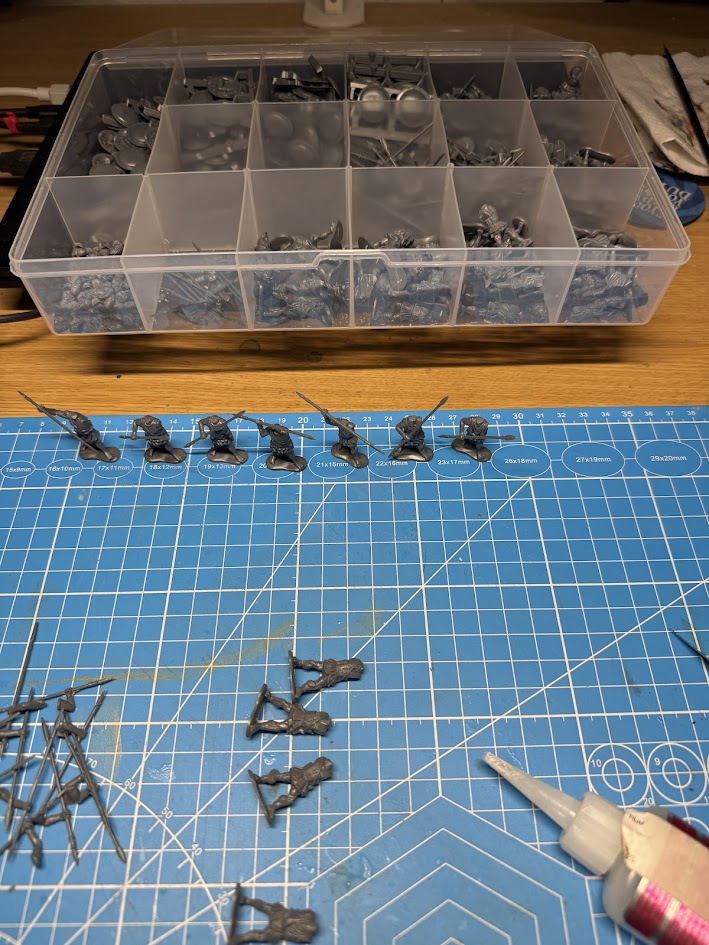
What's funny about this photo is I'm doing this wrong. Because the spear placement can cut it close with the heads, I glue on the heads first and then the spears. I do all 32 heads. Then 32 spears. Shields are left off for painting. After that is finished, I glue them onto the Sarissa MDF bases. This part is a little tricky, but goes quickly. I start with the spearmen whose spears are in a 'low' position and place them along the back row. They are waiting to engage the enemy and do not need their spears in a 'high' ready position.
The bases I ordered are 40mm square bases for 4 Hoplites. It's important not to place the Hoplites directly in front of each other as you want to make room for the spears. You also want the overlap between ranks to fill gaps in the Phalanx. I work back to front to ensure the spears clear the Hoplite in the next rank.
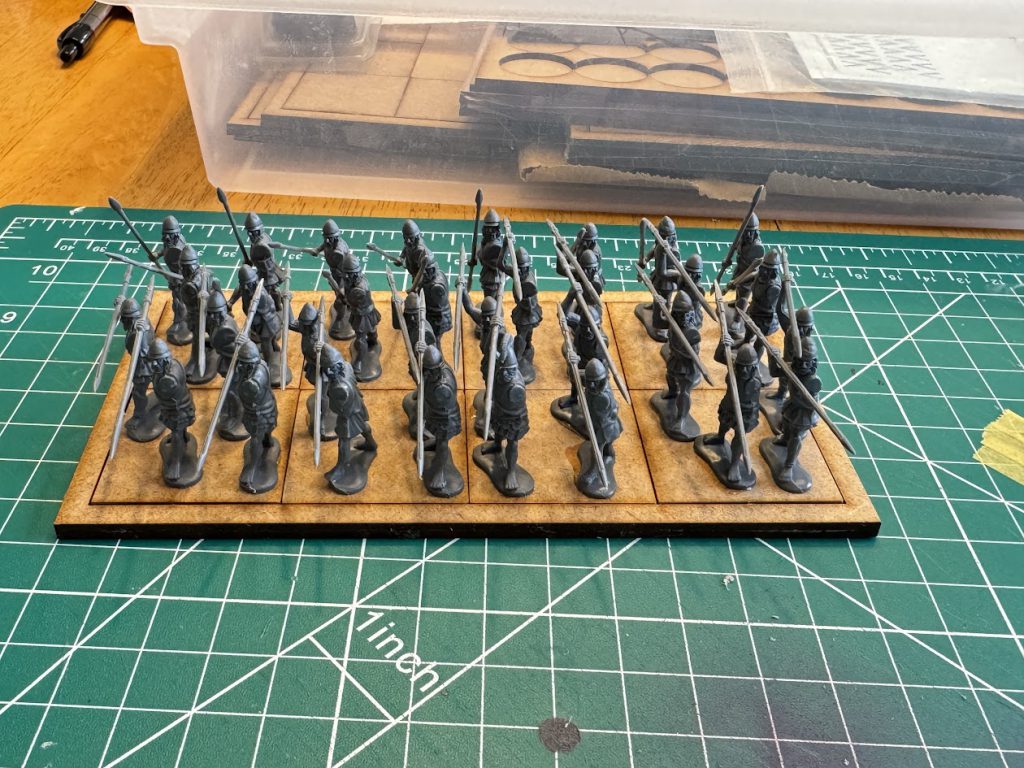 Getting everyone in the Phalanx situated. Credit: Colin Ward
It's imperfect and it's a little chaotic but we got there in the end. Any issues with shield placement can be adjusted by just rotating the shield on the shoulder joint during final assembly. I make sure to write on the bottom of the bases and the bottom of the movement tray to show which base goes where in the tray and which tray each base goes to (1A-8A, 1B-8B, etc). This way I don't have to keep them in order while painting. After this step, they're ready for basing material.
I fill in around the bases using Vallejo's Diorama FX Dark Earth. You can really use any textured paste, but it's important that it is a thicker paste. If it is too thin, you will be able to see the outlines of the bases. Milliput is also an option but more time consuming and you'd have to do texture anyway. This is much more efficient!
Riding high on completing the initial Phalanx, I set about assembling the remaining 128 Hoplites across 4 Phalanxes.
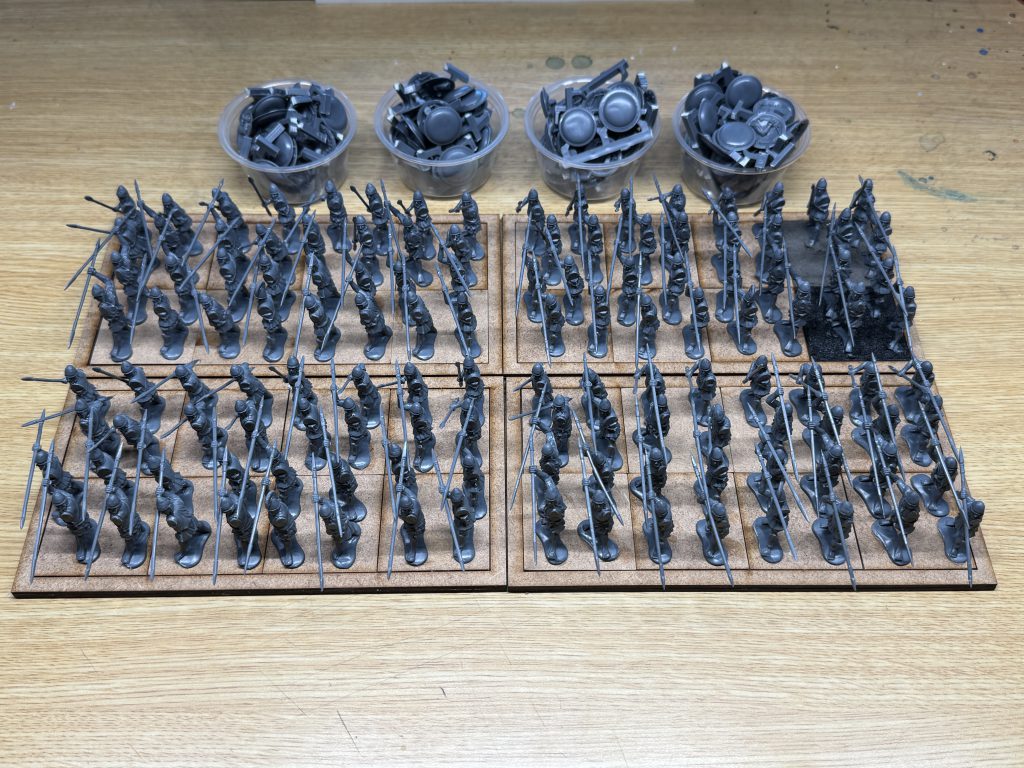 4 Phalanxes of 32 Spartan Hoplites ready for basing. Credit: Colin Ward
LIGHT WORK. And yes, there are 32 shields in each salsa cup. It's funnier when you consider that this is only 1/3 of the models I have left for the project and the other 2/3 are more detailed and have a less uniform color scheme. Also, transfers! But they're ready to go and I couldn't be more excited to tackle them in the coming months.
The Process, Step 2: Painting
I had worked out a scheme in advance of picking up the airbrush/brushes. I always get the outlines worked out in my mind palace before I start. It saves a lot of time and a lot of half-finished miniatures that I'm not happy with. Understanding that there wasn't a lot of standardization of uniforms/garb/kit in Ancient Greece, I still need to get a project painted and on the table in a reasonable amount of time.
This is real 'Forest for the Trees' work. Individual models are only important inasmuch as they contribute to the aesthetic of the whole Phalanx. Their uniforms/robes/kit would be red, with white skirting. Bronze greaves and helmet. All the same skin tone, dark brown or black hair. And in the words of the mighty Polyphemus (probably) "Where we're going, we don't need eyes!" It's also important to always, always keep in mind that when looking at the front of the unit, 75% of every model will be covered by the shield. SPEAKING OF WHICH.
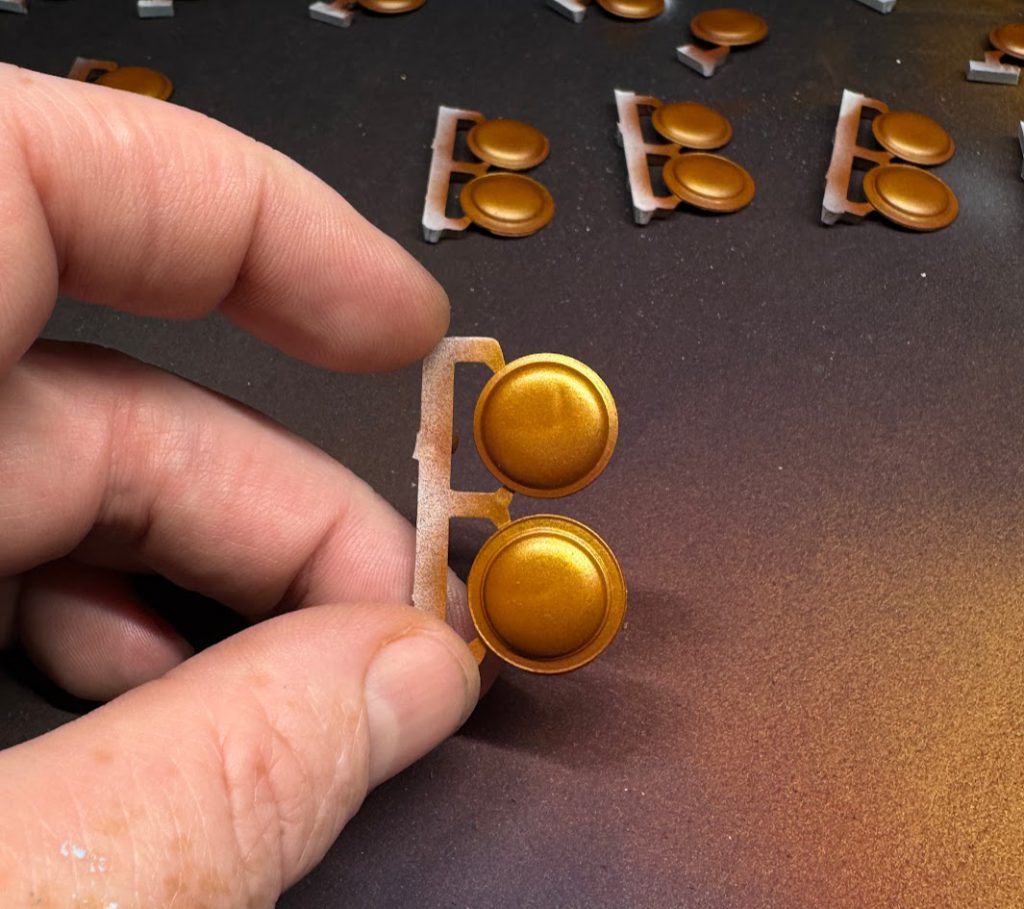 Spartan Shields WIP. Credit: Colin Ward
If there's one element of this entire project that I needed to absolutely nail, it's the bronze shield. She's an icon. She's a legend. She IS the moment. I didn't want to fiddle with it and fuck around. I wanted a good bronze through the airbrush and then just leave it alone. Bronze can look very gold, so it had to be warm and rich and not too bright. The recipe: Prime Black. Base: Scale75 Old Copper. Mid: Scale75 Victorian Brass (Upper 75% of shield). High: AK Brass (Upper 25% of shield). Finish with AK Satin Varnish through the airbrush.
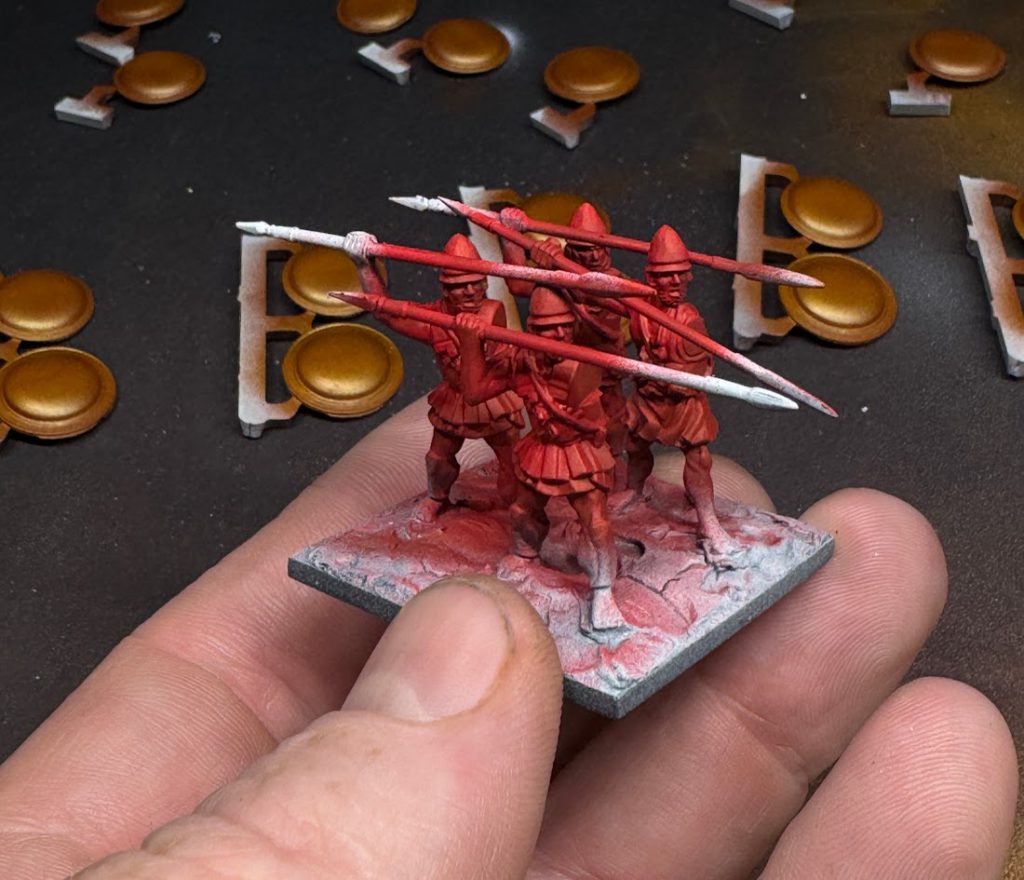 Spartan Hoplites WIP. Credit: Colin Ward
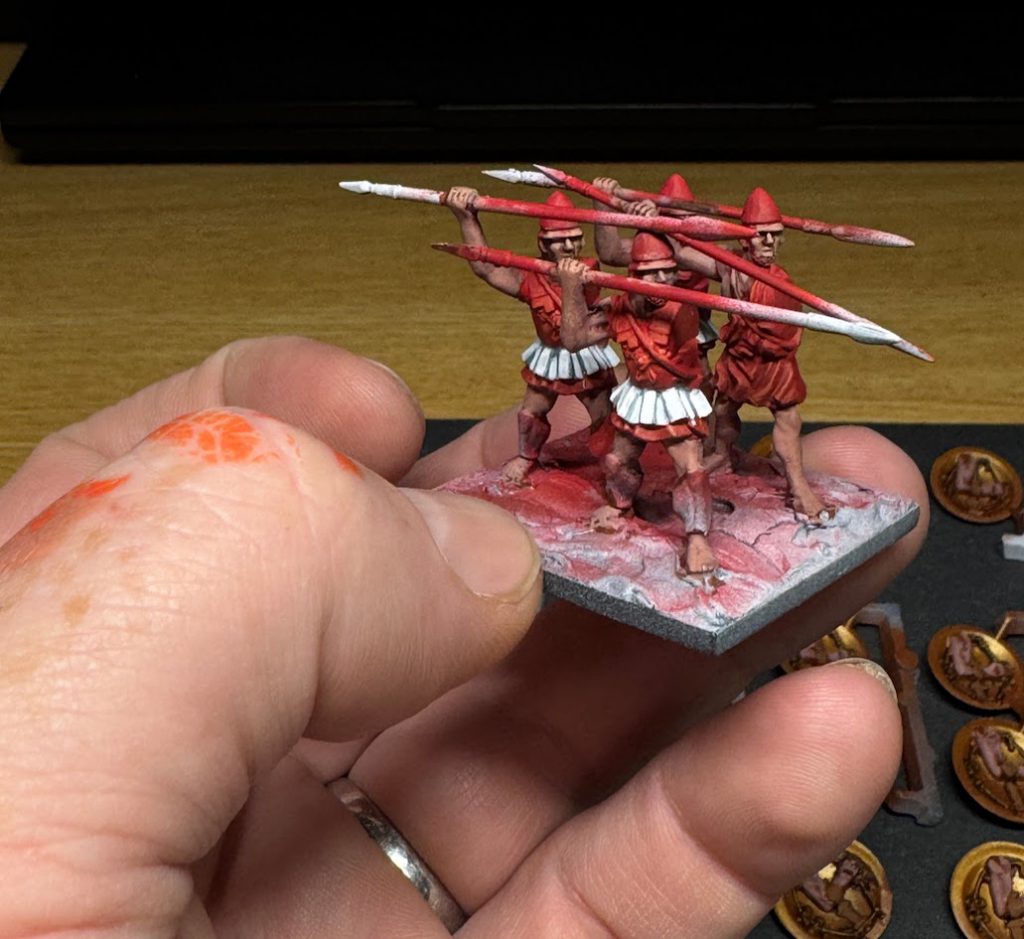
Airbrushed AK Dark Shadow Flesh basecoat; AK Brick Red mid tone and AK Carmine highlight. Then a quick drybrush of AK Amaranth Red.
 Spartan Hoplites WIP. Credit: Colin Ward
White skirting for a nice pop of color and something to tie the Spartans in with the Greek Hoplites when they're all on the table together. This was when I started to be able to see them really come together. Some leather straps, the bronze armor and the spears and we were done. All told, it took 20-25 hours over a week to paint and base this Phalanx. Even for me, that is efficient. And a huge relief. It makes the other four units seem very achievable.
 A Phallanx of 32 Spartan Hoplites. Credit: Colin Ward
 Side view of a Phallanx of 32 Spartan Hoplites. Credit: Colin Ward
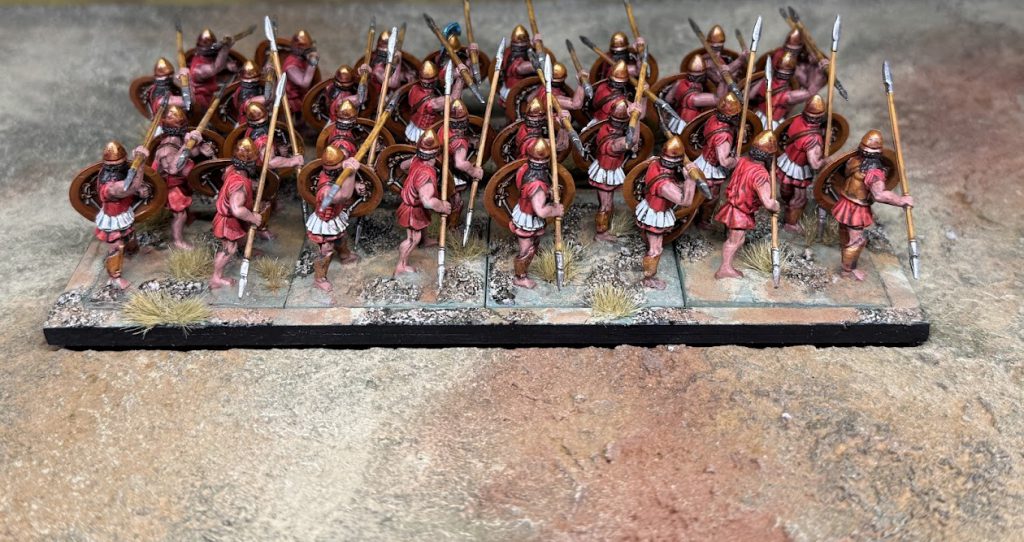 Rear view of a Phallanx of 32 Spartan Hoplites. Credit: Colin Ward
I'm also very pleased with how the phalanx looks from behind, as that's how I'll see them when they're on the table! As of this writing I'm working on getting the basing finished on the remaining phalanxes and get them primed and ready for airbrushing. I will airbrush all four units and 128 shields; as well as the 5 Command I have primed and ready to go! Then I'll break it down to individual units for brush painting/finishing up.
I already have the first Phalanx of Ancient Greek Hoplites clipped off sprue and awaiting cleanup. I'll tackle the two phalanxes of Warlord Games Greek Hoplites before moving on to the Victrix offerings. It's like saving desert for later, but also I'd love to finish off the contents of the Mystery Box proper before moving on to the units I added on to the project.
Thanks for following along. Eric, it's your move, my friend. I endeavor to update again before another 6 months have passed. Wish me luck and good fortune!
Have any questions or feedback? Drop us a note in the comments below or email us at contact@goonhammer.com. Want articles like this linked in your inbox every Monday morning? Sign up for our newsletter. And don’t forget that you can support us on Patreon for backer rewards like early video content, Administratum access, an ad-free experience on our website, and subscriber-only content covering competitive Warhammer 40K!Thank you for being a friend.

 Goonhammer Hobby Round-Up: March 2026
 Goonhammer Reviews: Tribal Conquest
 Conquest: Weaver Courts Gemred Knights and Scaile Dancers Model Review