Tutorials | Hobby | The Fabricator General
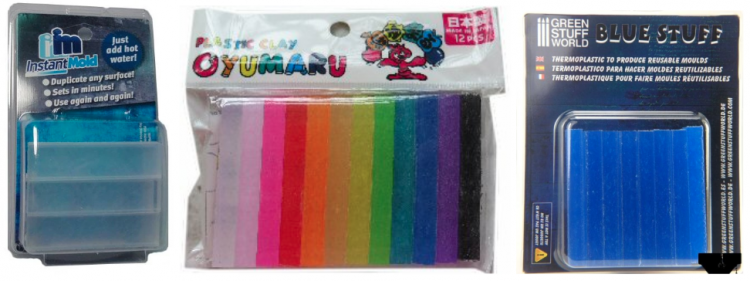 Don't let bright colors or different languages put you off - these products are essentially identical.
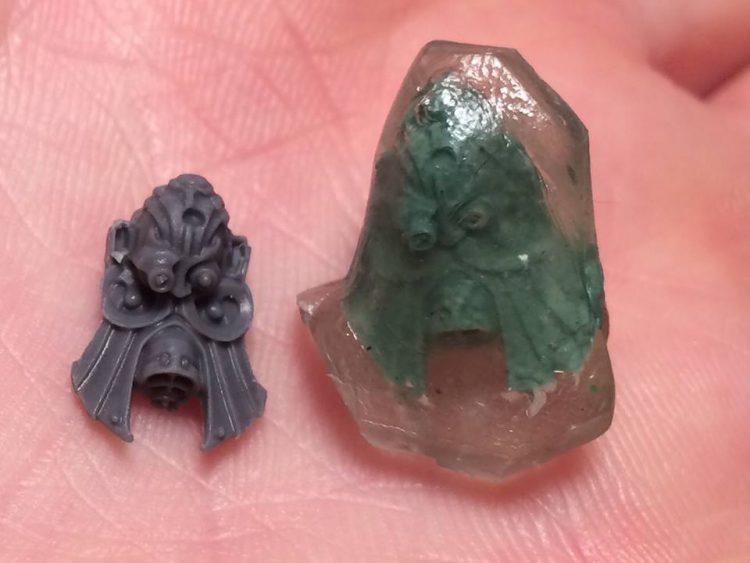
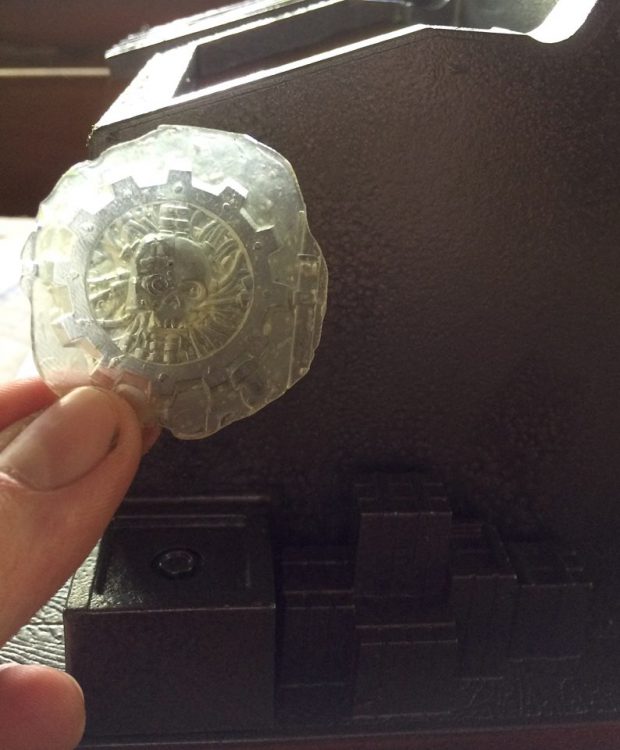
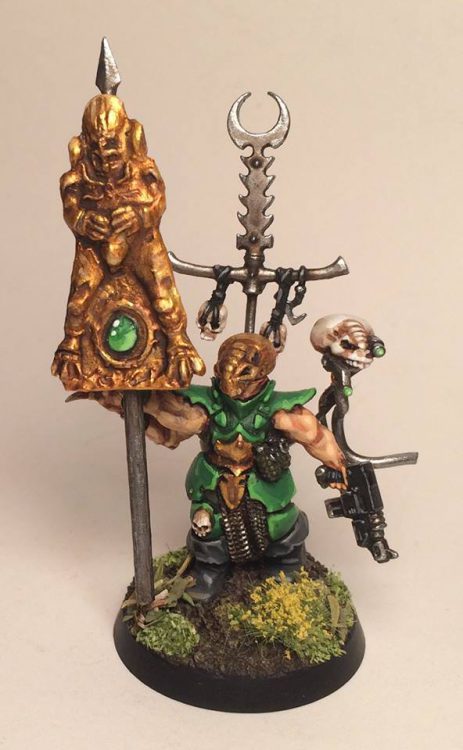 Years ago I commission-painted a rare and expensive Genestealer Patriarch model on commission. While I had it, I took the opportunity to make press-molds of the intricate throne details. Years later, I made this cast of the Patriarch design to use as the banner for a counts-as Acolyte Iconward.
 A robust and rubbery hunk of unlimited hobby potential.
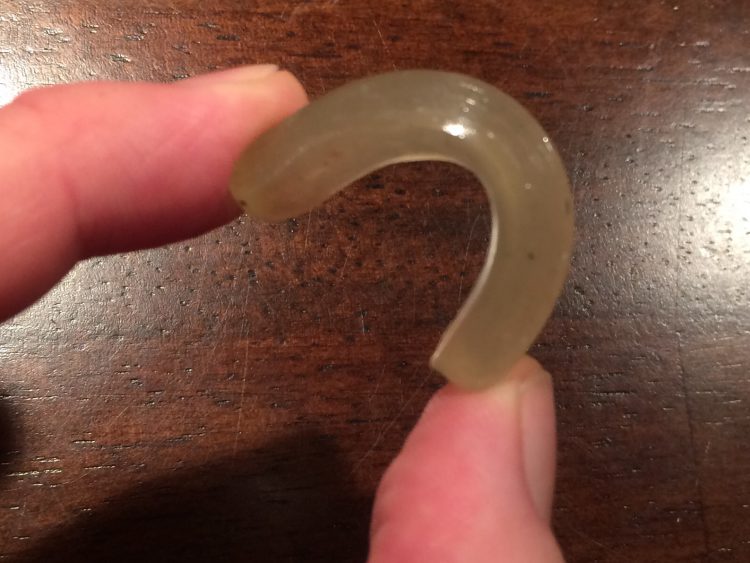 Good and flexible, but always springs back to its original shape
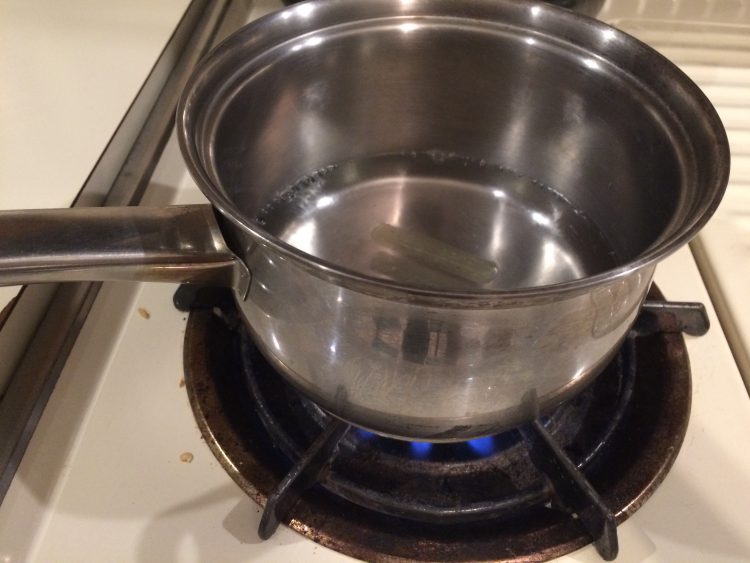 Just wait for the water to start bubbling, and toss the Instant Mold in. Let it bob around for 20 seconds, then scoop it out with a spoon or tongs. Squish it around - if it still has hard parts, flatten it and toss it back in for another 20 seconds. Repeat as necessary until it's uniformly pliable.
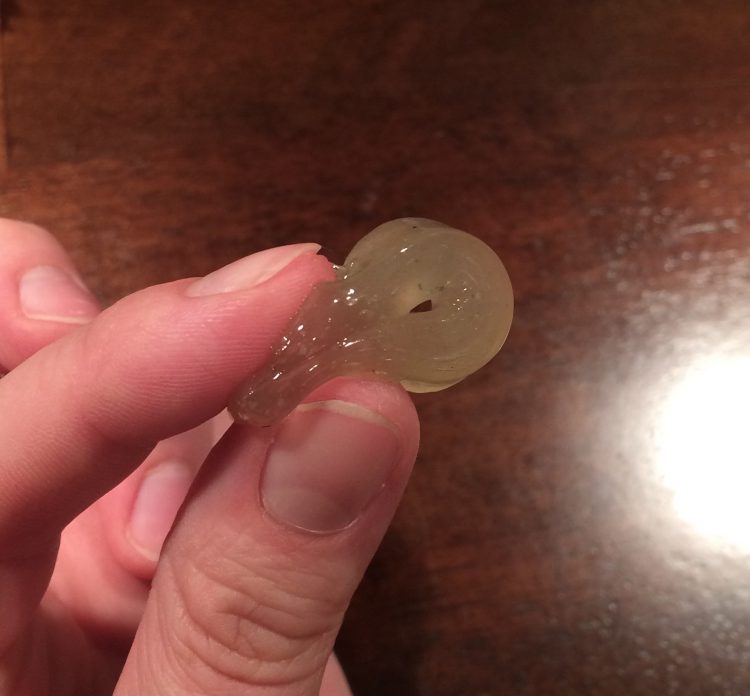 Try bending the Instant Mold like you did in Step 1... it should squish now!
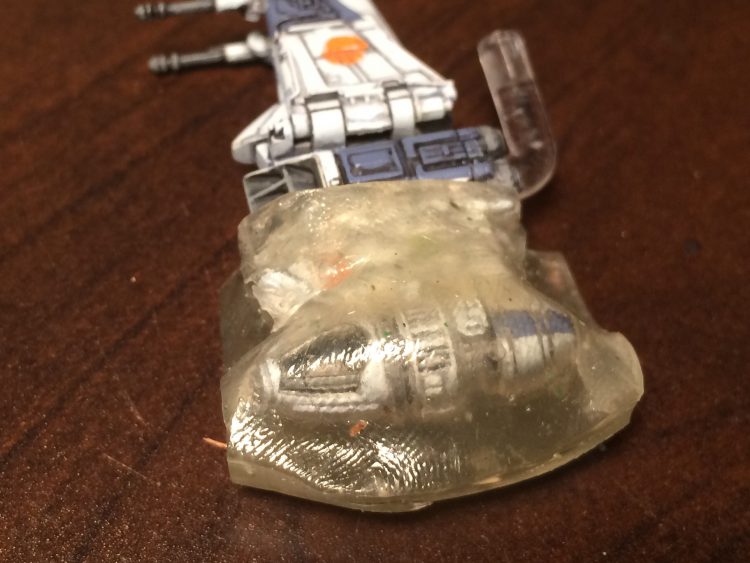 Simply form the Instant Mold around the object you wish to replicate. To remove air bubbles, roll your thumb along the Instant Mold as you press it into the object - this will press the material into deeper crevices while forcing any trapped air out. NOTE: If you are making a simpler stamp mold, there's no need to wrap the entire object - just put it on a clean flat surface and roll the Instant Mold over the top of it, being sure to force out any trapped air. This type of mold is easier to make and use, but only works for objects with a flat and featureless side.
 Let the Instant Mold cool. You can run it under cold water, toss it into the fridge, or simply relax with a good book and wait. The wait shouldn't take long - 10-15 minutes should be more than adequate in your average room temperature - but it's always better to err on the side of waiting too long. Trying to remove the mold too early can stretch and deform it, as it will still be pliable, so I recommend poking it with something to guarantee it's fully hardened before you move to the next step.
 After the Instant Mold is fully hardened, take a very sharp hobby knife and carefully cut the mold to release it. You want to cut as little as possible and leave a rubbery "hinge" along one edge, so the mold can open and close like a clamshell. In the photo above I only cut up to where the knife is on both front and back, so the entire right side remained intact. You most likely don't want to damage the bit you're replicating, so you can pinch and stretch the mold as you cut to avoid cutting into the original object. NOTE: This step will not be necessary if you made a simple stamp mold. Just lift the hardened mold up and you're ready to go!
 Roll up a ball of the material you plan on using and shove it into the mold, using a toothpick or other tool to make sure you force it into crevices if necessary. Make sure the "clamshell" mold closes all the way - the larger the gap between the mold halves, the larger the mold line around the bit will be. Having some material "ooze out" where the mold joins is normal and easy to clean up later. Greenstuff (or the equivalent product, like Kneadatite Blue/Yellow) is most common, but anything that air-cures and doesn't generate heat will work. Brown Stuff is best if you're replicating a bit with sharp edges or which you want to be less floppy (like swords), while air-drying clay is a cheap alternative for larger objects. Many resins heat up as they cool, and we know what heat does to Instant Mold, so don't use them!
Remember that tumbler of scotch and book you left by the fireside when you checked to see if the Instant Mold had cured? Return to those now and wait. The length of time will depend on the type and volume of material you used to fill the mold, so always follow manufacturer's instructions. For greenstuff I typically leave the mold untouched overnight.
Roll up a ball of the material you plan on using and shove it into the mold, using a toothpick or other tool to make sure you force it into crevices if necessary. Make sure the "clamshell" mold closes all the way - the larger the gap between the mold halves, the larger the mold line around the bit will be. Having some material "ooze out" where the mold joins is normal and easy to clean up later. Greenstuff (or the equivalent product, like Kneadatite Blue/Yellow) is most common, but anything that air-cures and doesn't generate heat will work. Brown Stuff is best if you're replicating a bit with sharp edges or which you want to be less floppy (like swords), while air-drying clay is a cheap alternative for larger objects. Many resins heat up as they cool, and we know what heat does to Instant Mold, so don't use them!
Remember that tumbler of scotch and book you left by the fireside when you checked to see if the Instant Mold had cured? Return to those now and wait. The length of time will depend on the type and volume of material you used to fill the mold, so always follow manufacturer's instructions. For greenstuff I typically leave the mold untouched overnight.
 This is the moment of truth - open the Instant Mold "clamshell" and pull out your prize! If you've done everything right, you should pull out something like the photo above. A wavy "frill" mold line is normal.
 This is the same recast part after some trimming and cleanup. Be sure your hobby knife is extremely sharp - greenstuff is rubbery, and a dull blade will sometimes bend floppy bits instead of cutting cleanly through them.
 This shows the original bit (left) and recast bit (right) after painting. The left of detail is almost identical. Also note that the original model is entirely unharmed - despite being painted with water-based acrylic paints and not sealed at all, the entire recasting process left no damage or residue on the original. Also, now that you have the mold, you can re-use it as many times as you want! When you don't need it any more, simply toss it back in hot water and use it for a new project.
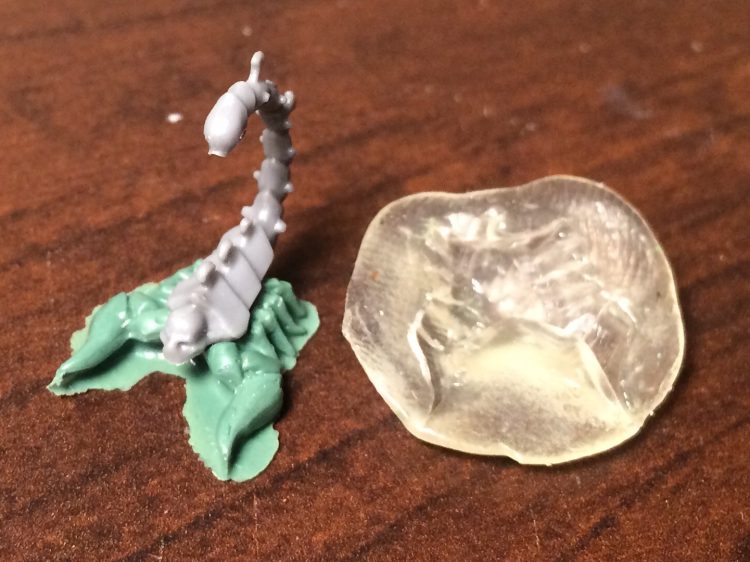 I only had a single pair of legs for two scorpion upper-halves, so used a simple stamp mold to replicate the legs. Now this lil' buddy is ready to terrorize a Deathworld Forest terrain piece or model base!
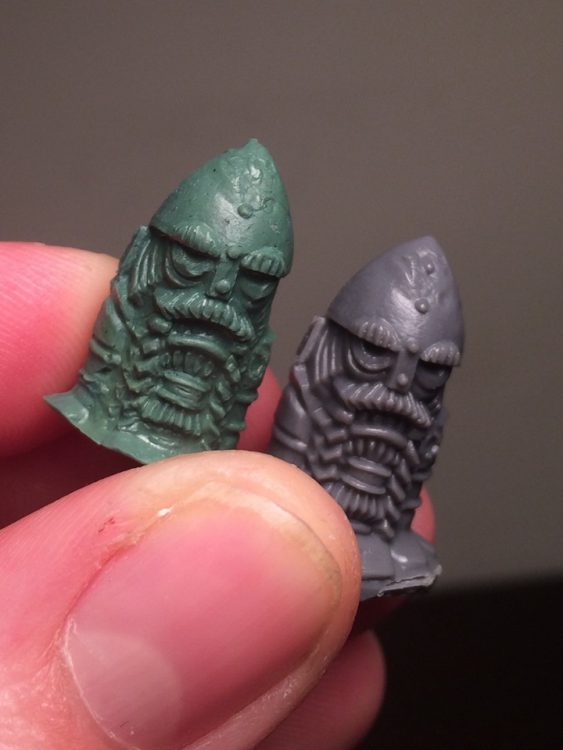
 This extremely weird dwarf head seemed perfect for a Squat servo-skull, but I didn't want to buy another $35 character model to get a second one. Instant Mold to the rescue.
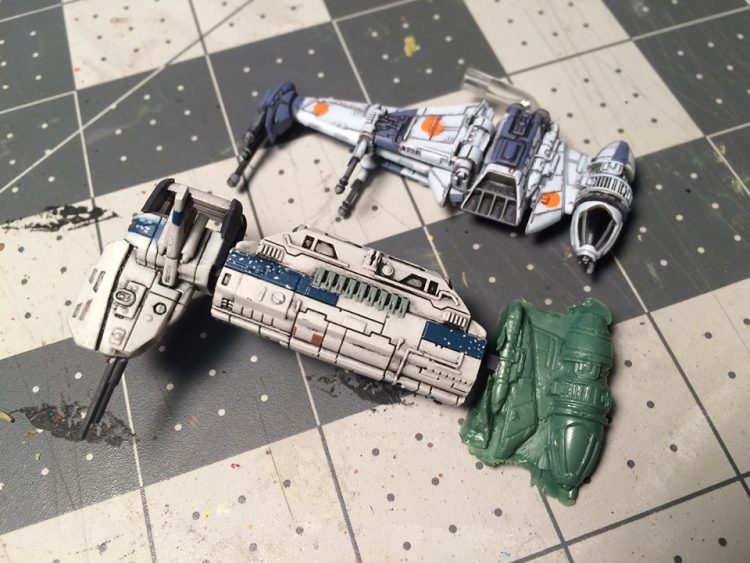
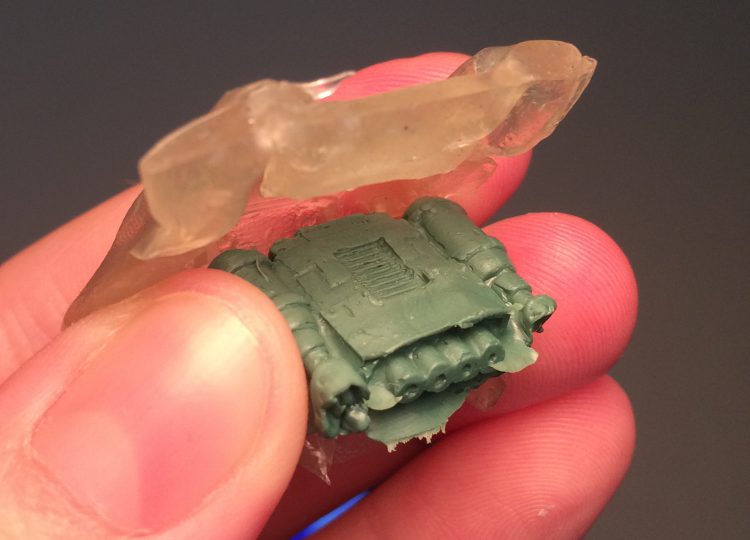
 Here's the servo-melta ready for barrel-drilling and paint. Although the recast bits look a little rough before priming, they look as good as the originals once painted.
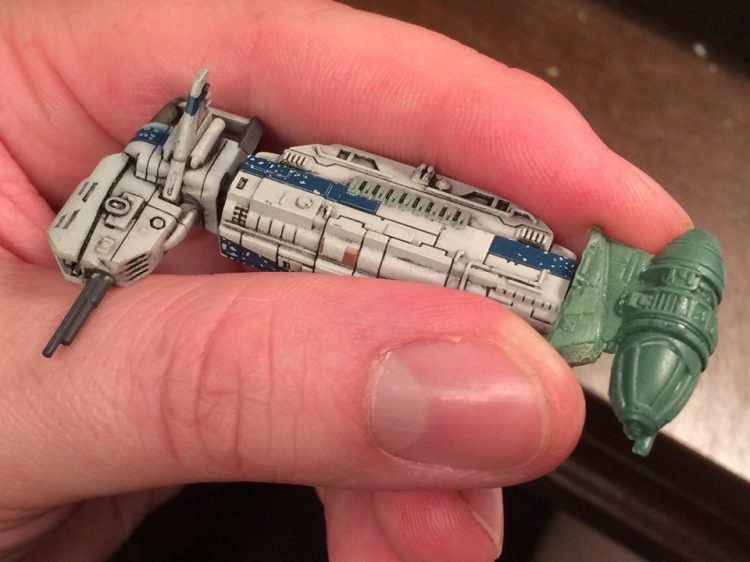
 Great look at the detail possible with an Instant Mold recast.
 Turn any old toy into a genuine 40k terrain piece with a tasteful smattering of skulls and cogs. This stamp mold was pulled off a Cities of Death building.
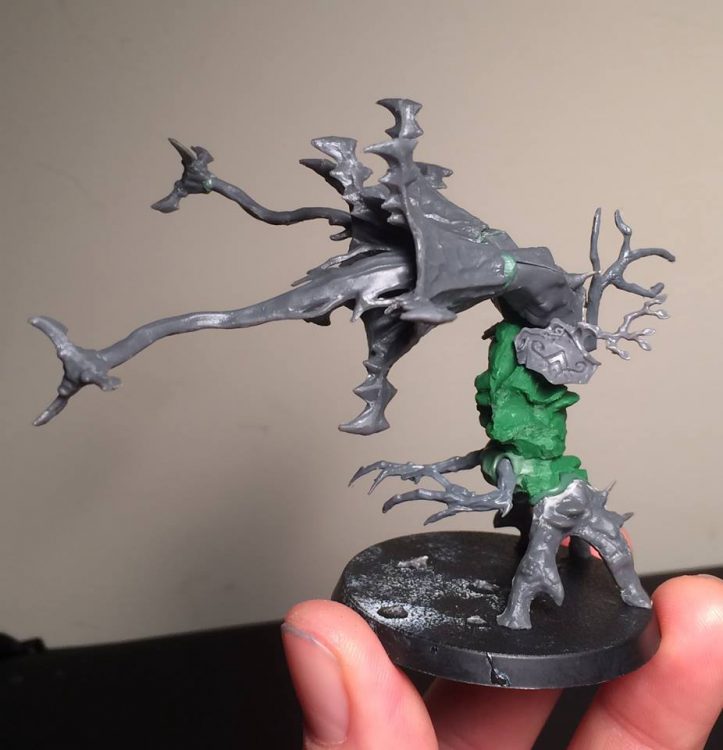 The torso for this jungle Chaos Spawn didn't need to be perfect, so I made an Instant Mold copy of a Deathwrld Forest bit and filled it with green Sculpey oven-bake clay. I then opened the mold back up immediately, dropping the clay onto a tray and baking it until hard. This is perfect for bits which take up a lot of material and where a little deformation won't be noticed - because Sculpey costs less than greenstuff, it's a good way to save that more valuable material for other projects.
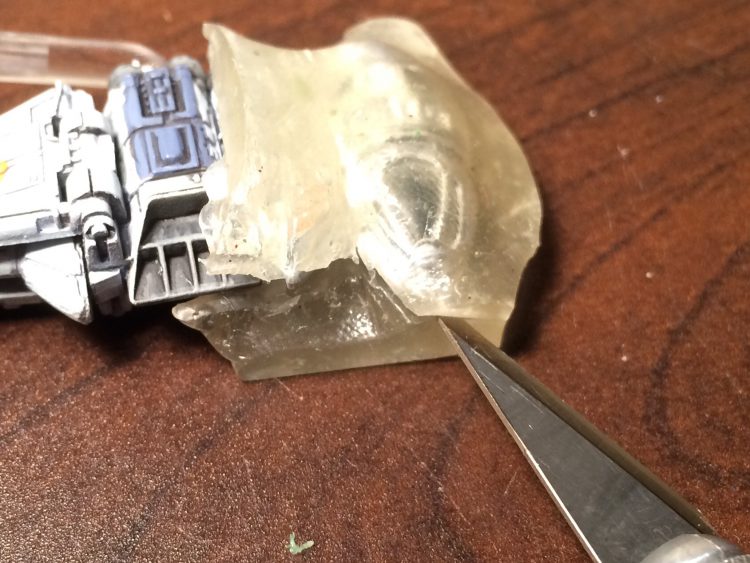
 What about recasting bits with undercuts? As you can see here, the rubbery nature of Instant Mold allows it to capture minor undercuts like the protruding lip in front and shallow barrel holes. Even with extreme undercuts, you could simply cut the mold in a few places to remove it.
 The same bit cleaned up and in place. After priming and painting, it should look just about the same as the originals. Any loss in depth can be mitigating with careful painting, shading the recesses to look darker and deeper than they actually are.
Tags: hobby | tutorials | Modeling | buffalochicken | featured | instamold | green stuff | The Fabricator General

Thank you for being a friend.
 Infinity N5 First Principles: Understanding the Outcomes of Face to Face Rolls
 Tactical Feedback: Timing the Go-Turn
 SRM's Roundabout to Adepticon 2026: Curd Is the Word
Support us on Patreon to get access to our Discord and exclusive App features.
Thank you for being a friend.
Already a Patron? Login with Patreon.
Visit our incredibly official store on RedBubble.
![]()
![]()
Support us on Patreon to get access to our Discord and exclusive App features.
Thank you for being a friend.