This article is part of a larger series on how to paint the Death Guard. To return to the parent article, click this link.

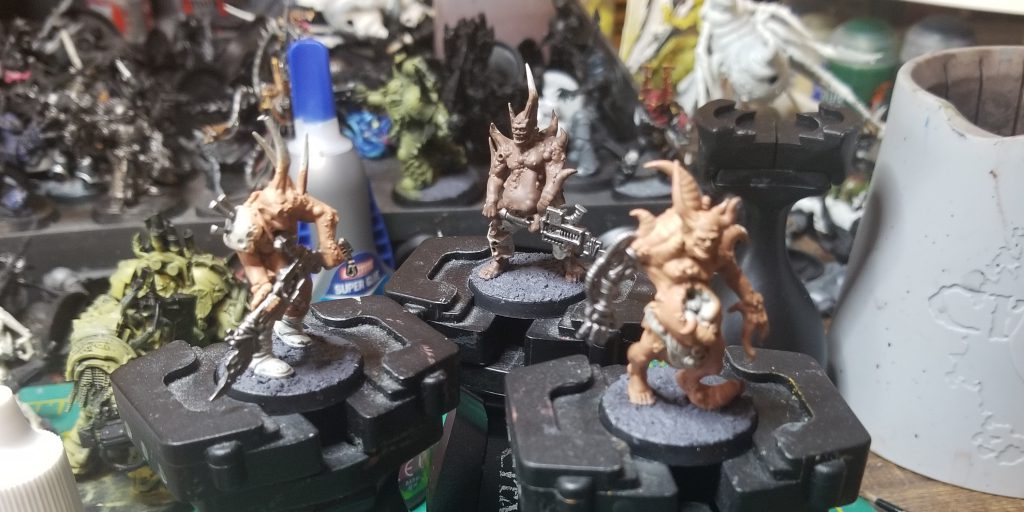
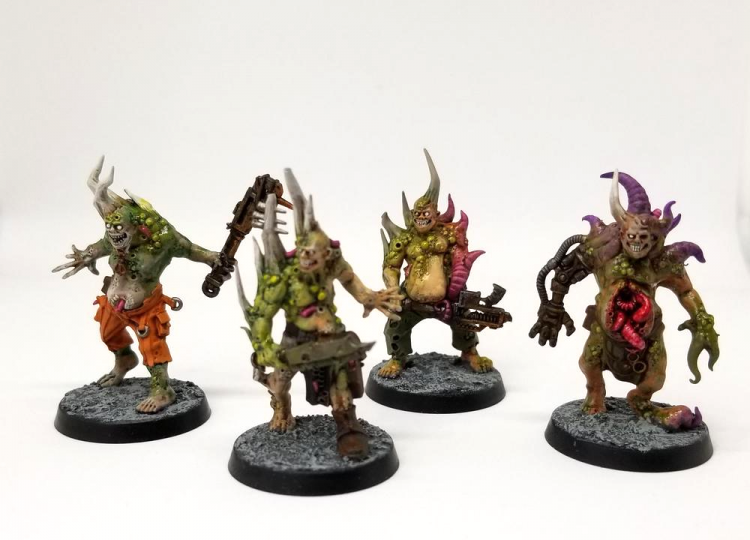
Poxwalkers are the underappreciated front-line casualties of the Death Guard army, the shambling, disease-animated corpses that hold objectives and screen out enemy units. They're among the cheapest units the army can field, and can come in units of up to 20 models. Despite being cheap cannon fodder, they're surprisingly detailed models, so if you want to put a lot of time into them, you certainly can.
 The key to great poxwalkers is to make them look wet. Slather the thing in Ardcoat and Nurgles Rot until it looks so shiny it might slide out of your hands. Always go to battle with the wettest looking models
Step 1: Priming
In an odd change of pace, I tend to prime my Poxwalkers with
Wraithbone, though I've also primed them black and worked from there. White and Grey Seer also work just fine, though the main reason I'm going with white is the flesh.
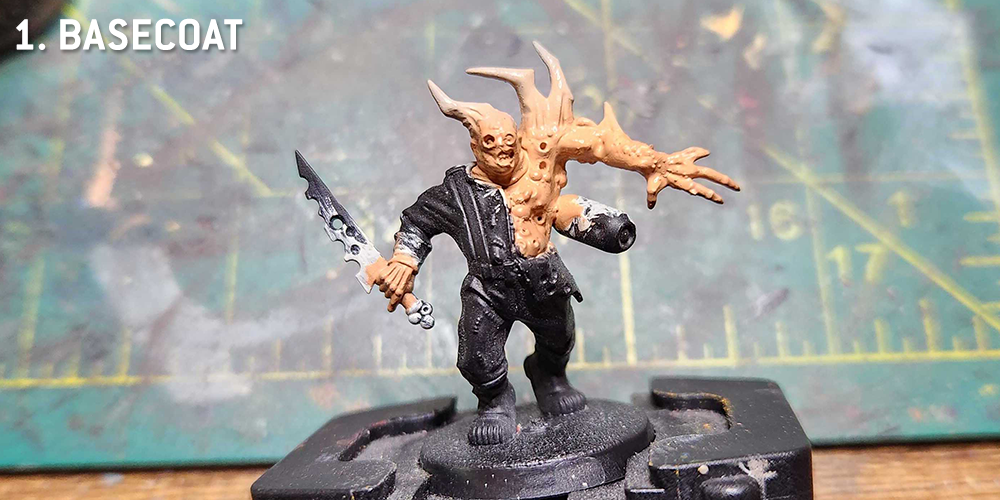
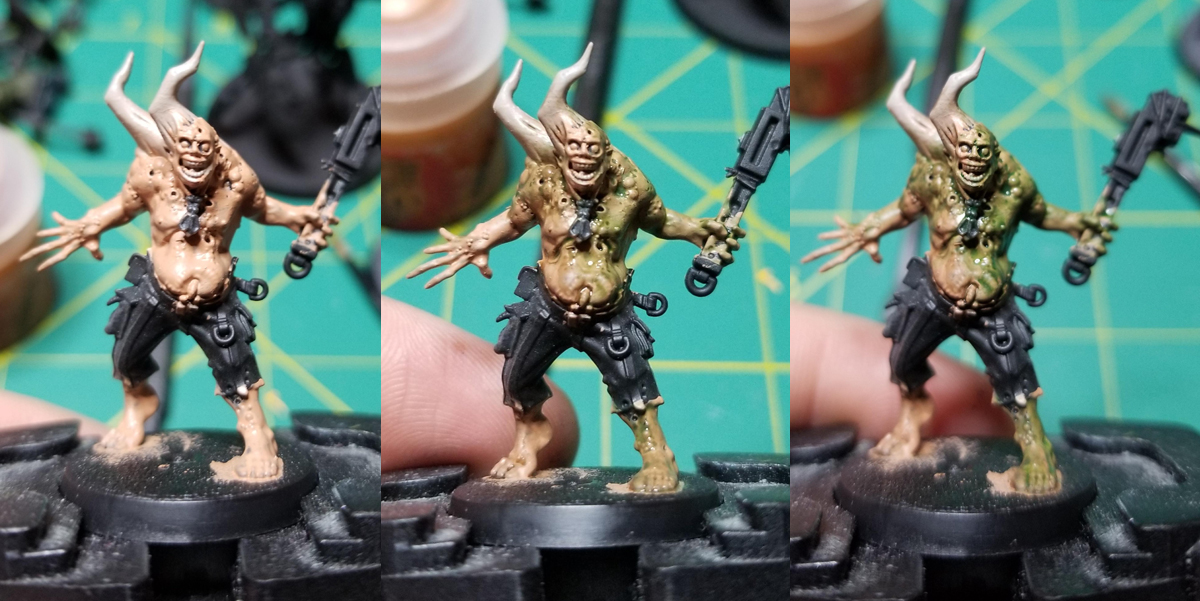
Step 2: Basecoating the Flesh
With Poxwalkers there are a number of elements to consider but all of them are pretty standard (the rusty weapons, the tattered clothing), save for the flesh, which is what this article is going to focus on. I start by basecoating the model's flesh. When I'm working in a batch I'll use a bunch of different colors to do this - Kislev Flesh, Cadian Fleshtone, Bugman's Glow, Dryad Bark, and Gorthor Brown are my go-to shades. At this point I'll also usually pick out any horns with
Rakarth Flesh.
If you want to go with Contrast paints for the flesh that's fine too - start with a flesh color, wait for that to dry, then start applying washes in the next step.
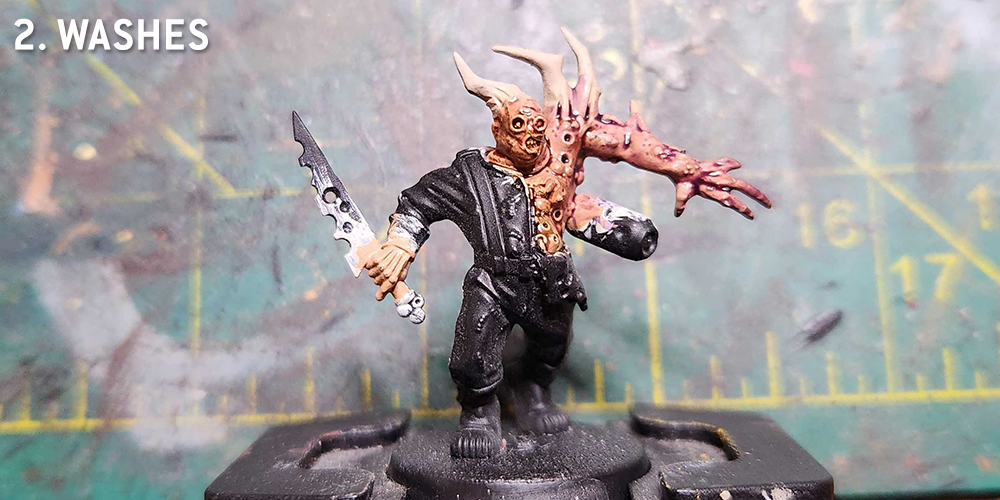
Step 3: Washes
Next up I wash the model. Some parts of this I'll do with
Agrax Earthshade or
Seraphim Sepia, but others I'll wash with a variety of colors - Carroburg Crimson, Druchii Violet, Biel-Tan Green, and Coelia Greenshade are my go-tos here, and I'll sometimes mix them. In the above photo I've done Agrax Earthshade and Druhii Violet. If you want to see what this looks like using greener washes, scroll down to an alternative paint method.
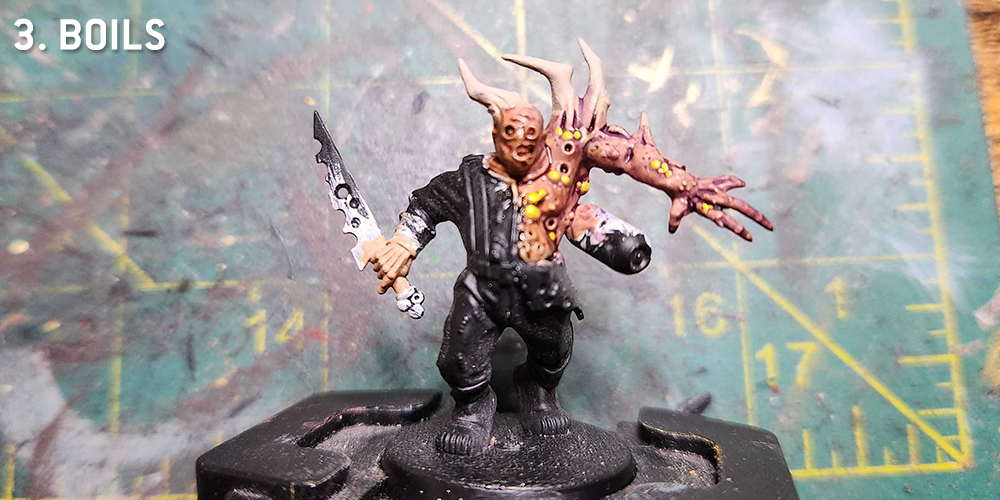
Step 4: Boils
These guys are covered in boils, and I pick those out next in
Averland Sunset. I'll come back and add a spot of
Flash Gitz Yellow to each one, which helps it stand out after I add the Nurgle's Rot later. I may also come back and touch up some flesh spots at this point, doing some highlights around raised areas. For this model I did a basecoat of Kislev Flesh, so that's what I used for the highlights.

Step 5: Slime
The final step when it comes to the flesh is adding slime. I want these models to look as wet as possible, like they'll slide right out of your hands when you pick them up. And that means adding
Nurgle's Rot and
'Ardcoat to the model. Mostly I use Nurgle's rot at this stage, slathering the boils with it. This will create some nasty looking contrasts with the flesh and purple colors, and gives the whole thing a sickly tone. If I need something more clear I may use 'Ardcoat instead.
From there it's standard painting procedure on the rusted metal and clothing - check out the Death Guard tutorial for more on painting rusted metal. I tend to go with pure white for the eyes and teeth to really make them stand out and make their toothy grins pop. If I have to do exposed entrails I'll typically paint those with
Blood Angels Contrast Paint to give them a deep red hue and add some 'Ardcoat to make them look wet. In all this method is pretty quick and painting up a poxwalker only takes an hour, maybe two if I'm not rushing.
Using Green Washes
If you're looking for a greener alternative to the purply Poxwalker above, using green washes over flesh, this will give you a quick idea of what that looks like.
For this guy, I've started with Cadian Fleshtone and shaded him with
Agrax Earthshade on the fleshier parts and two coats of
Biel-Tan Green on the parts I want to look green and sickly. I've tried ot hit everywhere there are going to be boils with the green in order to lay the groundwork for those diseased parts of the body. You can also get some interesting combinations here by shading Kislev Flesh with
Biel-Tan or
Coelia Greenshade, which is typically how I did the green sections of flesh.
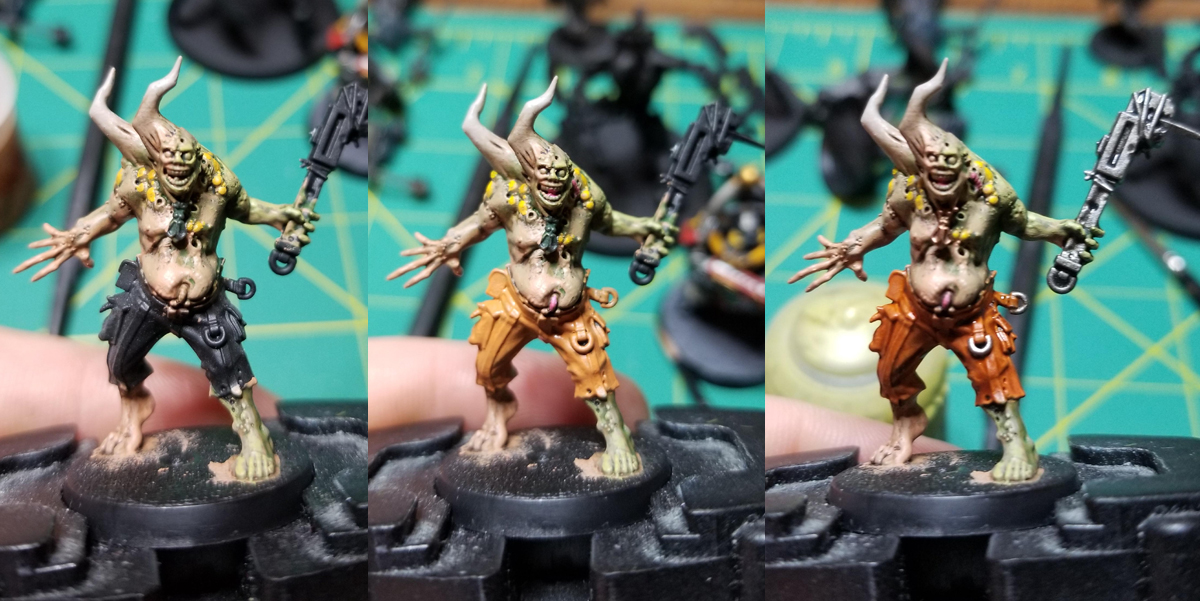
Once I've laid out the washes, I come back and highlight the fleshy spots with a mix of Cadian Fleshtone and
Ogryn Camo for the greener spots. The pants here got a coat of
Jokaero Orange before being washed with
Fuegan Orange and Agrax Earthshade (the re-highlighted with Jokaero), and I paint the pustules at this point with
Averland Sunset and spots of
Flash Gitz Yellow for the highlights. The tongue and pink maggots will get a coat of
Emperor's Children at this point as well and I highlight the bones with
Rakarth Flesh.
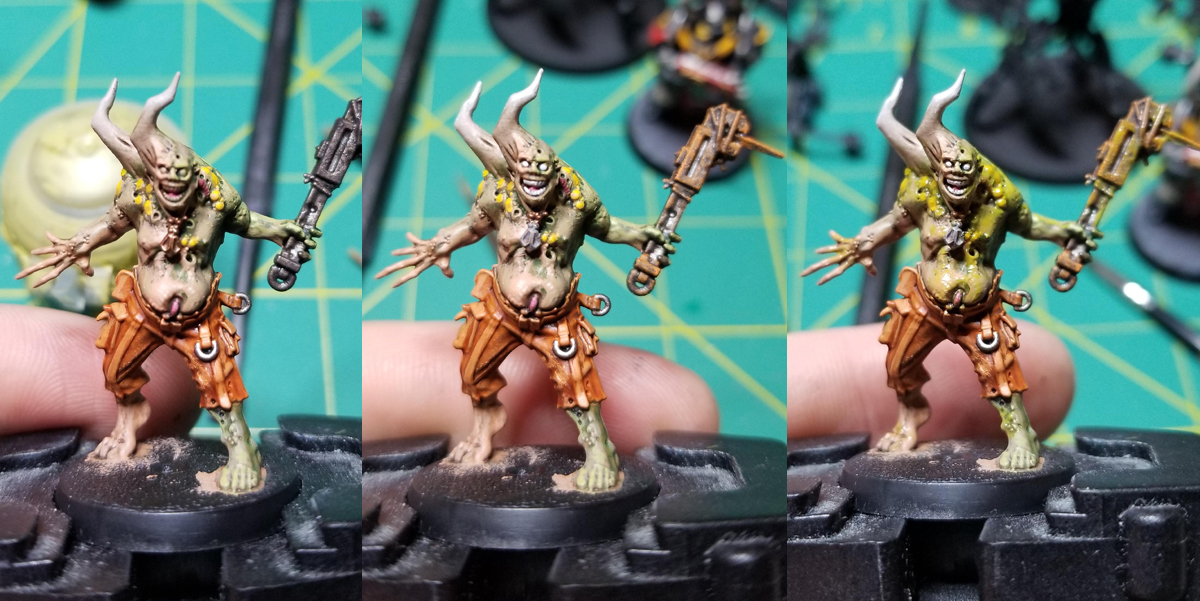
There are a few bits to finish here - the steel gets a coat of
Leadbelcher and then spots of
Typhus Corrosion and a drybrush of
Ryza Rust to look old and rusted. The copper parts get a coat of
Balthasar Gold and then a coat of Agrax Earthshade. Finally I need this guy to look and feel gross, so I coat big chunks of the model with
Nurgle's Rot, paying particular attention to the boils and snotty parts of the model to make him look appropriately gross. If I've done things right, the model will look kind of wet even when it's dry. Again, just aiming for the wettest looking models around.
 Credit: Robert "TheChirurgeon" Jones
This article is part of a larger series on how to paint the Death Guard. To return to the parent article, click this link.
Credit: Robert "TheChirurgeon" Jones
This article is part of a larger series on how to paint the Death Guard. To return to the parent article, click this link.
Thank you for being a friend.
 The key to great poxwalkers is to make them look wet. Slather the thing in Ardcoat and Nurgles Rot until it looks so shiny it might slide out of your hands. Always go to battle with the wettest looking models
 Credit: Robert "TheChirurgeon" Jones

 Goonhammer Hobby Round-Up: March 2026
 Goonhammer Reviews: Tribal Conquest
 Conquest: Weaver Courts Gemred Knights and Scaile Dancers Model Review