This article is part of a larger series on how to paint Necrons. To return to that series, click here.

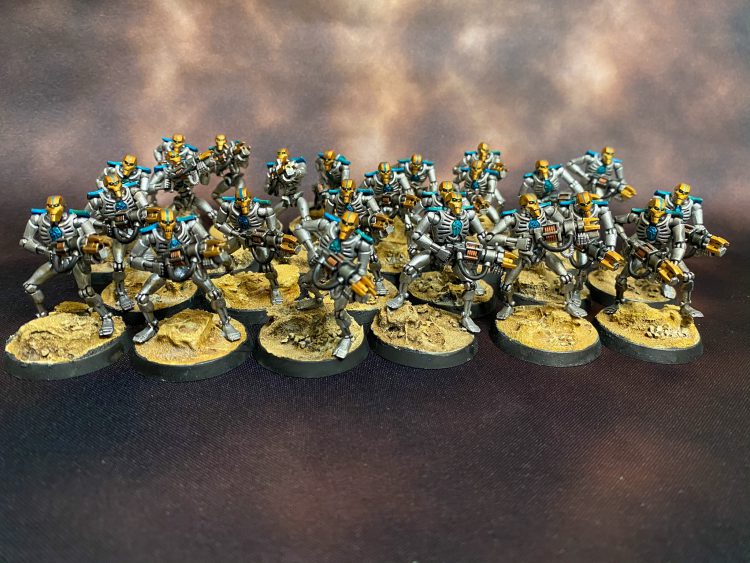
Nihilakh Supremacy. Nihilakh is my favorite dynasty, and
just because I once got a shout out on how to paint them. If someone ever tells you “Painting Necrons seems like it would be really easy because you’re basically just spraying them silver”, listen to them because they’re 100% right. Necrons are an easy army to knock out quickly. I painted up my entire Necron army in less than two months, starting on March 8
th and finishing them at the on May 5
th.
 Credit: ZuultheCat
My method of painting Necrons is simple. It’s made up of a few simple steps that when added together looks great.
The Metal Skeleton
This is the first step. Simply prime then wash the models. I primed my Necrons with
Bare Metal Primer from Ammo by MIG and then washed them with 2 coats of
Nuln Oil, letting each coat fully dry before proceeding to the next step.
The skeleton should be very dark following 2 directly coats of Nuln Oil. Following this the entire skeleton gets a drybrush of
Necron Compound, starting from the top and only brushing straight down.
 Credit: ZuultheCat
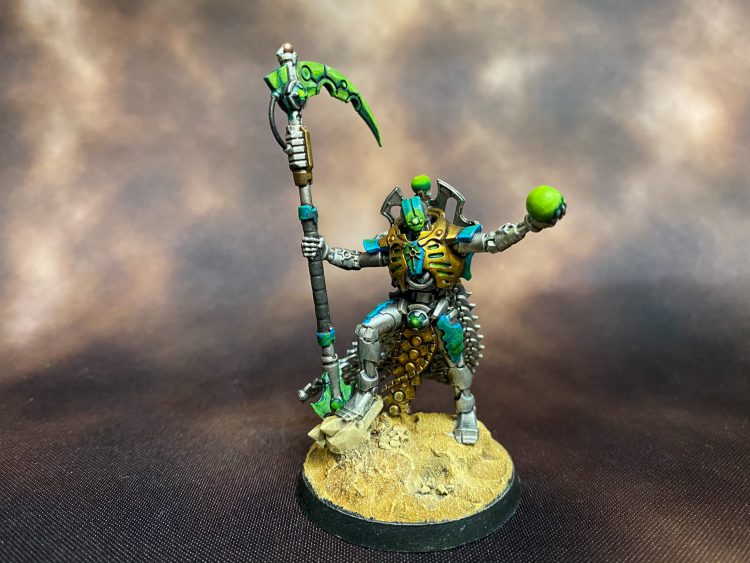
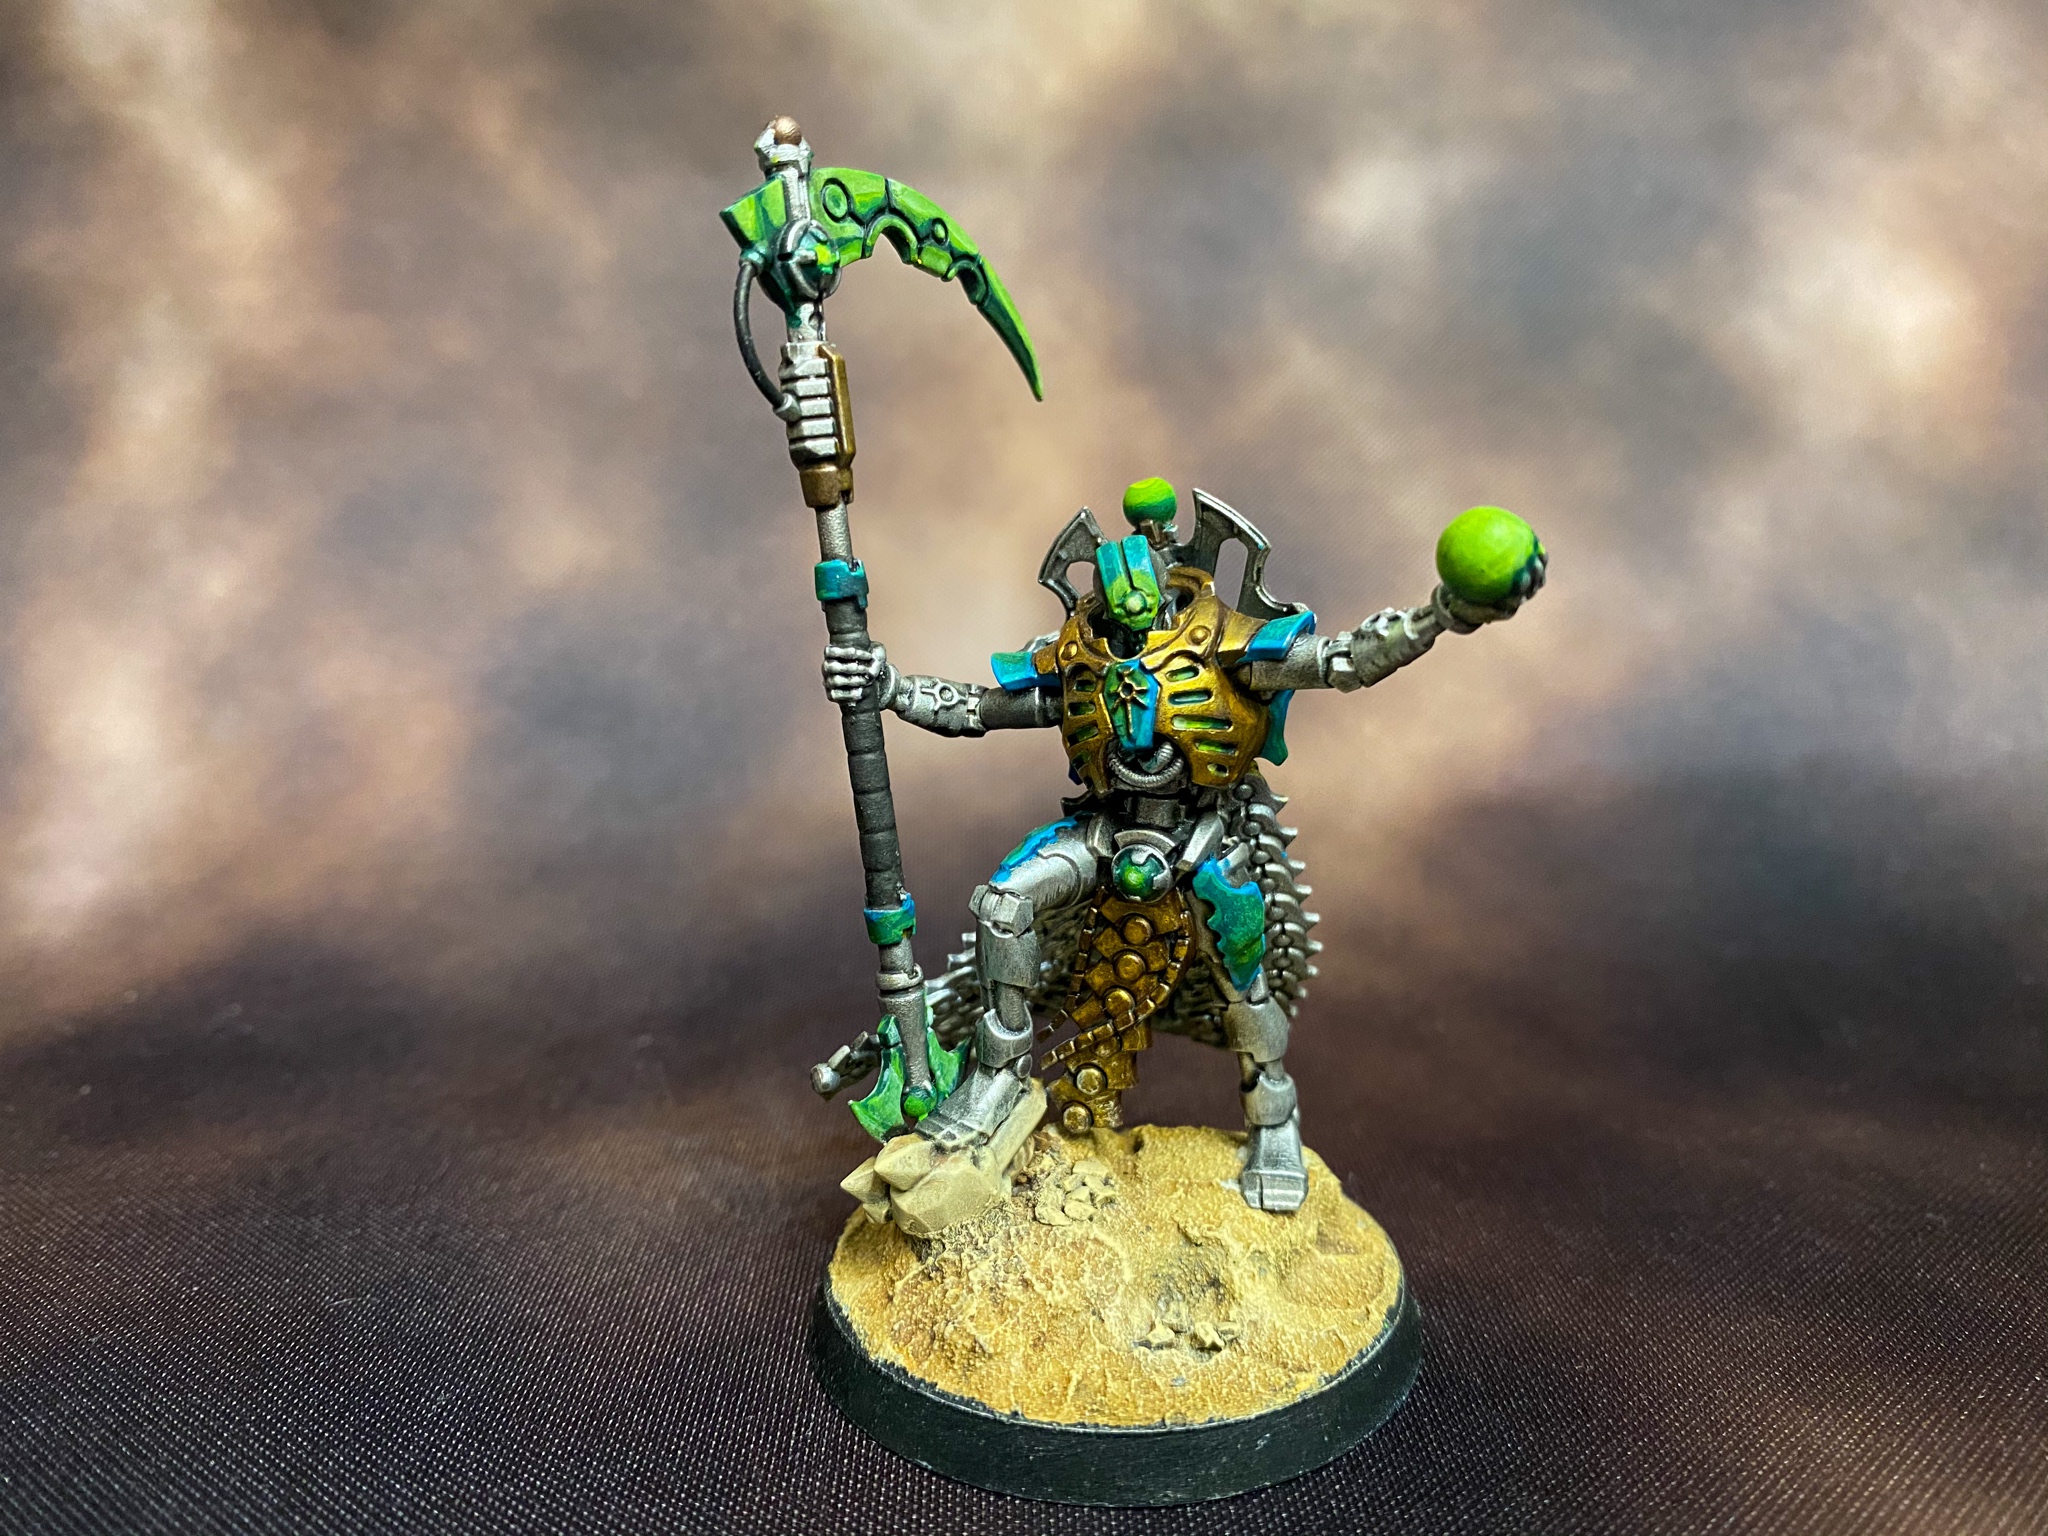
The Teal Bits
These are easier than they look: Start with 2 base coats of
Sotek Green to get a solid base coat. Once this is dry, load up some
Temple Guard Blue on a small dry brush and get most of the paint off, like you’re going to drybrush. Stab the brush directly onto the sotek green parts, breaking up the solid blue base coat. Once this dries, simply glaze over the teal parts with an undiluted coat of
Lamenter’s Yellow.
If you don’t have any of that long-lost liquid gold, you can mix up
Iyanden Yellow contrast paint with
Contrast Medium or just make your own Lamenter’s Yellow.
The green Parts
This is the part that takes the longest on my models. For this, I use the following paints in successive, very thin layers, building up the intensity through successive layers:
- Caliban Green
- Warpstone Glow
- Moot Green
- Yriel Yellow and finally,
- Skull White.
Make sure you let each layer dry before moving onto the new one.
The Gold Parts
The Gold is relatively simple. I use two different methods for the gold in this army. Troops got a simple base coat of
Retributor Armor followed by a wash of the contrast paint
Guilliman Flesh thinned out.
The characters & vehicles got a treatment of Scale 75 gold paints. Starting with a base coat of
Decayed Metal, then
Dwarven Gold and lastly
Elven Gold. Once this is all laid down, I give it a thin coat of
Guilliman Flesh.
The Black sections are by far the easiest – simply do two thin layers of
Vallejo Black.
That’s it! A few simple steps that make for a striking appearance on the tabletop.
 Credit: ZuultheCat
This article is part of a larger series on how to paint Necrons. To return to that series, click here.
Credit: ZuultheCat
This article is part of a larger series on how to paint Necrons. To return to that series, click here.
Thank you for being a friend.
 Credit: ZuultheCat
 Credit: ZuultheCat
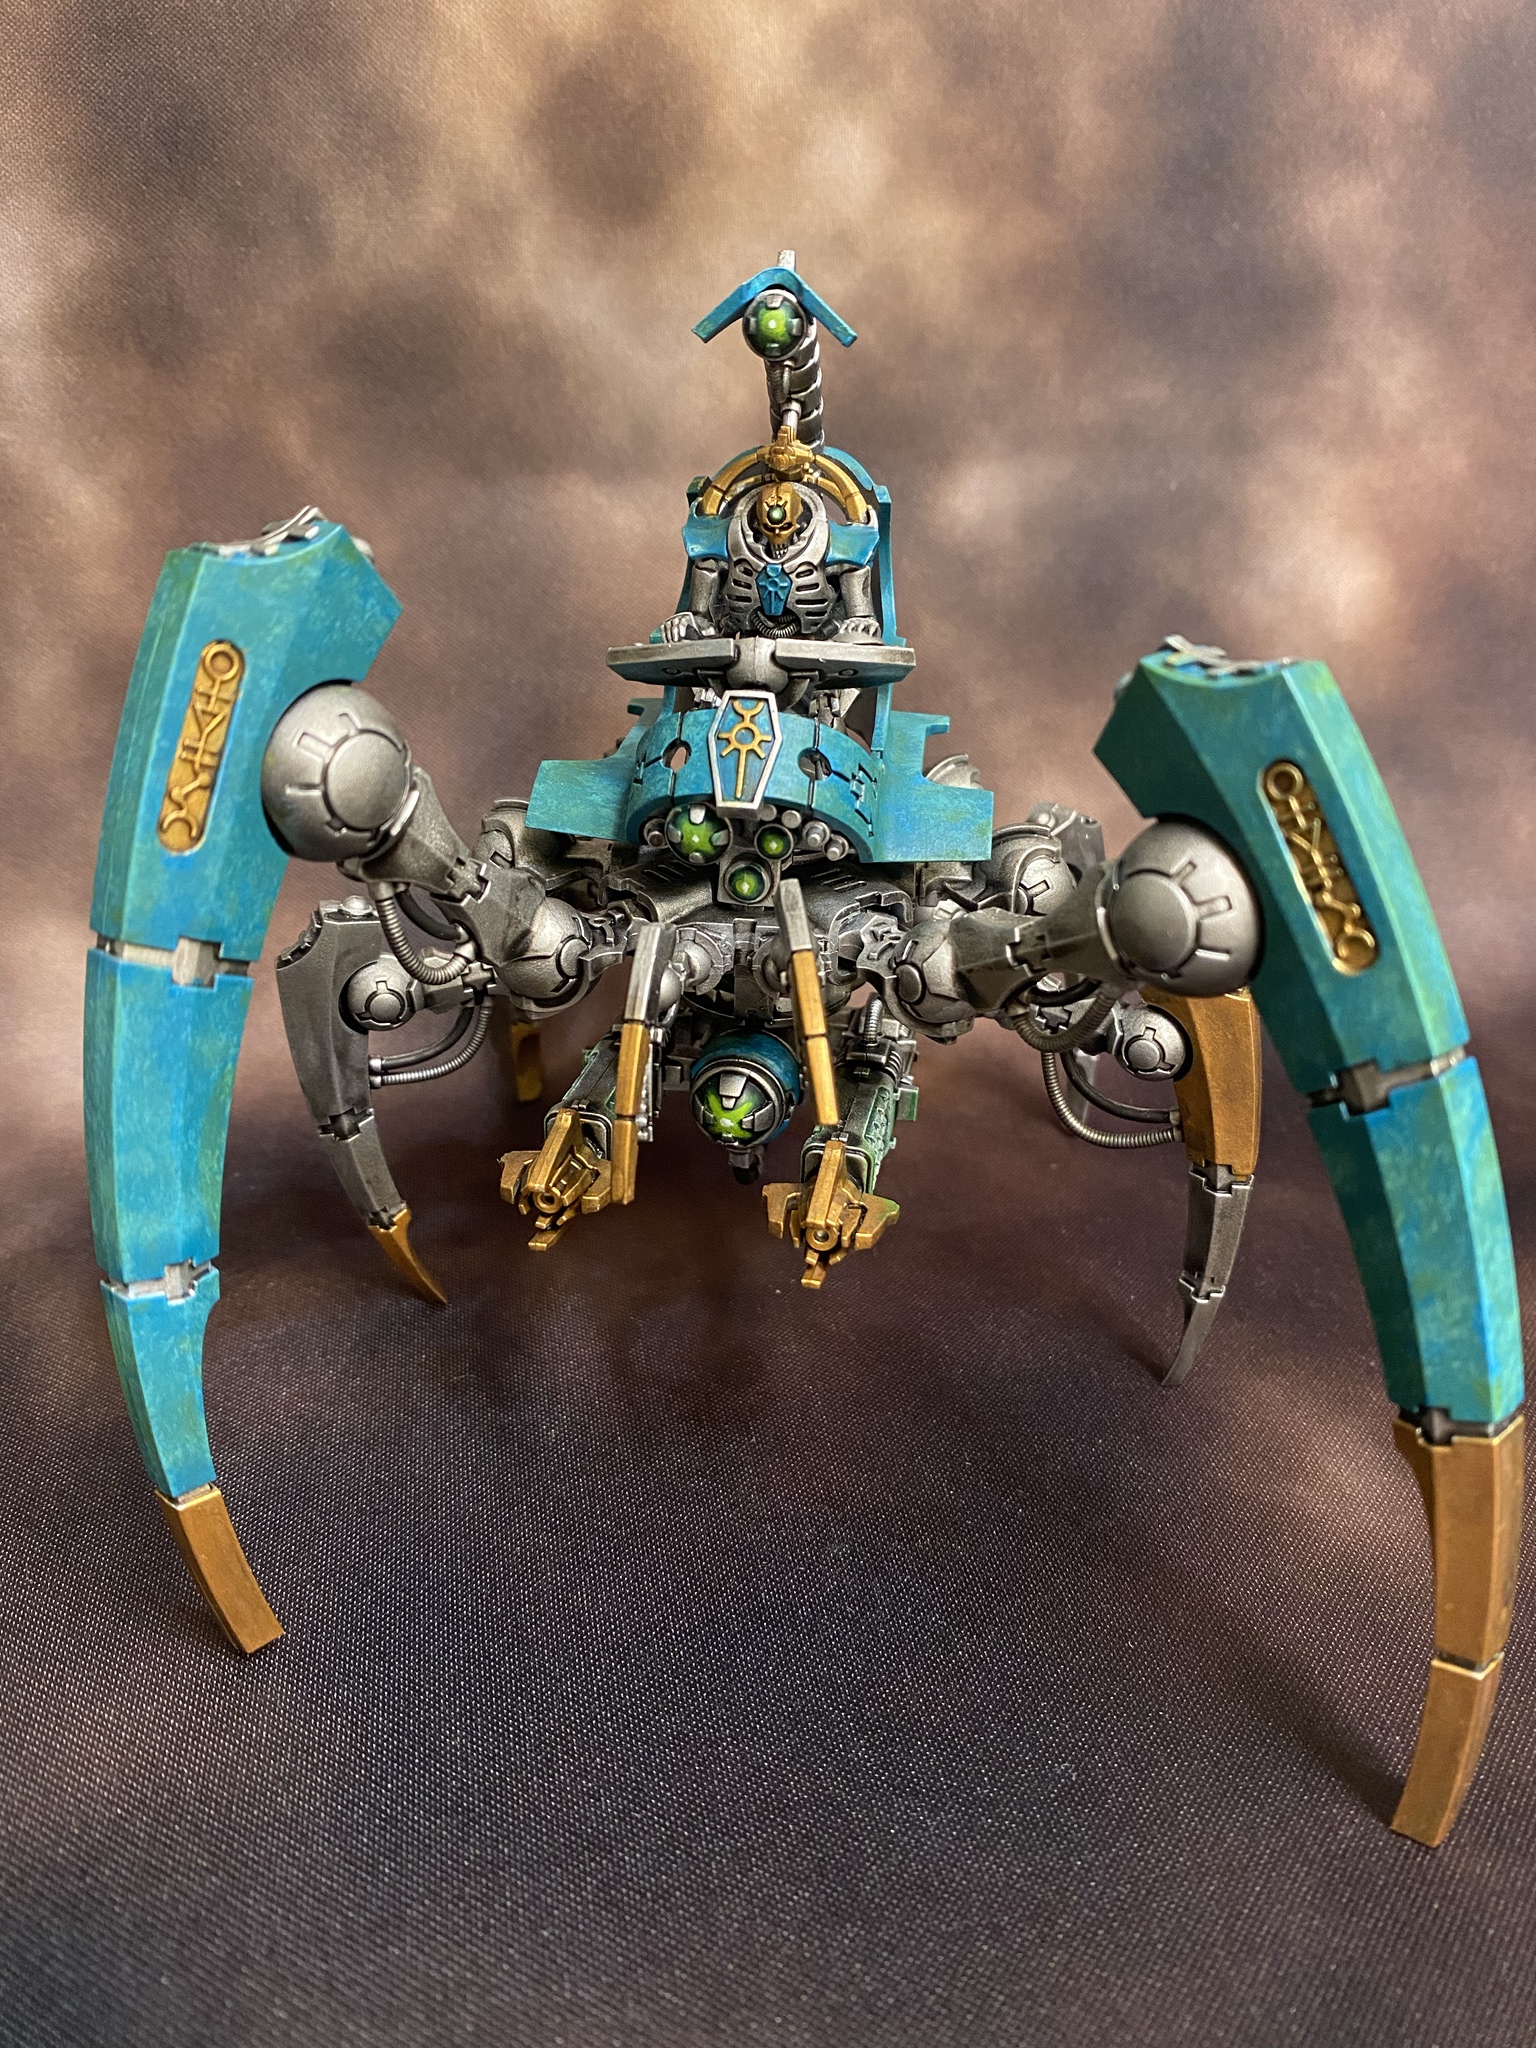 Credit: ZuultheCat

 Goonhammer Hobby Round-Up: March 2026
 Goonhammer Reviews: Tribal Conquest
 Conquest: Weaver Courts Gemred Knights and Scaile Dancers Model Review